


In reply to Sonic :
Wanna pop off the tension adjust cover and looking for this little ball bearing :)

In reply to Sonic :
Wanna pop off the tension adjust cover and looking for this little ball bearing :)
In reply to Sonic :
One thing to watch out for, the rack mount bushings can get sloppy. That was the original reason I first rebuilt my rack years ago; I thought something was screwed up inside the rack, turns out the steering column was just colliding with the subframe due to bushing slop.
Currently running blue polyurethane bushings from eBay, no problems :)
So I'm still waiting on those brake lines. Turned out that Mazdatrix shipped it next-day, but USPS seems to have lost it for 9 days. It went Long Beach to LA, then vanished from tracking for 9 days before appearing in Carson... 45 minutes away as Google Maps tells me. It shipped on the 2nd and only departed the airport today. Hopefully it will be here within the week, but I don't know for sure.
Until then, my Celica needed attention. If you aren't interested in Celicas then you can skip this update, the Rx7 hasn't moved since I last updated (because it has no brakes...).
I had been putting off changing to my summer wheels on my Celica because I also needed to inspect the rear brakes. This meant that if I found something wrong when taking it apart I would need to wait on parts, and then both my cars would have no brakes. But since the brake lines won't be here for awhile I decided to just risk it. For winters, I just run the stock Celica GT wheels. They were already in terrible shape when I got them, so I'm not upset by what the salt does to them:

The brake problem I was having seemed to be related to the self-adjusting mechanism on the rear drums. Basically, every few days I would notice that the hand-brake needed to be pulled harder to bite. Over time it got to the point where it didn't work at all. I had adjusted them when I installed them before the winter, but for some reason they weren't self-adjusting. After pulling them apart, my suspicions were confirmed:

On both sides, I was able to grab the drum and just pull it off. No resistance at all from the shoes. I sprayed the area down with brake cleaner but nothing seemed amiss. I know that the adjuster mechanism relies on there being contact between the shoes and drum, so I adjusted them again until I was barely able to install the drum due to resistance. Seemed to fix the problem, so I'll observe over the next few weeks for any change.
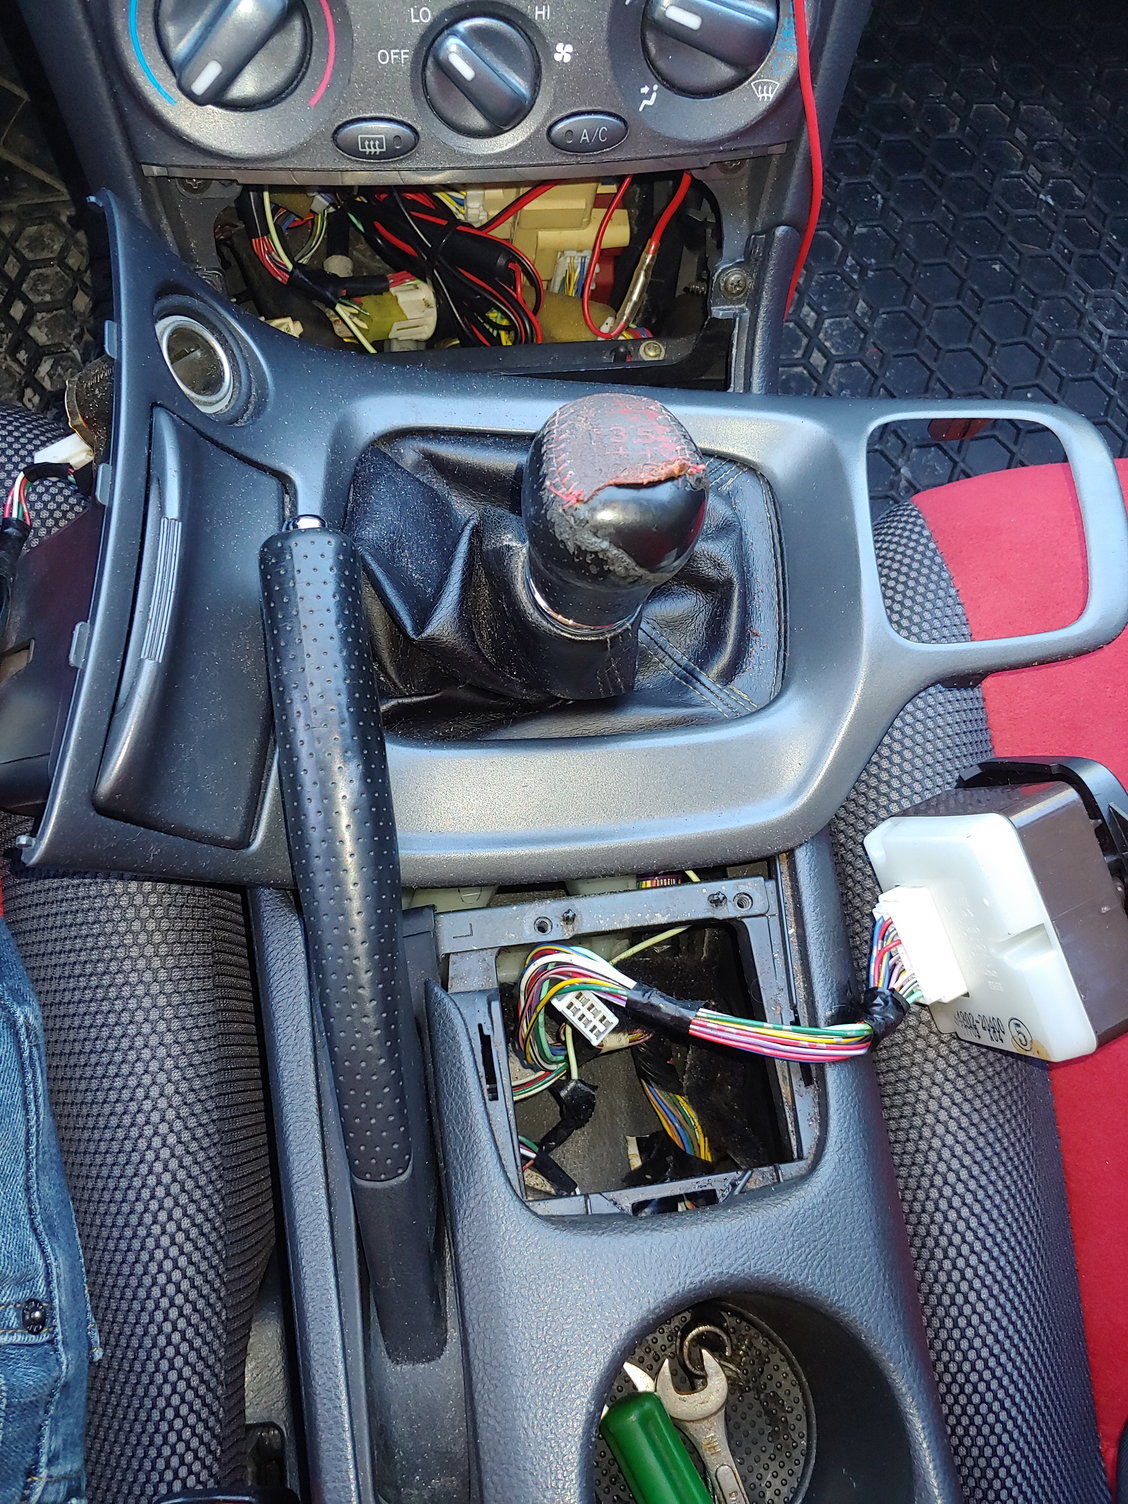
In the cabin, I needed to adjust the hand-brake at the handle. I had mitigated the problem with the parking brake by temporarily tightening the adjustment, but now the parking brake was beginning to grip up with one click. You can access it in less than one minute by popping off and rotating the shifter trim, then removing two screws and pulling out the window switch:
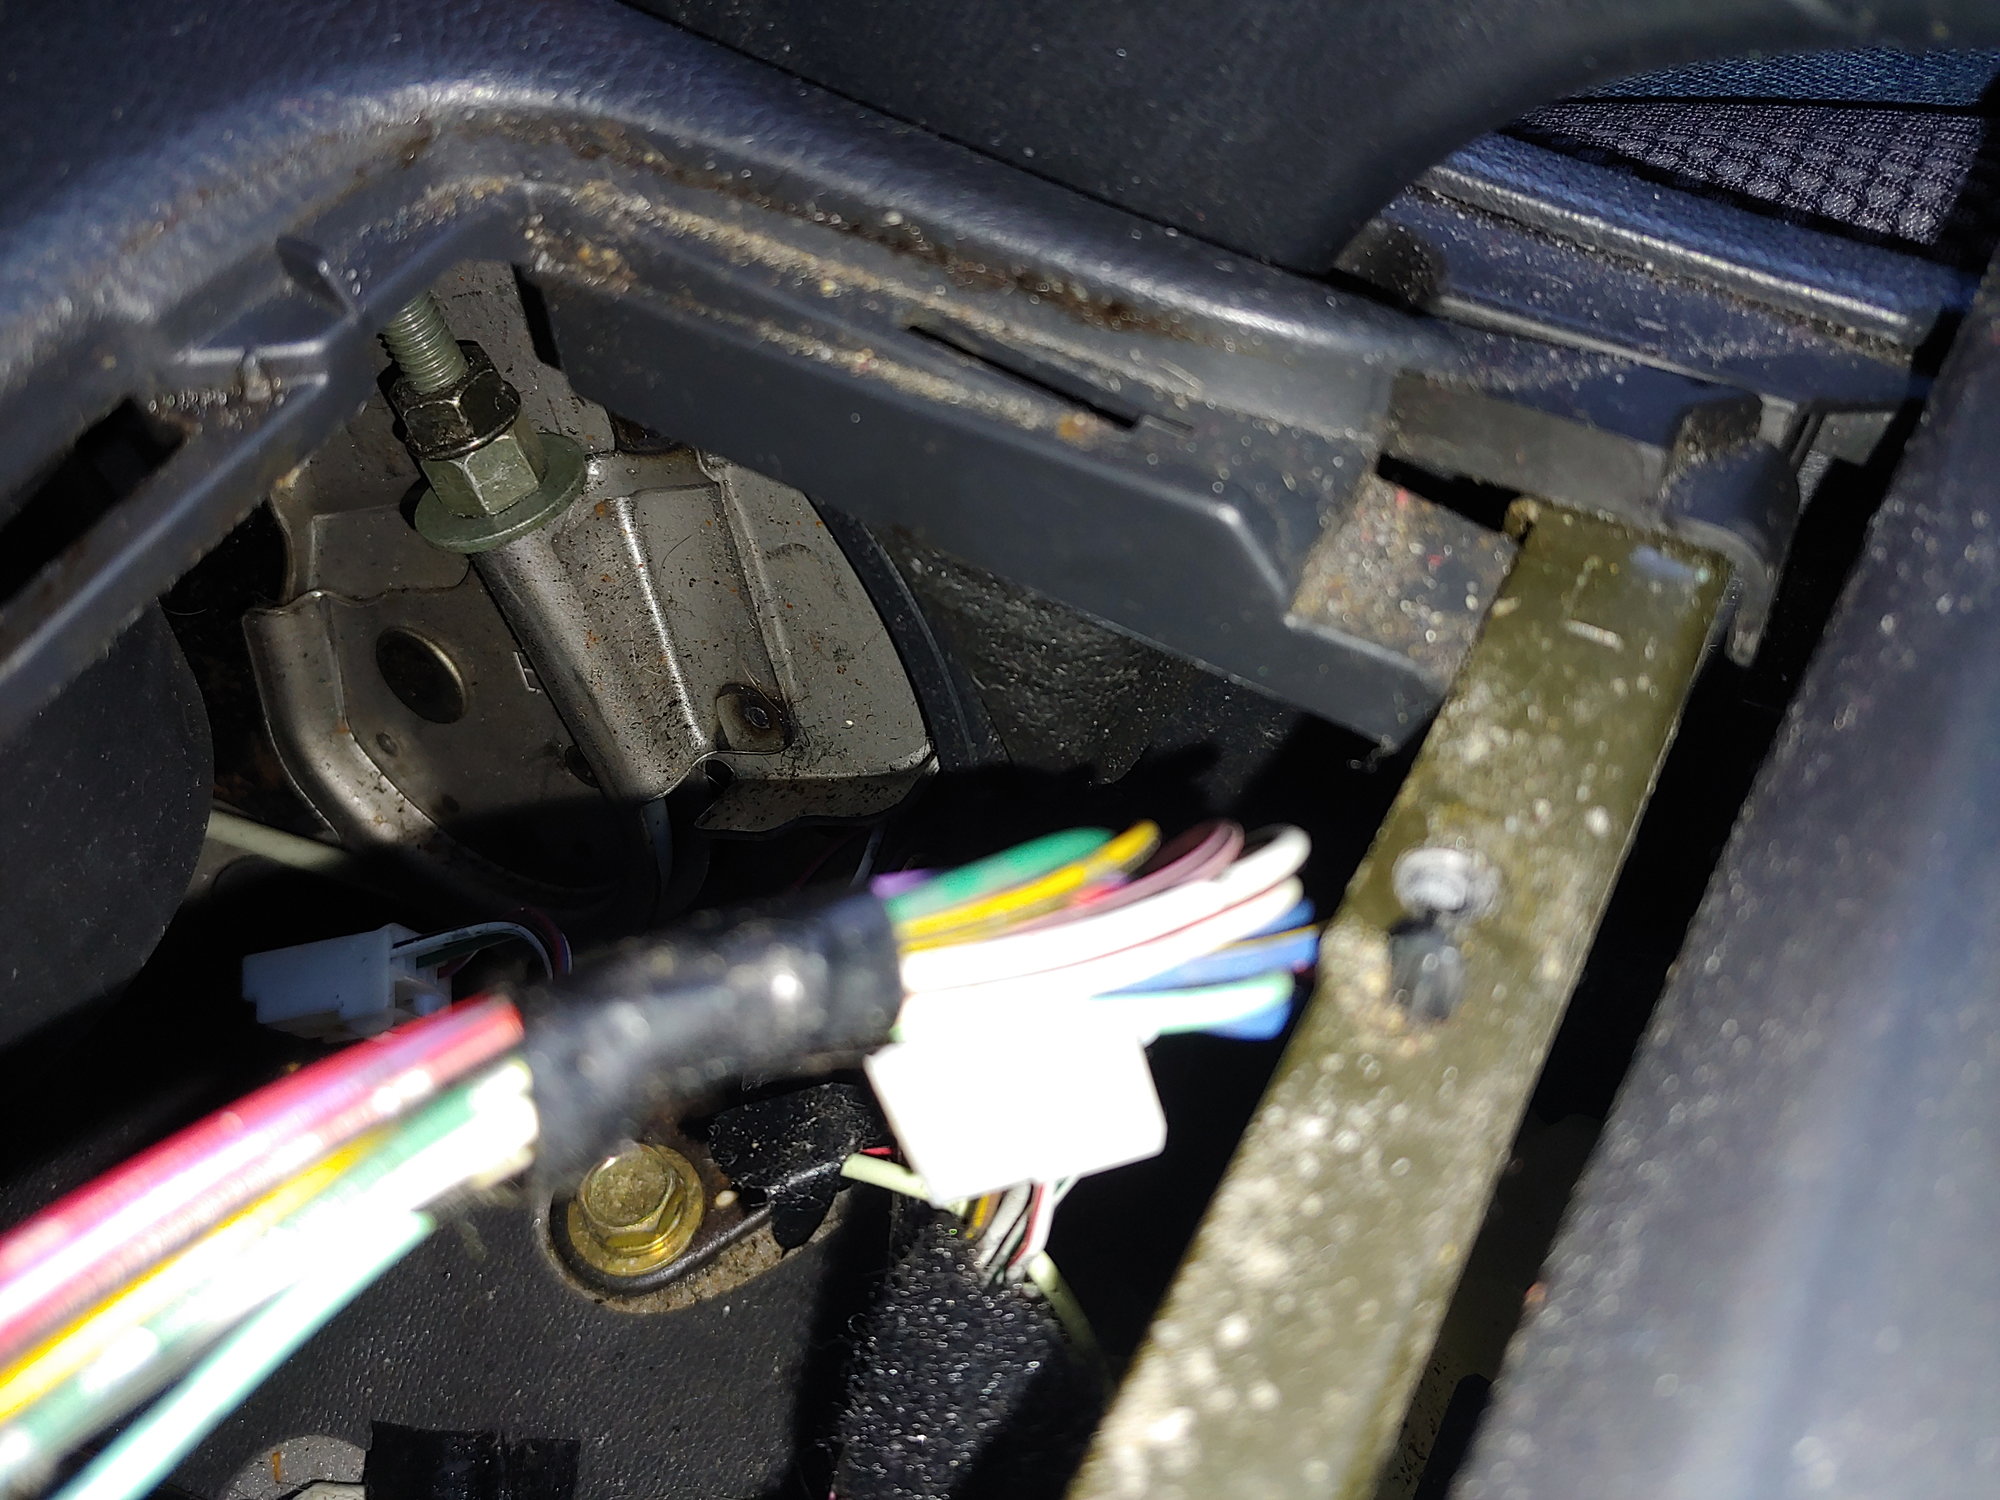
After backing the nut out a few threads and tightening the lock nut, it's now only three clicks to engage the hand-brake. Perfect. Then I put the summers on:
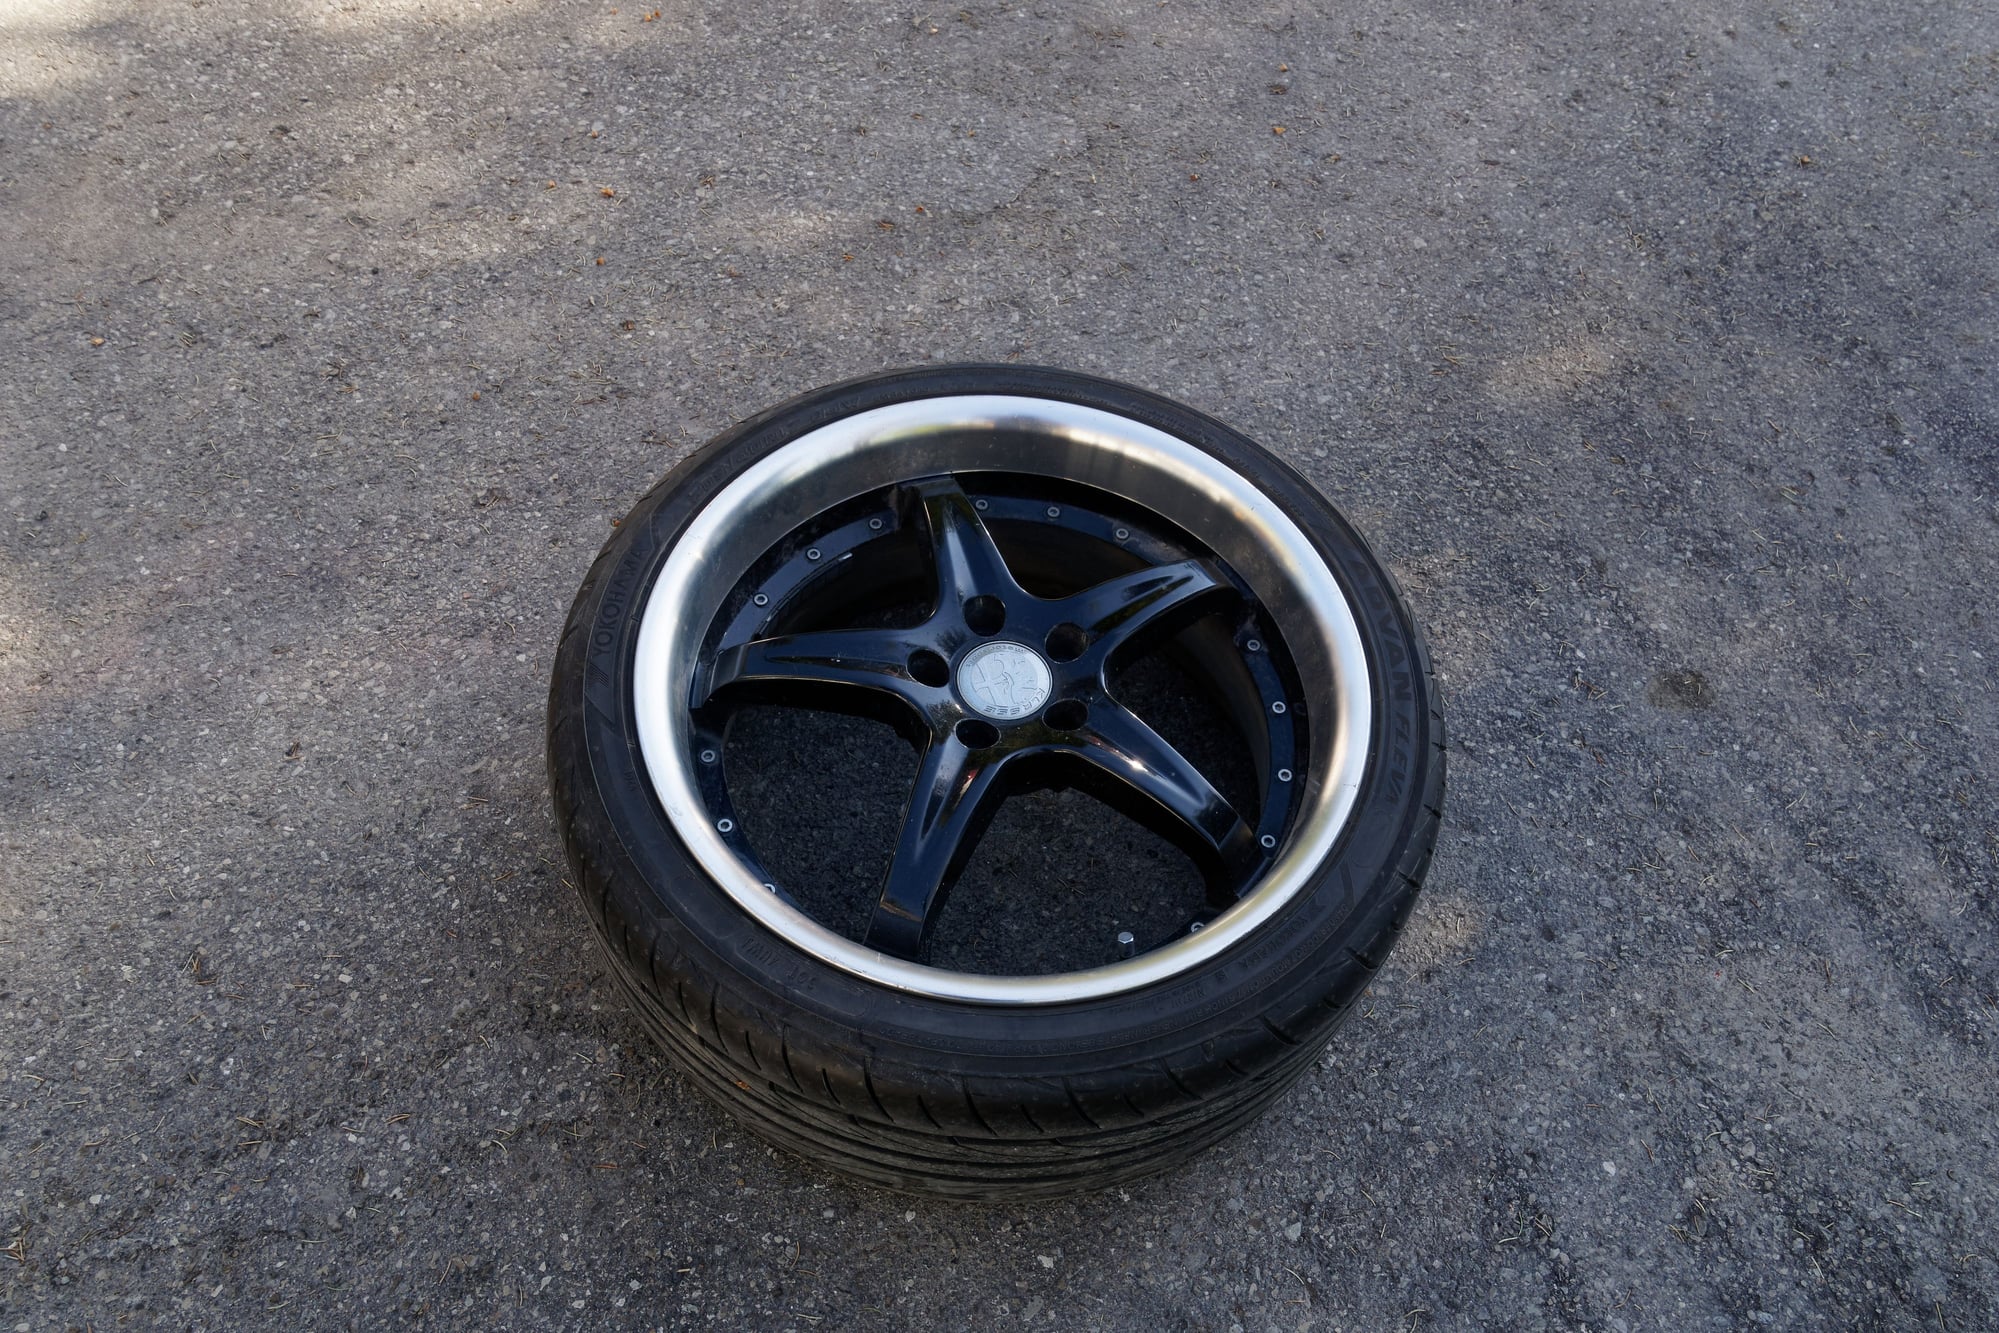
They aren't exactly my taste, but they aren't bad and they came with the car. The tires are Advan Fleva, which is nice for summer driving without wearing as quickly as grippier tires would.
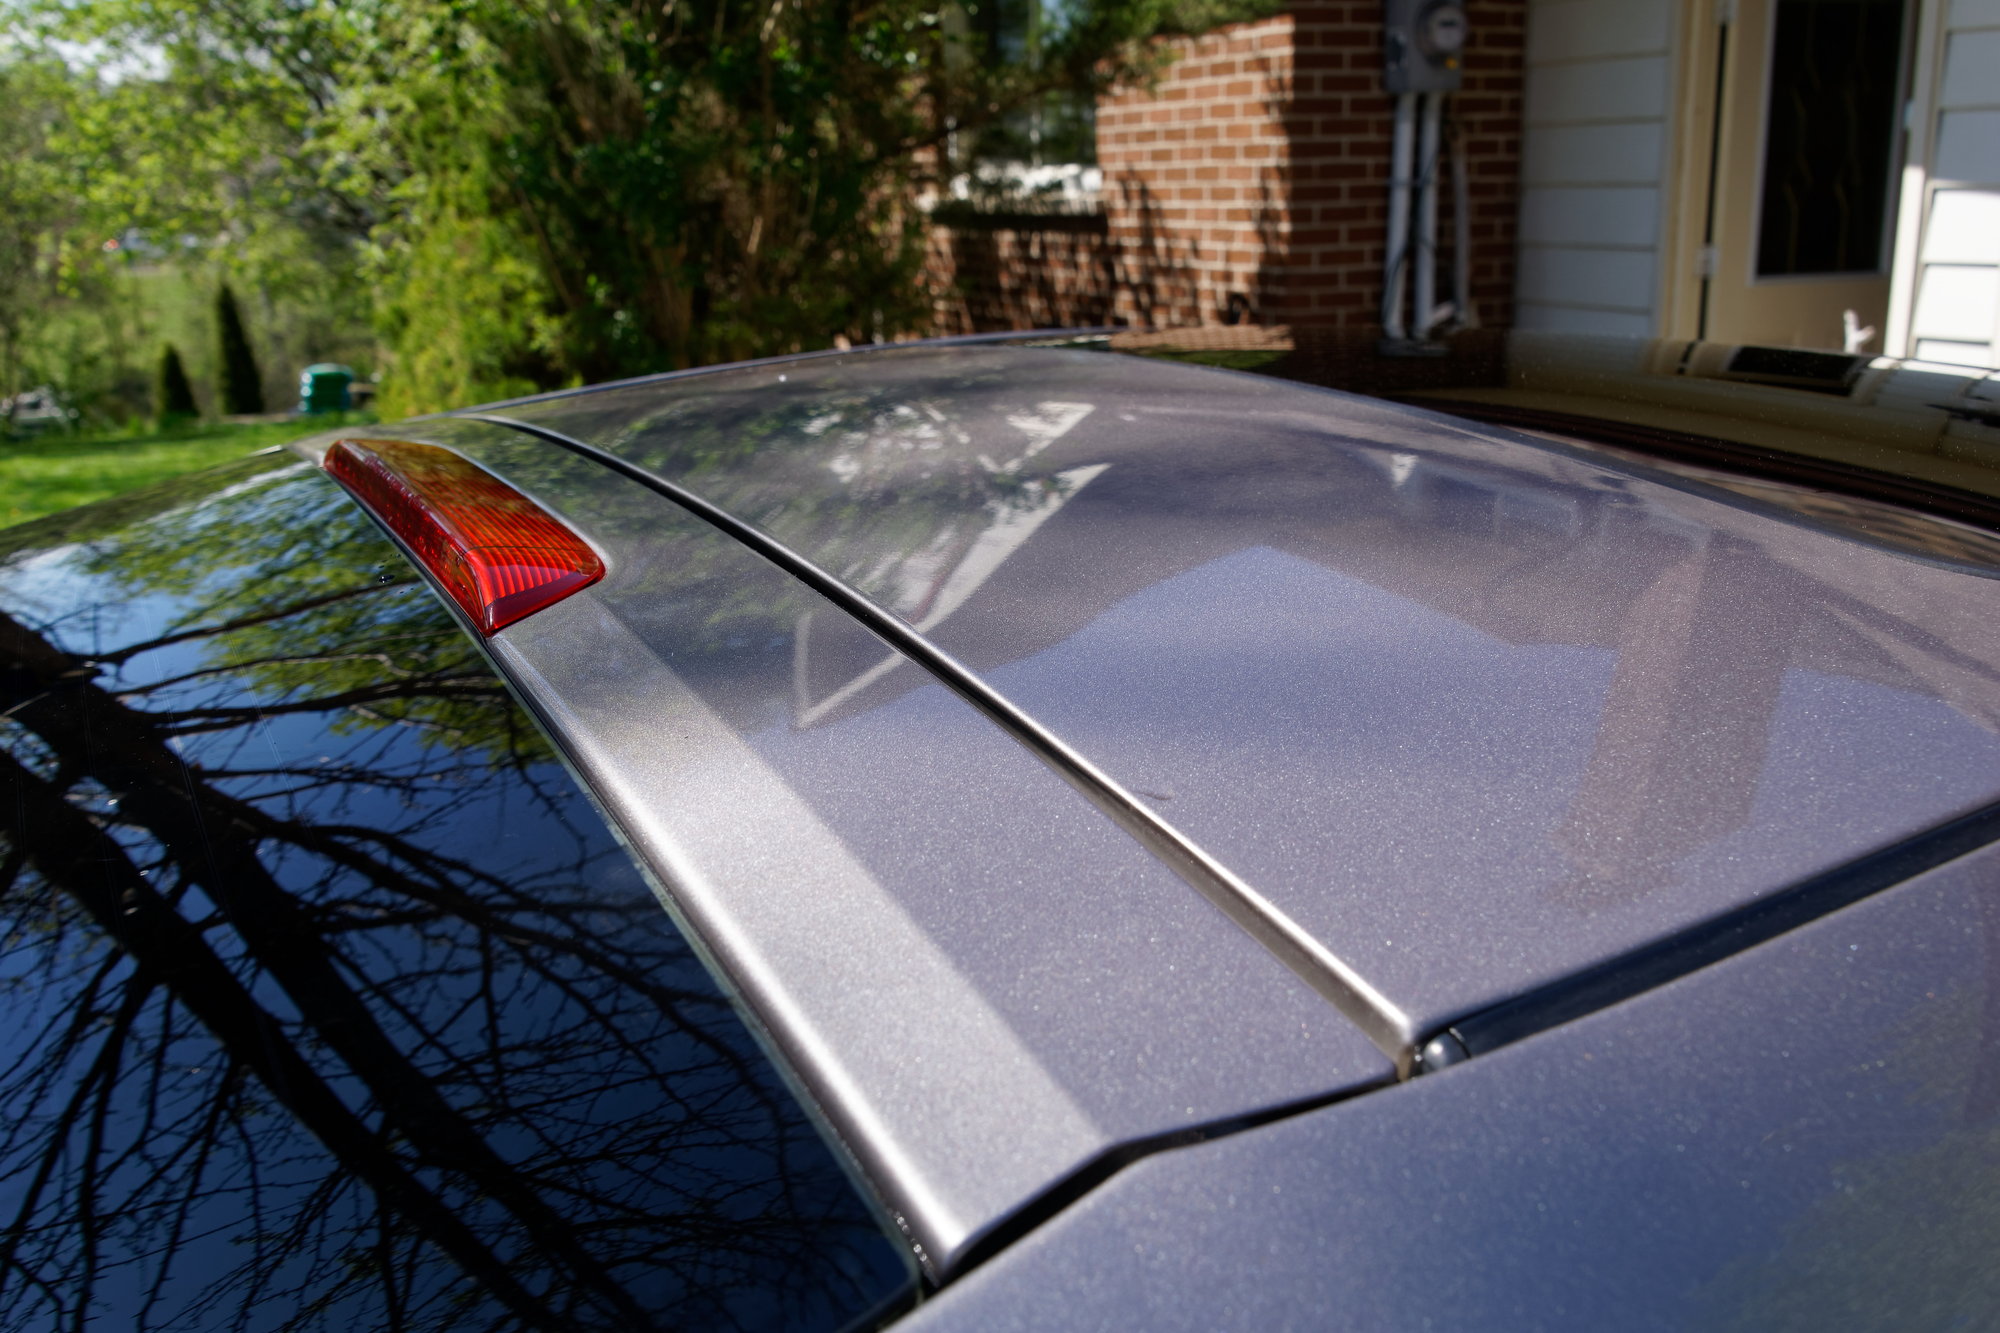
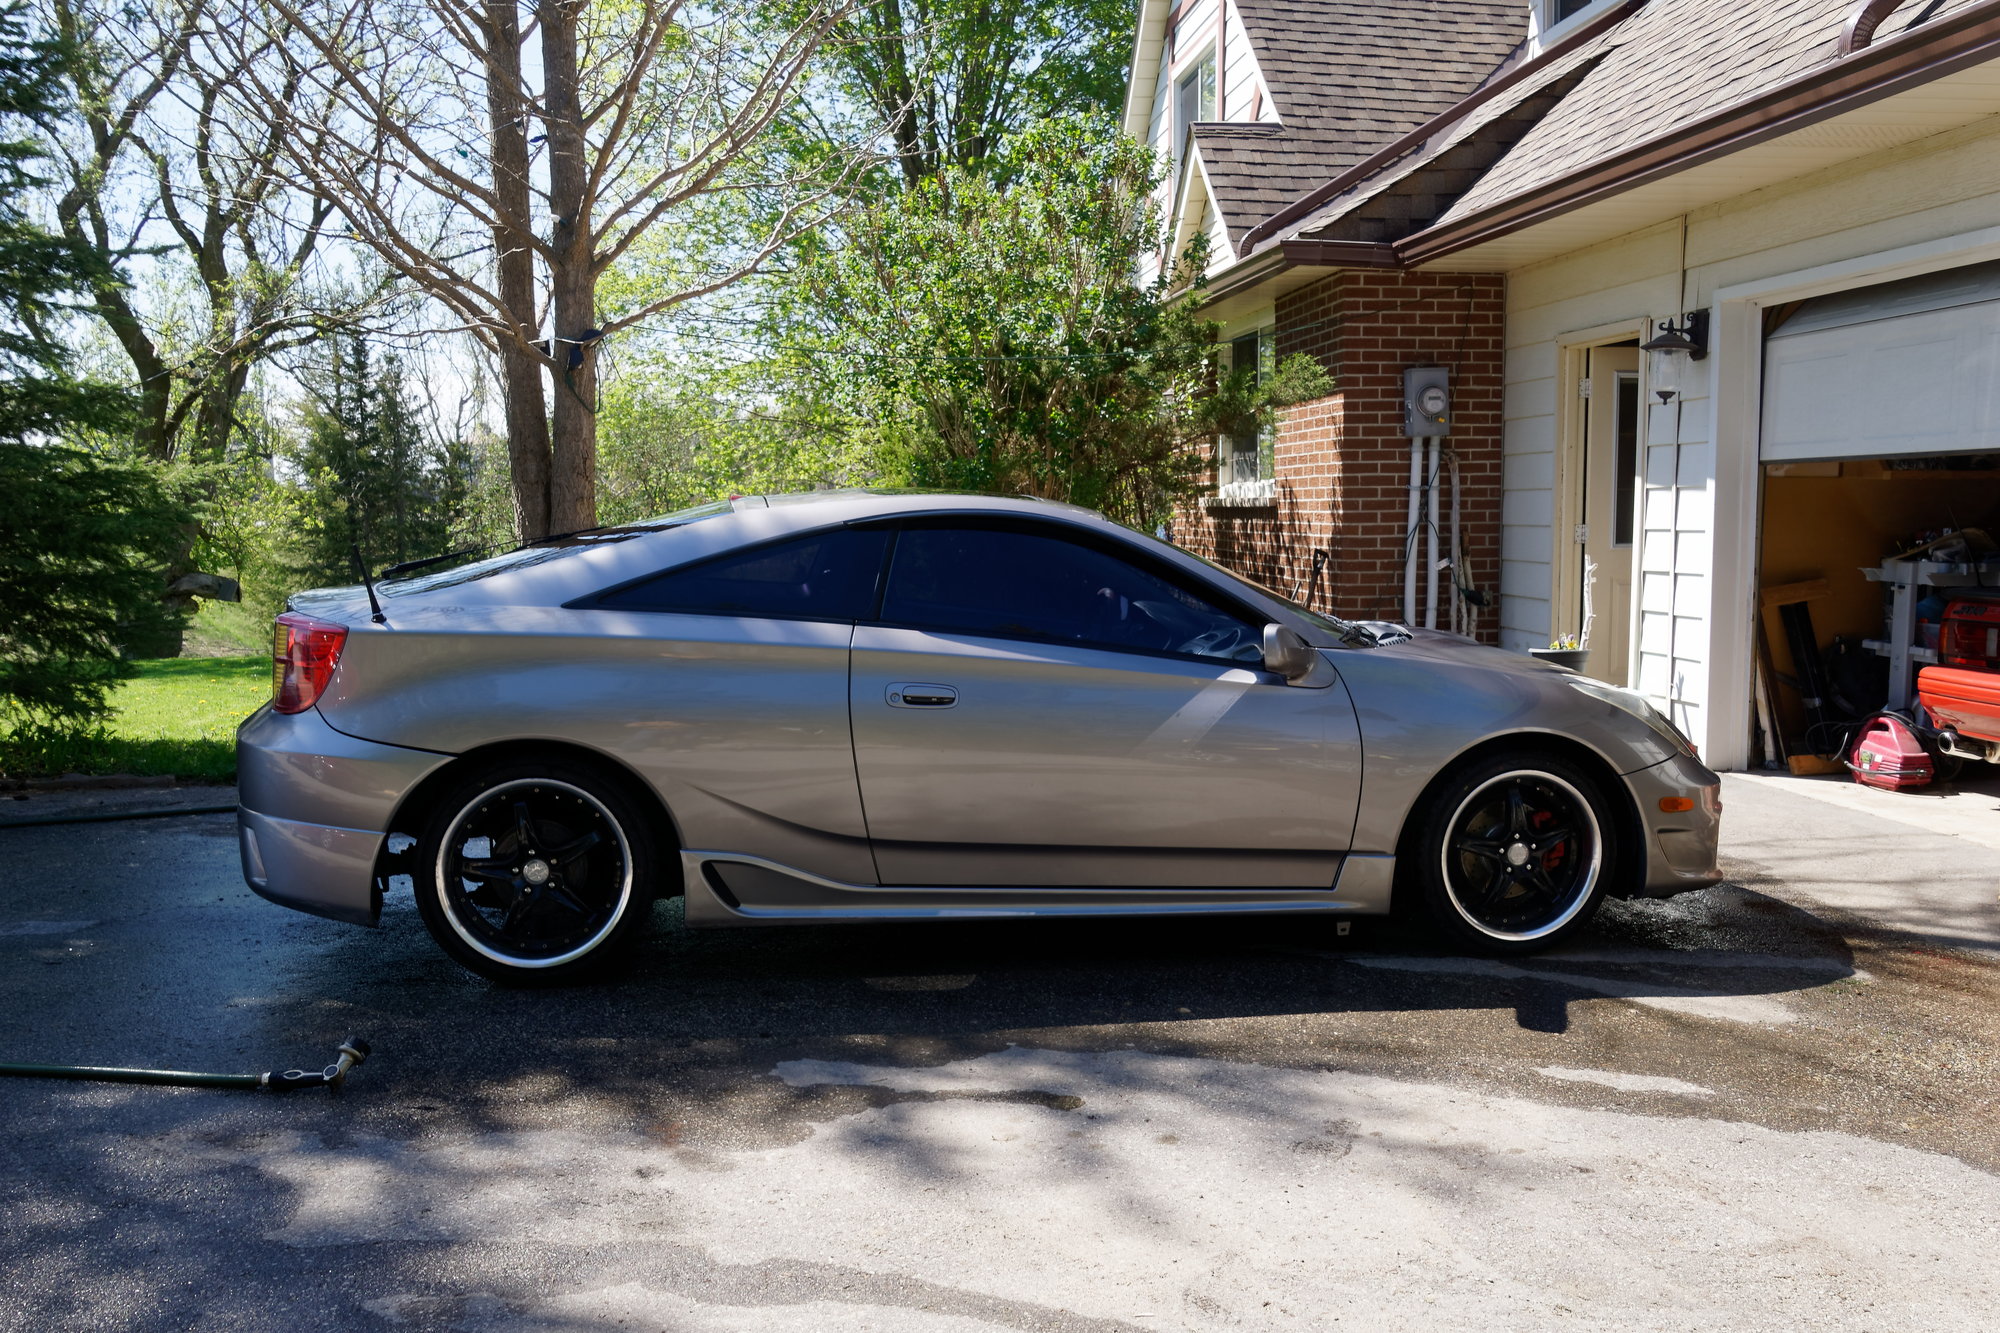
With those on, I gave the car a quick wash. The paint is showing it's age in a few areas, but it still cleans up pretty nice:
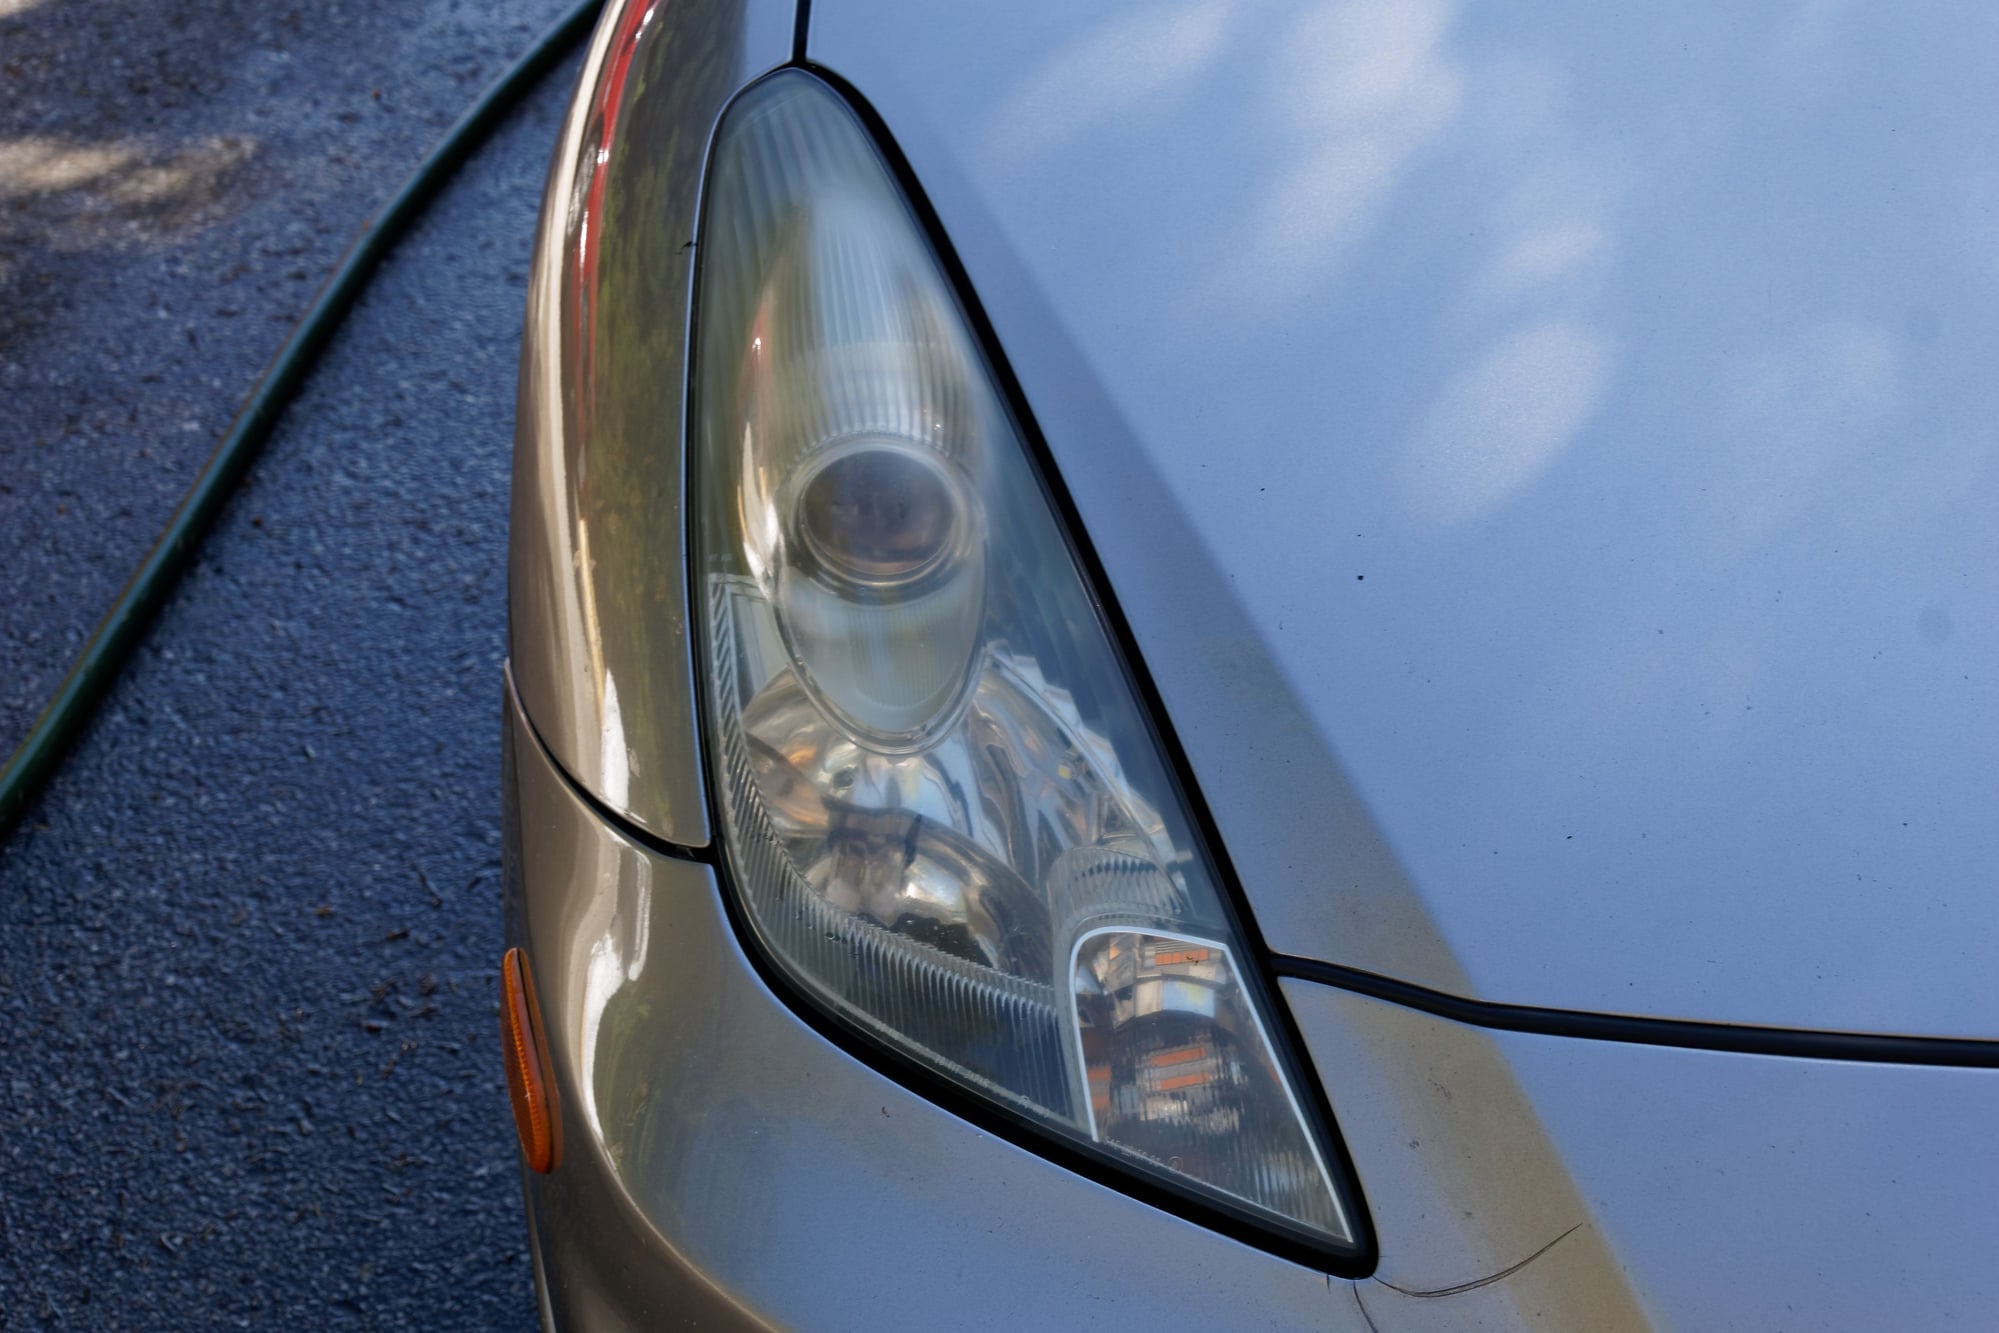
I also polished the yellow out of the headlights, as I have been doing once a month since I bought the car. Before:
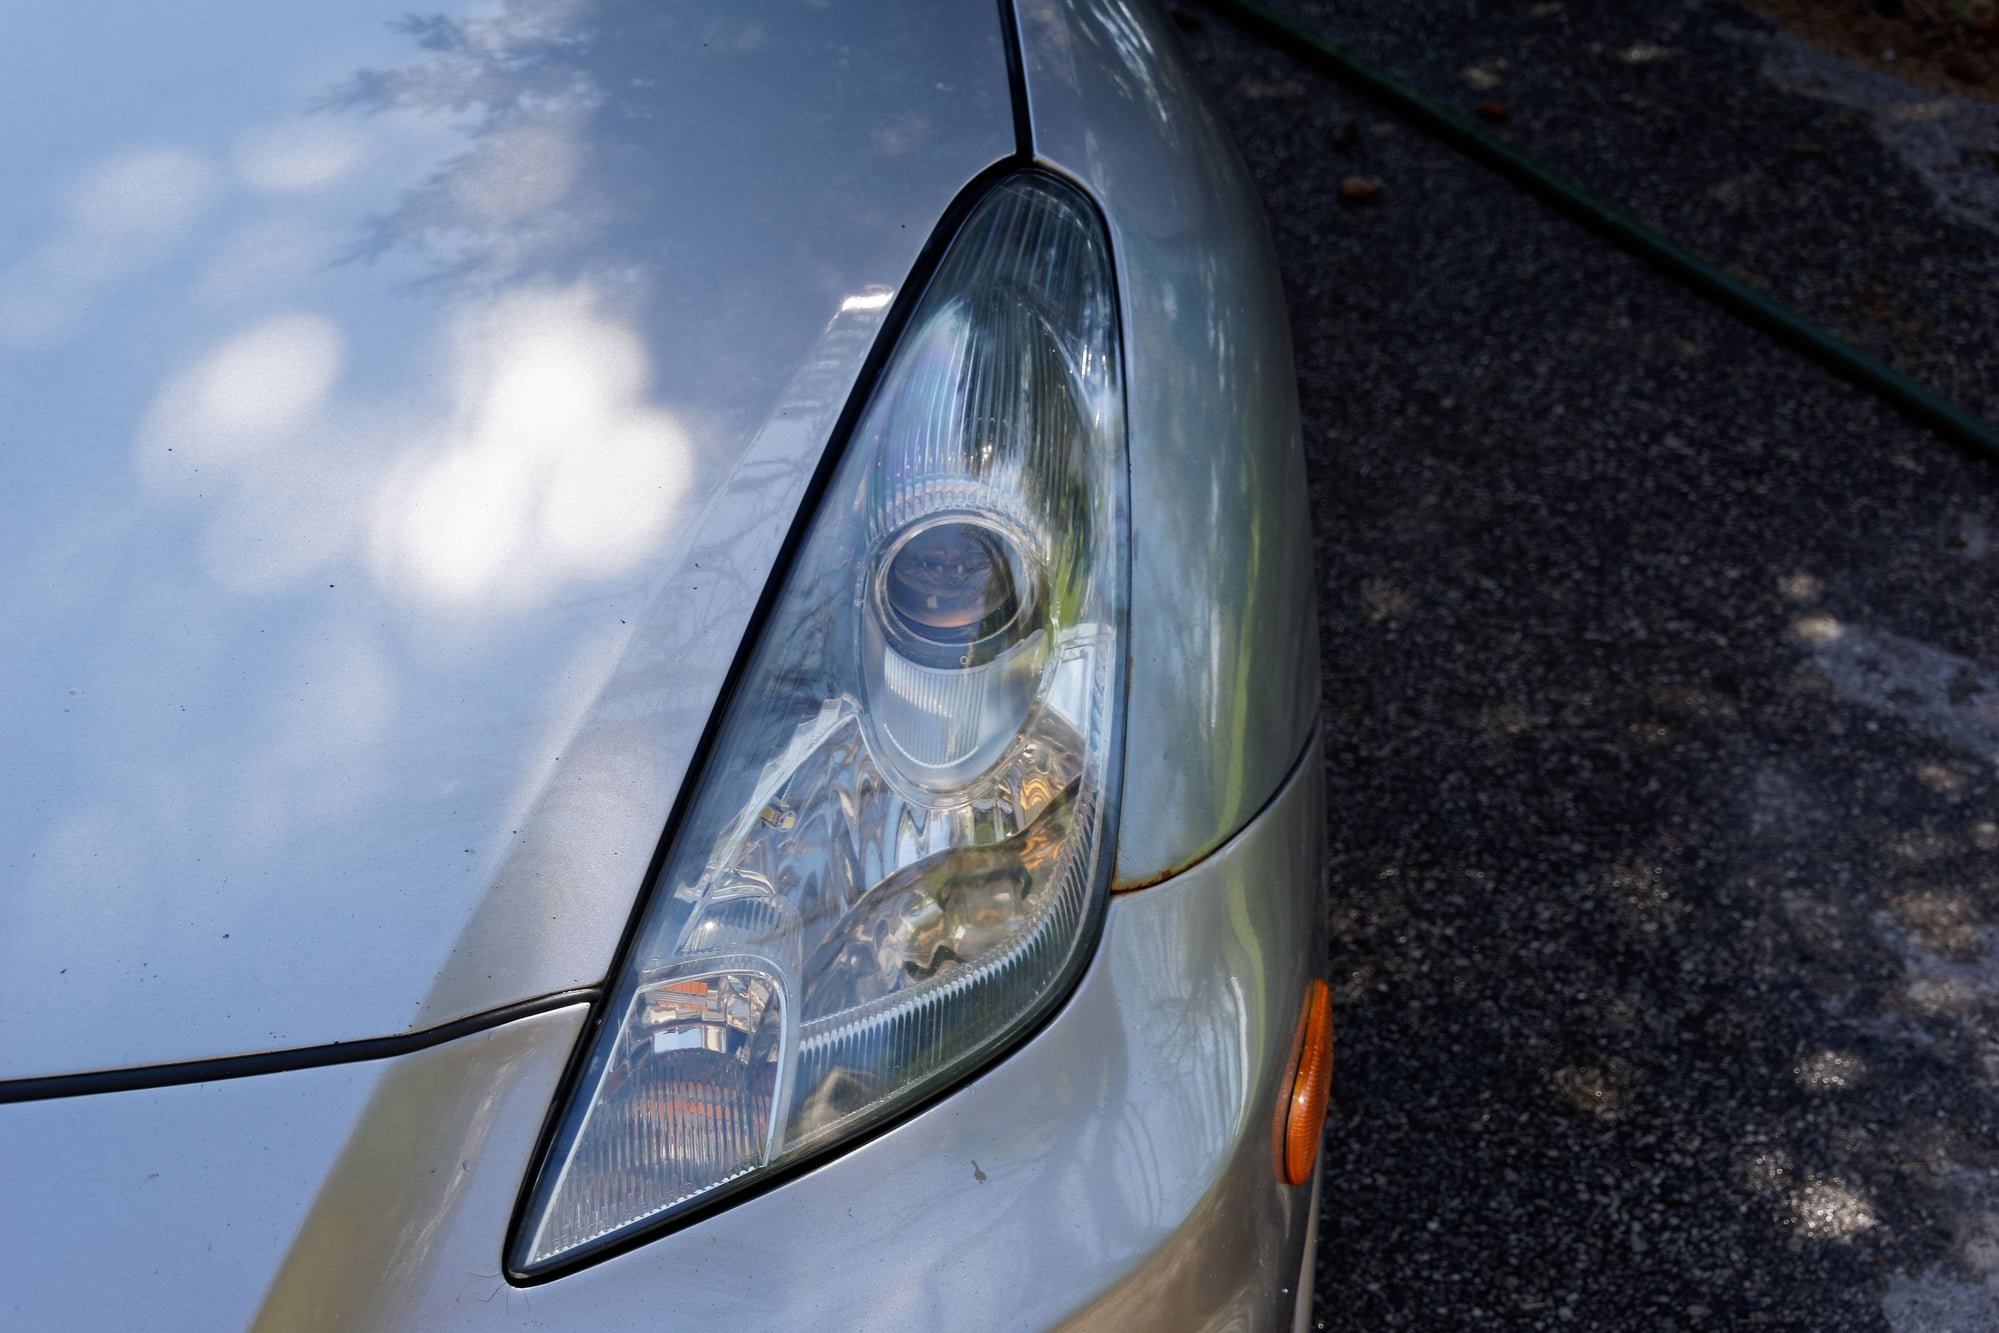
After:
Yes, that fender needs replacing. I think replacements are available from Rockauto, but honestly this is my daily car and it doesn't get any attention it doesn't really need.
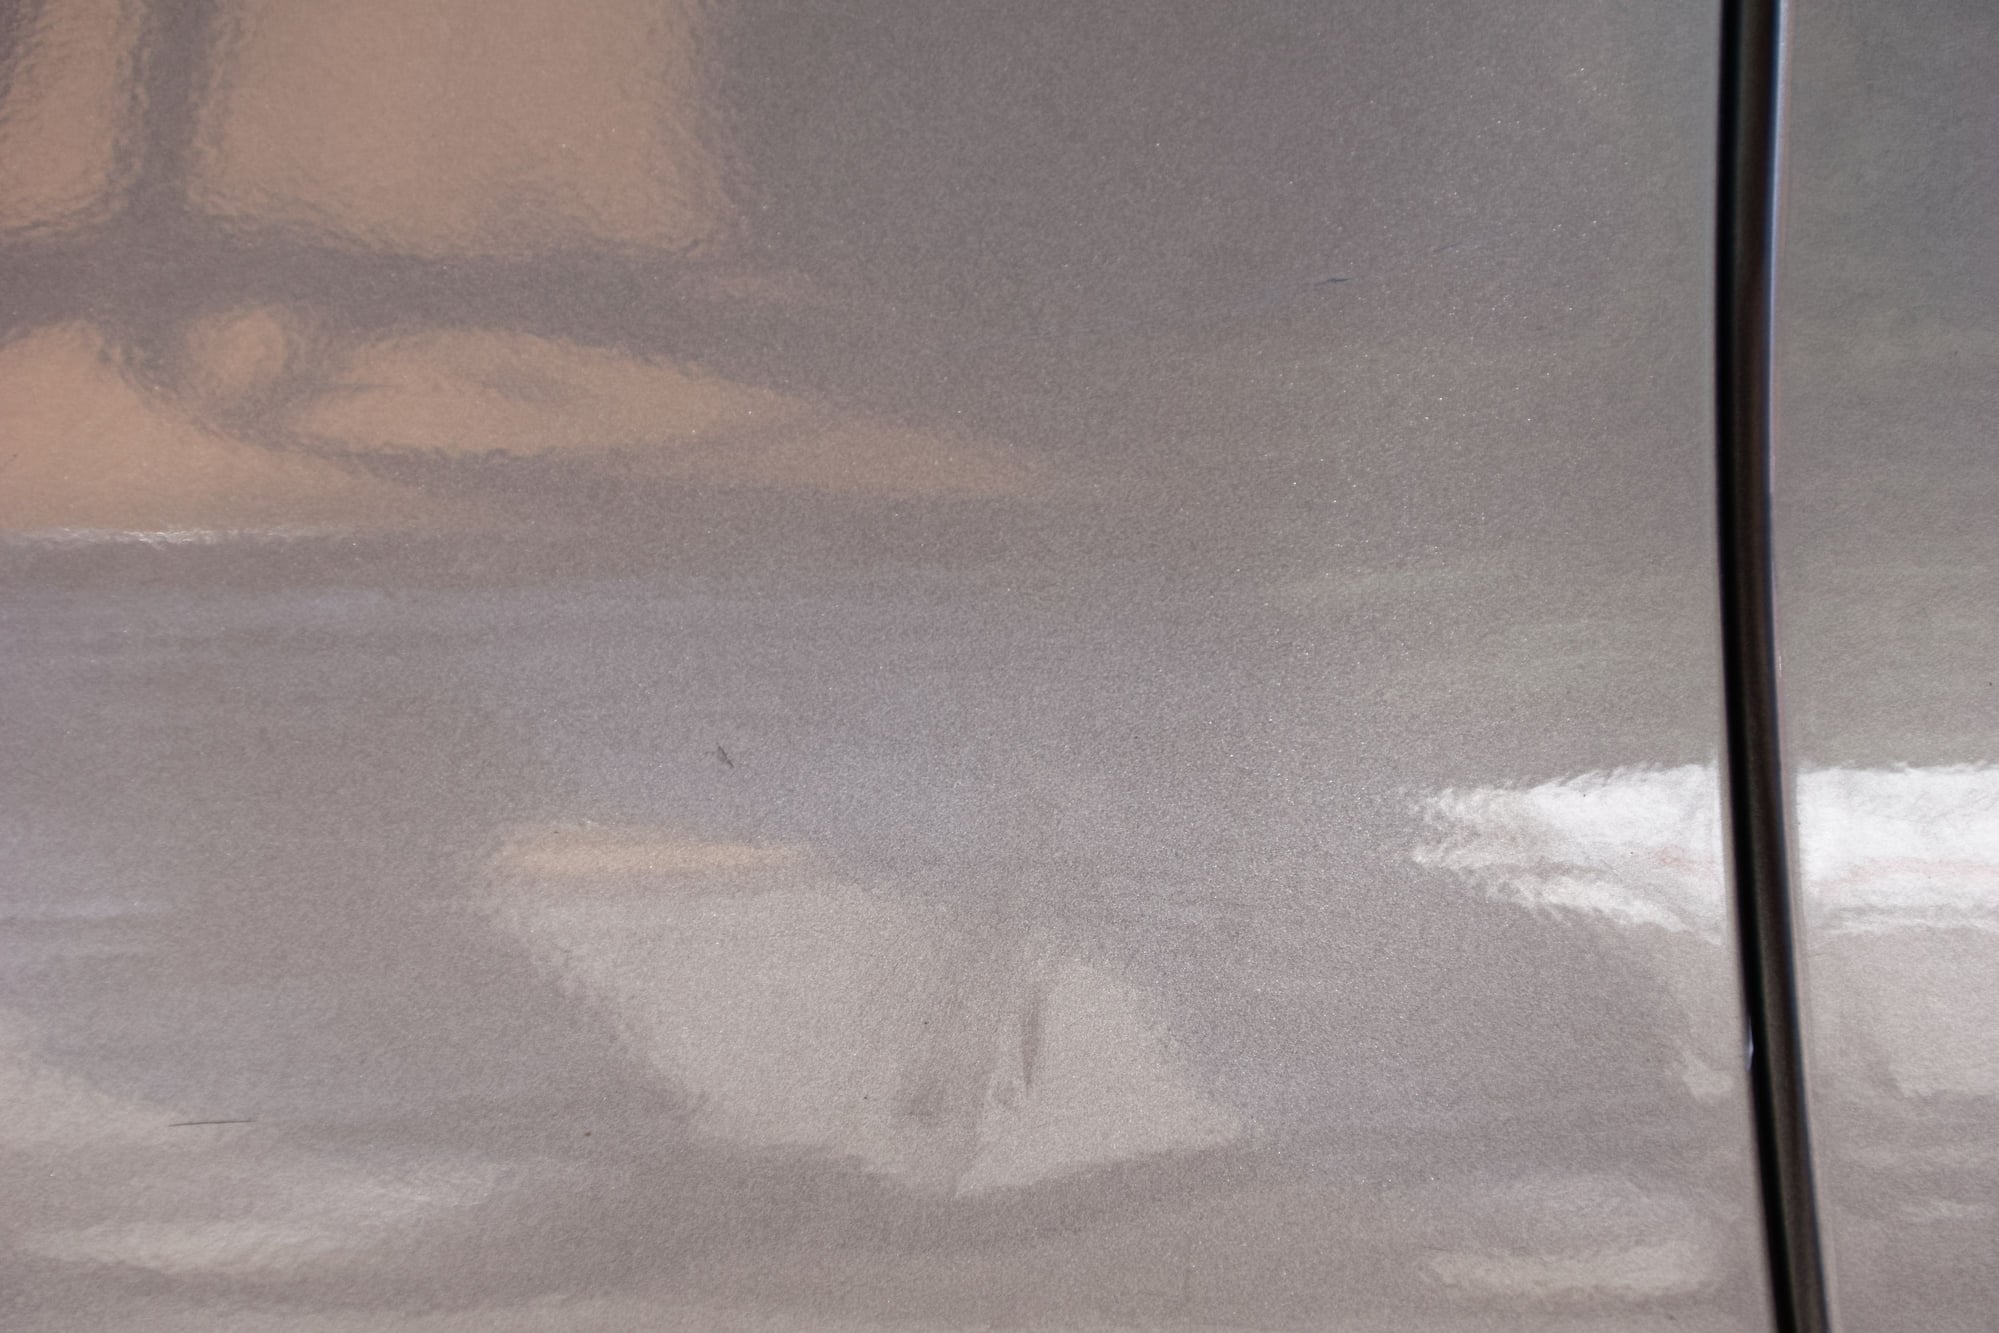
Lastly, I found another scratch. The university parking lot has been hell for this car:

Right down through the clear into the colour... damn. Also, this car has the thinnest paint imaginable. I know the Rx7 is different since it's a transparent single-stage and lays on thicker, but I swear the paint on this Celica was allocated by the gram. Some polishing minimized the worst of this scratch:
And with that, I'm calling it a day car-wise since I head to work shortly. I still need to chase down an o2 sensor code (despite having replaced the sensor before winter), and an evap code. E-testing has been eliminated in Ontario, but there's no reason to neglect the repair. Also with the engine light on all the time I wouldn't be able to tell if a more serious code emerged.
Cleans up okay for a daily car. Hopefully the Rx7 brake lines will arrive sooner rather than later, so I can test out the steering at speed.
Until next time :)
This is a pretty minor update overall, but I did get a little bit done on the car. When I left off I was waiting on some replacement brake lines and then an alignment. I'm happy to report the brake lines from Mazdatrix arrived and fit perfectly. Only problem is my front hardlines were seized; I was able to replace the rears no problem, but I still have the old lines in the front. Neither is leaking but since the rear one started to leak with no apparent cause or warning, I am not super confident. I will be looking into getting new lines for the front shortly, but that's on the back-burner while I deal with some other stuff.
One thing I was able to do was acquire some more OEM black interior pieces I needed. Most of them I have not had time to install, but I was able to install the sun-visors. My original visors were in very poor shape, which is why I felt perfectly fine about using the vinyl dye on them. Take a look:
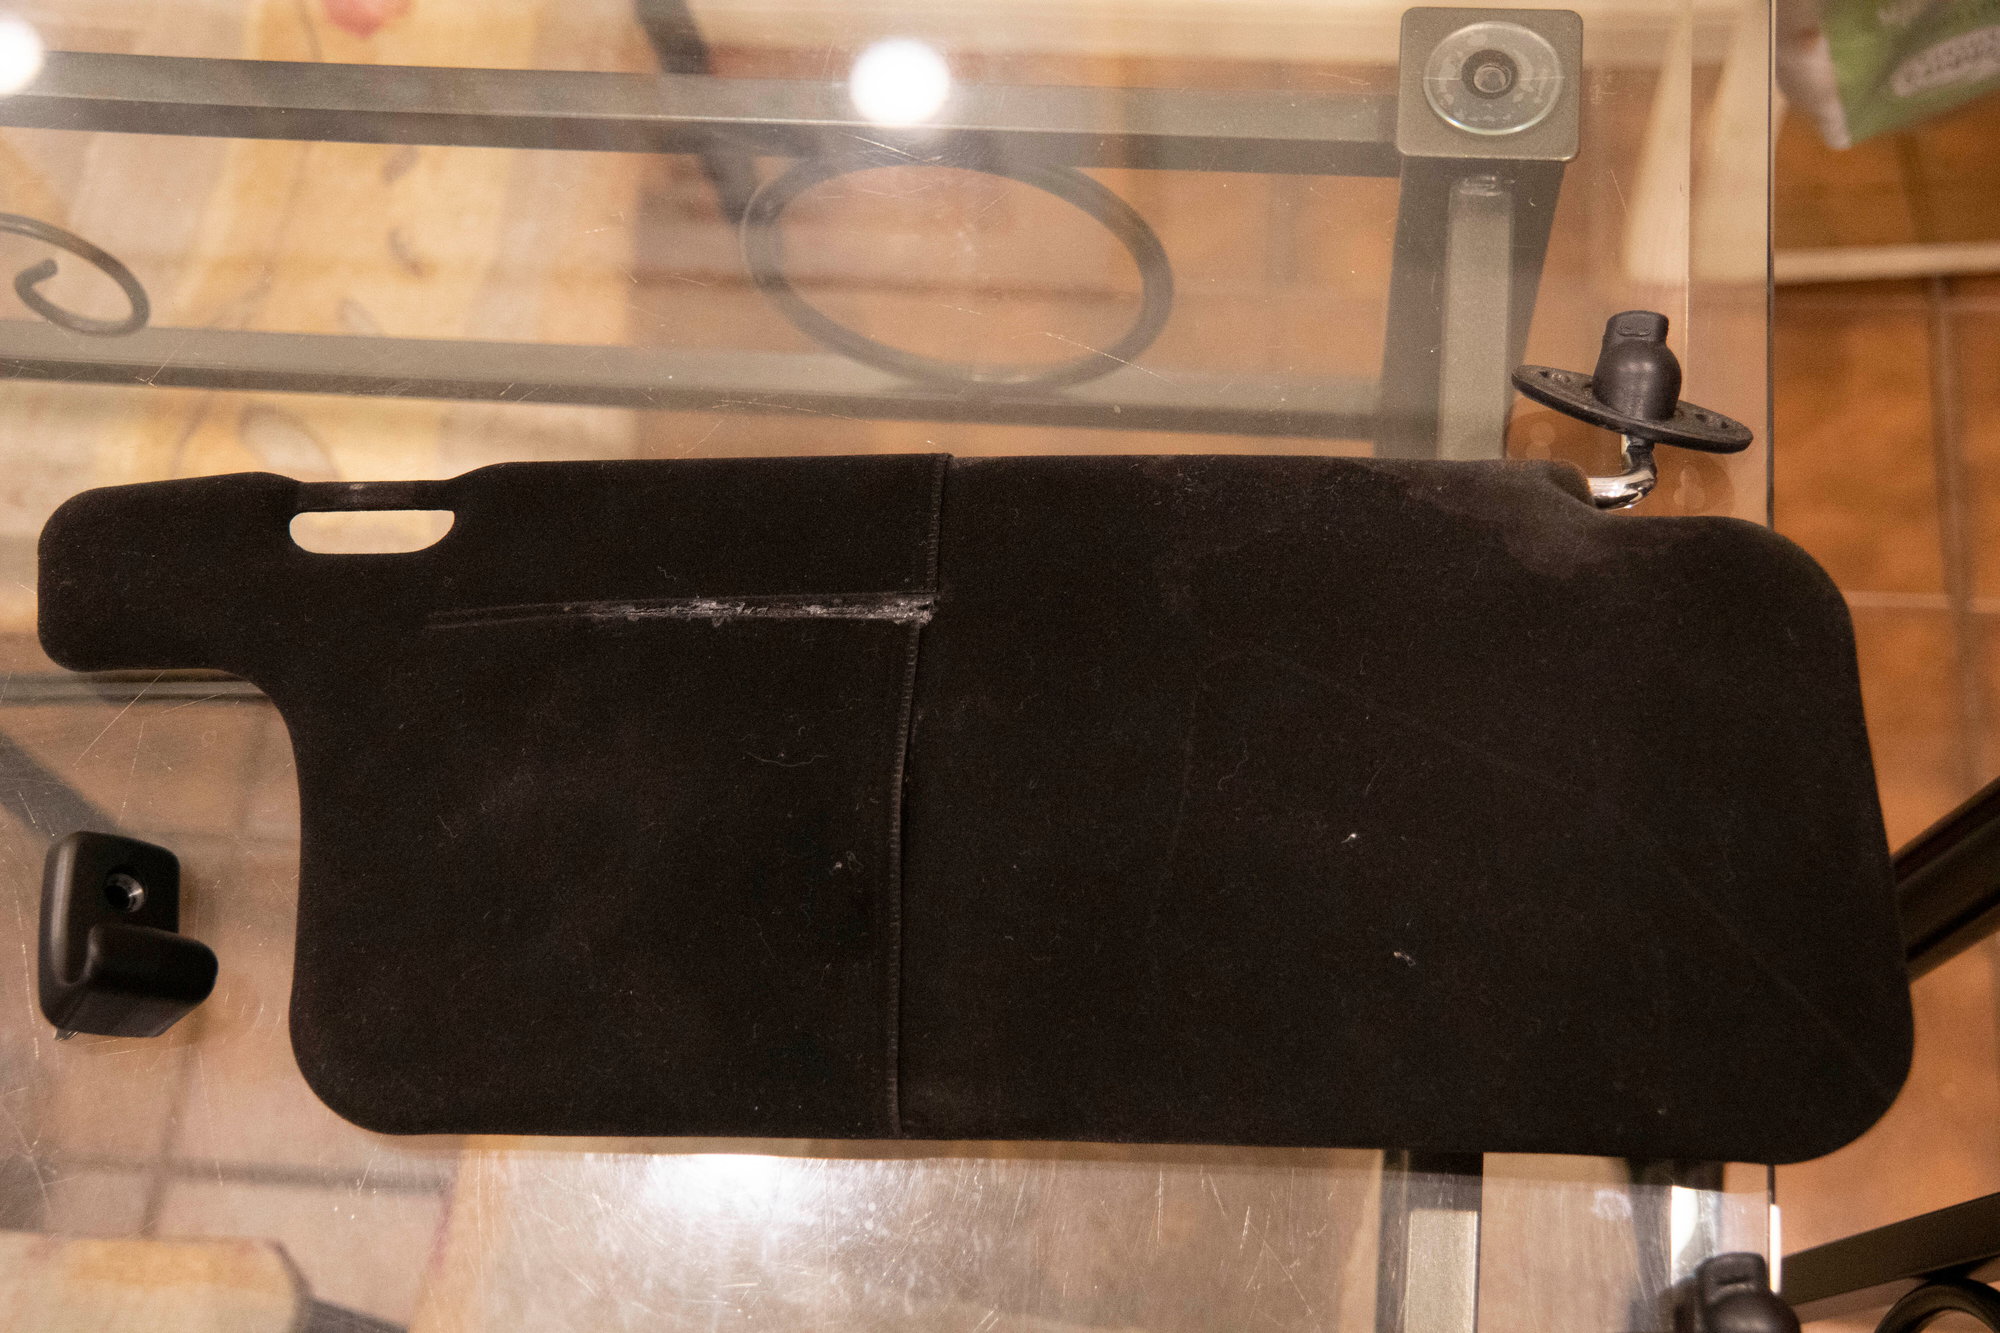
The little pocket part was torn at the seam when I got the car. Multiple different glues failed to fix it. Also despite cleaning them very thoroughly before dying, the top right has an area that just turned out a bit dull. The other one is not much better. Here's what's replacing it:

Factory black piece from an S5 car. The little black clip is a 3D printed sunglasses holder. Also, check it out:
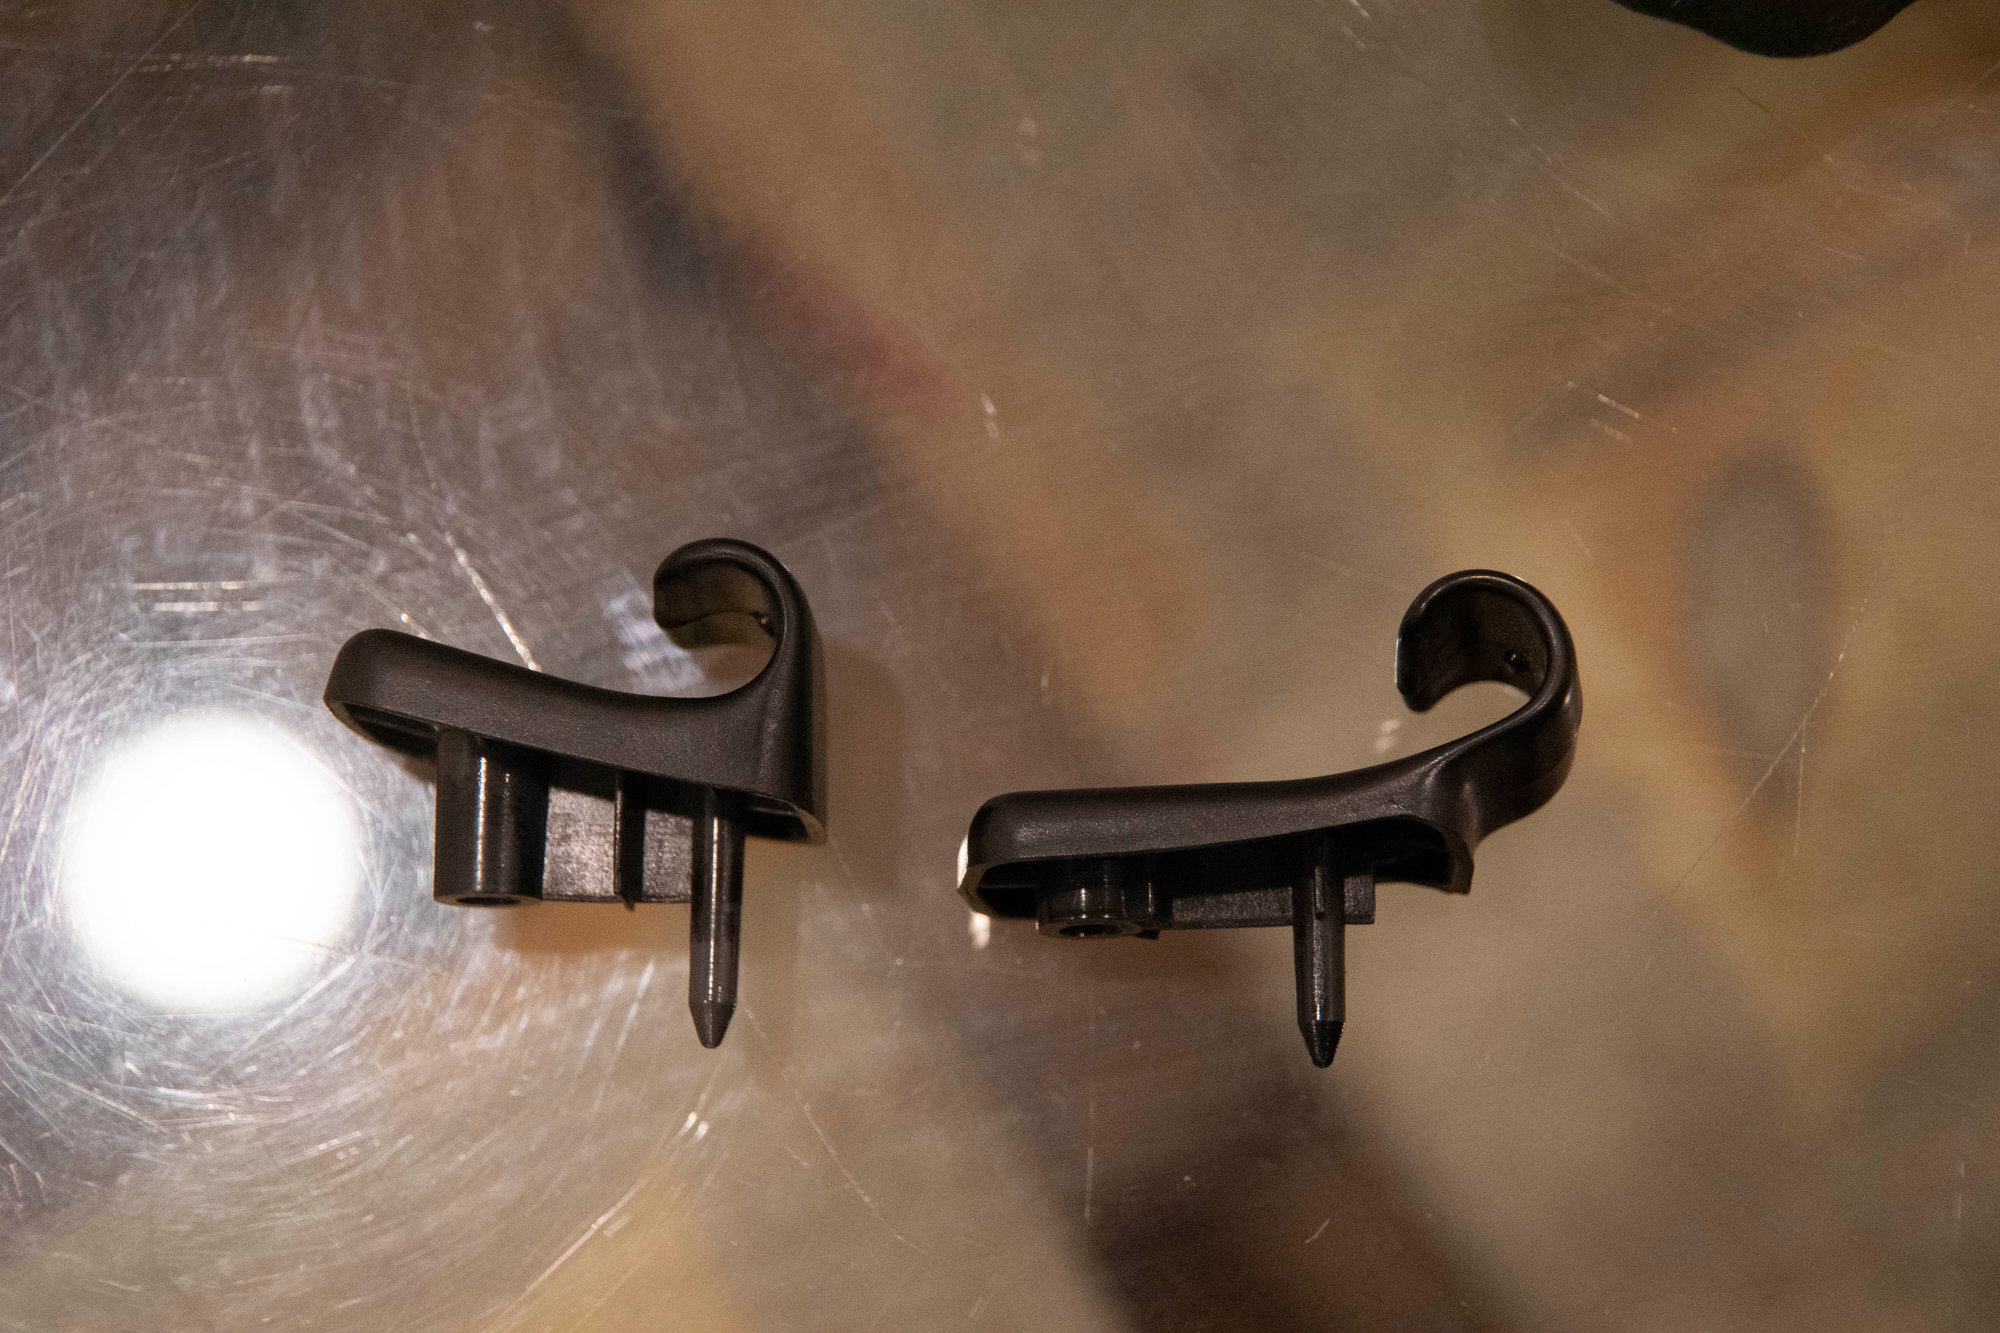
In true Mazda fashion, someone decided it was vitally important to redesign the visor clip from S4 to S5 cars. S4 on left, S5 on right. And no, they aren't interchangeable. I ended up reusing the S4 part. All installed:
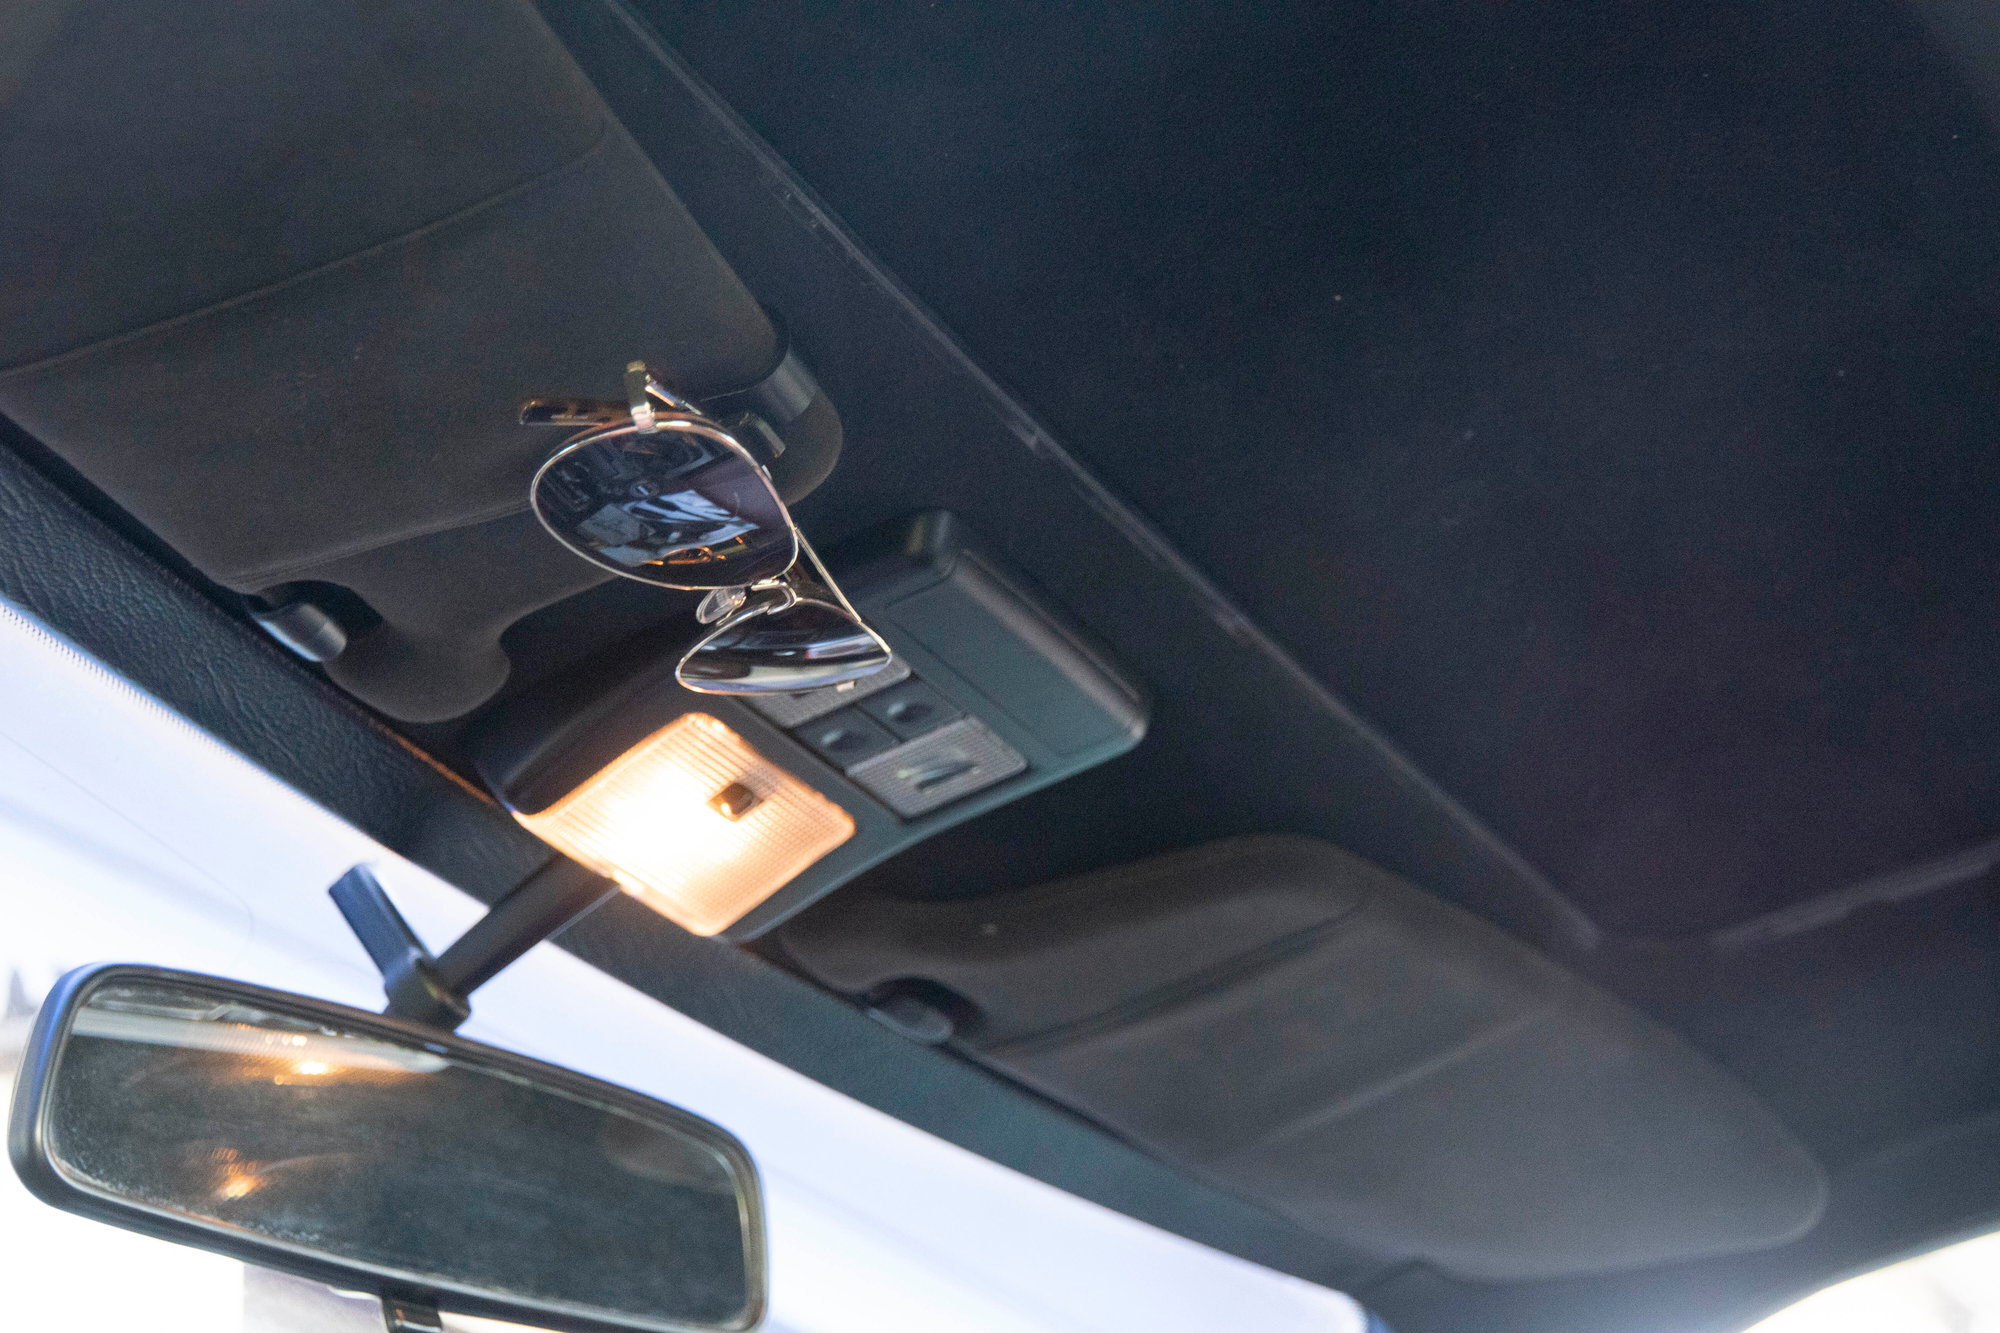
There is a slight colour difference due to the dyed headliner. However the dyed headliner actually came out all one colour with no flaws, so I am perfectly content to keep it and not worry about finding the OEM black piece.
Also, I've complained about the exhaust being too loud on this car. I decided the only way to quiet it down was to add an obstruction to the exhaust stream and absorb some of that energy, so I picked something up that should help with that:
Details to come as soon as I have time. I'll be working some extra shifts for the next little bit to support my latest automotive mistake :)
Until next time
Different visor clips may be due to sunroof versus no sunroof.
infernosg said:Different visor clips may be due to sunroof versus no sunroof.
That's a good point actually, hadn't thought of that. Although since they're forward of the sunroof, I'm not sure why they would need to be different.
Here's whats going into the car. No, not the 750cc Honda engine:
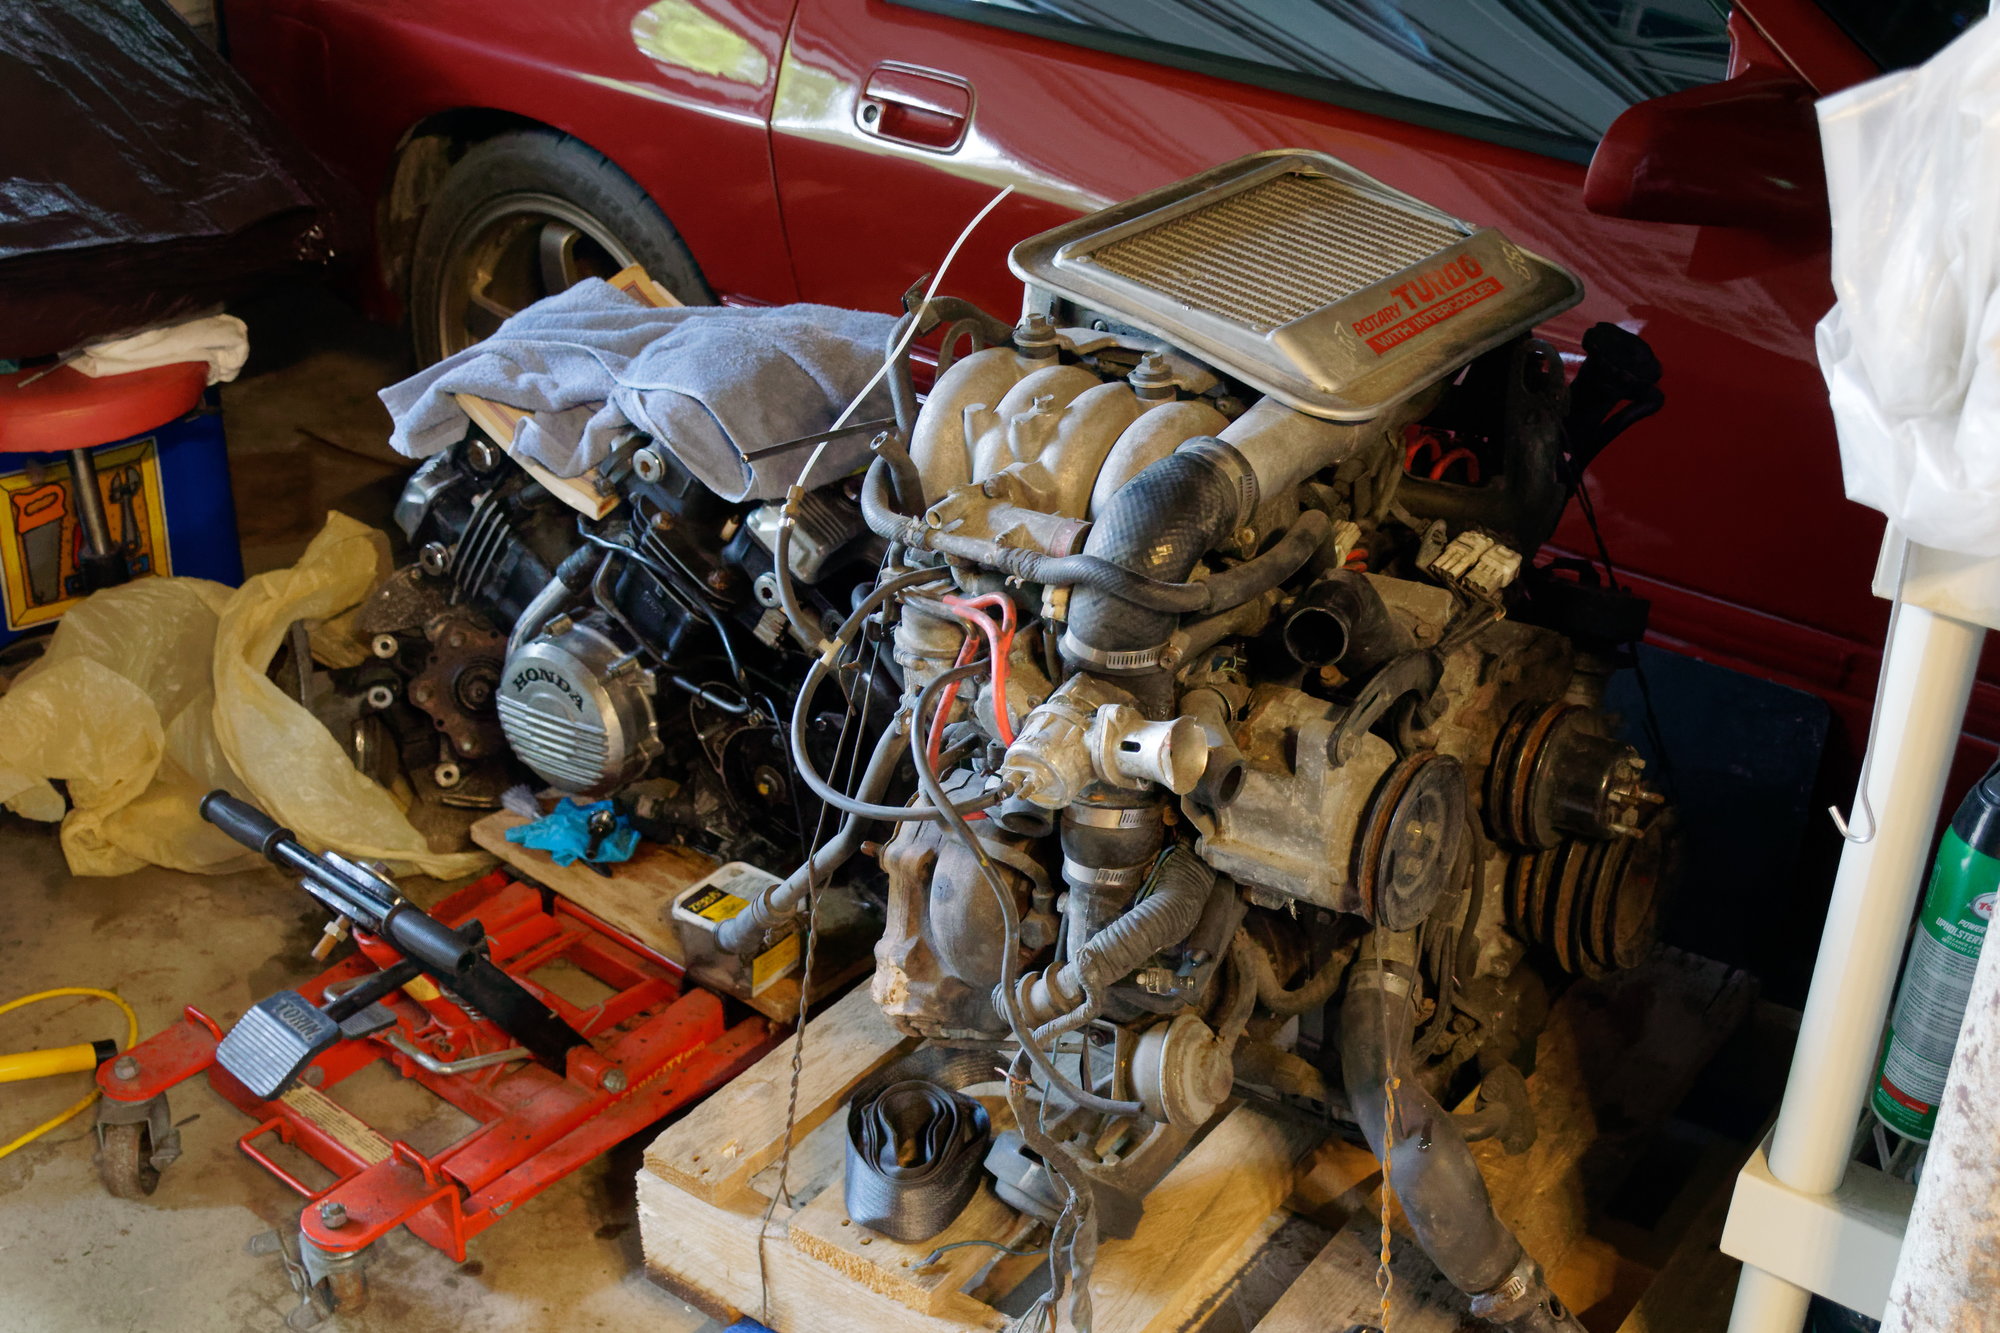

I've mentioned a few times that the plan was always to go turbo. Recently I was even getting to the home-stretch of acquiring all the parts to turbocharge my NA block. But then I had an opportunity to get a full TII drivetrain swap for a good price, so I jumped on it. I may relay the full story soon, but for now I'll just say that the price was hard to beat. The engine was tested to start and run and comes with a 60 day warranty (not that I'm likely to be done installing in 60 days, but nice to have).
The parts yard owner told me that it had "head work" done. I presume this means that it is a rebuild and the housings are new. Whether that is a good thing or not depends on who rebuilt it. The non-factory RTV on the front cover lends credence to this theory. Also notice that there is no boost-controller, which is good, since it means the previous owner wasn't running more than the factory 7 psi.
S5 engine, so it has the reinforced dowel casting. Not that I plan to make crazy power, but good to have:

For anyone not familiar, this casting becomes a weak spot on earlier engines. People say it's around the 400hp point but who knows for sure. On Series 5 engines like this one, Mazda changed the casting to add this reinforcement rib and mitigate the issue. Hypothetically it shouldn't be a problem unless you get a really hard detonation, but realistically the headroom is nice since you never know what can happen. There are plenty of people making lots of power on S4 blocks (hell, even on turbocharged NA blocks) but I don't want to worry about that for a long time. Although my plans for the indefinite future are to keep the factory turbo and factory boost limit, which I expect to put me between 220 and 240 hp with a full exhaust.
Spray paint courtesy of the parts yard. Not sure why they needed so much of it:
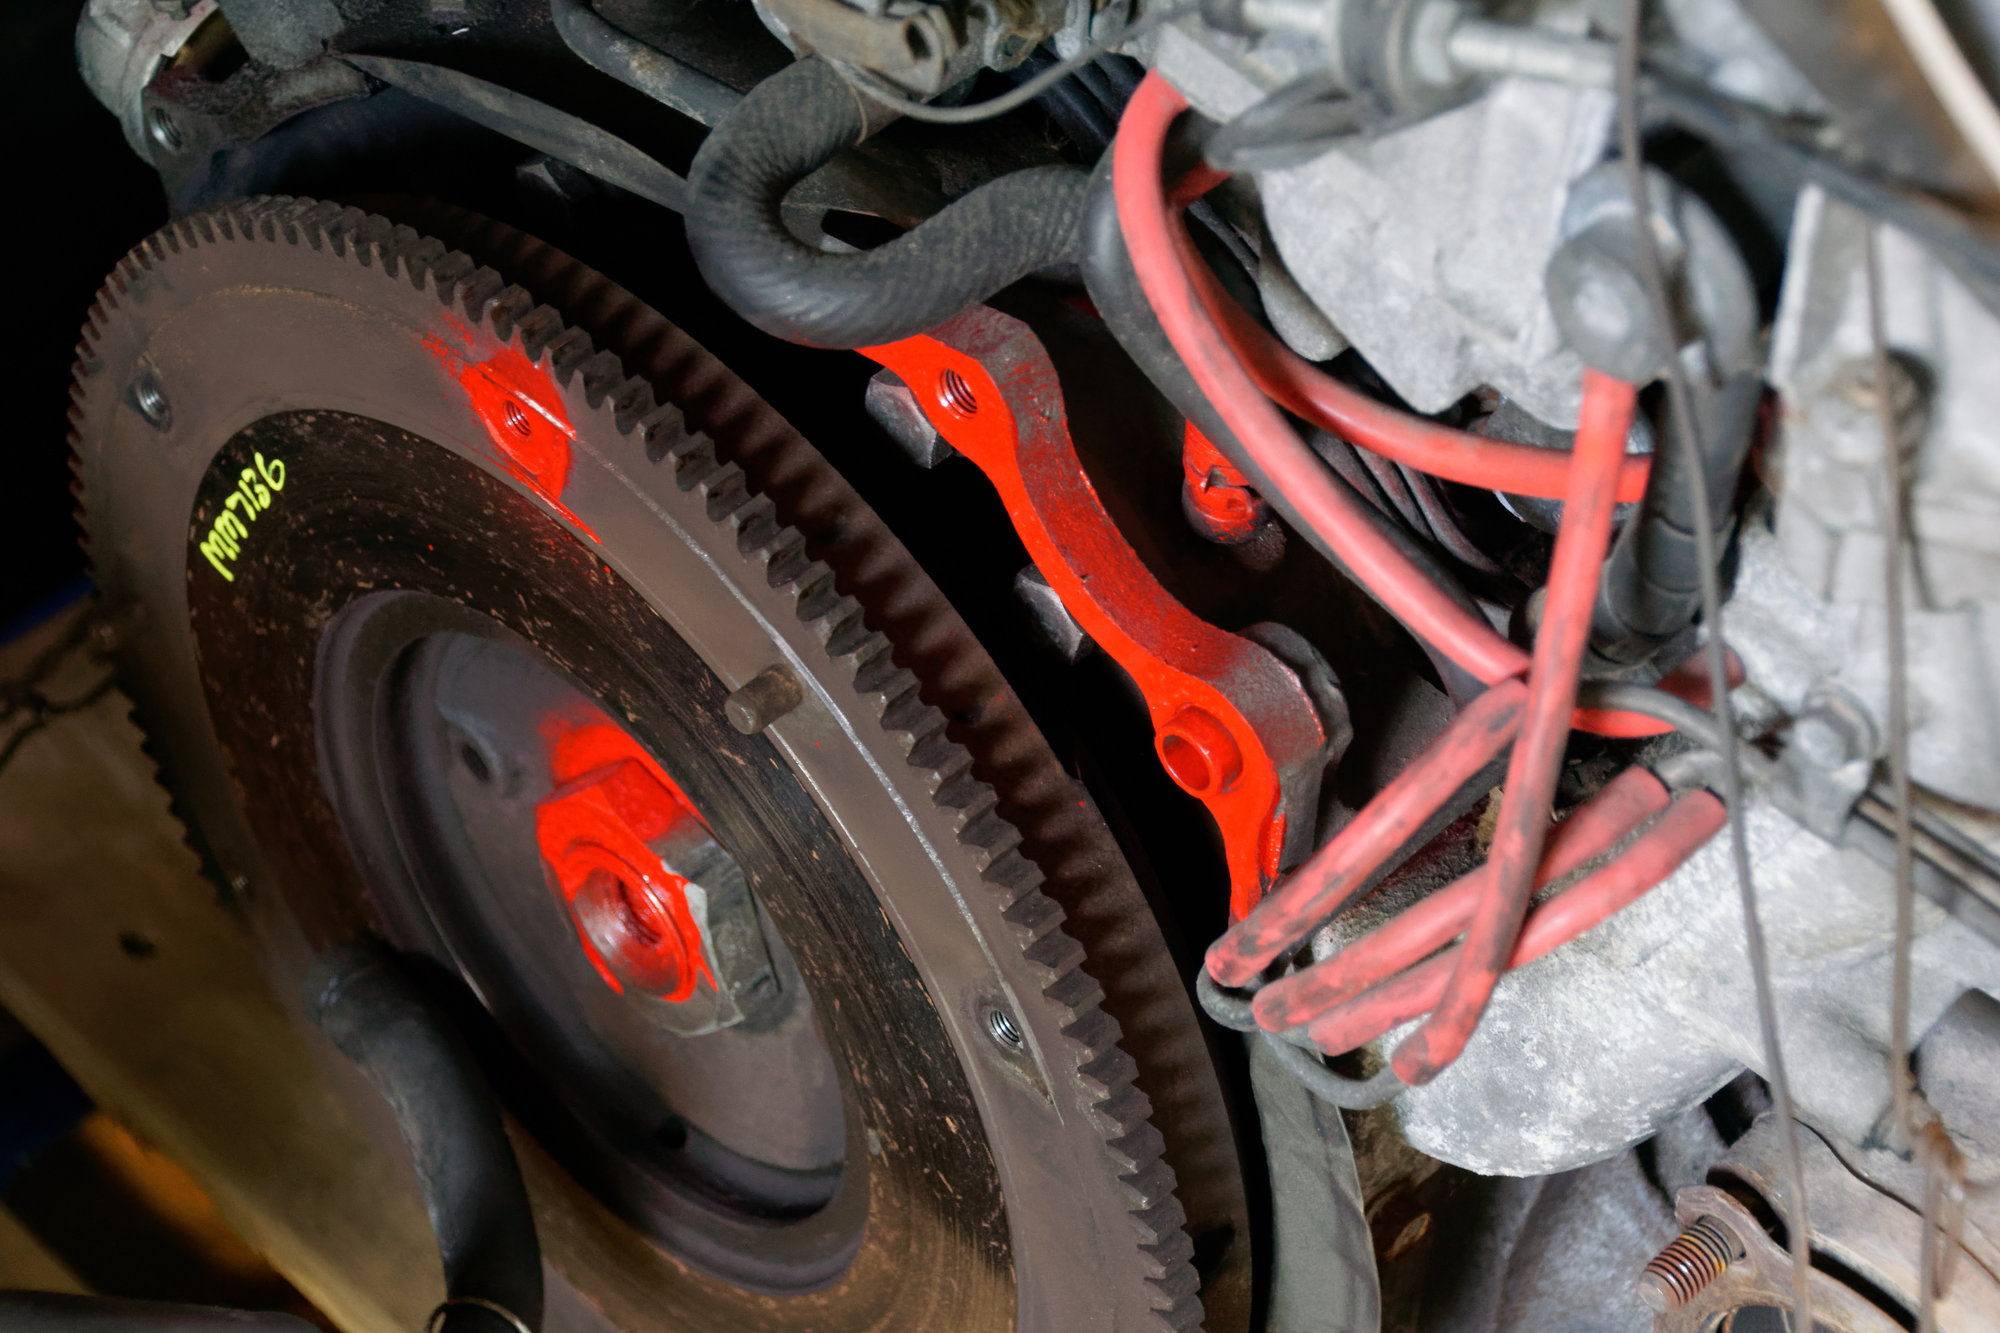
Why spray into the pilot bearing? I mean, I already have the new one and didn't intend on reusing the old. But still, come on.
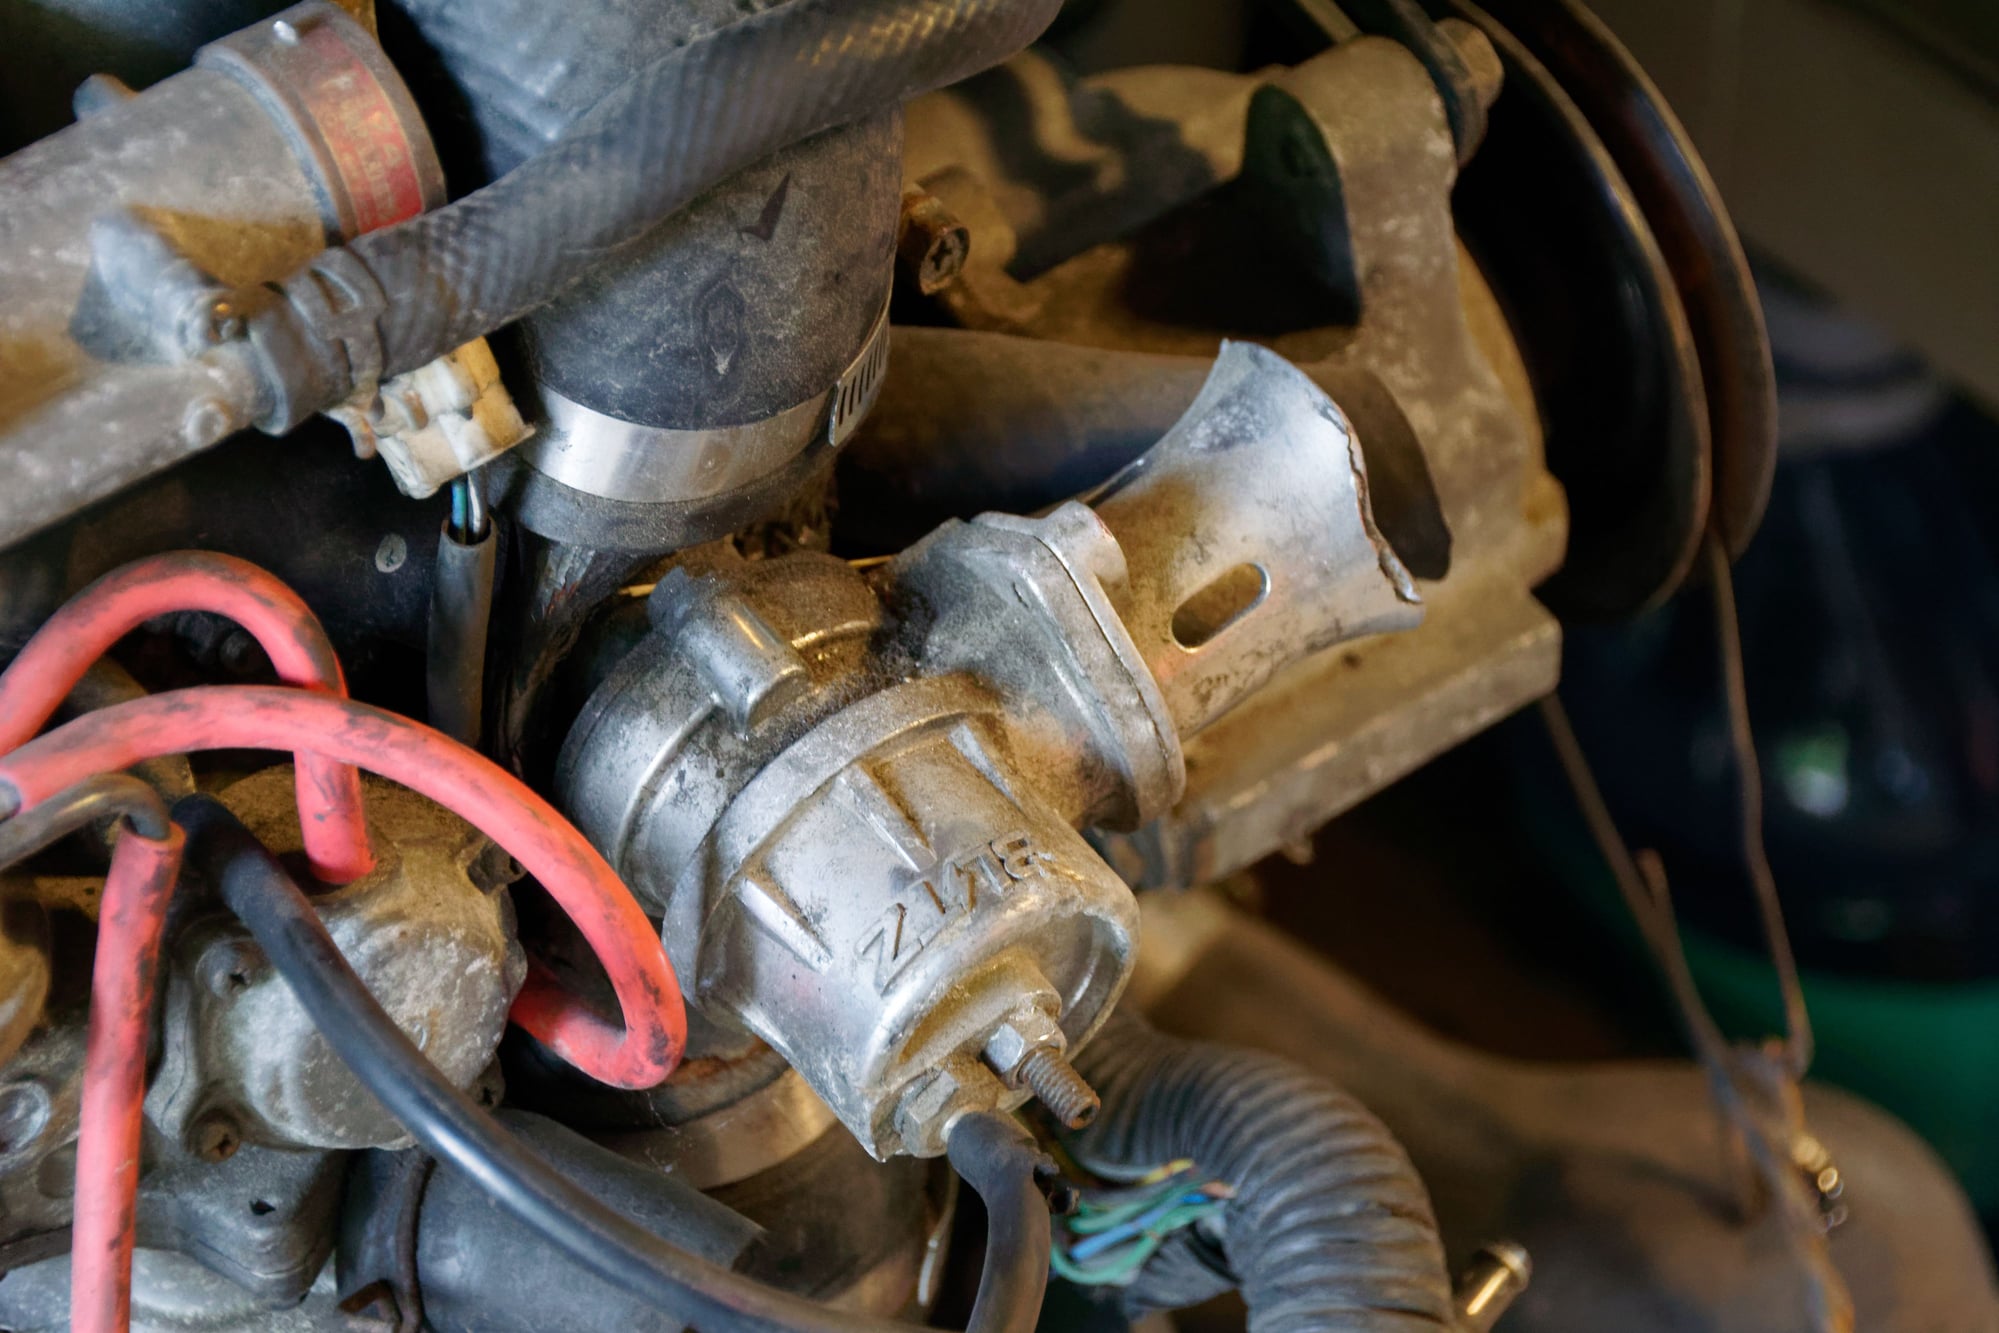
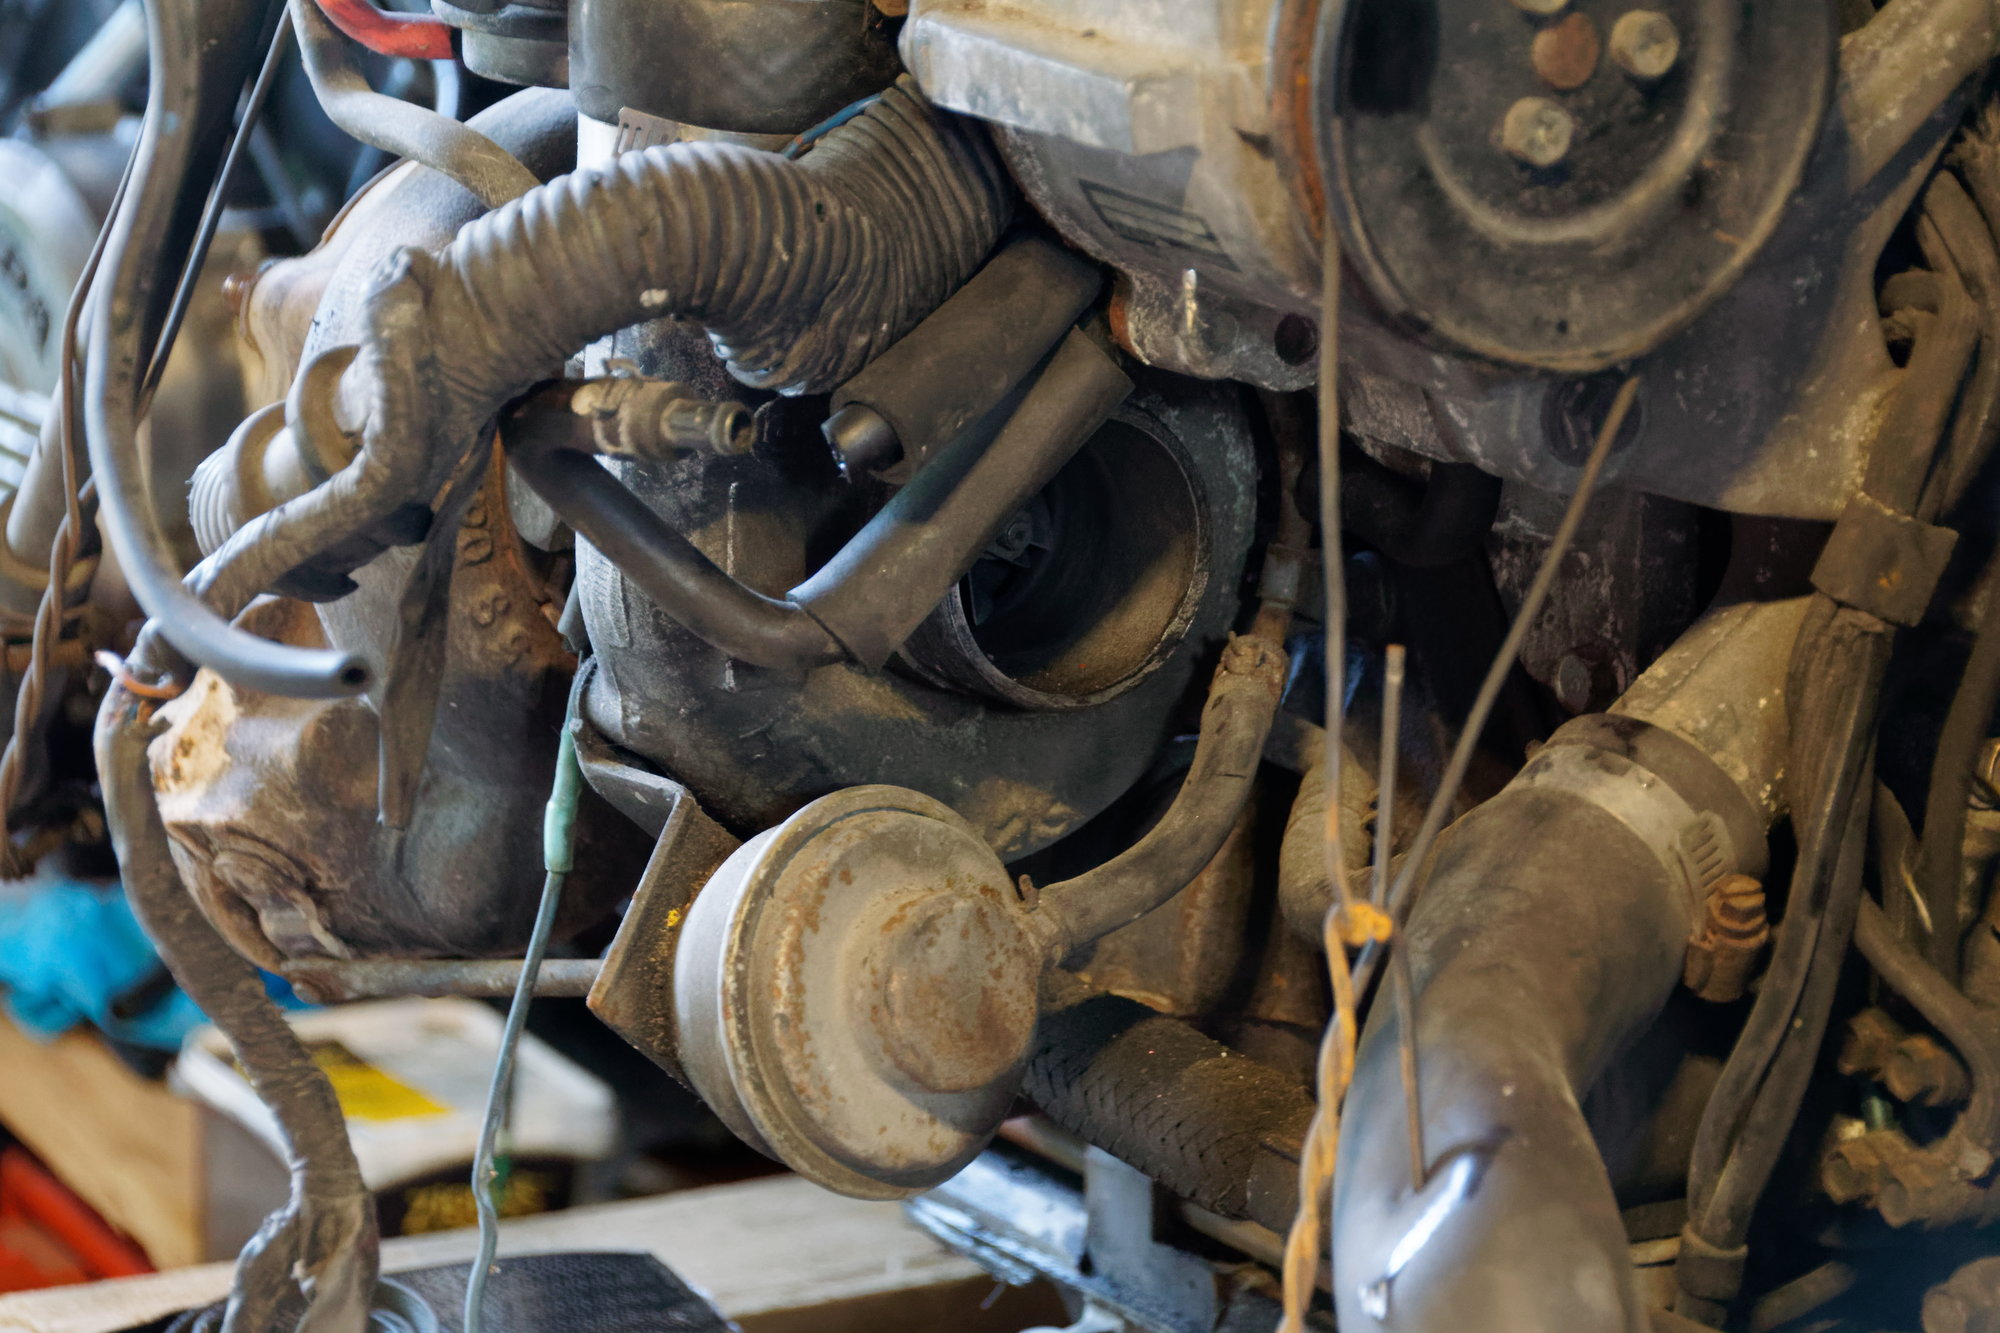
The engine is seemingly stock, although the previous owner did leave this Blitz blow-off valve. Not sure if I'll be using it since it's pretty crunched, as is the pipe to which it mounts. I have an HKS knockoff in the basement somewhere, although I may just go to the stock recirc valve to avoid police attention.
I also got the diff and half-shafts, although the yard wasn't able to free the half-shafts from the diff. On the upside I got basically the entire rear suspension and brakes for free:

On the downside, I sense lots of heat and hammering in my future. I don't know how I feel about those TII axles I see for sale on eBay, and apparently when you order the part on Rockauto they send you the NA part. We'll see how I fare removing these and I'll go from there.

The differential is a Series 5 TII, so unfortunately is the viscous type. Since I don't drift, I doubt I will notice too much of a difference. Also, the TII transmission and driveshaft.
What's cool about this development is that I am able to avoid the whole "parts chasing" problem of turbocharging the NA engine. Almost every part outside of the block itself is just a little different, and therefore incompatible from NA to TII. For example, I would need multiple tubes, the compression elbow, the tube for the BOV, throttle body, OMP rod, OMP, custom oil lines, custom coolant lines, etc. This is now a nearly drop-in swap (mechanically speaking).
The Turbo II transmission and diff are also much beefier. I can deadlift the NA transmission trivially, but the TII one is pretty heavy. Same goes for the diff, which is an 8" ring vs a 7" ring in the NA. The TII half-shafts are also thicker in diameter, with larger CV joints, and apparently good for 500hp or so. This should give me tons and tons of headroom to have a fairly bulletproof drivetrain.
The next little while I'm going to carefully inspect everything for issues while I work on freeing those axles. I'm slowly compiling the list of things I still need to acquire (the biggest being Turbo II hood, so anyone looking to sell one in southern Ontario, PM me). Also a standalone ECU is basically a requirement since I don't want to chase down all the stock TII electronics, but I've been working on that for awhile and have a good plan to balance cost and features.
Until next time :)

Nice score on the TII drivetrain!
I actually have an s5 ECU and associated bits if you were interested in staying stock. But that may not be the best plan if you are not running stock exhaust.

Man, that Blitz BOV belongs in a museum.
WondrousBread said:That's a good point actually, hadn't thought of that. Although since they're forward of the sunroof, I'm not sure why they would need to be different.
IIRC, the whole headliner sits about 1 in. lower in the sunroof cars even though the mounting points for the clips are in the same location. I have the clips from a known sunroof car and they sit a little weird with my non-sunroof headliner. It's never bothered me enough to try to seek out the correct ones.
Nice score on the TII engine. Are you planning on breaking it open to rebuild? I'm sure you already know this but I'd highly advise either just tearing into it or finding some means to accurate gauge its condition. Pressure check the cooling system and find some way of doing proper hot and cold compression tests. Even though it was tested to run you don't really know. My engine would still start and drive just fine with 50% compression on two faces of the rear rotor. Also, if you don't want to run the viscous LSD look into the FD Torsen units. They're a direct swap. All you have to do is swap ring gears (although maybe not) and reset lash/contact area.
If you don't need the extra set of rear control arms I know someone interested :)
sevenracer said:Nice score on the TII drivetrain!
I actually have an s5 ECU and associated bits if you were interested in staying stock. But that may not be the best plan if you are not running stock exhaust.
I appreciate the offer, but I'm pretty set on a standalone. They offer better engine protection and future proofing. Also S4 > S5 wiring swaps are a bit of a nightmare, since Mazda changed the entire pinout from one to the other. Plus the engine harness connects to the body harness at some point along the firewall and those pins are different too.
infernosg said: Nice score on the TII engine. Are you planning on breaking it open to rebuild? I'm sure you already know this but I'd highly advise either just tearing into it or finding some means to accurate gauge its condition. Pressure check the cooling system and find some way of doing proper hot and cold compression tests. Even though it was tested to run you don't really know. My engine would still start and drive just fine with 50% compression on two faces of the rear rotor. Also, if you don't want to run the viscous LSD look into the FD Torsen units. They're a direct swap. All you have to do is swap ring gears (although maybe not) and reset lash/contact area.If you don't need the extra set of rear control arms I know someone interested :)
I'm planning on bolting up the TII transmission, and then once I get the starter I can do a cold compression test. Not as accurate as hot, but good enough to assess if anything is blown. I get the appropriate amount of puffing while turning the flywheel to know it isn't D.O.A.
Then I'm probably going to rig up something to test the cooling system for pressure. As long as all the hoses are capped, I should be able to cut out a piece of lexan and thread in a barb, then use that on the block inlet/outlet on the front iron.
I have no particular plans for the control arms once I've freed the axles. Only thing is they're trapped on there, so I'll either get the axles free from the hubs or have to cut them / separate the CV joint to get the control arm off. I am in Canada, so depending where your friend is located it may not be economical to ship. But we can cross that bridge once I get the axles free :)
Normally my attitude with this sort of thing is "If there are no obvious problems, send it." But given the cost and scarcity of these parts, some basic testing on the TII engine is definitely warranted. I had already intended to bolt up the transmission on the garage floor and install a starter so I could check compression, but infernosg pointed out that I should also pressure check the cooling system.
First thing to do was pull off the water pump housing. Which entailed also removing the water pump, air pump, and all the pulleys:
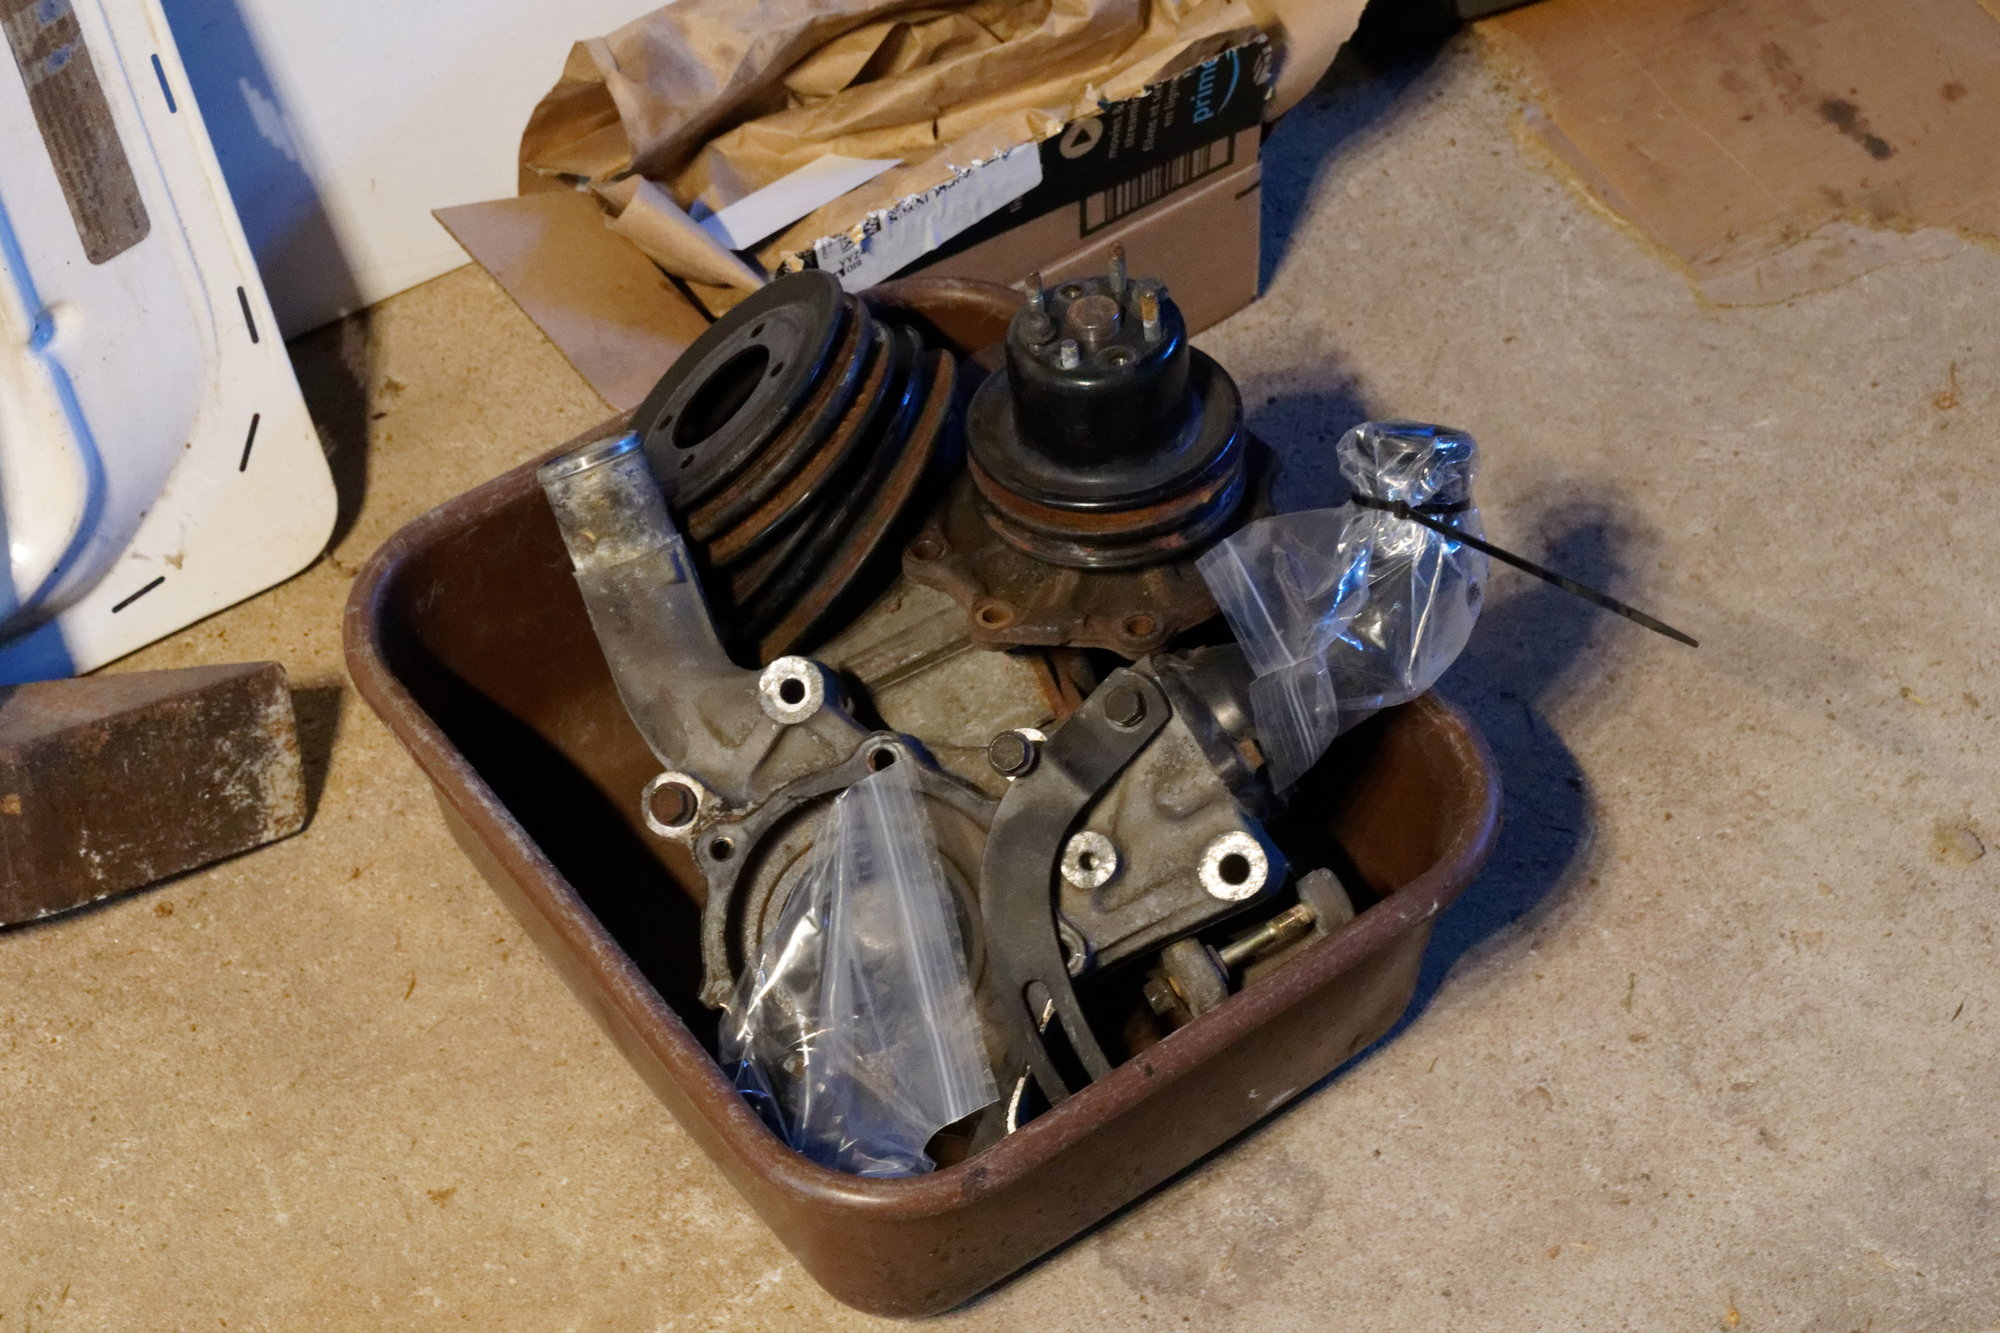
Everything came off without too much of a fight. Whatever car this engine lived in likely did not see a Canadian winter. All the bolt heads are a bit oxidized and a few are rusty, but the threads are beautiful. Might have to do something about that plastic thermostat elbow. Aluminum replacements are $130 shipped or so, which seems like a lot. But unfortunately my aluminum S4 neck has a different bolt pattern, and I'm a bit nervous about running 32 year old plastic in my cooling system.
I also had to remove the oil metering pump for clearance. Series 5 models used an electric oil metering pump. Series 4 models used a mechanical pump. Unfortunately, most standalones can't drive the electric pump. And even if they did, I really prefer the mechanical model since it doesn't fail other than by leaking. I threaded the bolts back in, but that is something else I'll need to address. In the short term I will probably just block it off and premix my fuel. In the long term, I'll probably look for an S4 TII front cover and use a bicycle cable to actuate the mechanical OMP. I have some spare S4 NA covers, but I would need to make a custom turbo oil drain setup, so we'll see about that later.
With those off, I had access to the main water passages on the front iron:
Then I whipped up an adapter plate to let me pressurize the system:
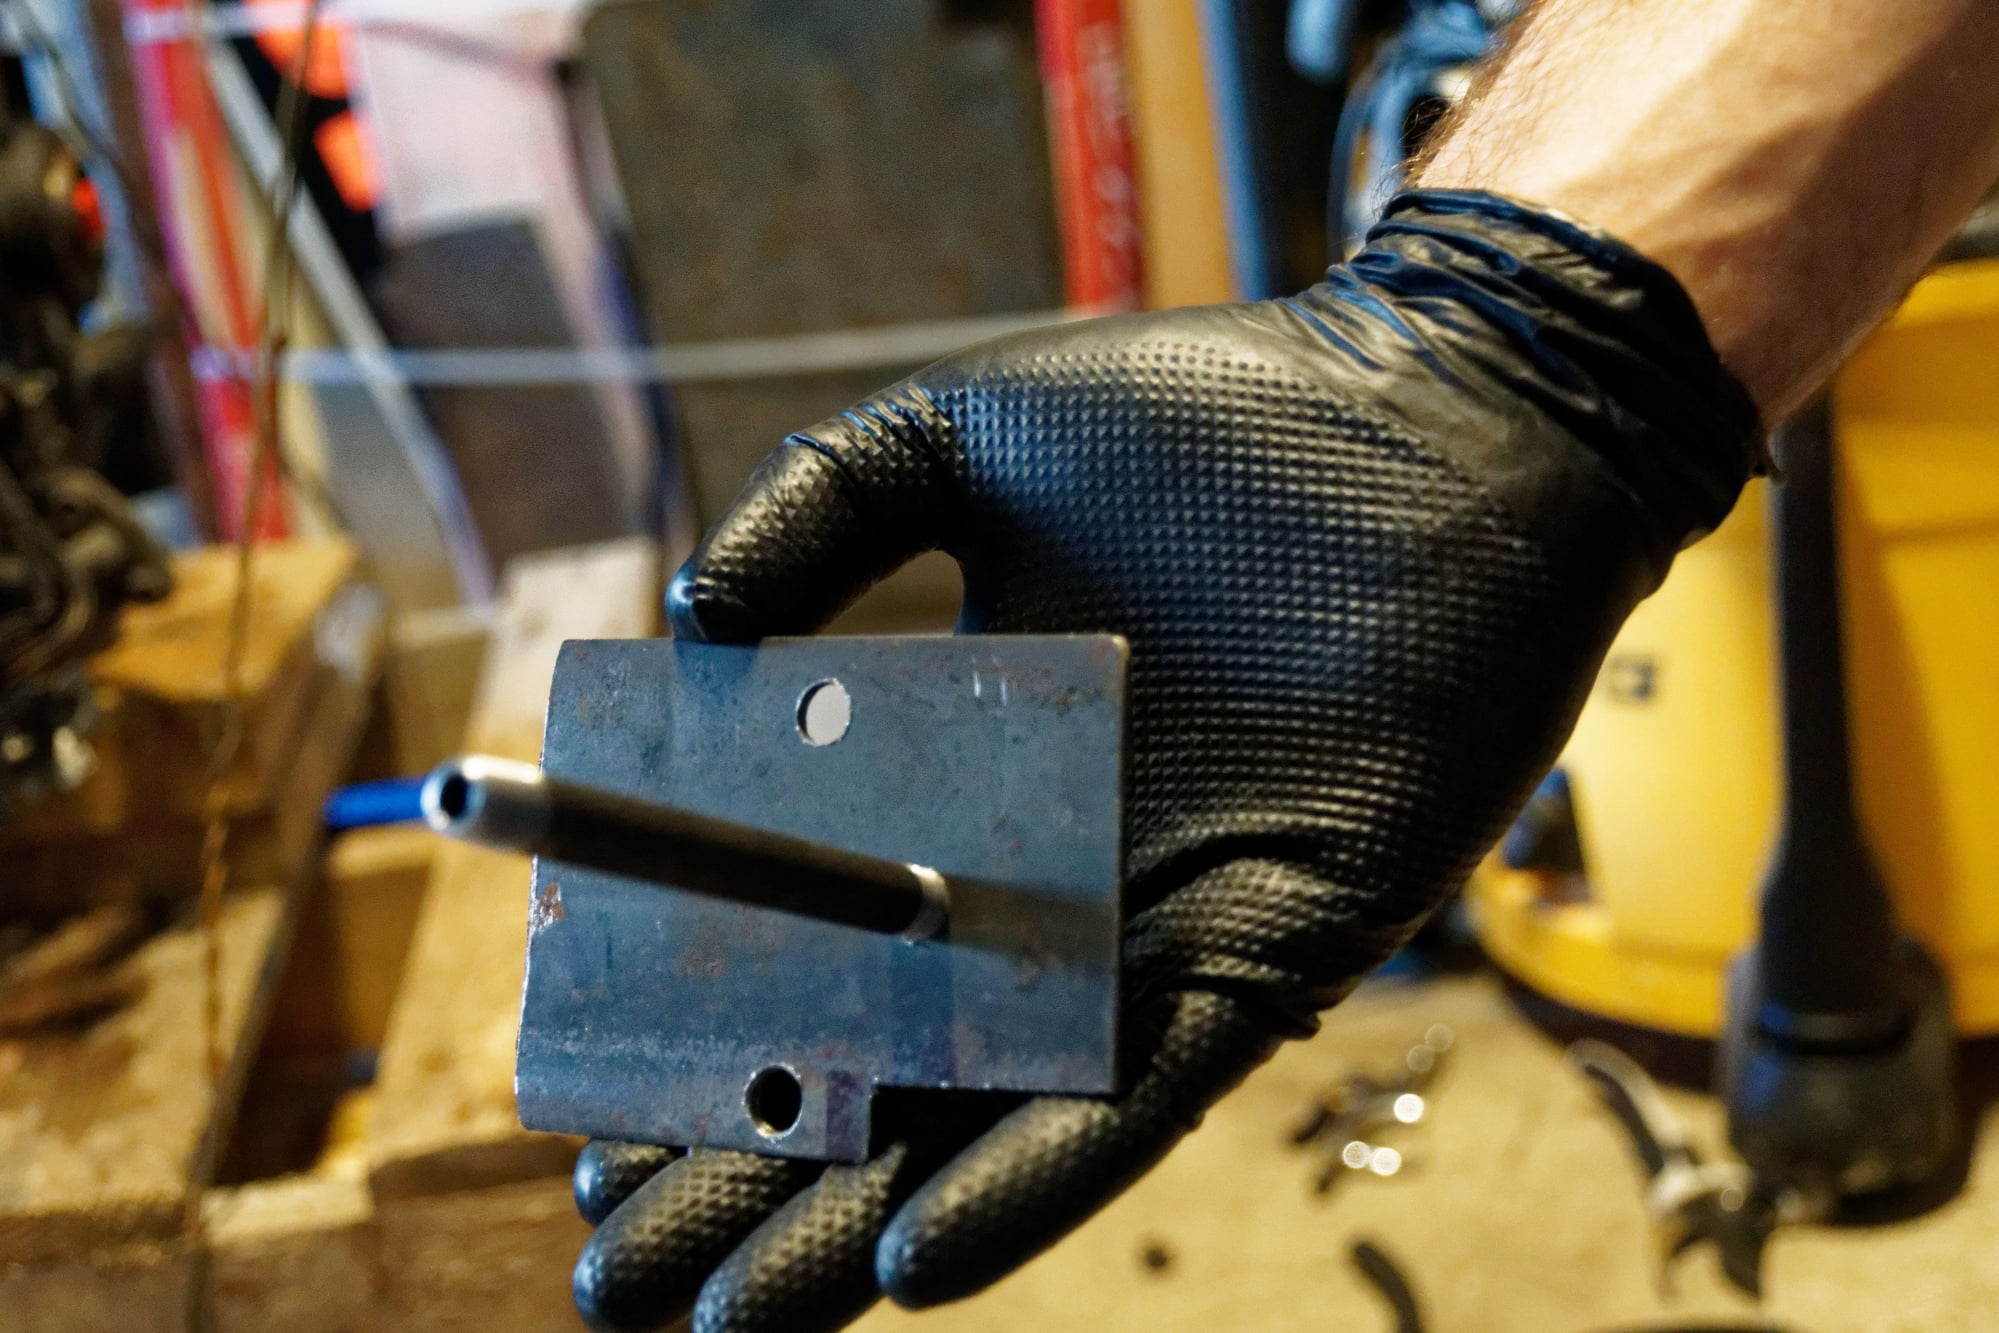
The notches in the corner are to clear the nub on the front cover and the CAS casting. It's not pretty, but it does the job. Used some RTV to get a good seal:
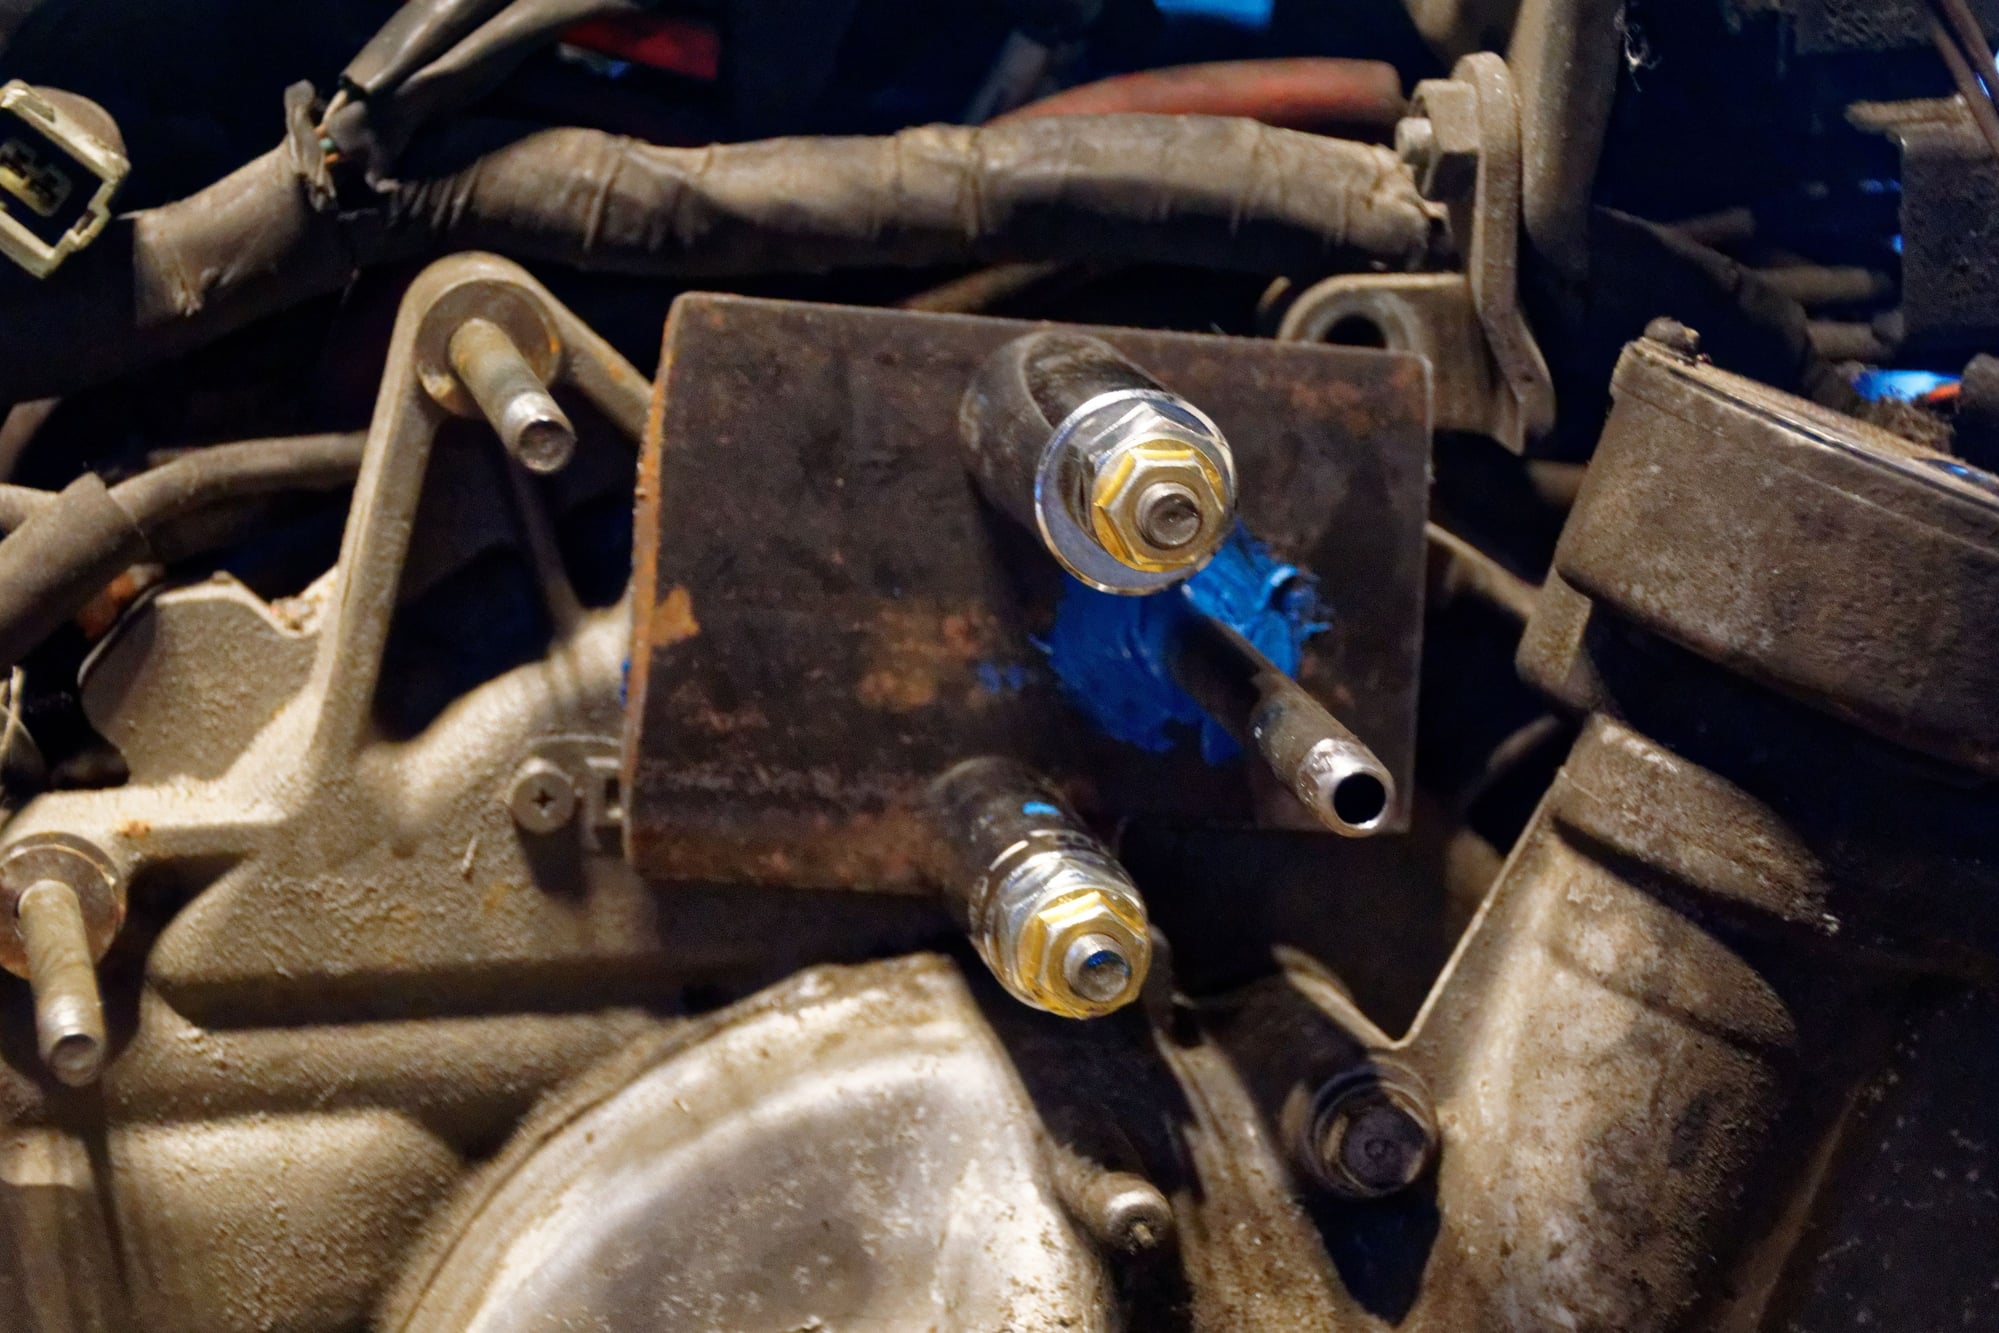
Then I went and plugged any open coolant hoses on the engine, before assembling my testing device. Compressor air wand connected to hose:
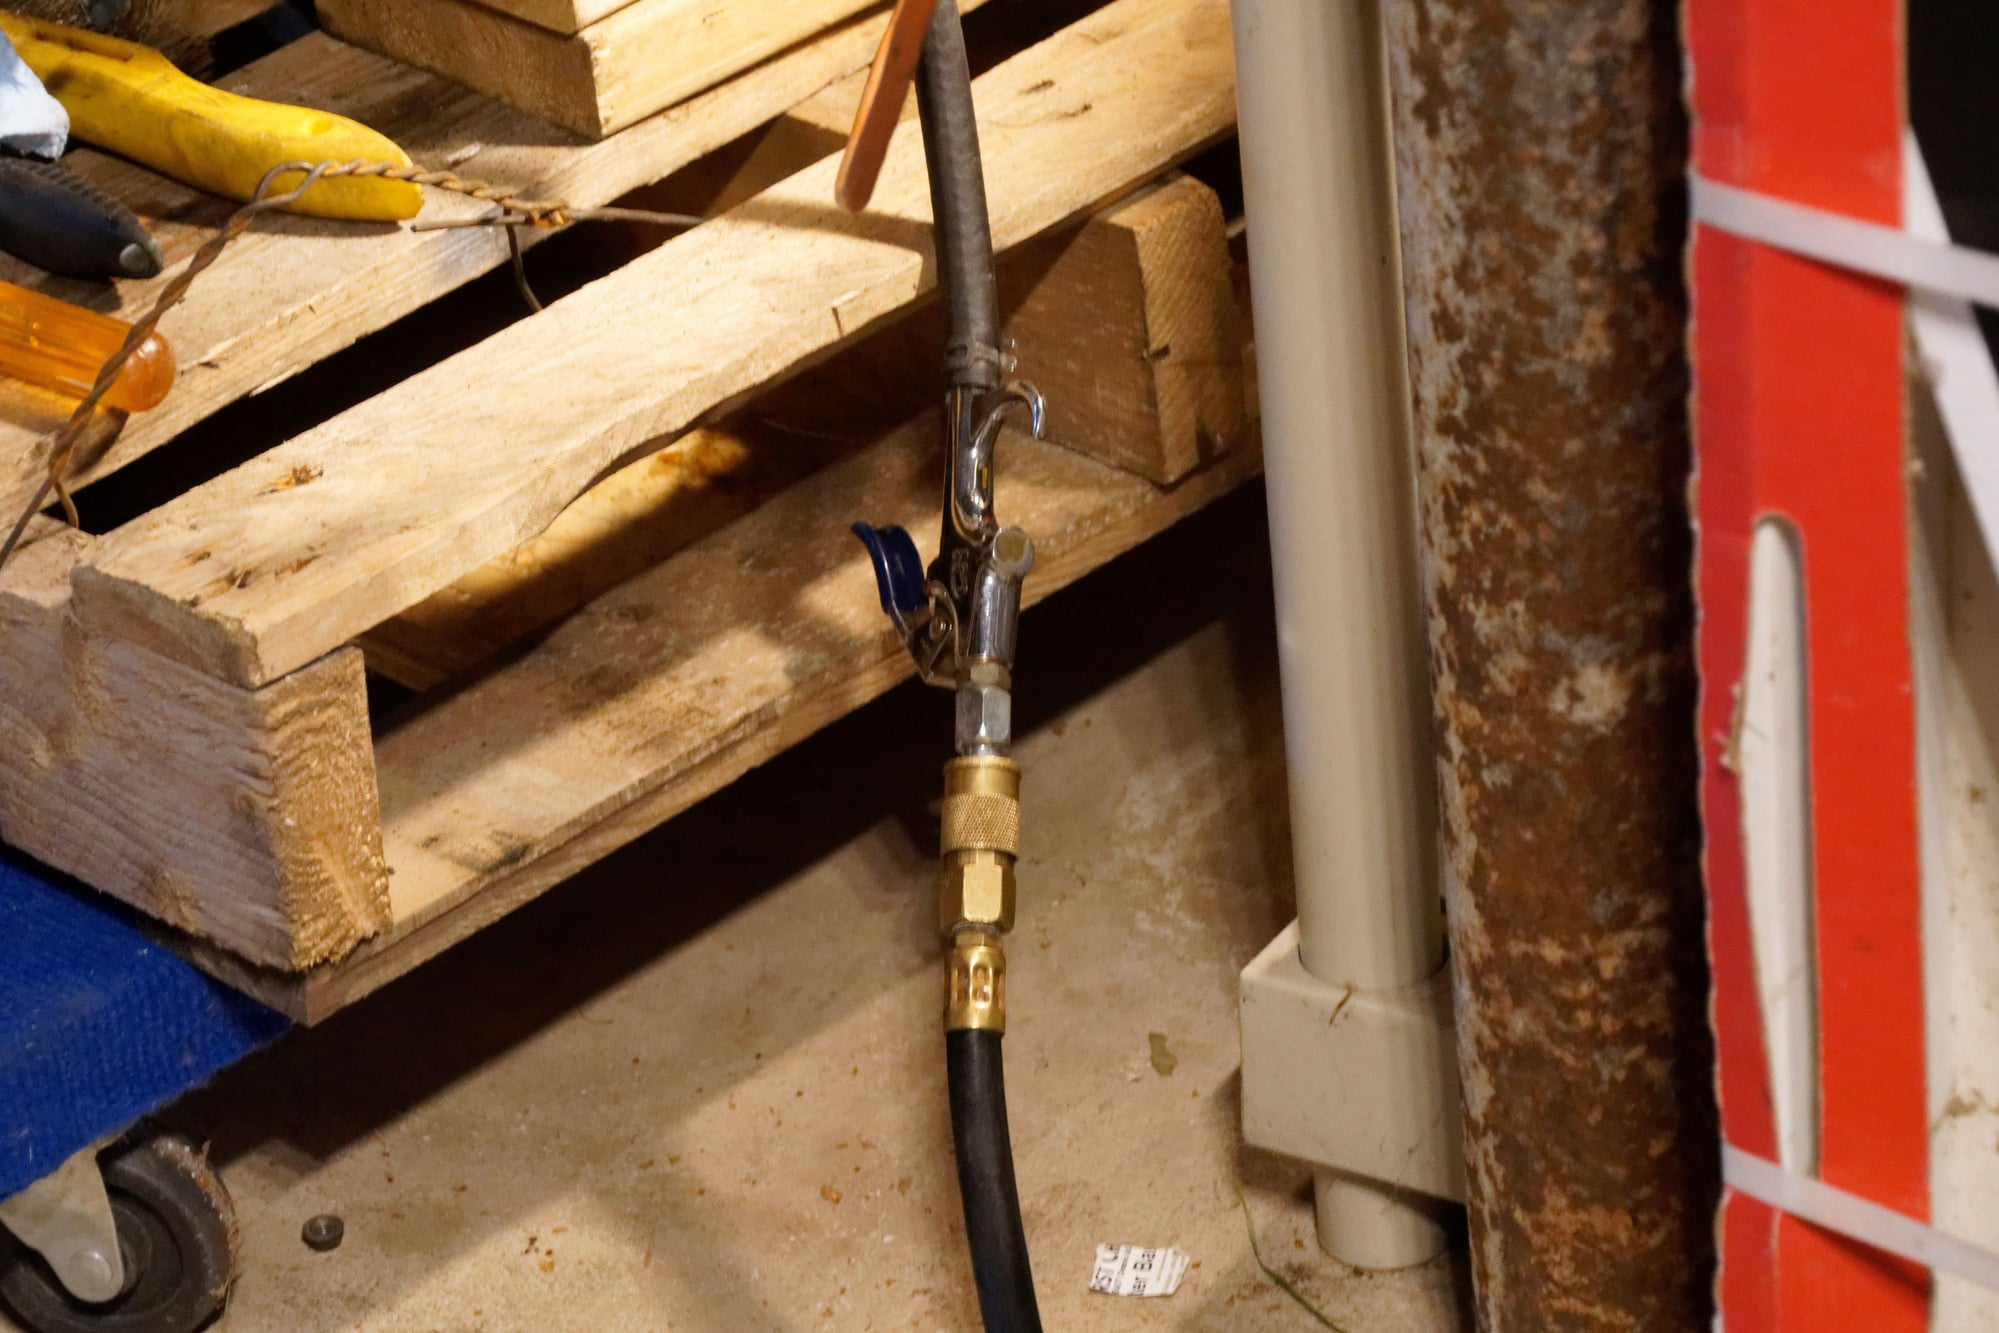
Air supply hose teed in with gauge and barb on adapter:
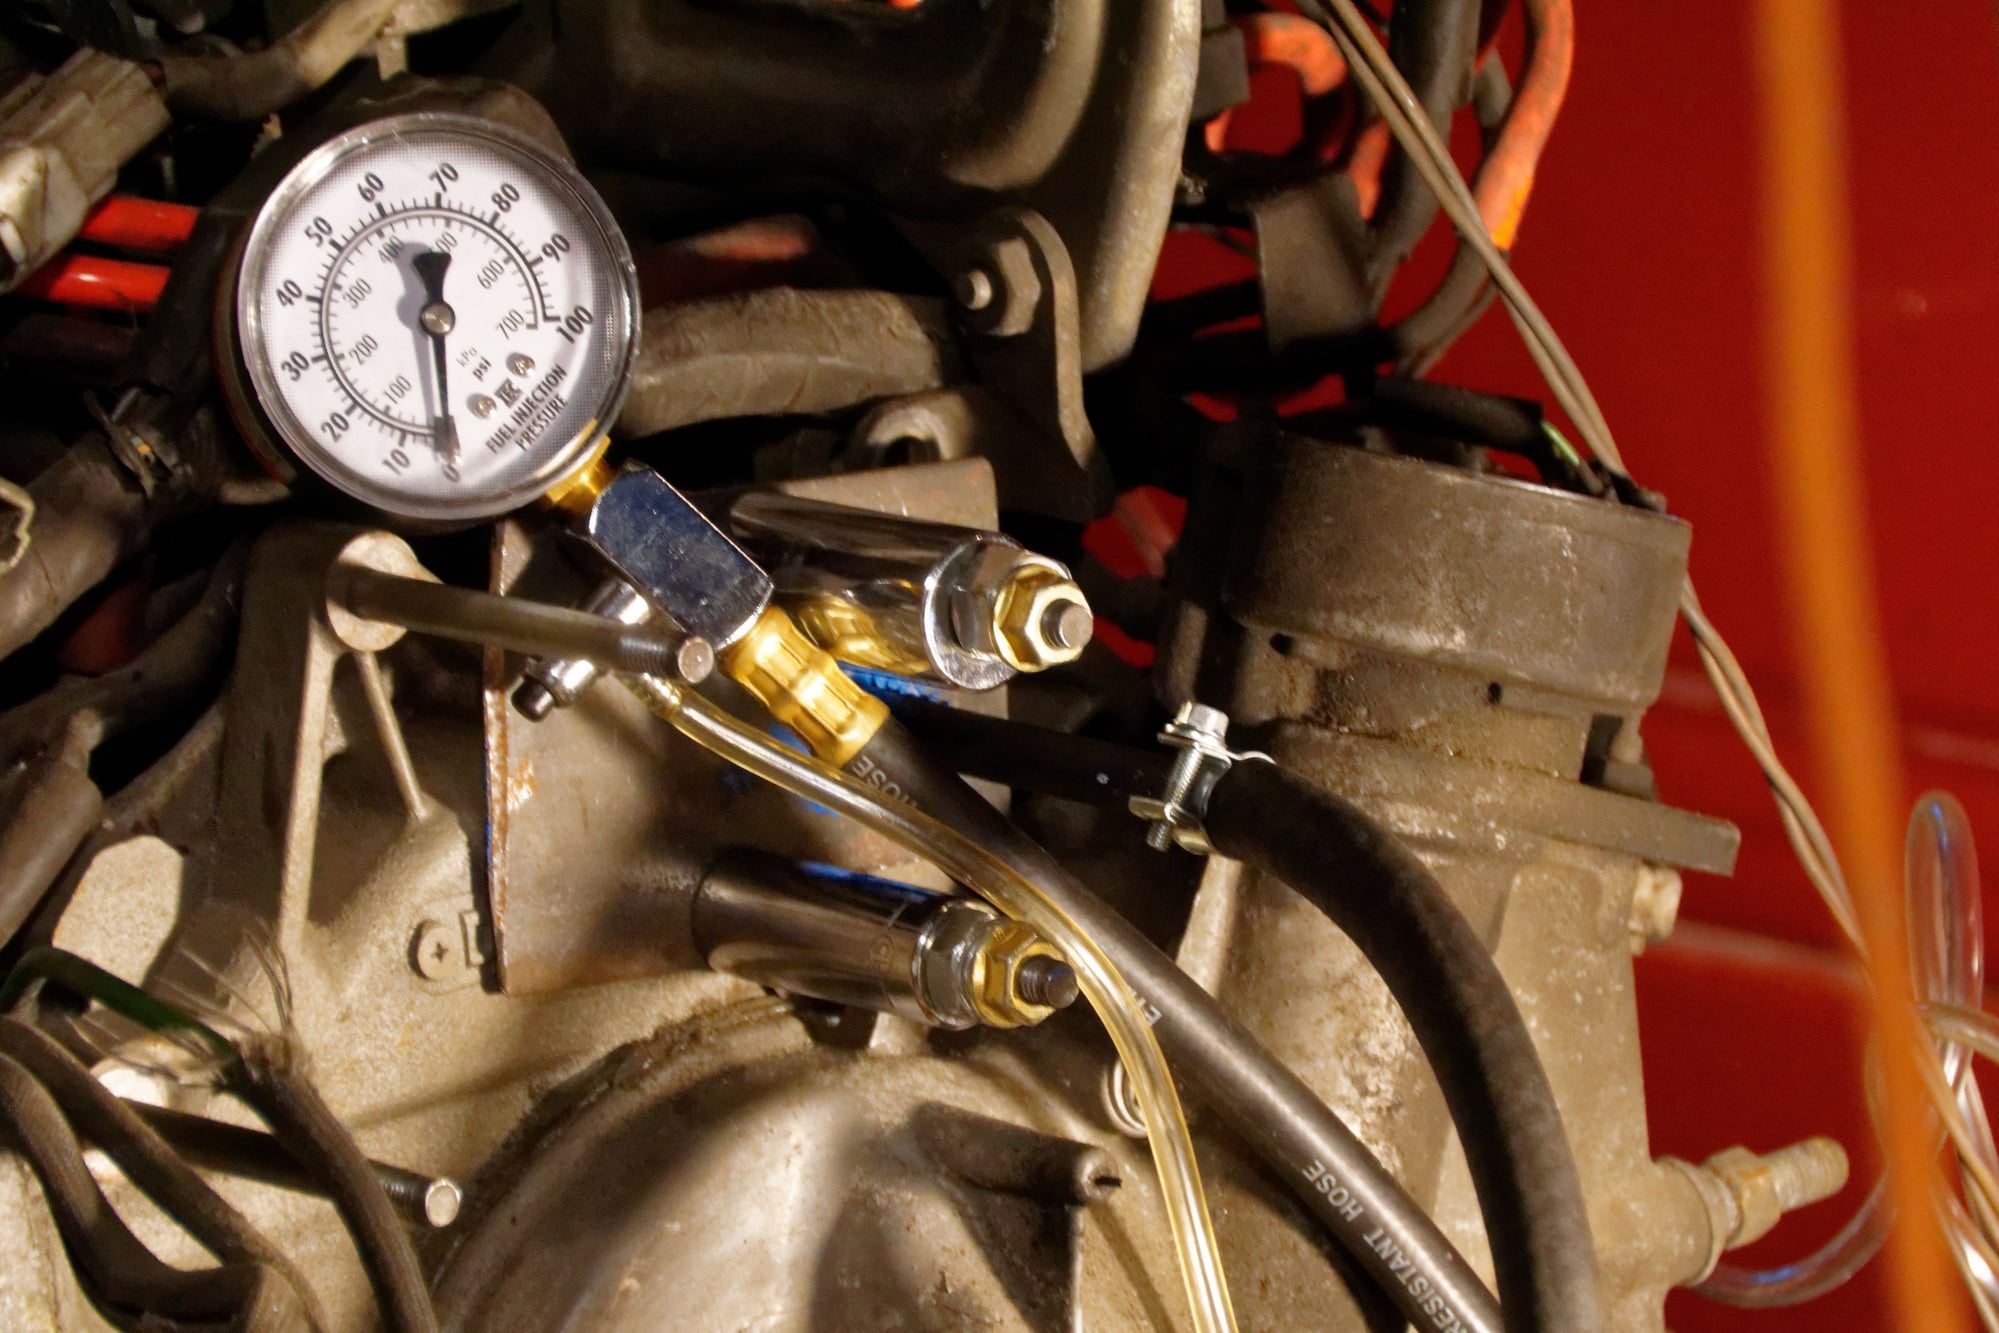
After that, I chased down leak after leak. Leaks from the wand tool, leaks from the hoses I'd plugged, leaks from the heater hose itself, etc. I probably spent 30 minutes stripping the engine and 30 building the adapter, only to spend 4-5 hours chasing leaks. But after finally tracking down the last leaks, I was able to pressurize it and test. Anyone trying this themselves, make sure to turn down the reg on your compressor. You don't want to pump 120psi into the system; nothing good can come of that. I pressurized it to 14 psi:
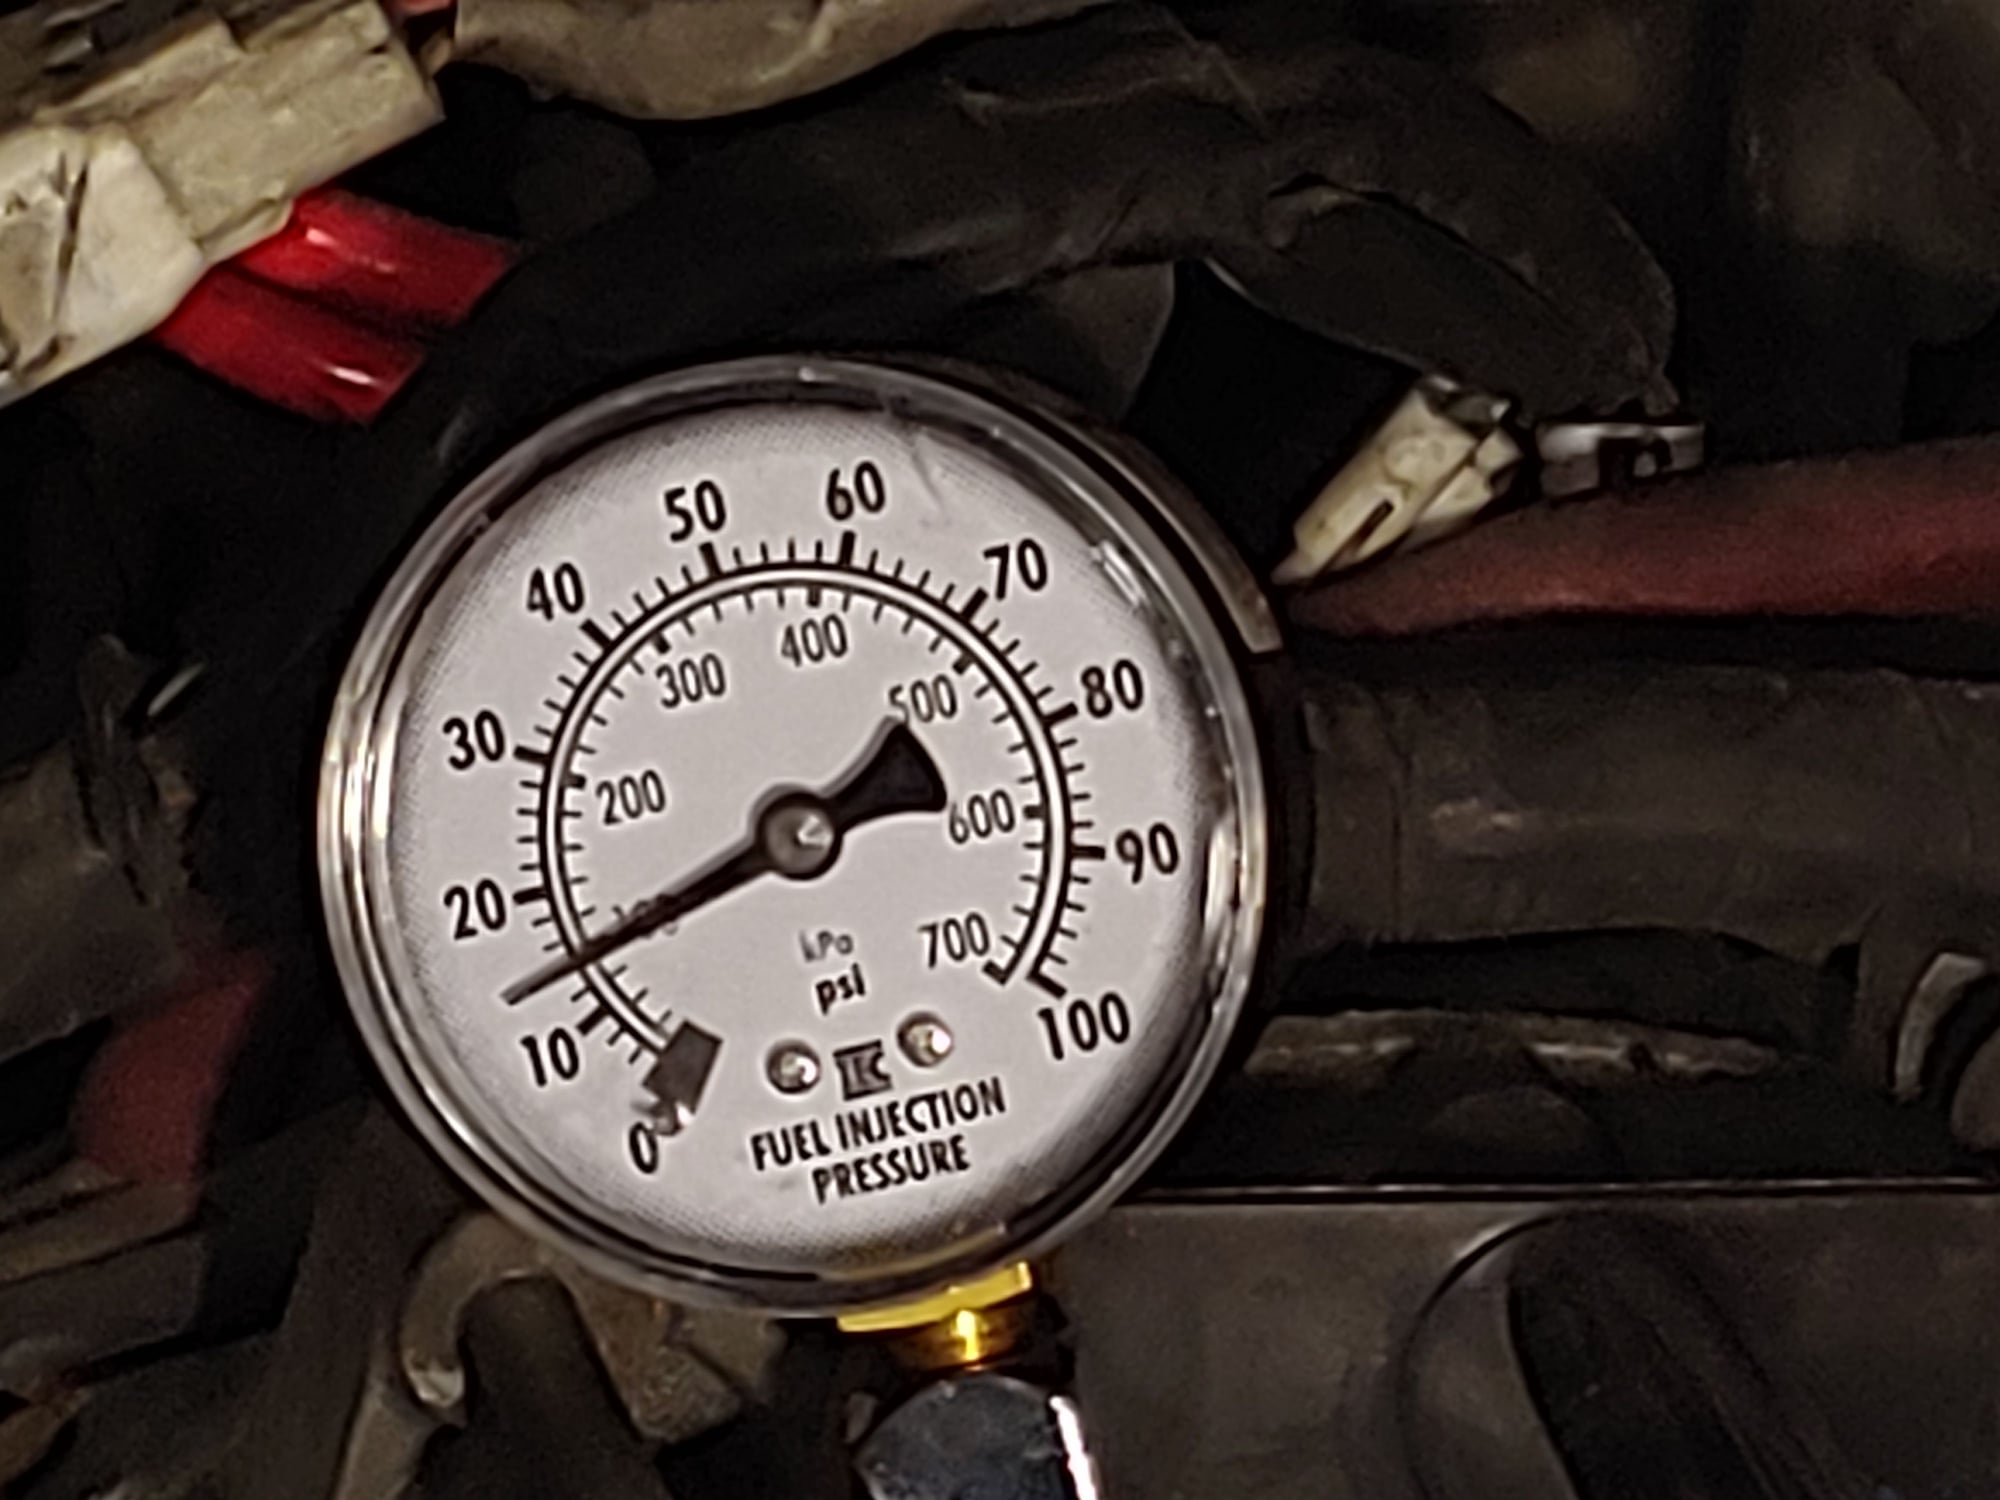
After 15 minutes:
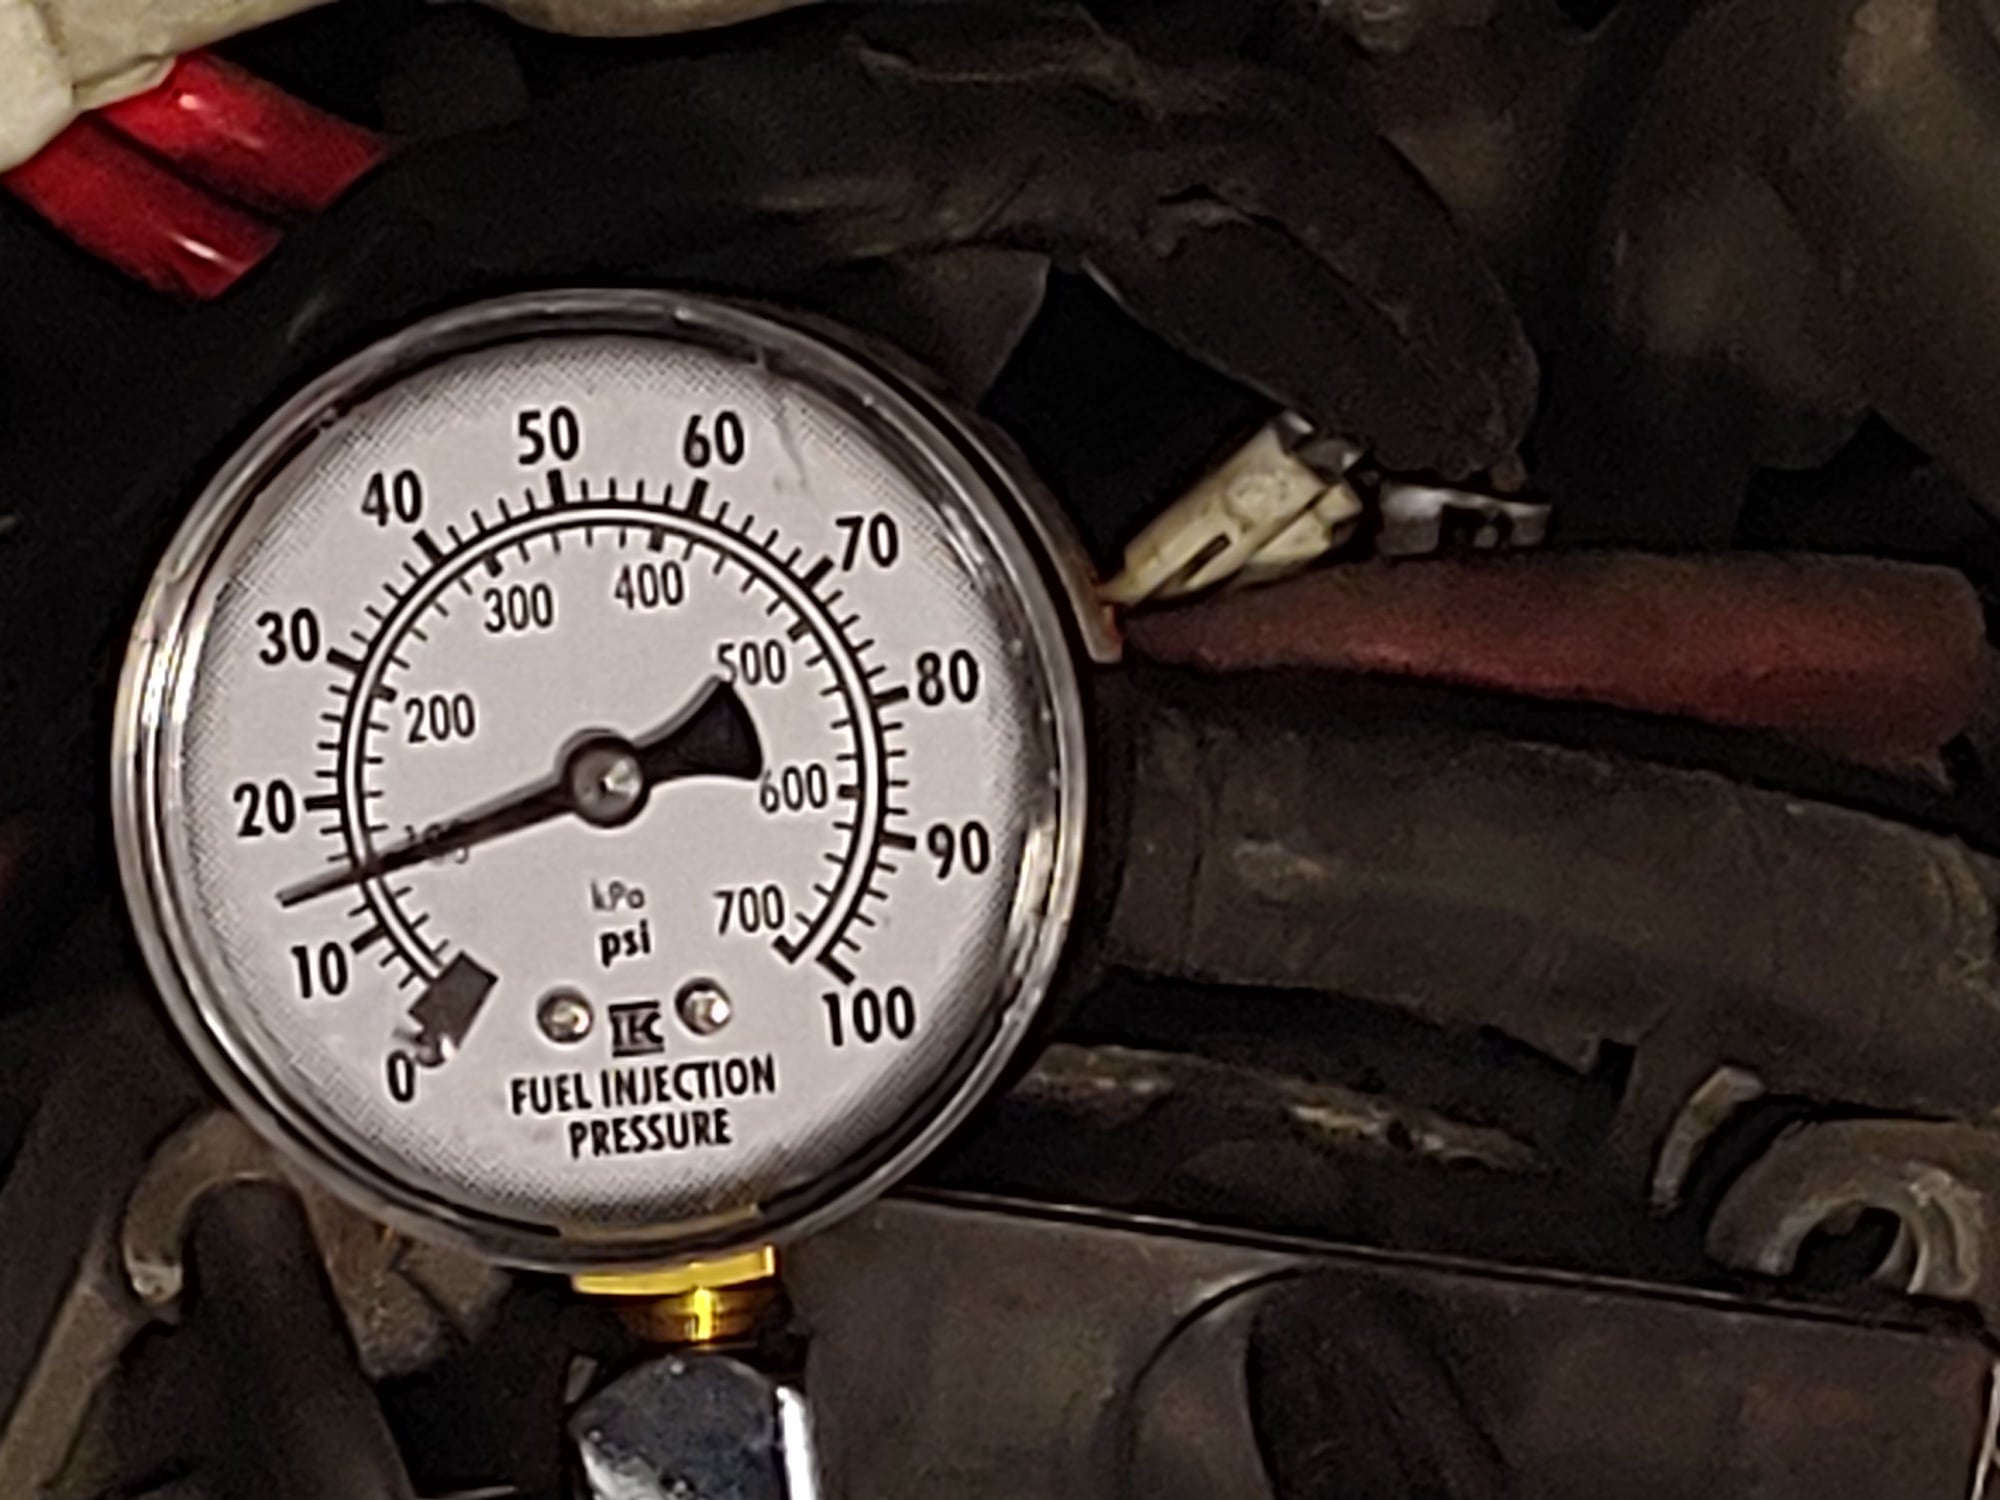
After 30 minutes:
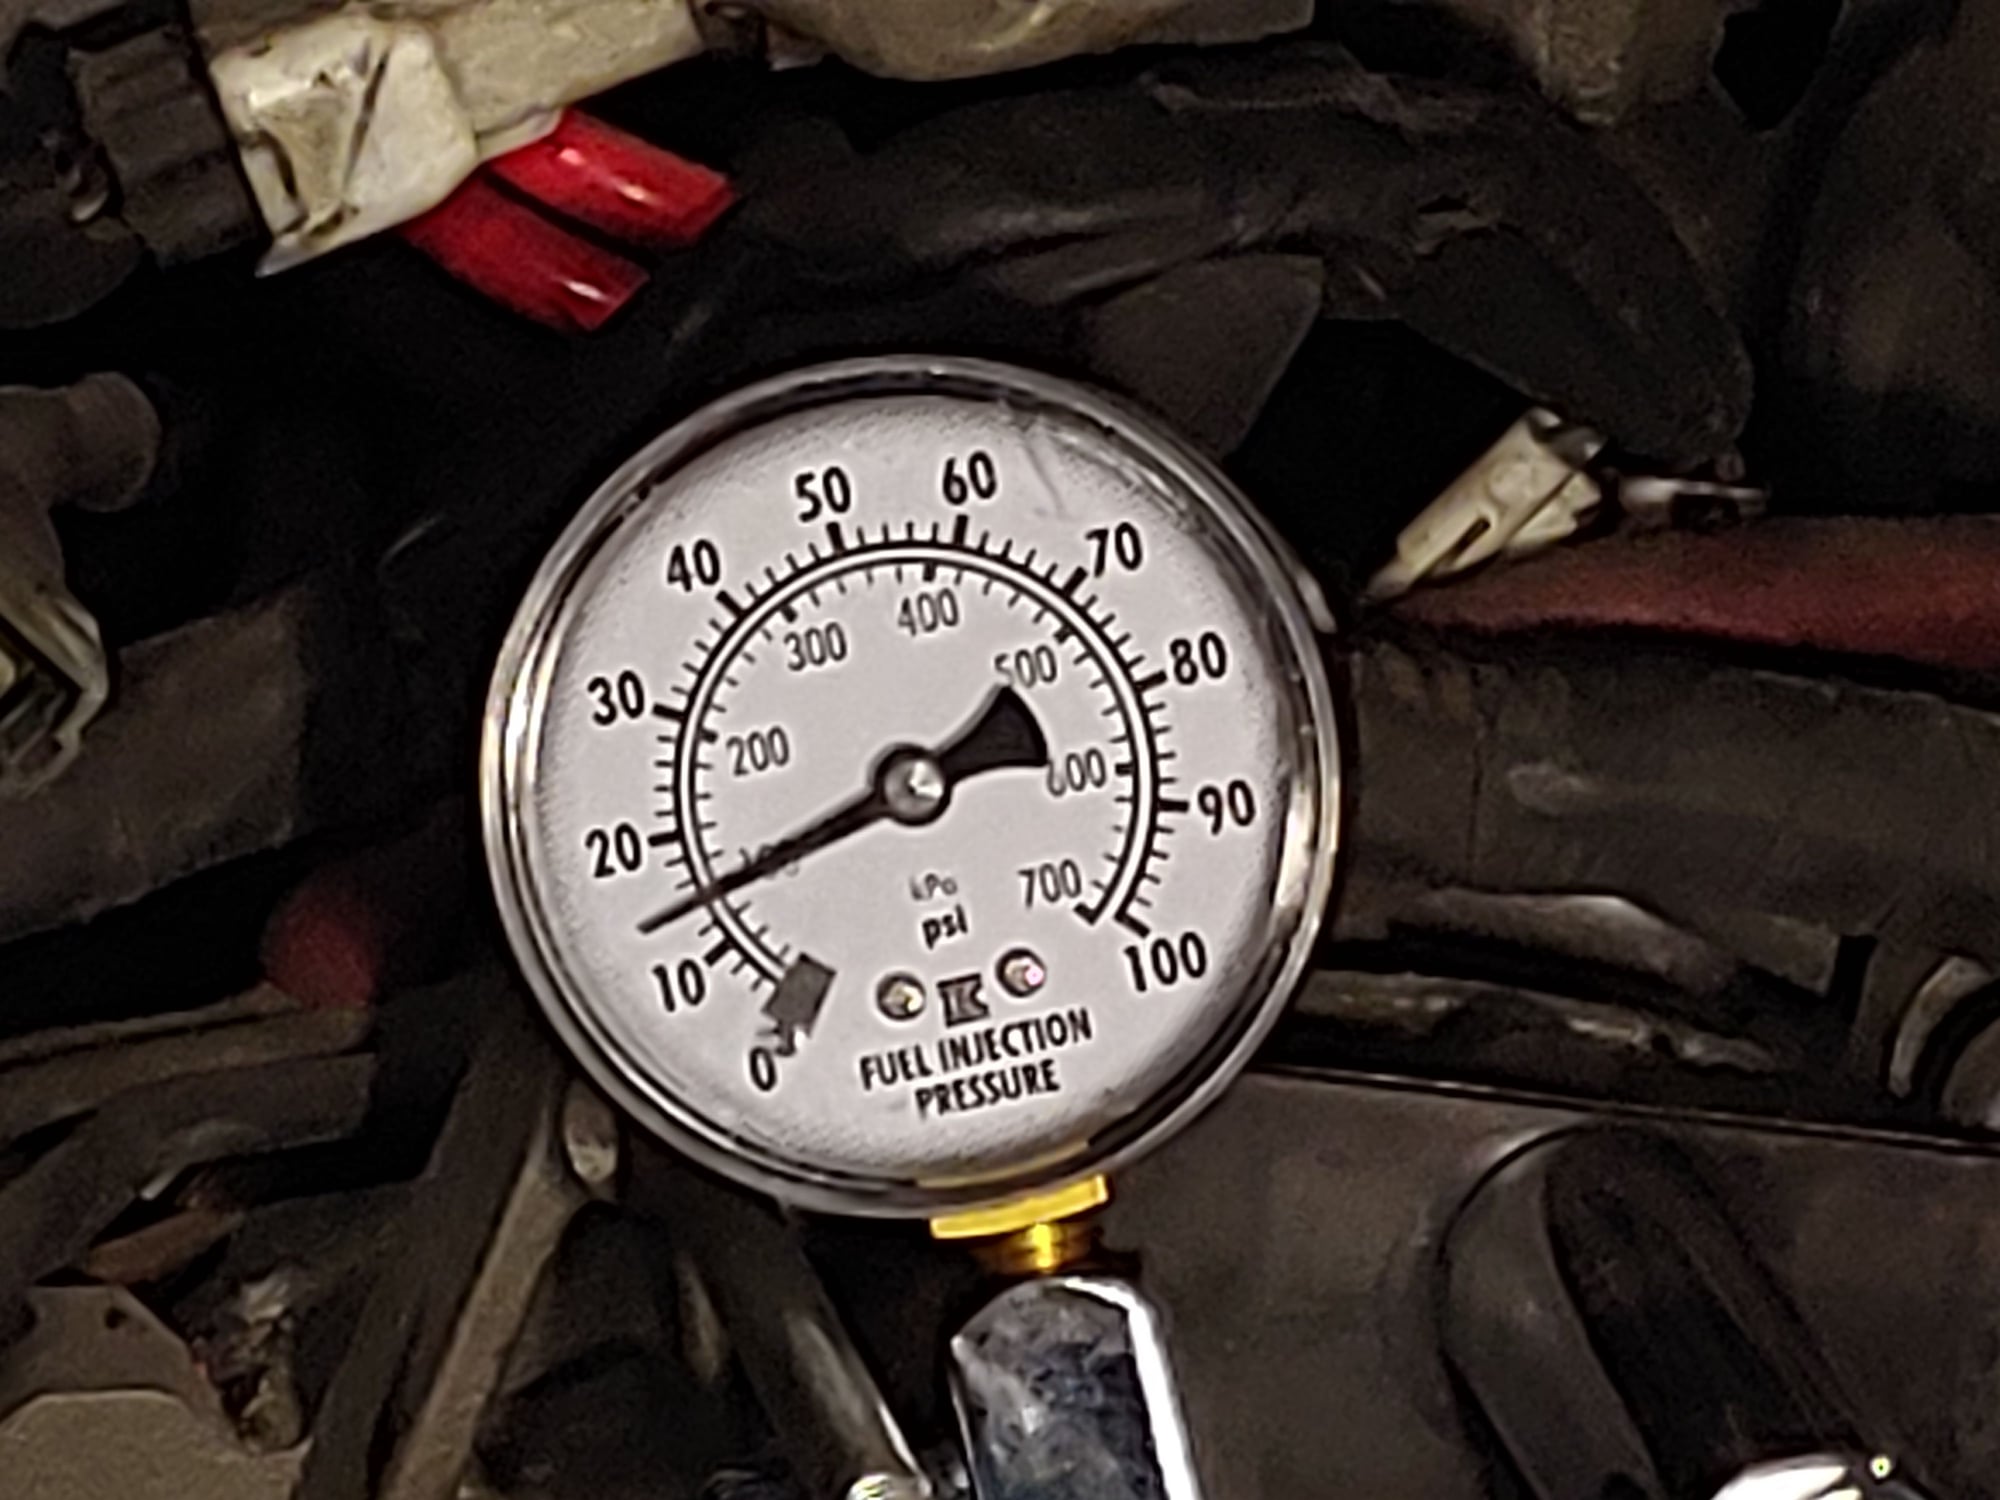
I left it for about 40 minutes with no drop before calling it a success. As soon as the starter arrives I can test compression, and if nothing is grossly wrong then in the engine goes.
Until next time :)
Good call on the compression test. I had a bought a JDM TII motor eons ago, and was planning to just send it in my FB swap since it was supposedly an under 60k motor. Ultimately, changed my mind and had a rebuild done due to, as you said, the cost and scarcity of the engine parts. Rebuilder found a chipped corner seal - would have shown up in a compression test.
In reply to sevenracer :
Exactly. A chipped corner seal is bad, but it would be worse if it failed while running and under load. Then you might gouge a housing, an iron, etc. The rebuild kit is already like $1200, after exchange and shipping more like $1600 CAD for me. Add in an iron or two and it gets very expensive very fast.
Even with the tests it's not a sure thing (it could blow oil smoke or something). But at least the risk is minimized.
So this is a S5 TII engine that you're planning on putting in your S4? You've got a couple options with regards to the cooling and oil metering systems. For cooling you can use either S4 or S5 stuff but it has to be as a set: water pump, water pump housing, coolant elbow and thermostat. The thing to pay attention to is whether you'll need the little spacers on the back of the housing. If I recall correctly the S4s needed them but S5s don't. I have the opposite of you - S5 water pump assembly on an S4 front plate, and I didn't need the spacers. The oil metering system is more complicated. The "easy button" is to just remove it. Your S4 ECU won't be looking for it so no fear of limp mode but you will have to pre-mix. Not a big deal to me but some people are particular about it. To use the S4 oil metering pump requires the use of the S4 front cover so that will need to be swapped. This means you'll have to come up with a solution for the turbo oil line. Some N/A front covers already have the casting there - you'll just need to drill out the port and tap the stud holes. Again, my S5 N/A front cover has this but I think I've seen some FC front covers without it. I've also read anecdotal stories of the S5 front counterweight interfering with the S4 front cover. You'll definitely want to check that. If I recall correctly it doesn't require swapping counterweights. Just some clearancing on the inside of the front cover.
infernosg said:So this is a S5 TII engine that you're planning on putting in your S4? You've got a couple options with regards to the cooling and oil metering systems. For cooling you can use either S4 or S5 stuff but it has to be as a set: water pump, water pump housing, coolant elbow and thermostat. The thing to pay attention to is whether you'll need the little spacers on the back of the housing. If I recall correctly the S4s needed them but S5s don't. I have the opposite of you - S5 water pump assembly on an S4 front plate, and I didn't need the spacers. The oil metering system is more complicated. The "easy button" is to just remove it. Your S4 ECU won't be looking for it so no fear of limp mode but you will have to pre-mix. Not a big deal to me but some people are particular about it. To use the S4 oil metering pump requires the use of the S4 front cover so that will need to be swapped. This means you'll have to come up with a solution for the turbo oil line. Some N/A front covers already have the casting there - you'll just need to drill out the port and tap the stud holes. Again, my S5 N/A front cover has this but I think I've seen some FC front covers without it. I've also read anecdotal stories of the S5 front counterweight interfering with the S4 front cover. You'll definitely want to check that. If I recall correctly it doesn't require swapping counterweights. Just some clearancing on the inside of the front cover.
The water pump and associated hardware is probably going to stay S5 for now. I do have a few sets of S4 NA water pump housings and associated bits, but they all lack the stock turbo coolant drain. Long term I'd like to eliminate the coolant running through the manifold entirely, then just use the stock thermowax/BAC coolant feed and drain for the turbo. This simplifies a lot, and since I'll be running a standalone ECU, I won't need the thermowax at all.
OMP-wise, I'm going to just premix for now. That's the quickest route to a running and driving car. Long term I would like to reinstall the S4 OMP for convenience, but for awhile I don't mind premixing. It really isn't that big a deal to premix, but it detracts from the "get in and go" aspect of the car. I know that S4 NA covers (of which I have a spare or two) definitely do not have the casting for the oil drain, but there does seem to be ample space to drill and tap for an AN line solution.
My goal for now is to complete the swap with minimal cost & complexity, without compromising safety / reliability / longevity.
The axles arrived earlier than expected, and to my relief, they are in fact TII axles. I'd heard stories about people ordering TII axles but being sent NA axles. The easiest way to tell is by the diameter of the shaft:

NA shafts are much thinner. Putting it side-by-side with the OEM TII shaft, it's the same. There are some obvious quality issues; the edges seem to be a bit rougher on the differential flange, and there is some surface rust already out of the box. But for $45 apiece for brand new axles, that's nothing to complain about.
The only thing that concerns me a little bit is that I may be detecting a bit of play in the outer CV joint. There is axial movement on the inner CV on both these and the factory axles, but it feels nice and smooth. Both these and the factory axles have no radial slack, so that's good. On the new axles though, the outer CV has a tiny bit of axial movement in excess of the factory. It's hard to tell if it's just a minor variation (since there IS movement in the factory shaft) or if it's some sort of quality control issue. I may be imagining it frankly, but I might pick up some new clamps and pop off the CV boots to check the joint before running these. Even if only to add better grease than the factory probably used. Both new axles feel identical to the other.
The starter is supposed to arrive today, so if that actually arrives on schedule then I just need to bolt up the transmission and do a compression test.
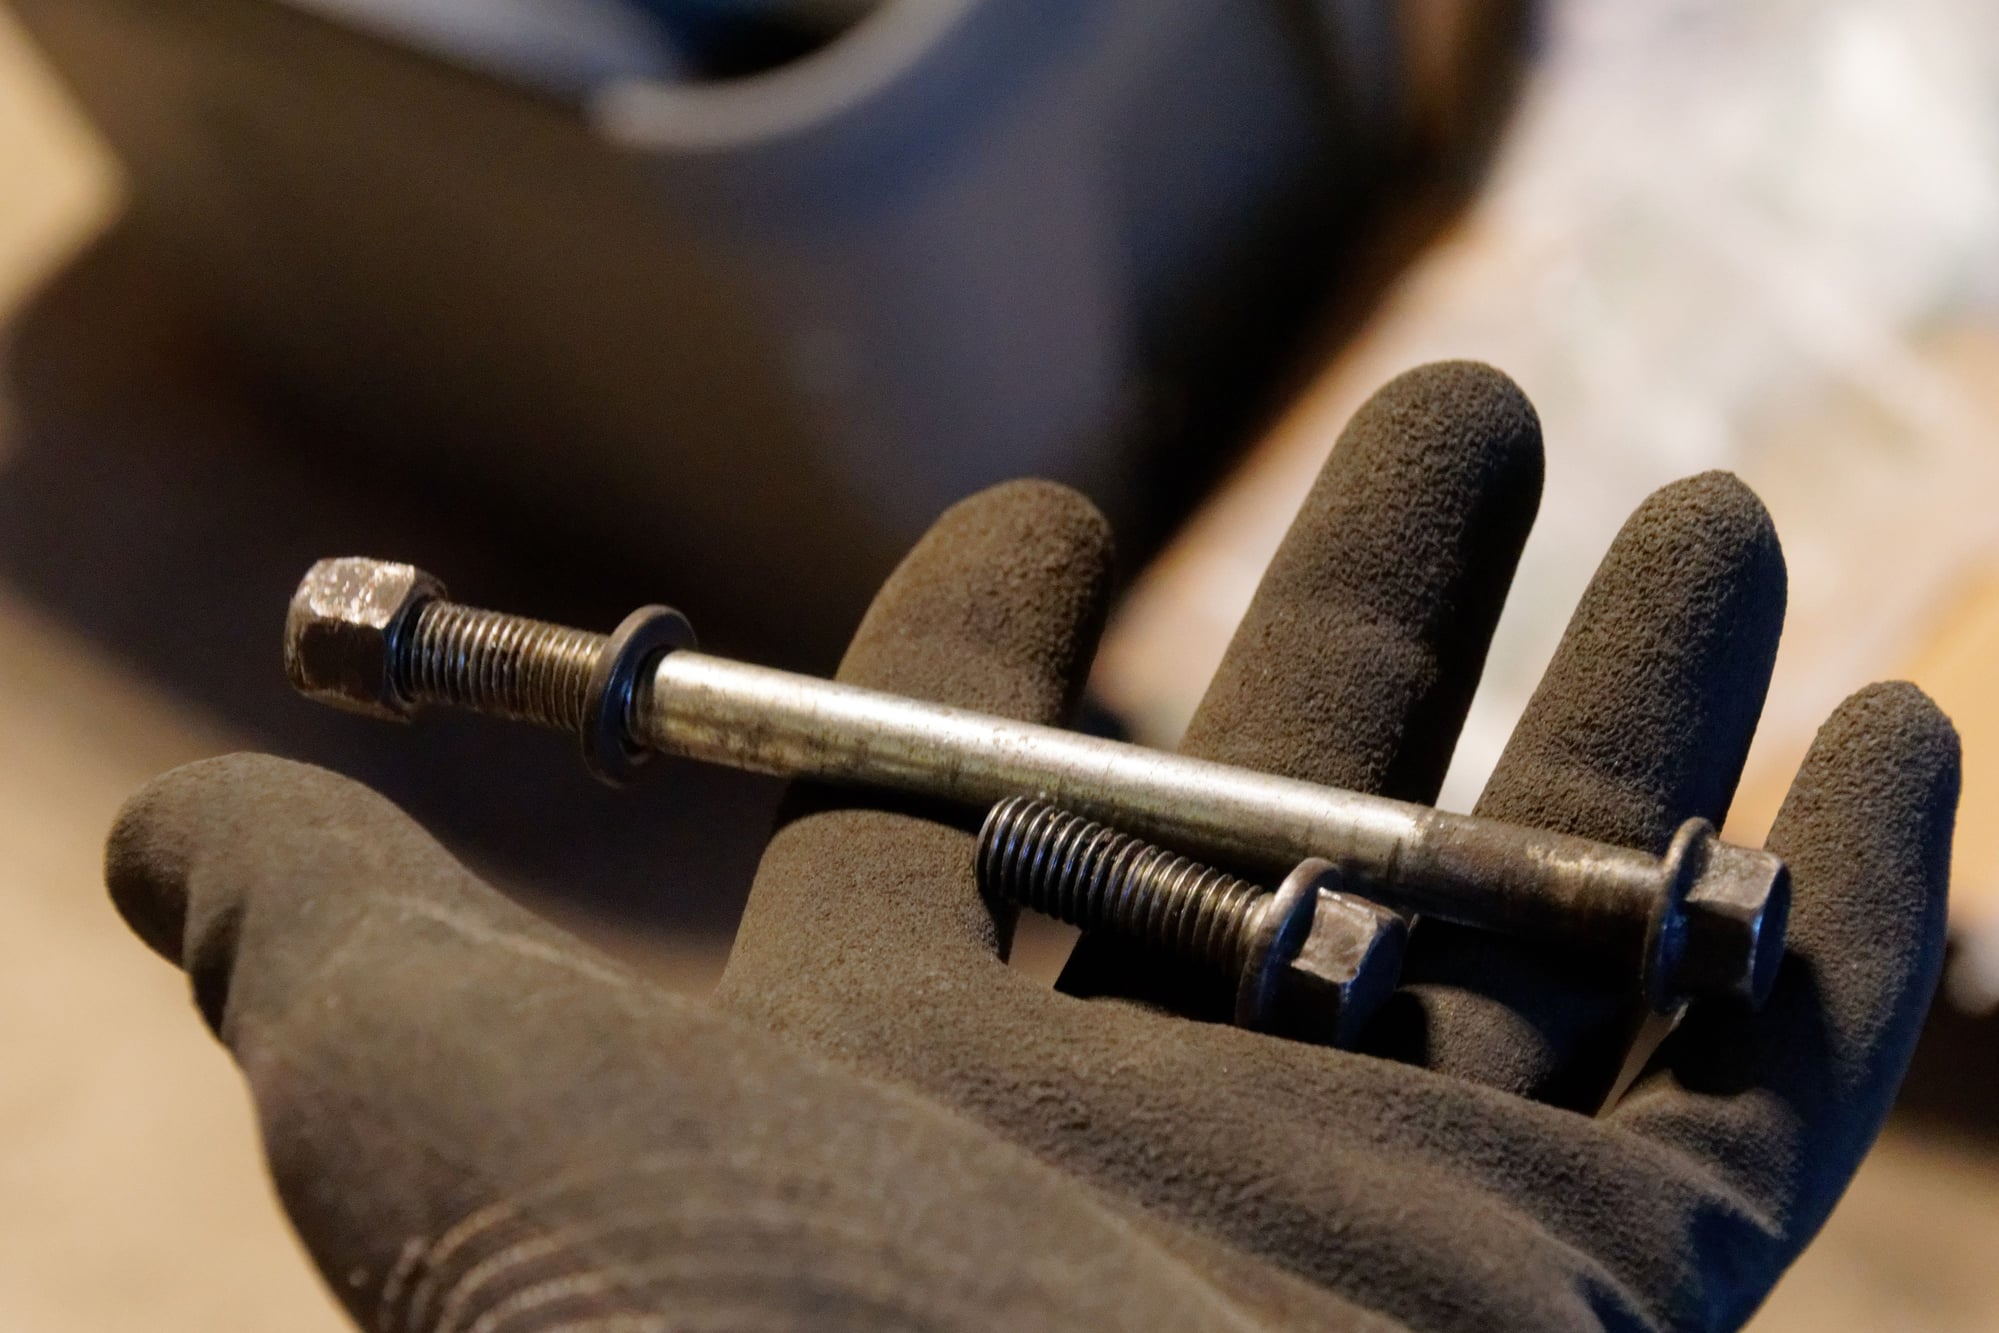
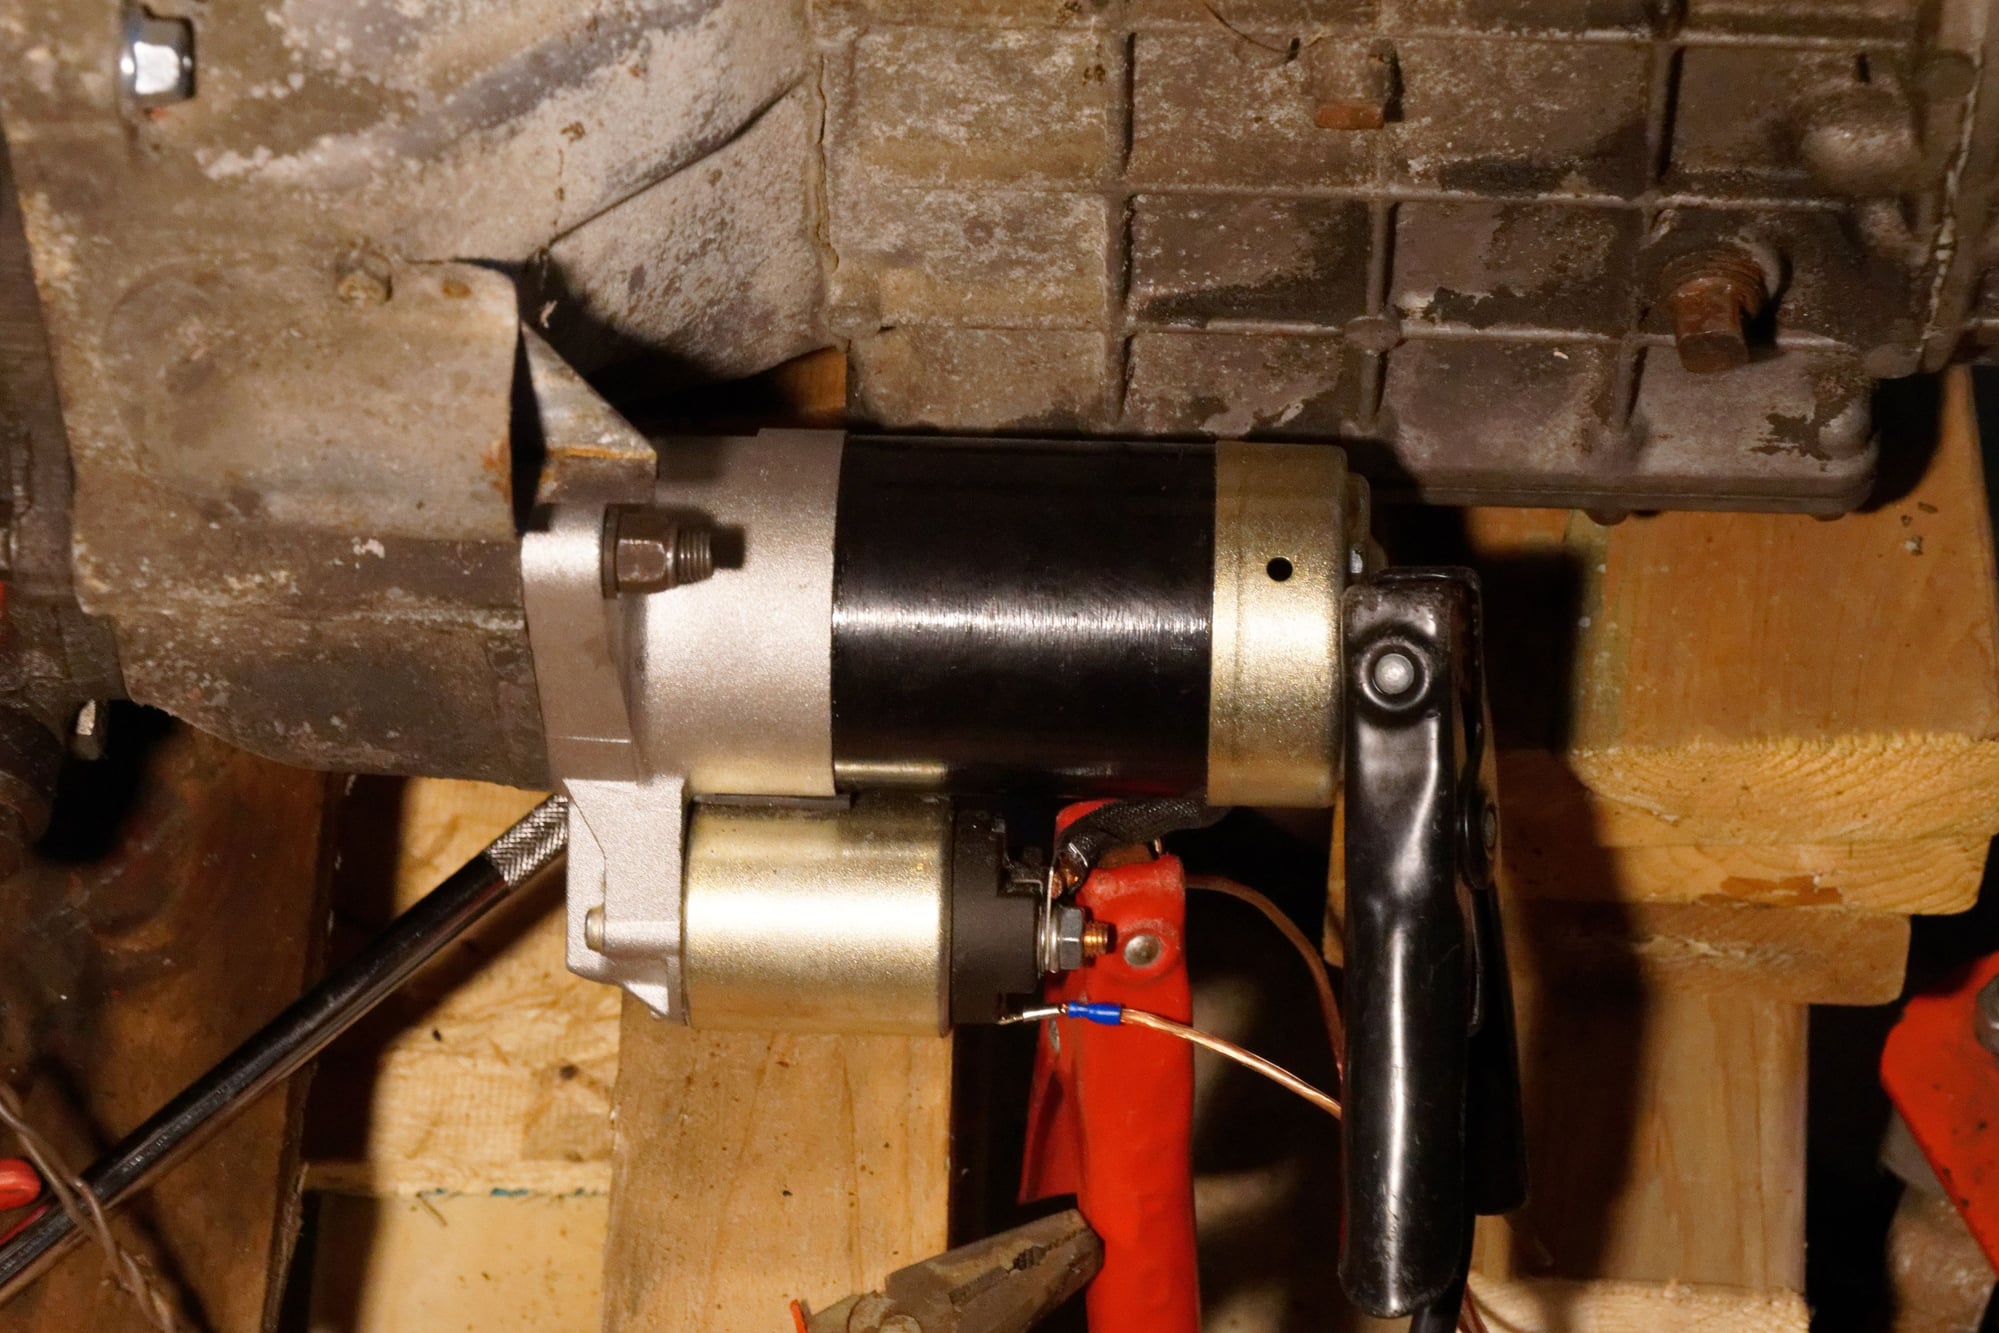
I received the starter on Monday, and bolted up the transmission in just a few minutes. However, I realized I didn't have the necessary hardware to mount the starter, since it uses one really long bolt for the top fastener. Only one place to get it:
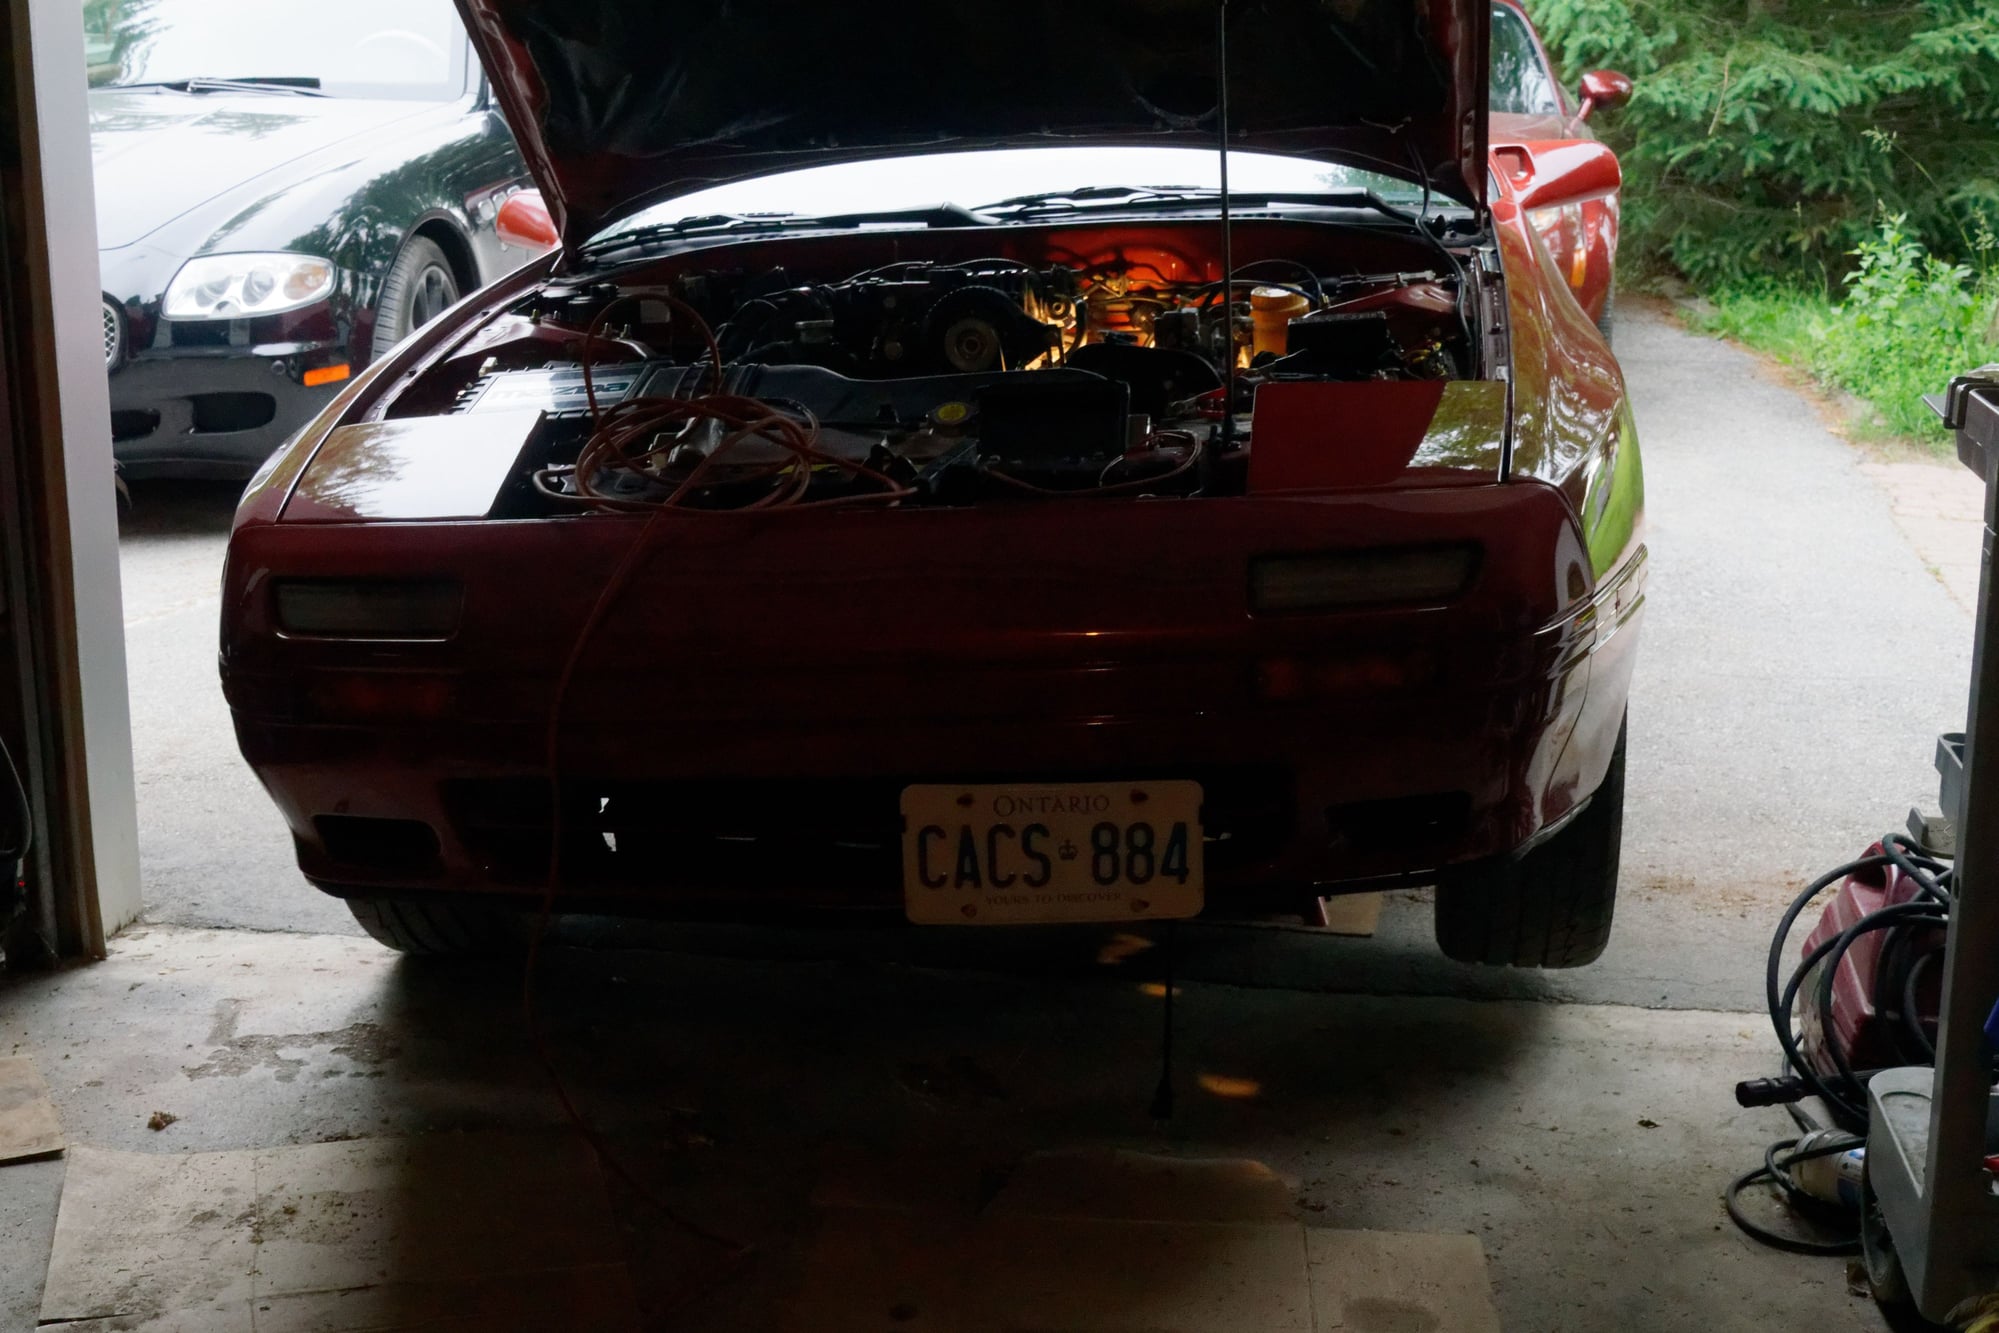
Having borrowed the fasteners I needed, I went to do the test. Some of the photos may be dark since it was stormy out and I was in the garage. This is what it looked like at 10AM:
The starter I ordered is for an automatic Rx7. Drop in fit for Turbo II transmissions, but has a 2kw motor instead of the stock 1.4kw:
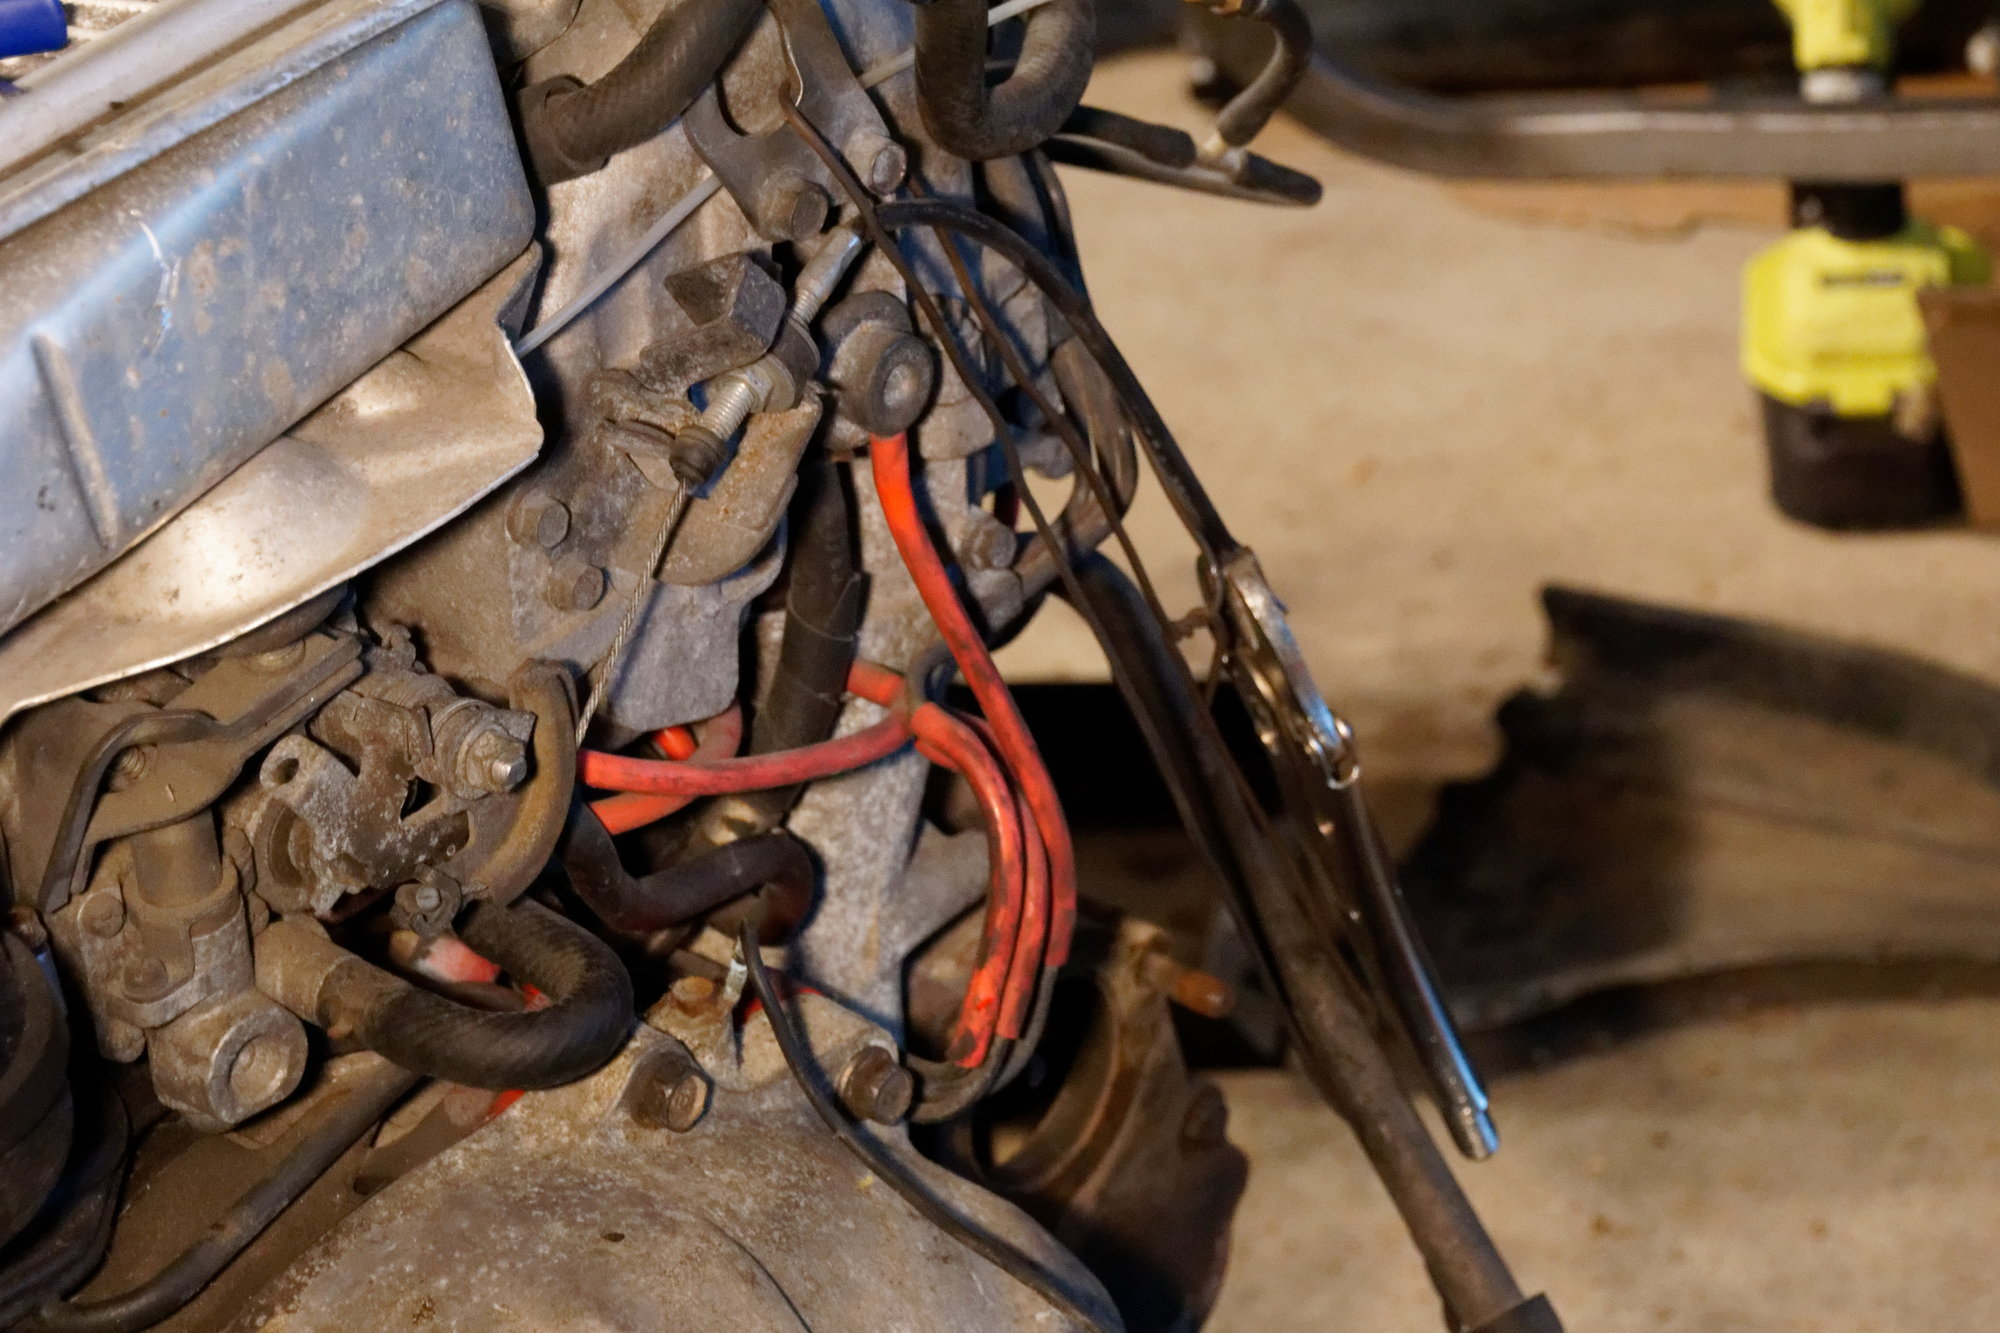
I connected it with a jumper pack, and just connected the trigger wire straight to the positive alligator clamp. Then whenever I turned the switch on the jump pack it would power the starter. Held the throttle all the way open by pulling the throttle cable and clamping vise grips on the end:
Zip-tied my compression tester to the engine after removing the Schrader valve:

Front Rotor:
Rear Rotor:
Cold engines tend to be a bit higher than hot engines, but I'm getting around 110-115 psi on each face. No major variations between faces or between rotors.
So in other words, it looks like we're good to go as far as installing this engine. This doesn't eliminate the possibility of issues presenting when hot, or blowing smoke from blown oil control rings. But it does mean that the engine is healthy enough to install and run.
Until next time :)

WondrousBread said:
I may be imagining it frankly, but I might pick up some new clamps and pop off the CV boots to check the joint before running these. Even if only to add better grease than the factory probably used. Both new axles feel identical to the other.
Definitely push the boots back and make sure they are greased well. I'm running a set of similarly priced half shafts on my E28 from Rockauto and there was a single glob of grease under each boot but not really any in the joint. It's a messy job but worthwhile.

In reply to WondrousBread :
I'd say you're good to go - ideally you would want to pressure test the cooling system and let it sit overnight. 1hr can be too soon and sometimes they like to be filled with water/coolant and pressurized to really seal but yours doesn't seem to be the case.
compression wise. I'd say your rock solid, especially for age. usually when i see 70s I start to want to rebuild time and even then I will run it until it doesn't want to start (non turbo) anymore.
Yep, I'll echo. Compression looks good. Looks ready to drop in and run.
One thing I never understood is how removing the Schrader valve affects the results. Does it make the readings higher or lower? I've just held it open, but I'm usually only concerned with the variation and not the absolute value.
In reply to infernosg :
The Schrader valve is the one in the base of the threads on the tester, not the one on the side. Or maybe I'm mixing up the names.
Anyways, if you hold the one on the side you get the bouncing but incorrect readings. This valve is a release valve that lets the air out, since on a piston engine you are looking for the maximum value. Then when done, you press the valve to vent the air. At least in my case, holding the one on the side, I get like 30-30-30 on a healthy engine, because some of the air from the compression is rushing out through the open valve. It works as a litmus test for whether the engine is blown or not, but isn't accurate as far as an actual reading.
However, if you don't hold the valve open, it behaves like it would on a piston engine where you just get subsequent increases in the reading without the "bouncing" we are looking for in a rotary engine. Obviously this is fine on a piston engine because you're measuring one chamber at a time, but on our engines we want to measure three chambers in succession.
The Schrader valve in the threaded end of the tester prevents the compressed air rushing back out of the gauge into the engine between bounces. This is why by default the reading only increases. If you use needle-nose pliers to remove this valve, it gives you the best of both worlds; the readings are still accurate because the air isn't rushing out the side valve near the gauge (the system remains closed), but the needle can still bounce because the air is rushing back through the hose into the engine after the apex passes.
Anyways, this is my educated guess based on observing how the gauge seems to work and why.
I had planned to do some interior work on my Rx7, since the Turbo swap still requires some parts and I'm on a budget. Meanwhile I also got some more interior pieces I needed from the same car that I got the drivetrain. But things went a different way starting yesterday morning just after the compression test; here's the floor pan of my mum's NC Miata:

We've been chasing down some leaks, and it looks like we finally got all of them. Now it was time to address the "surface" rust...

Yup. I did that with my finger, by the way. You know the drill. Cut it out:

I don't have spot weld removal bits, so I used a chisel and hammer. Unfortunately the rust extended along the floor underneath the seat mount:

So I had to cut a little further. Then the flap wheel abraded all the rust and broken spot-welds from the bottom of the seat mount. I treated the bare metal with phosphoric acid just in case, before using weld-thru primer on the area:

Then time to cut a patch panel:

And weld it in:

I drilled out the factory spot-weld holes in the seat mount, and re-used them when welding in the patch panel. I basically just started from the side where the panel fit was closest, then used a hammer to contour it to match the OEM seat mount. I don't know that much about bodywork, but it seemed logical to sort of just start from where the panel "wanted" to fit and then massage it into place progressively from there. All my experience is from Youtube videos or fixing my own floors, so don't use anything you're about to see as a guide.
A professional would probably be ashamed of these welds, and also would probably have ground them down before applying seam sealer. I am no professional though, so they just got cleaned thoroughly and primed again before sealing:


Then I turned my attention to the rear of the floor pan for a bit. The original plan was to clean and POR-15 the rusty spots on the floor, but the area with the holes was beyond that. Luckily the rear of the floor wasn't as bad as it looked. Spent awhile scraping, brushing, and degreasing:

Forgot to take a picture after the vacuuming. The next photo is after using the phosphoric acid in the POR-15 kit:

There weren't any soft spots (from above or below), and this area is significantly more complicated to repair. So for now it's getting the POR-15 and a watchful eye. If things worsen, I need to get a spot-weld removal bit set and take out the rear seat mount to see what's underneath. I'm hoping my mum gets years of enjoyment out of her Miata before that becomes necessary. POR-15:

This stuff is interesting, it's really tough once it's cured. Never having used it before, I was concerned that it wouldn't be any different than regular "rust" paint. So far it certainly seems to be as tough as people say. I also poured a bit into the seat mount holes and then ran a tap through the threads before it was completely hardened. I can't really see under there, so I'm hoping it spread around decently. Also POR'd the bottom of the patch:

And then applied rubberized undercoating once it was cured:

I've heard people say that the rubberized undercoating accelerates rust. I don't really buy this; most rust starts from the inside, in this case from a leak. All the water collected in the low-spot and rotted away the floor starting at the welds. The rubberized undercoating just reduces noise and protects from stone-chips.
And that's about it for now. I did get a bit of work done on the Rx7, but I'm going to write that post when I'm not exhausted from hours of grinding, welding, and painting. Until next time :)
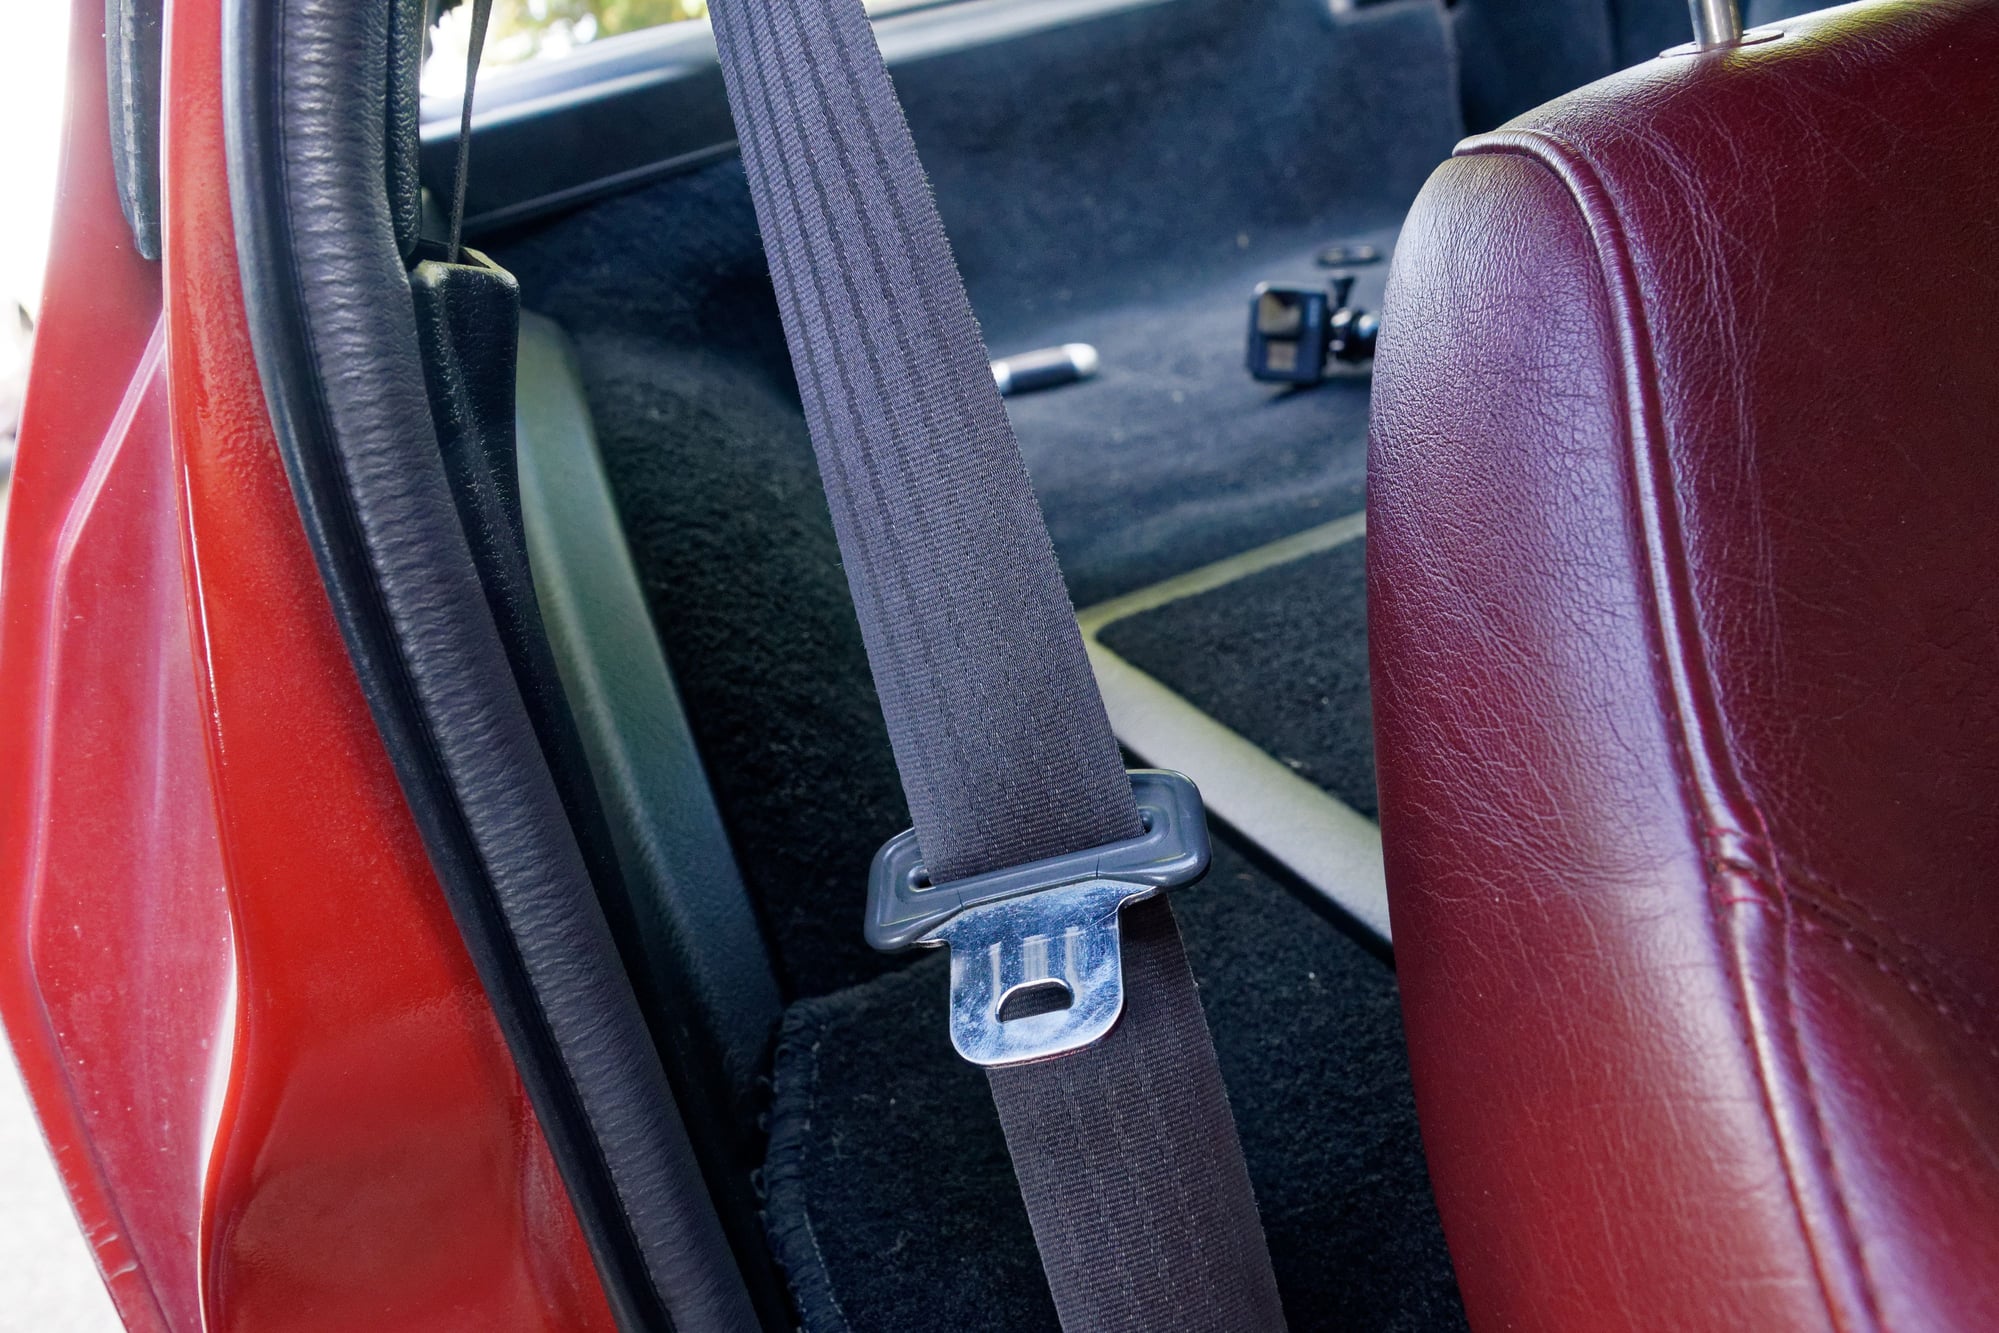
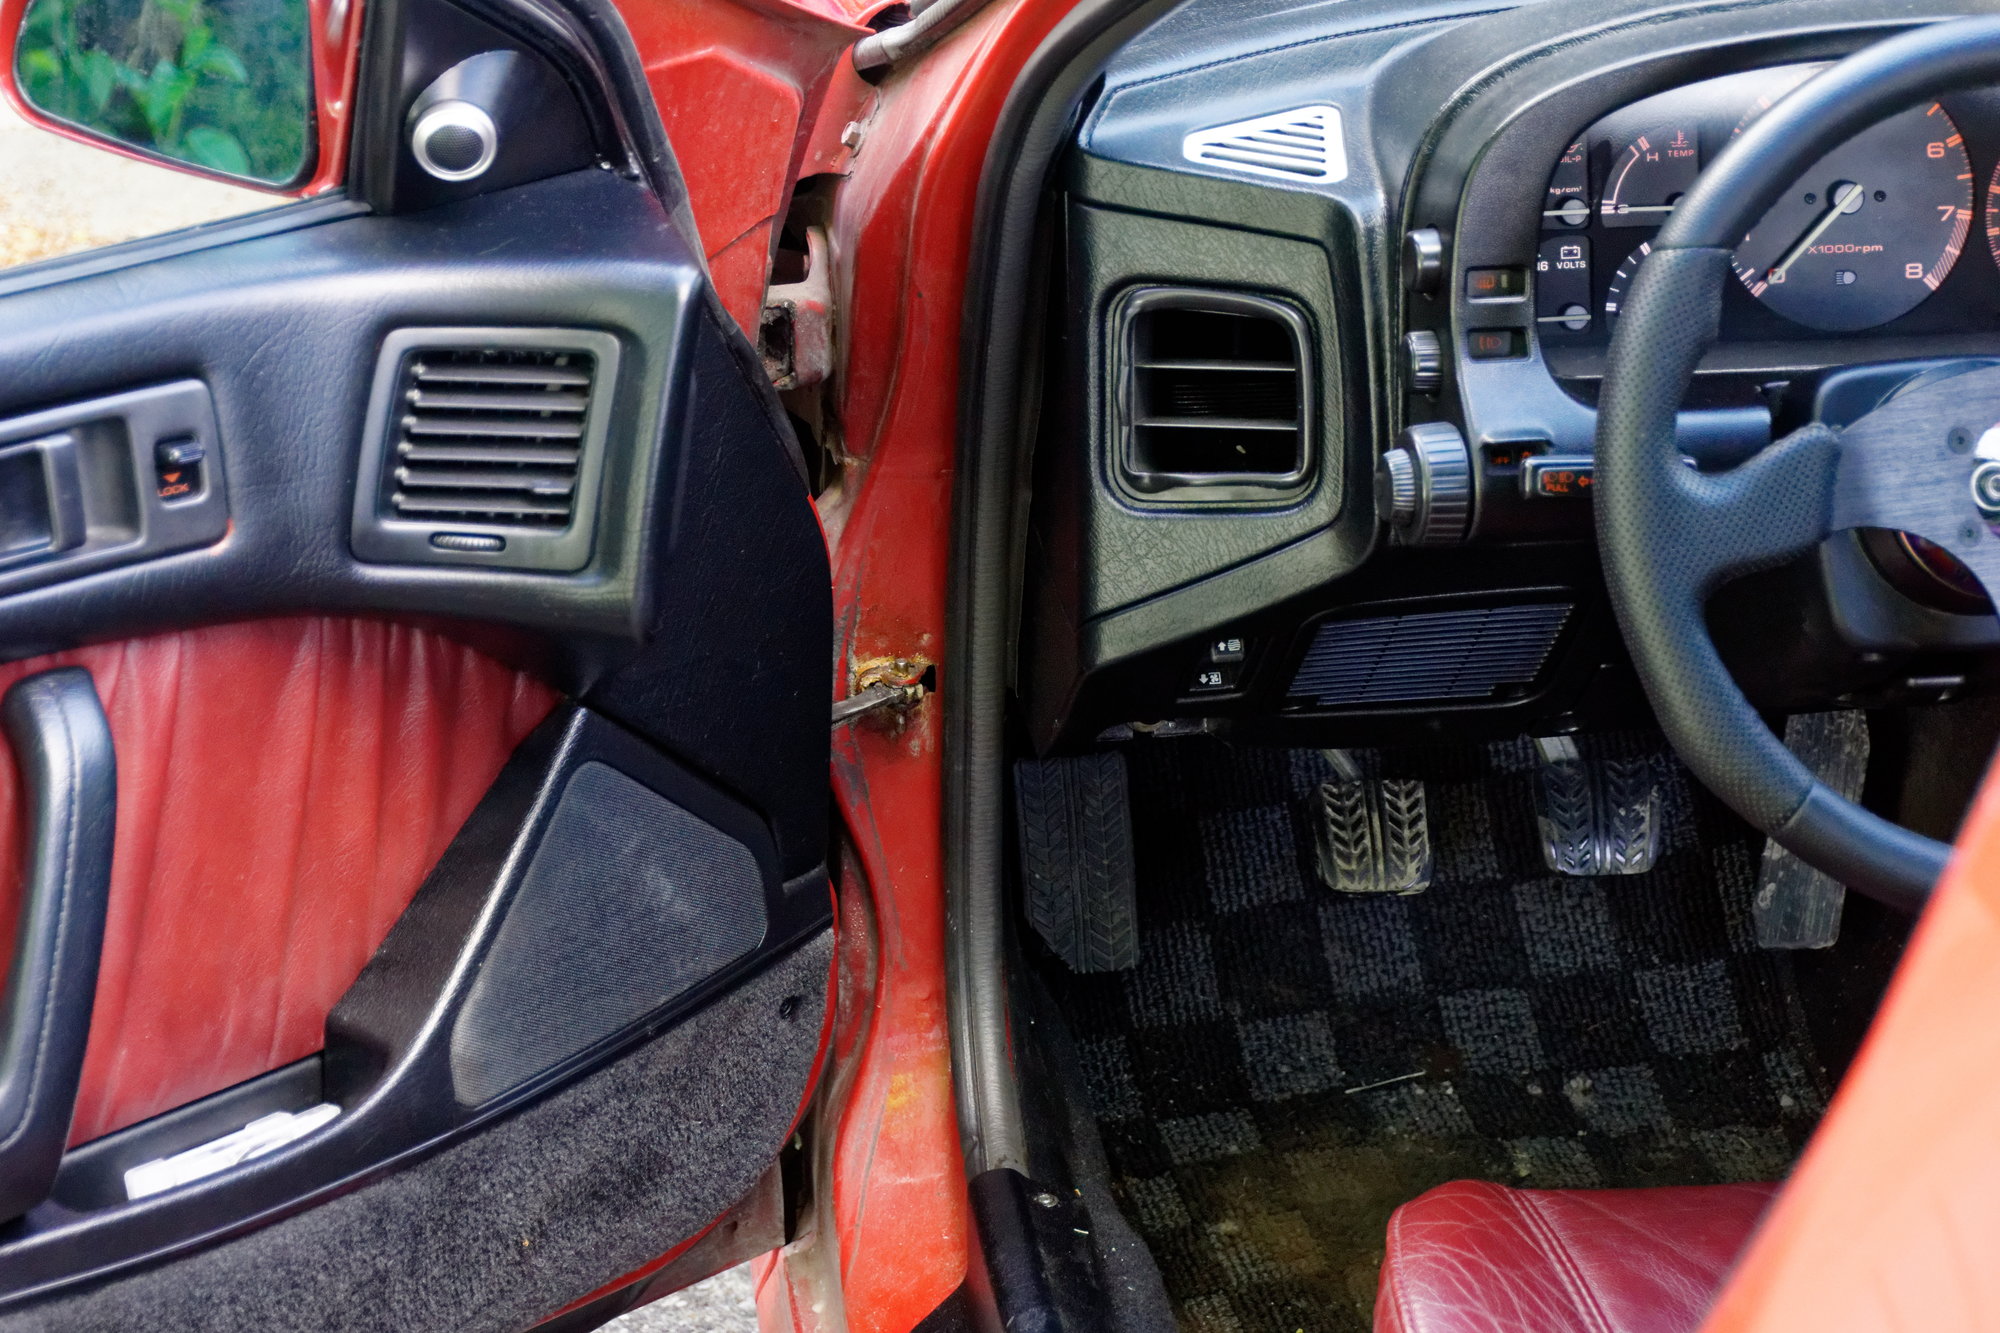
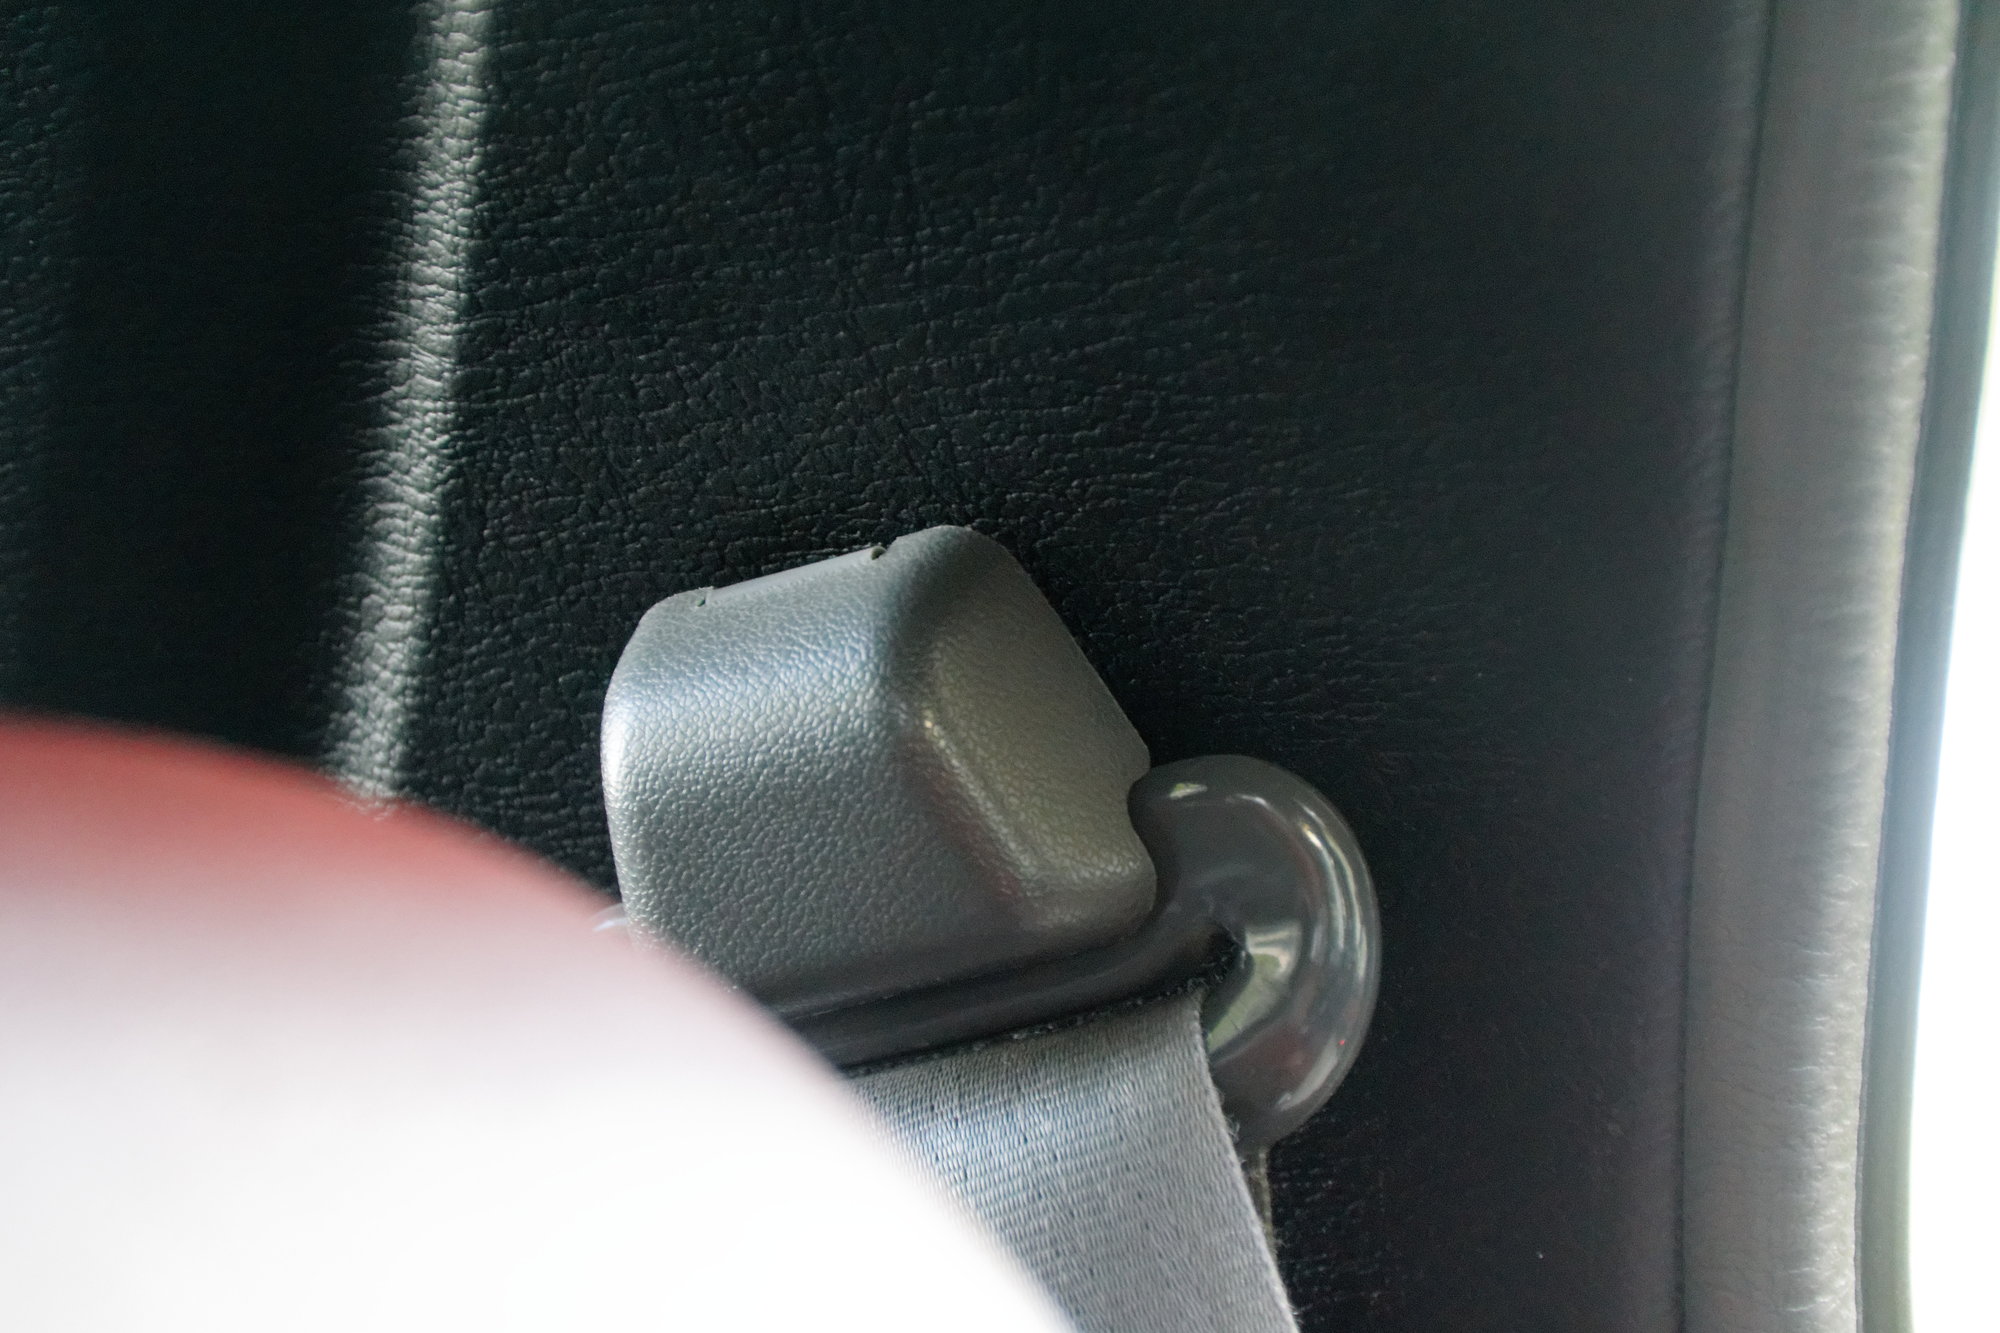
The latest parts (and almost the final parts) of my long quest to have an interior that is all one colour were the seat belts and door seals. The seat belts are self-explanatory, but you don't think about the little things like door seals until nearly everything else is done and you're seeing it stick out like a sore thumb:
In this photo, you can also see the only place that the vinyl dye did not work well on the interior. See the tiny flake by the door handle? I'll be addressing that in the near future. Everything else (other than the skidplates that get beaten up every time you get in or out of the car) has held up perfectly.
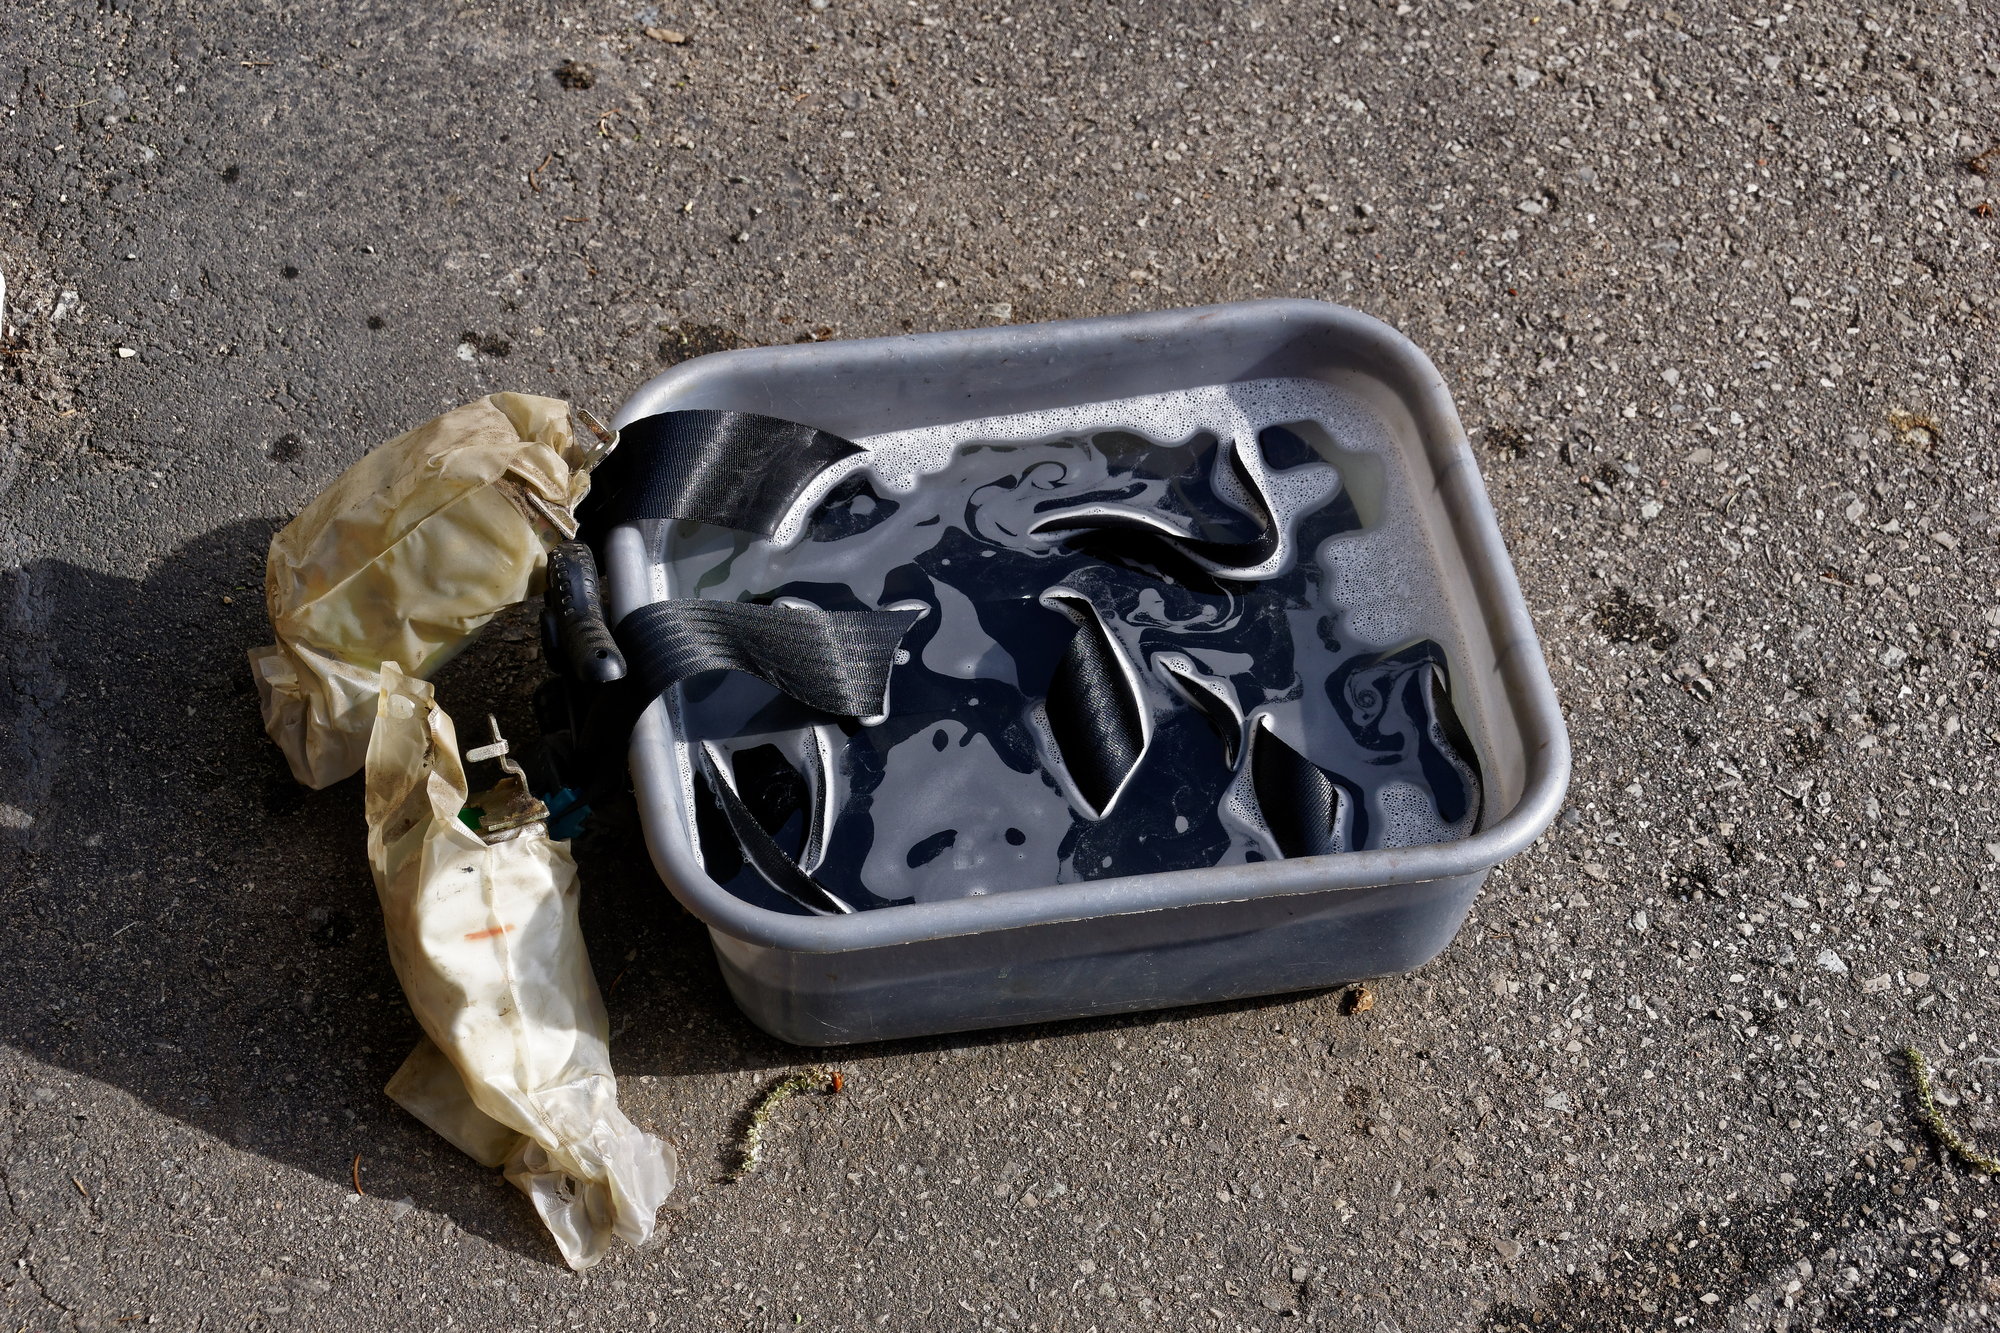
Along with the drivetrain, I was able to purchase the seat belts and seals I needed. This was especially nice since I couldn't even find the part number for this seal. That means I couldn't even buy it new from Mazda if I wanted to. Before installing anything though, they needed a deep cleaning. I clamped the belts at their full length, then soaked them in hot water with laundry detergent:
Sure, they look clean. But after 20 minutes:
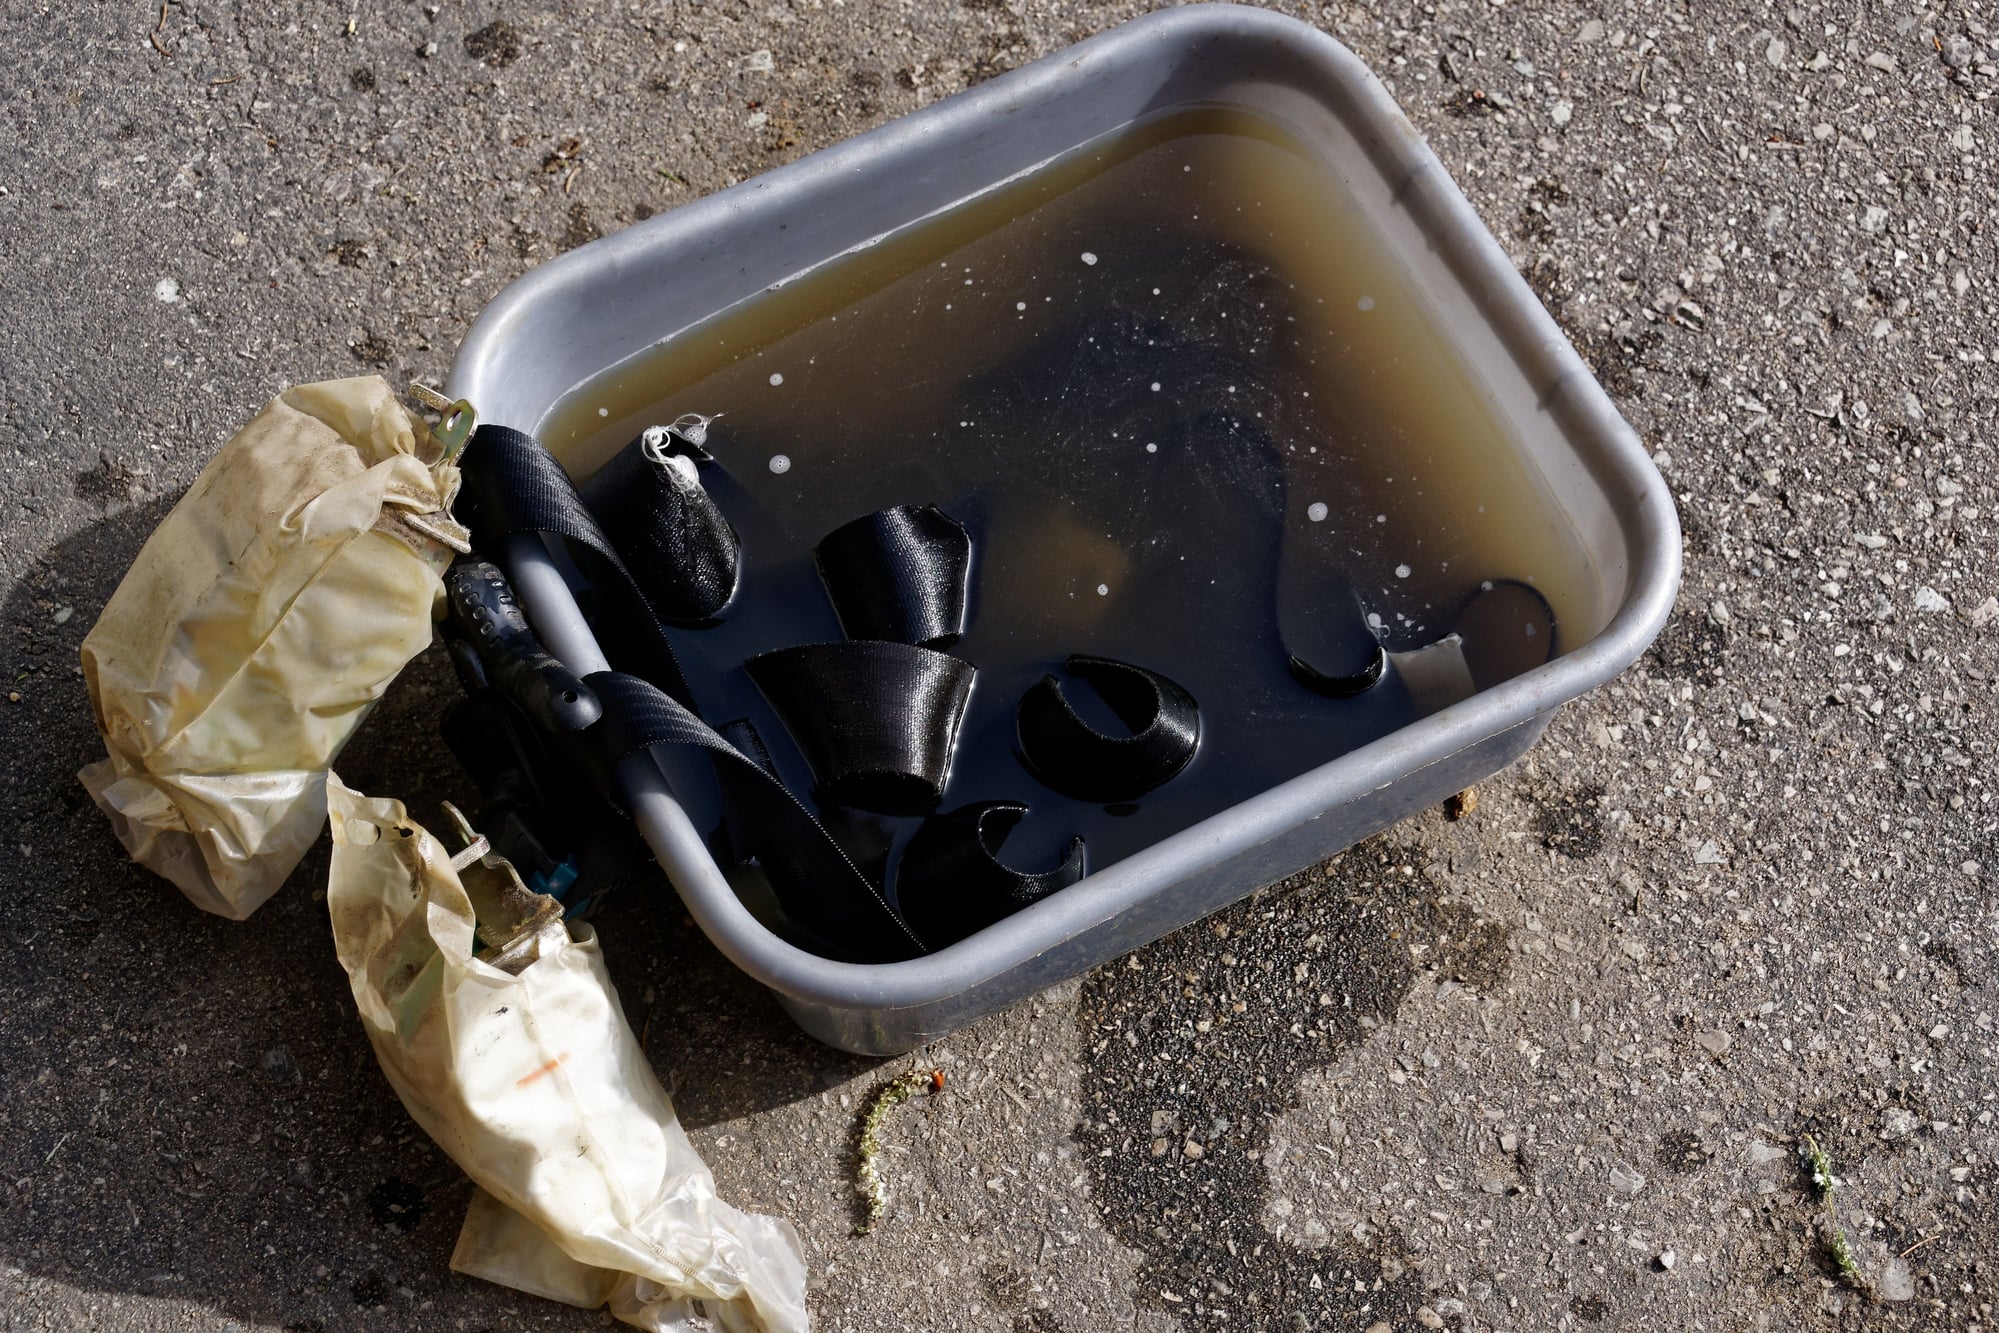
It took about 5 passes before the water kept coming away clean:

Then they were left to dry for a day or two. The seat belts are a bit of work to replace, but I did it in under an hour. If you're careful, you can work out the bottom b-pillar trim by loosening the bolts that hold the rear storage bin deck in. If you actually remove the rear deck, this job becomes quite a bit longer.
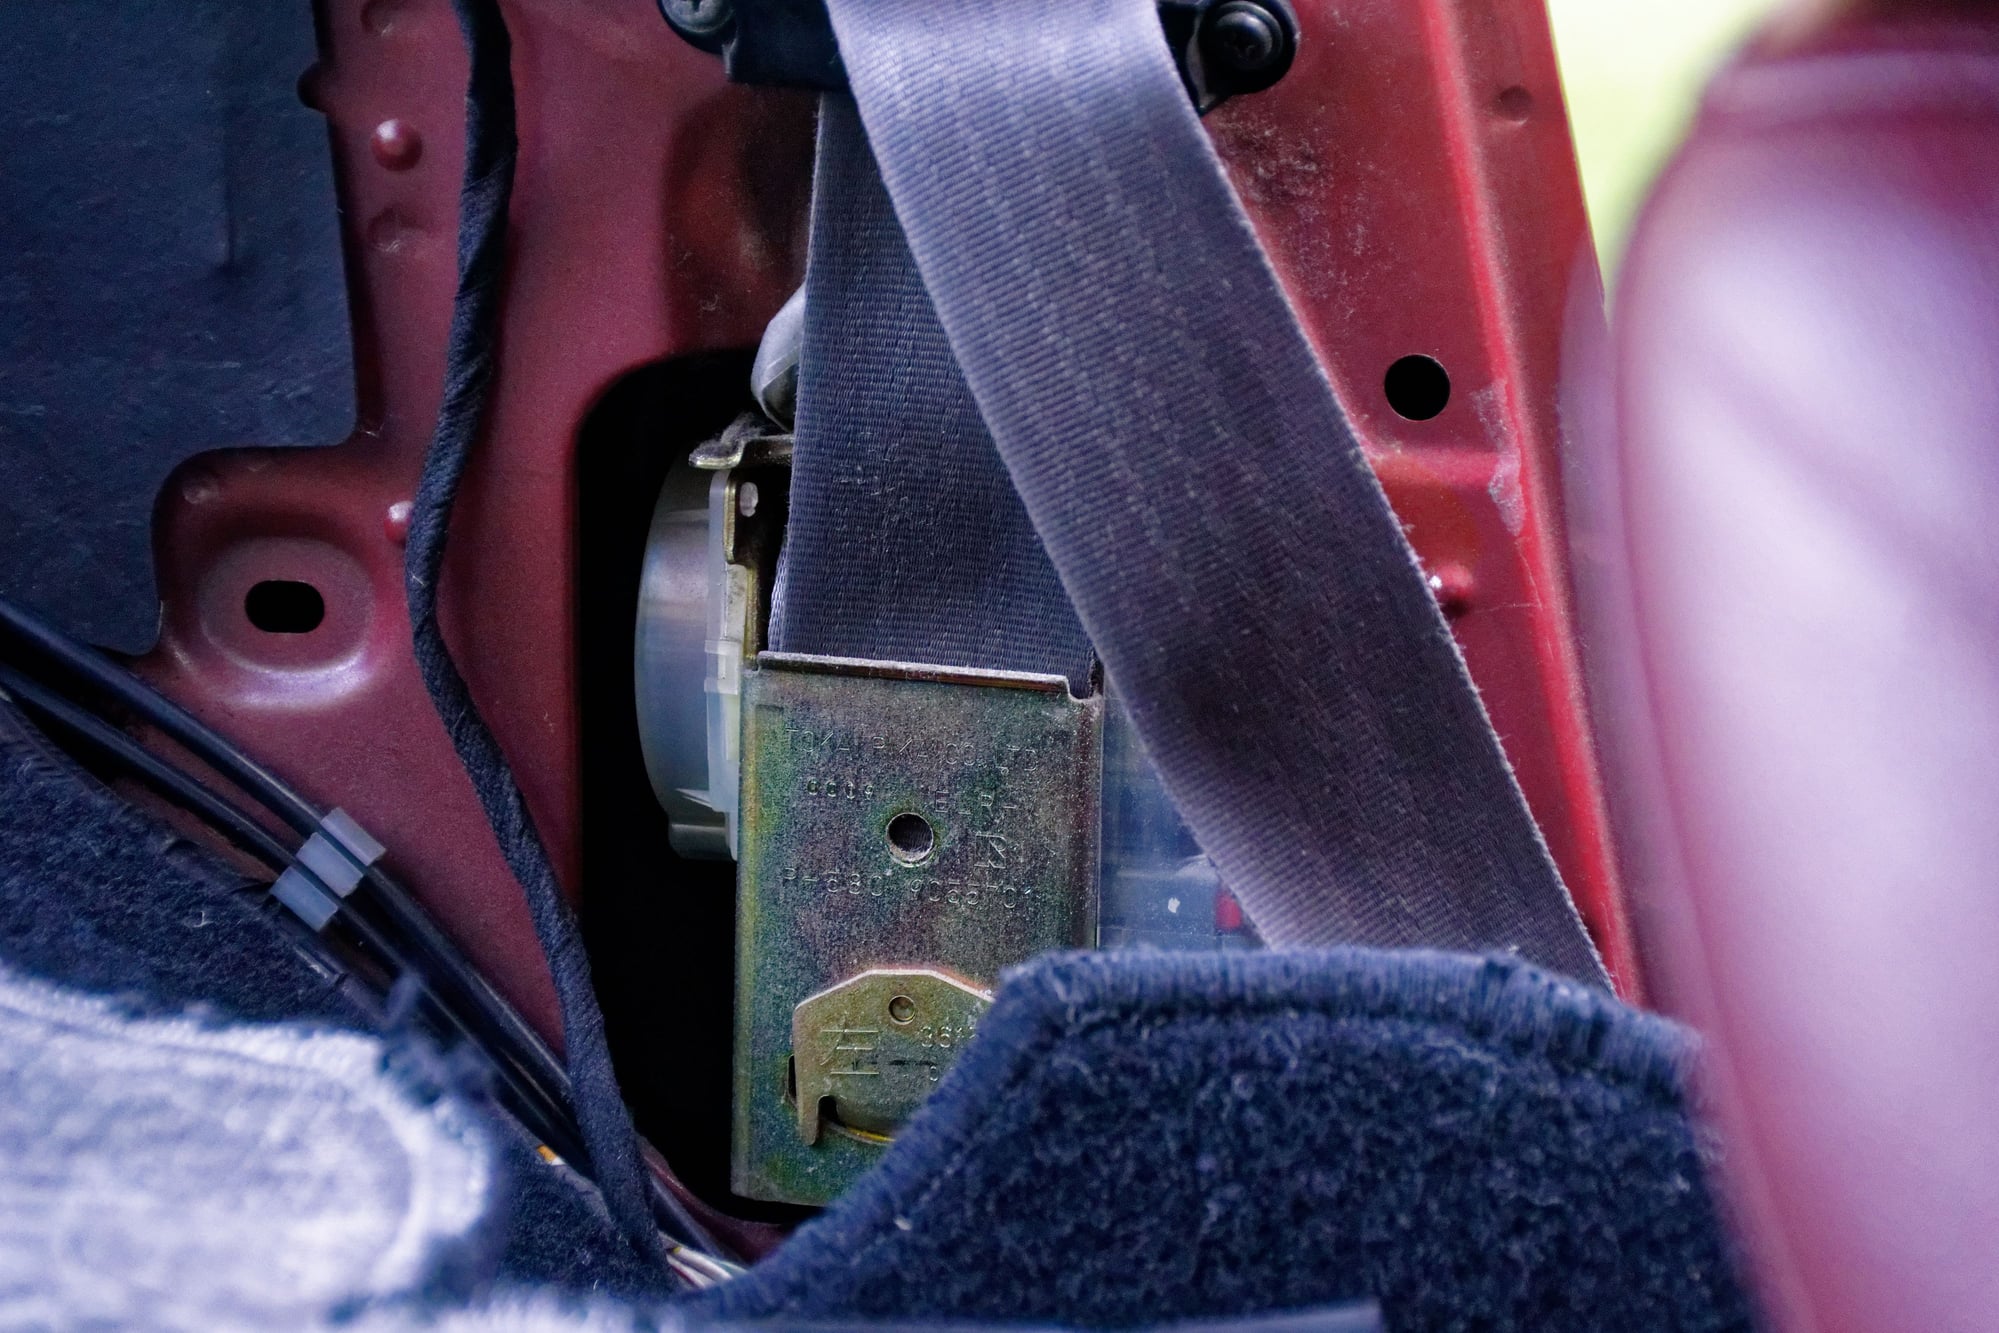
It's two small trim screws for the guide, and a 16mm bolt for the retractor. Actually, all three seatbelt bolts are 16mm. Weird...
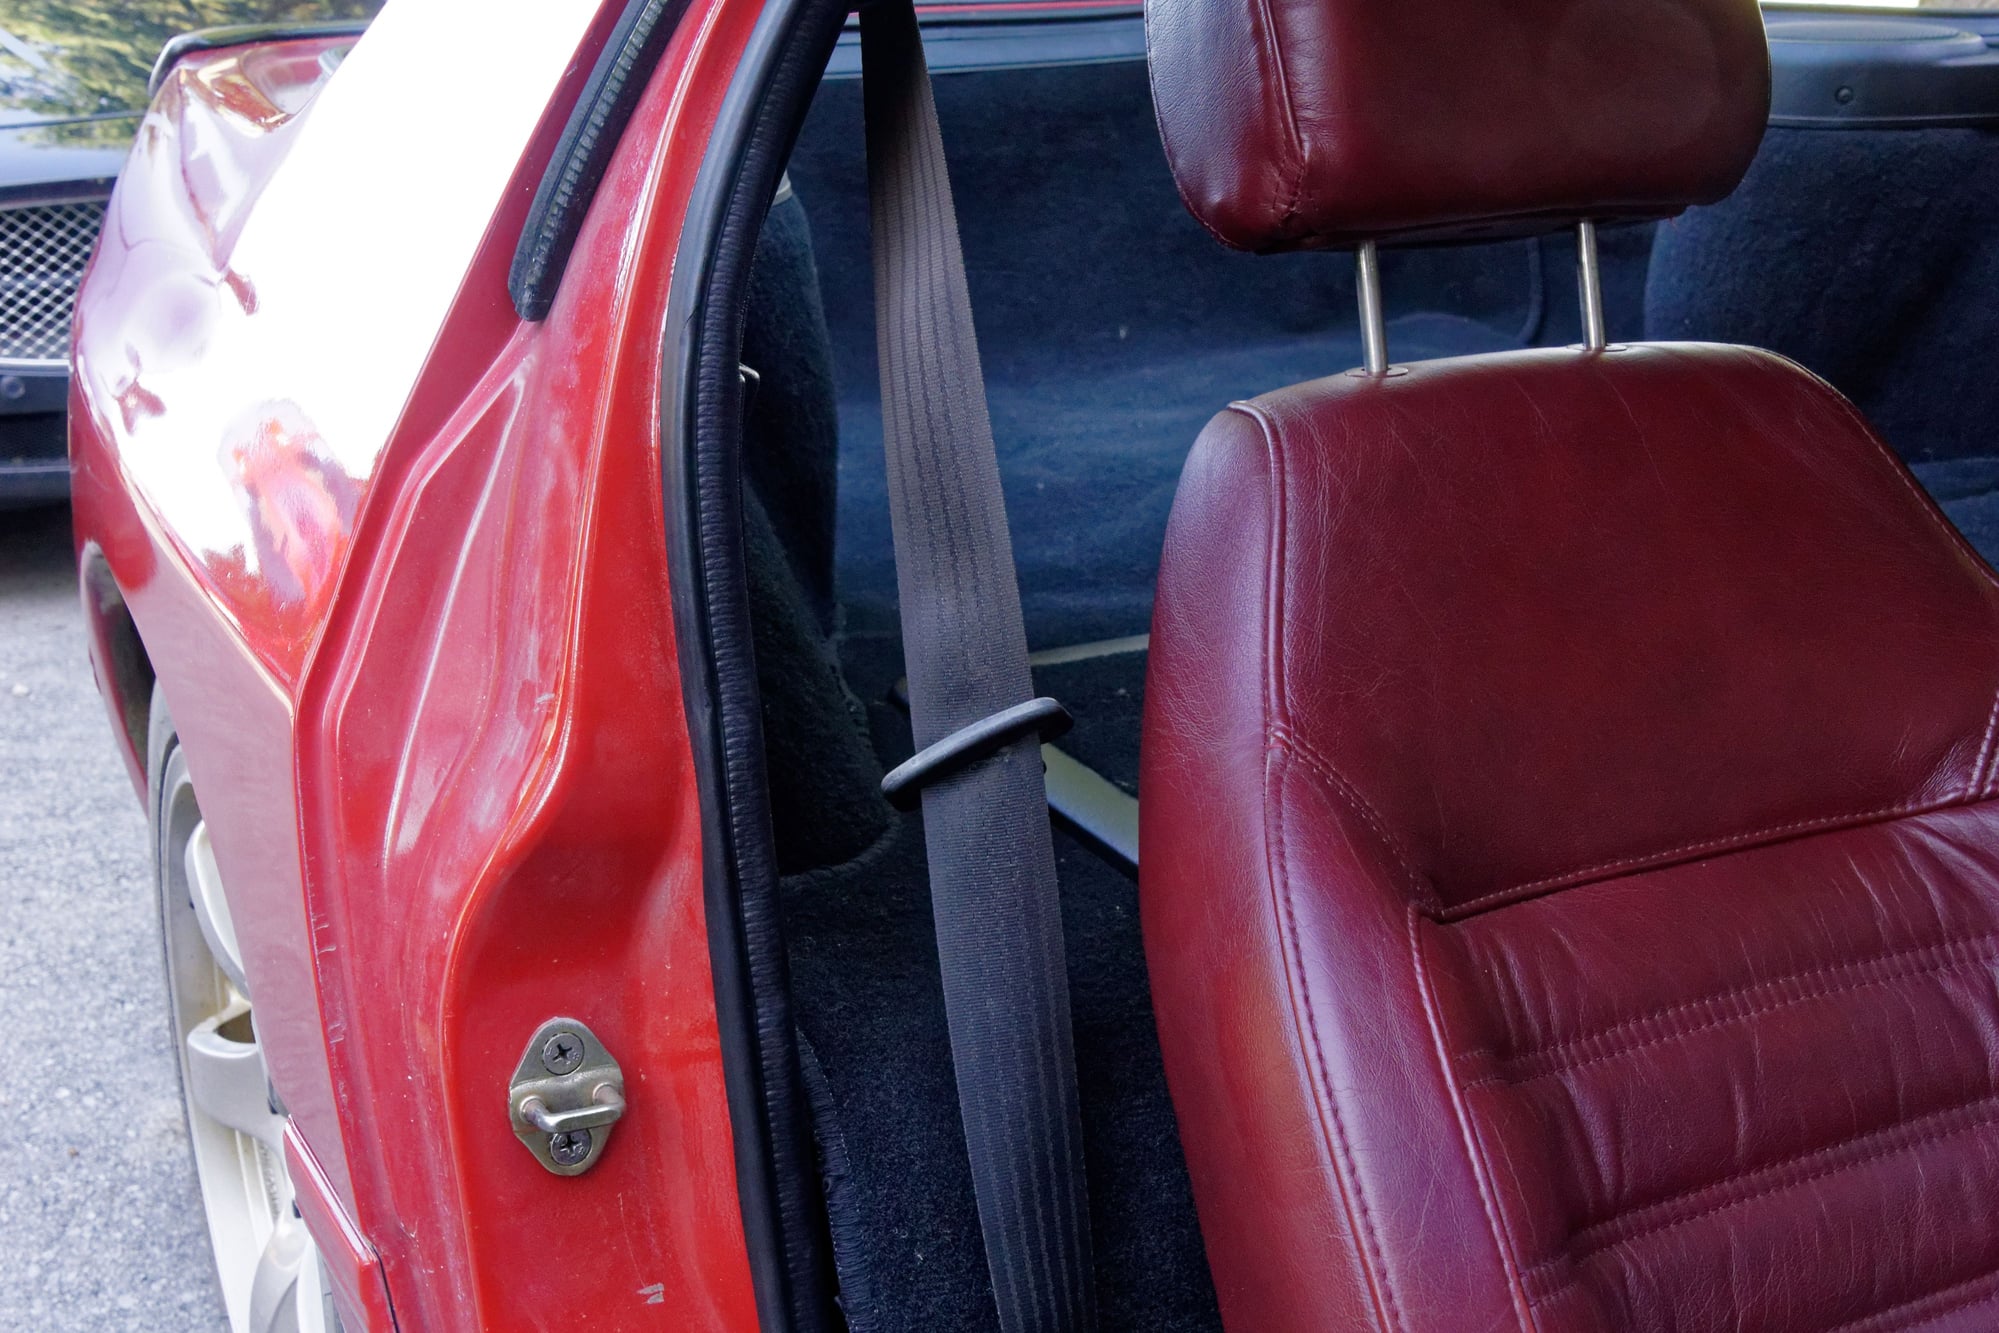
Going to have to sit in the car a few times and pull the belt across before I figure out which way it's supposed to face. It's surprising how much of a difference one part can make:
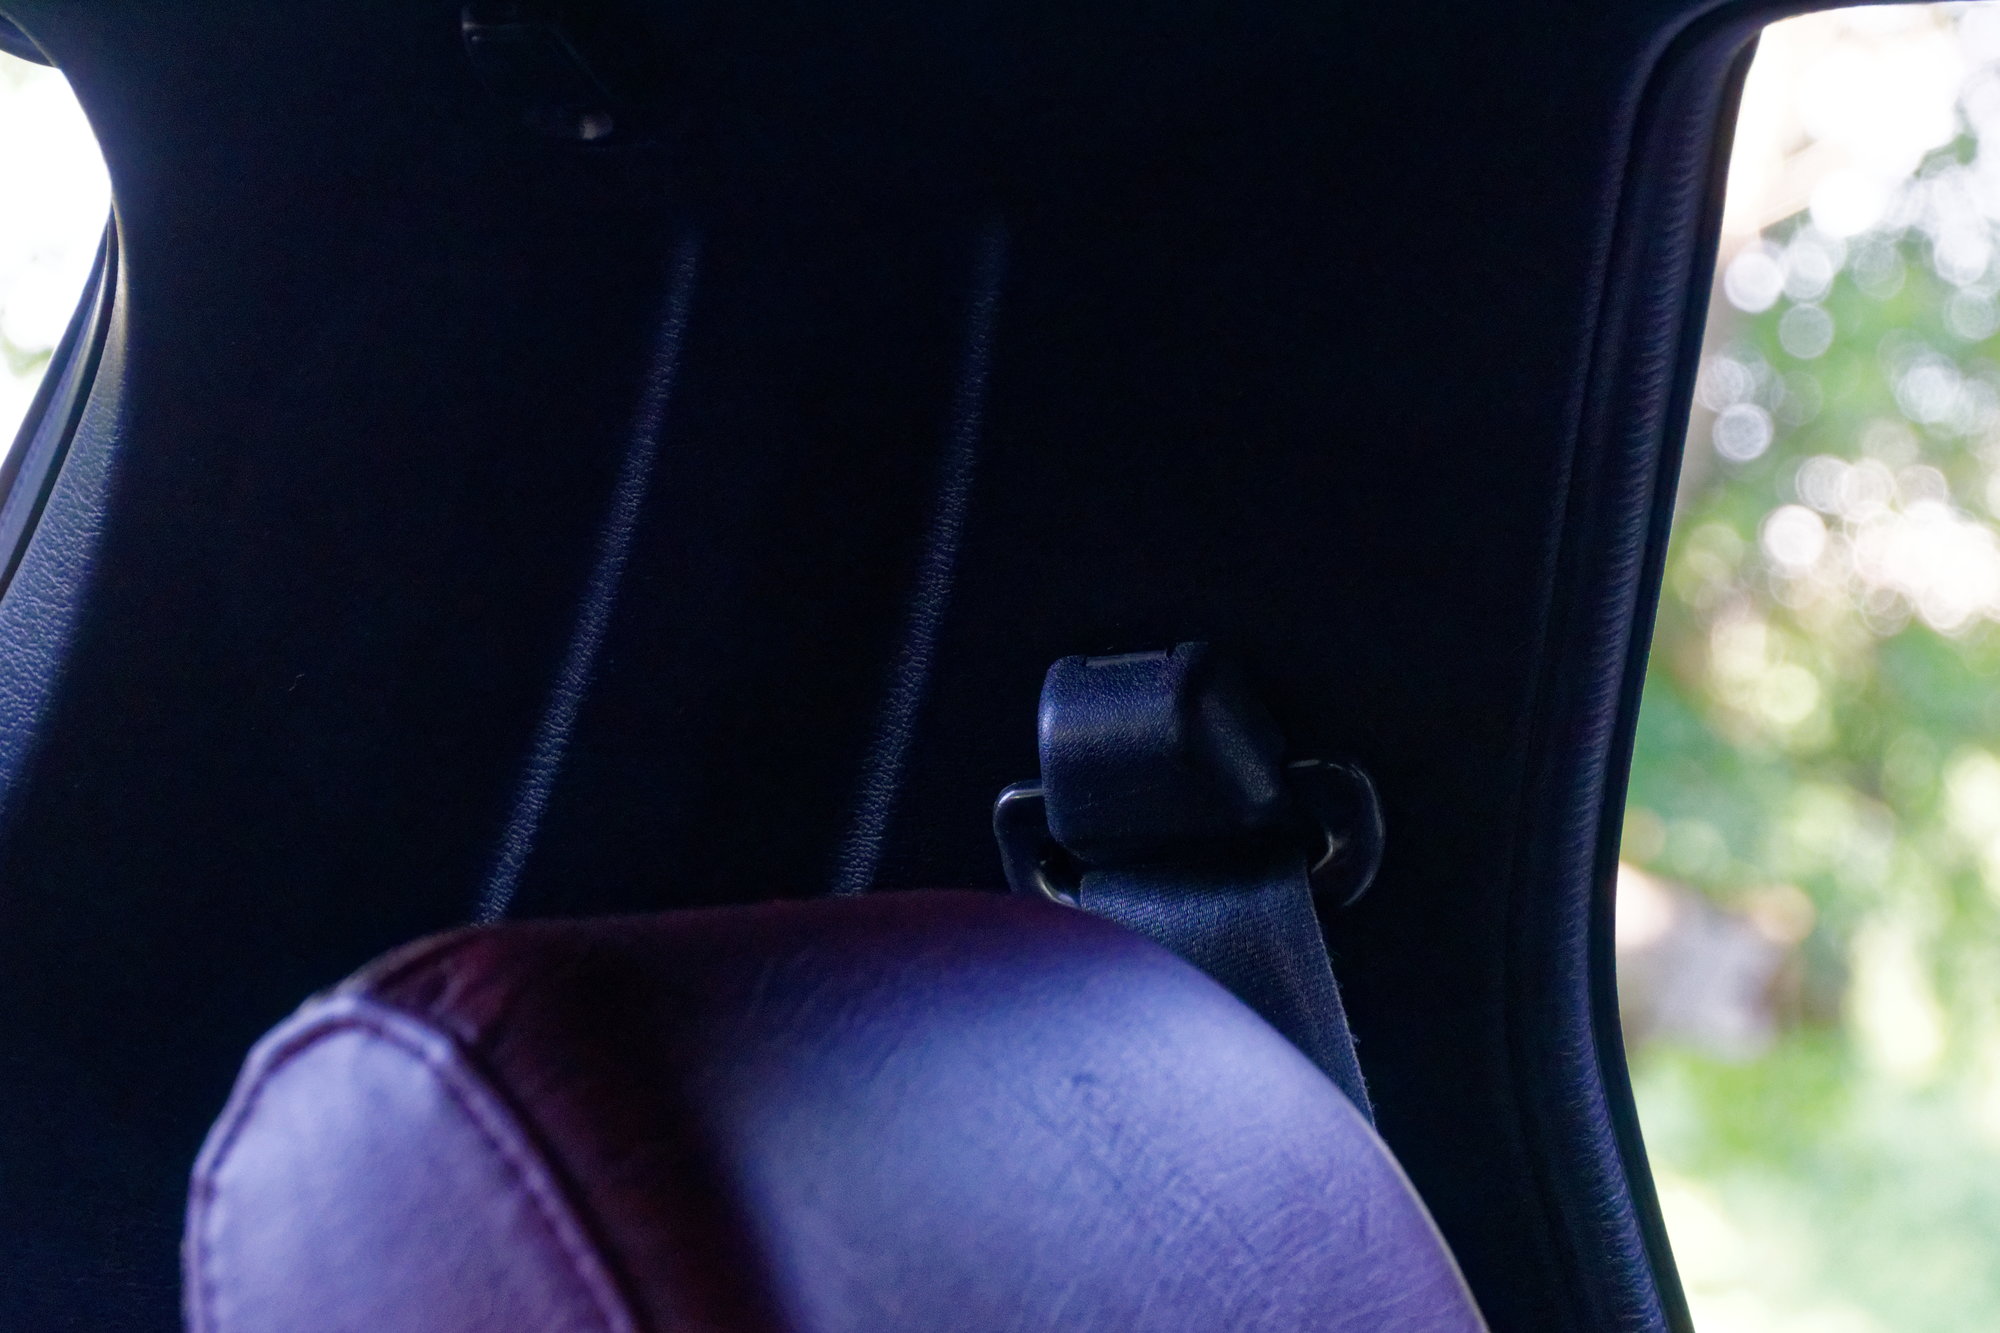
The new seal is also visible in this picture. Like I said, big difference.
To be continued.
You'll need to log in to post.


