1 2 3 4 5
teamilluminata
teamilluminata HalfDork
2/21/18 6:45 p.m.
759NRNG said:

"Should the bumper go behind the quarter panel or should it butt up and why is the quarter panel so far out or the bumper so not wide enough? We feel we have a solution. More later."

So.....what seems to be the consensus on this topic????? looking way good so far wink

well this is what ended up with.


teamilluminata
teamilluminata HalfDork
3/9/18 2:03 p.m.

QUATTRO RALLY HOMECOMING

It was a big day last Saturday. We dragged the car home from Cherry Classic Cars where it has lived for the last twelve months. It was almost 15 months to the day that we dragged it up there with its first layover being at Thompson Racing Fabrication where it received its ARA legal cage and other modifications.


Finally home. We think this is where we'll build it; in the showroom!


So yes, the car is in primer. This is because we still have quite a bit of cutting, welding and grinding to do. The front bumper bar needs various tabs welding to it and there are lots of brackets and tabs we probably wont use so to protect the shny paint we left it in the can for now. The plan is to almost completely build the car before striping it again and finally painting the shell. This will allow us to make any required modifications as we go and not ruin the paint. As the primer will get dirty easily one rule we are implementing is that nothing gets bolted to the car that is in its final refurbished condition especially anything containing oil. We will see how long that lasts.

There's lots to do and lot's to buy. Mostly an engine. More on that later but for now we are on the quest for one of these 1/18 models that Sunstar just released.


Brace yourselves for an onslaught of updates.

teamilluminata
teamilluminata HalfDork
3/22/18 8:29 p.m.

So we have had the car back a couple of weeks and there has been plenty of buzz though not, seemingly, much progress. That, of course is not the case with much of the action taking place in online shopping carts as we start to buy the parts we will need.

Most importnatly, an engine. We have the 10V that came with the car and that "ran when parked" as they say. But it's only good for 2-300 horspower max and then you have to ditch the CIS injection and spend gobs of money on it, jst to get 300hp. A slightly more modern 20V engine can easily manage 3-400 horsepower apparently with much more availble if you want to go bankrupt. We think 350 hp will be fine for our purposes so have decided to go that route. We have orderd a stock but tested engine from a quattro guru that is coming with a chipped ecu and a few other niceties that should give us a plu and play 300-350 hp. More on that when it gets here.

So what else: well, we started assembling the iconic Group B dash by pulling out all the gauges and switches we had previously purchased. Then went to eGauges.com for the ones we are missing. VDO Vision Black; in Metric when available.

Before we could order the fuel level gauge we needed to figure out what ohms range the stock sender puts out. The interweb didn't seem to know so we showed it our FLUKE multi-meter. That must hace sacred it because it didn't work. After careful disassembly and cleaning of all the electrical paths we finally determined that it went from 40ohms to 285 ohms so ordered a 33-240 ohm gauge.


We also test fitted our Sparco seat bracket, both in the car and on one of our Corbeau FIA seats but resisted the temptation to test the both in the car, for now.


Then, with a little help from some MRF rally tires we installed the rear diff and subframe.


And yesterday our refurbished rack arrived from Jorgen Automotive so we threw that at the car too.


Next on the list is to refurbish and install the  steering column, pedals and shifter. Me should have the front subframe back from powder coating so don't be surprised to see that on the car too soon.

irish44j
irish44j UltimaDork
3/29/18 6:36 p.m.

Nice progress, it's going to be sweet! So is this just a tribute/show build, or are you going to come hit the stages with us in it? Either way is cool, but the latter is way more fun ;)

teamilluminata
teamilluminata HalfDork
3/29/18 7:15 p.m.

I don't think we can afford to hit anything with this once it's finished :(

Cage is ARA legal though if someone wants to try.


irish44j
irish44j UltimaDork
3/29/18 8:01 p.m.
teamilluminata said:

I don't think we can afford to hit anything with this once it's finished :(

Cage is ARA legal though if someone wants to try.


So just drive carefully ;) But seriously, you really could run one rally, just so you can say it is legitimately a rally car when you're showing it - doesn't mean you have to drive it fast or be competitive! It's pretty easy NOT to hit things in rally if you're not pushing all that hard, in truth. Hell, I ran the practice stage at Sandblast ---- in my tow rig Sequoia ---- at a decent clip :)

I'd say to get it logbooked with one of the organizations even if you're not going to run it, since the cage is legal. Will give it more resale value if you ever decide to sell it, and having that logbook sitting in the car when you're showing it is a +1 for legitimacy, since it looks like you're often parking with actual historical rally cars at the shows. Once it's logbooked, nobody can say "well that's not a *real* rally car," because it is!

teamilluminata
teamilluminata HalfDork
3/30/18 7:33 a.m.

No, I hear you. It will have an ARA logbook and we will do some RallyCrosses with it. 

Maybe we do a rally sprint or milder rally. What's a "safe" one in the midwest? Summer Sno*Drift perhaps?


teamilluminata
teamilluminata HalfDork
4/2/18 6:34 a.m.


This concept of refurbishing parts then bolting them to the unpainted shell is working out well as we have already discovered a few things we need to mod and are accumulating quite a parts list too.


We got our first batch of parts back from powder coating:


And wasted no time attaching some of them to the car. Front sub=frame for instance:


We also received a Sparco battery cut-off for the dash:


Our friend Paul is concurrently building an RS200 replica with a Focus RS crate engine. He brought over his superfluous factory intercooler to see if it might work for our application. Maybe:


We finished the refurb on the steering column but it is going to need a bushing sleeve replaced before being put into actual service. However, this didn’t stop us bolting it up along with the refurbished pedal assembly:


We thought our pedal assembly was in pretty good shape, until we took the over-center spring apart to clean it:


Add that to the parts list. Stll, it didn’t stop us bolting it to the car:


We also spent a bit of time prepping some parts for plating. We are having this lot zinc dichromated so they need sand blasting first. It was suggested filling the cylinder bores with hot glue so they wouldn’t get sand blasted so we gave it a try.


We took the opportunity to test fit the dash as we suspected it would interfere with the steering column. We were not wrong. There’s a reason for that cutout after all:


We plan to continue to assemble the car this coming week so look for an update soon.


teamilluminata
teamilluminata HalfDork
4/5/18 7:48 p.m.

TOO MANY FRONTS!

What do we mean by “fronts”. Well, we have opened up quite a few areas of work on the car, none of which seem to be nearing completion: namely:
•    transmission, 
•    plating
•    pedals
•    dash
•    shifter

We have power washed the transmission and replaced axle seals but we broke a tab off the rear output unit and only just found a spare transmission to steal one off. Now we will disassemble that and replace both seals. Fortunately the bearing in this one is in great shape so it actually saved us some money and time.

Still have to clean the trans and replace the input seal. Then install the shift linkage we recently refurbished.

Along with the calipers we prepped for plating we also have dozens of fasteners and brackets to re-plate. To help with the cleaning process we bought a vibrating parts cleaner from Harbor Freight. We are still learning what media works best for what degree of rust etc.

We did make some progress with the shifter in that we managed to disassemble it. Without breaking anything either!


The reverse lock-out tab is bent but otherwise it’s OK. We ordered a short shift kit from 034 Motorsports for it too 


We laid down some plywood floorboards after installing the pedals. The floor was very uncomfortable to kneel on and our work boots made it dirty. This will be a lot more convivial.


We still need to find the accelerator pedal, get the dash to fit over the steering column and also fill it with gauges and switches.

Lots to do!

teamilluminata
teamilluminata HalfDork
4/13/18 5:20 p.m.

We made quite a lot of progress this week but it doesn’t feel like it. Perhaps because we didn’t get to actually bolt anything to the car. What we did do was finish prepping the transmission. We replaced the rear coupling and seals with a non-broken version, cleaned and painted the case, installed new drain and fill plugs, replaced the input shaft seal and installed the mounts and brackets. Mounts are 034 Motorsport in Delrin.


People keep telling us we really need to run with the big, heavy rubber damper mounted to the back of the transmission as Audi intended but we’d really rather leave it off. Are we nuts?


We also managed to recommission our ancient, homebuilt sand blaster and put it to work on some rusty components. Unfortunately, in our excited state, we forgot to take the “before” pictures.


Next week we hope to modify the dash to fit over the steering column and get some parts plated. We will also look for something to bolt to the car. Exciting!!!!!!!


stuart in mn
stuart in mn UltimaDork
4/13/18 9:35 p.m.

You haven't been getting a ton of responses, but rest assured we're all interested and are following this thread.  smiley

teamilluminata
teamilluminata HalfDork
4/14/18 7:41 a.m.

I know. It must be hard to respond when your jaw is on your knees LOL

teamilluminata
teamilluminata HalfDork
4/25/18 11:19 a.m.

Like most car nuts we are easily distracted by shiny things that come in the mail. This week was particularly distracting in that regard:


Clutch bulkhead brace from 034 Motorsports:


Solid Delrin engine mounts from 034 Motorsports:


Transmission mounts from 034 Motorsports:


Short shift kit from 034 Motorsport (of course):


We also gave the car its own "woom" to gestate in. Do you think it will be ready in nine months?


Next up. Hacking up the dash to make it fit.


teamilluminata
teamilluminata HalfDork
5/1/18 6:27 p.m.

It’s time to make the Group B rally dash actually fit in the car. This is a reproduction panel modelled on an original by a member of the US Quattro community and is beautifully crafted. Unfortutunately they have to be “relieved” to fit round the steering column as the lower return is supplied straight. You can’t just cut it as it would then be too flimsy. An added complication is that we intend to still use the ignition key so we have to make room for the barrel housing too. You can see the interference here:

That bottom flange needs to follow the curvature of the panel. To do so it needs to be cut, formed and then a bridge piece added to maintain its rigidity. Then we will need to remove some material to clear the lock. We will have to do all this with the gauge panel in place or it will easily distort.


These fasteners will be replaced with rivets once we are confident everything fits.

Then we needed to clear the ignition key housing:


The dash panel is suspended from the dash bar welded between the cage A pillar bars but will need some bracing beneath to stop it swinging back and forth.  We fabricated these brackets and used the holes from the old cage to help mount them.

Done!

Now to mount some more gauges, fuses and a computer!


(These are just a small selection of the pictures we have taken. You can see all of them at https://flic.kr/s/aHskqskKvZ)


teamilluminata
teamilluminata HalfDork
5/31/18 4:27 p.m.

Gauging progress on the Quattro Rally Build.

The dash on the Group B Quattros is somewhat iconic especially the big orange oil light in the middle. For this reason we have been very keen to progress work in this area.

Our large tachometer came without any mounting hardware. It looks like it was designed to mount into a rubber grommet like the Porsche 911 gauges. That was never going to work with the 2mm thick aluminium dash we are working with so we had to get creative. First we tried a large hose clamp but of course it rattled around.


Then we butchered some garage door seal for its rubber and tried that under the hose clamp.


This worked as the clamp squeezed itself up against the back of the dash but didn’t really look the part. We found a roll of thicker black seal in the back of the shop and sliced that up instead. Success!


Then our missing VDO gauges came in from egauges.com so we mounted them up. The threaded sleeve on these makes installation so much easier than the yoke and thumb nuts of old.


Our tachometer came without mounting studs but no yoke so we made one.


Then we just had to put it into the car.


All it needs now is warning lights and switches, mostly.

We were also very excited to receive a box of metric flange nuts and bolts we found on eBay. These will be very useful.


Yes, we know, we’re nuts!


stuart in mn
stuart in mn UltimaDork
5/31/18 5:43 p.m.

Here's another option...I once used a rubber donut out of a Fernco plumbing fitting for mounting a motorcycle speedometer to a custom mounting bracket  They look like this:


You can find them in the plumbing section of any hardware or big box store in a variety of sizes.

teamilluminata
teamilluminata HalfDork
6/1/18 7:42 a.m.

In reply to stuart in mn :

Interesting. Thanks for sharing.

teamilluminata
teamilluminata HalfDork
6/6/18 4:16 p.m.


We took our first foray into replating components recently. Many steel components on 80s German cars have a gold finish which was at the time probably cadmium plating. These days, due to EPA regulations, zinc dichromate plating seems to be a better option. You can do it in-house quite easily but the dichromate part is really toxic so we prefer to have it done as far away from our shop as practicable. We have also resisted the temptation to lick the newly finished parts. 

First step in the process is to degrease the components and then to remove all the rust by blasting. As we mentioned earlier, we recently recommissioned our home-made sand blaster so used that to blast a bunch of accumulated parts.


We boxed them up and ran them over to Plating Specialists Inc. in Madison Heights. A safe 15 miles from our shop. Two weeks and $240 later WOW:


We couldn’t help but bolt a few components to the car:


We think we might be addicted to zinc dichromate plating now.

Ed Higginbotham
Ed Higginbotham Associate Editor
6/7/18 8:43 a.m.

Awesome progress! Let me know if you'd like this moved to the Build Threads forum.

teamilluminata
teamilluminata HalfDork
6/7/18 9:55 a.m.

In reply to Ed Higginbotham :

Thanks Ed. If you think that's the best place for it.

teamilluminata
teamilluminata HalfDork
6/19/18 4:18 p.m.

SHORT SHIFTER
We mentioned earlier that we had purchased a short shift kit from 034 Motorsports. Well, with our freshly plated shifter components back at the shop we wasted no time in assembling it and bolting it in. This is the stock shifter:


And the freshly plated components and short shift kit jigsaw puzzle:


We soon had it together:


And bolted in the car:


Of course the transmission is not in so the shift rod is just hanging in space for now.


GAS PEDAL
During or shifter assembling we stumbled upon the gas pedal. We knew it couldn’t evade us forever. The pivot bushings seemed fine so we quickly slapped it in the car and made VROOM - VROOM noises.


We are not sure if we are going to employ the original method of connecting the accelerator cable though. Seems a bit weird.


After all that hard work we felt we deserved a sit down and a nice cup of tea:


teamilluminata
teamilluminata HalfDork
9/10/18 12:35 p.m.

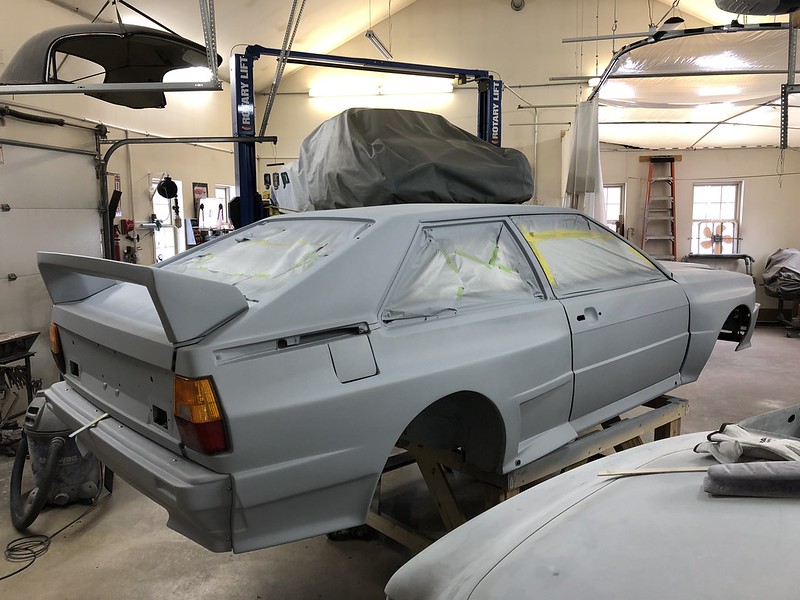
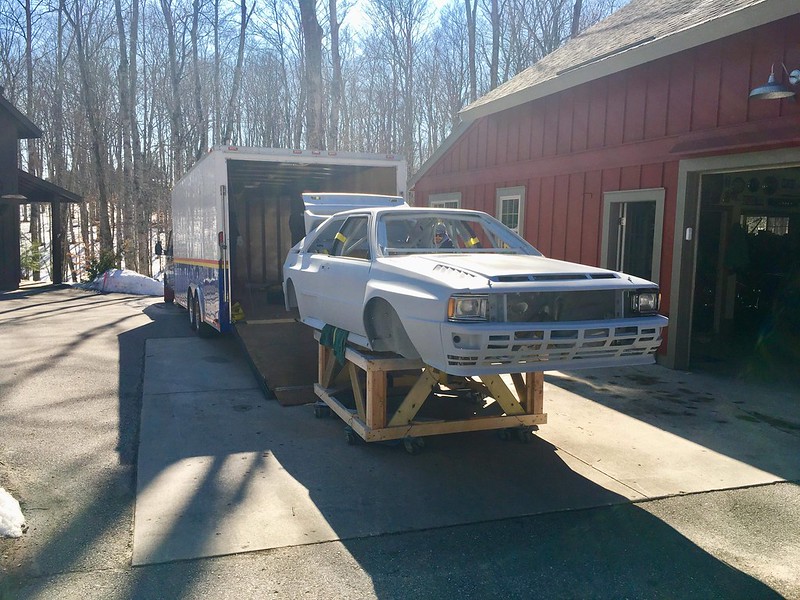
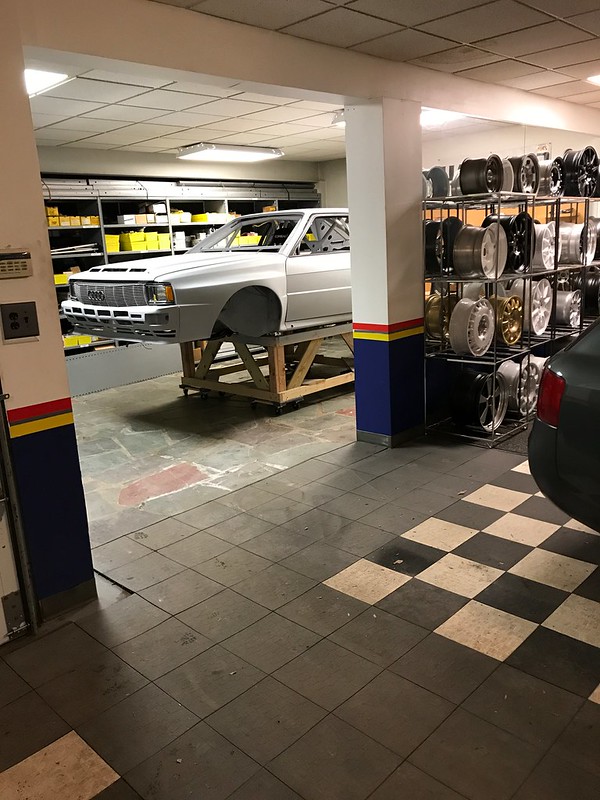
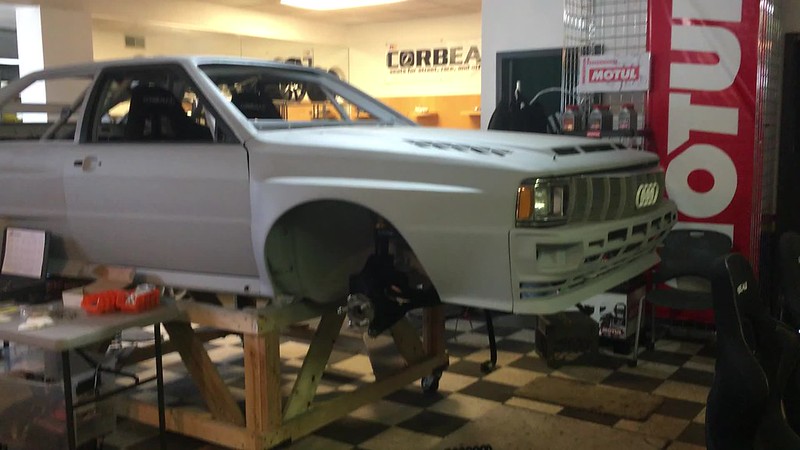
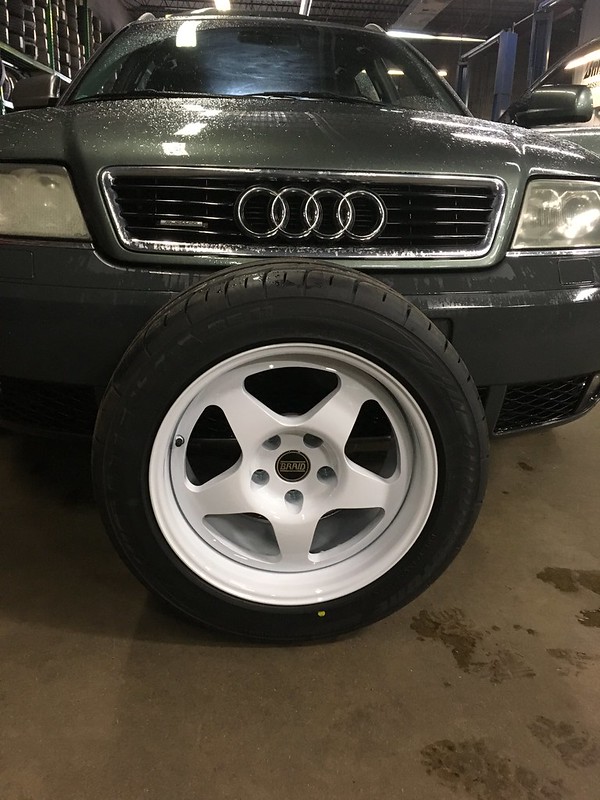
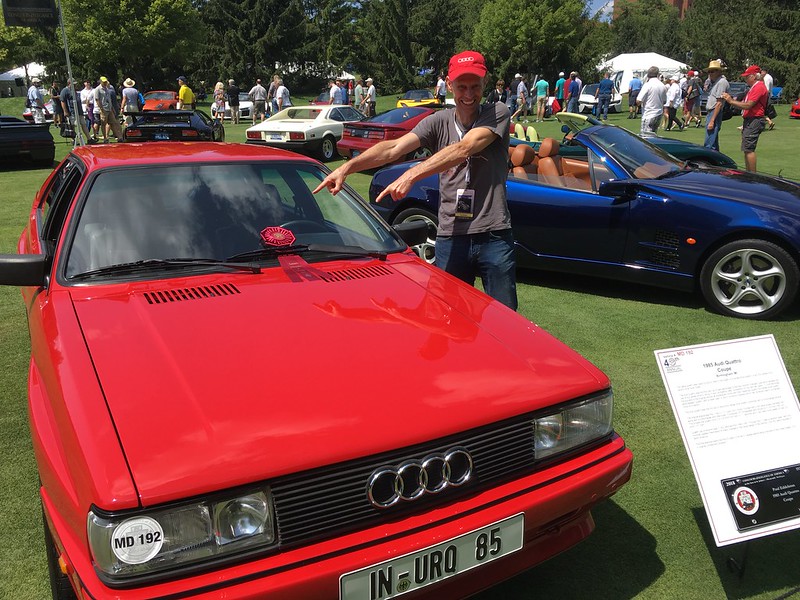
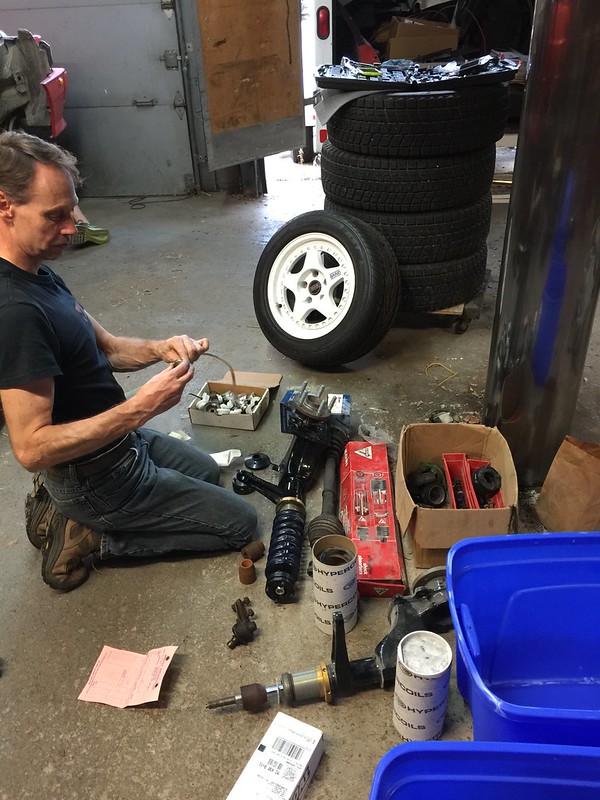
It’s been a while since we got to work on the rally Quattro project so also a while since any updates. We have been distracted by other projects such as getting our 85 Quattro ready for the Concours D’elegance of America towards the end of July. Happily the car won an award so it was worth the effort.


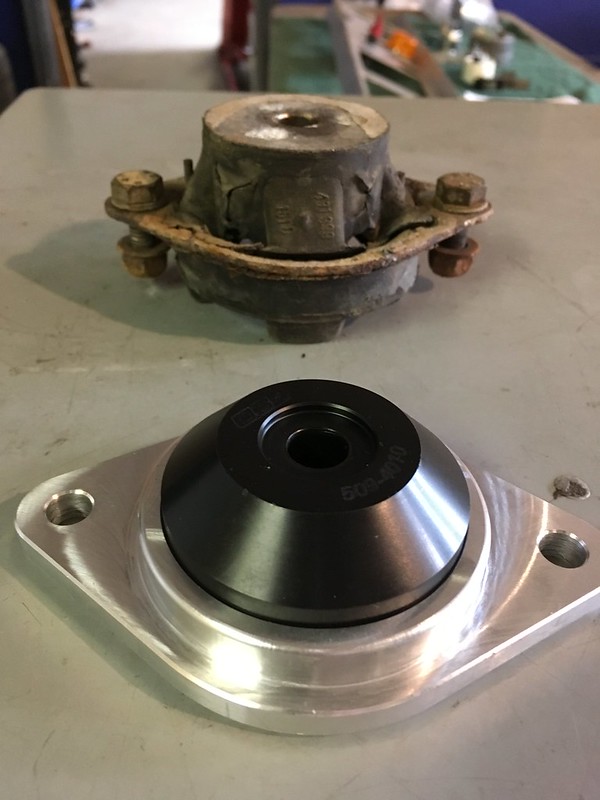
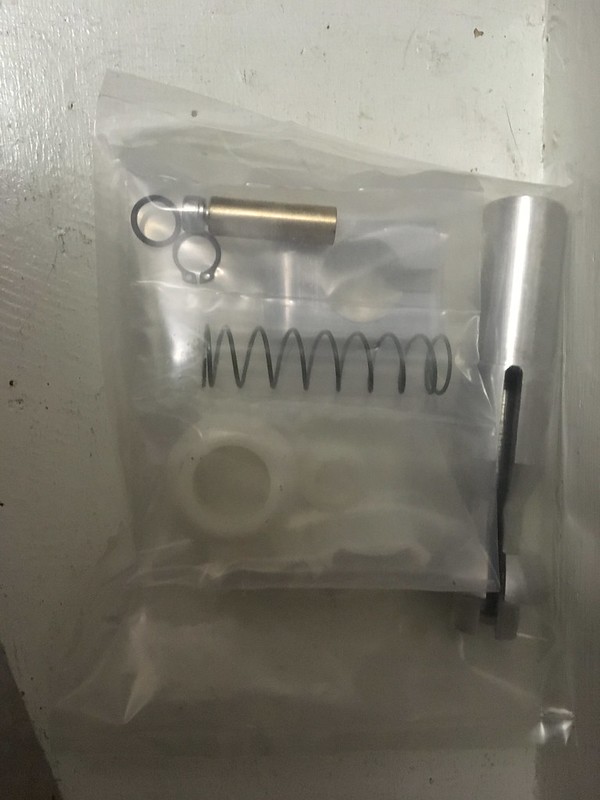
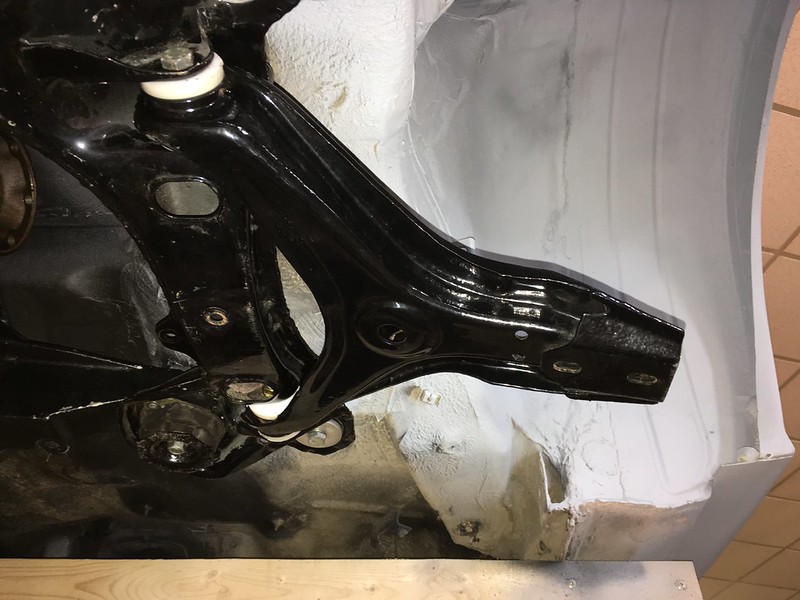
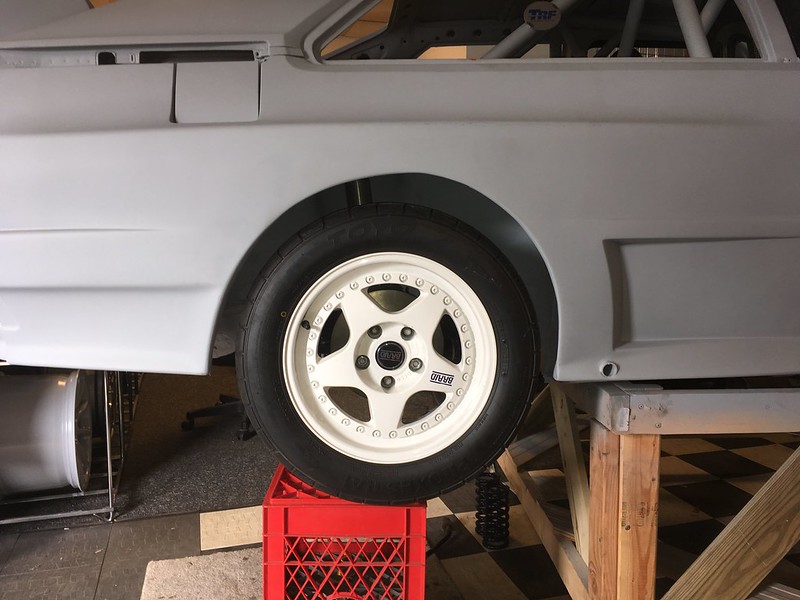
As you may recall the car came with some suspension parts, the origin of which we could not determine. Namely: delrin control arm bushings, coil-over conversion kit and spherical bearing top mounts.

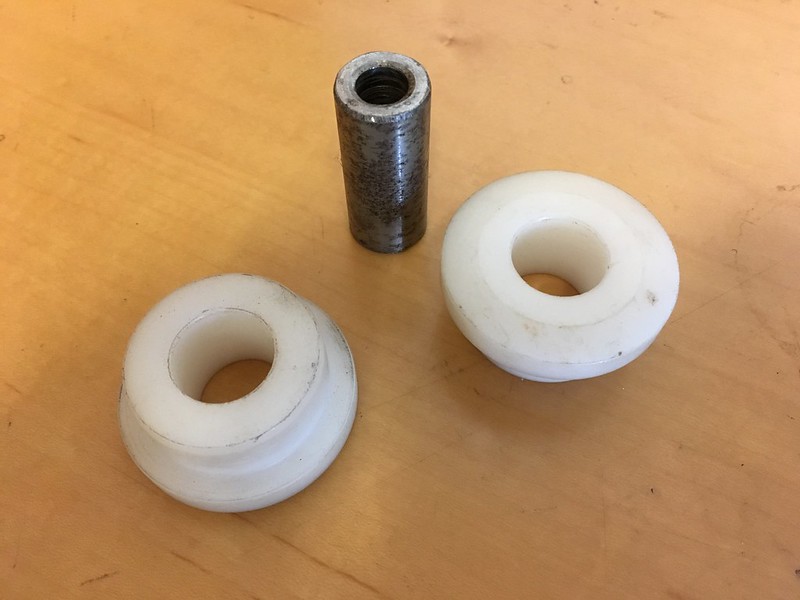
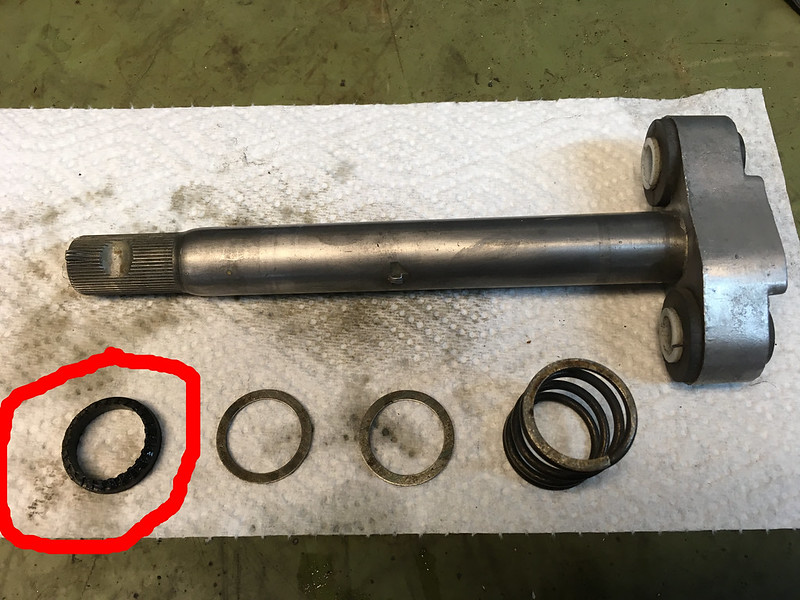
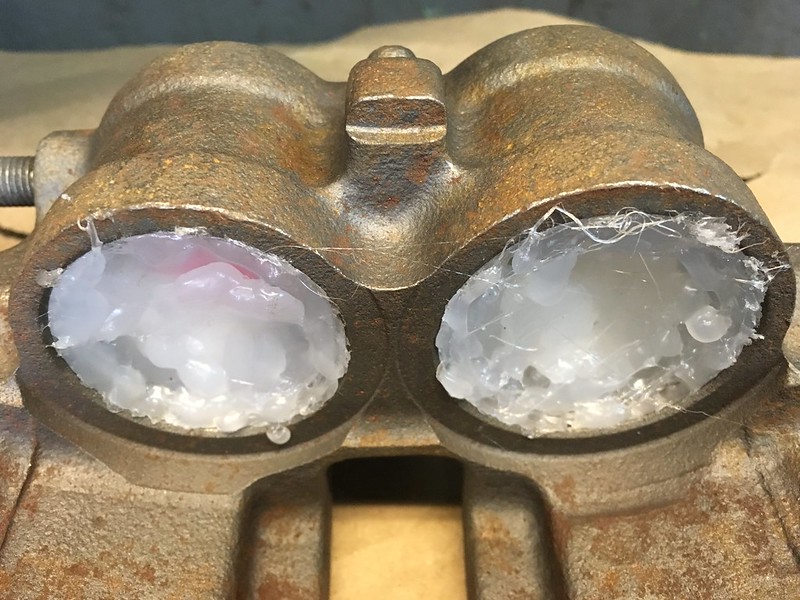
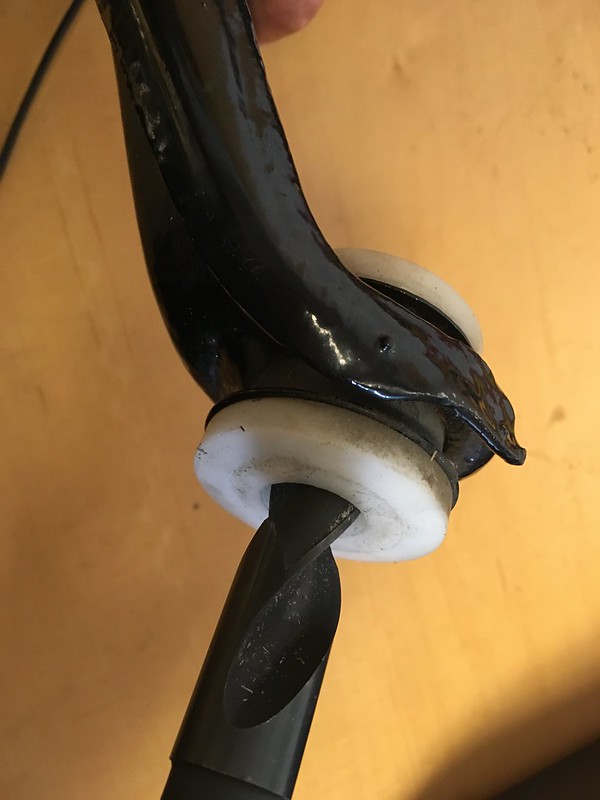
We have had an interesting time trying to get all this kit to work. Firstly the delrin bushings are wider than the sleeve that goes through them. This sleeve needs to end up slightly proud of the bushings so that it get clamped in the mounting slots and does not move. Then the bushings can rotate on the sleeve. Fortunately the sleeves appear to be the correct length.

It’s a good thing the bushings are also too thick as we need to remove some material to make them shorter than the sleeves. However, the sleeves are too tight in the bushings so we will also need to relieve them a little so they will actually rotate.

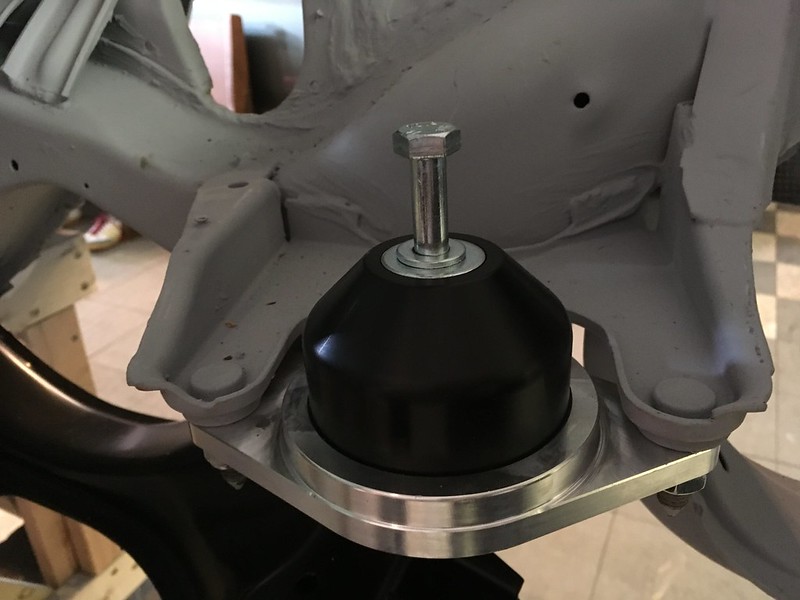
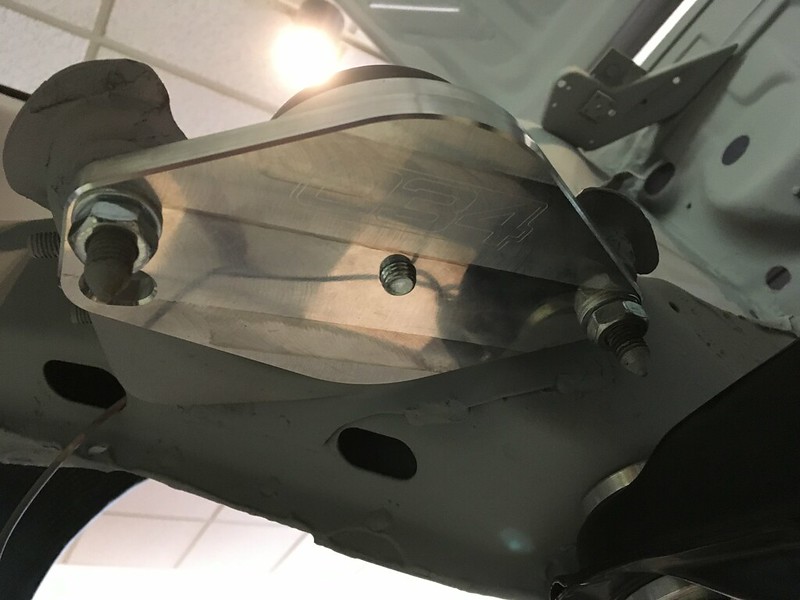
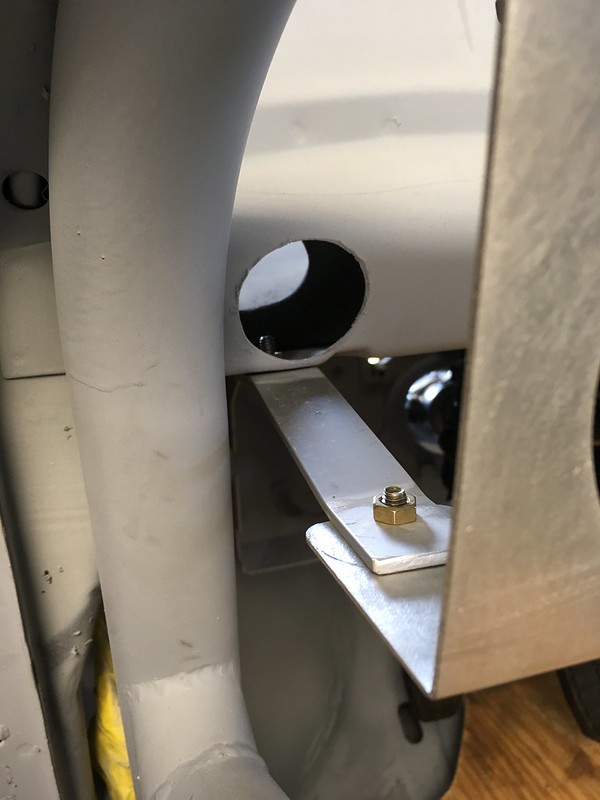
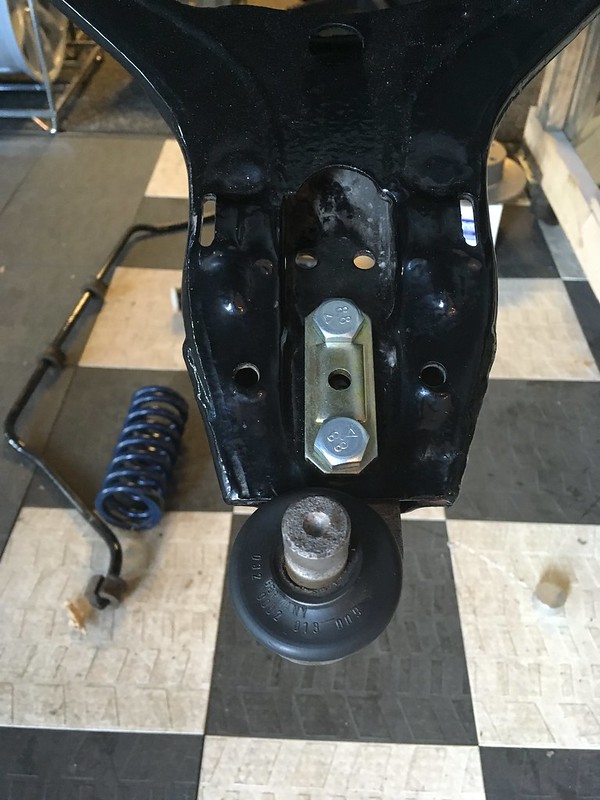
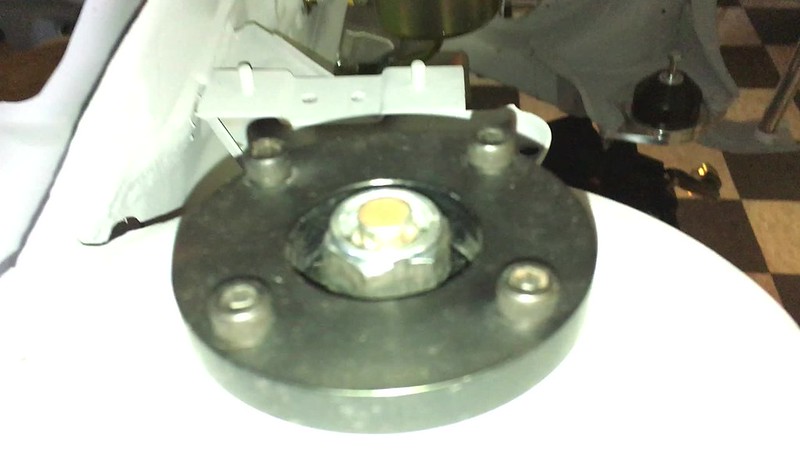
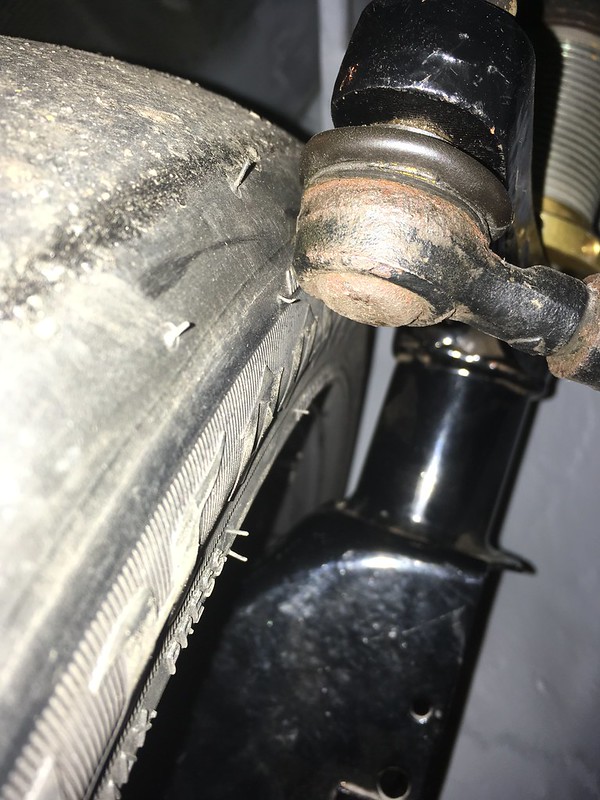
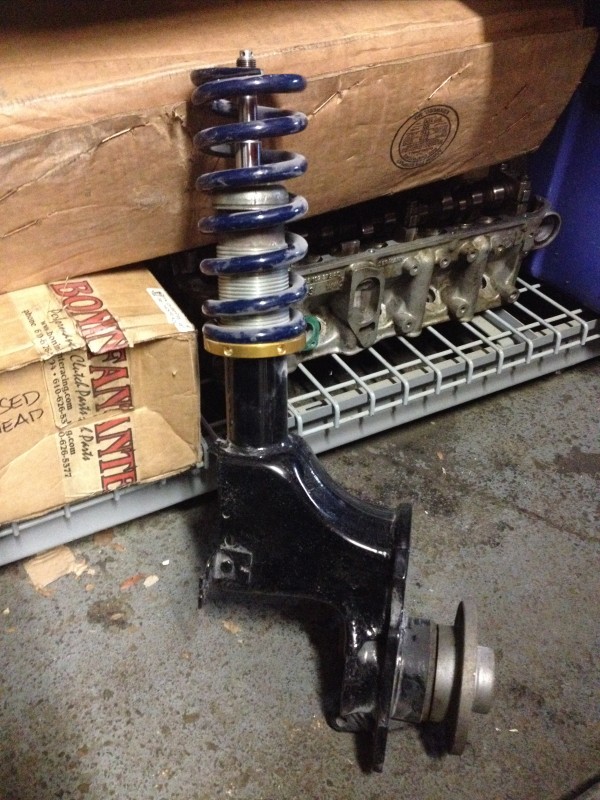
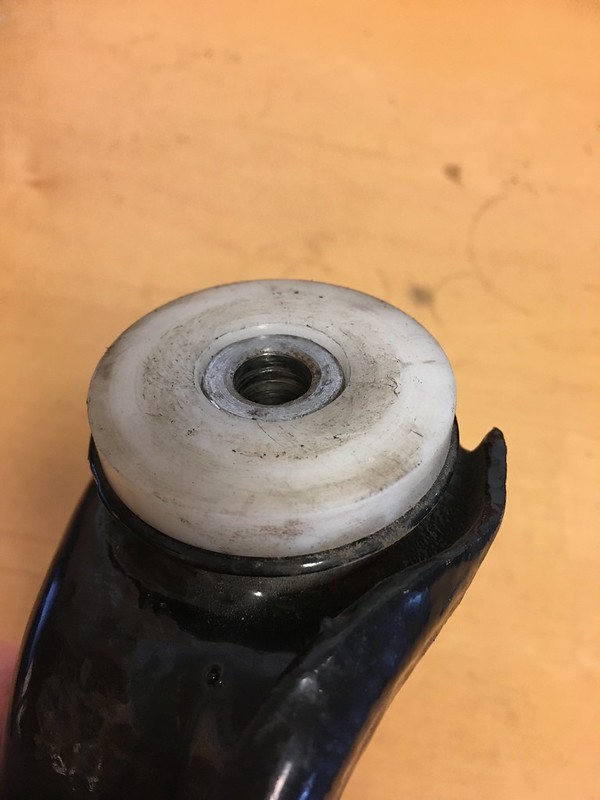
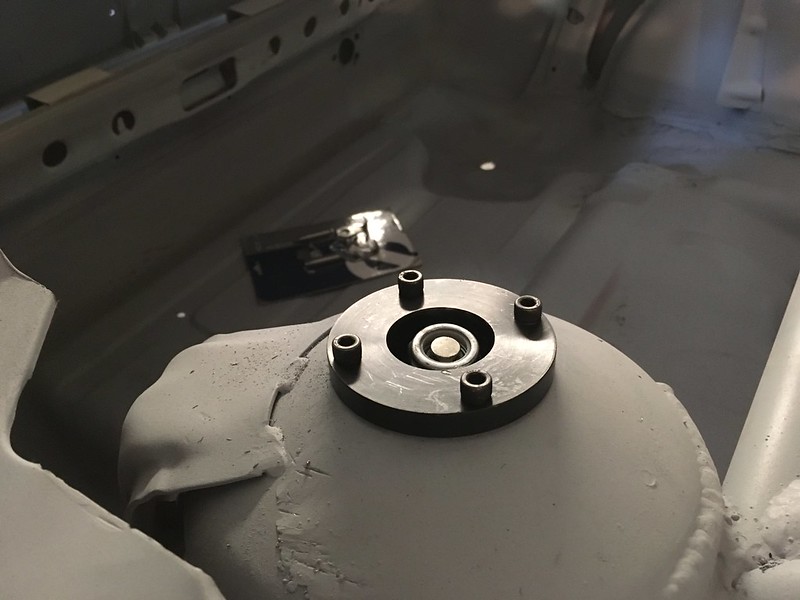
The top mounts don’t work either. Early on we had some spacers made to locate the upper spring perch and get some articulation in the mount but we won’t know how much articulation we need until we can mock-up a front and rear strut and control arm, but it’s definitely going to require more than we have now.

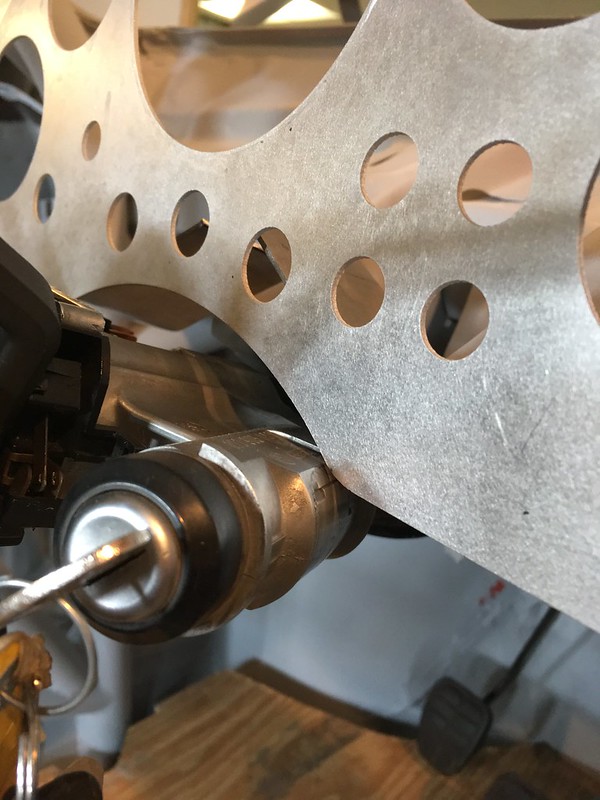
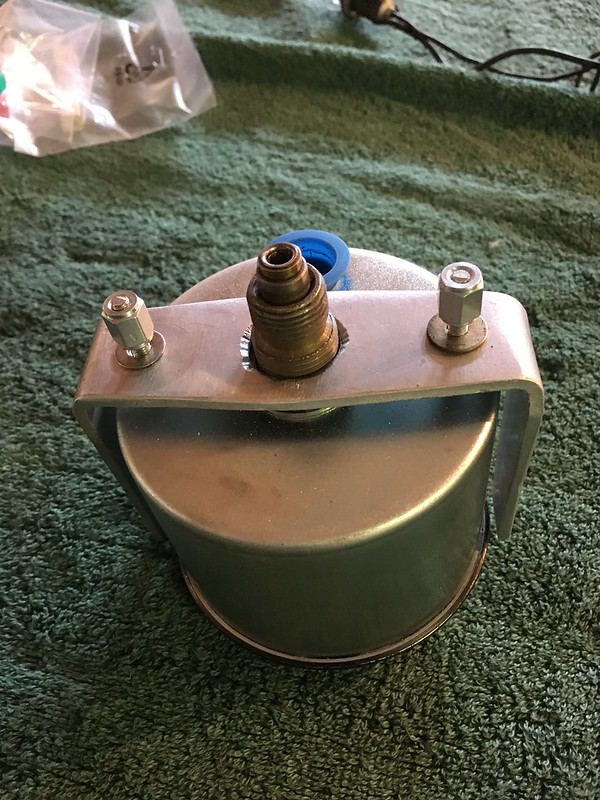
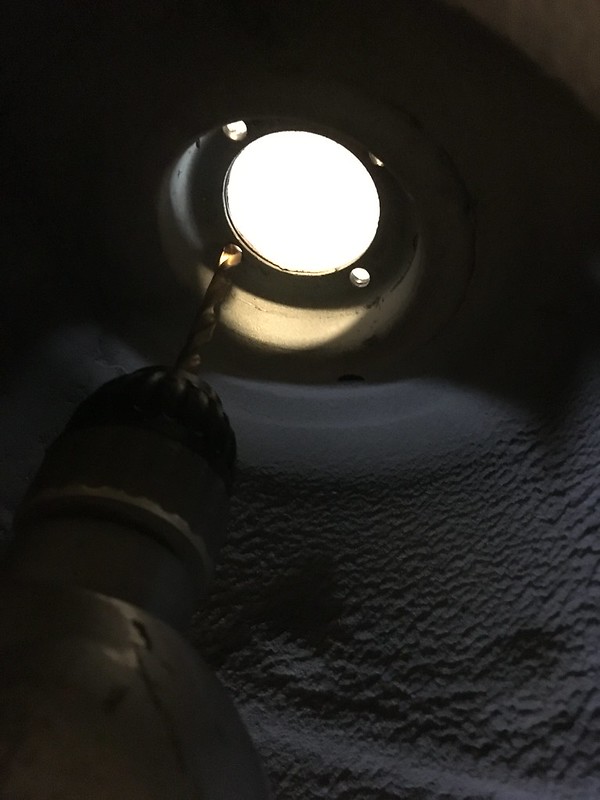
Unfortunately, due to the amount of hardware we are introducing to allow articulation we are also using up all of the threaded portion of the strut shaft and, although we can get a nut on we can’t access the hole in the top which will allow us to stop the shaft turning so we can torque it down.

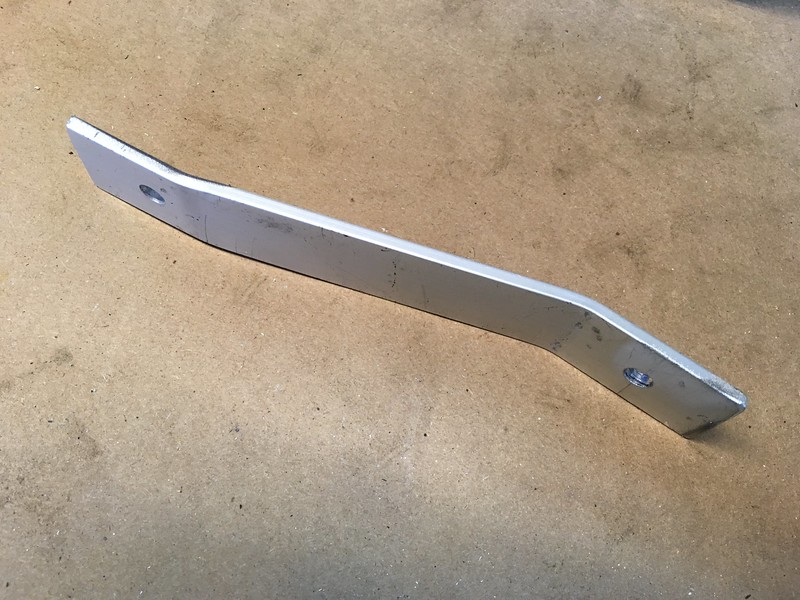
To make things more interesting we have not yet found any off the shelf tubing of the correct dimensions to use as spacers so it will all have to be made.

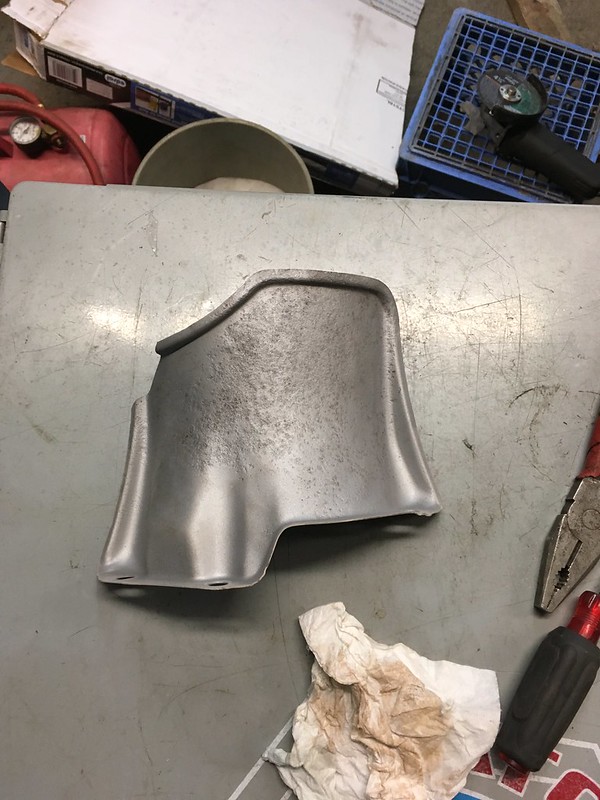
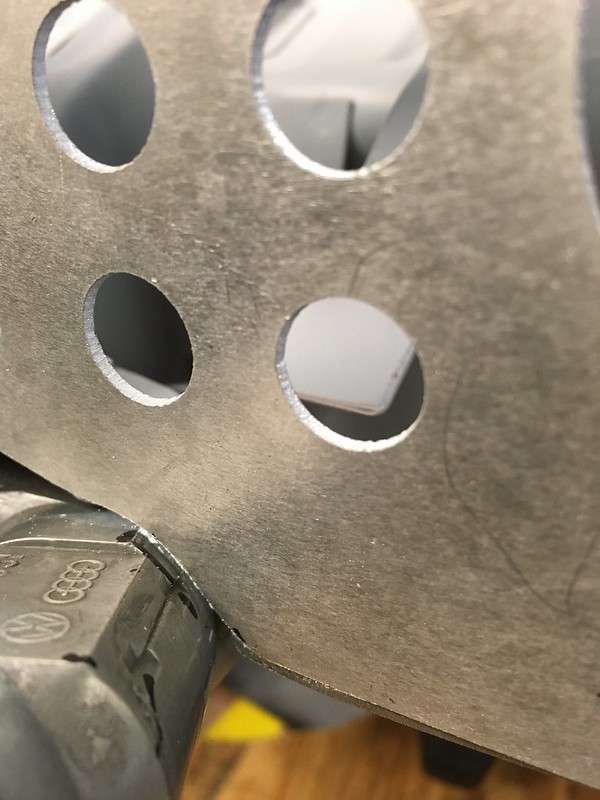
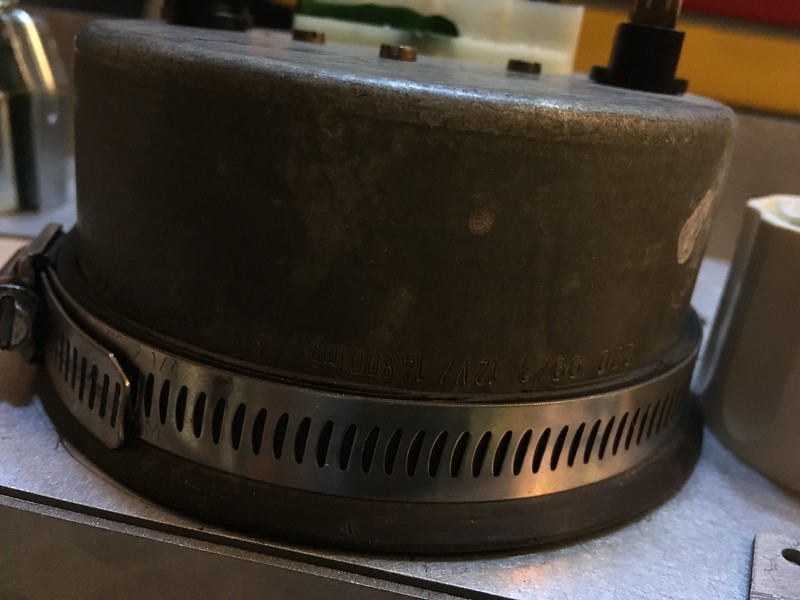
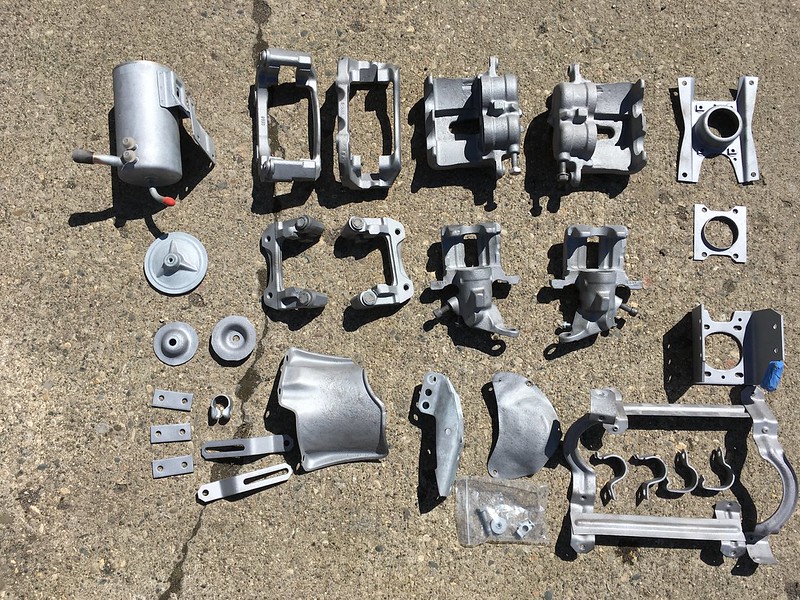
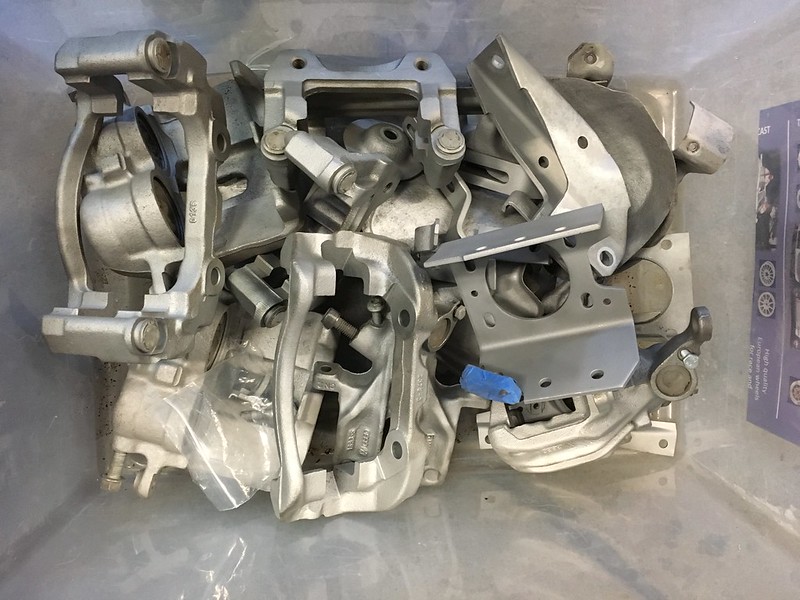
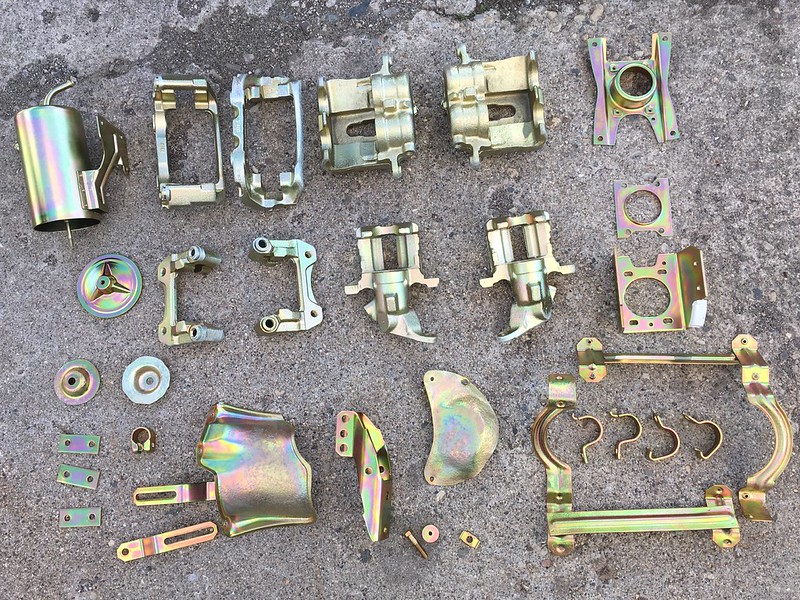
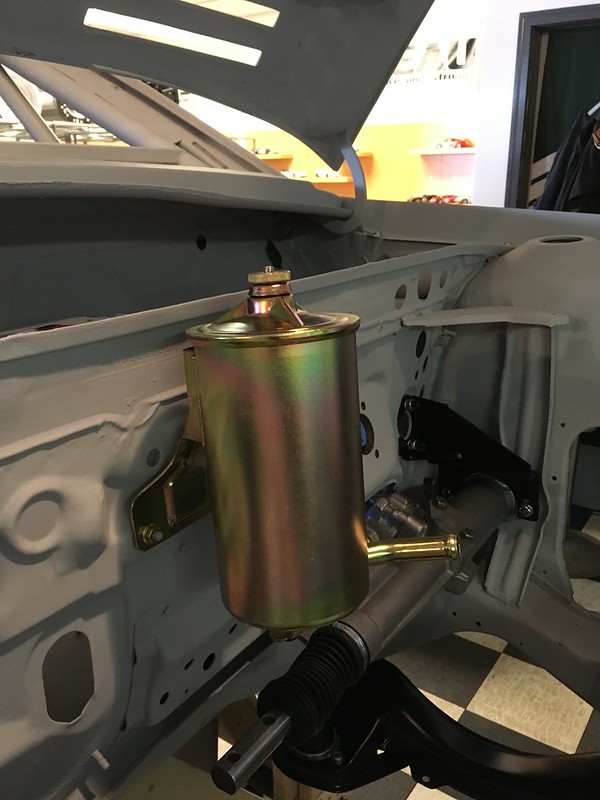
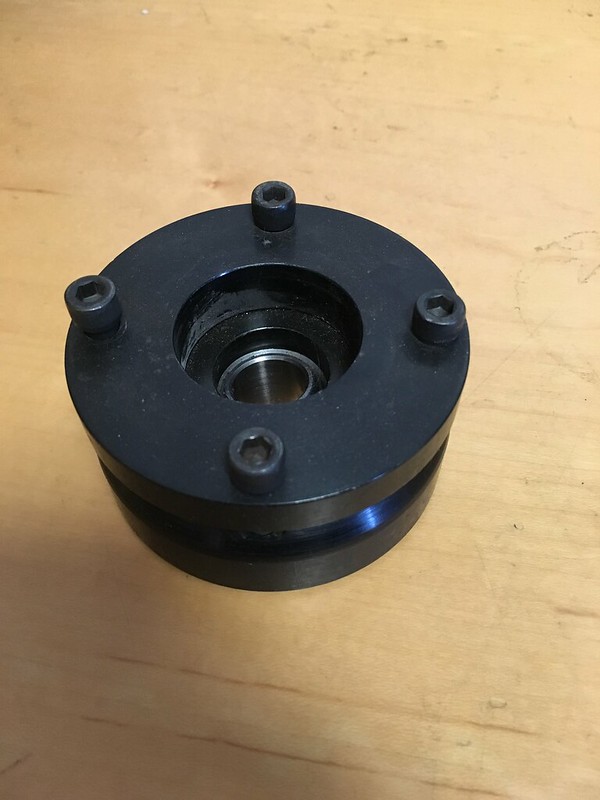
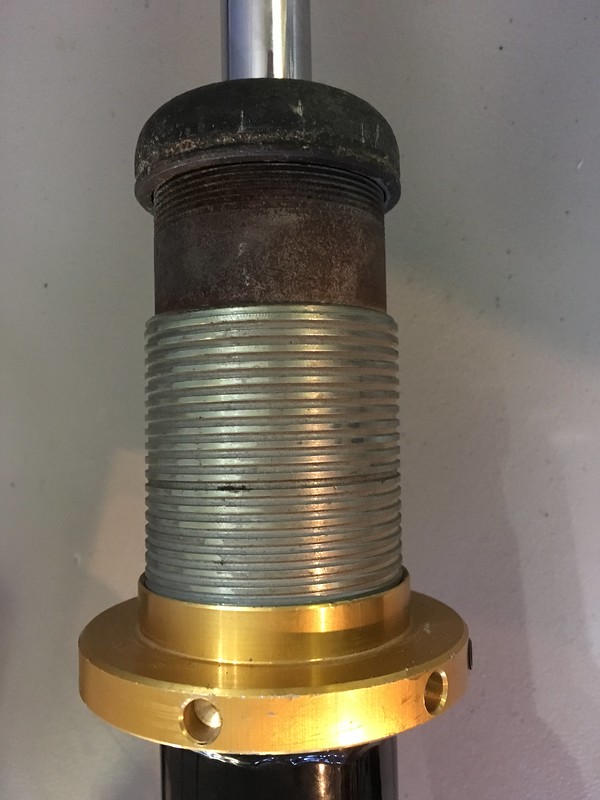
The tops of the struts are also unfinished. We are concerned that these may corrode, especially the threaded sleeves. We are hoping our plating shop can zinc dichromate just the top portion as paint would be too thick.

And we thought not having to stick to OE parts would make this project fun!

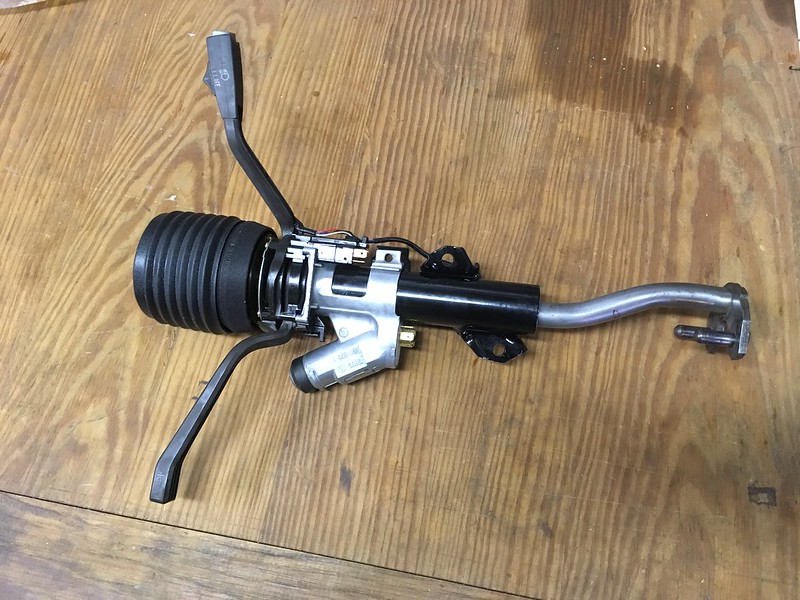
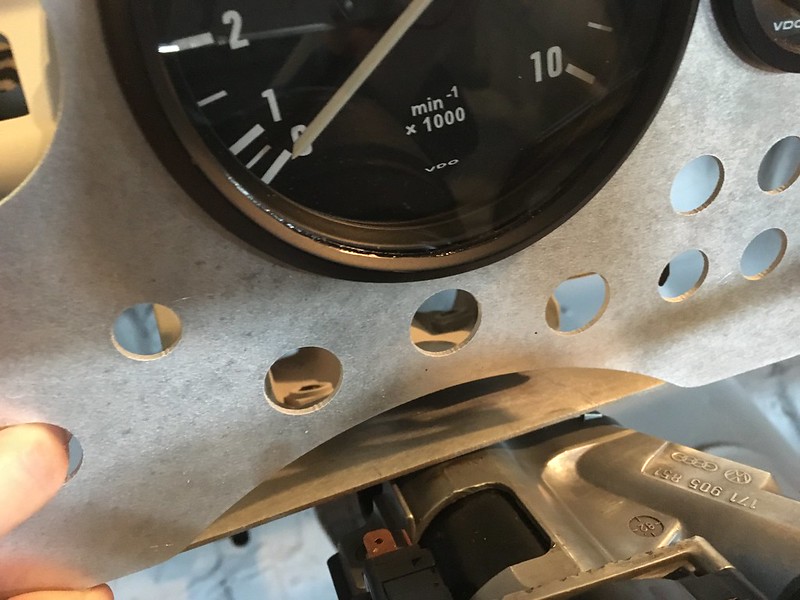
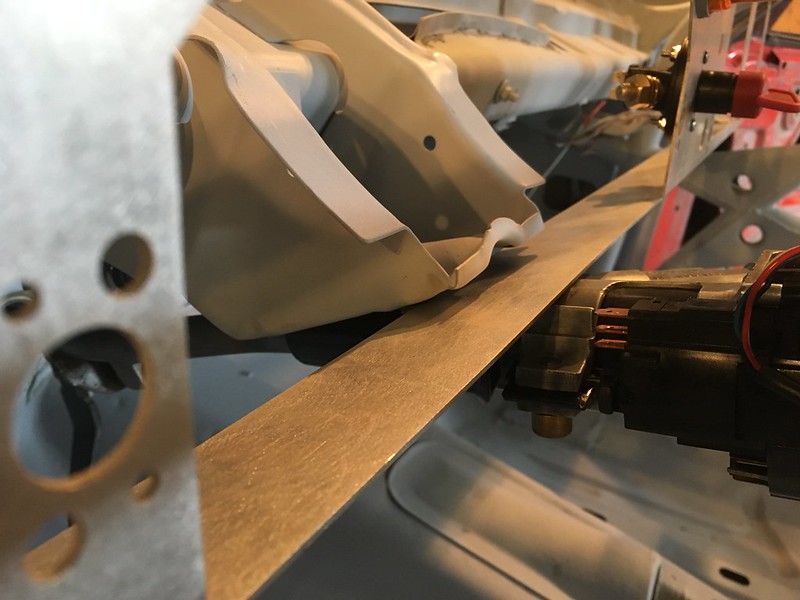
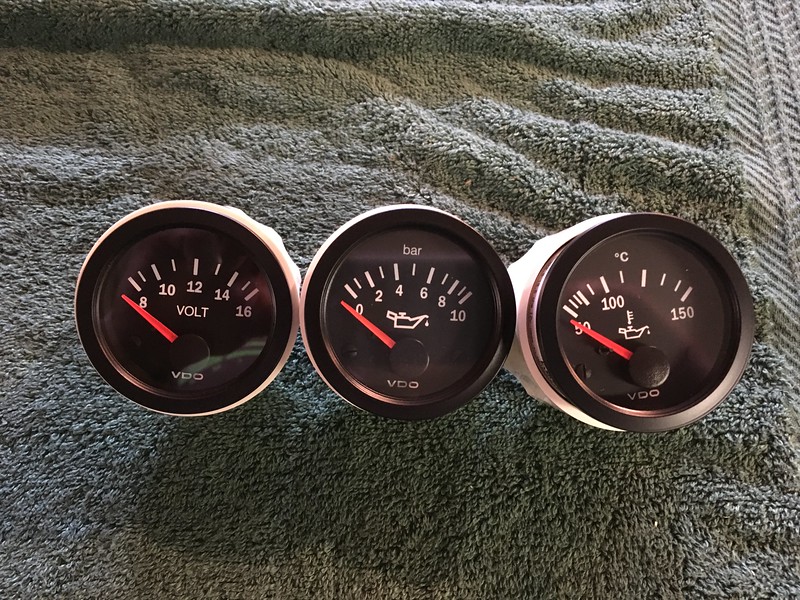
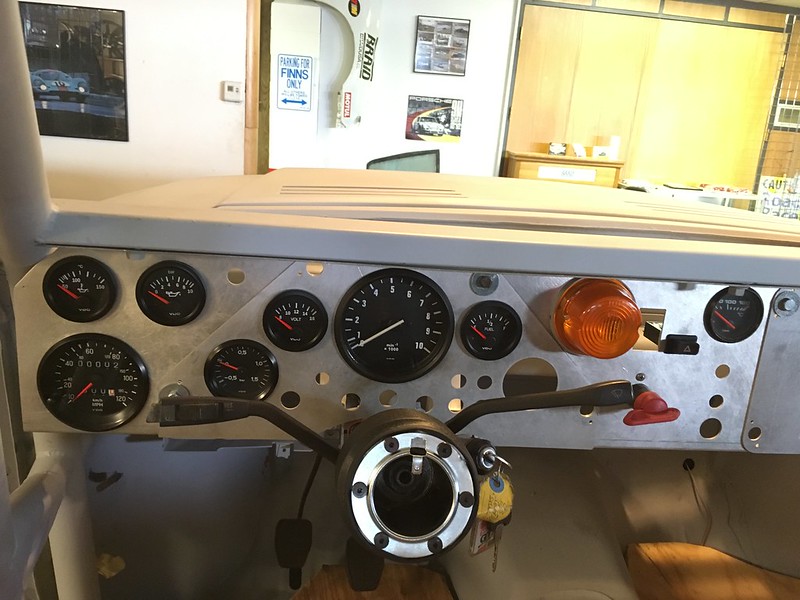
On a brighter note we did have some small victories with the dash. We found and mounted a VW Beetle headlight switch:

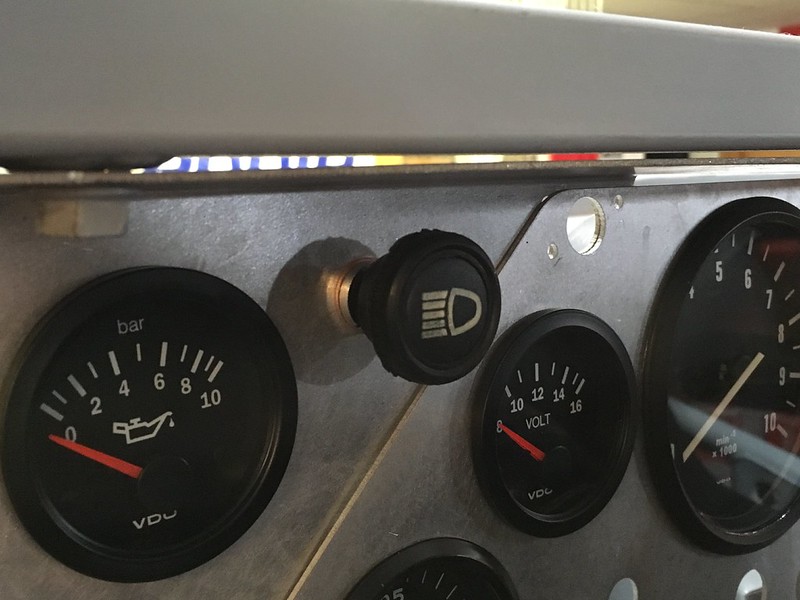
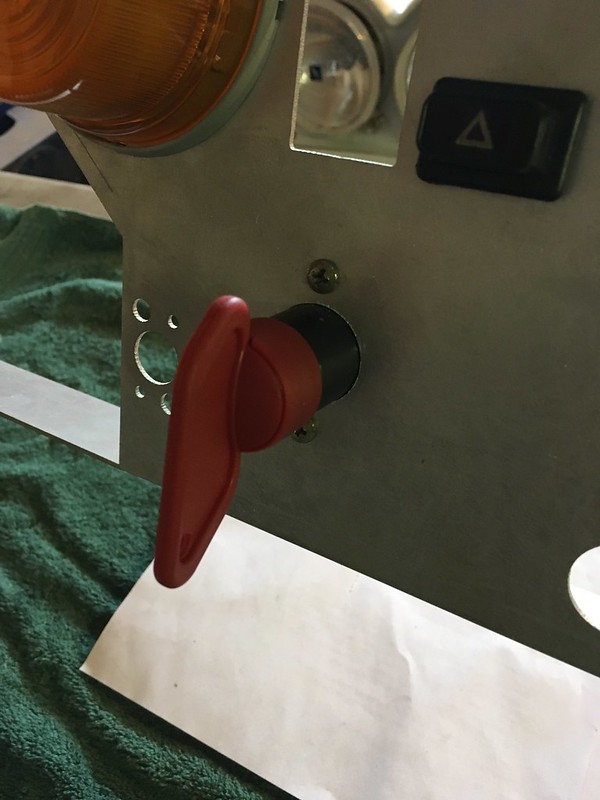
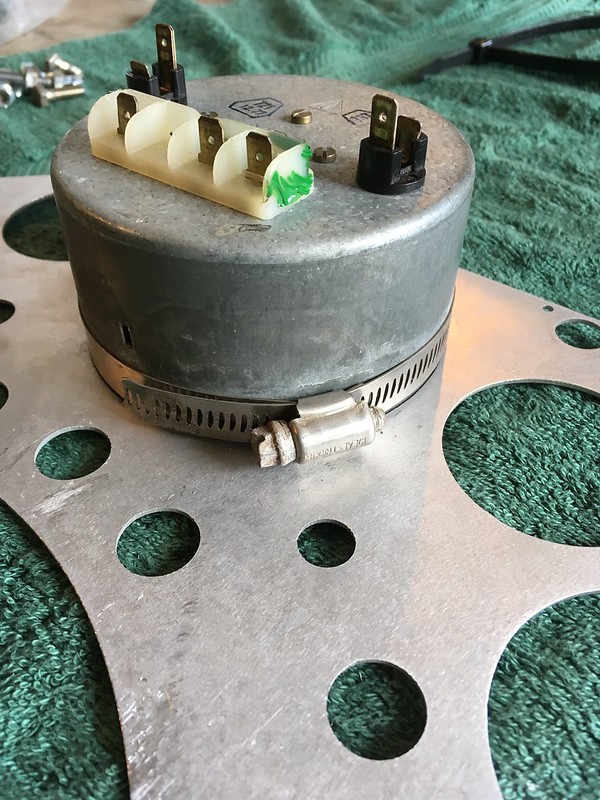
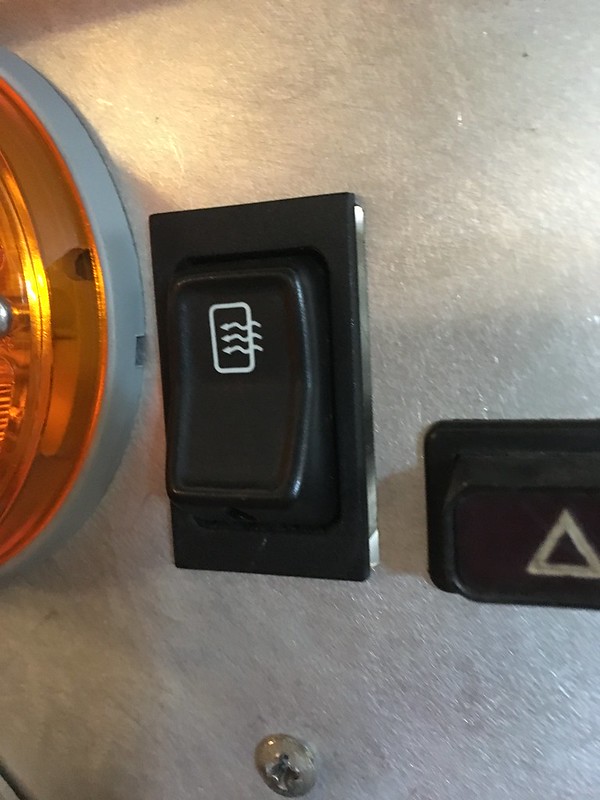
And the period correct heated rear window switch:

Next update should include how we solve all the suspension issues, hopefully.

de80q
de80q Reader
9/11/18 2:19 a.m.

Just in case you check here more often, I'll post it here as well.  


When using sold strut mounts like those, you, normally need to use a special nut that extends into the spherical bearing to allow more thread engagement for proper torque.

teamilluminata
teamilluminata HalfDork
10/8/18 10:30 a.m.

Like the suave, sophisticated gentleman in this video says “The car has legs now”


How did we get to this point? Well, as we discussed in our last post the delrin bushings are wider than the sleeve that goes through them. This sleeve needs to end up slightly proud of the bushings so that it gets clamped in the mounting slots on the subframe and does not move. Then the bushings can rotate on the sleeves. Fortunately the sleeves appear to be the correct length but they were also too tight in the bushings so we relieved them a little:


The bushings are also too thick so we removed some material to make them shorter than the sleeves and also added a chamfer so they would fit in the subframe slots:


Then we had to scour the globe to find ball joints:


Our top mounts that came with the car are held in place by four set screws so we had to get the drill out again:


We were worried that our bearing, spacer and nut combination wouldn’t have enough articulation so we assembled a front strut and put it through its entire range to see if it would be enough. It was, thankfully:


To celebrate this small milestone we threw on a wheel off our 85.


Maybe next update we’ll have figured the actual wheels and tires we will use. Maybe you can help by suggesting a wheel from the BRAID range. https://braidusa.com/collections/wheels

teamilluminata
teamilluminata HalfDork
10/17/18 8:08 a.m.

TIRES

It’s time to start thinking about wheels and tires. Well, it’s a bit early but a) we are obsessed about wheels and tires and b) this project is as much about showing off our BRAID wheels as anything. At least that’s how we justify it.

You may recall we previously purchased a set of BRAID Serie 6 in 16x9 and mounted some 245/45-16 Bridgestones on them.


This size combination seems to be typical of what people run on these tribute cars but we ordered them way too soon (obsessed remember) and another build needed them for their project so we let them go. We always thought we would order up the exact same thing again at a more sensible phase of the project. Then we saw this:


And we knew what we had to do.

We have always loved the Michelin TB15s as we sell hundreds of 911 wheels for them and they look just perfect on those RSR recreations, but we never thought we’d have a car suitable for them as the sizes they come in are either too narrow or too wide for anything we have. Or so we thought. It turns out that back in the day at least some Quattros were running the 23/59 - 15 TB15s (about a 270/40R15) so we knew they should fit on our car too. Unknown though is at what offset and rim width. Michelin only make the 23/59 – 15 in a TB5 now so we ordered up a TB15 in 23/62 – 15 from Coker tire on the condition that we could return it if we didn’t mount it. Specs for the tire are:

Section width: 10.6”/270mm
Tread width: 9”/229mm
Diameter: 24.6”/625mm
Rim width: 8.5”-10.5”
Measured rim: 9”

Unfortunately we had nothing similar in the shop to test with; or so we thought. One of our customers keeps his 944 Turbo race car in the building and it runs Hoosiers in 275/35R17. The specs on those: are

Section width: 11”/279mm
Tread width: 10.3”/261mm
Diameter: 24.7”/627mm

So just slightly larger than the TB15, apart from tread width which is quite a bit larger. We had us a surrogate.


Now some of you might point out that a Porsche 944 is not going to bolt up to a Quattro. Well normally that’s right but we have some hub adapters that allow us to bolt a set of 911 Safari wheels to our Audi Allroad so we employed one of those in our test fit. The 944 wheel, which coincidentally is a BRAID Serie 6, has an offset of 55. Our hub adapter is 27 and we also have some 18mm spacers. That makes the resultant offset of the test setup et11, right about where we anticipate our new wheels need to be. Time to find out.


The Hoosier cleared the strut but kissed the tie rod ball joint. Not to worry, The TB15 is not as wide at that point so should clear.


On full lock and full compression the Hoosier barley kissed the rear inner fender. OK, same as above, the TB15 should clear.


Lots of room under the front fender too:


So with the front suspension in its worst orientation (full lock and full compression) the big Hoosier almost fit. We were so happy as we came away very confident that the smaller TB15 would have no issues. Still, we best throw it on the rear just for fun right? Uh oh! What’s this?


Lots of interference with the rear arch. Who would have thought? It only has to go up and down. It might fit if we tucked it in a chunk and hacked the arches up but then it might rub on the front inside and look odd. We concluded the overall diameter of the Hoosier and the TB15 precluded us from using the TB15 on this car. What to do? Well, remember the picture we found showed a much smaller diameter 23/59 -15? That size is available in a TB15 which might even be a better tread pattern for us anyway. So we returned the TB15 and ordered up Coker’s last set.


And mounted one on a 15x9 Porsche Serie 1 we had on display to see if that width would fit it well.


It would probably be happier on a 15x9.5 or even a 15x10 but by going with 15” we have somewhat painted ourselves into a corner, in that there aren’t any other 15” tires this wide available and who knows how long the TB5 will be around. By restricting ourselves to a 9” wide rim we have at least left the door open to some currently available and suitable 245 or even 225 tires. Hopefully we never need to go through that door.

So the next big issue to resolve: what 15x9 BRAID wheels to order to mount these on? Her are the candidates:

https://braidusa.com/collections/whe...5-x-112+15-x-9

What would you choose?

1 2 3 4 5

You'll need to log in to post.

Our Preferred Partners
hze1d9D3pv5HWnCkPAfxolzgCVS1pGPb5WI20XhlYPZ0wP9IwyMXzZKMCuG3oeP1