1 2
volvoclearinghouse
volvoclearinghouse SuperDork
8/29/16 11:12 a.m.

Disclaimer: I wasn't sure where to put this thread. It's Grassrootsian, to be sure, but also relevant to classic motoring and racing. So if anyone up high feels it should be moved, please do so. Furthermore, I am not a professional welder, a professional mechanic, or known for particularly good hygiene (just ask my wife). As a result, do not attempt this yourself, unless you're as stubborn and committed to taking the hard way about any project as I am.

Background: I've owned my 1964 Chevrolet Corvair for about 9 years now. I drove it home from California to Maryland, and it's been a good little summertime cruiser. It's also taken many long trips, most of which have involved some sort of along-the-way repair, but none of which left me stranded.

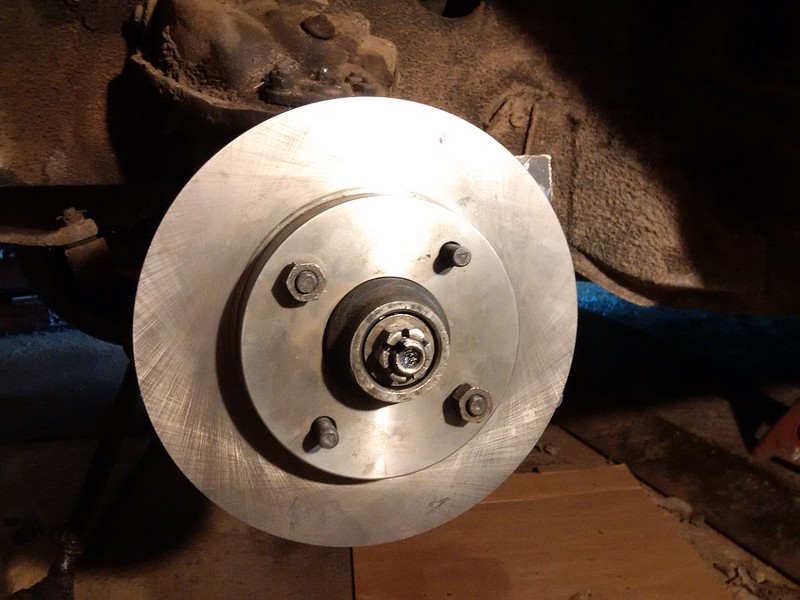
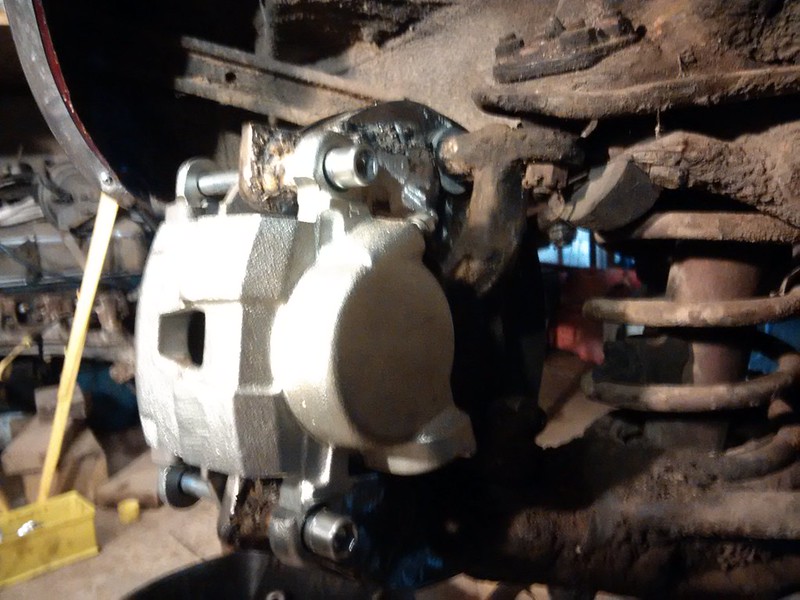
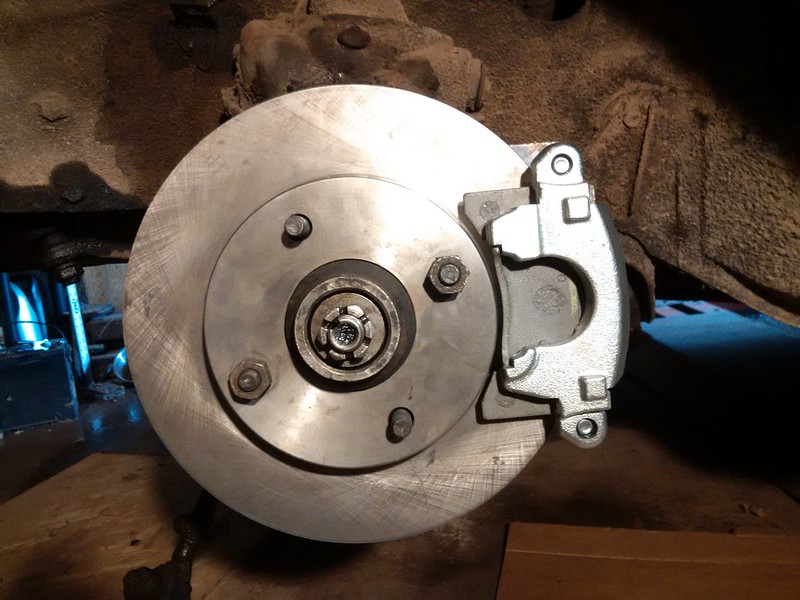
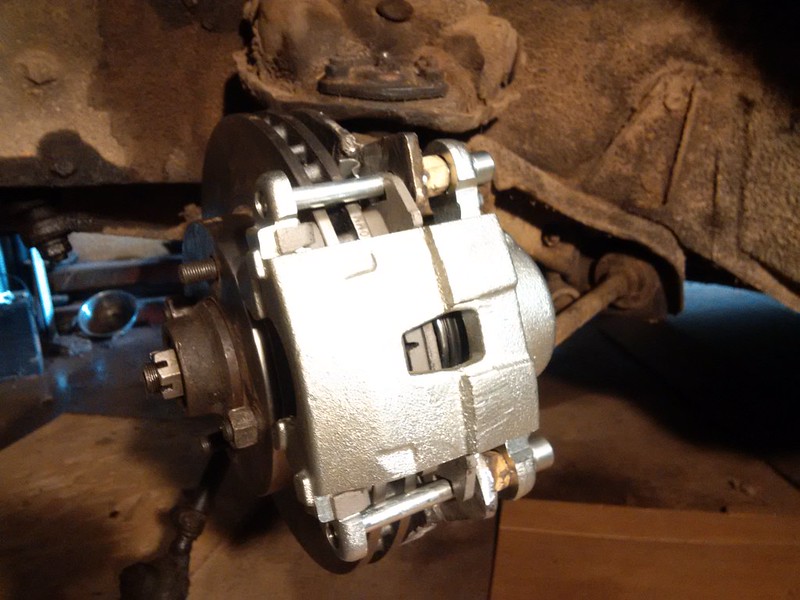
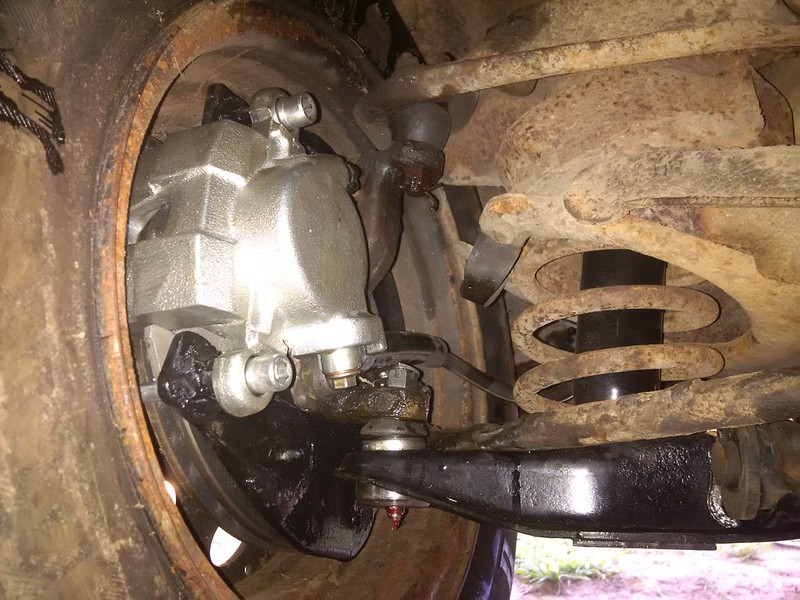
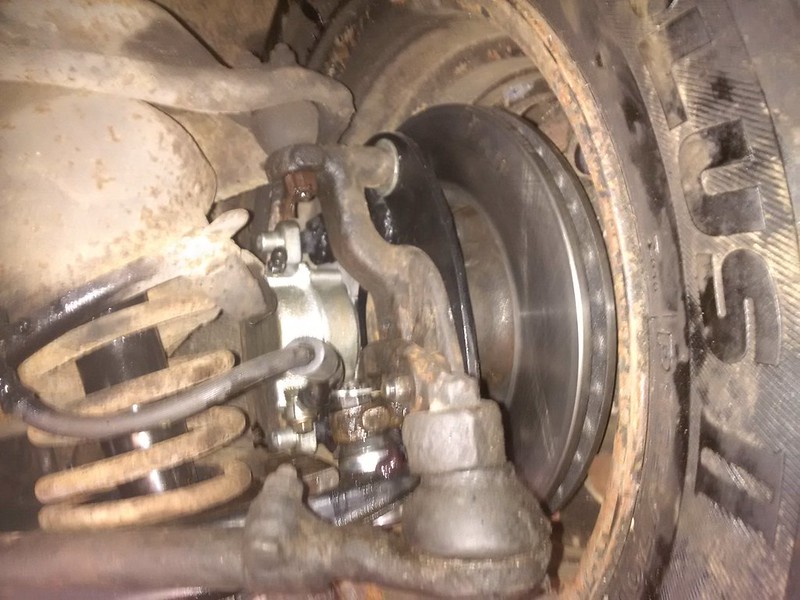
However, one very glaring weak point for the Corvair is that of many older cars: the brakes. I've worked on them, adjusted them, and tried all sorts of magic, but the car just never really stopped well. One wheel would lock up, or it would pull, or they would fade. And on a swing-axle car with a rear-weight bias, the last thing you want to worry about is your brakes. Trust me, there's a lot more you need to focus on.

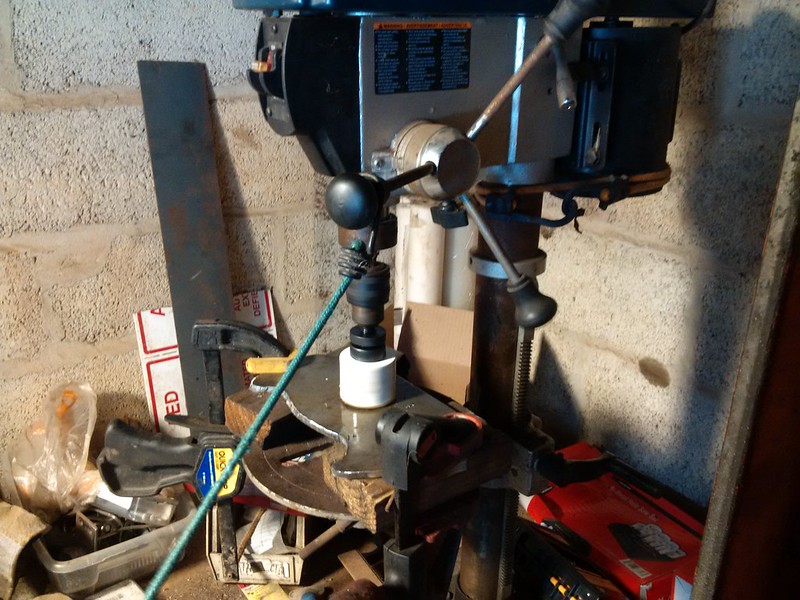
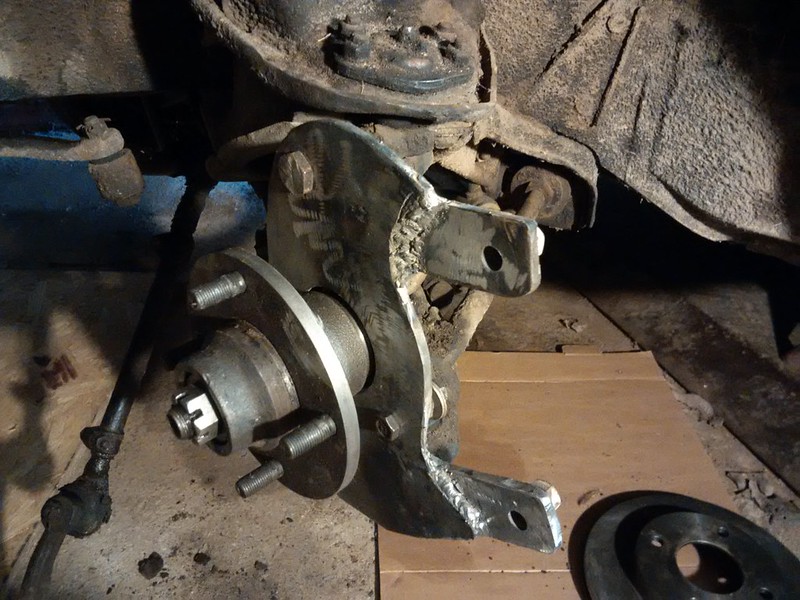
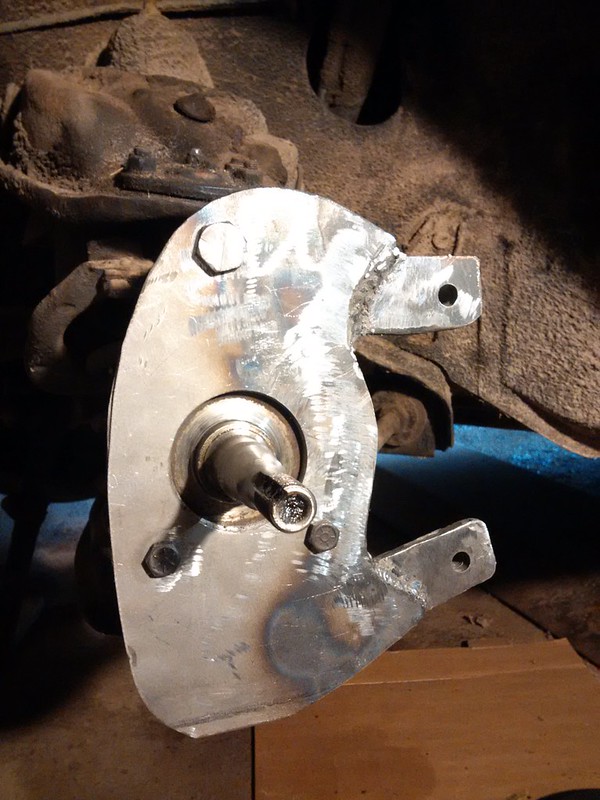
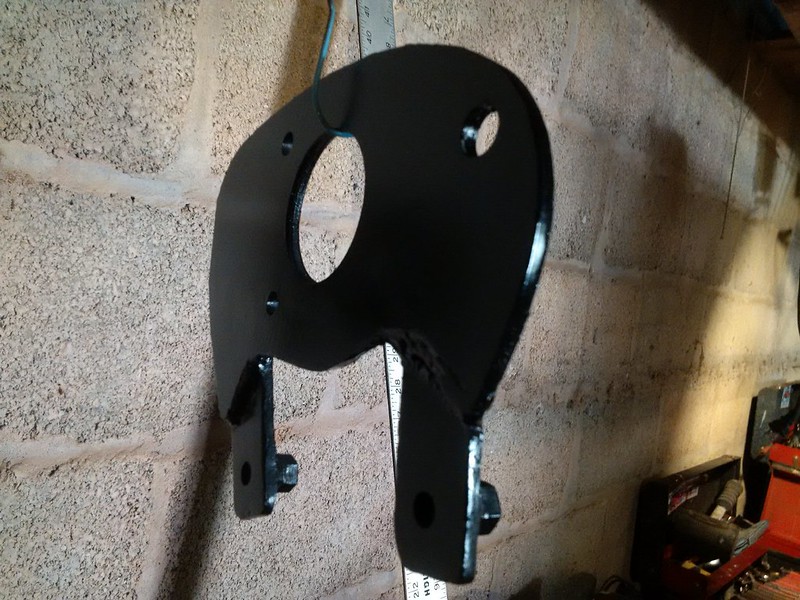
After one particularly harrowing sideways slide, I took the car off the road and made up my mind that I would not drive it again until the brakes were completely fixed. That was, unfortunately, about 2 years ago. This spring, though, I finally got a plan together and started work. A little spoiler: it's done, but I wanted to do a write-up on it here, both for future reference for myself, and for the benefit of others who may also be struggling with the brakes on their Early (1960-1964) Corvairs.

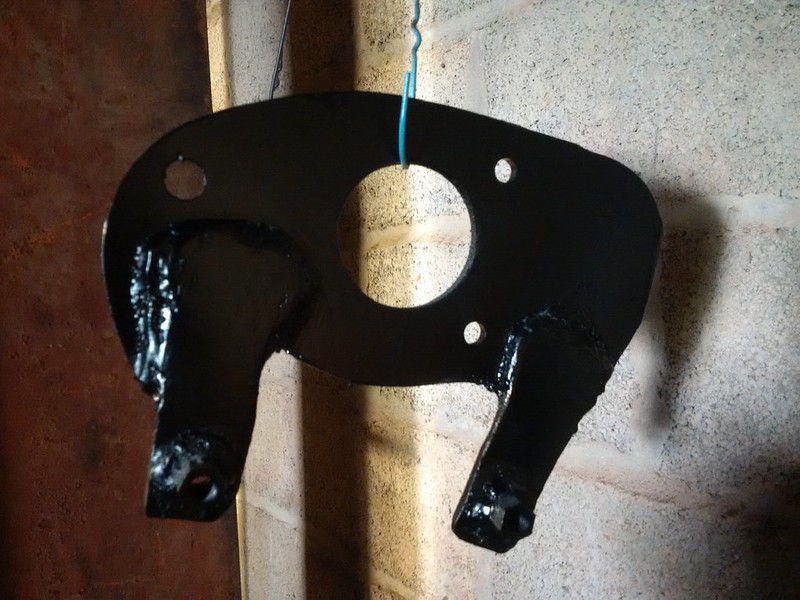
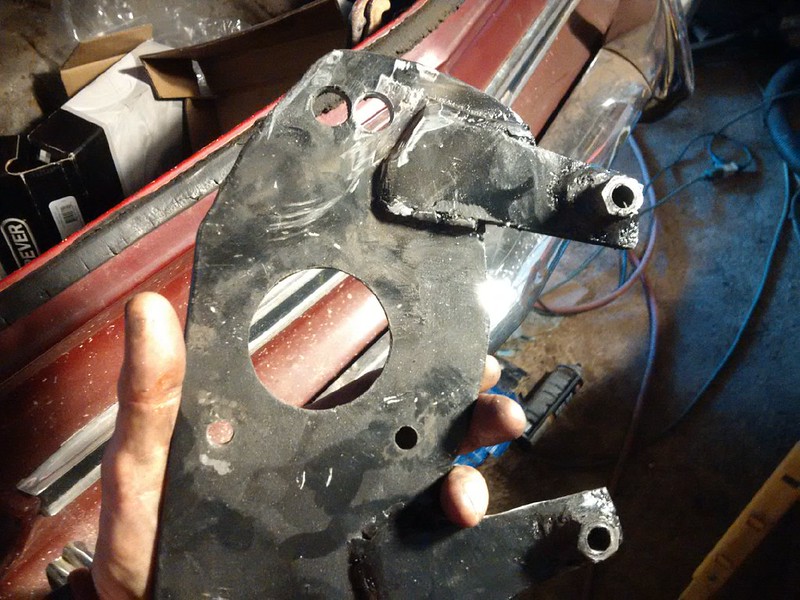
Naturally, if you own a late model (65-69) 'Vair, none of this matters. You can simply bolt on some parts sourced from the later GM parts bin and have disc brakes in a weekend. But the early cars have always had their share of "uniqueness"...

volvoclearinghouse
volvoclearinghouse SuperDork
8/29/16 11:36 a.m.

So when I decided to "do" the brakes, I made up my mind to convert the fronts to disc. After some research, I found that there's basically one "kit" out there that comes in a few different varieties, to put discs on the front of the early 'vairs. Clark's Corvair sells the kit ($700.00), and others sell things that are similar. In essence, this kit uses a front disc and hub and caliper from a mid-1970s' Dodge Colt. Since this is a small car, this conversion allows keeping the stock 13" wheels, which is its main benefit.

Unfortunately, mid-70's Dodge Colt parts are not exactly growing on trees anymore, and the prices reflect that. The hubs in particular are difficult to find- I guess all the Corvair people scooped them up for their earlies!

The real difficulty lies in the Early Corvair bolt pattern 4 x 4.5". Not many cars have that bolt pattern, and even fewer of these were older cars with smaller wheels...and disc brakes. Since I didn't want to change the bolt pattern, this was the needle I was trying to find. However, I had upsized the wheels on my car to 14", with no intention of returning to 13" wheels, so that opened up options a little...

After looking at bolt patterns for 40 years' worth of cars, followed by hours scouring Rock Auto, looking at rotor sizes, I narrowed the search down to a few vehicles: 1990's Ford Festiva and Geo Metro, late-80's Plymouth Colt, early 80's Mazda RX-7, and the early 90's Infinity / Nissan Stanza. Since the Nissan parts were least expensive and most readily available ($20 for a rotor at the auto parts store), I bought one rotor for a 1991 - 1996 Infinity G20 and brought it home to try out.

IMG_20160603_172654

The bolt pattern was right, the stud size was perfect, the 'hat' distance looked workable, and the hole for the hub center was the right size. However, the outer diameter of the Corvair hub was about 1/4 of an inch too large to fit into the hat of the rotor. So, after knocking the drum off the hub (they are riveted on from the factory), I took the hub to a local machine shop and had it turned down to 5.50" outer diameter. The result is what you see above.

So far, so good.

volvoclearinghouse
volvoclearinghouse SuperDork
8/30/16 7:13 a.m.

Getting the rotor to fit the hub was relatively easy. Next up- find a caliper. Initially, I thought that using the mating caliper (from the 91-96 G20) would be a good idea, but after buying one, I found out it was just too massive, and there was no real way that immediately presented itself to easily mount it to the Corvair spindle.

This is what the spindle looks like, stripped of everything that rotates or was part of the drum brakes.

IMG_20160822_184138

It seemed like that 3 holes that the drum brake assembly mounted to would make good mounting points for a caliper bracket. The top hole is slightly out-of-plane from the bottom ones, but a small spacer could fix that. I grabbed some cardboard and a razor and cut out a mock-up.

From doing a rear disc conversion on our LeMons car, I knew the GM metric calipers had mounting points in the same plane as the 3 holes on the car. Those calipers came on the 80's GM RWD mid sizers- Monte Carlos and the like, that are super common. The calipers are fairly compact and very inexpensive. And I had some on hand- the spares for the LeMons car. So I decided to go with them. Fortunately, the disc thickness of the cars these calipers went on was very close to the thickness of the Infinity rotor- another key factor.

I plasma-cut out a plate, using my cardboard template, and drilled the center hole for the spindle.

IMG_20160807_125614

Then I cut out two "arms" that would serve as mounting points for the caliper. I had to do this, and weld them onto the main plate, in order to clearance the caliper properly from the rotor. I also welded some threaded spacers onto the arms for the caliper mounting bolts to thread into.

IMG_20160603_172557

These calipers are quite interesting. The two bolts that mount the caliper to the car also serve as the sliding bolts for the floating caliper. Pretty clever. In order to make sure everything was perfectly aligned, I drilled the holes in the arms first. Next, I threaded a caliper mounting bolt into a threaded spacer, and then slid this through the hole in one arm. I then tack welded the spacer onto the arm, removed the bolt (so it wouldn't get welded inside the spacer!), and finished welding the spacer.

After welding a spacer to each arm in this fashion, I mounted the caliper to the arms and clamped the arms to the main backing plate. This allowed me to fine tune the position of the caliper relative to the rotor, and make sure the caliper wouldn't hit anything on the car as the front wheels articulated. Finally, I welded the arms in place.

IMG_20160603_172546

IMG_20160603_172453

The three mounting holes in the main plate were tricky to get perfectly drilled; I had to oversize them by a little to get it all to work without binding.

Test fit the caliper:

IMG_20160603_172907

Test fit the rotor and caliper:

IMG_20160603_172925

IMG_20160603_172901

Looking good so far....

volvoclearinghouse
volvoclearinghouse SuperDork
8/30/16 11:51 a.m.

So, I got a little cocky, and decided to clean up the welds and paint the brackets.

IMG_20160822_185559

IMG_20160822_185549

Nice, right?

The project got detoured for a bit when I discovered how worn out the front suspension was. I ordered a new set of anti-roll bar bushings, rebuilt lower A-arms (the lower ball joints were trashed), a steering idler arm, and a few other odds and ends. I also replaced the old single pot master cylinder with a dual from a 1968 Corvair. It bolted right in the same place, with the same hardware. Of course, this necessitated running all new front brake lines.

IMG_20160822_184151

The stock line normally ends at that upper bracket. I extended the line down and welded on a new bracket to the front suspension crossmember, where the new brake hose connects to it.

When I went to put the whole thing together for what I thought would be the last time, I hit a snag. See picture below. Where the banjo bolt connects the hose to the caliper, when the wheel was turned full lock, would hit the trailing-stabilizing arm of the suspension. It hit just enough to make me worry...plus, as the pads wear, the caliper will move inboard, meaning the contact would get worse.

IMG_20160828_173806

volvoclearinghouse
volvoclearinghouse SuperDork
8/30/16 12:06 p.m.

I decided the easiest way out of this problem would be to rotate the entire bracket assembly around a few degrees to rotate the caliper up and forward on the rotor. This would get the banjo bolt up and over the suspension arm and clear it.

Using the old drum brake backing plate as a guide, I scribed out 3 new mounting holes clocked about the center spindle hole so as to rotate the caliper into a better position.

First the top hole:

IMG_20160825_173944

Then the bottom ones. And then, I welded over the old holes and ground them flat.

IMG_20160825_180111

IMG_20160825_180106

Fun times.

Of course, I then had to grind, sand, clean, and repaint the brackets. Happily, the modification worked, and the brakes finally went together as planned.

IMG_20160828_173722

After another day of replacing the rear brake hoses, finishing up the suspension work, bleeding the brakes, and fixing the fuel lines (one has to remove the gas tank mounting strap - the gas tank is over the front suspension - in order to replace the sway bar bushings) it was ready. I poured in a few gallons of fresh gas and started the car for the first time in over 6 months.

Other than an unpolarized generator (a thing that happens on old cars if you disconnect the battery for too long) the engine fired right up and the car went into gear. I made a few test runs up and down the driveway, readjusted the back brakes (which are still stock), and then went out for a road test. A few stops from 30 mph to rest showed no pulling or locking, just even, sure stops. I even let go of the steering wheel and mashed the pedal, and the car just stopped without darting. When I got back to the garage I could feel some heat coming off of the front rotors so they were definitely doing their thing!

The car needs a few things to go back on the road - chief among them being a BATH! - but the brakes seem to be working as planned. I may install a variable proportioning valve in the back brake line, to experiment with front-rear balance, but the car doesn't dive under hard stopping and pedal feel is good.

So, I'm going to call it: SUCCESS!

wheelsmithy
wheelsmithy Dork
8/30/16 12:56 p.m.

Very cool!

volvoclearinghouse
volvoclearinghouse SuperDork
8/31/16 7:11 a.m.

In reply to wheelsmithy:

Thanks! I know there's some Corvair folks on this board, this may be of interest to them.

Tim Suddard
Tim Suddard Publisher
9/1/16 9:16 p.m.

We did a story about this a few years ago, as part of our Corvair project car series.

volvoclearinghouse
volvoclearinghouse SuperDork
9/1/16 9:39 p.m.
Tim Suddard wrote: We did a story about this a few years ago, as part of our Corvair project car series.

Possibly before I became a subscriber. What was the solution then?

Today I pulled all four wheels to see how things were doing after a little driving. As it turns out, the caliper pistons were just barely touching the fabricated backing plates- no big deal; an angle grinder took care of this without needing to remove the plates. I touched up the grinds with paint.

I readjusted the back brakes to take some "slop" out of them. And I removed the front rotors, hit them with brake kleen, and then installed a set of Raybestos semi-metallic pads (I'd left the test-fit pads on there for the first drive, but they were all sorts of dinged and oily from being installed and removed repeatedly and laying about the garage).

After doing this- whoa, what a difference. I'd considered the modification a success already, but now the 'Vair REALLY stopped. Like, I wish there was more than a lap belt stopped.

I did order a proportioning valve for experimentation. We'll try that next week, as the brakes still seem very slightly over-rear-biased. Also, in further research I found that a master cylinder from a manual-brake '75 GM 1/2 ton pickup is a bolt-in swap, which gives a larger reservoir for the discs (which will slowly drain the MC reservoir over time as the pads wear). I'll keep an eye on fluid levels and possibly swap to this MC over the winter.

Finally, I installed a rear seat belt in the car, so we could take our daughter with us on the next night on the town- which will be in "Daddy's Car with No Top".

volvoclearinghouse
volvoclearinghouse SuperDork
9/7/16 7:07 a.m.

Adjustable Proportioning Valve installed. Nice little compact unit from Summit Racing. $40 or so. Drove the 'Vair into work this morning and she handled the 40 mile drive in rush hour traffic without any issues. I missed convertibling.

minimac
minimac SuperDork
9/10/16 8:40 a.m.

Very nice installation. Thanks for sharing.

SyntheticBlinkerFluid
SyntheticBlinkerFluid UltimaDork
9/11/16 11:58 a.m.

Nice! EM brakes have always been kind of iffy. I don't love them on my Dad's '64. LM brakes are way better because they essentially put Chevelle brakes on them and they stop very well for a drum brake car.

I'm going to pass this along to the Corvair Owners Group on FB, some people would be interested in this.

volvoclearinghouse
volvoclearinghouse SuperDork
9/12/16 10:42 a.m.

In reply to SyntheticBlinkerFluid:

Sure, please do. I shared it with a few of my Corvair friends local but I'm not on any FB Corvair groups. I do lurk on the Fastvair yahoo group, and had a few people interested on that. Mostly in my finding out about the Infinity G20 rotor fit. A lot of them wanted to criticize my welding.

AngryCorvair
AngryCorvair UltimaDork
9/12/16 11:33 a.m.

I used Nissan Altima rotors on my Lakewood, with 2nd-gen RX7 four piston calipers. Sold the car before completion though, but in theory it was slick.

volvoclearinghouse
volvoclearinghouse SuperDork
9/13/16 8:57 a.m.

In reply to AngryCorvair:

What year range Altima rotors? After getting the bolt pattern right, the other factors in finding a rotor were the inside diameter that fits over the hub, the center hole diameter, and the hat spacing. Curious what those were on your rotor vs the Infinity rotor I used.

4 piston calipers are neat, but I like sliders. Less risk of knock-back (Which I've had on the 3 piston calipers on my 122s) and simpler to mount and align. Plus the GM calipers are $25 a piece, and good semi-metallic pads are $25 a set.

This whole conversion, just counting the brake stuff, cost me right around $325.

$100 - Machining the hub diameter to 5.50" to fit the rotors $50 - Infinity G20 rotors $50 - GM Metric Calipers with pins $25 - Raybestos semi-met brake pads $30 - Soft lines $10 - Banjo bolts and crush washers $20 - threaded bushings for mounting calipers $0 - Free 1/4" steel plate to cut caliper bracket out of, from the shop that machined the hubs $40 - new hard lines and adaptors to mate with existing lines in car

Of course, I did other stuff too like replace the Master cylinder and overhaul the front suspension, which weren't technically needed for the brake conversion but needed to be done anyway.

Jerry From LA
Jerry From LA SuperDork
9/15/16 7:21 p.m.

Next up: Shoulder harnesses.

Kreb
Kreb UltraDork
9/15/16 10:25 p.m.

Are you doing anything about the steering ratio?

volvoclearinghouse
volvoclearinghouse SuperDork
9/16/16 7:08 a.m.

I like the stock steering ratio. Yeah, it's slow, but I like the feel and the effort. I drive spiritedly, but I also like to cruise in the car.

Shoulder harnesses...yeah. Not really any way to mount them. I guess if I put in some seats from something like a Sebring that have integral seatbelts. But then they'd look like ass. And I'd have the safest seats in a car with crumple zones roughly as rigid as a riding tractor's.

AngryCorvair
AngryCorvair UltimaDork
9/16/16 12:37 p.m.

In reply to volvoclearinghouse:

1998 was the year I told the parts guy. I found it by searching by bolt pattern in Brembo's online catalog. I'm confident your rotor and my rotor are the same part. I also had to turn the hub OD and IIRC the pilot. I chose the RX calipers because I wanted to maximize effective radius, and I wanted a cool looking brake since I was using a very thin-spoke wheel.

mlwebb
mlwebb New Reader
9/18/16 9:57 a.m.

Nice work!

I put the same rotors on my Datsun roadster, with Volvo calipers. Michael

volvoclearinghouse
volvoclearinghouse SuperDork
9/19/16 7:03 a.m.
AngryCorvair wrote: In reply to volvoclearinghouse: 1998 was the year I told the parts guy. I found it by searching by bolt pattern in Brembo's online catalog. I'm confident your rotor and my rotor are the same part. I also had to turn the hub OD and IIRC the pilot. I chose the RX calipers because I wanted to maximize effective radius, and I wanted a cool looking brake since I was using a very thin-spoke wheel.

Those are slightly different. The rotors from the 91-96 Infiniti G20 only fit that car and IIRC the 90-94 Stanza. I didn't need to do anything with the pilot- these rotors just slipped on right over the Corvair hubs, once I machined the OD of the hub down to 5.50".

Rock Auto has a pretty good system to see dimensions on their online site, too.

govairs
govairs
1/31/19 11:39 a.m.

In reply to volvoclearinghouse :

Great information. Do you have templates for the brackets you made? Can you make some more? I don't have the equipment to some but can get them made. Thanks again.


ScottElliff
ScottElliff New Reader
7/19/19 5:13 a.m.
volvoclearinghouse said:

Sure, please do. I shared it with a few of my Corvair friends local but I'm not on any FB Corvair groups. I do lurk on the Fastvair yahoo group, and had a few people interested on that. Mostly in my finding out about the Infinity G20 rotor fit. A lot of them wanted to criticize my welding.

Great job. But you need to check the places of welding all the time. This part of the car can withstand heavy loads and probably undergoes the greatest vibrations, therefore, cracks may appear in the places of welding. Usually, I try to avoid welding in this cases and instead apply a threaded connection or monolithic cast parts. It's just my opinion.

volvoclearinghouse
volvoclearinghouse PowerDork
9/6/19 1:59 p.m.

In reply to ScottElliff :

I just pulled the front wheels off a few weeks ago and happy to report, everything looks great.  Welds are holding well, no cracks or other issues.  And the car stops great.  I overhauled the rear brakes (drum, still) also and everything brake-wise is great.  

I've welded a number of brake caliper brackets before- in fact, our LeMons car has some adaptors I welded up over 5 years and 7 or 8 races ago.  They still look perfect.  

jantheman
jantheman New Spammer
7/4/20 7:12 p.m.

Good Job!! Am sure it took alot of time to do this but worth [the paddling] effort

1 2

You'll need to log in to post.

Our Preferred Partners
0EWwY1Uu0oj1ytM3TFuuOtkcZ1JxUUxGYianh4eALnFQzOgBtyCz8tsC7gIWlZ99