Honsch said:
mke said:
these guys show a custom speed as one of their examples
They list a 3 color 4x6 at $168...but this is all one print that they align vs 3 1 color prints I'd need to align with the cheaper option
At that point it's cheaper to buy a vinyl cutter and some vinyl if you have more than one gauge.
can you cut that small of a font ?
I think making 5-10 of them to divide up the cost is a way to go ......

Honsch
New Reader
12/18/20 2:20 p.m.
californiamilleghia said:
can you cut that small of a font ?
How small of a font are you talking about?
The big pain is weeding (removing the vinyl that you don't want transferred) before moving it to transfer tape.
You could also contact local sign shops. Most of them do vinyl cutting and printing. I suppose you could have any details that are too small to cut out printed on the vinyl.

wspohn
Dork
12/18/20 4:20 p.m.
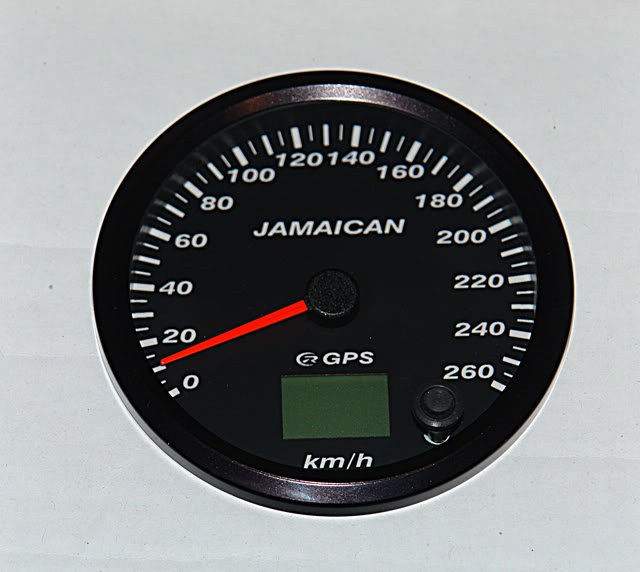
There are people making templates for gauge face reproduction (they do it for my old MGs) as well as businesses like Speedhut that offer a fair degree of customization of their gauge faces.
Here is one I had them do for my Fiberfab Jamaican bodied MGA with GM V6 installed
I 3D printed thin plastic gauge faces, then printed the color backgrounds on paper to lay behind them.


mke
HalfDork
12/19/20 6:39 p.m.
I made a CAD model of what I want....this may not be the bet approach but its what I know how to do.....now to see if I can get decent dry transfers made from the files I created.

mke
HalfDork
12/20/20 2:53 p.m.
Transfers ordered. The cheap price is for 20 day max to ship then cheap shipping is 10 days, so by the end of Jan I guess....unless its 20 business days then mid Feb, $76.
I realized why the images looked different with the background on or off....hide edges command was needed. Then the fight to go from CAD to graphic. Th transfer place had a link to an illustrator like program "inkscape" which I literally could not figure out how to make it do anything, anything at all useful or otherwise. I exported the model as an STL, paint3D imported that and exported a pgn, I found "GIMP" which imported the png and the pdf template from the transfer place as xcf, and once I figured out the correct scaling I could edit the graphic in .xcf format, paste it the now xcf template, then export the finished product as a pdf again because the transfer place doesn't support xcf....but that was good because then I could open the pdf with adobe and print it 1:1 to confirm everything looked right.
Clearly there must be an easier way but this worked I think and here is the result. There was room so I decided extra harsh marks would be the best way to register the 3 prints on the the face. The white I left full, again for registrations to see where everything will be before transferring anything.
Trackmouse said:
Floating Doc said:
 Not entirely relevant to your question, since you are asking about making your own, but just as an FYI, revlimiter does some custom work.
This is from my Miata when I bought it. I swapped it out for a stock cluster.
What did you do with them, and how much?!?!?!?!? God I want those!
I never did follow up on this. I sold this back to the previous owner of the car for $100. It's supposed to be garage art now.
mke
Dork
2/4/21 4:50 p.m.
A quick update....the transfers arrived today. and they look really good. They end up fixing my artwork and sent 2 full sets plus extra of the white stuff.....they must know I'm prone to mess stuff up on the 1st try 


Hey, it now goes to 11.
So, how'd the install go?
mke
Dork
2/10/21 1:56 p.m.
In reply to David S. Wallens :
Update soon. The transfers showed up the same day engine parts did so the tach is sitting at the moment.
mke
Dork
2/12/21 7:11 p.m.
Here it is

first sand, prime paint


then the transfer. I did the white first and I included circles to align with the holes in the metal face to help me get the transfer straight, then taped it down.


Then just rub them on, I used a piece of wood.

then peal off what's left


Then cover the white and lay the yellow over. I extra numbers printed for alignment.


then the same for the red


And its done


