1 2
Curtis73 (Forum Supporter)
Curtis73 (Forum Supporter) MegaDork
9/23/20 7:28 p.m.

I have posted several threads over the last few months requesting all of your adviceseses on a home improvement project; hardwood floors and a fireplace installation.  Some of you asked for updates, but instead of updating a bunch of zombie threads, I thought I would put my "build thread" together.  This is partly so I get a couple pats on the back, but also to show all of you who chipped in and helped just how awesome you are.  This forum, its members, and its staff are an amazing thing.


Curtis73 (Forum Supporter)
Curtis73 (Forum Supporter) MegaDork
9/23/20 7:43 p.m.

Phase 1

Way back nearly a year ago, my neighbor approached me about having two large maples removed from her property.  Both were showing some significant rot in all the wrong places.  It was only a matter of time until tree A fell on her house, and tree B would fall on mine.  I'm employed by a non-profit arts organization, and she's a quardriplegic living on disability and hopes.  I started a GoFundMe campaign and shared it in this thread last November (2019).  I was able to quickly raise the funds (thanks to you folks) and the maples came down on Jan 2nd 2020.  I spent about two months getting all the limbs cut, split, sold, and kept about 1/2 cord for myself.  The trunks went on the trailer and headed off to the sawmill along with some Walnut that the power company had taken down at Dad's farm.  Once at the sawmill, I was discussing with the guy about what the heck I'm going to do with all this maple.  He mentioned he can turn it into tongue and groove flooring.  Shut up and take my money.

By the way... in this next picture, I had 6 pieces this size.

Fast forward to August, and I picked up my 5" x 1/2" maple flooring.  The millwright said he has ordered blocks of curly maple that didn't have as much curl as what he found in these trunks.


AngryCorvair (Forum Supporter)
AngryCorvair (Forum Supporter) MegaDork
9/23/20 7:49 p.m.

I've always suspected, but now have proof: nice wood, Curtis!

Curtis73 (Forum Supporter)
Curtis73 (Forum Supporter) MegaDork
9/23/20 8:02 p.m.

Phase 2: install new fireplace.

I dragged my feet on this one.  Installing the fireplace meant first leveling the floor, which isn't the end of the world for a 52" wide fireplace, but knowing that I was also going to be doing hardwood that meant leveling the whole thing.

I tore out the carpet and (true to being an old house) I discovered things were worse than expected.  From a quick and cobweb-encrusted peek into the crawlspace, I thought I might get lucky.  The joists met at a beam in the middle.  Drop the beam, drop the floor, right?

I started pulling the floorboards out from over the beam, and much to my (not) delight, pieces of the joists were coming off with the floorboards.  Termites from ages ago.

So, the whole subfloor came out for a full assessment.  The full assessment was, I have no idea what is holding this end of the house up.  The complete beam perimeter was nothing but basically gone.  Out came the bottle jacks.  Once it was supported, removing the old foundation beams required one tool... my hands.  I just pulled it all away, hauled it out in buckets.  Replaced the whole perimeter with PT sistered 2x8s

In this next photo, the black tub at the very bottom of the picture is my foundation beams.  That brown pile of used-to-be wood is what was purportedly supporting this entire room.

Ripped out all the joists, replaced with new, added a support beam (totally unnecessary) so the 2x8 joists have no more than a 5.5' span.  I figure I could drive an 18 wheeler on it.

Curtis73 (Forum Supporter)
Curtis73 (Forum Supporter) MegaDork
9/23/20 8:03 p.m.

Phase 3 coming soon.  Have to get the photos organized, and there is a cold beer to be had.

Curtis73 (Forum Supporter)
Curtis73 (Forum Supporter) MegaDork
9/24/20 7:57 a.m.

Phase 3.  Actually installing the fireplace.

Got the permit, cut the wall so I could recess it back about 5" (saving 5" of precious space in the living room).  Easy, right?  Nope.  Old house strikes again.  It's nearly impossible to explain, and even harder to get pictures up in the attic.  This room is an addition, likely added in the 1920s.  The wall I was cutting into ended up being a former exterior wall.  That is fine, except when the addition was made and the previous roof got hipped in with the new, nothing was done to address the fact that they had relied on the simple rafters to transfer the weight.  What once was a load bearing wall was now empty with just a couple short jackstuds to hold some drywall.  No sill plate, no top plate, and the new ceiling had simply been nailed to the 1x fascia.  So I added two 2x studs that went floor to ceiling, then added two 2x6s that went all the way to the rafters.  That let me tie into the old ceiling joists, the newer ceiling joists, and support the rafters near where the chimney would go through.

Of course, in the process of this excavation, I found knob and tube wiring.  Not the end of the world, except... it was bare in places showing the conductor, and it was tied into a branch, blind in the wall, no box, just twisted together with cloth electrical tape.  Worse, that branch led off to a blind box in the wall, then out to some romex that just ended in a wall somewhere.  So, I ran new 12-2 from the attic to the basement and replaced it all.  That circuit is now all fresh yellow 12-2 back to the breaker.

Electrical stuff aside, I moved on to putting some keystones together for home theater.  I had run a couple speaker wire circuits under the floor while I had remarkably easy access.

At this point, the chase is mostly framed, but I needed to leave one side off so I could get the chimney installed.

Curtis73 (Forum Supporter)
Curtis73 (Forum Supporter) MegaDork
9/24/20 8:03 a.m.

Phase 4:  Painting.

Can't have a remodel without getting rid of the hideous nude/beige paint.


Curtis73 (Forum Supporter)
Curtis73 (Forum Supporter) MegaDork
9/24/20 8:22 a.m.

Phase 5, flooring install

I had anticipated a difficult time installing the Maple flooring.  This wasn't a commercially-sourced, CNC-cut, laser-inspected product.  It was a guy named Derek with a portable sawmill, a kiln, and a planer.  I had also chosen one of the more difficult configurations; very thin at 1/2", very wide at 5", and all in a species of wood that was very prone to splitting.  Derek's work was ridiculously impressive.  He got excellent yield and included everything; knots, wane, inclusions, the works.

The process was to rough cut, then kiln dry, then re-cut to true up the warp, then plane and cut the T&G.  I think it turned out amazing.  At this point, it is ready for sanding and poly.  That will likely be a tomorrow project.


mtn (Forum Supporter)
mtn (Forum Supporter) MegaDork
9/24/20 8:24 a.m.

I just cleaned changed a diaper that was about exactly the same color as that mustardy-gold color there.


This looks awesome Curtis (although I'm not personally a fan of that mustardy-gold)

914Driver
914Driver MegaDork
9/24/20 8:25 a.m.

Nice job!  When you first posted the fireplace I pictured brick & mortar on a poured base (can't help there) what you have is quite a bit lighter!  Very nice.

Over the years every room in our house has been painted a few times.  Tip:  our dining room, rectangular, feels like a tunnel.  Paint or paper one wall and it draws your eye that way making the room appear larger in that direction.

STM317
STM317 UberDork
9/24/20 8:35 a.m.

That floor is so cool!

KyAllroad (Jeremy) (Forum Supporter)
KyAllroad (Jeremy) (Forum Supporter) UltimaDork
9/24/20 9:12 a.m.

Damn Curtis, you're making me feel lazy AF.  Impressive work, it looks great!

Mndsm
Mndsm MegaDork
9/24/20 9:24 a.m.

That flooring is insane. Props to derek. 

Curtis73 (Forum Supporter)
Curtis73 (Forum Supporter) MegaDork
9/24/20 9:54 a.m.
mtn (Forum Supporter) said:

I just cleaned changed a diaper that was about exactly the same color as that mustardy-gold color there.


This looks awesome Curtis (although I'm not personally a fan of that mustardy-gold)

Behr calls it Gold Ink.  I call it Avocado Diarrhea.  I love it.  I think it will work fantastically with the walnut around the fireplace and the maple on the floor.

Curtis73 (Forum Supporter)
Curtis73 (Forum Supporter) MegaDork
9/24/20 9:54 a.m.
Mndsm said:

That flooring is insane. Props to derek. 

I truly want to cry at how great the floor turned out.

Curtis73 (Forum Supporter)
Curtis73 (Forum Supporter) MegaDork
9/24/20 10:05 a.m.

Oh, and by the way... the custom 5" maple cost LESS than buying generic 2" oak at home depot.

3.99/sf for oak.  This was 3.65/sf made exactly to my specs.  The only caveat there is that you have to supply the wood.

Paul_VR6 (Forum Supporter)
Paul_VR6 (Forum Supporter) Dork
9/24/20 10:22 a.m.

Your caveat is a very hard to source tree. I have to say it looks great compared to the "box store" solutions.

Curtis73 (Forum Supporter)
Curtis73 (Forum Supporter) MegaDork
9/24/20 1:14 p.m.

Around here it's pretty easy.  Mine was (of course) taken down from right beside my house and I got lucky that it was Norway Maple.

Seems like there are constant ads around here for "free firewood."  It's almost always huge trunks of something.  What seems to happen is that someone calls a tree service, hears the astronomical price, and takes all the bells and whistles off their service; they only pay to have it taken down and the limbs chipped.  Then they have a monster thing in their yard that they can't do anything with unless they buy a $400 chainsaw and rent a bulldozer for two days.

Bingo; free "firewood." Load it up and take it to the mill.

Brake_L8 (Forum Supporter)
Brake_L8 (Forum Supporter) Reader
9/24/20 3:42 p.m.

That floor is amazing. I followed your thread about leveling up the house and it sounded remarkably awful at the time, but the results are clearly going to be well worth it.

Curtis73 (Forum Supporter)
Curtis73 (Forum Supporter) MegaDork
9/27/20 12:52 p.m.

Phase 6:  Poly the floor.

The floor is finished.  Pictures truly don't do it justice, but I'll show some highlights.

I went back and forth for days on oil vs water poly.  Oil has that soak-in ability which really makes the figure of the wood look 3D, but it also ambers wood, and the oils will get darker as the years go by.  Water poly doesn't darken the wood, but also lacks the ability to really give contrast to the grain.

I had pretty much decided on Zar "self leveling poly."  It seemed to have the least ambering, and rated as the hardest poly after it cures.  Unfortunately, the self-leveling part comes from additional solvents and high VOC which means I can only get quarts in PA.  I wasn't keen on spending $400 for a finish that meant moving out of the house for a week to avoid brain damage.

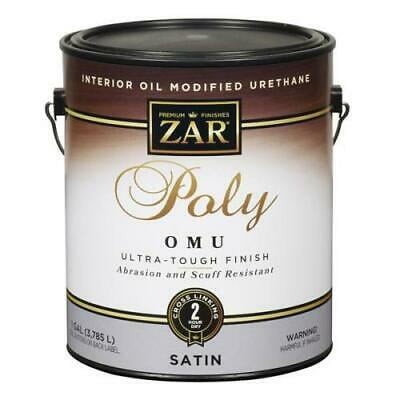
I went to Aumen's Paint in Palmyra PA, and spoke to [ironically, yet another] Derek.  We probably spent an hour talking about finishes.  He always keeps one pint or quart of everything he stocks as store use.  I had taken a scrap with me and we tried 6 or 7 finishes.  One came through hands down winner.  Zar OMU.  Oil modified urethane.  It is oil/alkyd urethane esters emulsified in a water base.  Just enough of the alkyd esters to make the grain pop without darkening.  Cures both my film drying and O2 crosslinking and supposedly very hard when cured. 

Viscosity I would put right around melted butter or maple syrup.  On the thinner side of a typical oil poly and on the thicker side of a water poly

ZAR Ultra Max Satin Clear Polyurethane 1 gal.

The first coat I put on with a typical synthetic sponge on a stick and found it difficult to work with, so instead I went and bought one of these and jabbed a stick in the handle.  This was the bees knees.  No edging or snowplowing, just start at one end and go to the other.  Drop-ins, starts/stops, no worries.  I just made sure the mop was moving before contact.  That is probably also due to the OMU's ability to self level.

This is what I used and may never use a normal floor pad ever again.  It is a microfiber cover on a T-bar that is marketed for professional window washers.  You dip it in soapy water to scrub.  This thing ROCKED my floor.  $12 at Home Depot.

See the source image

So, here it is.  Like I said, pictures don't do it justice, especially snapshots on my aging phone.


Curtis73 (Forum Supporter)
Curtis73 (Forum Supporter) MegaDork
9/27/20 12:58 p.m.

The moral of the story is, if you need a sawmill, find a Derek.  If you need paint/poly advice, also find a Derek.  Also, my neighbor who gave me some advice on putting down the floors?  Derek.  My brother-in-law who didn't help at all with this project?  Derek.

Curtis73 (Forum Supporter)
Curtis73 (Forum Supporter) MegaDork
9/27/20 1:03 p.m.

Another bonus is that I have enough T&G left over to do the baseboards with it.

Curtis73 (Forum Supporter)
Curtis73 (Forum Supporter) MegaDork
9/27/20 1:07 p.m.

Also, found and purchased the couch and chair.  It's not quite the English Gentleman's Club style, but everything else about it was perfect and the price was right.  I might call it Victorian Cottage style.

rustybugkiller
rustybugkiller Dork
9/27/20 2:33 p.m.

Very nice job!

z31maniac
z31maniac MegaDork
9/27/20 3:42 p.m.

That floor is just ridiculously gorgeous. Well done! 

Looking forward to seeing the final pics with the fire place.


1 2

You'll need to log in to post.

Our Preferred Partners
e2UO8Y77ywin2GOKGTUTTHZAGDQGCkTHjp44WtlZyxbjwpZzglZW6HVYGzNxr5Ml