
So I have always wanted to try this but haven't had a rusty enough project to justify it, until now.  I present to you: Project Rusty Hibachi.


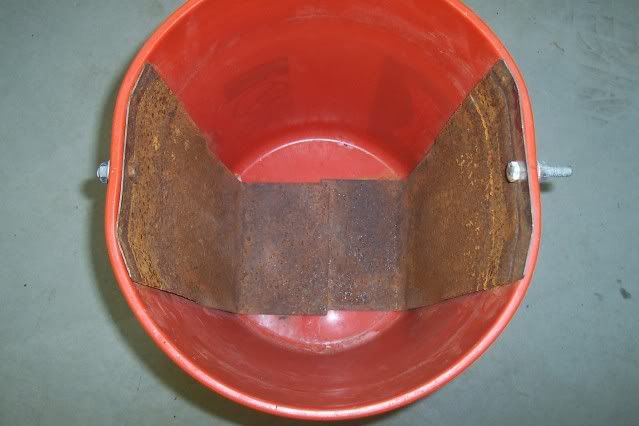
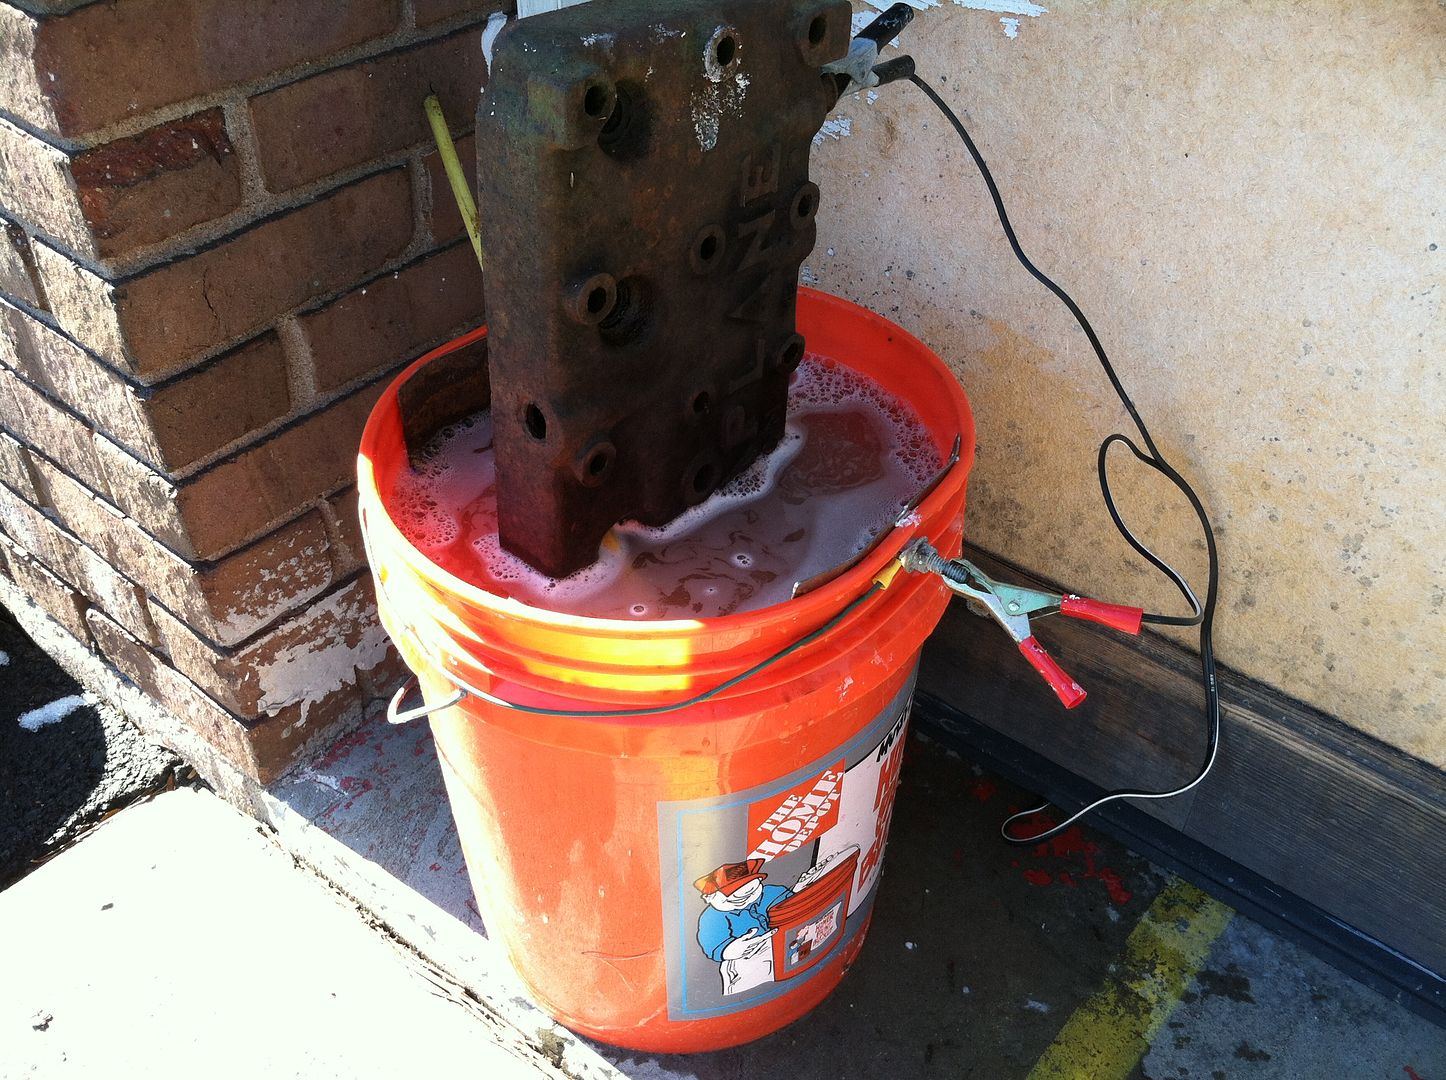
I love to go camping, and I have been wanting a little cast iron charcoal grill to take with me. This one showed up on craigslist and I snagged it. Sweet! So now, I want to clean it up. To be honest, the grilling surface is fine, but I want to restore it and reseason the whole thing. I have been reading up on electrolysis a bunch, including this thread by Oldtin, and this web article, as well as watched some videos, so I am feeling pretty confident. I would still love to hear your input, tips, tricks and cautionary tales. Here's the supplies I have gathered so far: I got my big ol' bucket and sacrificial anode, which looks copper-y in the pic but it is just plain old steel. I have read that expanded steel placed around the entire bucket circumference works really well, because of the direct line of sight from all sides, but I want to be able to reuse my anode, so I thought this would be better since I can just take a disc grinder to it and clean it off in a jiffy.

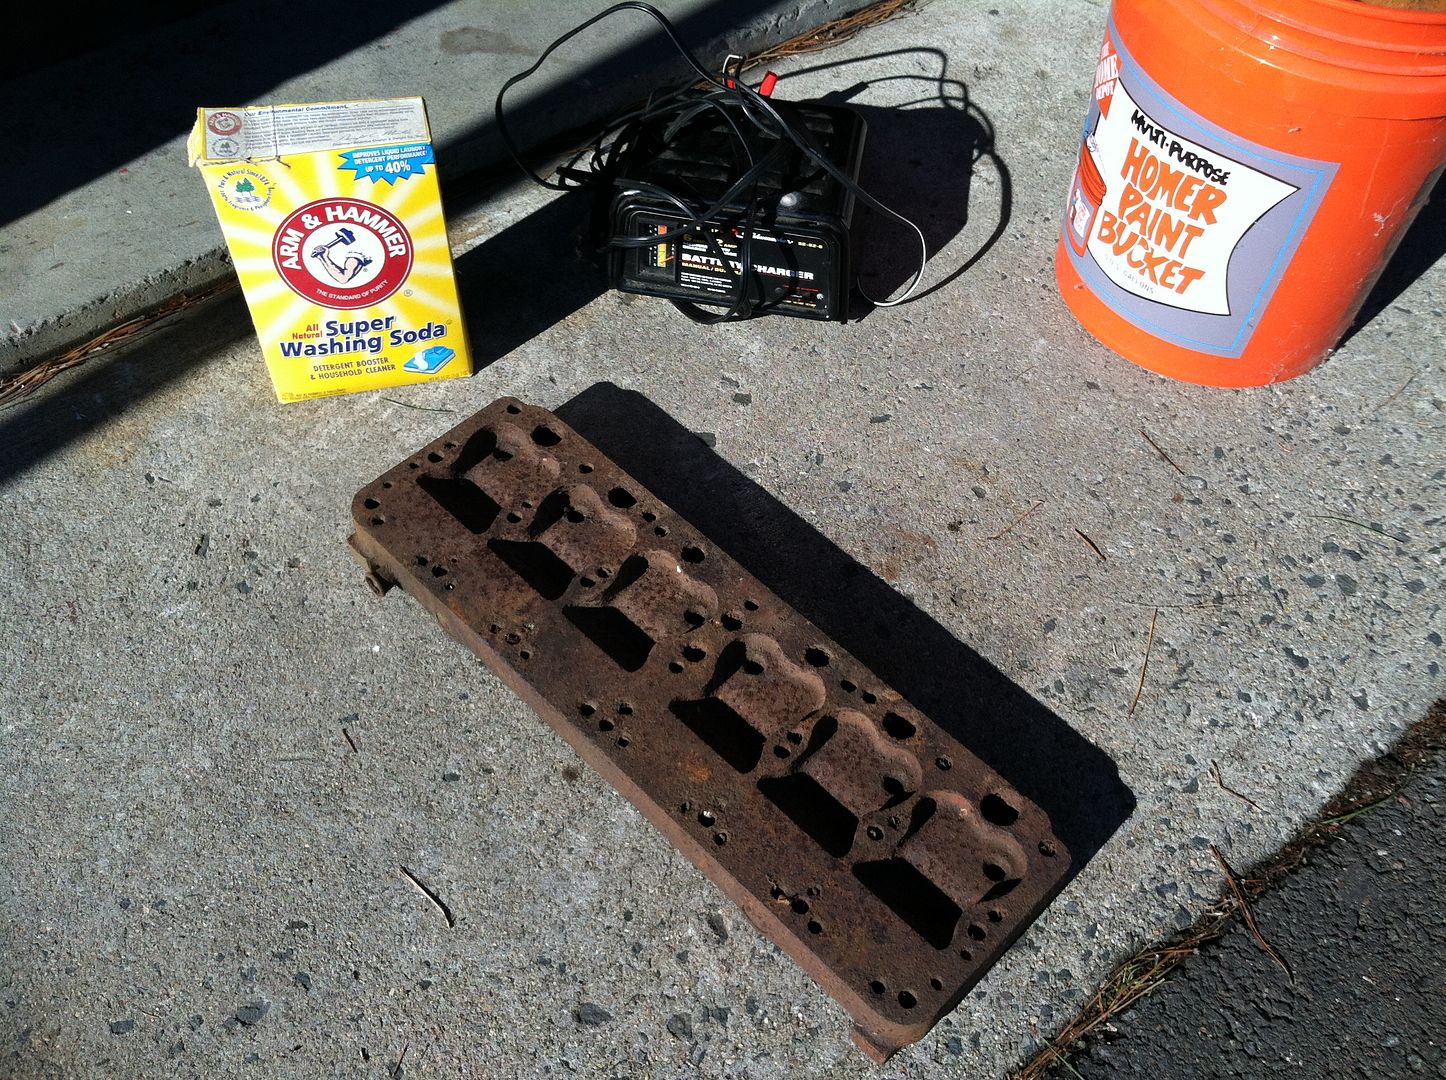
For the body I will either have to use a big rubbermaid tote or just do it in the bucket 1/2 at a time. Gots my Washing Soda:

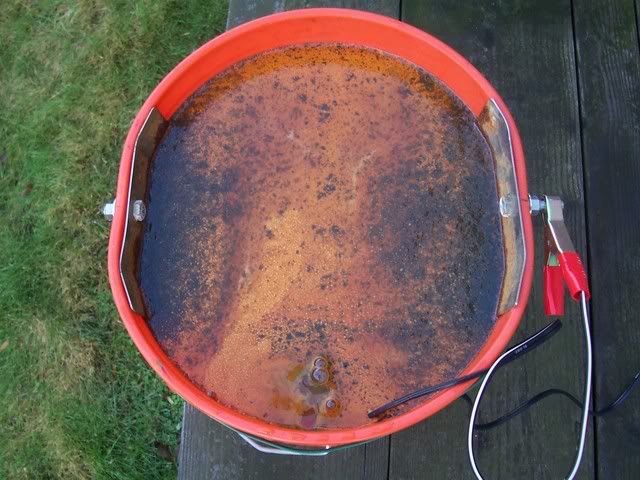
So now I am hunting for a battery charger. The one we have is a "smart" charger, so if it does not sense a battery, in theory nothing will happen. I found this DieHard Charger on craigslist, but I don't know a lot about them. Is this one dumb enough to use for this? I do plan on hitting the whole thing with oven cleaner beforehand to remove any greasy stuff. I've read that the electrolysis won't work as well if it's greasy. Also, I know that this process does release some noxious fumes, so I will be doing this outside with plenty of ventilation. And I'm pretty sure I don't want to stick my hand in the bucket while the charger is on.  Any tips or advice is greatly appreciated! Thanks for checking out my project. I can't wait to grill up a mean steak and baked tater or two on this awesome grill!

Woody
MegaDork
6/3/14 7:29 p.m.
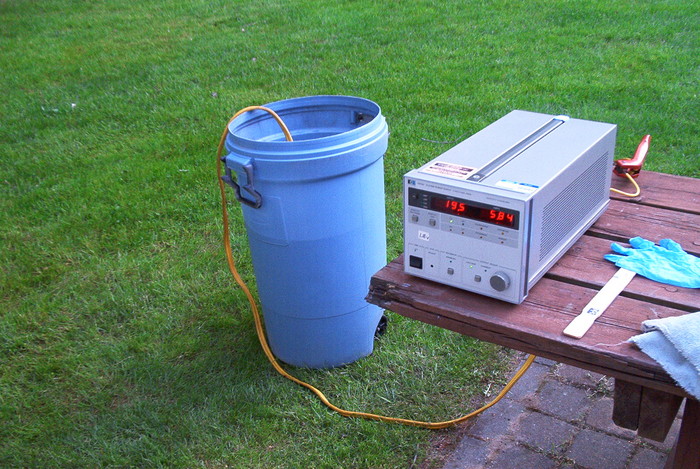
I love doing this! You will need a big bucket for that. A Rubbermaid tub should work. Put some 2x3s on the bottom so that it doesn't hit the metal. That's the battery charger that I use.
Doing big items in two steps will leave a "seam".
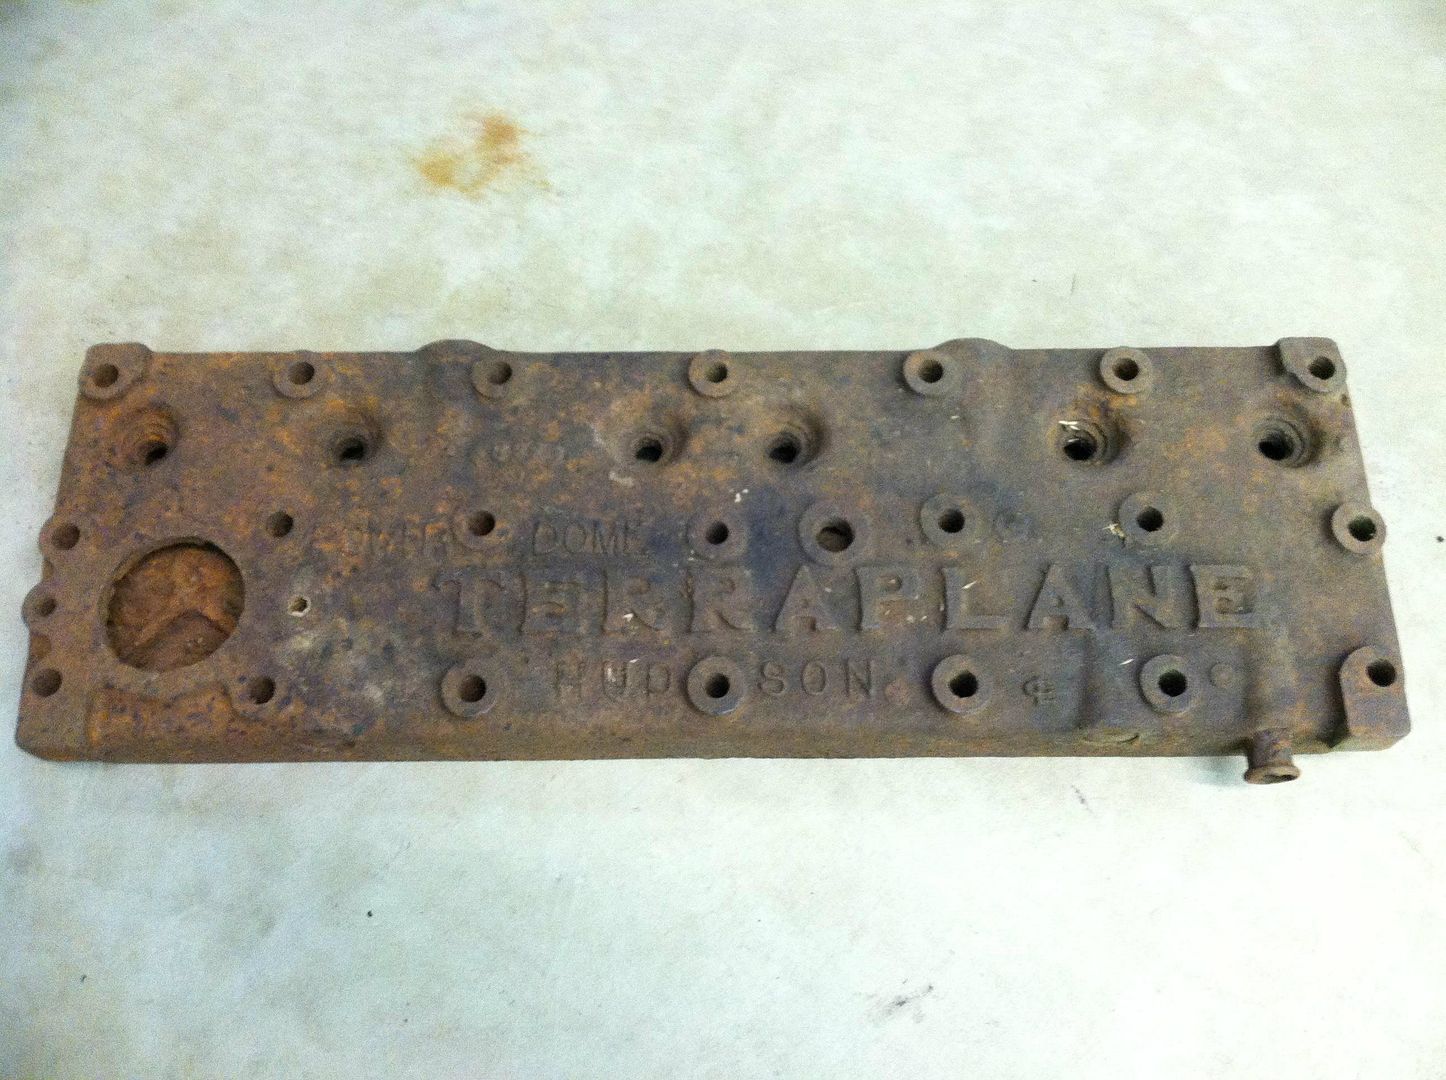
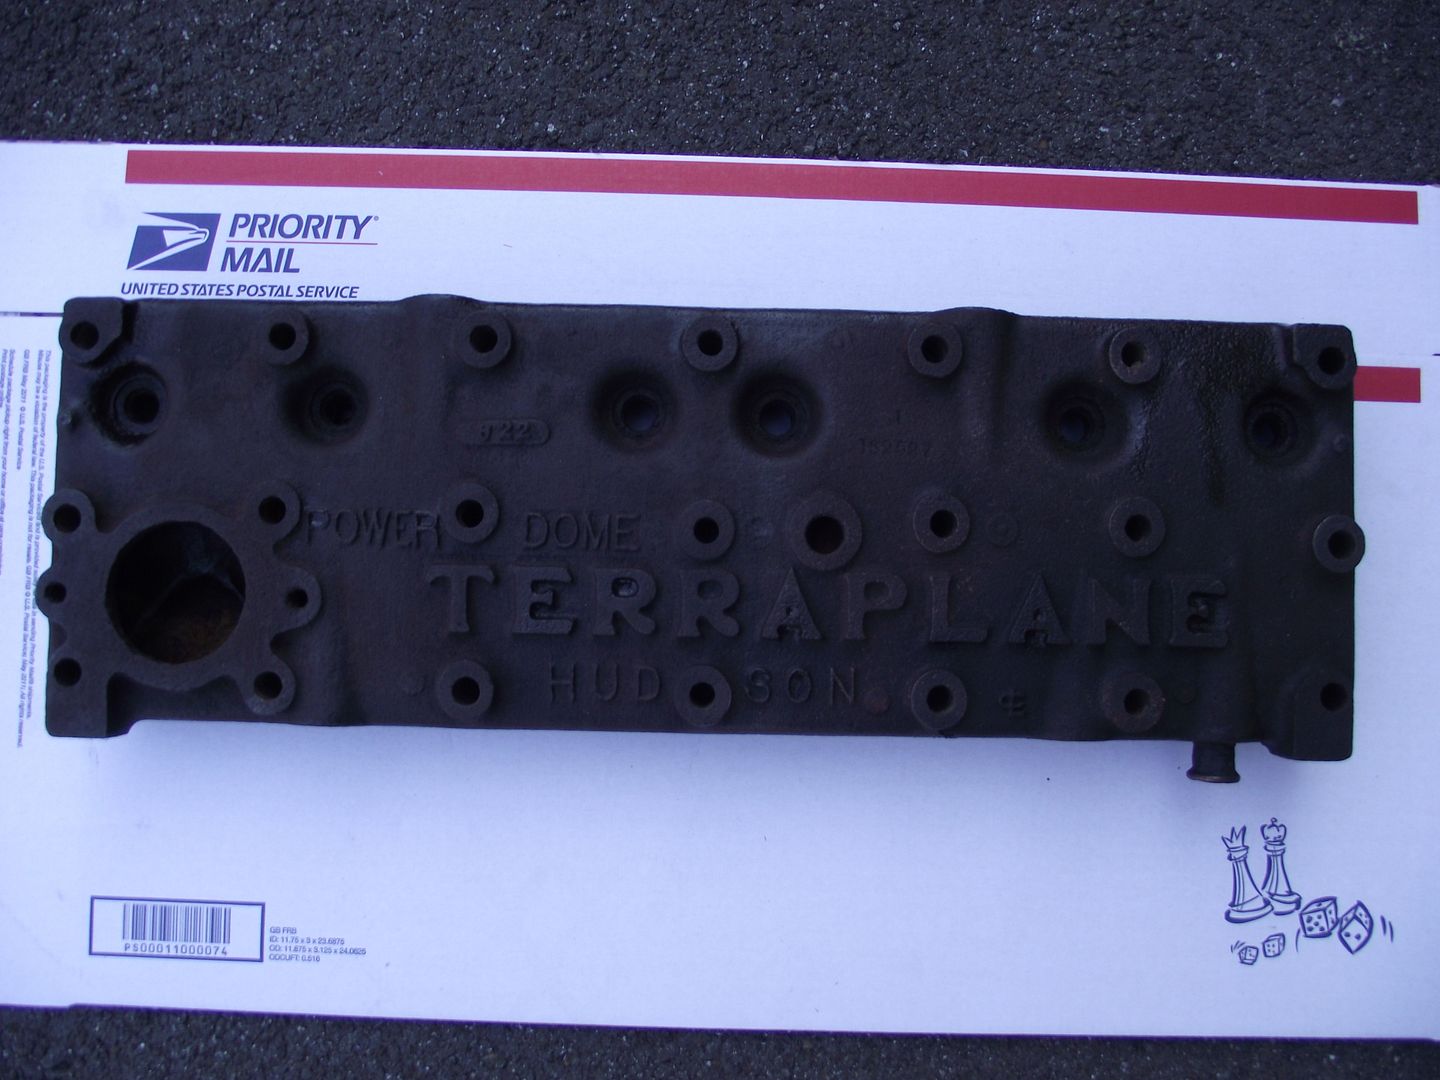
Oohhh, pretty.  I remember your post about that valve cover now. Good call on the "seam", I don't want that. I like the way you bolted the anode through the bucket, that gives an excellent place to clamp the charger.
Woody
MegaDork
6/3/14 7:41 p.m.
You can see the seam around the A.
Woody
MegaDork
6/3/14 7:45 p.m.
I don't think that adding extra washing soda, nor higher amperage makes much of a difference. I set the charger on the lowest setting (6V, 2 amp if I recall correctly). You just need an electrolyte solution and a difference in polarity. Time and surface area/sight line of the sacrificial anode make the difference.
Woody
MegaDork
6/3/14 7:47 p.m.
Also, you can't see it in the top photo, but I have a jumper wire going from one top bolt to the other so that both metal plates are charged.
Woody
MegaDork
6/3/14 7:49 p.m.
When you plug that charger in, the bubbles appear in seconds. Do it outside: that's hydrogen gas.
Woody wrote:
Also, you can't see it in the top photo, but I have a jumper wire going from one top bolt to the other so that both metal plates are charged.
Excellent. I was curious if you had tack welded them at the bottom. That answers that.
How much washing soda do you use per gallon?
I used a plastic trash can while Mom was away. The cables I used were just jumper cables, and I remember using baking soda instead of washing soda (that's all Mom had in the cabinet...). The orange ring in the trash can still hasn't disappeared yet, but my parts got clean pretty quickly!


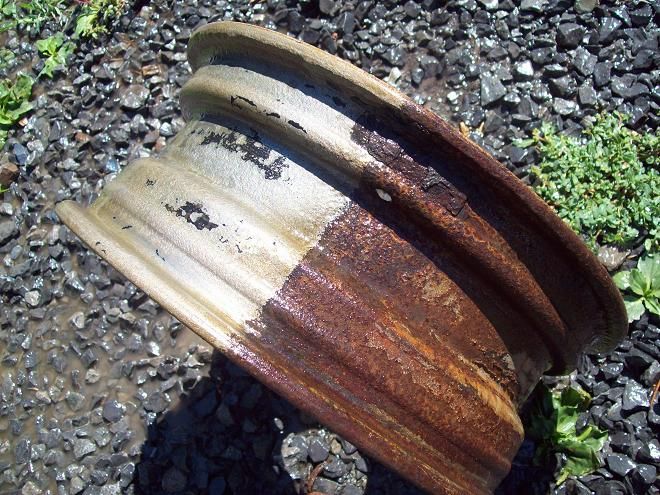
I did this to all the suspension bits on my Miata last summer.(They were rusty from 16 winters in Michigan ,ECM) I used the 30 gallon garbage can from the garage and simply put a garbage bag in it to prevent staining. I welded some old pieces of rebar to a strip of sheet and bent it in a circle to get the parts from all sides. It worked very well.
That is an awesome hibachi
ryanty22 wrote:
That is an awesome hibachi
Thanks! I've been wanting this particular design for a while, but new ones are $100+. It is currently made by Lodge, but it has been made by Birmingham Stove and Range, among others. It is a design carried over from the days when ironing clothes was done with a sad iron, and this was what was used to heat the iron. This one of course, is nowhere near that old, but the design has remained almost unchanged since the '40s. When electricity became more readily available, and sad irons fell out of use, this design saw a rebirth as a grill.
Probably way more detail than you wanted, but if you are interested in getting a hibachi like this, just google Sportsman grill.

bgkast
SuperDork
6/9/14 4:36 p.m.
Watching with interest. You might want an anode over the top too, and maybe smaller pieces of wood on the bottom to limit the covered areas.
Witchcraft, thats what this is
EastCoastMojo wrote:
ryanty22 wrote:
That is an awesome hibachi
Thanks! I've been wanting this particular design for a while, but new ones are $100+. It is currently made by Lodge, but it has been made by Birmingham Stove and Range, among others. It is a design carried over from the days when ironing clothes was done with a sad iron, and this was what was used to heat the iron. This one of course, is nowhere near that old, but the design has remained almost unchanged since the '40s. When electricity became more readily available, and sad irons fell out of use, this design saw a rebirth as a grill.
Probably way more detail than you wanted, but if you are interested in getting a hibachi like this, just google Sportsman grill.
I scored one of these bad boys years ago from my grandfather's estate. It even had a shallow pan that would have made for some awesome fish frying. Sadly, I believe it went out in one of the yard sales we had.

NOHOME
SuperDork
6/9/14 4:39 p.m.
Bit concerned that your wires that join the anodes are going to become sacrificial themselves. The rust inside the cavity will most likely not be removed.
Having done this, and with time on my side, I would consider the molasses dip next time.
Woody
MegaDork
6/9/14 4:44 p.m.
That is a really cool grill! And yes, I'd put the wires outside. The sacrificial plates won't know the difference.
In reply to bgkast:
Good idea on the smaller pieces of wood, I'll dig around some more in the wood bin.
In reply to NOHOME:
The wires are cheap, if they rust out I'll run the on the outside next time. I just barely had enough length to run what I have there. I was thinking about flipping it over to get the inside clean too.
Great feedback guys! I want to hear more about this molasses dip.  sounds delicious!
Woody
MegaDork
6/9/14 4:49 p.m.
You'll have to put the grill onto the wood before you fill it with water or it will float away. If you screw the base of the grill to the wood, you can take it out to check your progress.
Score! I found another longer length of wire, so I can run it sround the outside, except for that one piece going to the bottom anode.
Good hint on the floataway wood, Woody. Since I don't have any rubber gloves that long, I guess I'll just have to tape some garbage bags over my arms so I can reach down and position the wood after checking progress.  bWith the charger OFF, of course.
The only other scrap wood I have is 1x2, will that be too close to the bottom anode?
spitfirebill wrote:
I scored one of these bad boys years ago from my grandfather's estate. It even had a shallow pan that would have made for some awesome fish frying. Sadly, I believe it went out in one of the yard sales we had.
That's a shame, these grills have a big following because they are so awesome. If yours had four legs instead of three, then it was one of the earlier models made shortly after the changeover from sad iron heater. Probably late 1930's. The fry pan was an option, and mine didn't come with it but I did find one on craigslist for a good deal. I can't wait to use it!


