Once we did some initial cleanup, we just started fixing stuff. Our 1984 VW Rabbit GTI—turbocharged by Callaway—was clean when we got it, but there was still some work to do.

We started with the hood latch that didn’t properly latch. A broken cable was part of the problem. The latch receptacle on the radiator support had fallen through as well because the rivets had failed. We were able to find a Rabbit parts car nearby at a salvage yard and grab the entire latch assembly.

First, though, we had to clean those used parts.
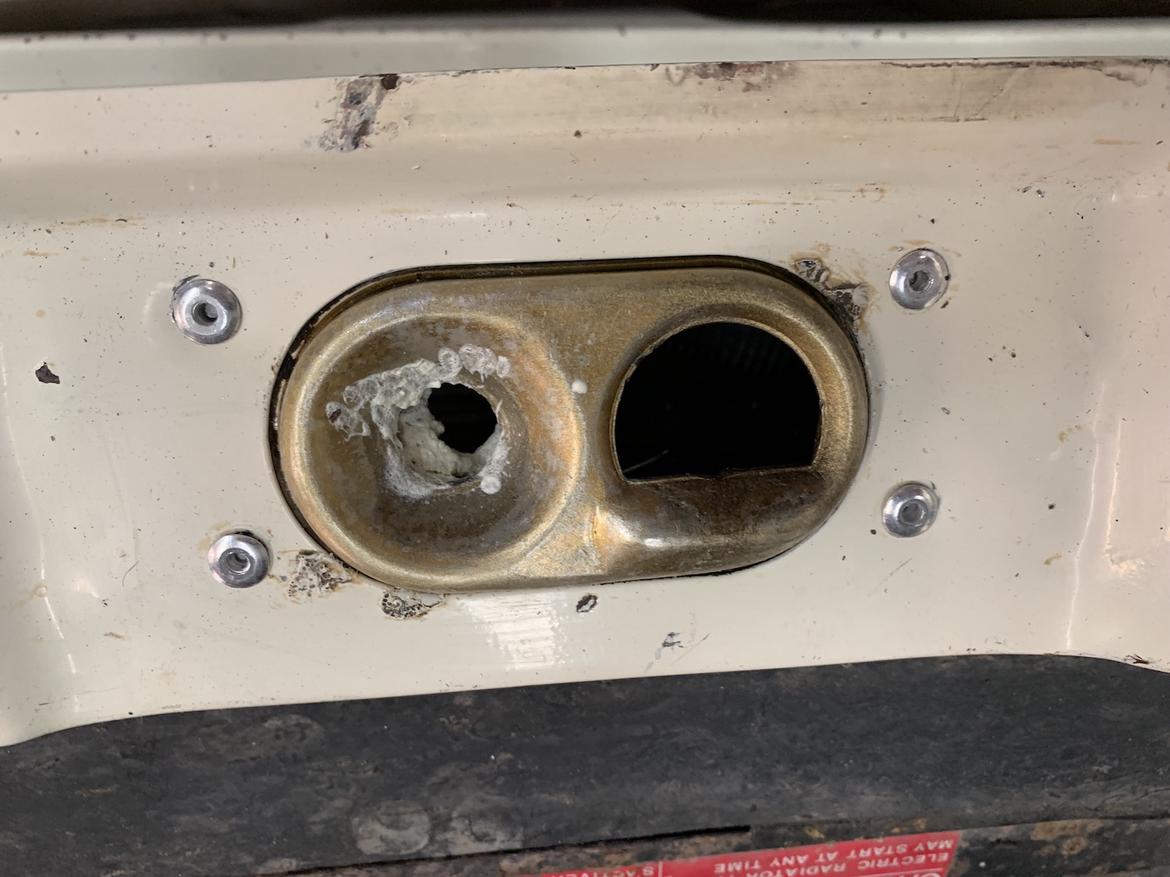
Our hood latch is now as good as new thanks to new rivets, a bit of gold cadmium paint from Eastwood, and a thorough cleaning and lubricating.

The windows would barely move up and down in their tracks. We started the R&R by cleaning and lubricating both the glass and the tracks. An application of CRC Heavy Duty Silicone goes a long way toward easing this problem.

Once inside the door panel, we could see that the cable that raises and lowers the window also needed to be cleaned and lubricated. Once we completed all of these tasks, the windows worked pretty well.

Our GTI’s headlights and corner lights were all broken. While popular in the ’80s, these square headlights are a bit tougher to find these days. We were able to order some from our local auto store. The corner lights, however, are essentially made of unobtainium. We were able to source one from the parts car in the salvage yard and order another via eBay Motors.

A little CRC Di-Electric Grease makes installing headlights a bit easier on any old car.

We decided to clean and paint the headlight buckets as well, as they had gotten quite rusty. After reassembling everything and installing our new hardware—including a new relay—we were rewarded with working lights.

Our bumpers needed attention, too. Someone had replaced the front bumper with a non-original, Euro-market piece, while the rear unit needed to be stripped and refinished.
While at the salvage yard, we were able to procure a good U.S.-spec front bumper from the same-year Rabbit. The only difference between a regular Rabbit bumper and a GTI bumper is the finish: silver versus black.

An aluminum bumper needs to be primed with a product designed to promote proper paint adhesion. After that step, you can use traditional or high-build primer and then any paint you want.

We painted the bumpers with SEM Trim Black spray paint that we sourced from Higgs, our local auto body supply house. We have used this paint on dozens of cars. It goes on easily, dries quickly, and looks right on cars from the ’80s and ’90s.

We wanted to redo the plastic end caps, too. After we cleaned them, we painted them with the same SEM Trim Black paint.
Watch this video to see how we tucked in the bumpers for a smoother look.

We also took the time to paint the wiper arms and install fresh blades.
More like this
Comments
First off, Let me congratulate you for finding a rare Calloway GTI. Next as an original 1984 GTI owner after 36 years I'm into this as deep as you are about to be. Mine is suffering from age and neglect from the California Sun, and a couple of survivor issues but it's addictive. Suffice it to say ,I have nothing but respect for your approach to the restoration process. (witness the Lotus Elan odyssey). My list of suppliers and Nonbtainium sources might help in your quest ( or at least save you a bit of time!) but once bitten, the carrot rules the budget.
Many thanks to you for my monthly therapy fix. Your publication is stellar!
Joe Kruskamp, Aka Rabbit herder, and Literary fool (Pintosopher..PCCA) and the most impoverished possessor of unlucky automotive equipment.
Displaying 1-1 of 1 commentsView all comments on the CMS forums
You'll need to log in to post.


 Update by Tim Suddard to the


