Oh, how progress marches on. In their day, British sports cars were seen as quick and nimble. After all, the average MGB or TR could easily outrun the family trucksters and imported econoboxes of the era.
Of course, times have changed. Vintage machines aren’t so quick and nimble anymore, at least relative to today’s cars. Our classics haven’t slowed down, but the trucksters and econoboxes have definitely sped up. Thanks to progress, MGs and Triumphs now have to huff and puff just to keep the family minivan within sight. Even a Prius can be a serious threat off the line.
Times have changed in other ways, though. We’re living in an era where upgrading the performance of our classics is easier than ever thanks to good products and advice available from a myriad of sources. Some are calling this a new golden age of the automobile.
Time to apply some of that automotive magic to one of the icons of our scene, the MGB. Can we make it outrun today’s average minivan without spending more than two grand?
When discussing performance upgrades for the MGB, conventional wisdom often points toward a supercharger or big carbs, often with a cam swap thrown in. This path has some merit, but our budget required that we take less radical steps. We’d have to replace trick hardware with a methodical, scientific approach or we’d end up poorer but no faster.
We had already addressed this car’s ignition and air filters, so now it was time to dig deeper: cylinder head, compression ratio and cam. Could we beat that pesky minivan without breaking our budget?
Step 1: Baselining and Measuring
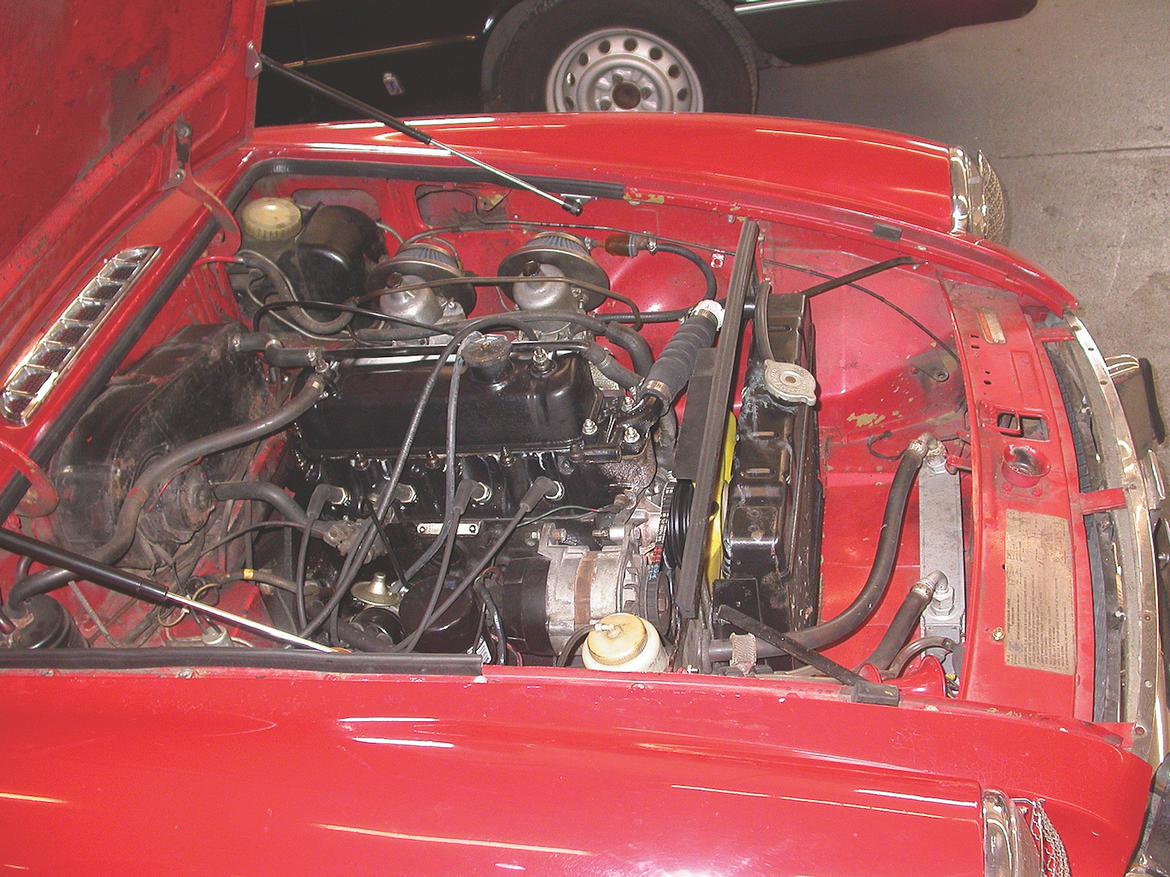
Since we wanted to measure the effects of our upgrades, we did some baselining before we started any work. Our 1973 MGB GT had a rebuilt engine with about 20,000 miles on it.
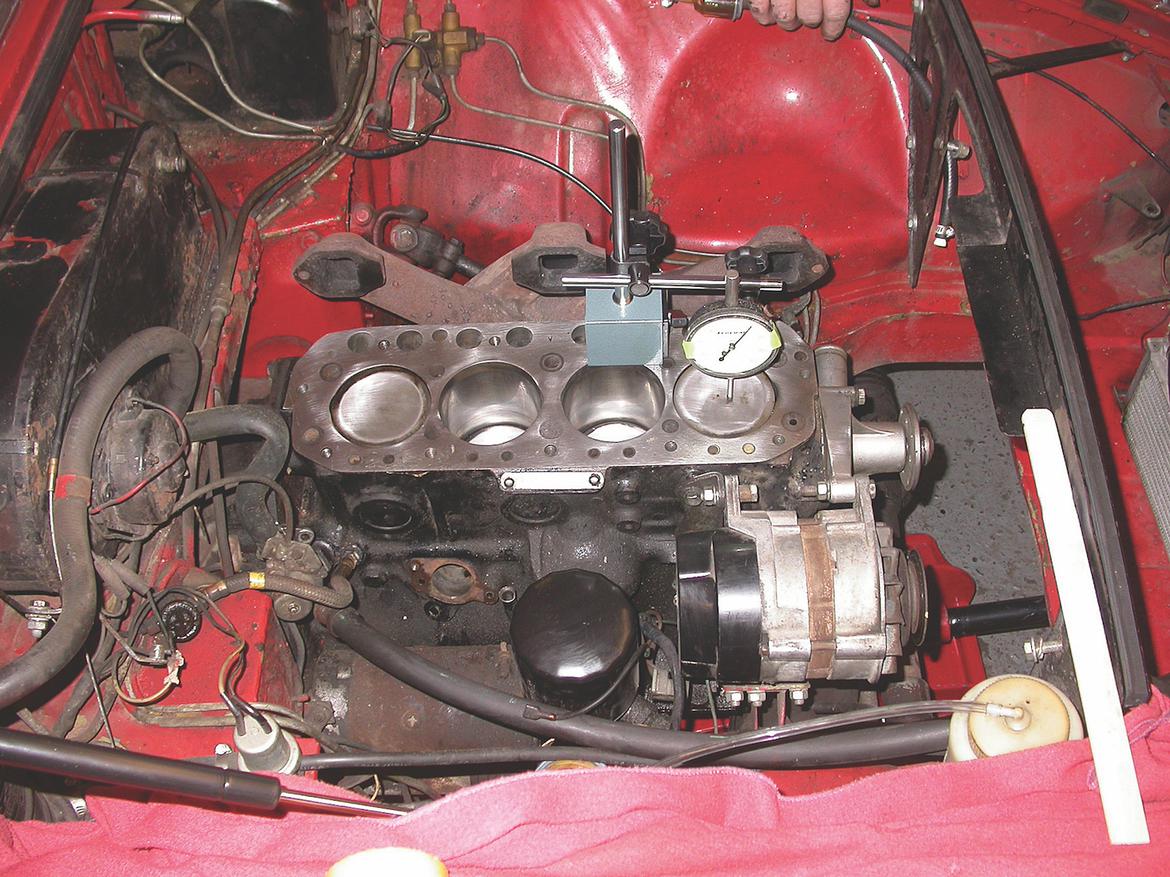
We suspected the engine had a higher than normal compression ratio, however, because even with unleaded premium fuel it pinged under load. A compression confirmed those suspicions, yielding readings of 190 to 200 psi per cylinder. This was very high—most MGBs are in the 125 to 175 range.
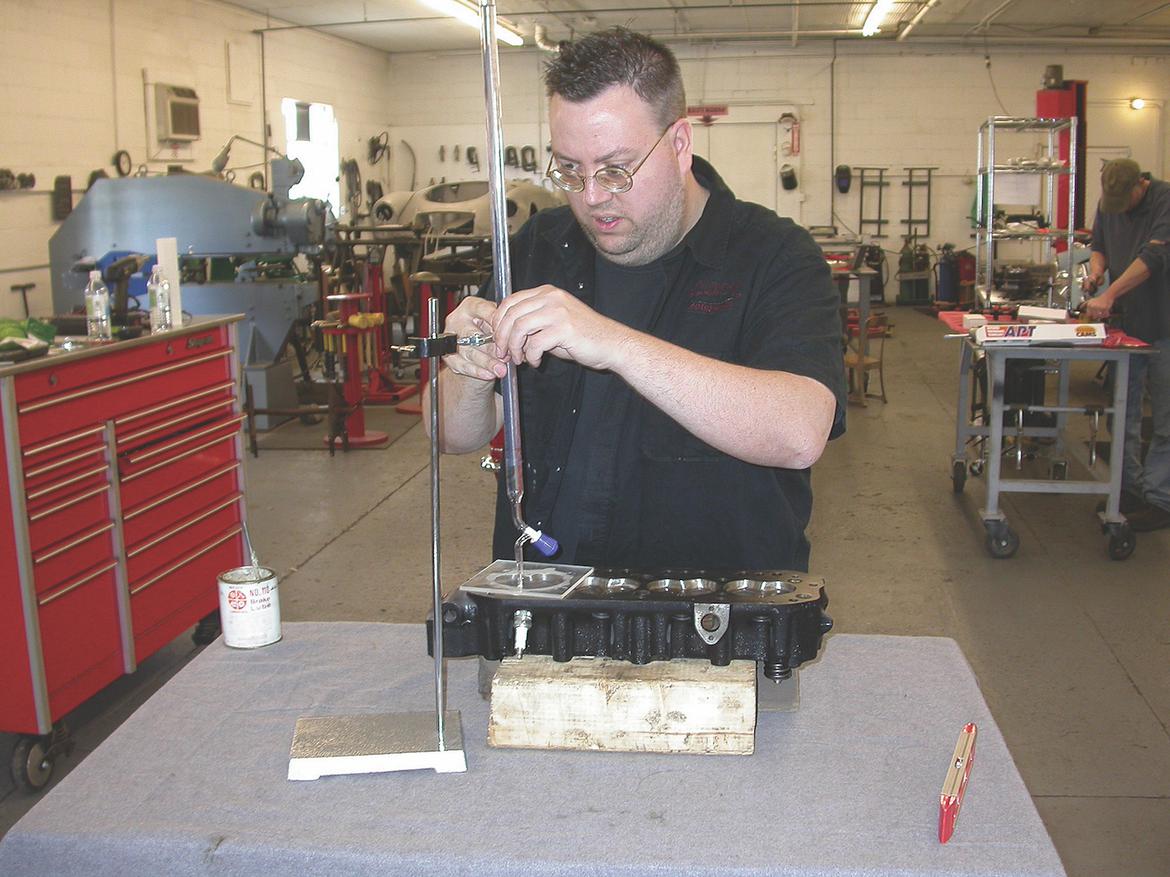
Before sending it out to the machine shop, we cc’d our head. (The machine shop could have done this, too.) We now know that our head has 39cc of combustion chamber volume.
Next we wanted to establish an acceleration baseline. Our zero-to-60 times averaged 13.5 seconds, about normal for an MGB. We also put the car on the chassis dyno and learned that it made a little less than 64 peak horsepower at the rear wheels, which is about normal for a stock MGB.
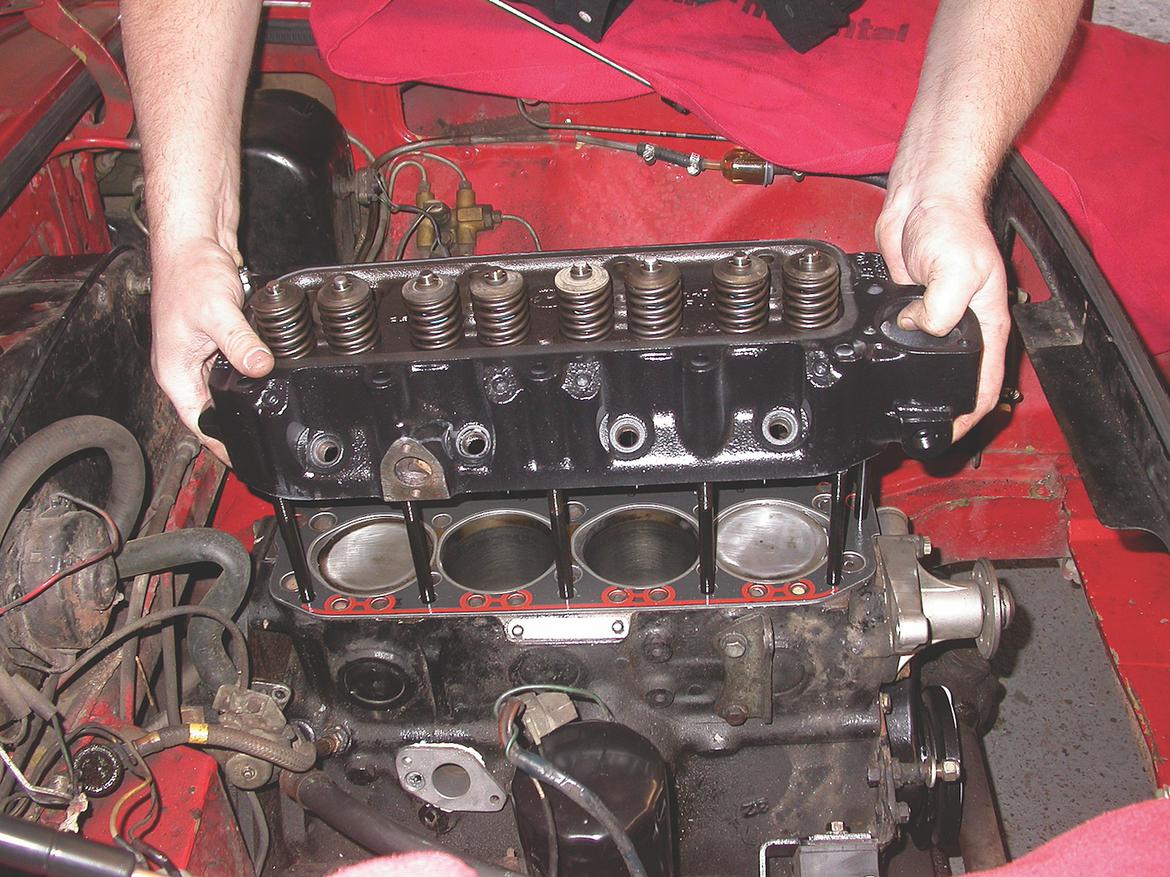
Now we could start removing parts. First, we pulled the cylinder head so we could take some measurements. As expected, our car had a pretty high compression ratio. Even though our pistons should have given us a fairly typical 8.75:1 compression ratio, we measured an actual ratio closer to 9.5:1. We’d like to blame this on a combination of factors: One, that the pistons had production variations. Two, that the head had been skimmed or the block had been decked in the past.
We also confirmed the location of top dead center so we could correctly install our camshaft and set the timing accurately. This baselining and measuring would not only help us track our future gains, but would also give us valuable information for future tuning and troubleshooting.
Step 2: The Head’s Im-PORT-ant
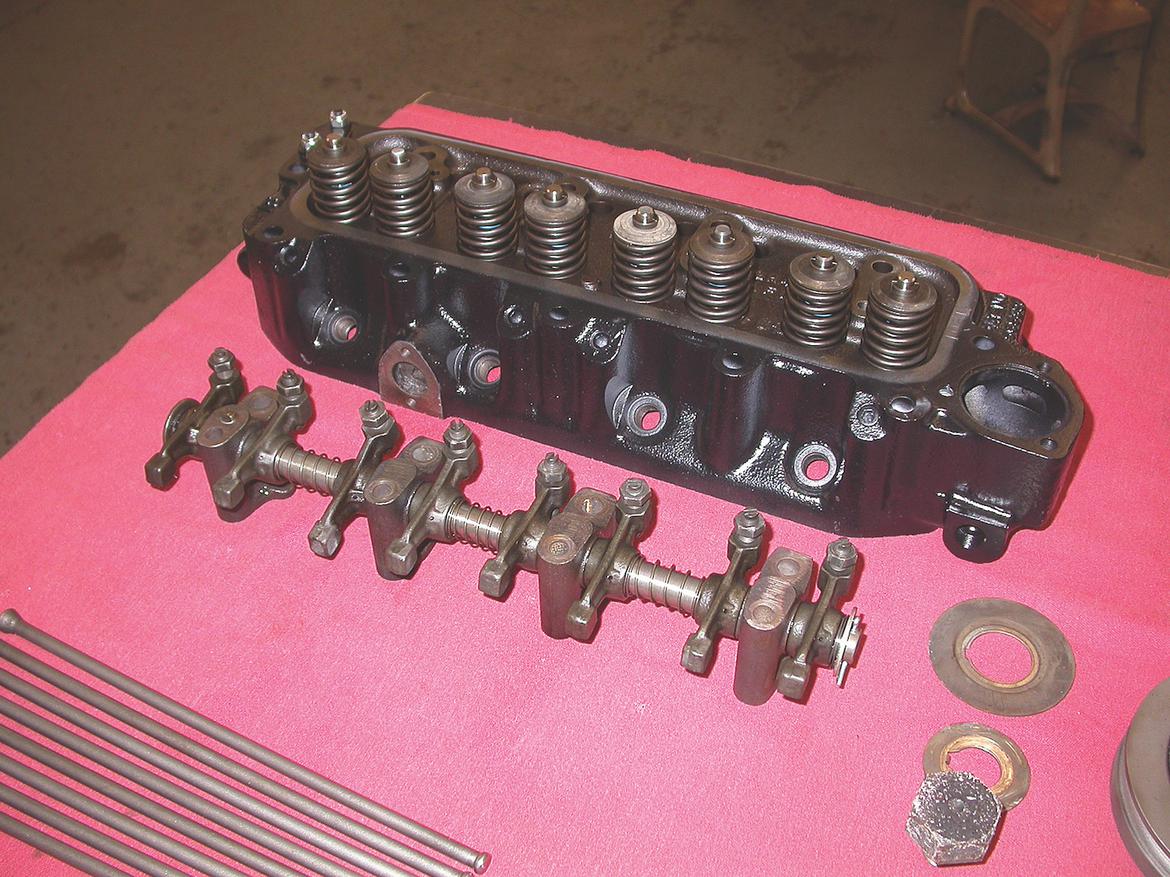
While it looked nice on the outside, what really mattered about our newly ported cylinder head was the inside—the ports were now optimized for our application. While we had everything apart, we installed a new rocker shaft and had the rocker arms rebushed.
When they slapped cylinder heads on MGB engines back at Abingdon, MG’s engineers were working within a set of compromises. They had taken a relatively common engine (the B-series engine was used in everything from performance cars to family sedans to Sherpa trucks) and hopped it up where they could.
Even so, manufacturing practices and cost constraints would only let the engines do so well. As a result, the stock MGB was a decent performer in the low- and mid-ranges, but it would pretty much run out of steam around 4500 to 5000 rpm. The head just wouldn’t flow too well above that range, which was fine for the average driver at the time.
The stock MGB engine’s redline is 6000 rpm, so getting the head to breathe better above 4500 rpm can free up some serious horsepower. We devoted the first part of our budget to having our cylinder head ported, allowing it to breathe deeper.
We’ve all heard the term “ported and polished,” but it’s often misunderstood. Everyone understands polishing—smoothing out the insides of the head for better flow—but it’s porting that really matters for cylinder heads. Simply put, to port a head is to reshape the intake and exhaust ports to allow more air to flow through.
Of course, it’s really more complicated than that. All kinds of science (air flow and fluid dynamics, oh my!) and experience (knowing when you’re about to hit a water jacket) make the difference between a well-done porting job and a junk head.
As a result, we’ve wised up to the fact that it’s best to pay an experienced pro to do our porting. It’s also wise to carefully discuss the intended use with said pro to make sure the porting will suit our needs. Here’s why: If you ask for the best-flowing head possible, you might wind up with huge ports and expensive race parts. That’s great for a track monster that runs around at 8500 rpm for most of its life, but it won’t be the best setup for your street car.
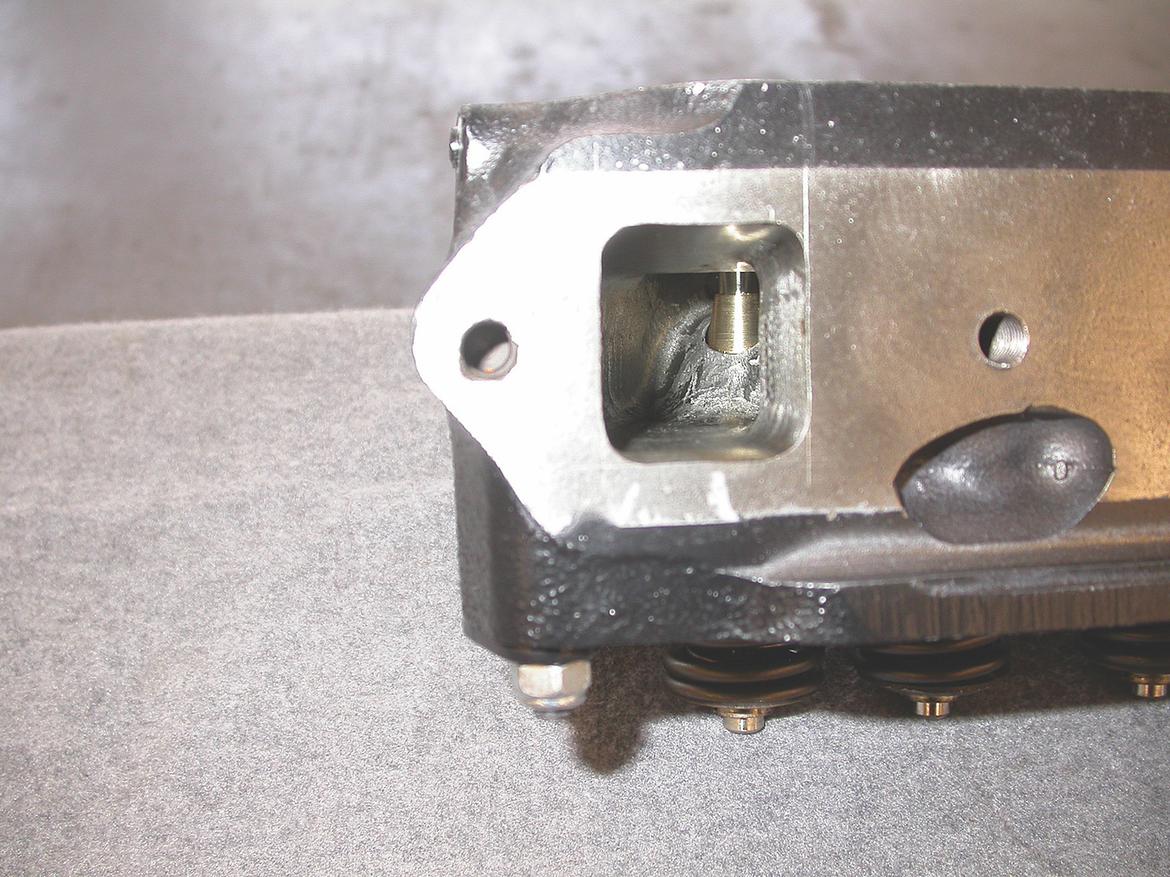
Our machine shop performed some magic on the exhaust ports, cleaning and opening them for better flow. Just barely visible is the bulleted valve guide, which is much less restrictive than the stock, squared-off piece.
First, some basics. While bigger ports can sometimes be better, they come with compromised low-end performance. For the air/fuel mixture to do its job, it needs some velocity. Big ports make for very slow air/fuel velocity at lower engine speeds, and performance suffers as a result. Fuel can fall out of suspension, or the air/fuel just might not make it into the cylinder in time as it pokes around. Second, all those trick parts and the extra work needed to hog out the ports are going to cost you money you don’t need to spend.
Talk with your porter and explain what you plan to do. In our case, we wanted our head to flow well up to 6000 rpm and have good port velocity at lower speeds. Big ports and huge valves weren’t necessary. We just wanted to fix the flow problems in the ports and around the factory valves.
We used CD’s Engine Service, a local shop that has done a lot of heads for us in the past. They focused their attention on the bowl area under the valve (often called pocket porting), as well as the valve itself, performing a three-angle valve job. They also smoothed out the lumps and bumps found in the intake and exhaust ports before port-matching the head to the intake and exhaust manifolds.
We told CD’s that we wanted our combustion chambers to stay at their current size: 39cc. We also wanted to retain our 9.48:1 static compression ratio. While a bit high for a stock head and cam, we felt that it was ideal for the cam we were about to install. If we had needed more compression, we would have told the shop to skim the head as well.

This cutaway picture shows the real difference between a ported and stock head. The port on the right is stock and really necks down to a restrictive path. The one on the left has been ported—note the smooth transitions and even sizing.
In the end, they took 0.007 inches off the head’s face to cure a slight warp. This move decreased our combustion chamber volume to 38.4cc and raised our static compression ratio to 9.54:1—still close enough for us.
After the porting was done, CD’s installed new valves sourced from Moss Motors as well as APT valve springs. We also had the shop rebush our rocker arms and install a new APT nitrided rocker shaft.
Step 3: With Cams, Bigger Isn’t Always Better
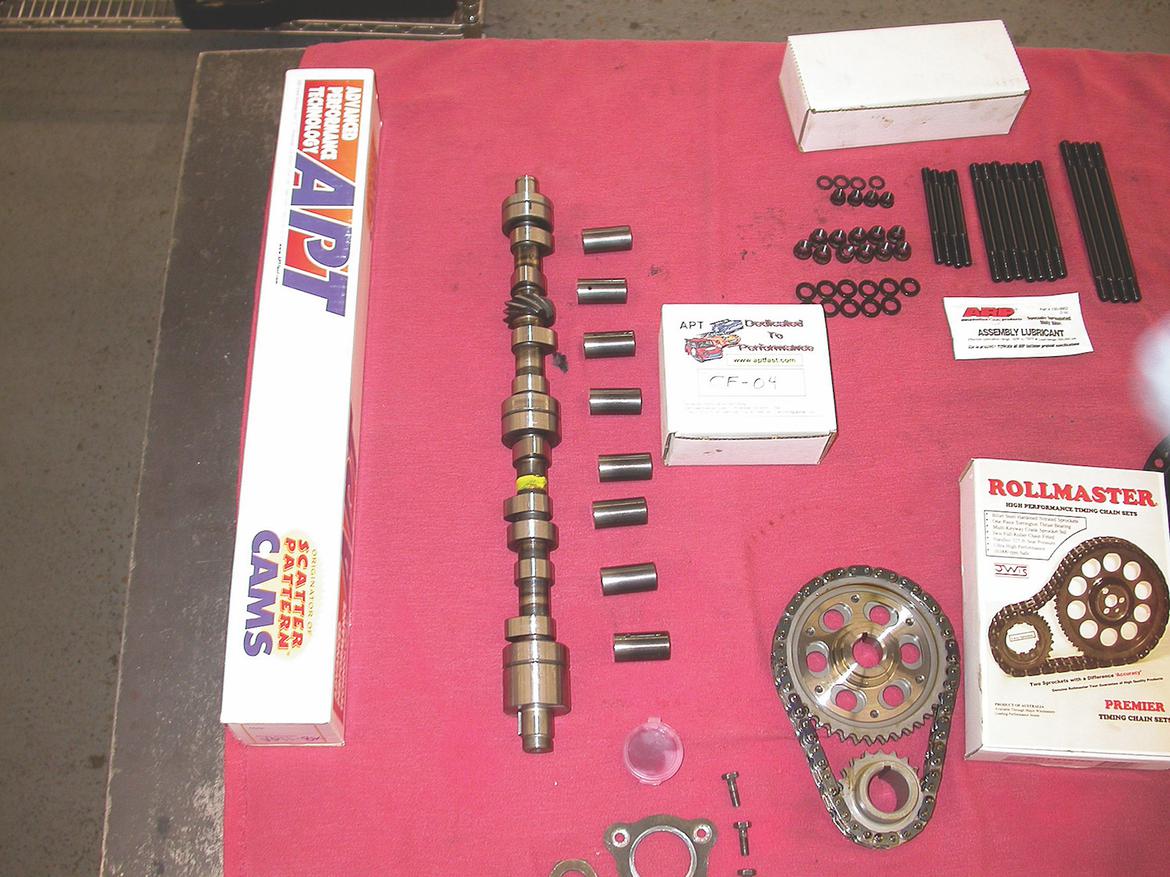
We went with APT’s VP11 cam along with their chilled iron lifters and an adjustable gear/chain set. It’s a little hotter than stock, but it’s not a full race cam.
Cam swapping is a tricky business in a world filled with misinformation. A lot of people put the wrong cams in their cars—they usually go too big—and hurt performance more than they help it. When it comes to cams, bigger is not always better. In fact, too big is always worse. So when we picked our cam, we wanted to be careful not to ruin a good thing.
A rule of thumb is that cam changes usually shift torque and power from one rpm range to another. Typically a camshaft will make more top-end power at the expense of low-end performance. As a result, it’s not uncommon to see an engine that makes big power north of 5000 rpm but can’t produce anything below 3000 rpm. Don’t forget, a street car needs to perform well off idle.
Cams are rated in lift and duration. The higher the lift, the more the valves open. The longer the duration, the longer the valves stay open. A bigger cam will have more lift and longer duration than a stock piece, two characteristics conventional wisdom would say are needed for more performance. The problem is that increasing lift and duration improves performance at higher engine speeds at the expense of low-end power. That increased lift slows velocity, and the increased duration lowers the effective compression ratio, both of which have especially detrimental effects at low-rpm performance.
There are two other common cam swapping problems. First, sometimes the cylinder head can’t flow well enough to support the high-rpm gains of more lift or duration. This is why most radical cams don’t often work well with stock MGB heads. These cam swaps are crippled by the bad air flow of the stock ports. Always port the head, then change the cam.
Second, as cams get more aggressive (bigger), they usually need a higher static compression ratio to support them. Think about it this way: If you increase the cam’s duration so the valves are staying open longer, you are lowering the effective compression ratio of the engine. If you simultaneously and appropriately increase the static compression ratio and add more duration, then you’ll keep the effective compression ratio correct.
Back to our cam selection. We wanted more power from 4500 to 6000 rpm but no losses below that range. We didn’t want to give away any low-end performance, nor did we want to buy performance we didn’t need. Our engine can spin safely up to 6000 rpm—any power potential after that is wasted.
Truth be told, the stock MGB cam is already pretty aggressive—252 degrees of duration and 0.264 inches of intake and exhaust lift aren’t exactly sheepish numbers. The cam was the factory’s main tool to make the MGB perform better than the aforementioned sedans and Sherpa trucks.
We picked APT’s VP11 cam, rated at 260 degrees nominal duration with 0.286 inches of intake life and 0.293 inches of exhaust lift. With slightly more duration and lift than the stock cam, we knew we’d pick up the power at the top end without giving any away at the low end. To complete the installation, we added a set of chilled iron lifters (part No. CF02) and an adjustable vernier timing gear set (part No. VCS-02) so we could dial in the cam to specs.
Step 4: Install It Right
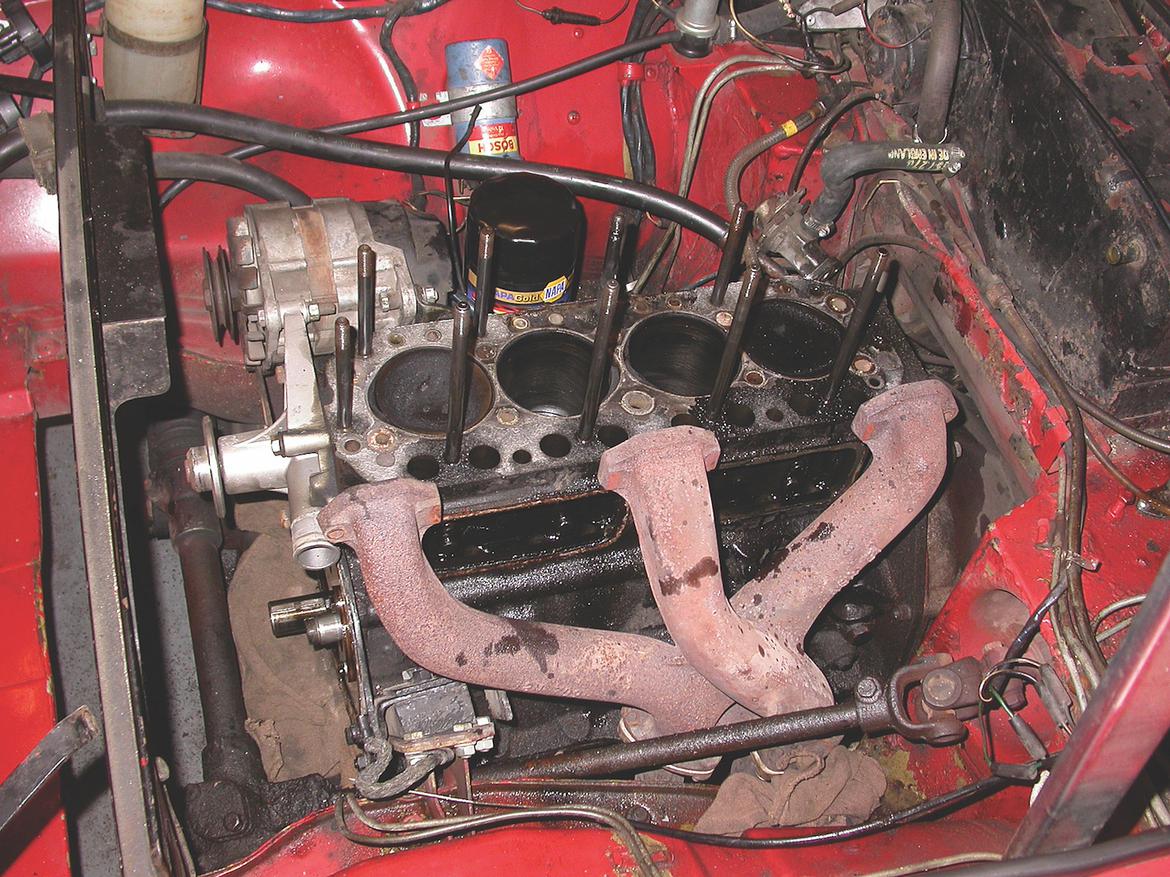
Now we could begin installing our trick new parts. We had already pulled the cylinder head for the port work, but the stock cam was still inside our engine.
To remove the stock cam, first we pulled the radiator to make room. Then we started on the engine, removing the harmonic damper, timing cover, timing gears and timing chain. Next we removed the distributor and drive gear; these components are driven by the cam and the gear interferes with the cam’s removal. (Note: The factory manual says you have to remove the oil pump as well, since its gear is also cam-driven. In practice, we’ve found you only need to remove the distributor drive gear.)
1. With the engine partly disassembled, we were ready to clean things up and then reinstall parts.

2. Before installing the cam, we thoroughly coated it with the supplied lubricant.
3. We carefully slid the cam into the engine.
Next, we removed the pushrods and lifters. With that done, we carefully pulled the cam from the front of the engine.
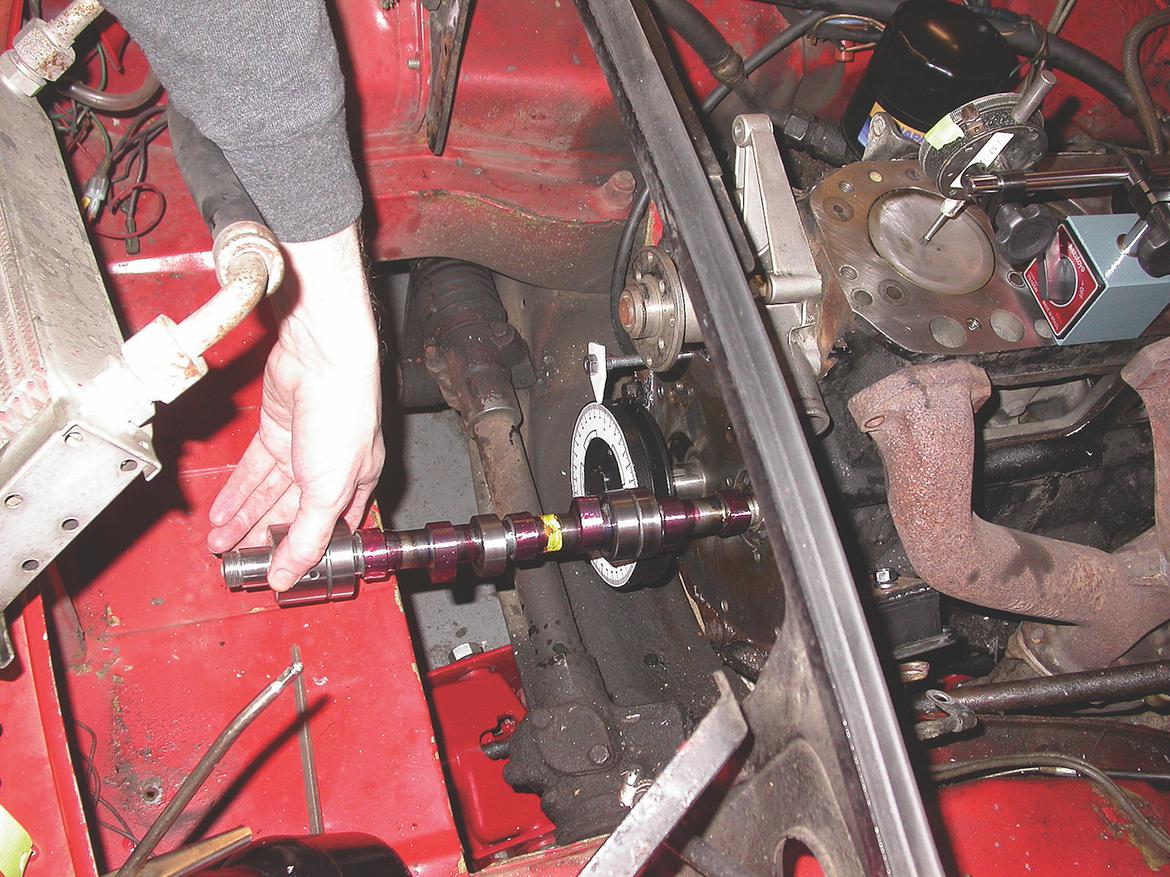
As the manuals always say, installation was the reverse of removal, with the exception of timing the cam. That procedure can be found in most repair manuals, but it requires a degree-wheel, dial indicator, wire pointer and a lot of patience. Spending the extra money on the vernier adjustable timing gear set really saved us some time in this process, and it wasn’t long before we had installed the cam and timed it at 4 degrees of advance.
With the cam and lifters back in, we reinstalled the cylinder head, pushrods and rocker assembly. We torqued the head to 55 lb.-ft. using the radial tightening sequence listed in the factory manual. We also adjusted the valves to the specs listed on APT’s instruction sheet: 0.018 inches for both the intake and exhaust.
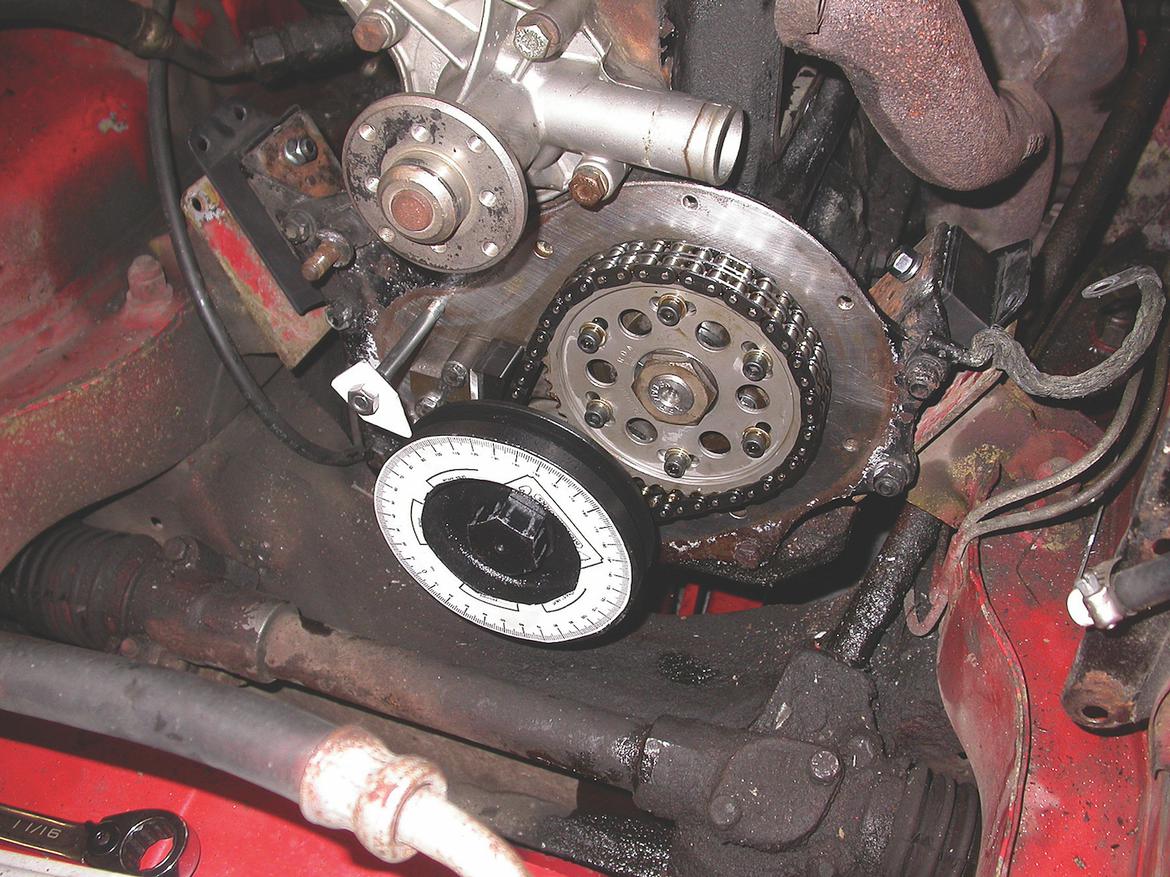
4. We downloaded a degree wheel from the Internet. We printed the wheel, cut it out and glued it to our harmonic damper. By now, we’d also installed our adjustable timing gear set and chain.
5. Using a dial indicator, we finished timing the cam to APT’s specs.
6. Now we could reinstall the cylinder head.
Last steps included the installation of the carbs, ignition and radiator. After that, we were ready to restart the engine. Since we had to bed in our new cam, we followed the same type of startup procedure we use for new engines. The short version is that we ran the engine at 2000 rpm for about 20 minutes before retorquing the head and readjusting the valves.
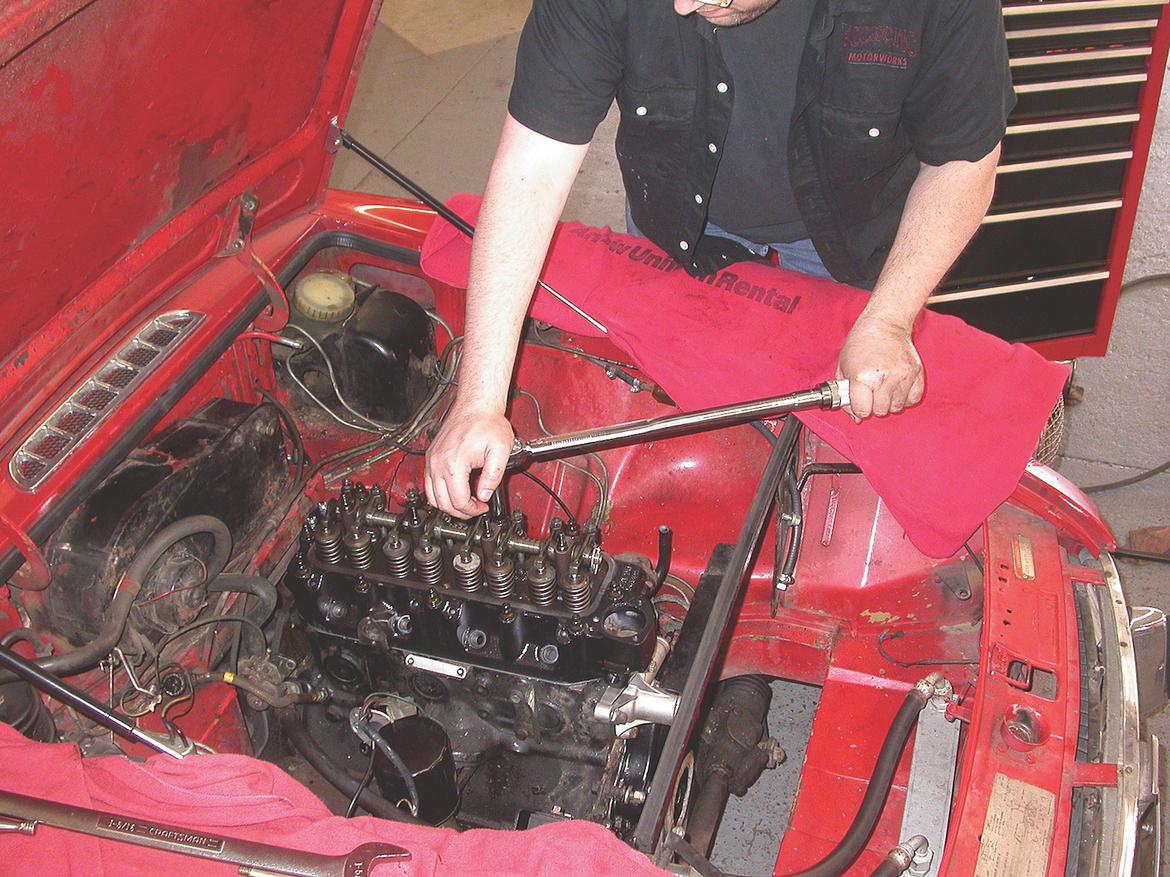
7. Then we torqued the head nuts in a radial order.
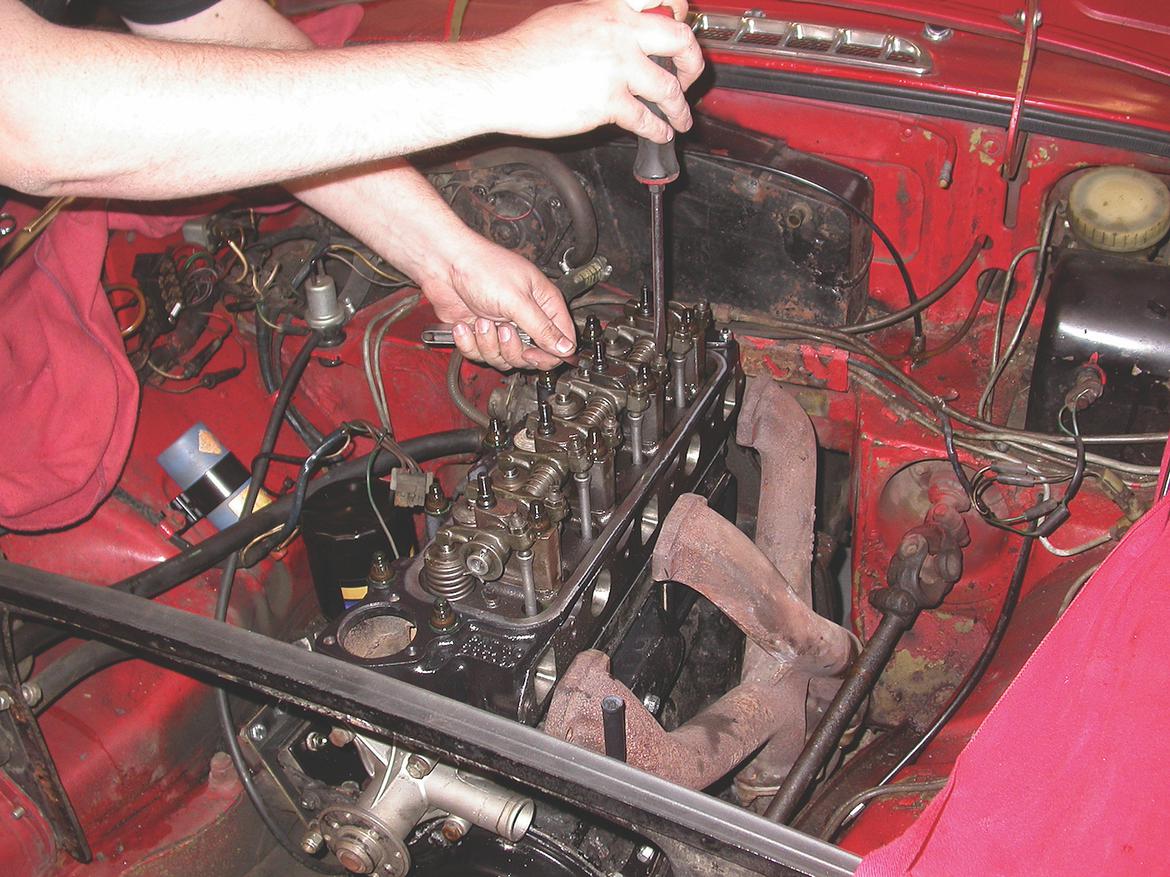
8. The valves were adjusted to APT’s specs.
9. With everything reinstalled, we were ready for a tune and drive.
Step 5: Tune It Right
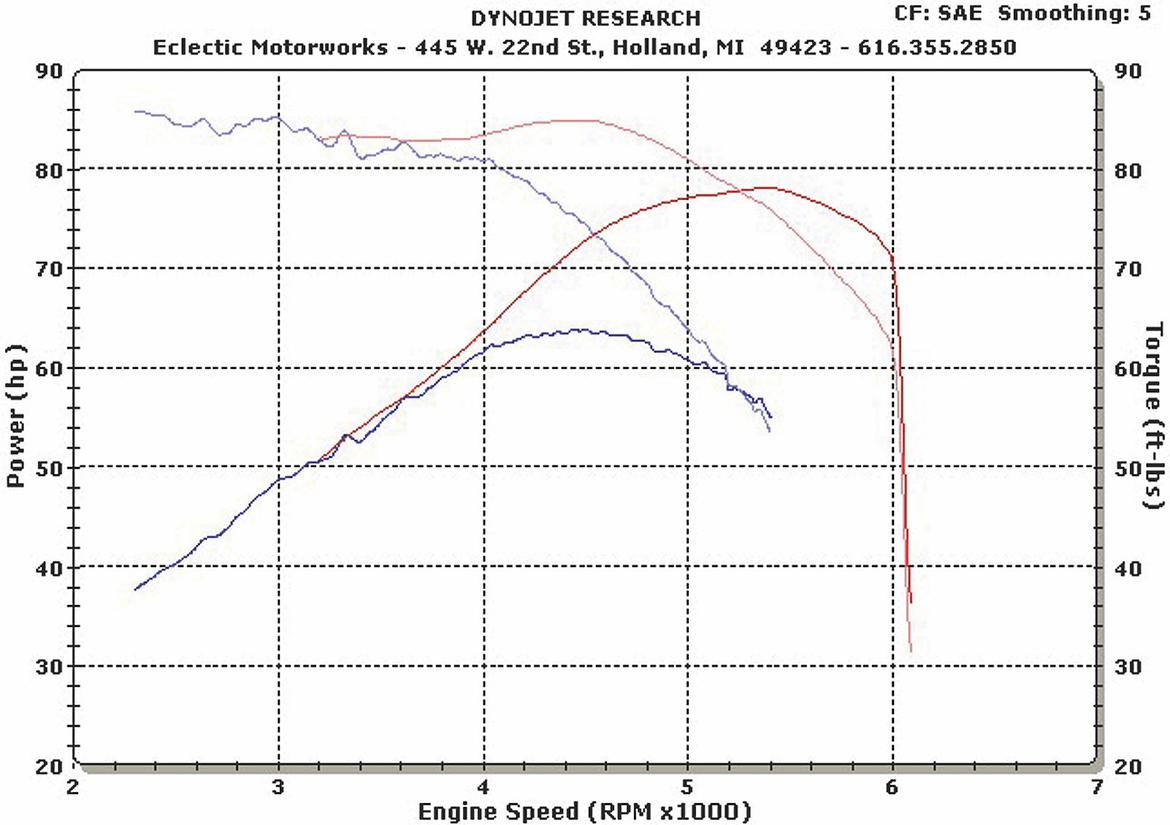
The dyno graph says it all: We greatly broadened our torque curve and increased horsepower without any losses. Careful planning and proper parts gave us near-perfect results.
Time to tune. We disconnected the distributor’s vacuum advance and set the ignition timing to 32 degrees of maximum advance. We then balanced the carbs and set the idle mixture.
A few test drives told us we had done something right—the car was definitely quicker. While we could have continued the tuning on the street, we headed right to the chassis dyno. We’ve found this to be the quickest way to hone in on a performance tune.
After our first dyno runs, we discovered that we were running lean at higher engine speeds. We weren’t surprised, since we were now making more power in this range. Some carb needle swaps got our air/fuel ratio where we wanted it—about 12.5:1 under load—so we then adjusted the timing slightly to find our best power. In the end, 35 degrees of total advance timing and a set of AAB needles got us the tune-up we wanted.
Peak horsepower at the wheels had jumped from 64 to 78. Better still, the new horsepower curve did exactly what we wanted: We saw gains above 4000 rpm with no loss down low. Torque had also responded well. We gained about 9 lb.-ft. of peak torque, but more importantly we extended the peak area of torque curve by more than 1000 rpm. That’s what gave us the additional horsepower above 4500 rpm.
Step 6: Drive It Right
We were done tuning and realized some nice horsepower gains. But what would the stopwatch say?
Our zero-to-60 runs dropped by 2.1 seconds to 11.4. While we were extremely pleased with this time, we figured that we could coax some more out of the car by simply driving it differently.
Before the upgrades, shifting gears at 4500 rpm netted us our quickest zero-to-60 times. If we buzzed the engine any faster, our times actually got longer since the engine was losing power above 4500 rpm.
After the upgrades, we shifted at the same point so we could make some fair comparisons. Our dyno graphs said that raising our shift points would now help. Shifting at 5500 rpm dropped another 1.3 seconds off our time. Our final zero-to-60 time averaged 10.1 seconds.
Not only had we sped up our car considerably, we had actually improved its drivability. By sticking with a conservative cam, we lost no power at low- and mid-range engine speeds and still had an excellent idle.
Better yet, before the upgrades, our high compression ratio required premium unleaded fuel that still left us with pinging problems. After the upgrades, we could run unleaded regular on all but the hottest summer days without a single ping. We attribute this gain to the porting, especially of the restrictive exhaust ports. We’ve seen this time and again with B-series engines—a well-ported head gets the heat out of the combustion chamber faster and keeps preignition and detonation at bay.
We were pleased with our results. We added almost 15 rear-wheel horsepower while lopping an honest 3.4 seconds off our zero-to-60 times. Minivans beware and Priuses watch out—there’s a faster MGB in town!
More like this
Comments
I raced a B in SCCA/CASC for many years, then restored a BGT to fast road spec. Great strides in this article, lots more to do - shaved & balanced crank, lightened/baslanced rods, flywheel etc., a weber carb, free flow exhast header, stronger valve springs - what have I forgotten? Used to pull 8,500+ on long straightaways this is for both road & track. Back in the day circa mid-70's. Vroom vroom........
Excellent article, I appreciate that the cost of parts was shown. Most upgrade stories don't include what it cost. The only thing missing was the hours involved.

wspohn
SuperDork
5/15/22 11:51 a.m.
Excellent article, well set out and with a significant improvement in performance at the end.
Nice to see some real thought going into a modification - I get so tired of some guy that sticks a downdraft Weber on an MGB claiming that he has made an improvement when he doesn't have a clue.
Displaying 1-3 of 3 commentsView all comments on the CMS forums
You'll need to log in to post.


 By Carl Heideman


