
JoeTR6
HalfDork
11/13/16 5:52 p.m.
The exhaust is fully in and torqued. It's rock solid, maybe too solid. I used a wide band clamp to hold the midpipe to the muffler, so that should allow slippage if needed. Before torquing down the exhaust manifold, I pulled it off to check the exhaust ports. Some work with a Dremel tool matched them a little better to the head, but I took less than 1/16" off for the worst one. So the fit was pretty good as is.
While bead blasting the radiator pan, one of the gloves tore. So finishing the frame was not going to happen. Manipulating this part in the blast cabinet got me thinking about how heavy the damn thing was and how much work it would be to make one out of aluminum. It probably weighs less than 20 pounds, but that's on the nose of the car. It could probably shave 10 pounds. But it does act as the front swaybar mount, so would need to be fairly thick.
Speaking of shaving weight, I'm going to cut the crash beams out of the doors. That's nearly 20 pounds of weight that I don't want. My goal is to keep the total weight below 2300 pounds.
JoeTR6
HalfDork
11/13/16 7:02 p.m.
So I've been thinking about this...
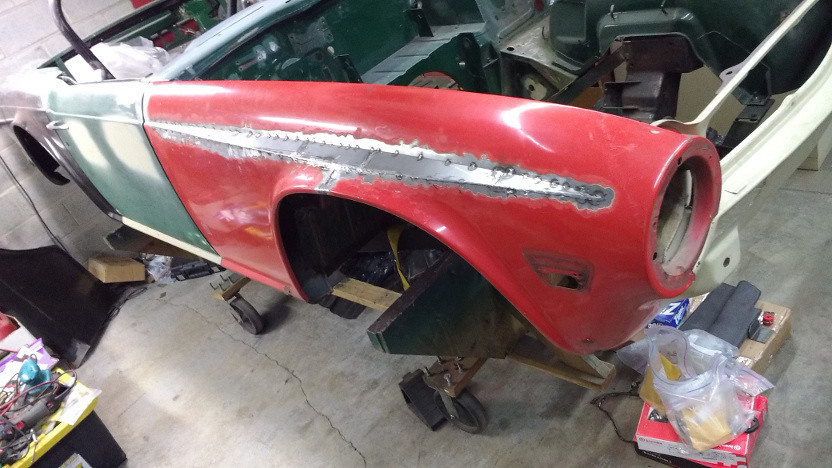
The autocross wheels I bought (Rota RB 16x7s) just barely fit inside the fenders of my stock TR6. With 225 width tires, they'll stick out a little. I questioned earlier whether I wanted to cut and weld new fenders. But now I'm thinking why not? The rear fenders may be harder than the fronts to flare. But one of my new rear fenders was slightly munged up. I had to drill new mounting holes, and it was damaged when fitting it. So, I was thinking about trying to flare it. Worst case, I buy a new rear fender. Overall, I think the car would look better with these flares. Sort of a TR6 M3. And later, when I completely lose my mind and drop a S52 into this chassis, it will be a better match. 
My concern is that with the suspension lowered as it is, no amount of fender edge rolling will prevent contact. I have some thin spring spacers that could be used to raise the ride height, but I'd rather make the autocross wheels fit inside the fenders.
JoeTR6
HalfDork
11/19/16 9:03 p.m.
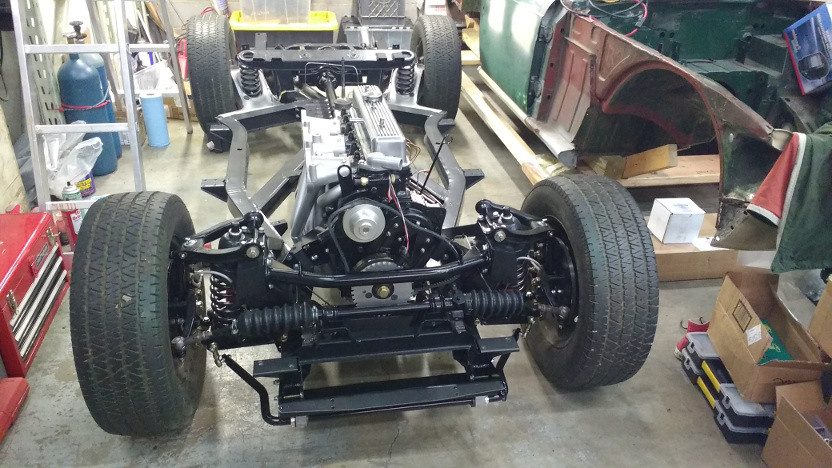
My goal this weekend is pretty simple. I just need to complete the frame so I can move on to getting the body painted. That's all. I spent an hour refitting the blast cabinet so that the few remaining parts could be prepped for powder coating. This mostly worked well, but the new media, a blend of glass beads and aluminum oxide, kept clogging in the siphon tube. Pretty frustrating, but the blasting is done. Now if I can just get the stuff powder coated. Both pieces will just barely fit in the oven.
The fluids were topped up, including the engine oil. If I can find the oil pressure line fitting, I'm going to spin the engine to build oil pressure tomorrow. So far, no leaks.
JoeTR6
Dork
11/20/16 7:26 p.m.
Today the front crossmember tube and radiator shield were powder coated and installed. This allowed the front sway bar to finally be bolted up. The clearance on the trigger wheel turned out better than I'd expected.
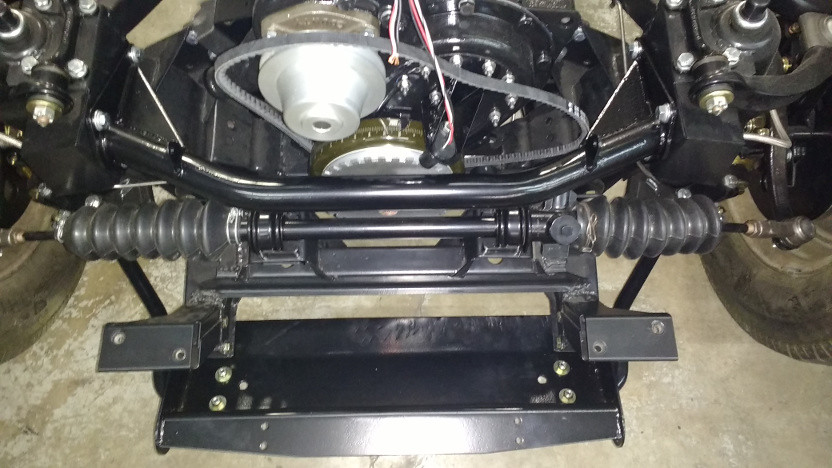
Well, that took longer than I wanted. And by that, I mean the entire frame. I had originally wanted to finish around early summer and have paint on the body by now. Oh well, better late than never.
BTW, all of the oils are filled with no new leaks. I'll spin the engine with the starter after Thanksgiving to see if it builds some oil pressure. It crossed my mind to bolt some Weber DCOEs on, drop in a distributor, and see if it will start. But that's just stuff I'd need to remove later. On to finishing the body.
JoeTR6
HalfDork
12/4/16 4:57 p.m.
I hooked up a temporary oil pressure gauge and battery to test the oil pressure. After the filter primed, pressure built slowly up to 60 psi. Doing this also coated the insides of the block and value cover with oil which will help it survive the next 6 months or so until it's ready to start.
Rather than bolt through the firewall, I'm going to weld mounts inside the footwell for the MS and other additions. This means I'm working on the positioning of all the Megasquirt related components now. As a bonus, I can figure out where to pass wires though the firewall before painting.
Still watching, cool to see it coming back together. I kind of like the slab sides on these cars, curious what flairs will do to the overall visuals.
JoeTR6
HalfDork
12/4/16 7:09 p.m.
pres589 wrote:
Still watching, cool to see it coming back together. I kind of like the slab sides on these cars, curious what flairs will do to the overall visuals.
Yeah, I'm still on the fence about flaring the fenders. If only there was a cheap way to see what it might look like in the color I'm leaning towards (Sapphire Blue).
JoeTR6
HalfDork
12/18/16 11:33 a.m.
I've been on a sabbatical from this project. The only thing I managed to do on the car in the last 2 weeks is cleanup and rearrange the bay so that work can proceed on the body.
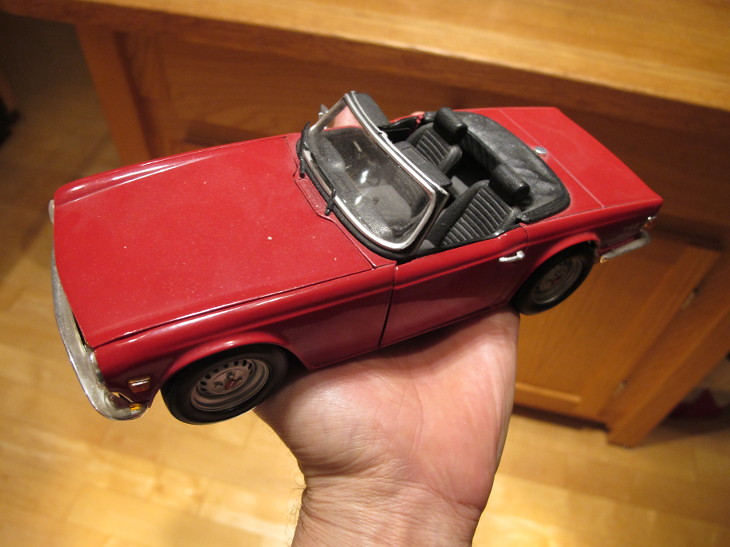
I did finish the body and paint work on the model.

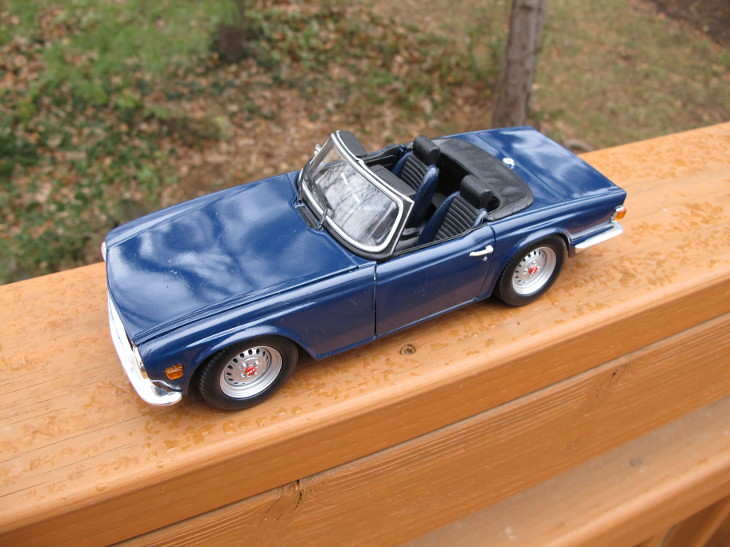
The fenders were flared the scale equivalent of 1 1/4" (which is about the same as an E30 M3). I can probably get a 1 3/4" flare without completely distorting the fender, but the risk of creasing it goes up. That's how much the actual fender shown in an earlier post was flared, but that was really pushing it. From doing this, I've learned at least two things. First, 1 1/4" flares would be fairly subtle. Secondly, my model building skills have really deteriorated. The paint I used was very watery and soft, so that didn't help any.
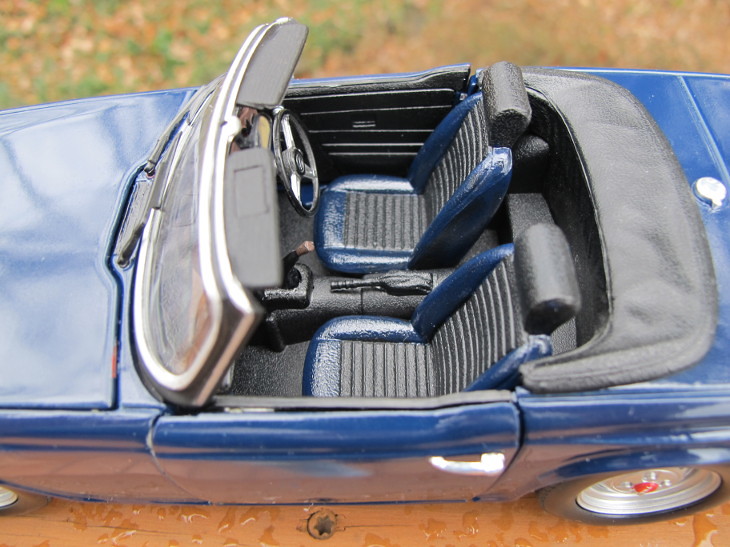
While the interior was separated from the body, I experimented a little with the seats. I was thinking that making them partially blue would break up the all black interior. Once the paint hardens some, a silver stripe will be laid across the nose similar to a TR250.
Jeez. I am in awe of your model-building skills. If it's not a LEGO, I can't build it.
JoeTR6
HalfDork
12/19/16 4:08 p.m.
This was just a pre-built Ertl model that I tore apart and resprayed. I'm just not as good with small screwdrivers and X-acto knives as I used to be. Maybe it's all of the 5-pound hammering I've been doing, but I've lost the finesse/desire for building small stuff.
JoeTR6
HalfDork
12/22/16 9:07 a.m.
Having thought this over for a few days, I've decided not to flare the fenders. While I think it would look OK, it's just more work that would delay getting the paint done. Also, the replacement front fenders, if I screw one up, cost $800 shipped. Plus the ones I have were made 25 years ago when the tooling was fresher. So I'm bolting up the body panels again getting ready for paint and working on a few small welding tasks.
JoeTR6 wrote:
Having thought this over for a few days, I've decided not to flare the fenders. While I think it would look OK, it's just more work that would delay getting the paint done. Also, the replacement front fenders, if I screw one up, cost $800 shipped. Plus the ones I have were made 25 years ago when the tooling was fresher. So I'm bolting up the body panels again getting ready for paint and working on a few small welding tasks.
+1, FWIW. Hard to mess with styling that close to perfection.
JoeTR6
HalfDork
12/23/16 2:04 p.m.
In reply to wheelsmithy:
Opinions are always welcome. Otherwise, when I come up with some crazy idea there's nobody to talk me down.
I was thinking that if the autocross tires won't fit inside the fenders, it's no big deal. They are already a smaller diameter than stock, so I just need to find the right diameter and width. Ultimately, I could end up with a setup like this where the fender flares can't possibly be wide enough anyway.

Since I'm using stock 5.5" steel rims for the street, I know the stock fenders will fit any tire that is safe to mount.
JoeTR6
HalfDork
12/31/16 5:33 p.m.
Some progress was made today. I filled three holes in the body that were used by the A/C system hoses and the radio antenna. It's almost pointless to have a radio in a TR6.
Last week I started pulling out parts that will need to be rebuilt such as the heater box. The fan motor is surprisingly good after 40 years. I also started working on a dead pedal that will also hold the headlight dip switch.
JoeTR6 wrote:
In reply to wheelsmithy:
Opinions are always welcome. Otherwise, when I come up with some crazy idea there's nobody to talk me down.
I was thinking that if the autocross tires won't fit inside the fenders, it's no big deal. They are already a smaller diameter than stock, so I just need to find the right diameter and width. Ultimately, I could end up with a setup like this where the fender flares can't possibly be wide enough anyway.
Since I'm using stock 5.5" steel rims for the street, I know the stock fenders will fit any tire that is safe to mount.
I actually kinda like the look with the meats hanging out of the fenders like that.... Not practical in the rain though.
And why is it pointless to have a radio in a TR6?
JoeTR6
HalfDork
12/31/16 10:25 p.m.
Indy-Guy wrote:
And why is it pointless to have a radio in a TR6?
I put a radio with a cassette player in my drivable TR6 when I restored it over 20 years ago. I know, swank. There were box speakers added behind the seats (on the floor, not on the back interior panel like some do). Even with the rear speakers, music sounded terrible and was barely audible above the engine and wind noise at speed. Plus, I don't like blaring the radio with the top down. I'd rather hear the engine than what's on most radio stations anyway. Maybe if I drove the car everyday with the top up, I'd have a different opinion. As another issue for an autocross car, there's the extra weight and drain on the alternator. I'll be using a 55 amp 1980 Fiesta alternator, so power isn't really an issue.

Ian F
MegaDork
1/1/17 8:23 a.m.
Finally got mostly caught up with your thread. Really cool. Few random comments:
Yes - POR15 engine paint is awesome and will look "wet" for many years. You do have to follow the instructions to the letter, though. Marine Clean > Metal Ready > POR15 > then the actual paint (while the POR15 was still slightly tacky). At least that's what my ex did for the engine in her Volvo.
I also agree about running a Goodparts cam, even if otherwise FSP. As you mentioned, the car won't really be competitive and from what I've seen/heard, unless you plan to go to Nationals, nobody will really car at the local level. I know a few Spitfire guys who run in FSP and the engines in their cars are even remotely legal. They still aren't PAX threats, so nobody cares.
Any reason why you didn't go with Good's CV joint axles instead of the U-joints? Or even a R180 diff? Yes... not really FSP legal, but again - who cares. I want R160 diffs for my Spit and GT6 so bad I can taste it. Every time I drive those cars, the whine of the rear diff annoys the piss out of me.
I have to admit, if I had a TR6 it would be hard for me not to call Richard Good and just say, "I'll take one of everything, please."  I am still planning to order few bits for my GT6 when I get my spare engine rebuilt.
JoeTR6
HalfDork
1/1/17 5:43 p.m.
Ian F wrote:
Any reason why you didn't go with Good's CV joint axles instead of the U-joints? Or even a R180 diff? Yes... not really FSP legal, but again - who cares. I want R160 diffs for my Spit and GT6 so bad I can taste it. Every time I drive those cars, the whine of the rear diff annoys the piss out of me.
Mostly to stay within FSP rules. The CV half-shafts are undoubtedly better. Technically even the hub upgrade is against the rules, but I prefer to keep my wheels on the car. Swapping to the R200 diff would have been cheaper and easier than buying/installing the Quaiffe unit. We have a Quaiffe in another TR6 that is purely an autocross car, and it does fairly well as long as you can avoid lifting the rear tire. Hopefully the rebuilt diff won't be too noisy.
Besides, I can always upgrade later. The half-shafts I'm using are in good shape with only 38k miles on them. They also cost significantly less.
JoeTR6
HalfDork
1/2/17 5:28 p.m.
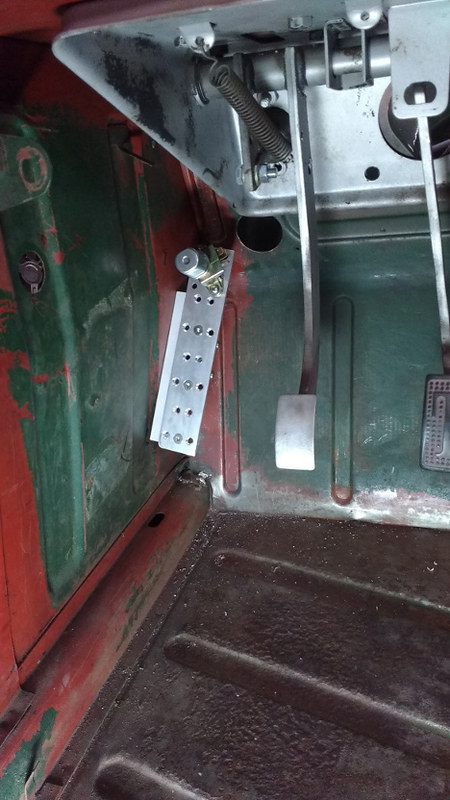
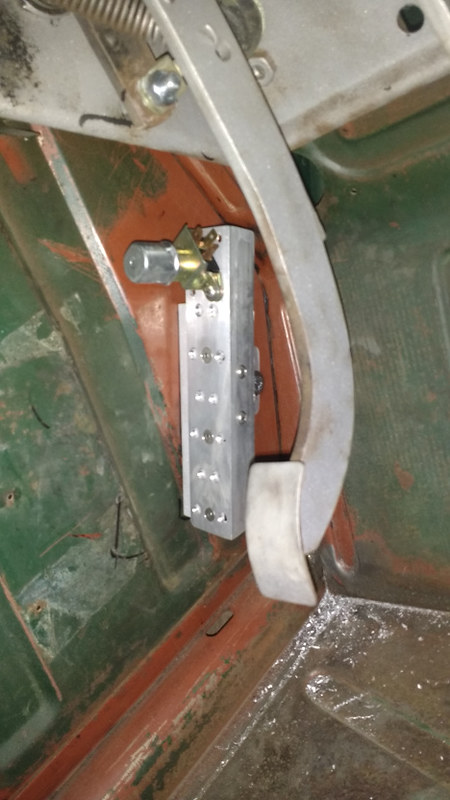
Todays accomplishment was finishing the dead pedal. The seat and pedal box were fitted to ensure it was in the right place before drilling holes in the bulkhead and welding nuts on the body. I'll need to put some hard spacers in the carpeted panel that covers the bulkhead side. The dead pedal rest is angled in towards the front to prevent my foot from getting trapped behind it, and there's an extra brace bolted to that to stiffen the assembly up. The bulkhead panel flexes more than the pedal itself, so it should be sturdy enough.
I realized today that before all of the Megasquirt-related stuff can be fitted, I need a fuse/relay box. My plan is to put as much as I can under the dash.
JoeTR6
HalfDork
1/14/17 6:56 p.m.
I spent today working on the actual car for the first time in almost two weeks. First up was revisiting the dead pedal. It flexed a little too much, so I added a bolt to the diagonal brace that before was only resting on the bulkhead panel. You can just barely see the bolt head here. This should keep the aluminum from fatiguing.
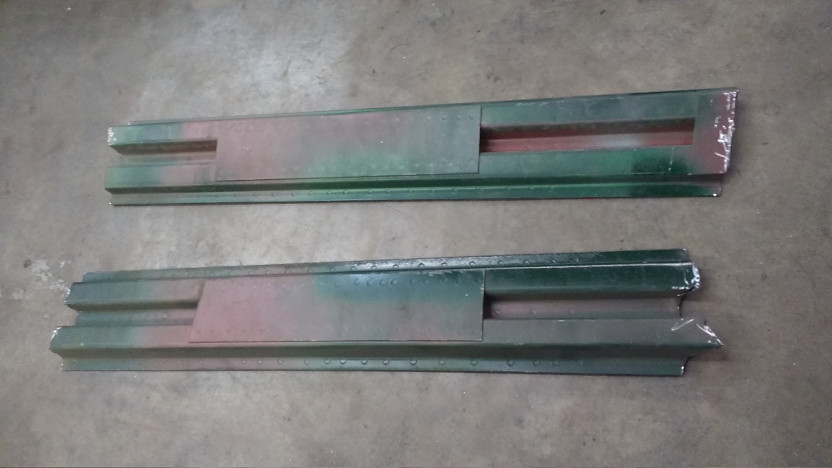
Next up was cutting out the side-impact door beams. I had started doing this before and thought it was going to be tough to cut welds that were close to the door skin at the front. It turns out I just needed to cut the beam further back, remove it, and then cut out the remaining piece without the rest of the beam blocking. I still managed to cut myself a few times on sharp edges and may have cooked my Craftsman equivalent of a Dremel tool. It sort of sucked anyway. Not a fun job, but at least the berkeleying things are out.
Weighing them verified that they were almost 10 lbs. per door.
The next thing is to mount the Megasquirt and other electronics under the dash. I've been sorting out the wiring harness to determine how many wires need to pass through either side of the firewall.
Those are some heavy door bars. Are you just leaving them out? or replacing them with a cage?
JoeTR6
HalfDork
1/15/17 7:38 a.m.
Indy-Guy wrote:
Those are some heavy door bars. Are you just leaving them out? or replacing them with a cage?
It's possible that I will run some forward braces from my bolt-in roll bar to the front frame mounts. I do not want to run these through the doors, so they would need to stay fairly low (i.e., below the seat cushion. This would provide some side impact protection, but would probably be too low to really help. Mainly it would be to stiffen the chassis.
At this point, I'm going for added lightness. I can always modify the roll bar later.
JoeTR6
HalfDork
1/16/17 3:28 p.m.
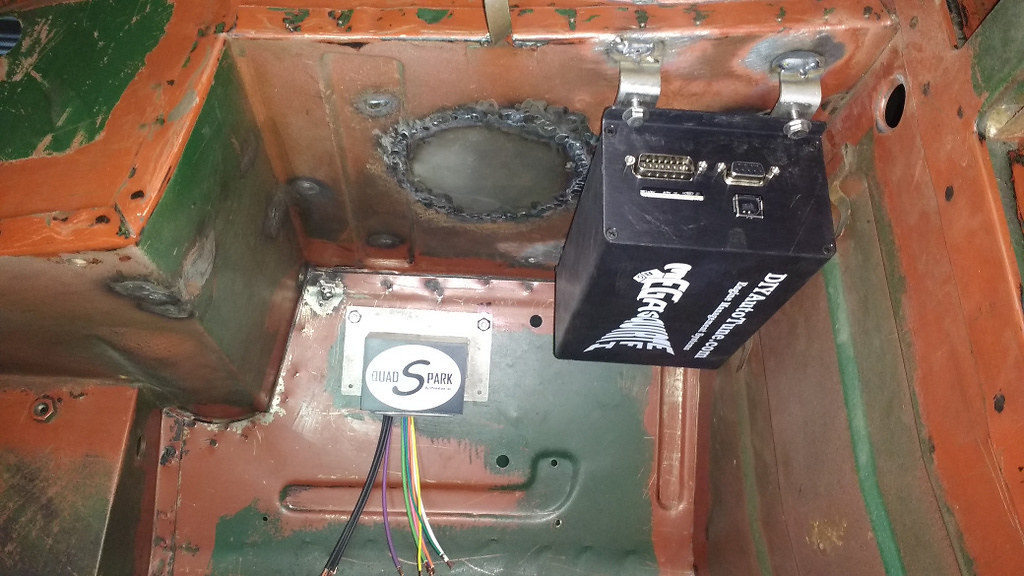
More progress towards paint. I'm using the space where the factory A/C unit mounted for most/all of the added electrical stuff. Space is a little tight. With the Megasquirt mounted, there's a 6.5" x 9" area to mount the fuse/relay panel. This is exactly the dimensions of the plastic bin I put everything in on another TR6, so it should fit. I'll mount up a board and lay all of the components out on it just to be sure. Given the location, I should put it in a box or at least put a kick cover over it.
JoeTR6
HalfDork
2/4/17 9:06 p.m.
It's time to get moving on this again. I made up a mounting plate out of lexan that fits next to the Megasquirt to hold the fuse block and relays. Mounts were welded in for that. Moving to the other side, I need to figure out the accelerator linkage. I'll definitely not use the stock linkage. The best thing to do is use a cable. Unfortunately, I can't find a stock accelerator pedal in my parts pile. Since I moved the motor back 3/8", I'm going to use a firewall mounted pedal that doesn't cross behind the engine like the factory pedal. That, a cable, and some lord mounts are on order.
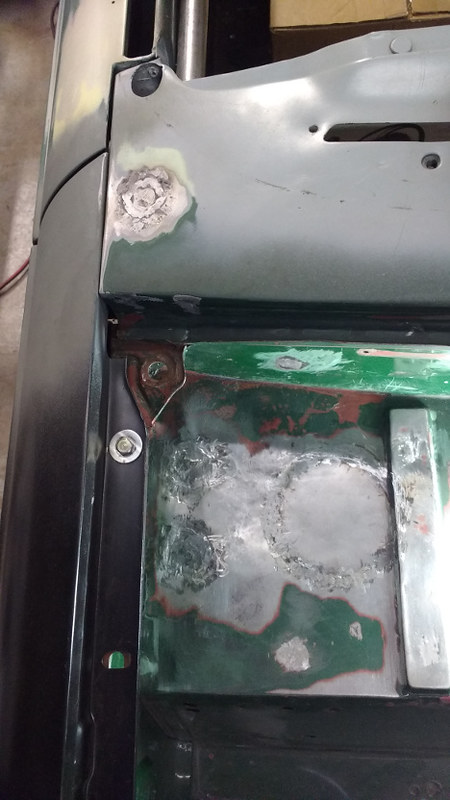
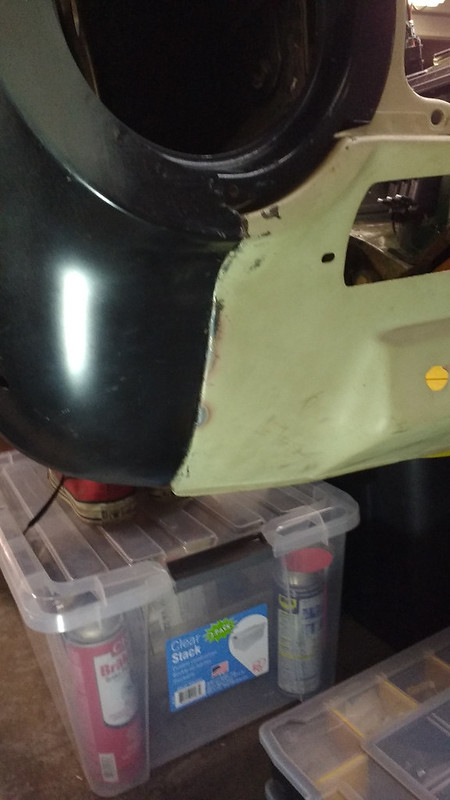
Time to finish some other details while I'm waiting on parts. First up was changing the shape of the front valence where it meets the fender on one side. The valance is the only original part from the '72 shell. It was welded on years ago by someone else, and they didn't check whether it matched the fender. I had to cut the plugs welds, then shape and re-weld the valance. It's not perfect, but should now just take a skim coat of filler to make pretty.
The panel fit on the rest of the shell is good. Once the throttle pedal and cable are in, it may be time to call the painter.
JoeTR6
HalfDork
2/12/17 5:20 p.m.
I now have 3 pedals.
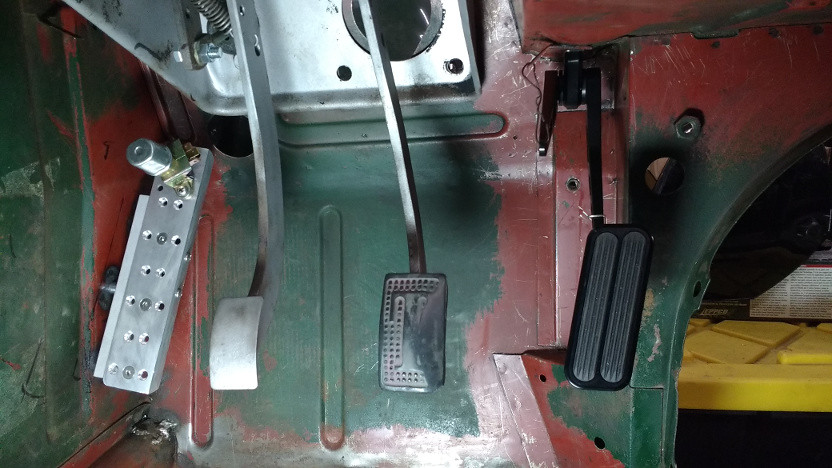
But there's a catch. The pedal I ordered was originally too short. Then I realized that the pad could be flipped over to extend it down an inch. This allowed the mount to be bolted to the bulkhead under where the steering column goes through the firewall. But this also moved the pad farther to the left where it was already close to the brake pedal. So I flipped the pedal to the other side of the mount which puts it a bit too far to the right. Where the mount is located now is on the bottom of a round cutout for the steering, so it would be difficult to move it to either side. Besides, the bellcrank would then not line up with the cable, which will already be as far left as it can go (but will definitely clear the steering column).
It's just one of those "damned any way I move something" situations. As it sits, the pedal lever is only 1/2" to the right of where the stock accelerator goes, but the pad on this one is wider and tilts towards the brake pedal. So I think it will work. If I can't heal/toe, I can move the pedal to the other side of the mount, but this will also change sides for the cable. I can also lower the pedal with a simple spacer between the mount and bulkhead.
The last thing on my pre-paint list is adding some wheel arch liners. Sticky tires really do a number on the wheel arch paint in a TR6, and stuff ends up getting into places that typically rust. I was planning on adding material to extend the metal arch to keep the fenders from getting blasted. The exposed tub could be protected with some clear plastic film. Adding these liners involves drilling holes in the tub, so I really wanted to fit them before painting. Also, I may weld nuts on the inside to make installation easier.


