I always recommend figuring out what the vehicles primary mission is before making powerplant (or really any major) decisions. That's tricky in this case because the vehicles primary mission is to provide a fun project to work on that allows MazdaDeuce to learn new project, photography and writing skills.
I haven't seen any pictures of the cylinder bores but I'm leaning towards just putting the existing engine back together with as few new parts as possible. Sure, it won't be ready for a bunch of high speed high mileage work but it'll run and allow MazdaDeuce and (everyone else to though his writing) to get to understand Ferdinand's personality as a running and driving truck.
Yes, get the plugs out, crank it over with copious amounts of WD40 going down the carb and in the plug holes.
Refill with oil and plugs. Start , run up to temp and repeat until no signs of moisture in the oil.
Same with the trans and diff.
Should live a long healthy life.
I used to 4 wheel in a small river. Sunk my K-10 more than once!
APEowner wrote:
I haven't seen any pictures of the cylinder bores but I'm leaning towards just putting the existing engine back together with as few new parts as possible. Sure, it won't be ready for a bunch of high speed high mileage work but it'll run and allow MazdaDeuce and (everyone else to though his writing) to get to understand Ferdinand's personality as a running and driving truck.
Sleeping on it and doing some math while driving around has me leaning this way. I need a new starter and rings, heli-coil one plug, and extract that exhaust manifold bolt. Maybe a new diaphragm in the fuel pump? Plugs, wires, coil? Maybe $300 in stuff. The hone, a valve spring compressor to disassemble the heads......I think it will be worth it as an experiment. Not that nobody has ever done this before, but I think it's pretty common to get a project home, take it apart, decide it's broken, and push it into the corner for a decade.
The Miata seats confused me greatly, until I figured out they weren't in the Miata.
I'm really surprised how fast that water went down. or did you just move the cars out of the water?
The water was down almost six feet in the last 48 hours at his house. There is a lot of people from outside Houston commenting on Houston drainage, but it honestly works well. It's just, 40 inches of rain has a hard time going anywhere.
Another bit of data to write down so I remember it. The transmission is a T-98. It should go from 6.39:1 in first to direct 1:1 in fourth. The IH box has a long input shaft, and in theory the 2wd box has a different output shaft from the 4wd box as well as being drilled differently on the output end so no easy way to attach a transfer case. The good news is that parts seem quite easy to come by and a whole pile of engines will bolt up to it.
So not the T-18 I thought it was, but that's pretty much how this project is going, isn't it? 

java230
SuperDork
8/31/17 4:19 p.m.
Do you have a two speed rear-end?
Big huge rear end with an Eaton two speed unit on it. The numbers I can find on the rear end itself are 525811 70599 and 6 33 with those separated by a diamond. I have no idea how to identify rear ends that are Sir Mix-a-Lot sized.
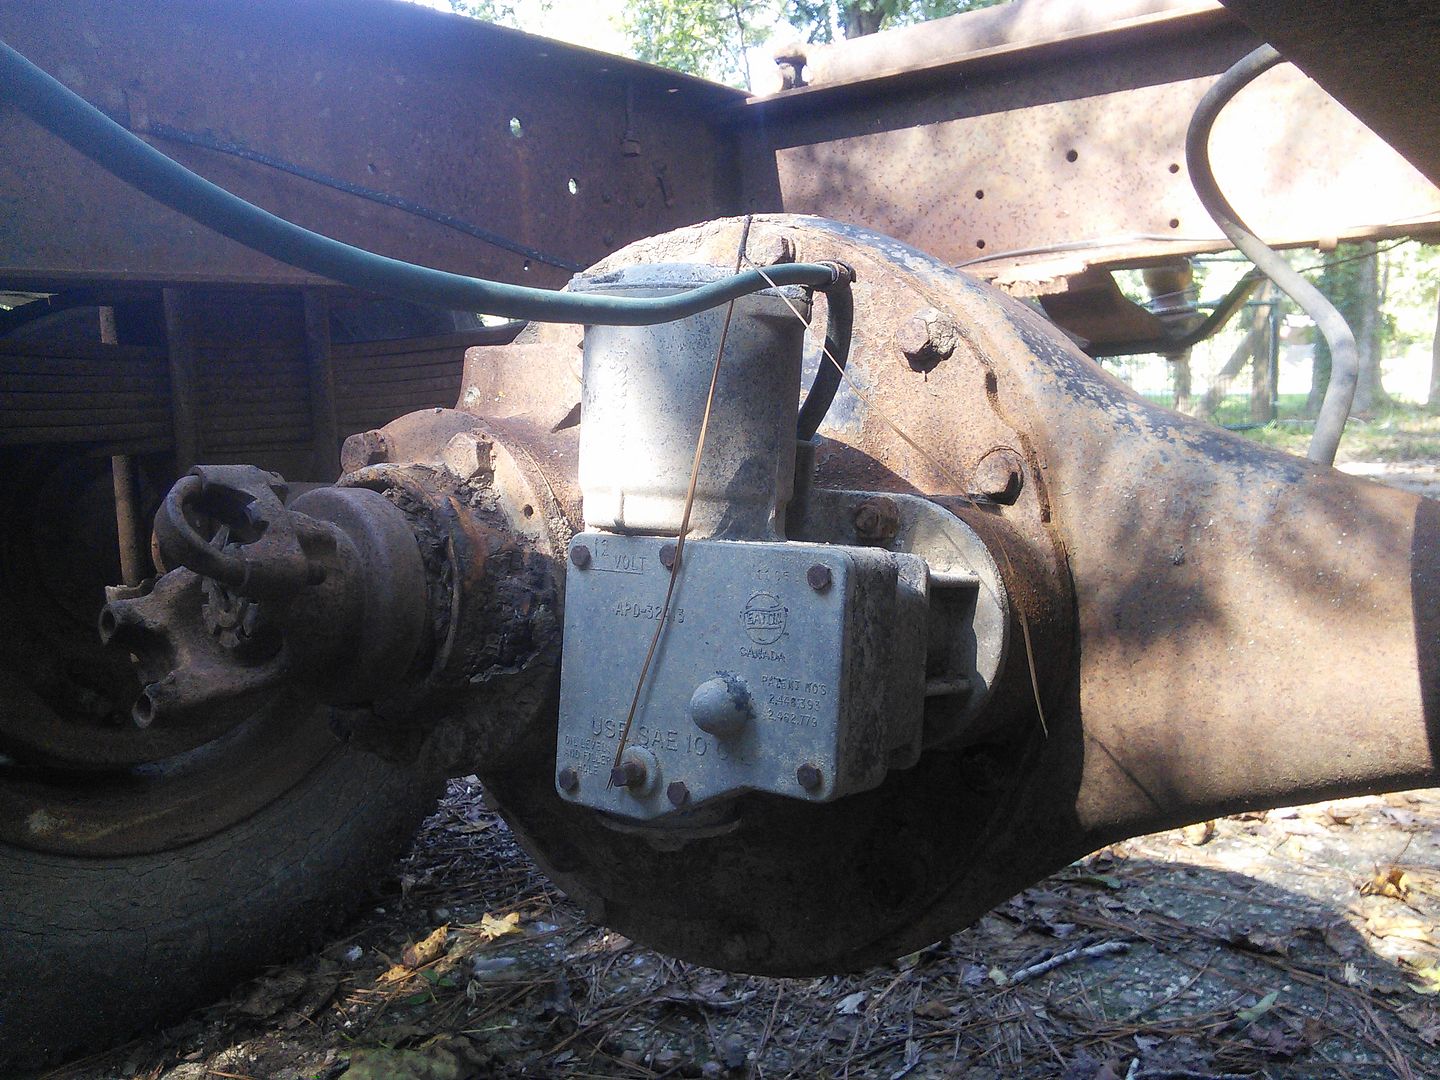
5.8ish and 6.4ish for the rear seems like what I found somewhere, both of which should terrible but are mitigated a bit by how tall the tires are.
How pitted are the cylinders?
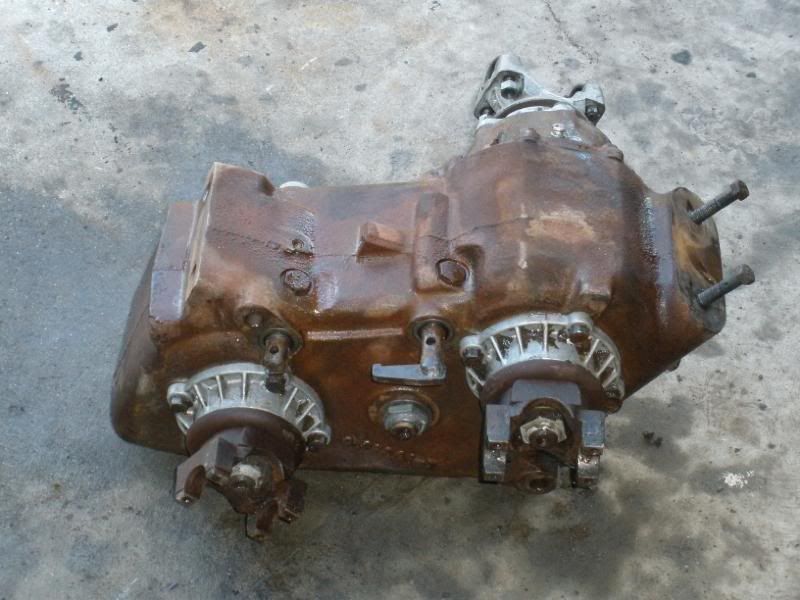
IH Transmission:
I'm not aware of any transfer case that bolts to the back on the transmission in the big trucks (the Scout and Scout II are a different story). The big stuff (read Pick up trucks, Travelalls, and this size) used the NP205 transfer case that has a U-Joint input yoke and SHORT little drive shaft that connects the transmission to the T-Case. Termed a "divorced" transfer case. Sooooo 4x4 IS possible with your transmission.
In reply to Indy-Guy:
A few of the '70s Suburbans came with a divorced NP205 as well. Neat setup.
Oldopelguy and I discussed divorced transfer cases before we even rolled it off the trailer. 
The last thing I did today was poke around the parts pile until I found something else to take apart, the fuel pump. About 70% of why I want to keep the motor is that I like the glass bowl in the fuel pump the holds the filter. It's spiffy.
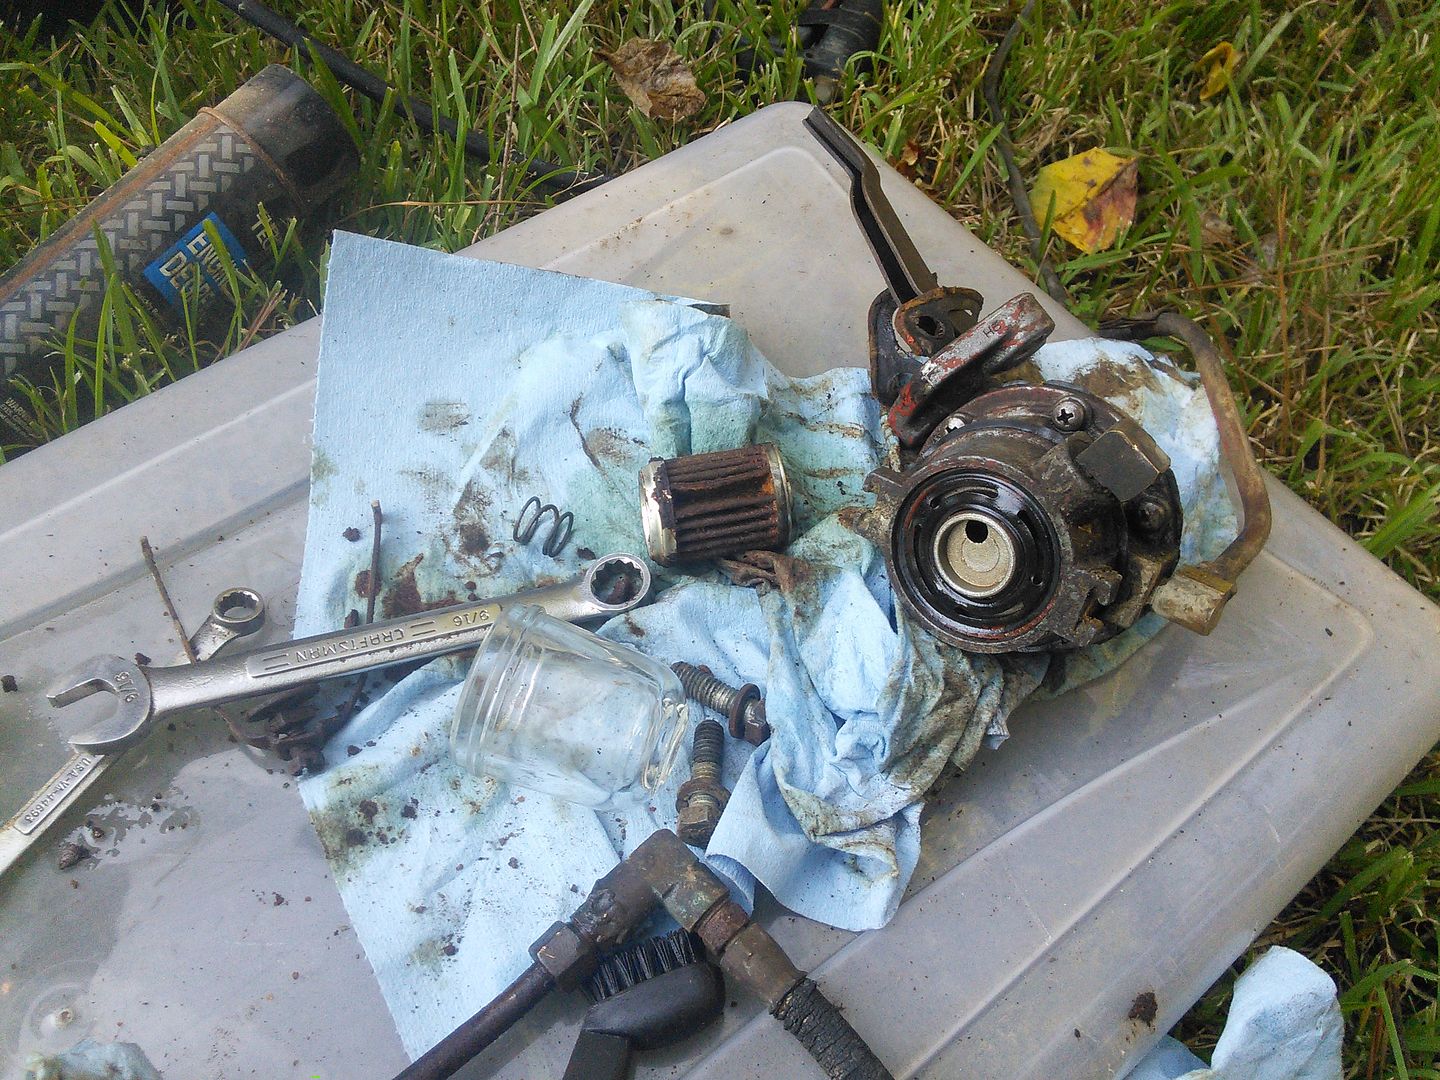 I actually took it out to the brush pile with a wrench so I could drain the old gas right onto things that I want to light on fire. I still got some one my hands. I'm going to go rub them with a mixture of PB Blaster and gear oil so they smell better than old gas.
oldopelguy wrote:
5.8ish and 6.4ish for the rear seems like what I found somewhere, both of which should terrible but are mitigated a bit by how tall the tires are.
How pitted are the cylinders?
When you say "cylinders", are you asking about the clutch master and slave? Those are very pitted. The brakes? Haven't taken them apart but I'm cautiously optimistic. Or the motor? At least six of them are good. One has a scratch that I'm worried about. The last one may or may not clean up, but I figure if I can get good compression in 6.5 of the 8, I'll run as good as it ever has.
It's got to run at least as well as the car my great uncle drove during WWII; there was at least two patches screwed on the block to keep oil in, when the rod bearings let go they were replaced with leather, and more than half of the lubrication fluid was lard to keep the leather softish. Supposedly at least one of the pistons had a disk of sheet metal screwed to the top of it to seal a hole, but I never saw it to prove it.
That reminds me, I need to visit the uncle that still lives on that farm and snoop around the shelter belt.

java230
SuperDork
8/31/17 8:24 p.m.
In reply to mazdeuce:
Yep rear end looks the same! The two speeds are sweet.
This is making me sad ours left.... The replacement is far more blah
NOHOME wrote:
Anyone know what Ferdinands last form of employment was? Guessing grain truck or grain truck wanna-be?
(giving photoberkit a try) This was Ferdinand's last job:


Yup, Ferdinand was Mater before Mater was cool.
I was able to pry the computer away from the kids for a few minutes to catch up on pictures.
Even with the shower cap on the truck took on a bit of water.
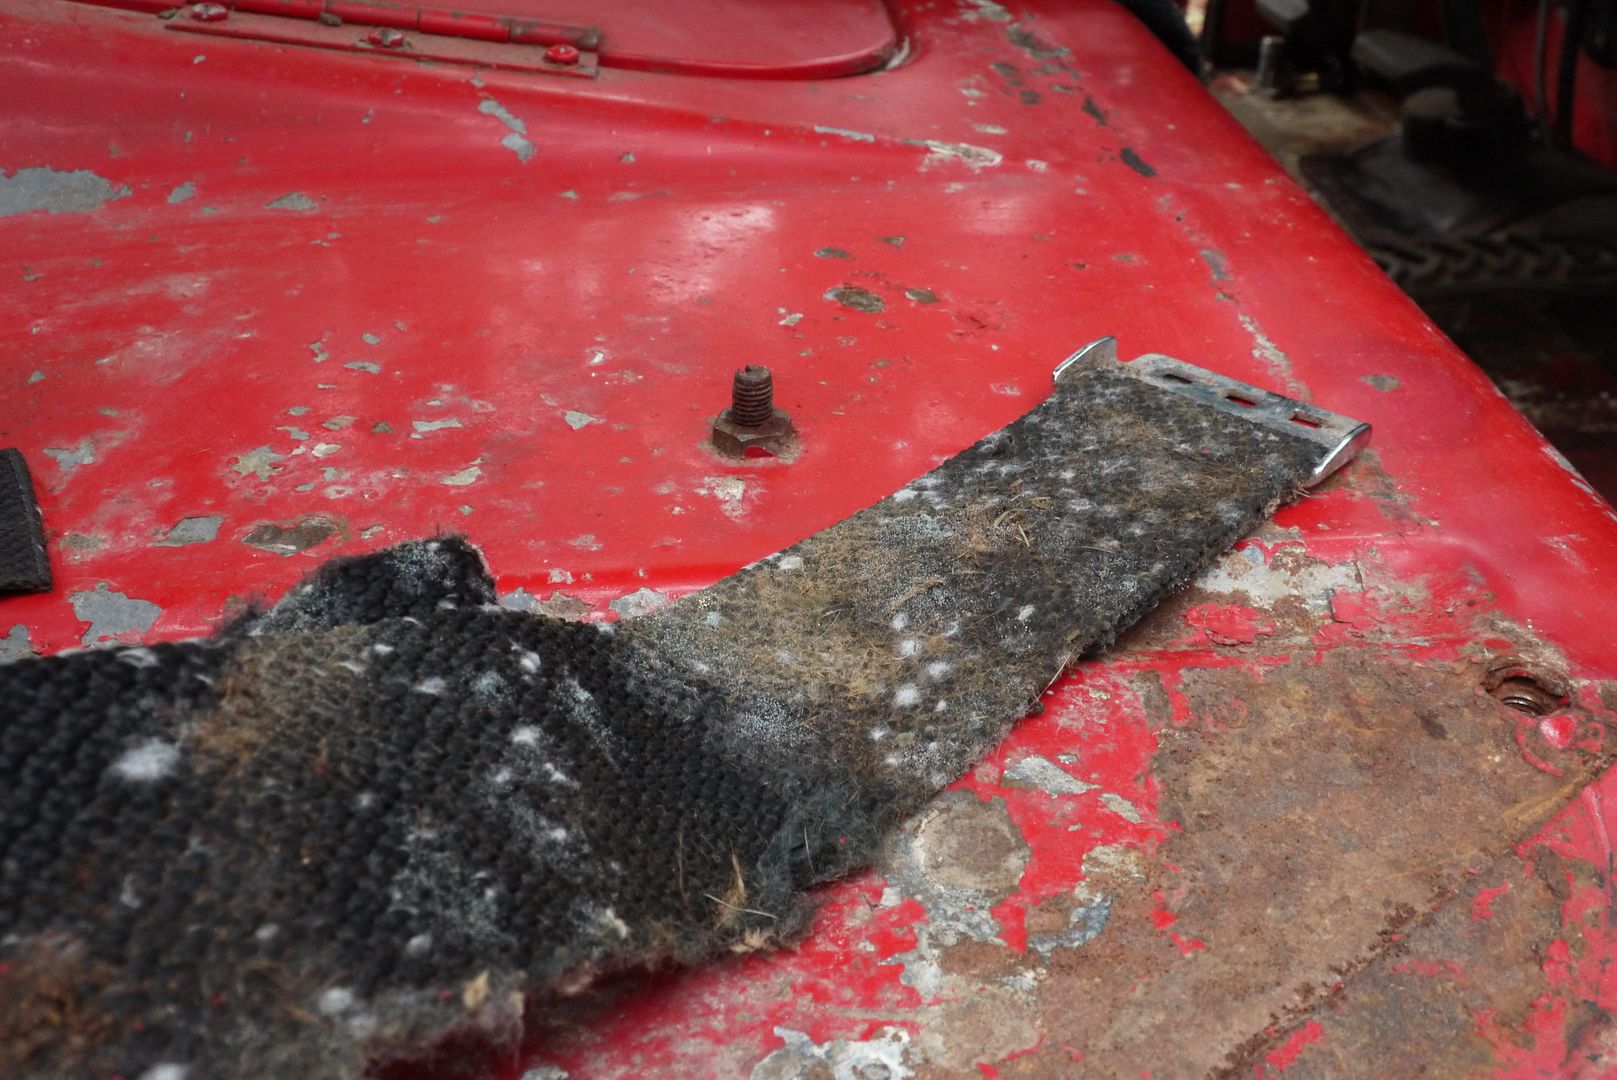
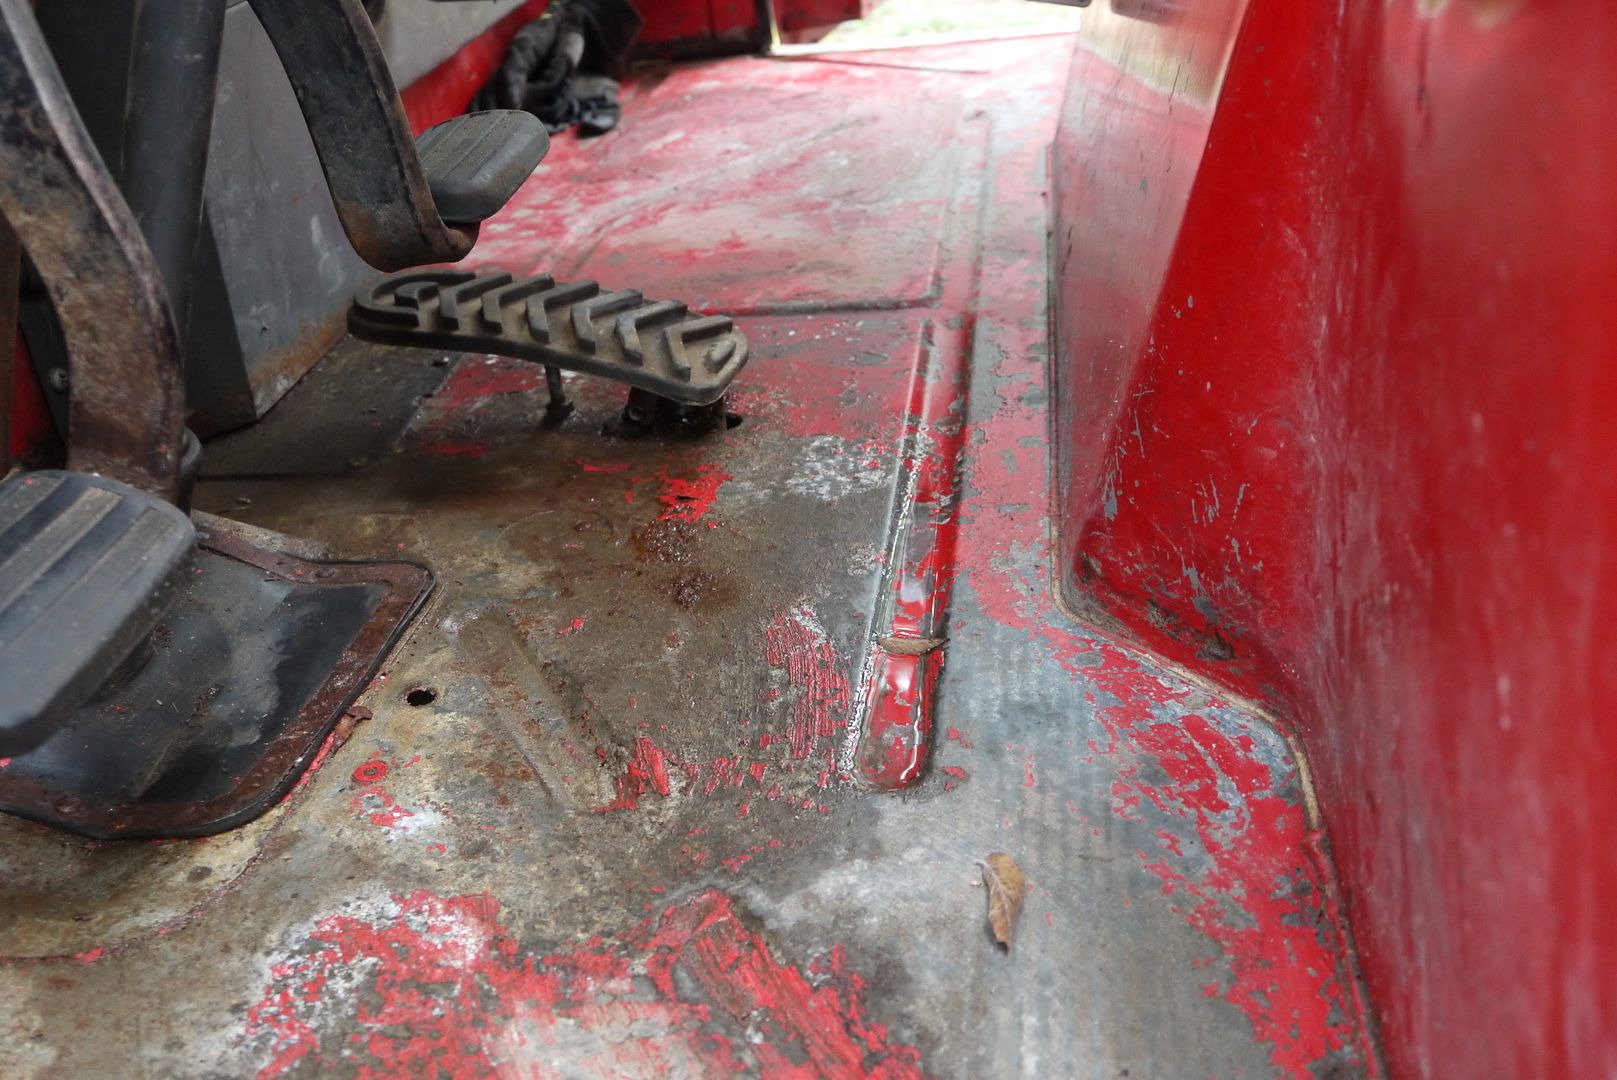 It's surprising how much mold was just sitting and waiting for moisture. The doors are open now and things are drying out.
 Who here has never taken a valve out? Anyone? Just me then? Ok.
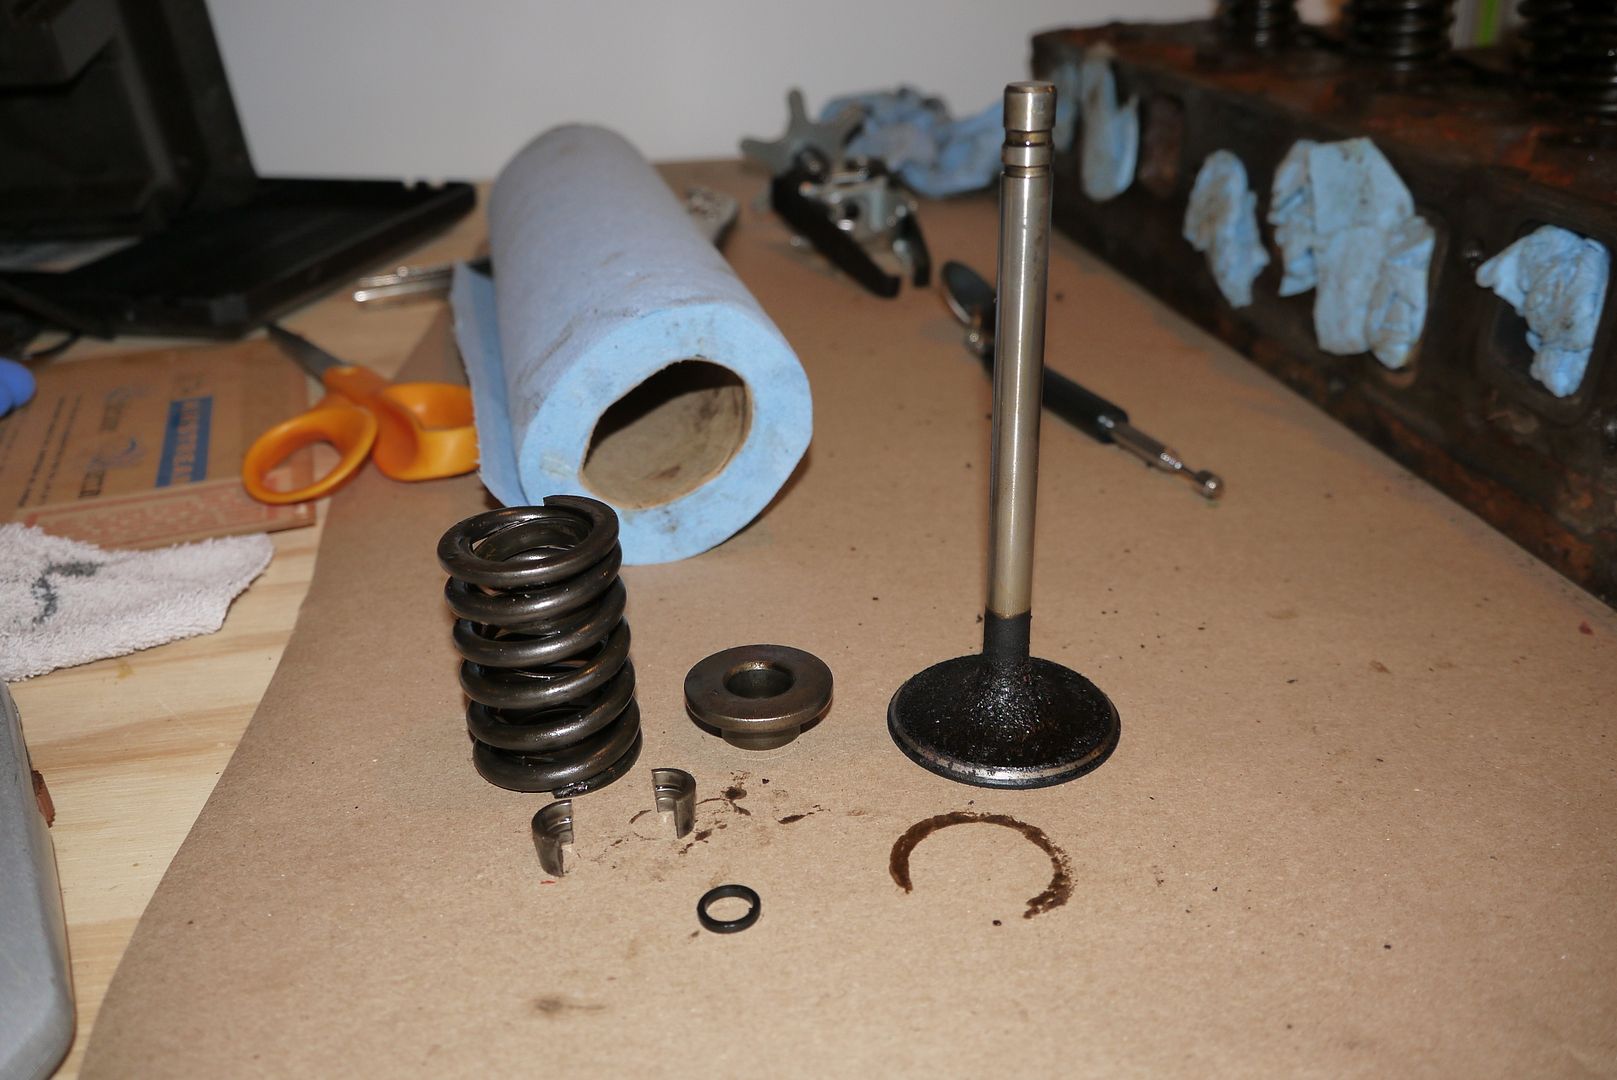
Armed with the finest Harbor Freight valve spring tool and a magnet on a stick, how hard can it be? 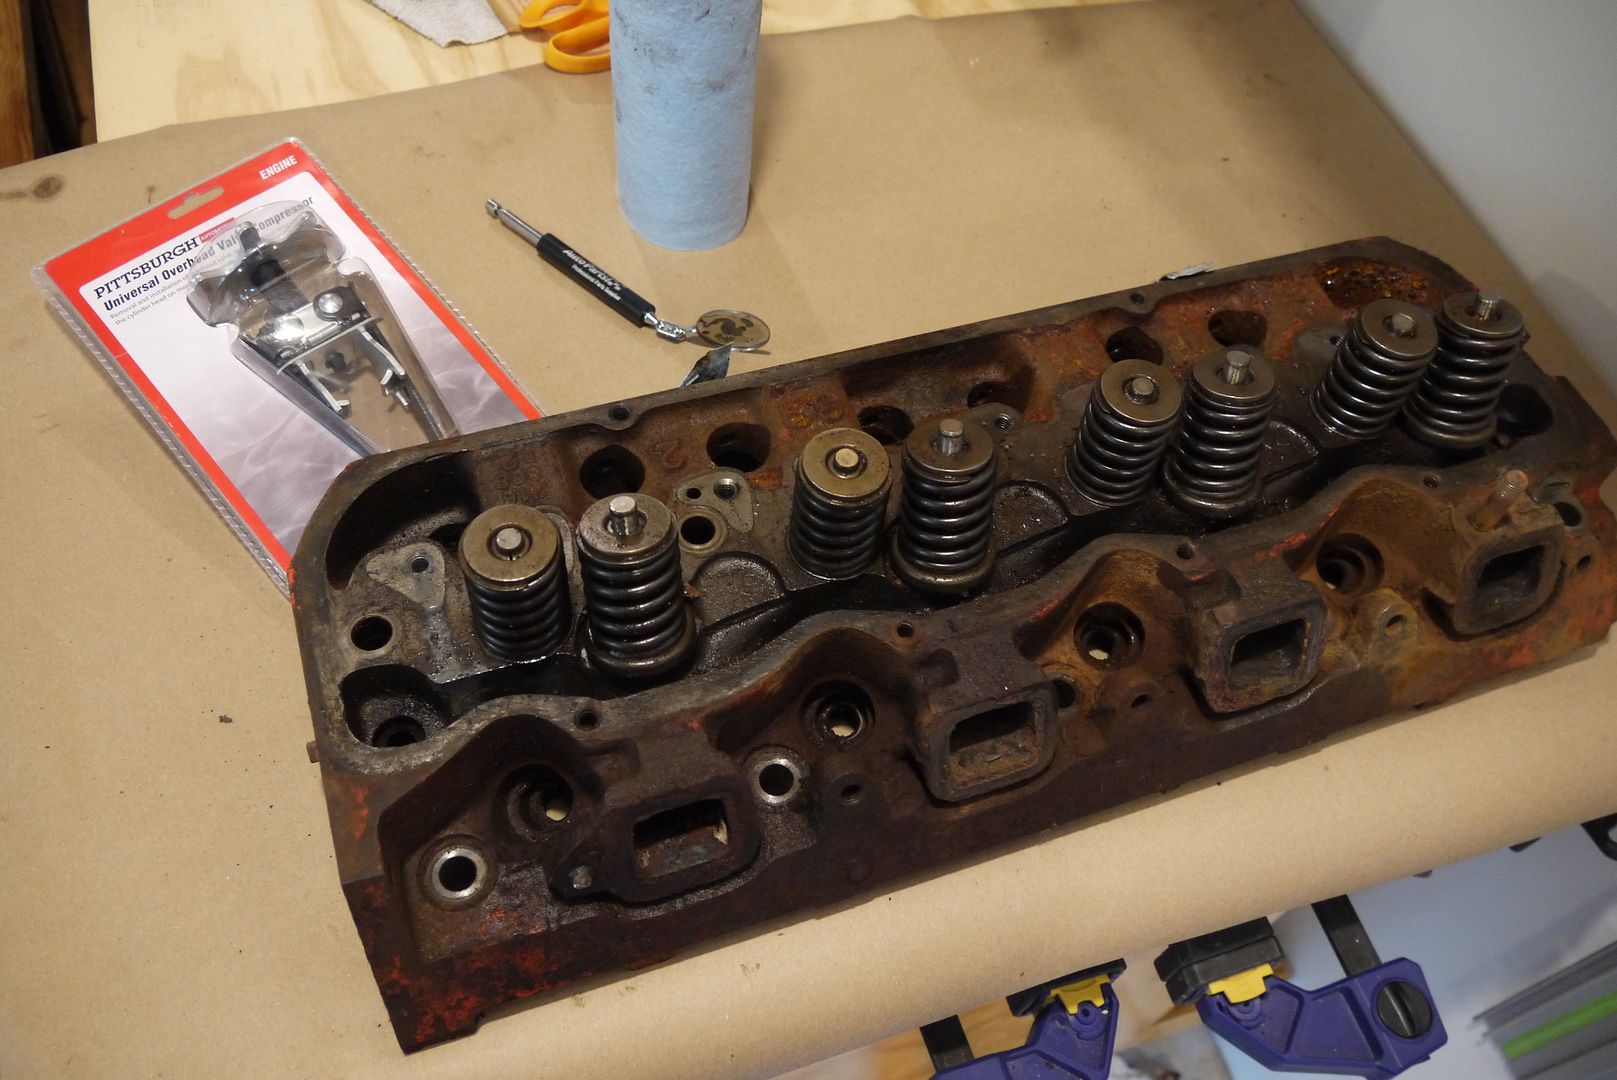 These are the parts of a valve assembly. As far as I can tell almost all valves are like this. I guess they figured it out early and haven't changed much. You have the valve, I think the valve seal is the little rubber ring, the valve spring and it's associated hats and seats which are the valve spring retainers, and the locks, which are the little half circles that wedge the whole thing together.
 The idea is that you compress the spring, the valve moves up with the locks, you remove the locks with your handy magnet on a stick, and then you just take it all apart. Which probably works great if your locks aren't stuck to your retainers. Which mine were. Of course. The initial solution was to tap the valve from the bottom with a hammer and loosen things. This popped the spring compressor off. Back on, but now hold the jaws in with Vice Grips. This worked. Kind of.
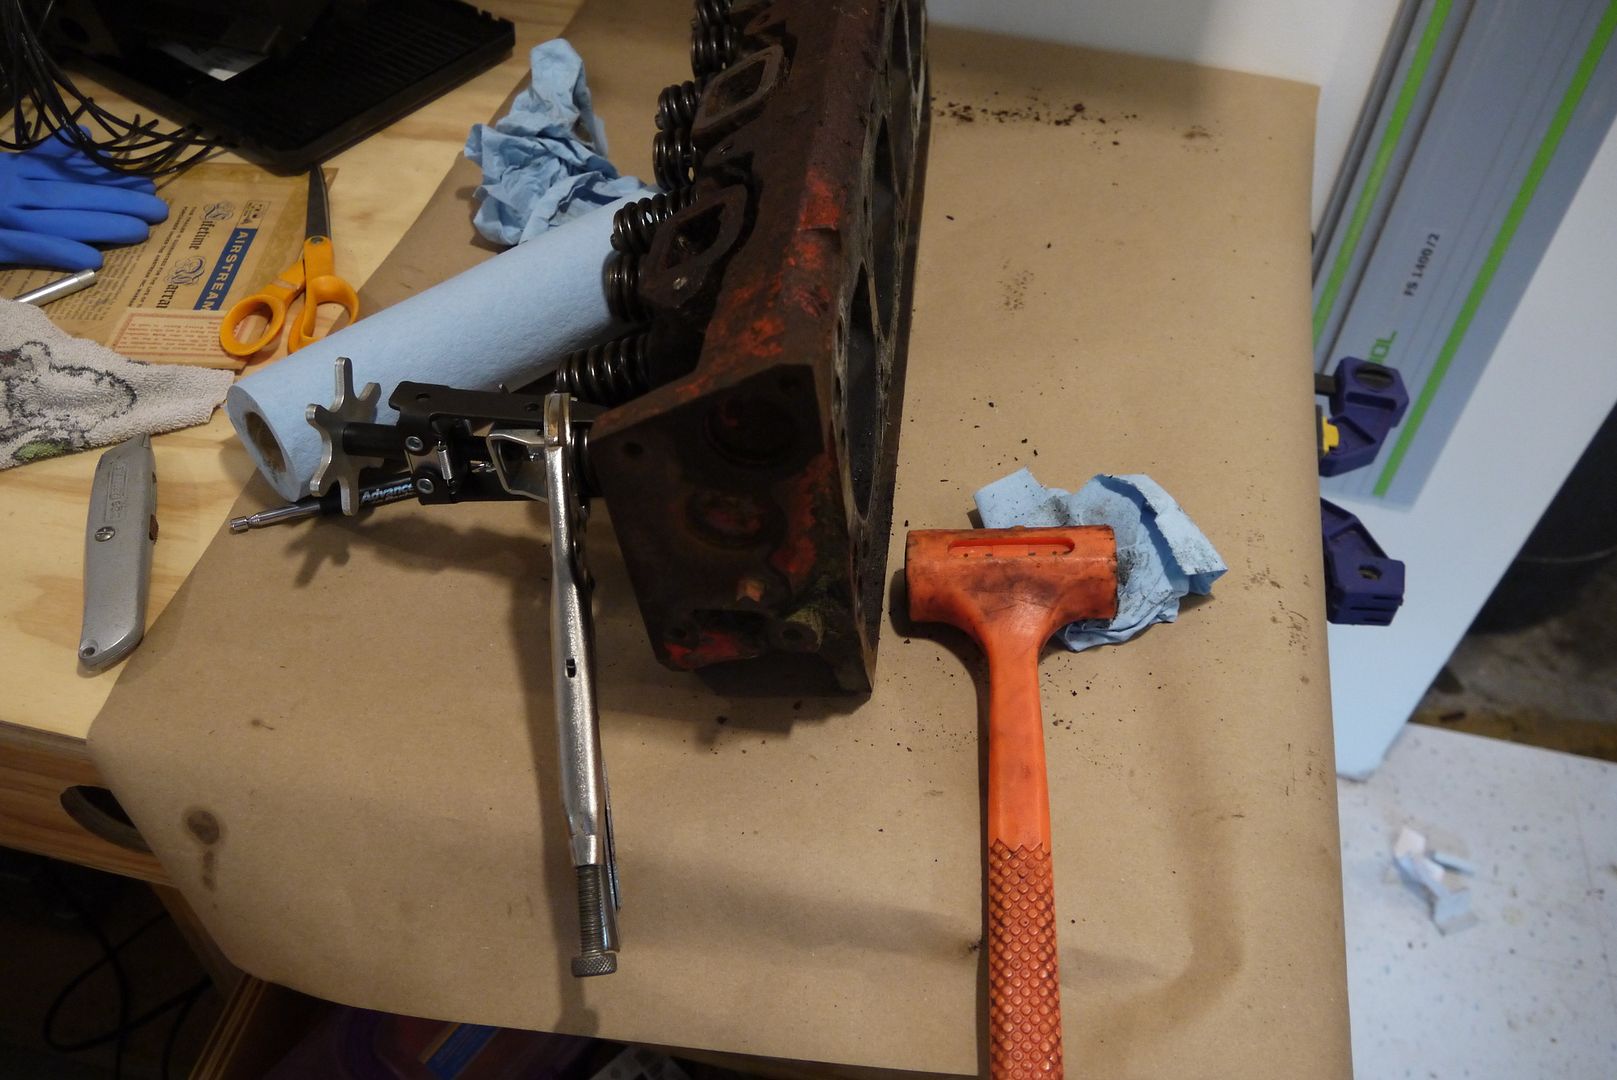 Then it didn't work. The solution I came up with but was too angry to photograph, was to put a paper towel under the head to hold the valves softly from moving down much. Then I put a socket on the retainer and hit it with a hammer a couple of times. This moved down the retainers while the valves stayed in place and freed the locks. Then I could use the spring compressor and all was well. Is there a better way to free stuck locks? I still have a second head to disassemble after all.
I hear there is power to be had by cleaning out the intake ports. Probably good I took this apart.
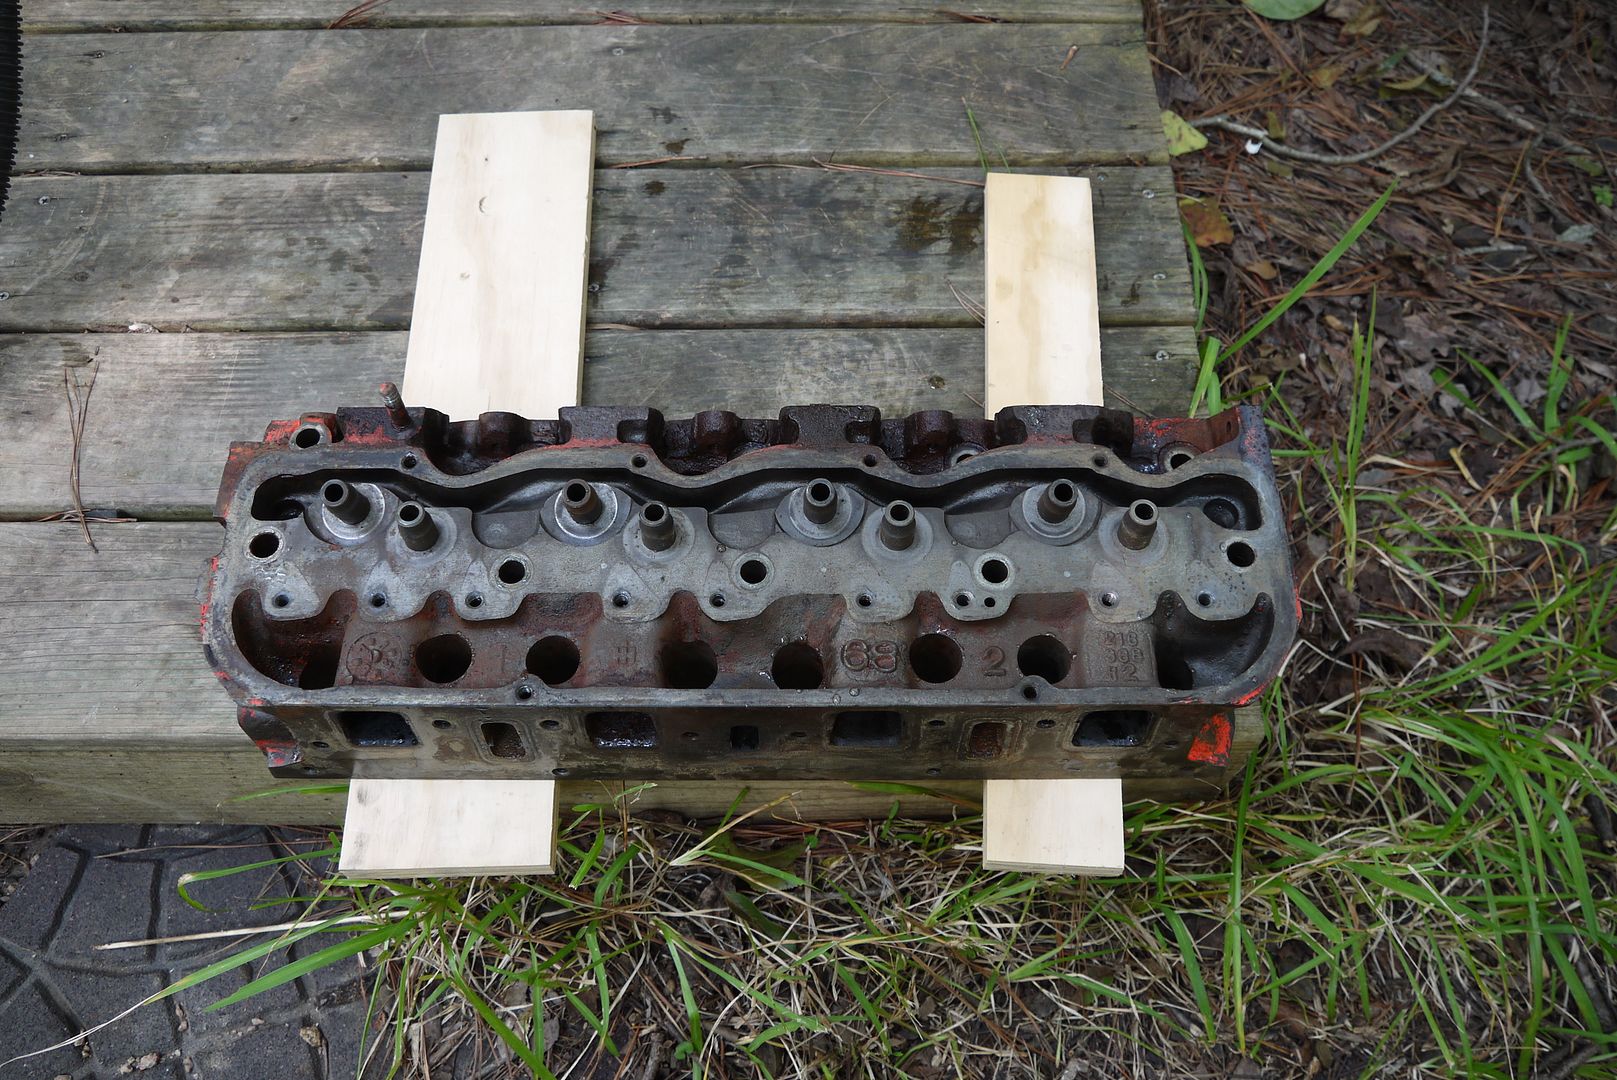
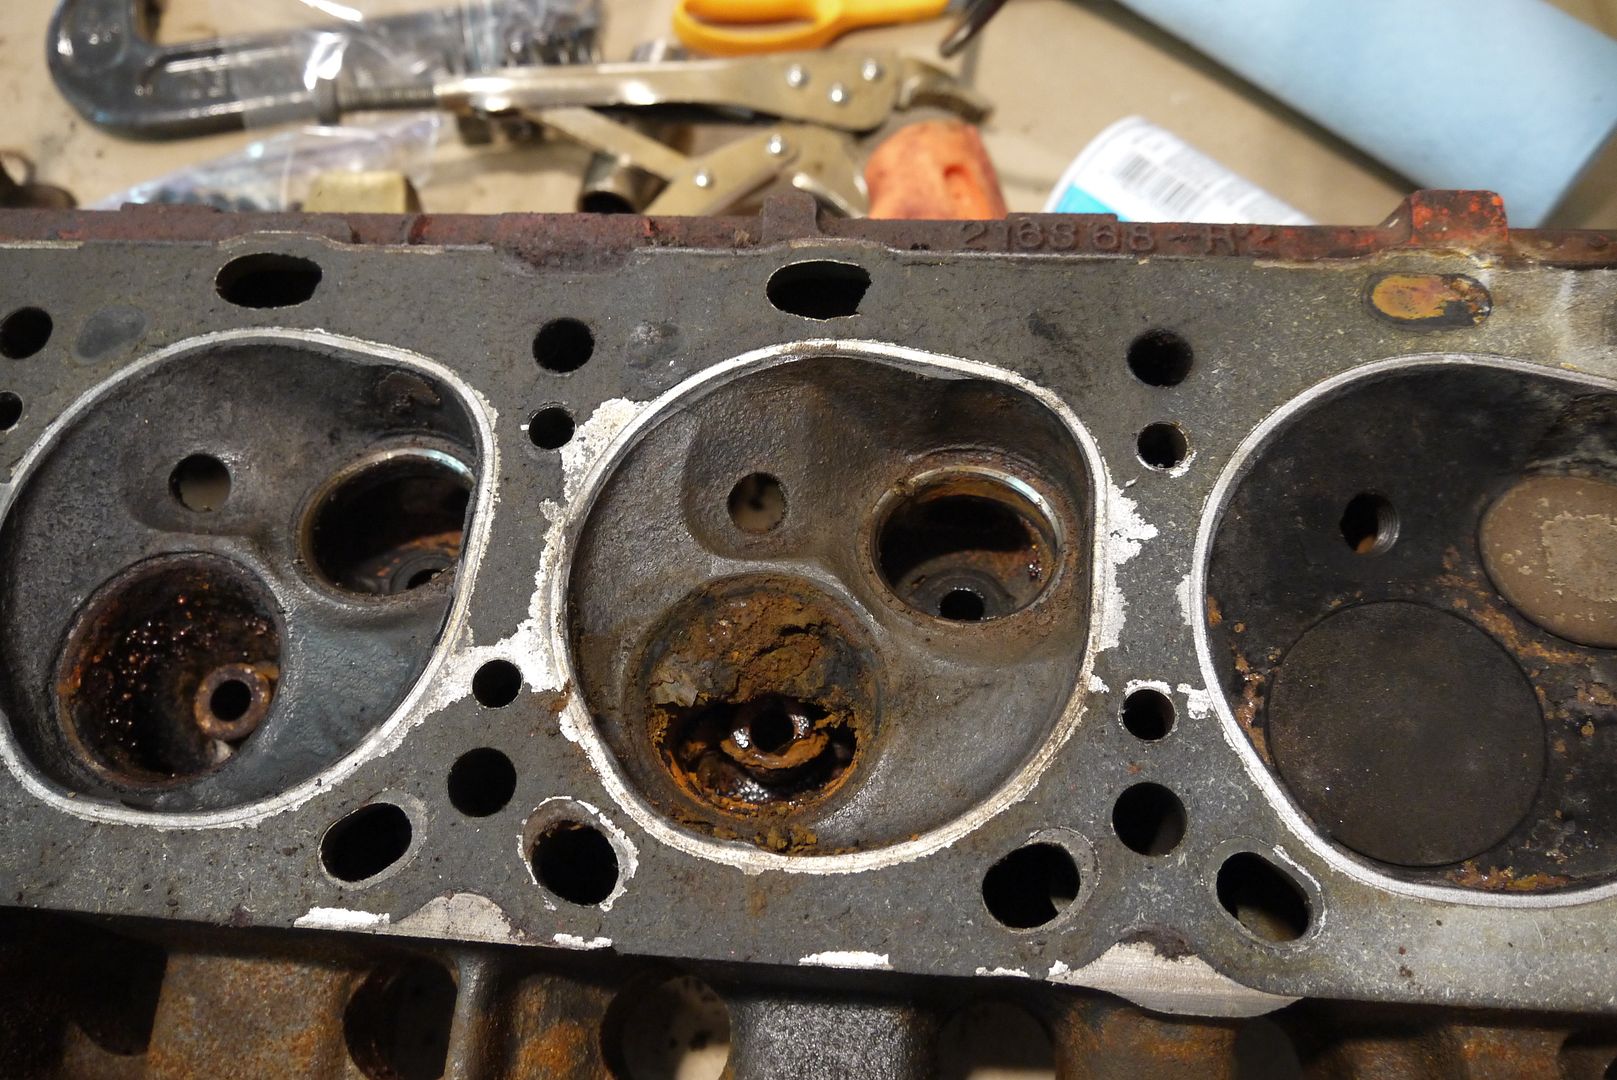 Some pressure washing and the head is apart. I need to extract that one exhaust bolt and helicoil the plug, clean the crap out of things, and reassemble.
Nope, there isn't a better way. What you did is exactly what I would have described if you had asked and what my dad would have thought his high school shop students.
I've never pulled a valve that didn't need a tap on top. In fact, I think I have a brass hammer with a hole drilled in it that dad used instead of the socket for acvws.
Nope you did it the way that it's commonly done.
I had a 20 ton press to get the valves out of the Rotax 914s I used to rebuild. We always used a rag or a shaped block of wood to hold the valves in place, there's really not any other good option, well minus that one time where we used a scrap head and expired epoxy to make a mold.
You'll hear people talk about not using magnets on the keepers from time to time. I've never seen any damage done to them in thousands of flight hours by using one. It's not like they'll stay magnetized.

NOHOME
UltimaDork
9/1/17 2:34 p.m.
All pretty normal from my experience. I have lost count of the number of creative ways to take valves apart when I don't have the right tool.
My preferred tool is the big C clamp cause it holds the valve in place while you compress the spring.

That's what I have. Don't recall the cost, but pretty sure it paid for itself by the 9th valve!
Do any of your local parts stores have a loan-a-tool program?
They do, but this is a tool worth adding to the box. I can already see that once I get comfortable with this sort of work then somehow I'll need to remove all sorts of valves.
I wish this motor would have started right up, but since it didn't, this is kind of fun.


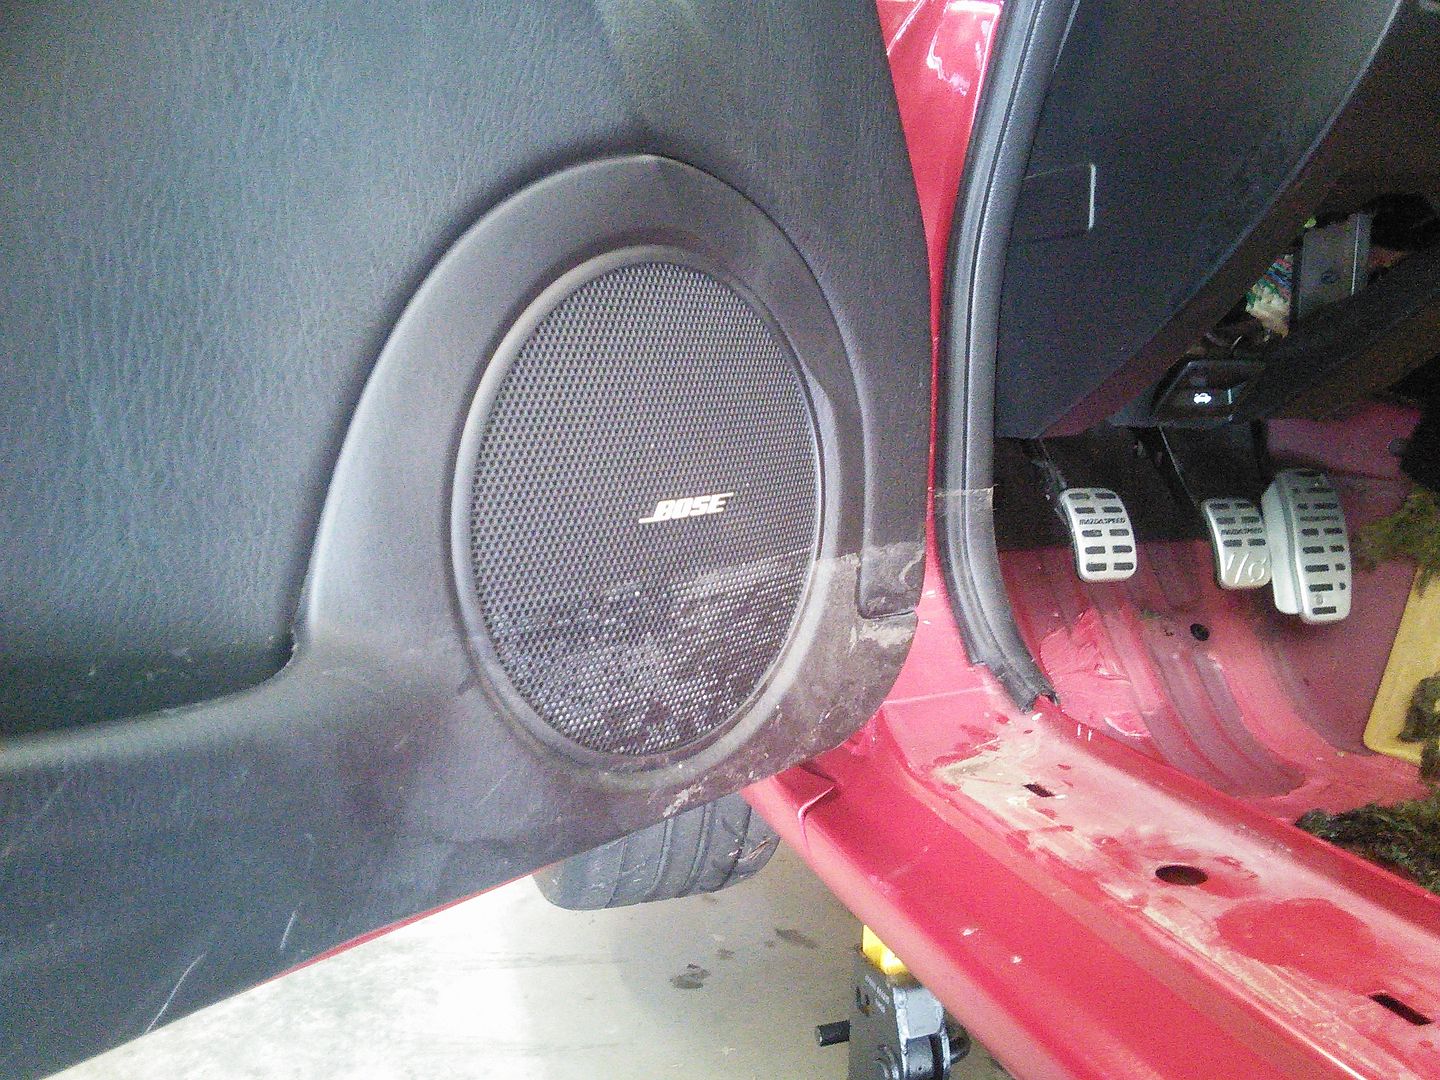 So we did this.
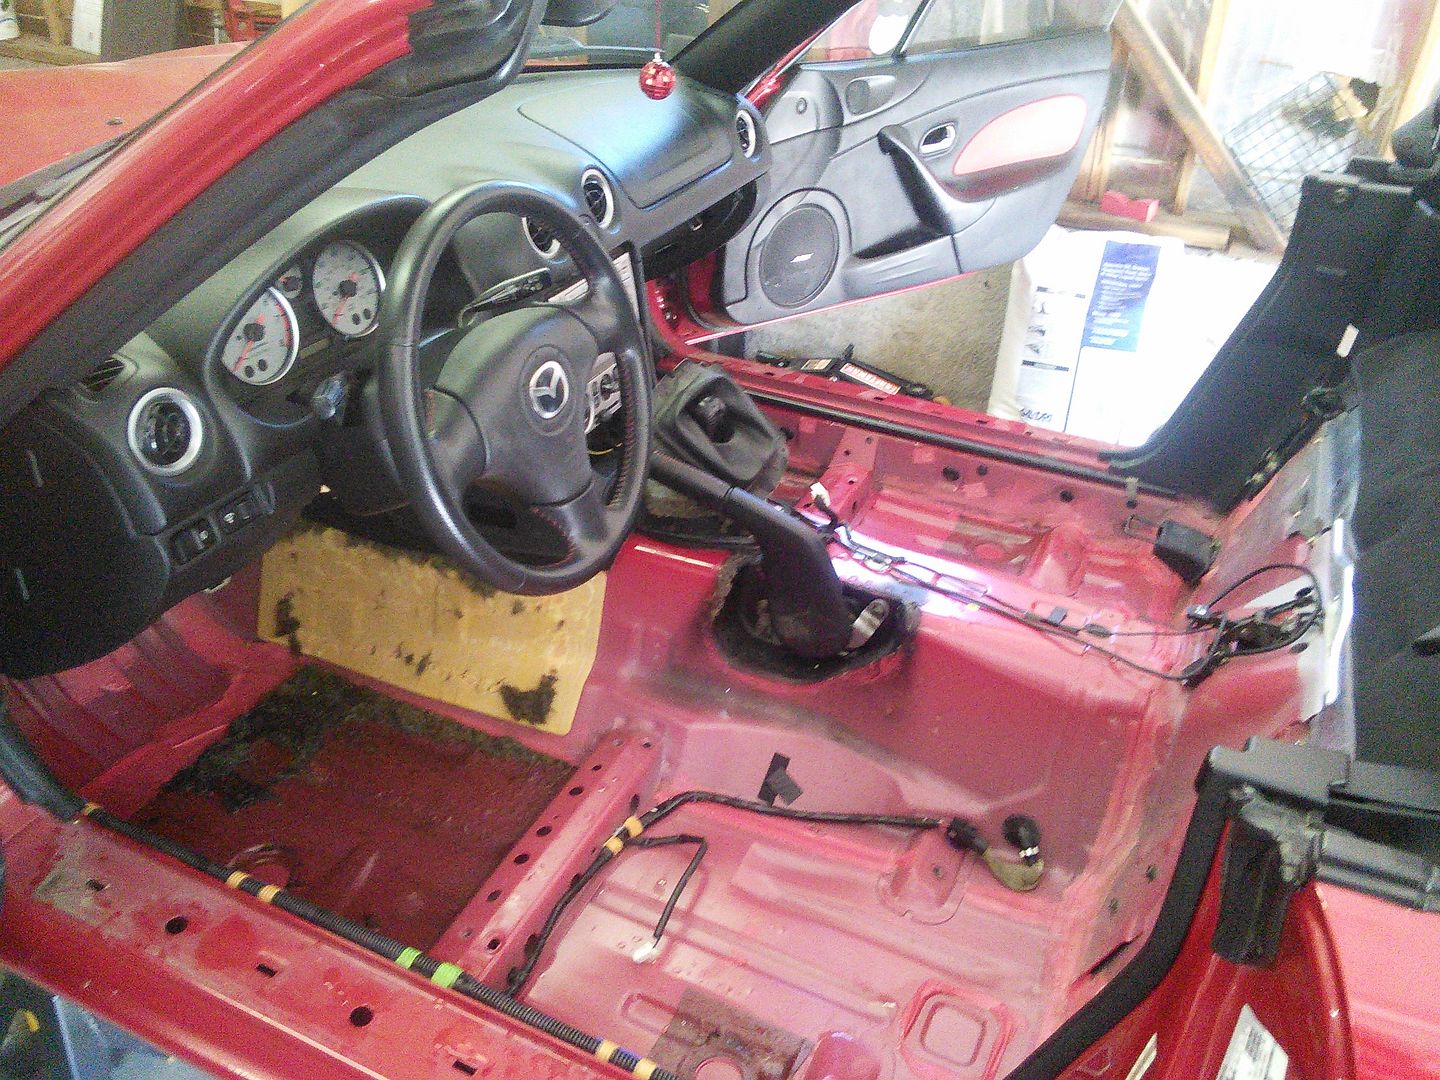 While he was figuring out that the easiest way to remove the carpet under the dash was with a knife and buy new carpet later, I took this:
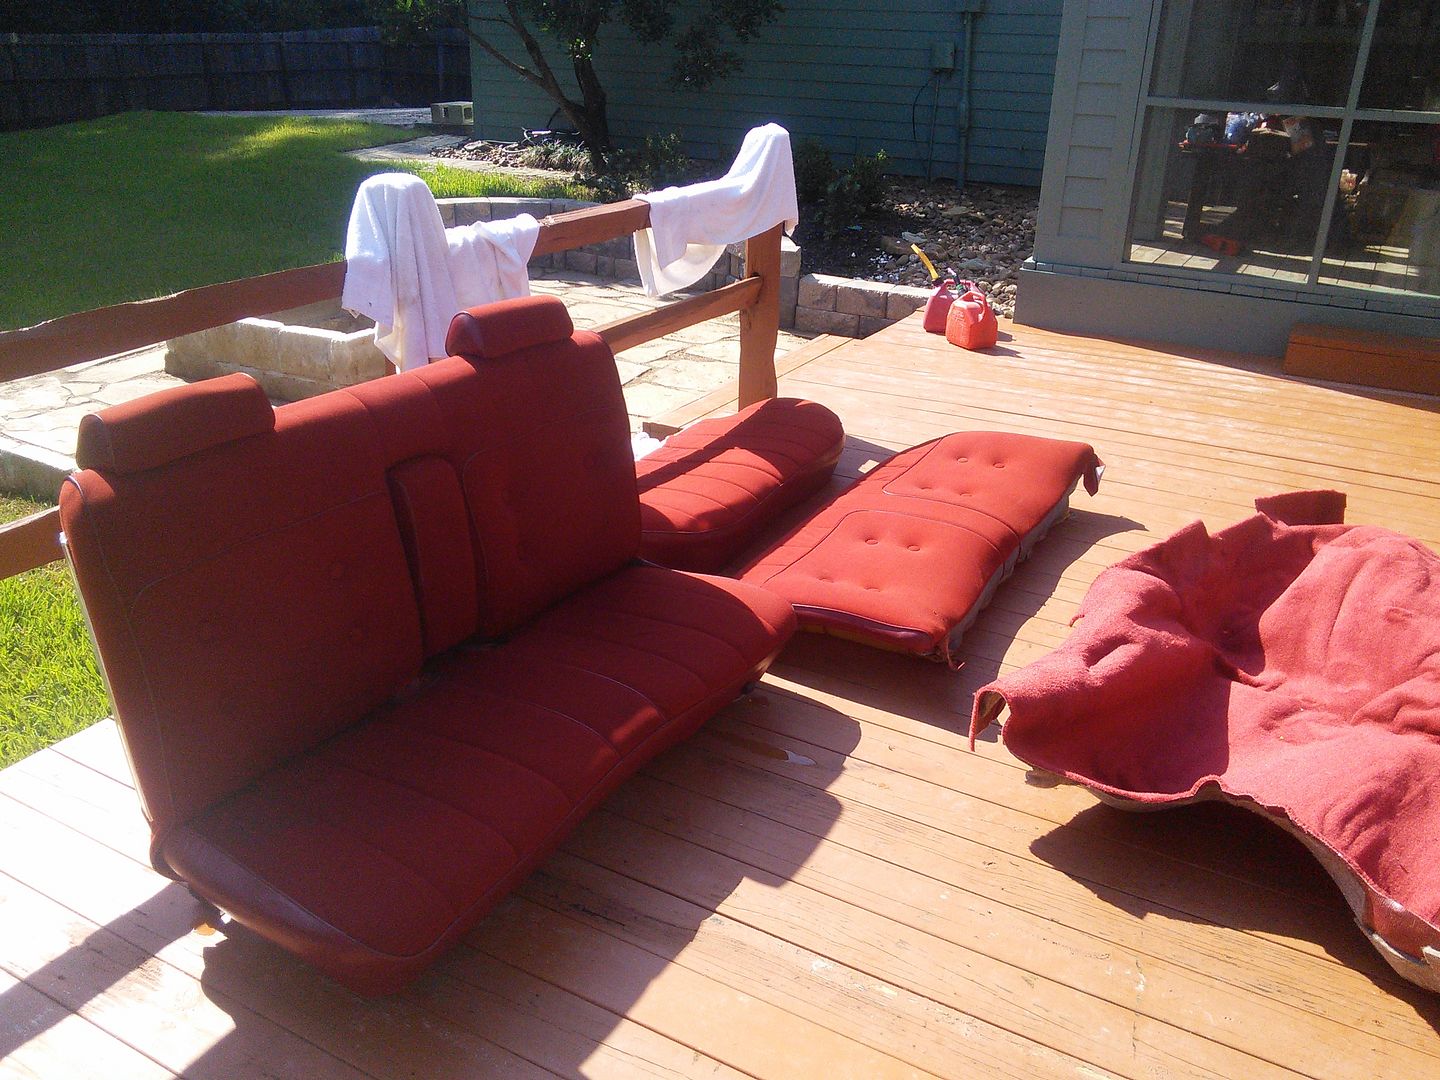 Out of the (I think) 1978 four door Caprice that his grandpa bought new and turned it into this:
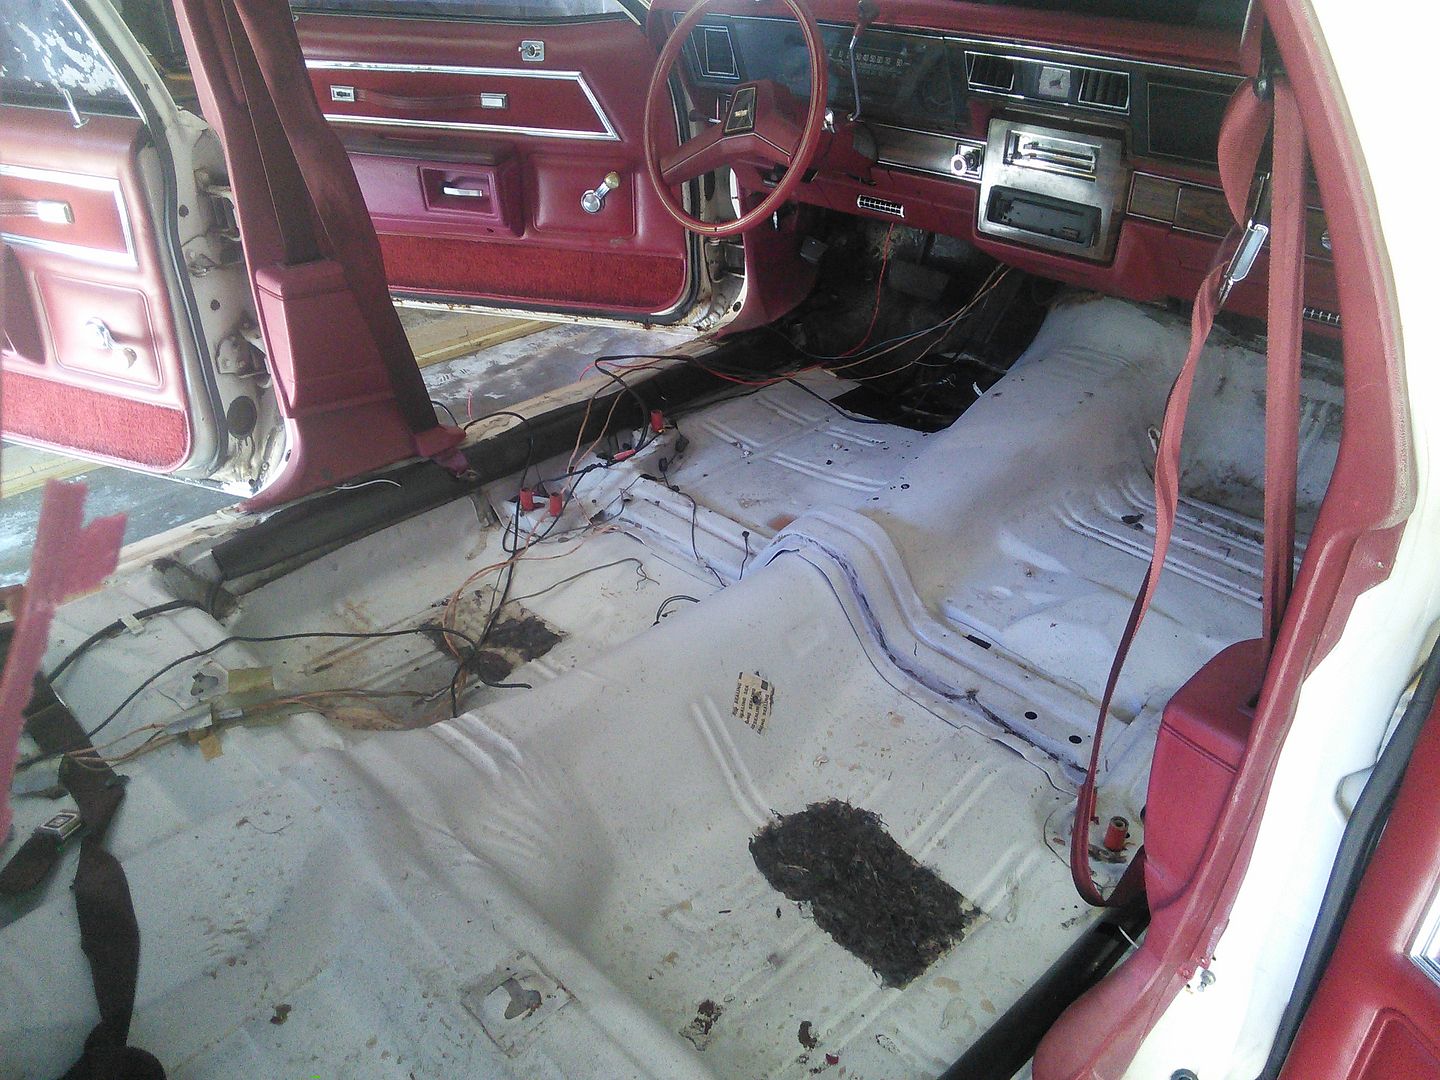 With that done we moved on to fluids. The floor was covered with ATF so we knew water had gotten into the transmission on the Caprice. Maybe a gallon of nice clear water before the rest of the transmission fluid dropped into the pan. Then we pulled the differential cover and drained that it was clear. Then the oil......I mean, how much oil can get into a crankcase?


 I actually took it out to the brush pile with a wrench so I could drain the old gas right onto things that I want to light on fire. I still got some one my hands. I'm going to go rub them with a mixture of PB Blaster and gear oil so they smell better than old gas.
 It's surprising how much mold was just sitting and waiting for moisture. The doors are open now and things are drying out.
 Who here has never taken a valve out? Anyone? Just me then? Ok.
 These are the parts of a valve assembly. As far as I can tell almost all valves are like this. I guess they figured it out early and haven't changed much. You have the valve, I think the valve seal is the little rubber ring, the valve spring and it's associated hats and seats which are the valve spring retainers, and the locks, which are the little half circles that wedge the whole thing together.
 The idea is that you compress the spring, the valve moves up with the locks, you remove the locks with your handy magnet on a stick, and then you just take it all apart. Which probably works great if your locks aren't stuck to your retainers. Which mine were. Of course. The initial solution was to tap the valve from the bottom with a hammer and loosen things. This popped the spring compressor off. Back on, but now hold the jaws in with Vice Grips. This worked. Kind of.
 Then it didn't work. The solution I came up with but was too angry to photograph, was to put a paper towel under the head to hold the valves softly from moving down much. Then I put a socket on the retainer and hit it with a hammer a couple of times. This moved down the retainers while the valves stayed in place and freed the locks. Then I could use the spring compressor and all was well. Is there a better way to free stuck locks? I still have a second head to disassemble after all.
  Some pressure washing and the head is apart. I need to extract that one exhaust bolt and helicoil the plug, clean the crap out of things, and reassemble.


