


mazdeuce wrote: I need one of those.
I have one I inherited from my Dad and have never used. He would have liked you. PM me your address.

mazdeuce wrote: I need one of those.
I have one I inherited from my Dad and have never used. He would have liked you. PM me your address.

Its even more fun taking the retainer loose while the head is still on the engine in the car. Sweating like a dog that one of them doesn't fall and go through an oil hole into the oil pan. Simple process attach spring compressor to rocker arm stud, place air line adapter in plug hole, attach air line. Apply pressure to spring compressor. and disassemble accordingly. Of course if they are pressed in studs, they can creep out from pressure of the spring compressor.

In reply to AngryCorvair:
Send you a PM. Thanks man, you're awesome.
In reply to ggrjr:
The package said something about "for removal of valve springs without removing cylinder heads" and I remember scratching my head thinking that would be quite a trick. I saw the thread in kind online and now I'm thinking those would be the bee's knees if you left the head on.
To remove springs and seals on valves with the heads on you can use a piece of rope,the size in a pull start push mower works fine. Remove spark plug, feed a piece of rope into plug hole, make sure to leave a tail sticking out as your going to have to take it out. Turn engine carefully with a wrench to press the rope to top of head to hold valves in place, compress springs remove keepers, spring, seals and replace with new, turn engine in opposite direction and remove rope, rinse and repeat as needed.
Scott

Inasmuch as it is a game of fine clearances and lack of fear, I like to think that rebuilding engines is the NA equivalent of this rite of passage
In reply to ScottS778:
That will stay in my mental toolbox, just in case. Thanks.
In reply to NOHOME:
I'm pretty sure that's a young man's game. How about I just stick to engines? ![]()
One last thing today, I went out shut the door and saw a funny reflection. The box that holds the floor vents was full of water. A quick siphon and it was dry again.
 It still smells almost violently of mouse pee. I need to take things further apart.

Might have been better off without the shower cap, and with the windows open....
My gut tells me that the heater box/blower might be the issue. Not that mice have ever built homes in a heater box before......![]()

Re: removal of valve springs with the head in place- had to do that on the push mower last summer. It's a Honda OHV deal, and I had a stuck valve resulting in zero compression... it was an adventure I'd rather not repeat any time soon.
Pushrods motors are way more fun...
If you don't send the heads to get machined, an easy way to lap the valves is to coat the valve seat in lapping compound, place the valve in the head, attach a length of tubing to the valve stem, and chuck the tubing into a cordless drill. Pull lightly to give it some tension, and turn on the drill. 5-10 seconds later, and you have a lapped valve and seat.

In reply to Recon1342:
You can also get the suction cup holders (or one of those suction cup darts with the plastic stem) from HF cut one side off and put it in a drill. If you like to work with the head upside down.
Make sure you have enough edge thickness left on the valve after lapping. Wouldn't want to eat a piece of the valve after all that work.
 (Borrowed from an AMS site)
In reply to The0retical: Yup. I actually have a jig I made out of 2x4 that cradles the head so I can work with it tipped sideways. It works great!
The valves will get lightly lapped to see how they clean up. Might as well add that to the list of firsts for this project. ![]()
So it still smells like mice. I pulled the panel that holds the fuse panel and covers the wires and cables that leave the cab and I found this.
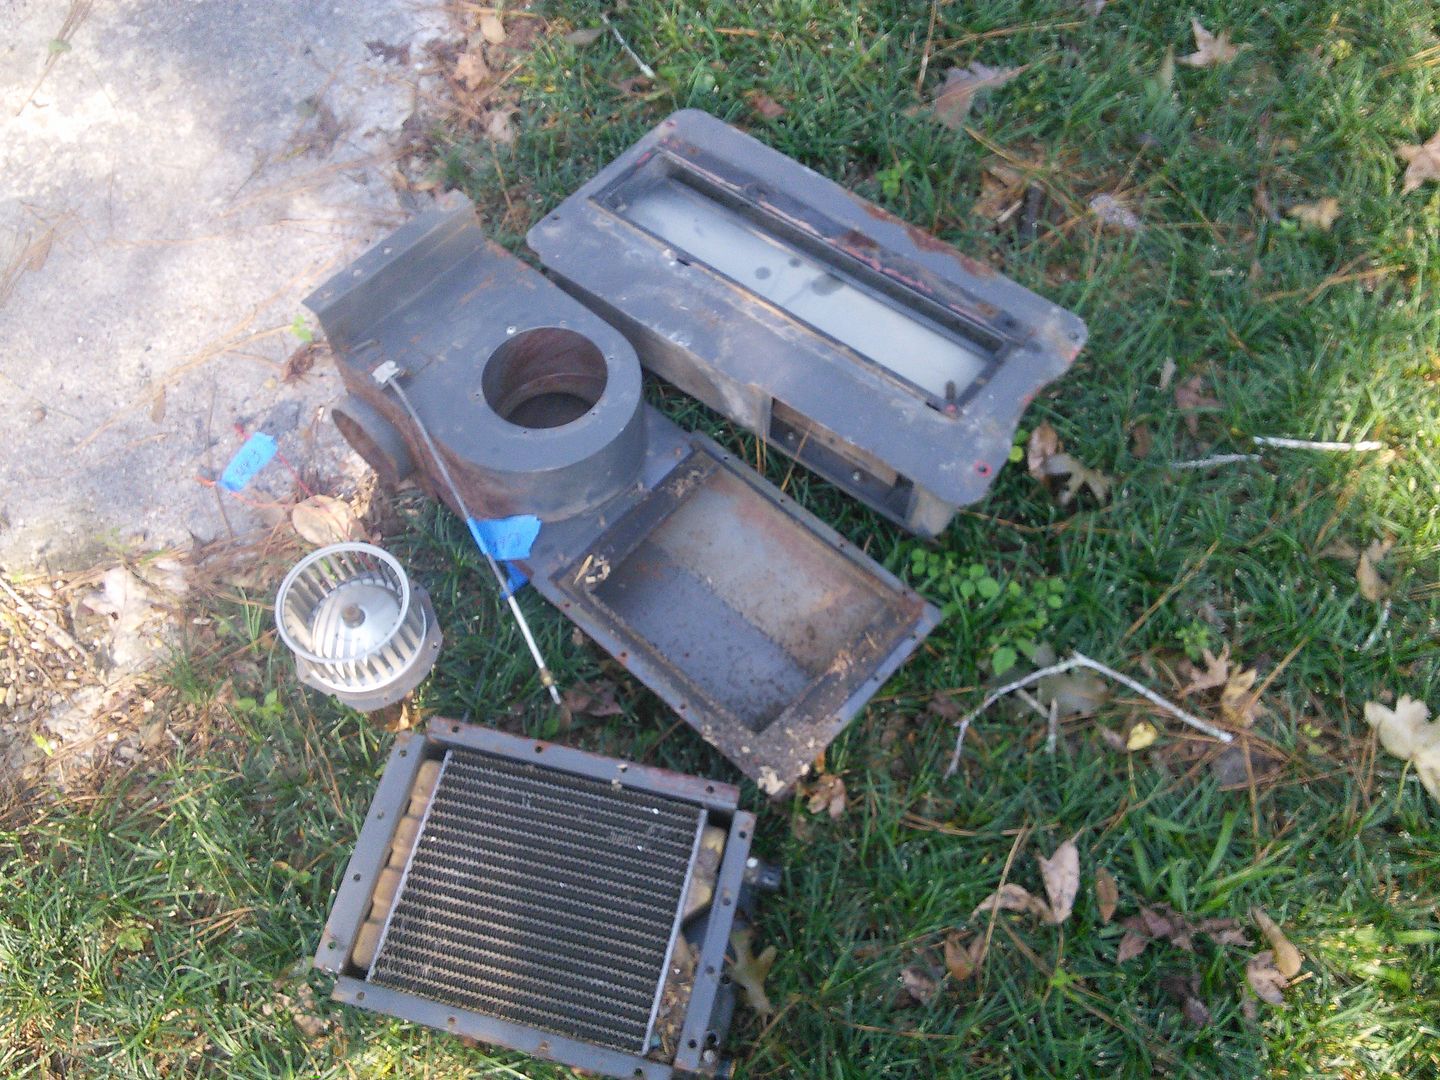
 So I decided to pull the everything out of the interior and see what I could see. Under the dash was a bit gross and needs to be cleaned but not too bad, so out with the heater box. Surprisingly clean. It needs to be wire brushed and have the rust stopped, but this can't be the problem.
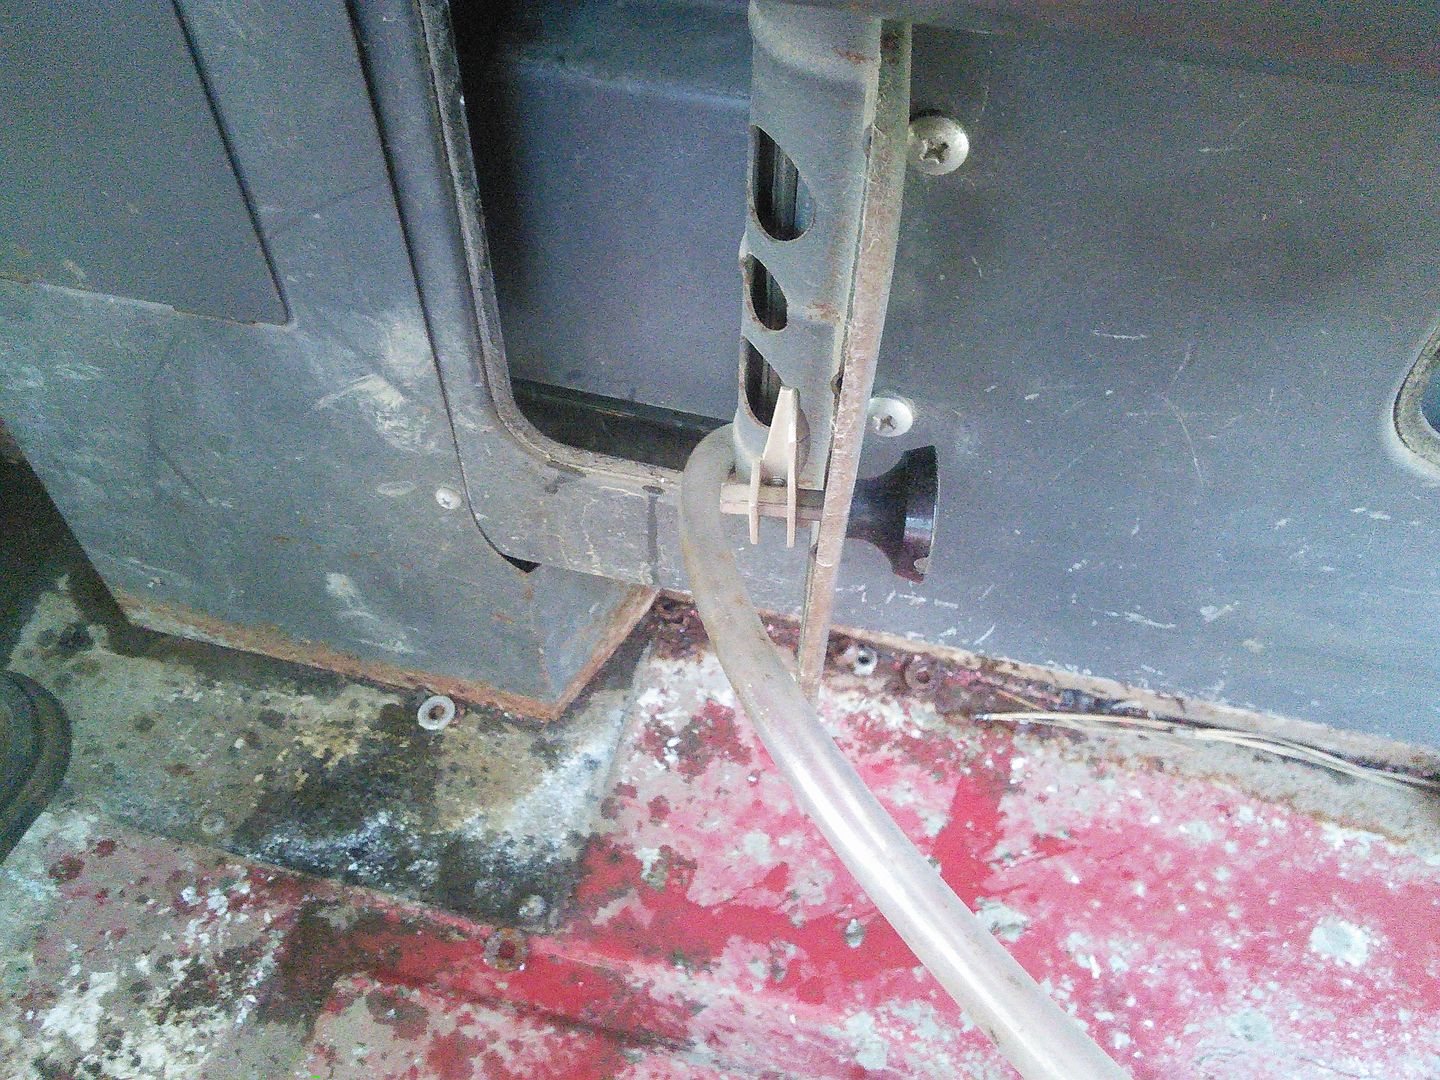
 And then I noticed that the back of the....firewall? No, the front wall? Cab face? It has indents for the headlights.
 Which means space. So off with the headlight buckets.
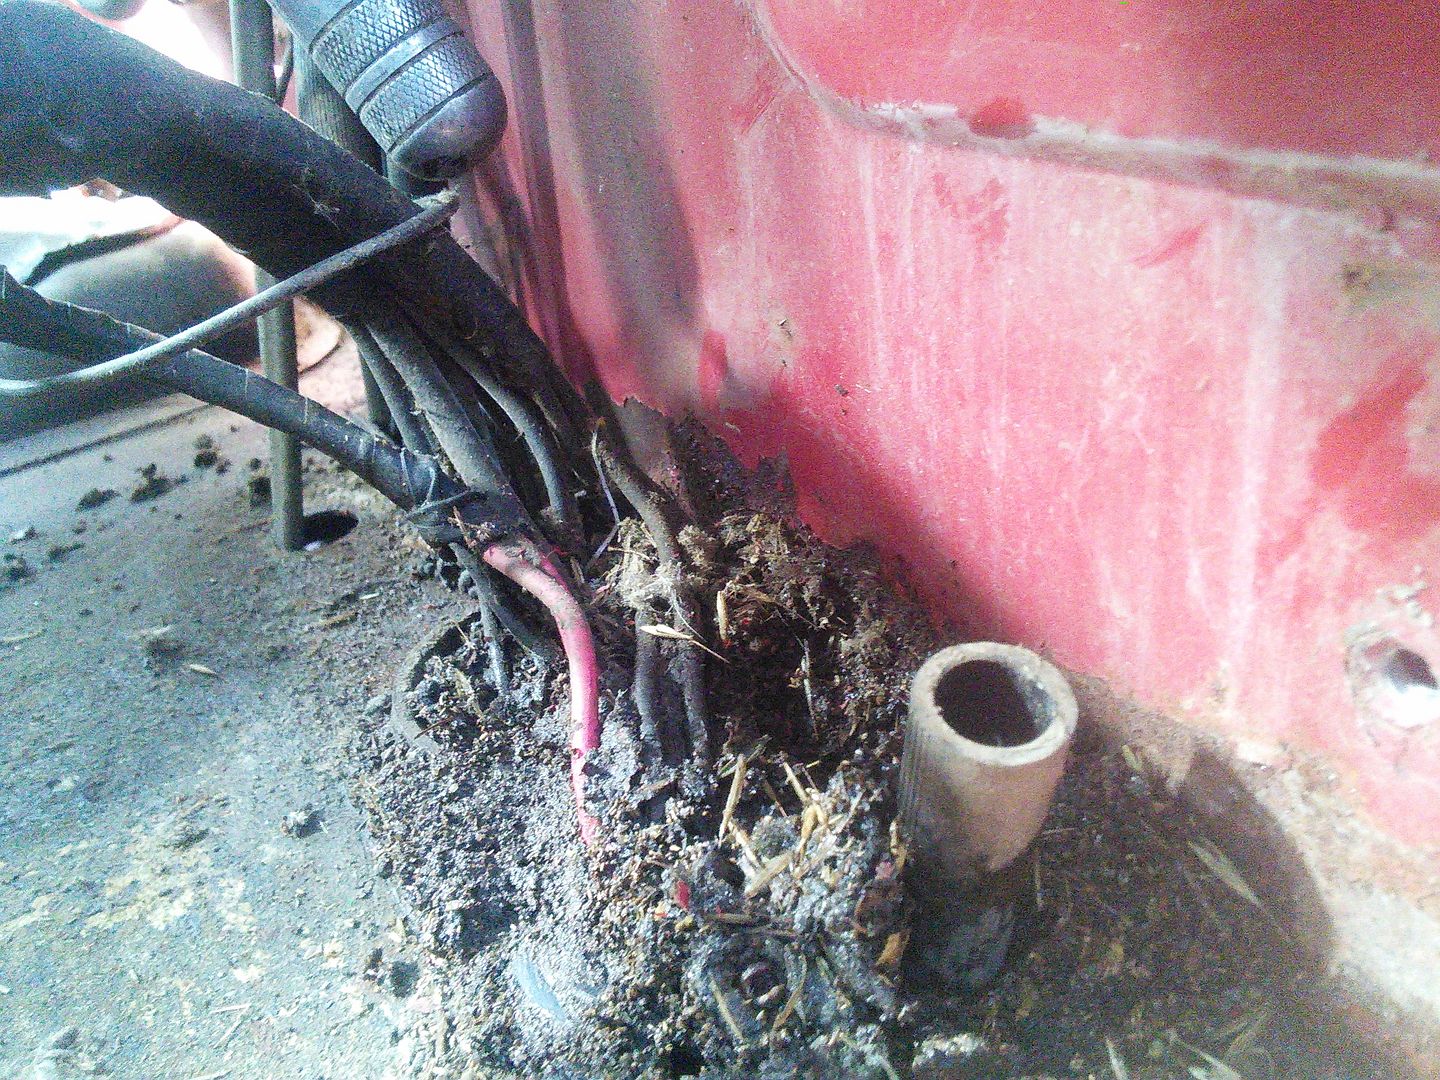
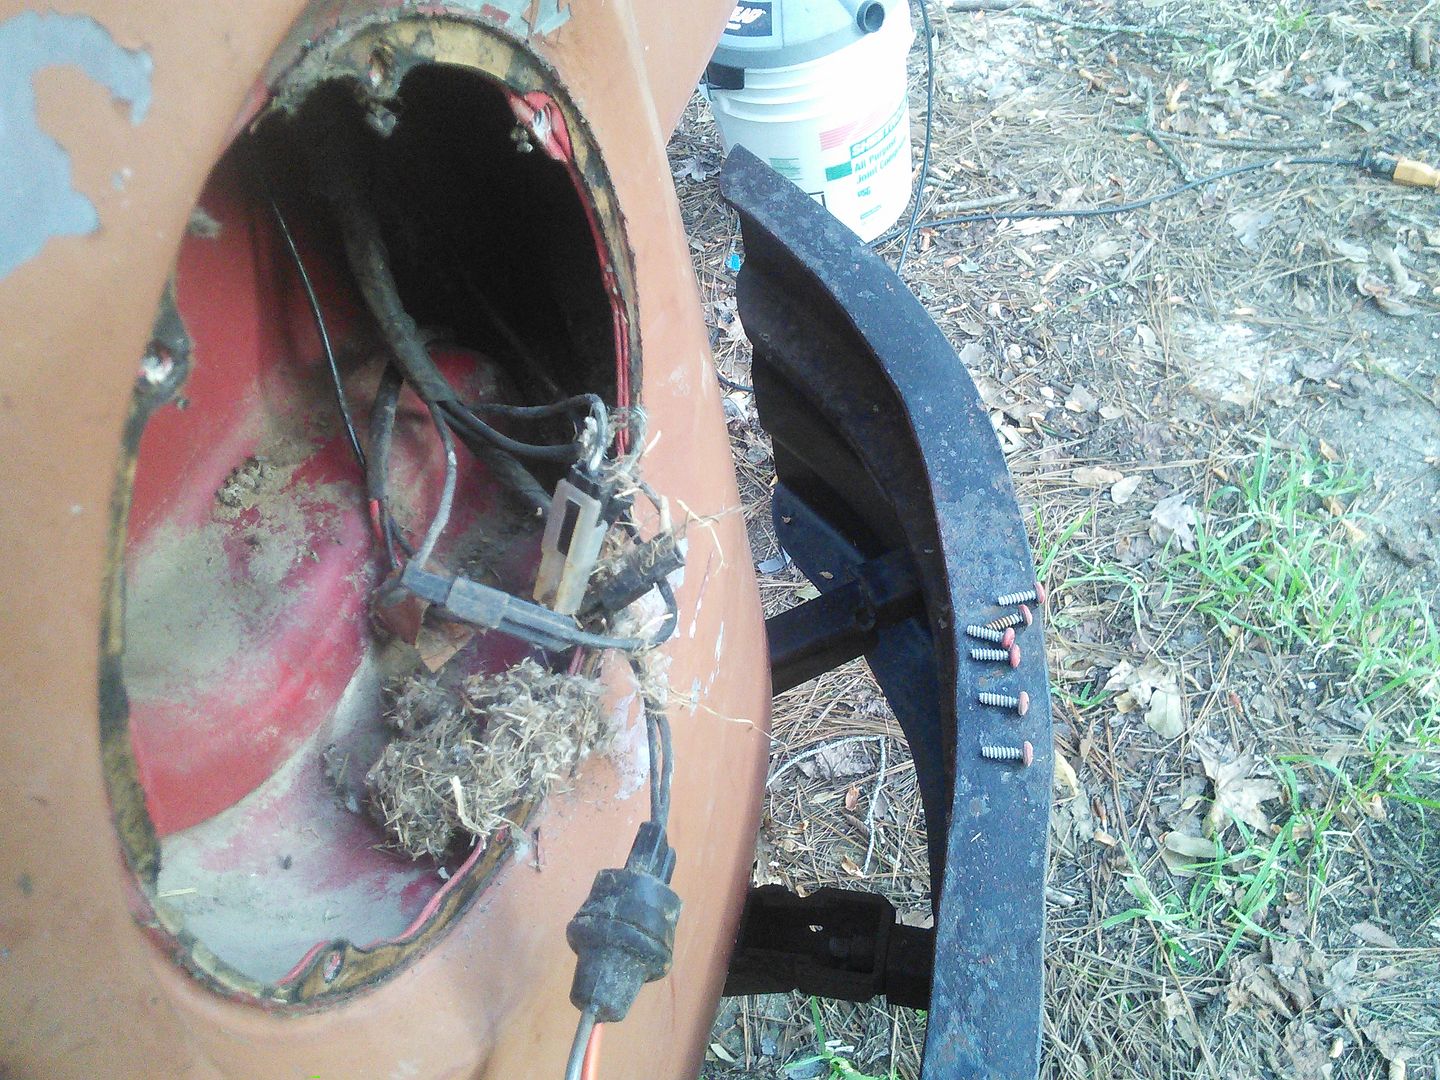 And we have chewed wires and mouse bedding six inches deep on both sides. The bottom is so old and so wet that it's supporting a colony of ants.
How do I clean this up? I've scooped out as much as I could with my hands, but now what. Blow it out with air? Pressure wash what I can reach? Hose everything out repeatedly? And then how do I stop the rust that's starting in the nooks and crannies? Rust converter slopped around? POR-15 everything I can reach? If I get this stupid thing running and the cab rusts through I'm going to be very grumpy.


Tjat kind of stuff, i use ALL the methods you listed. And add in lengths of chain drug around in the cavity to know E36 M3 loose, repeat. And repeat. And repeat. Eventually you get sick of doing it, which means 3 or 4 more times before saying "piss on it. Its good enough for who its for".

ScottS778 wrote: To remove springs and seals on valves with the heads on you can use a piece of rope,the size in a pull start push mower works fine. Remove spark plug, feed a piece of rope into plug hole, make sure to leave a tail sticking out as your going to have to take it out. Turn engine carefully with a wrench to press the rope to top of head to hold valves in place, compress springs remove keepers, spring, seals and replace with new, turn engine in opposite direction and remove rope, rinse and repeat as needed. Scott
I have done the same thing with old spark plug wires.
Being from So Cal, I'm afraid of allowing rodent excrement to become airborne. So I usually start with a water hose and a dust mask.
Mazdeuce - your R63 thread was highlighted on a UK MB forurm, and after I read that, I read your grosh thread and now this - you write well, are informative and have a pleasant and kind style I really appreciate so I joined just to say thanks and well done.
When I first saw this thread I thought your truck was a relative of the UK Bedford (a now obsolete UK arm of GM and sister to our Vauxhall brand) TK, but not so, even if it does have a similar "simple and sad" face.

I'm pleased the hurricane has been pretty gentle on you (the news footage has been shocking) and do please keep up the good work.
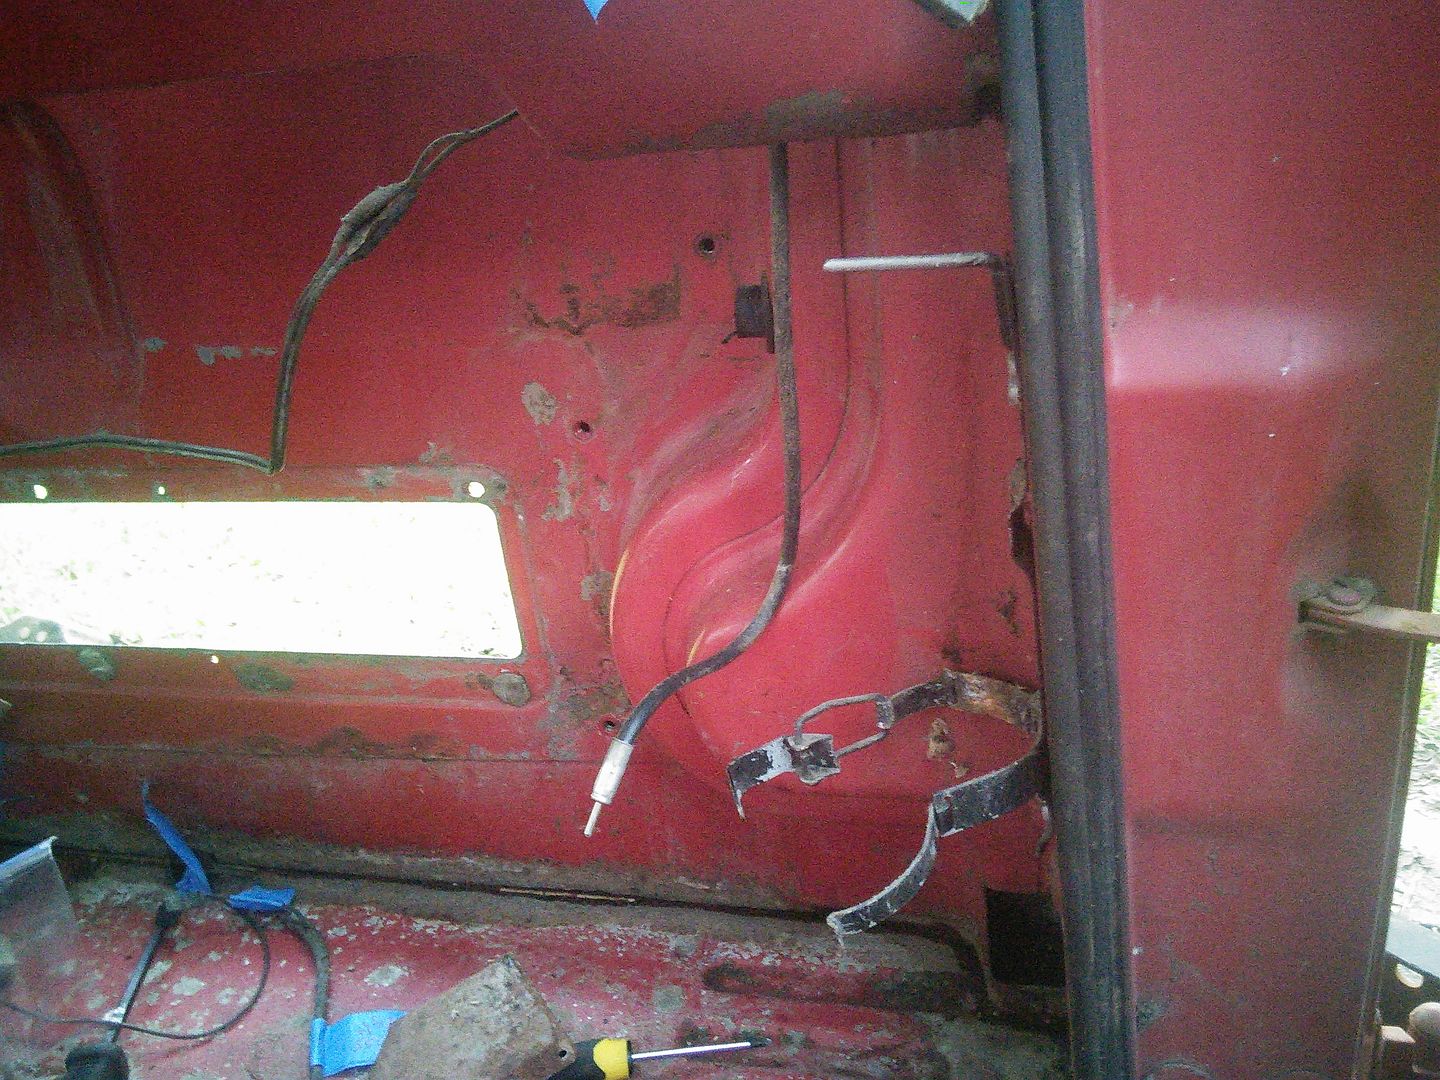
The dash comes out in a couple of chunks. There are the three metal panels that hold the switches and gauges, and the big semi broken plastic piece that holds it all. We'll come back to that in a couple of months. I took them out. 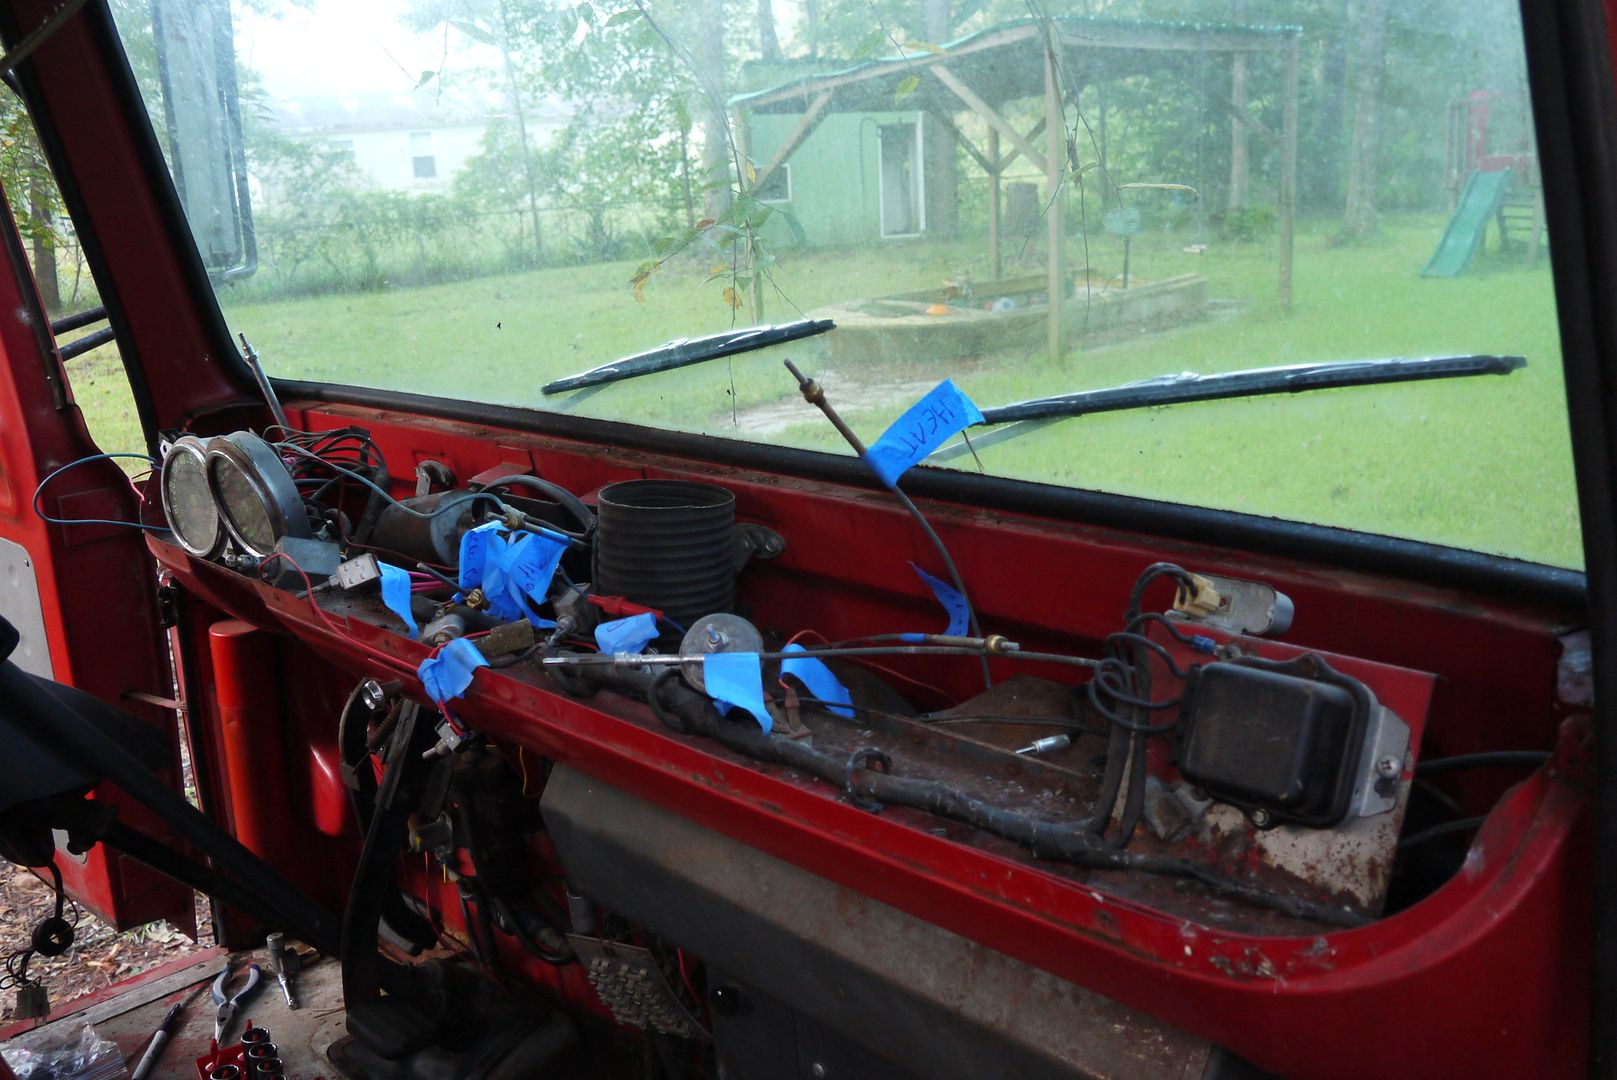 Then I looked the wiring. I imagine the brights wouldn't have worked well.
 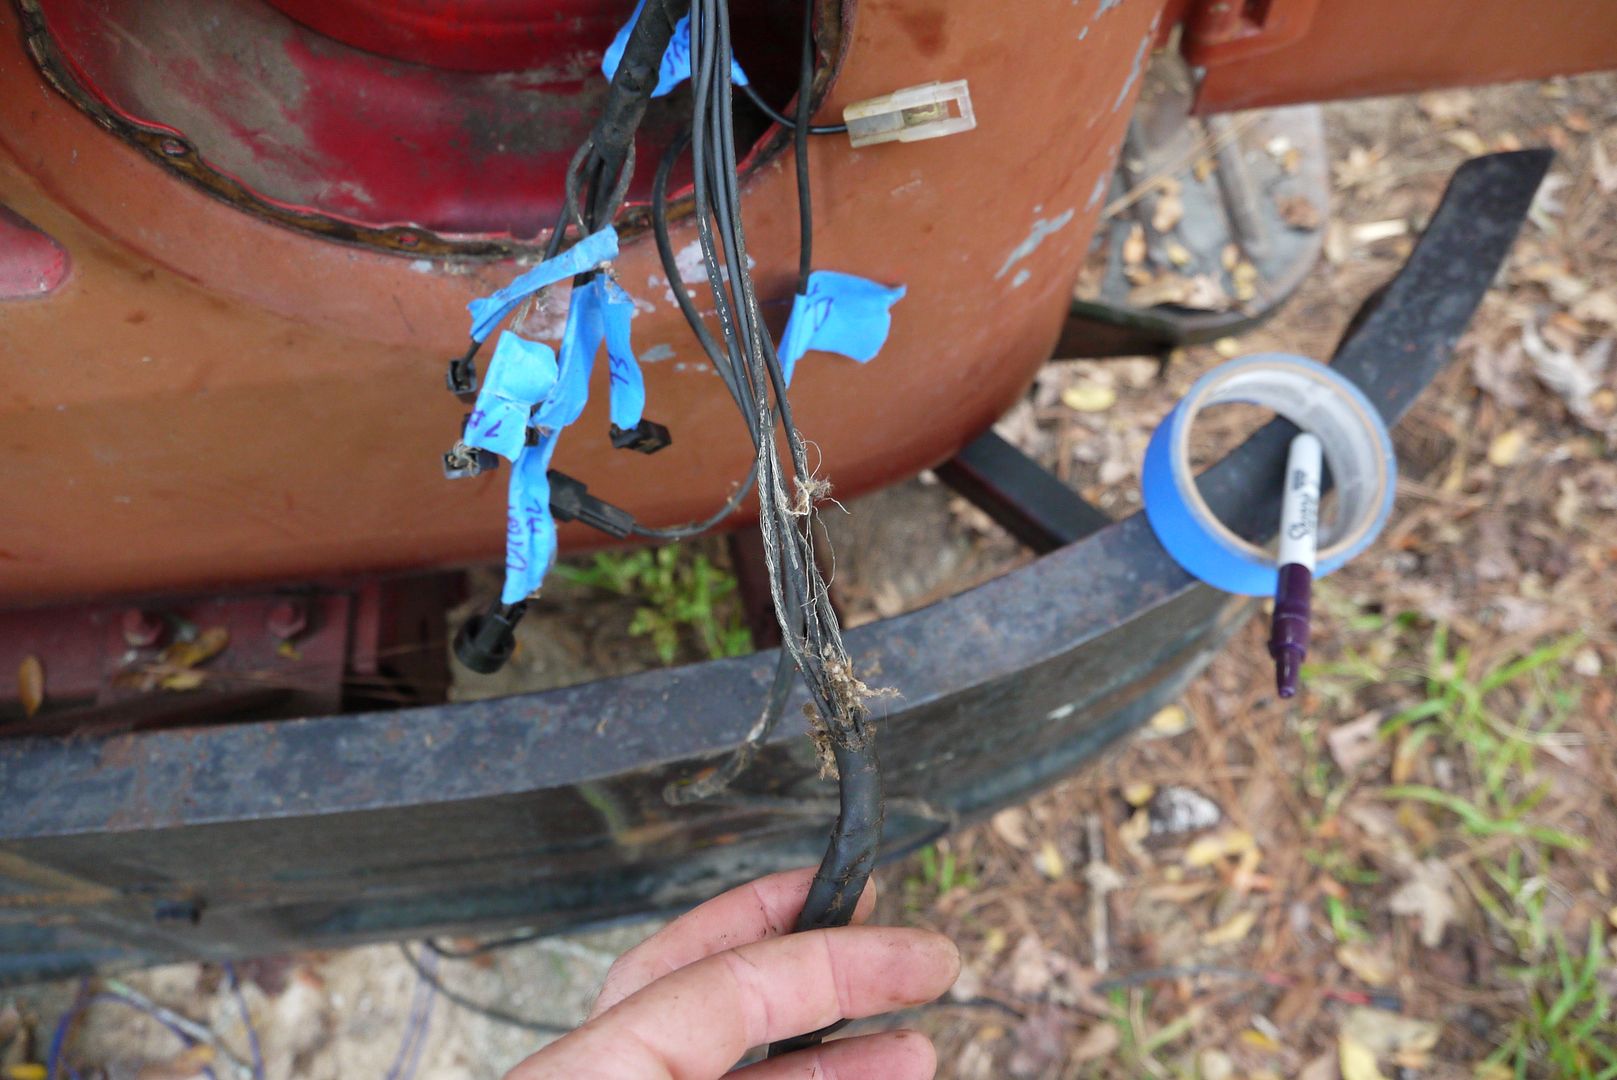 So I took it all out. This is the harness for the entirety of the cab. I think I could simplify it a LOT.
 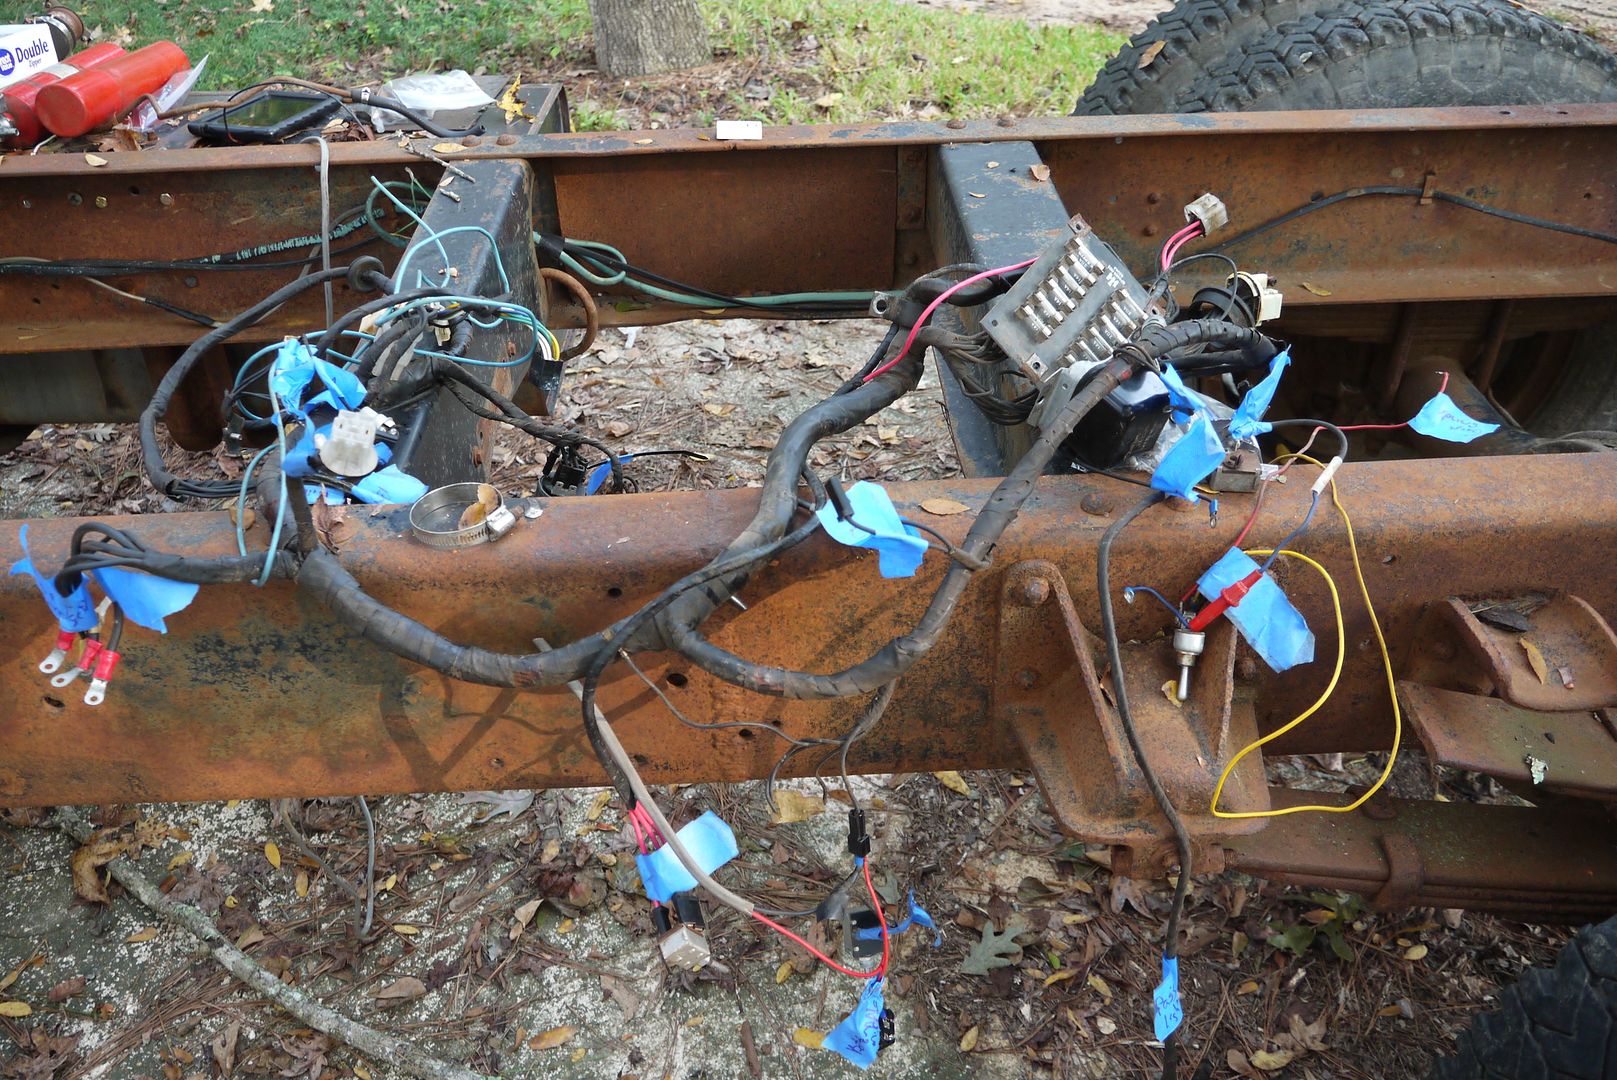 Everything left was bagged and the hosing down commenced.
 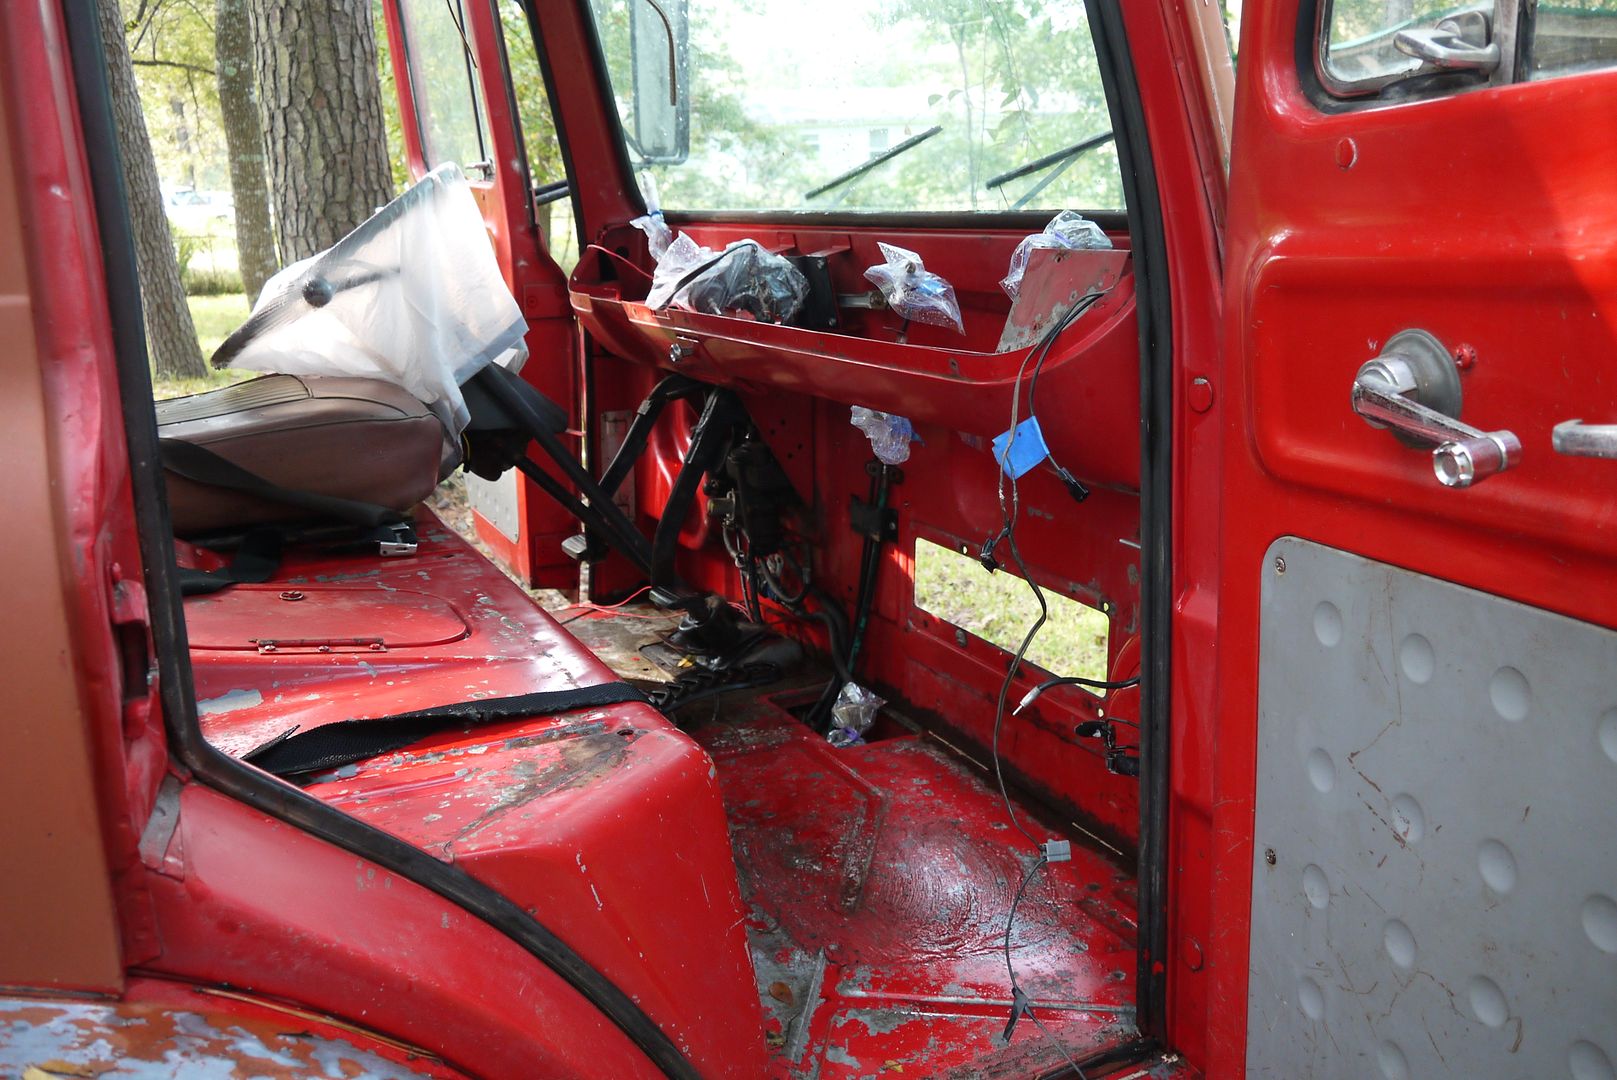 I spent well over an hour hosing things down. Inside the cab. Down from the A and B pillars. Through both headlights. Everywhere water could go I directed it and everywhere I directed it mouse turds floated out. The sheer tonnage of mouse poop is staggering.
 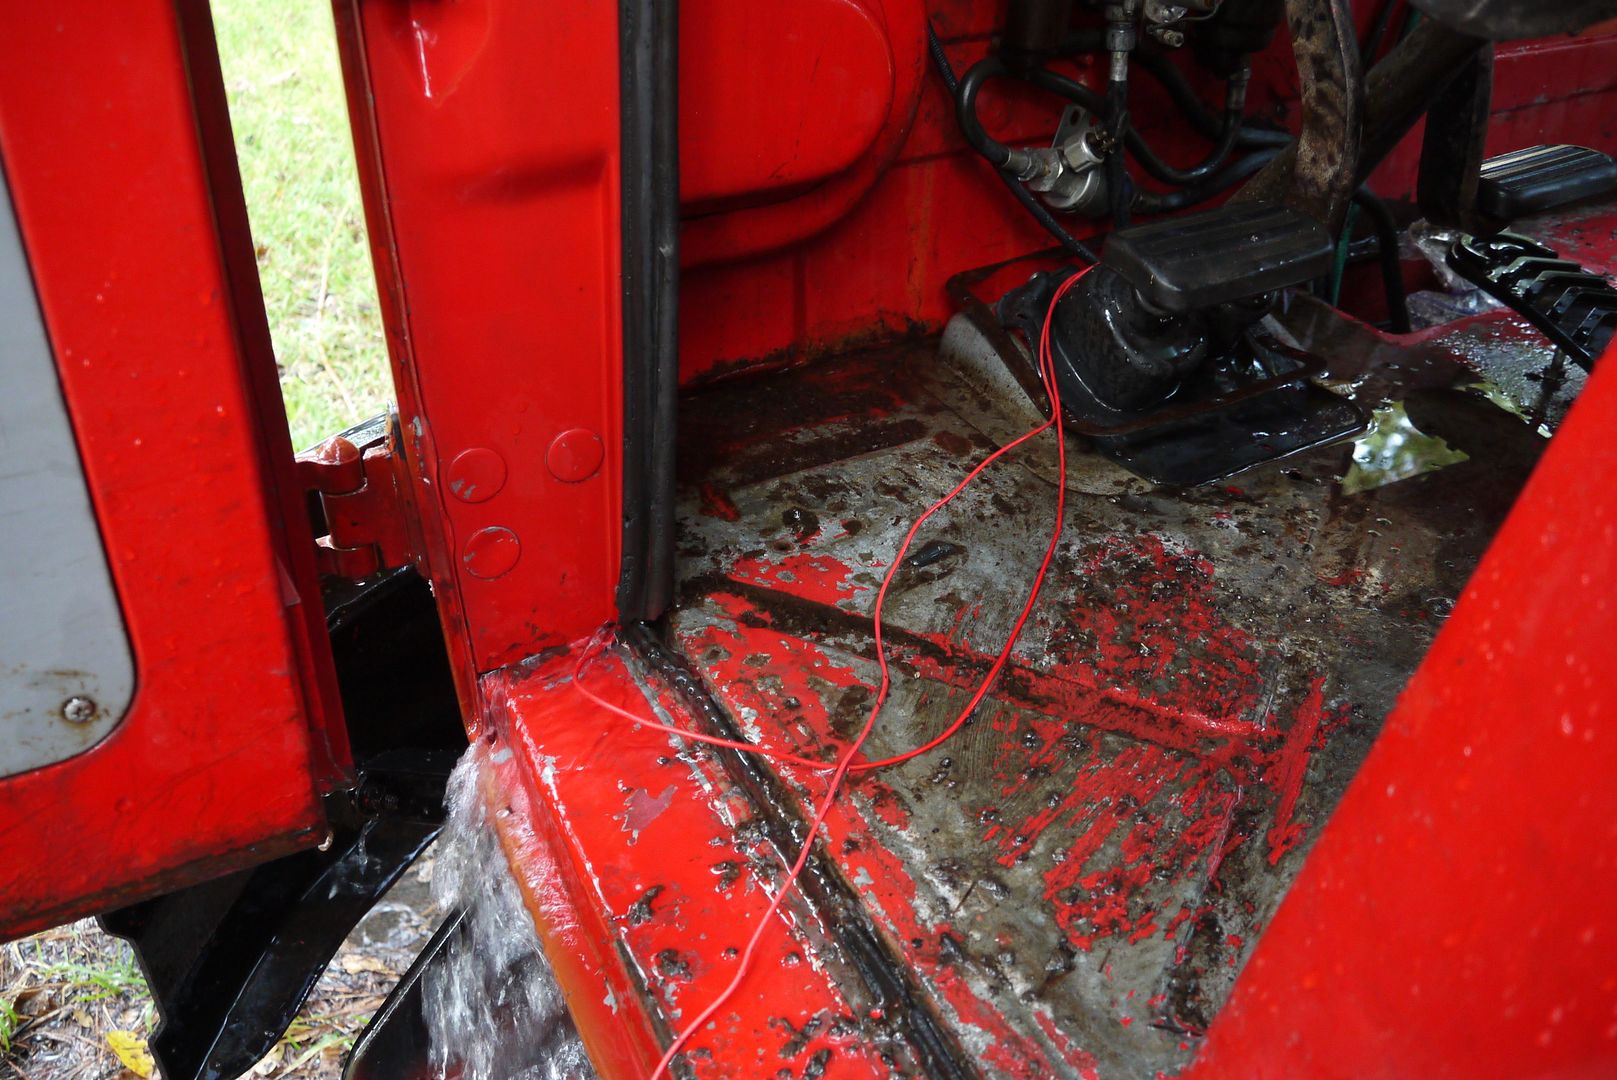 I even tipped the cab back up to get variety in my drainage.
 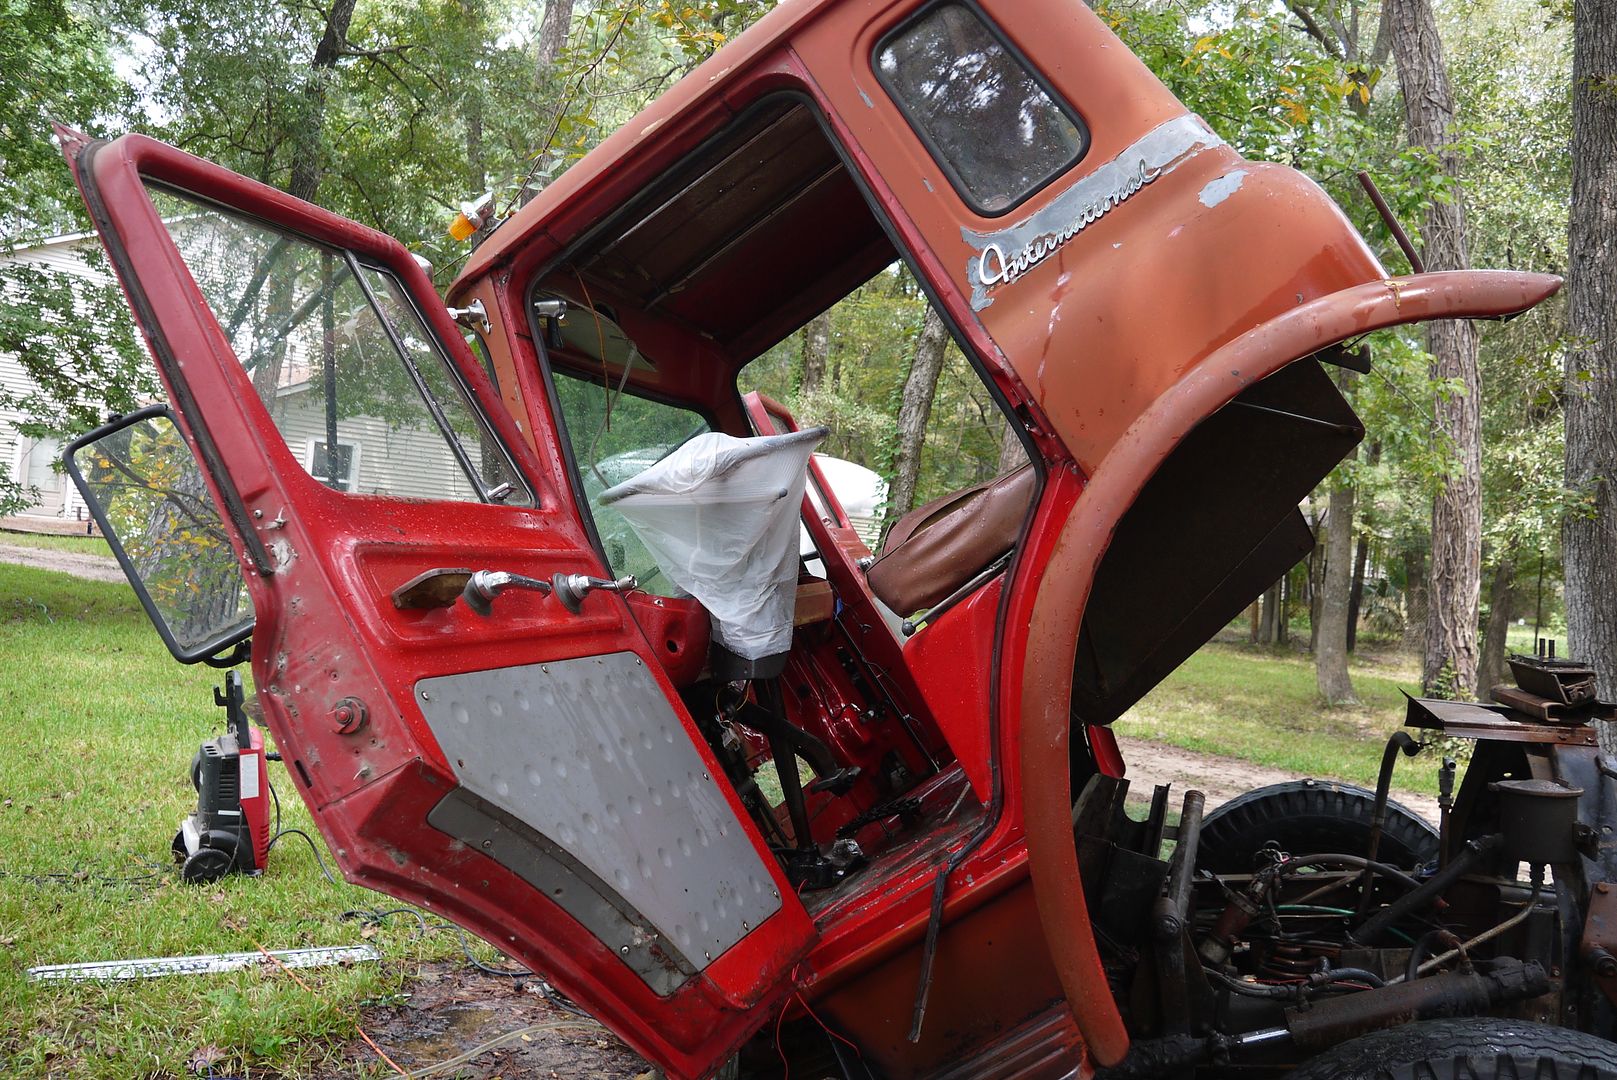 Things are drying now. There are a surprising number of weep holes and seams where things can fall out. This thing is already rusting to some degree from the inside out. Wire brushing and more washing and more wire brushing and then rust converting and painting to come. The good thing is that I don't really need any of the wiring to make the truck work. I just have to run switched power to the coil/alternator and use my fancy remote starter and it'll run. If I get the engine back together.
 ![]()

You can do it! I think the strip and clean approach is the best for a truck like this. That wiring looked like a fire waiting to happen, and now it'll get fixed properly. The red interior color is cool, would be rad to see the outside look like that someday.
If you can tackle an overly complicated German V8 and building a whole garage, then this should be a piece of cake for you. I love seeing updates to this thread, so keep going :)
In reply to dannyzabolotny:
Thanks. The plan is to make it pretty someday. Well, as pretty as it could be with that face. ![]()
Question about stopping rust inside things. Is there a better option that the rust encapsulator with tube from Eastwood? It's $18 a can, so not cheap, but if I can stop the rust from moving forward I'll drop $100 on it.
In reply to Stegel:
Thanks for the kind words. Please pass my thanks to the MB forum, I'm glad so many people are enjoying reading.
I've been looking at Pictures of the Bedford trucks. They're different, but close enough in general lines that they give me some visual ideas about paint jobs and the like.
Have you considered replacing the wiring in it's entirety with one of the hot-rod harnesses? For $150 you get rid of the fire hazard and get a fully fused and relayed harness.
In reply to NOHOME:
That's where I think I'm headed though I'd like to build something from scratch just because.
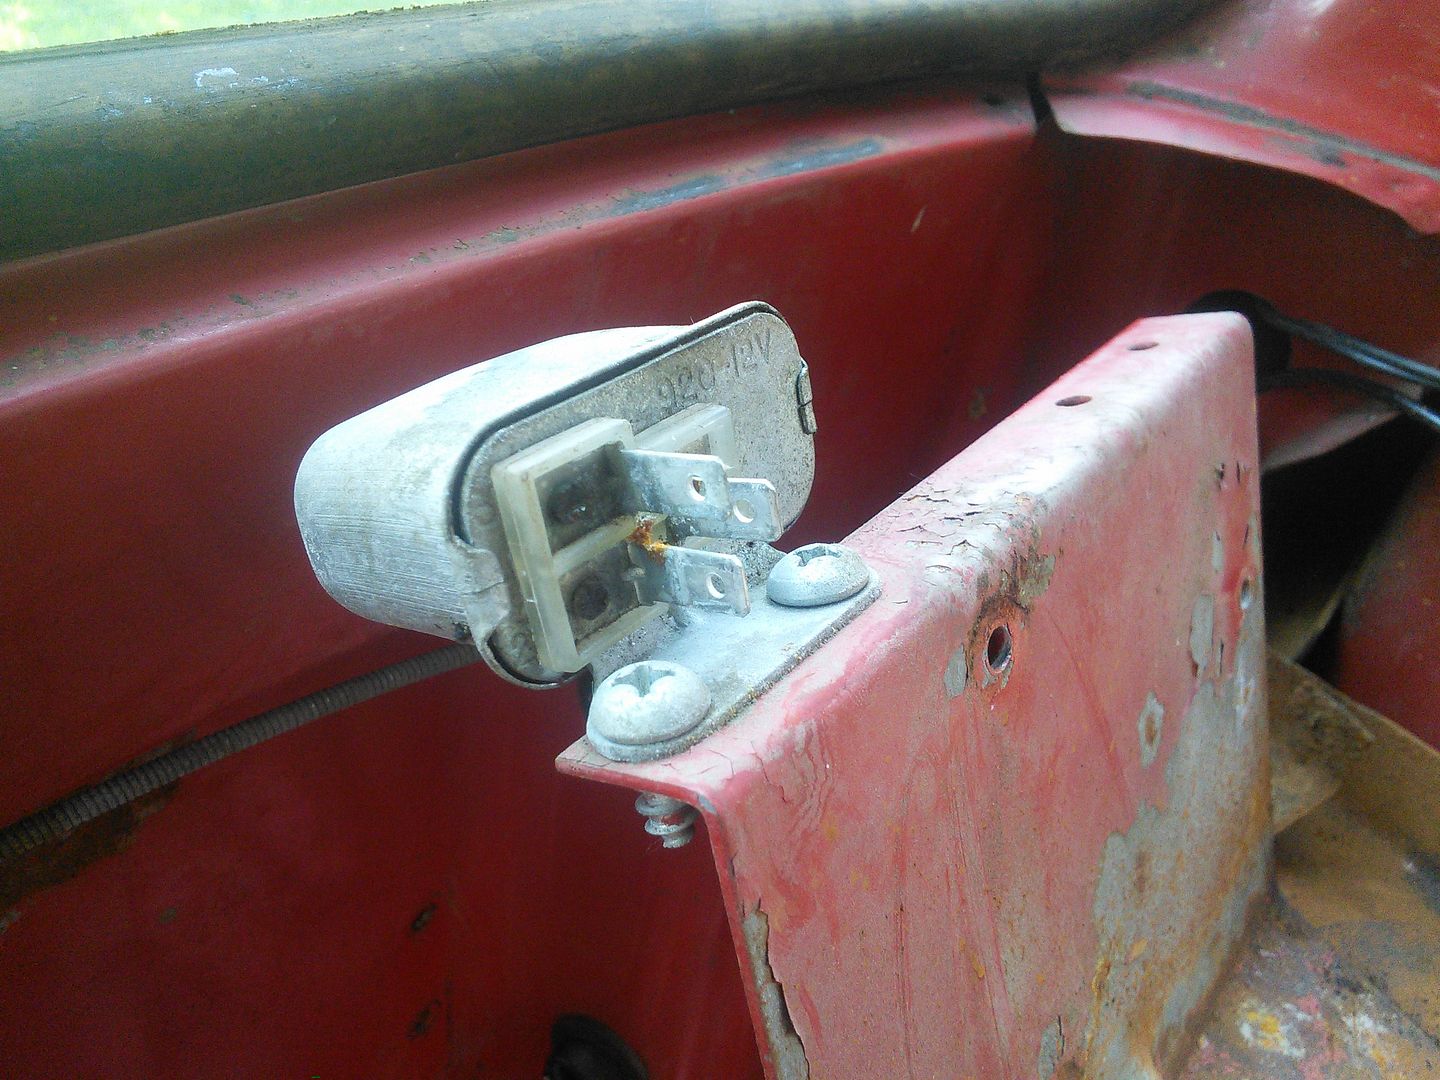 On a related note, what is this silver can thing? It was mounted on the same plate as the voltage regulator. Looks like a relay? I can follow the wires and figure it out, but I thought I'd ask.
I'm going to go with a one wire alternator and get rid of about 1/3 of the wires going back and forth between the cab and the engine.

mazdeuce wrote: I'm going to go with a one wire alternator and get rid of about 1/3 of the wires going back and forth between the cab and the engine.
So, down to two? ![]()
More usefully (I hope), could that little box be the starter relay? (Link is related to a very different IH, but plausible?)
Or horn relay
You'll need to log in to post.


