
bmwbav
New Reader
4/15/13 6:31 p.m.
In reply to Strike_Zero:
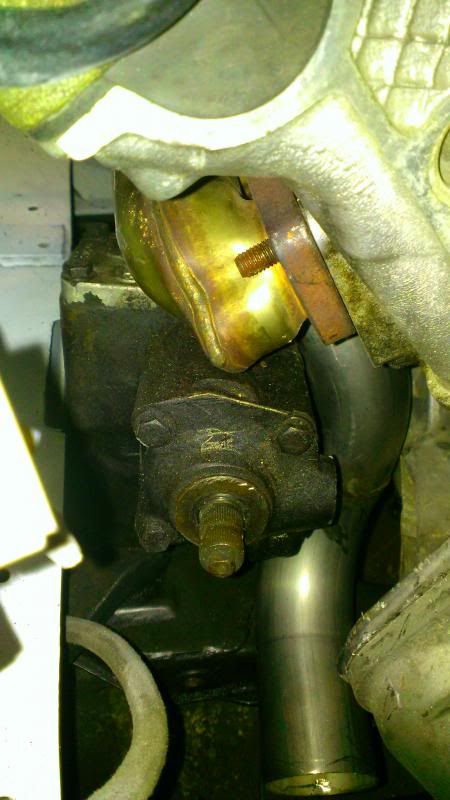
Yes, the X5 manifold may work better, I am getting one to try. I believe it hits the steering box with the stock shape, according to another fellow who tried. However, it's a 4-1 pipe, which reduces the amount of fab work compared to the dual pipes I have now from the 540.

bmwbav
New Reader
4/23/13 2:34 p.m.
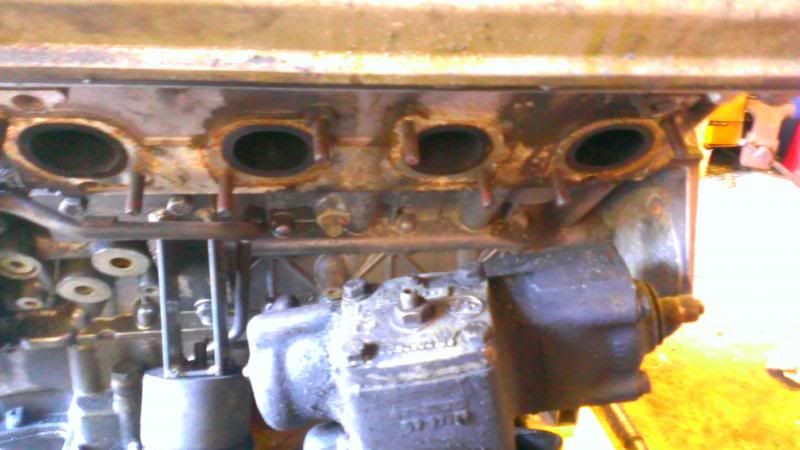
I've set the motor on the subframe out of the car to get a better view of the space I have to work with and start on the exhaust.
The picture below shows the space constraints for the exhaust with the steering box in place. (It's closer in person than it looks in the picture) I'm waiting for the X5 manifold to arrive so I'm able to see how it will work.

bmwbav
New Reader
4/23/13 2:40 p.m.
BMW switched exhaust manifold designs through the production run. Starting with dual 2-1 manifolds, going to a 4-1 manifold used on the X5 and later E39's. The 4-1 manifold exits in the center and should work best for my application. I have the dual manifolds already, however, there really isn't space for the rear exhaust to route between the steering box and the motor.

bmwbav
New Reader
4/23/13 2:42 p.m.
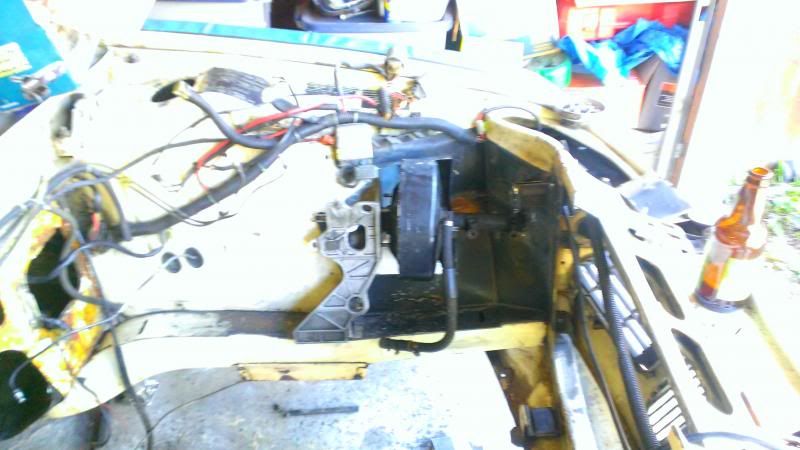
I also started on mounting the remote brake booster. It still needs to move forward a bit, but it should work well here assuming I can align the linkage from the pedal box.

oldtin
UltraDork
4/23/13 2:46 p.m.
Do you have room to take the tubes in front of the steering box instead of behind or beside?

bmwbav
New Reader
4/23/13 2:53 p.m.
In reply to oldtin:
I don't have much room, the alternator isn't mounted in the picture, but it sits fairly close.
bmwbav wrote:
So, quick update, I tried the E30/Frankenstein suspension mock-up, it will not work. The geometry is just too different, the 3 series chassis have a much larger strut angle. (Not sure what it's called) The angle between the hub and the strut is significantly higher than the E3, or 5-7 series. Thus the difference in offset and wheel compatibility between 3 series and 5-7 series. I could make it work with custom strut towers, but it's not really worth the effort.
I'm just going to get more creative with the header design and make it work.
Do you have pictures of this mockup? Maybe some one on here can point you in the right direction with this.

bmwbav
New Reader
4/24/13 12:15 a.m.
In reply to 93EXCivic:
Unfortunately I don't have pictures. The angle of the hub on the E30/E36/E46 strut is too steep. With the top of the strut in the tower of the E3, the hub is outside the fender to have acceptable camber.
But, I found a picture that shows the difference in struts, this person was attempting to put E34 parts on his E30. If you look at the 5th picture down, you can see the difference in the angle of the hub compared to the strut.
http://5luge30obdim52.blogspot.com/2008/12/e30-to-e34-suspension.html

bmwbav
New Reader
4/24/13 12:20 a.m.
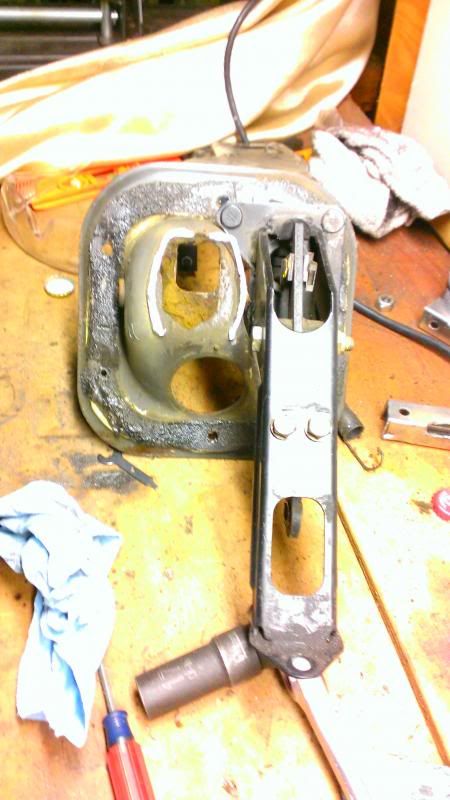
Did a bit more work on the brake set-up. I am going to use the stock pedals, but move them over a few inches to make the linkage fit correctly. The stock brake and clutch pedals are bent away from the gas pedal, so I straightened them and will move the pivot points away from the gas pedal. They should end up in the same positions, but have their pivot point relocated.
I modified the stock pedal box to fit the E34 remote booster lever. Still a little more work to finish this part, but it's close.
bmwbav wrote:
In reply to 93EXCivic:
Unfortunately I don't have pictures. The angle of the hub on the E30/E36/E46 strut is too steep. With the top of the strut in the tower of the E3, the hub is outside the fender to have acceptable camber.
Box flares!
http://grassrootsmotorsports.com/forum/grm/one-more-example-of-how-box-flares-make-everything/12227/page1/

bmwbav
New Reader
4/24/13 11:30 a.m.
In reply to 93EXCivic:
Yes, I know, it would be better with box flares :) Maybe this will be part of version 2.0. I just want to finish this thing now, and not get side tracked on another big project that doesn't directly contribute to make the engine work in the car.

bmwbav
New Reader
4/25/13 12:26 p.m.
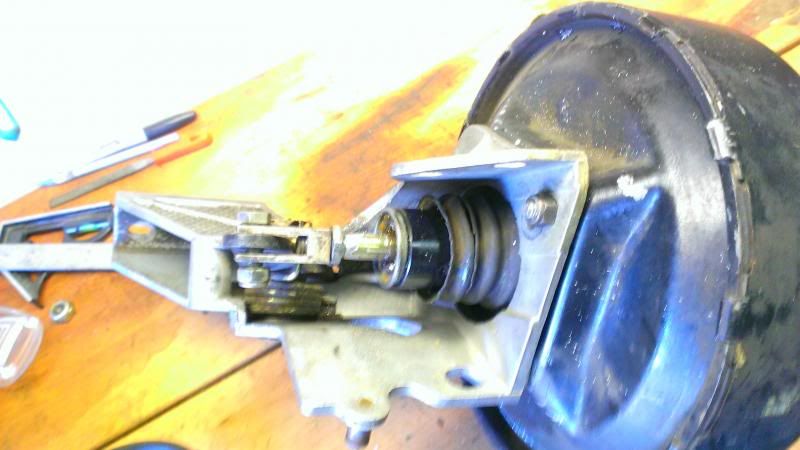
Worked more on the booster mount and made some progress. I had to shorten the actuator rod and the "fork" slightly to make it work with the lever in the remote booster bracket from the E34. I also had to remove two of the studs on the E3 booster and re-drill the mount, as the E34 mount only uses two mounting points. I could have built an adaptor plate to retain the original four studs, but it would need to stand-off from the mount about an inch, as shown in an earlier picture. This increases the size of the overall package, which I wanted to avoid.

bmwbav
New Reader
4/25/13 12:41 p.m.
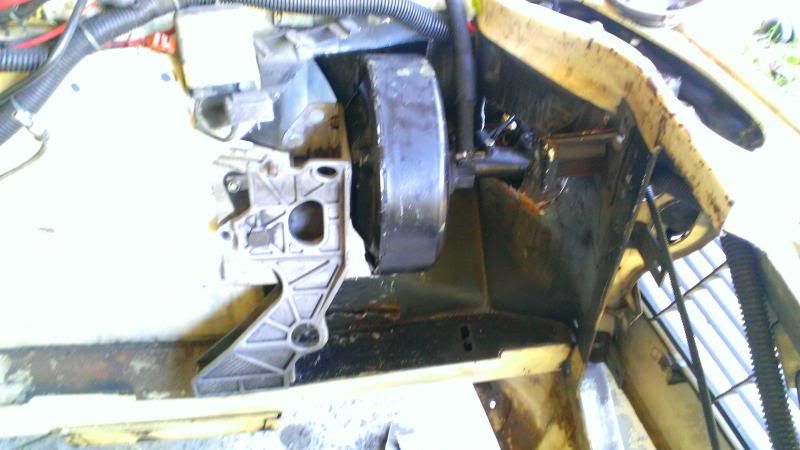
I have the booster/bracket around 90% installed. I had to cut out the inner fender to fit this into the bay. The E3 structure is different than the E34 and it's not a "drop in" fit at all. I welded in a bracket to support the side of the mount inside the fender.
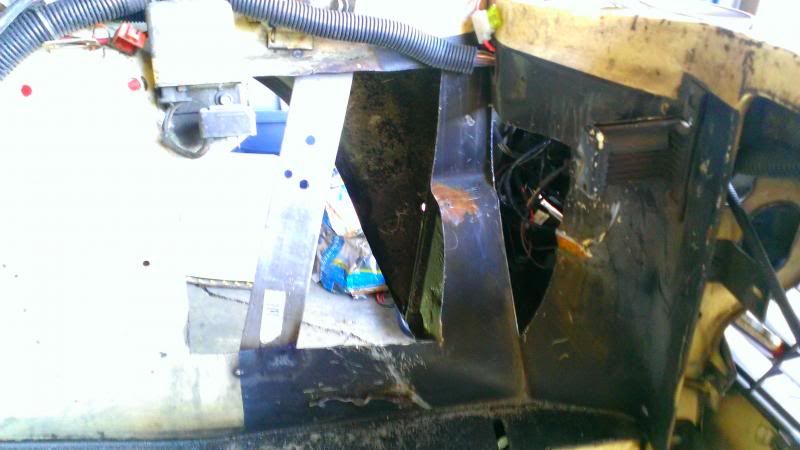
The master cylinder goes through the front bulkhead/clip and ends up about 2" behind the headlight. Fortunately the bulbs can be changed from the front of the car by pulling the headlight bucket out. I need to start installing the new brake lines now, and close up the hole in the fender.
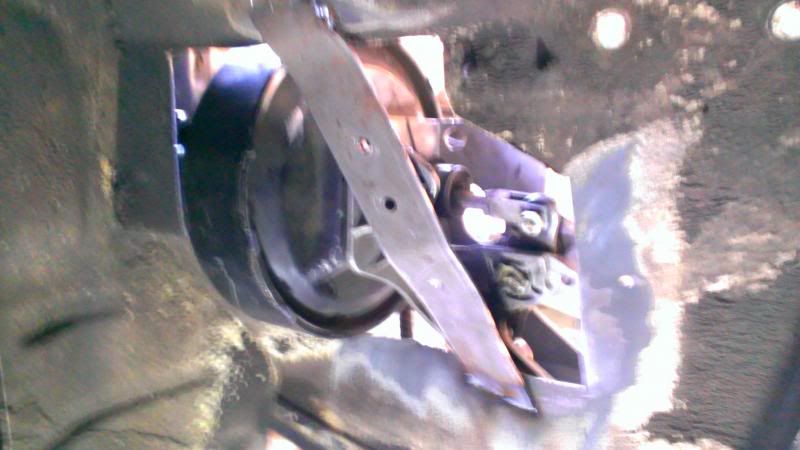
Picture from inside the wheel well. Fingers crossed that the tire doesn't rub on this once I close it up with sheet metal.

Nashco
UberDork
4/25/13 12:58 p.m.
I was expecting this thread to contain discussion about adding an Eaton M62 supercharger...that seems like a much easier job than this one! 
Bryce

bmwbav
New Reader
4/26/13 10:07 p.m.
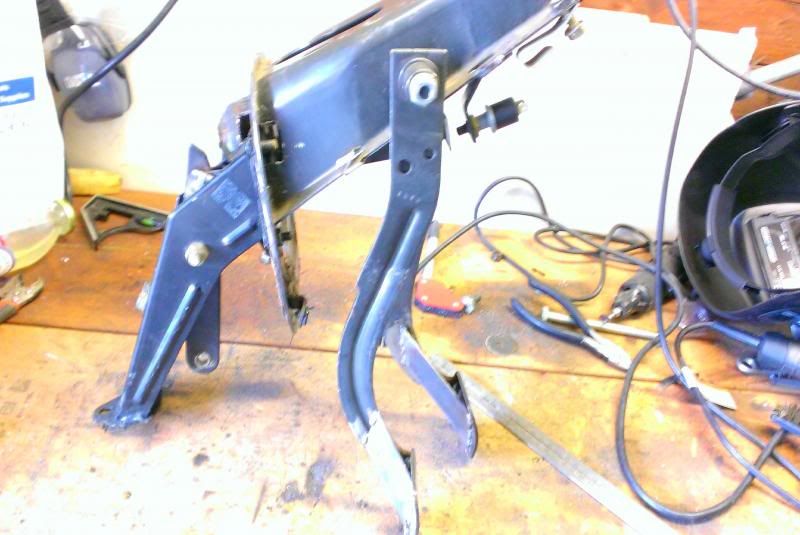
Nearly finished the pedal modifications today. I used a longer bolt to move the clutch pedal to the left. It now pivots outside the pedal box, moved the brake pedal pivot over about three inches to align with the E34 linkage and moved the brake light switch over to match.
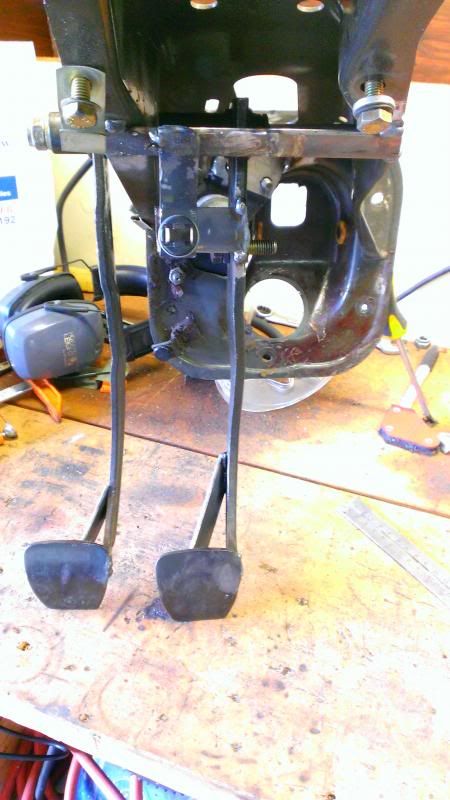
I had to reposition the pedal pads (Or whatever they are called) since I straightened the pedals. I moved them over to the left as far as possible to provide more clearance for the gas pedal, as my trans tunnel is larger than it was originally. I added supports, as the pedals are now attached on the very edge of the pads.
I still need to install the clutch master on the side of the pedal box, should finish that this weekend.

bmwbav
New Reader
4/26/13 10:18 p.m.
I finished up the E34 brake linkage as well, this was a lot of effort to make it work with the E3 pedal box, but it's done!
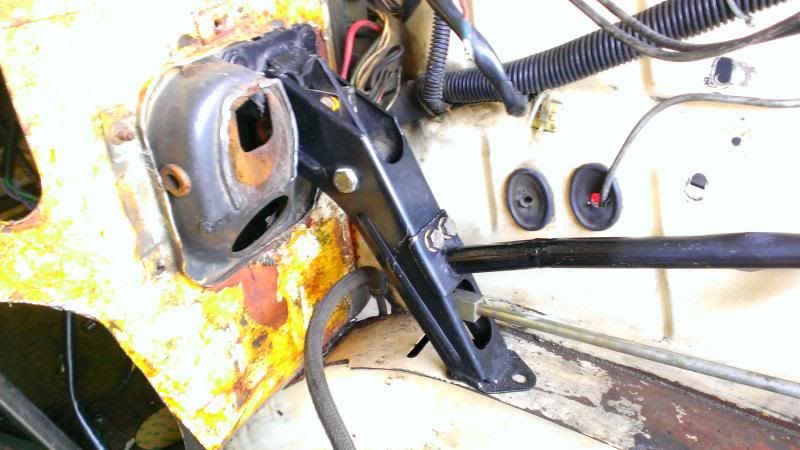
The bracket at the firewall just happened to fit like it was made to be there, very pleased with how it turned out. I had to shorten the linkage rod and the support bar slightly.
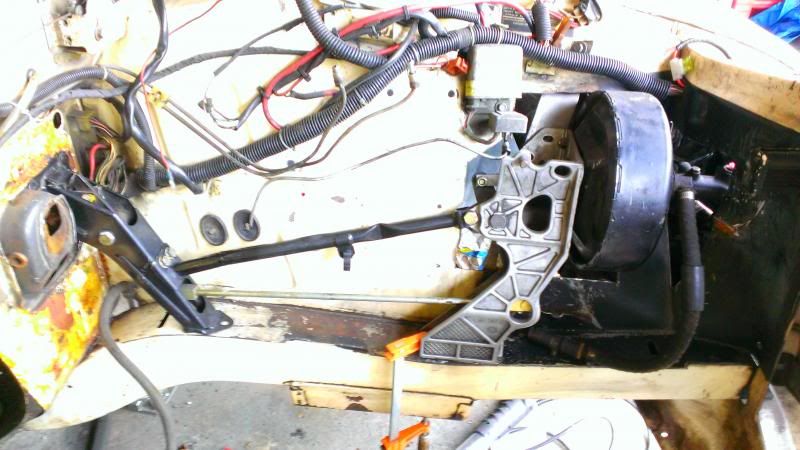
To finish the brakes, I just need to run the new lines.

bmwbav
New Reader
5/9/13 12:04 p.m.
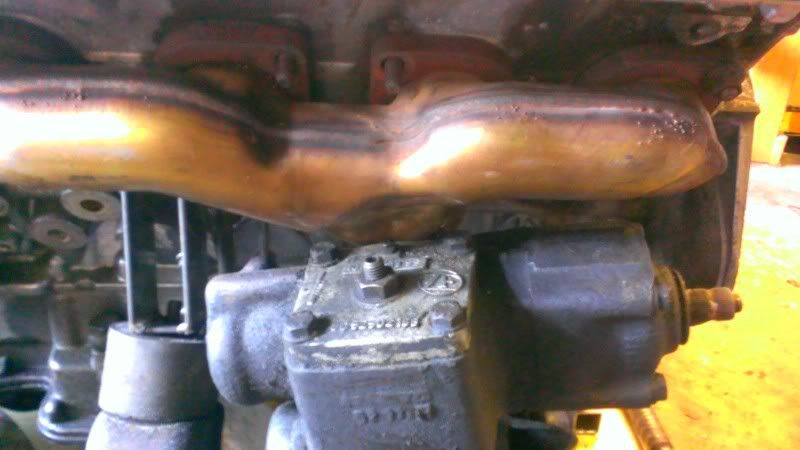
I received the X5 driver side manifold and it will indeed work. It's still very close, and I had to cut down the manifold quite a bit.

bmwbav
New Reader
5/10/13 2:10 p.m.
Hi all,
Have a question about seat mounting/position. I'm redoing the mounts in the car to lower them, and my original design was just terrible.
Anyways, the seats are from an E46, non-sport. The bottoms don't tilt, so I'm stuck with the angle I choose. Is there any sort of "rule of thumb" for what angle the seat bottom should be at for comfort? They need to be angled towards the rear and the seat has that built in to a certain degree, just wondering if there is a science to it...
Thanks!
awesome swap! I like to keep engines brand loyal and I commend you for doing the same. as far as the seat goes, my "science" has always consisted of mocking up the seat with shims, wood, metal, whatever you can find, and just get it to a point that is comfortable for you. there are always limitations between the floor and seat bottom so I have found the best way is to get that seat in there, carefully sit in it and add or remove shims till you find what works for you, then measure and fab brackets. I usually use 1" square tube and the factory seat rails. not very scientific but effective. 
keep up the good work!

bmwbav
New Reader
5/14/13 12:20 p.m.
In reply to 2K4Kcsq:
Thanks for the tips, I'll just try to make the angle comfortable. I'm using some really heavy gauge rectangle tube to mount the seats, as I'll be removing a support that goes between the sills and the trans tunnel.

bmwbav
New Reader
10/14/13 10:43 a.m.
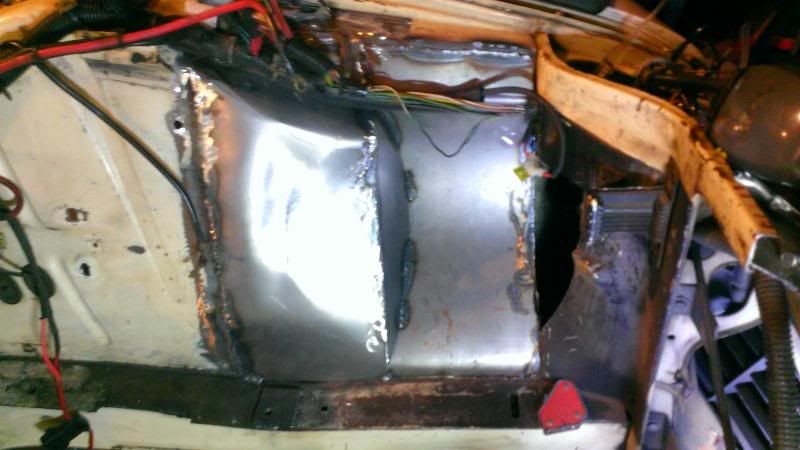
Made some more progress, repainted the engine bay, closed off the inner fender where the brake booster goes and got the exhaust manifolds modified and mounted.
Here is the new inner fender, with the scalloped area for the brake booster to fit;
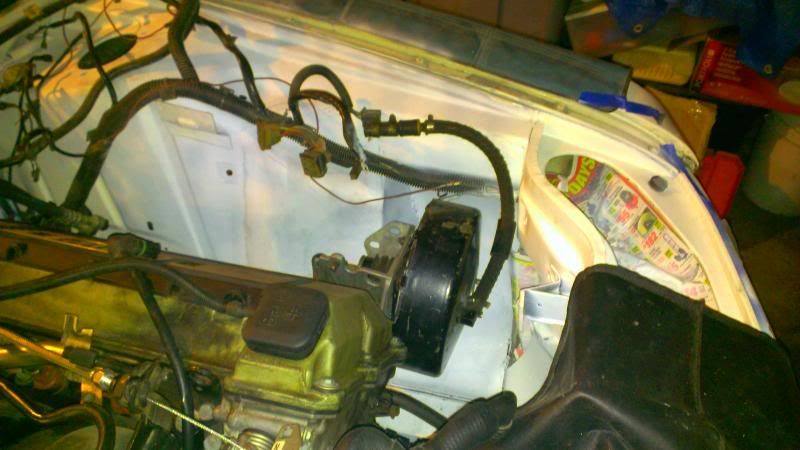
And with the brake booster and mount just lying there for the picture;
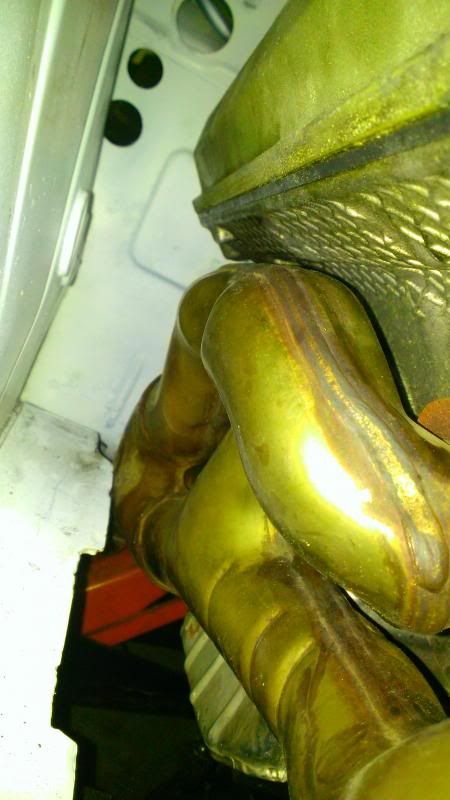
Here is the passenger side exhaust manifold, I had to remove a small lip on the frame rail for clearance.
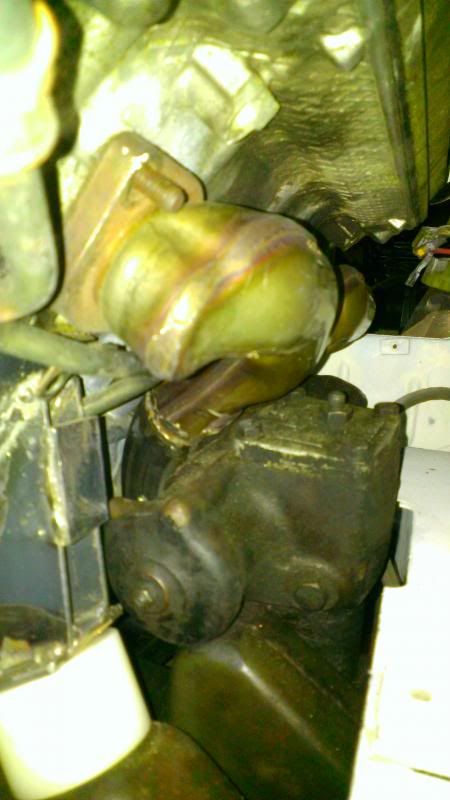
And probably the second most difficult part of this swap, the drivers side manifold. It's very close to the steering box, I'll add a thin aluminum heat shield and wrap the manifold.
Here it is from inside the car, looking through the firewall;
And one overhead shot of the engine back in the bay.
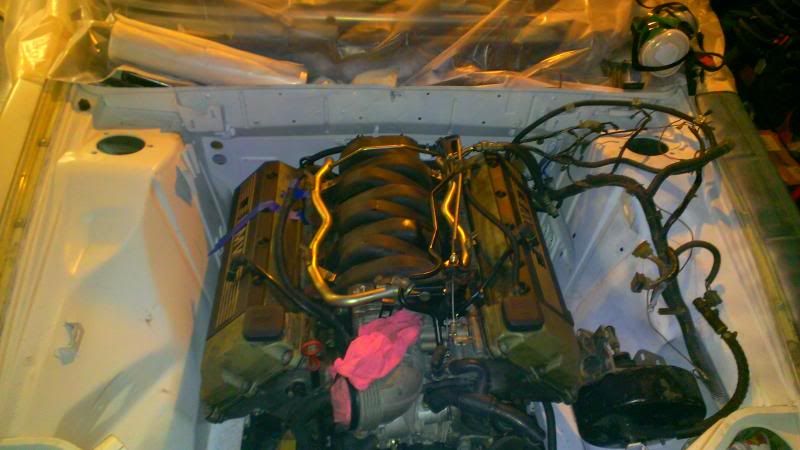
Next up I need to finish the rest of the exhaust, then pull the motor a final time and clean/replace all the gaskets. Then a million other items...

ransom
UberDork
10/14/13 10:52 a.m.
Nice work!
I don't even know what clearance issues I'll wind up with, but with the 2002's similarly restrictive inner fender layout, that sort of notching is something I'd wondered about. Nice to see it executed!

bmwbav
New Reader
10/17/13 1:54 p.m.
Hi all, what is your experience with flexible exhaust components? I'm planning to use a short section of the braided designs on each of the downpipes. It's pretty tight around the engine so I was planning to mount them right after the flange, before the x-pipe. Is there a reason to have them on the engine manifolds vs. the rear section of the exhaust?

bmwbav
New Reader
10/28/13 1:35 p.m.
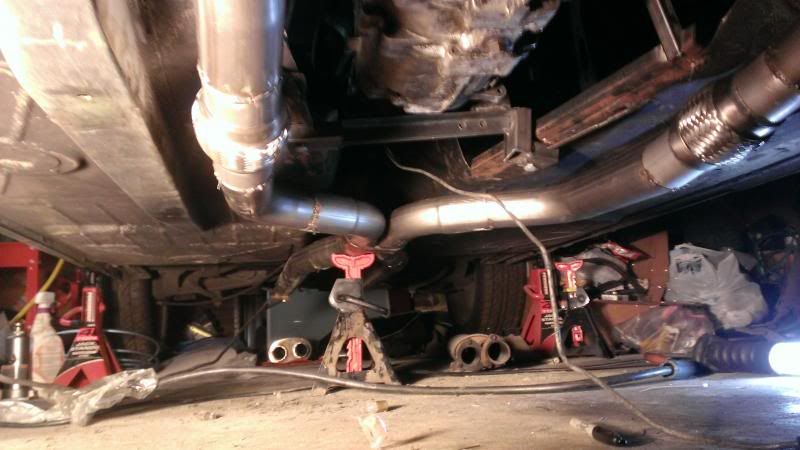
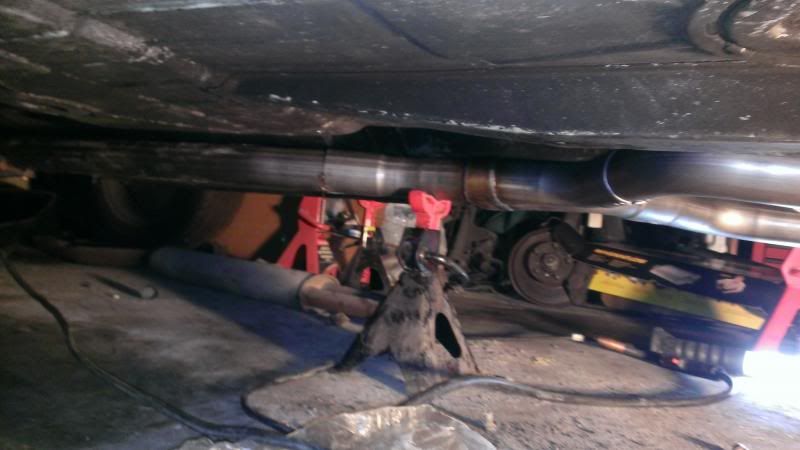
Made more progress on the exhaust.
Drivers side downpipe;
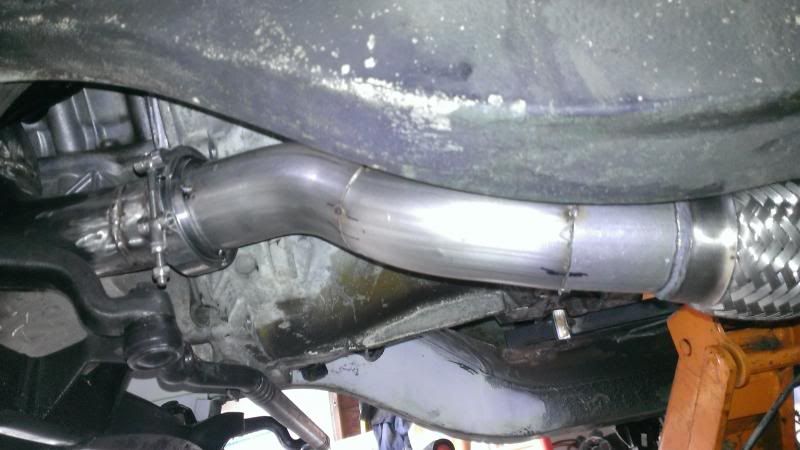
Both downpipes;
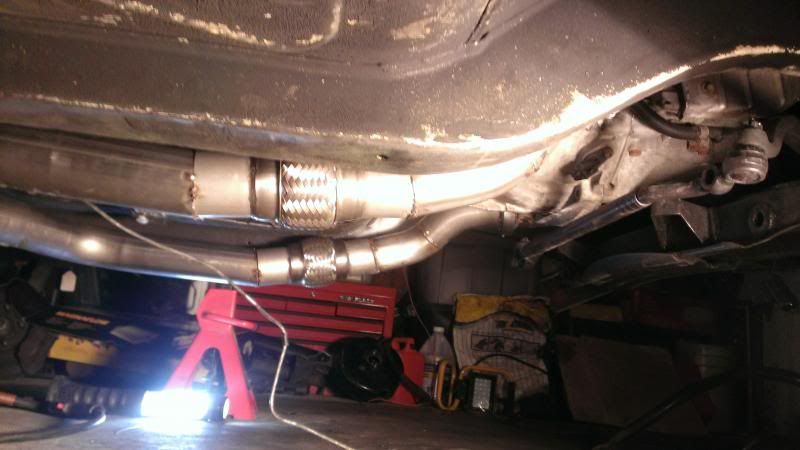
The X-pipe, looking back
And, looking from the side at the X-pipe

bmwbav
New Reader
12/17/13 1:23 p.m.
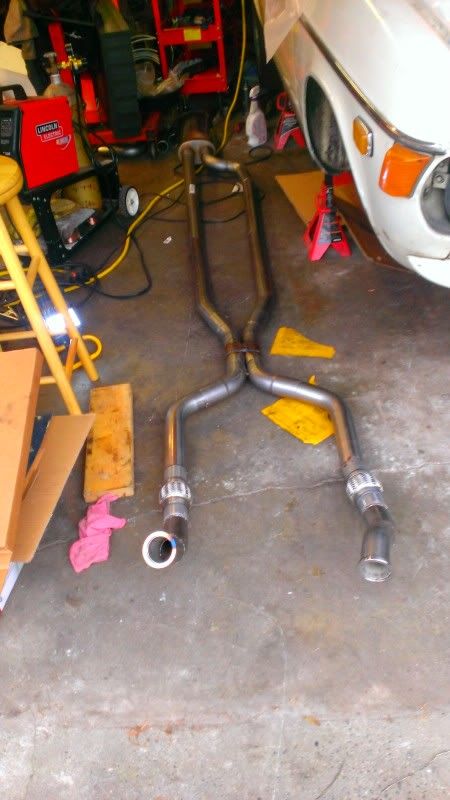
Was able to spend a few days getting stuff done on the car.
Finished off the exhaust
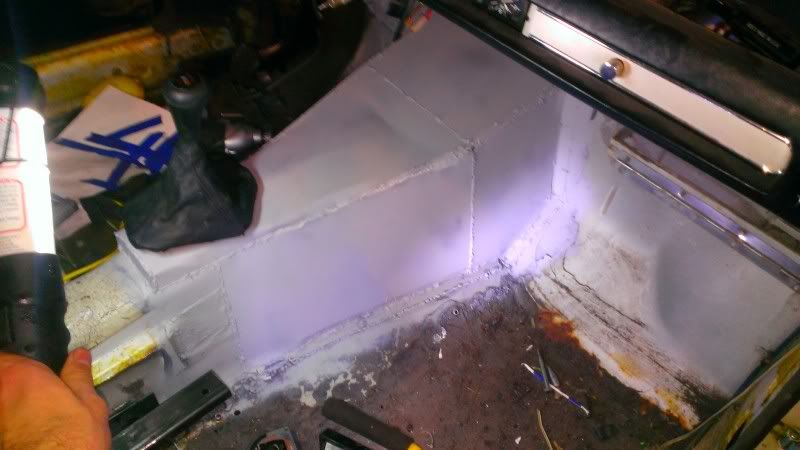
Finally got around to the transmission tunnel, which was one of the few jobs that I actually estimated time correctly.
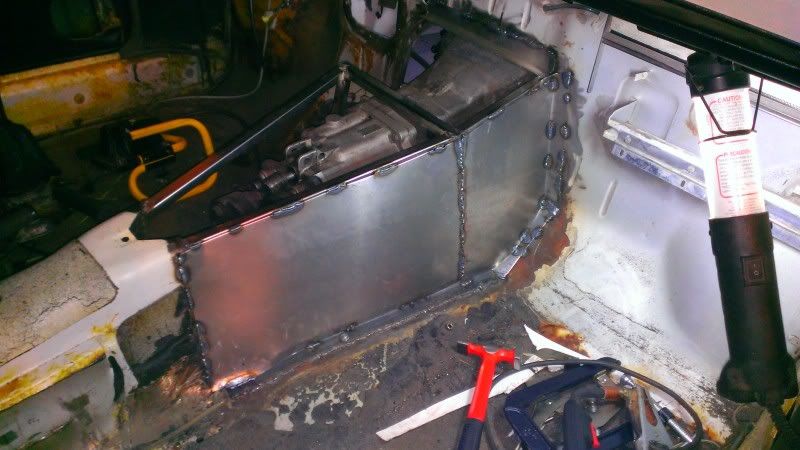 From the drivers side;
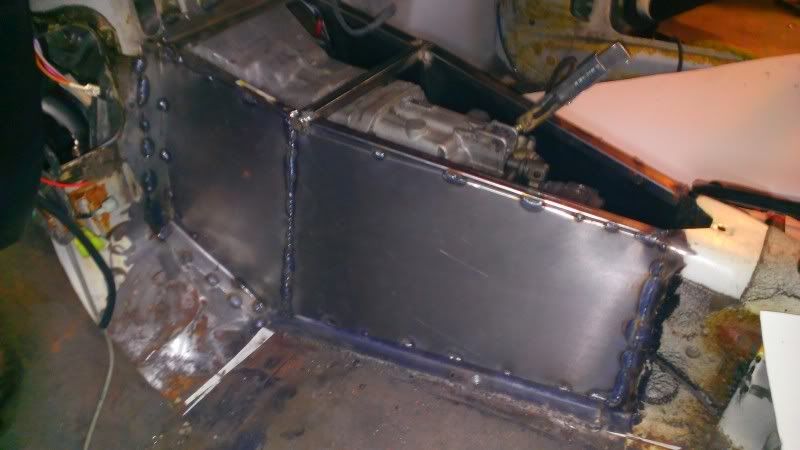
The finished and primed enclosure. The top piece ended up a bit of a mess with my rudimentary metal working skills trying to cover the shift linkage which was higher than I originally planned.
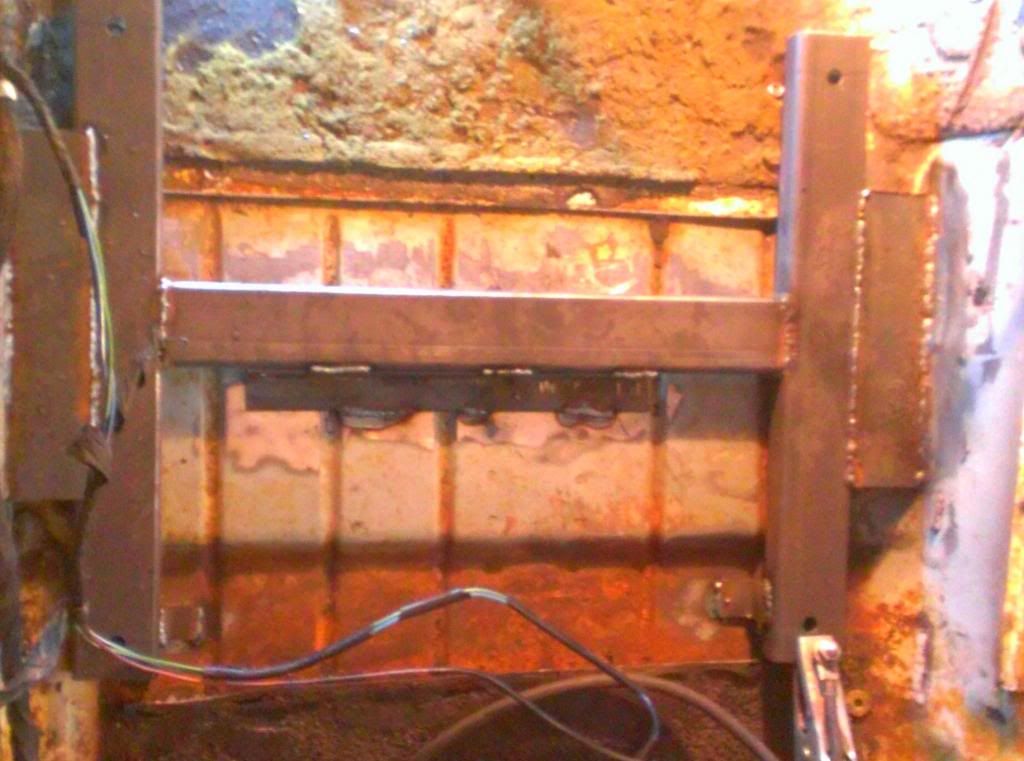
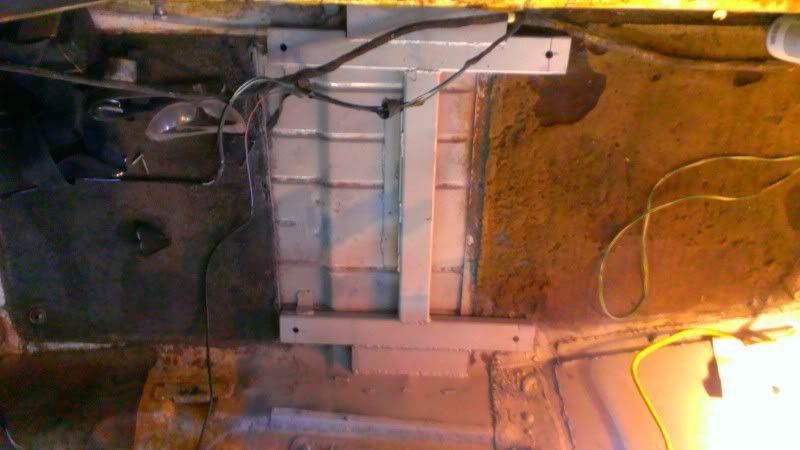
I also finished the new seat mounts. I previously added seats from an E46, but it was a hack-job and the seats needed to be lower. I completely cutout the original mounts and built sturdy platforms for the seats to sit on.
Finished and primed;
That nearly finishes all the fabrication needed for this project. I just need to replace all the gaskets in the motor, run brake lines and wiring, and get it back together.


