zordak
HalfDork
5/24/25 9:25 p.m.
Just got back from 1100 mile road trip and got this.

It is 1946 Pontiac Streamliner. Been looking for a good one at the right price for a while. it is not a 2 door but still has the right shape. Here is the back and other side.
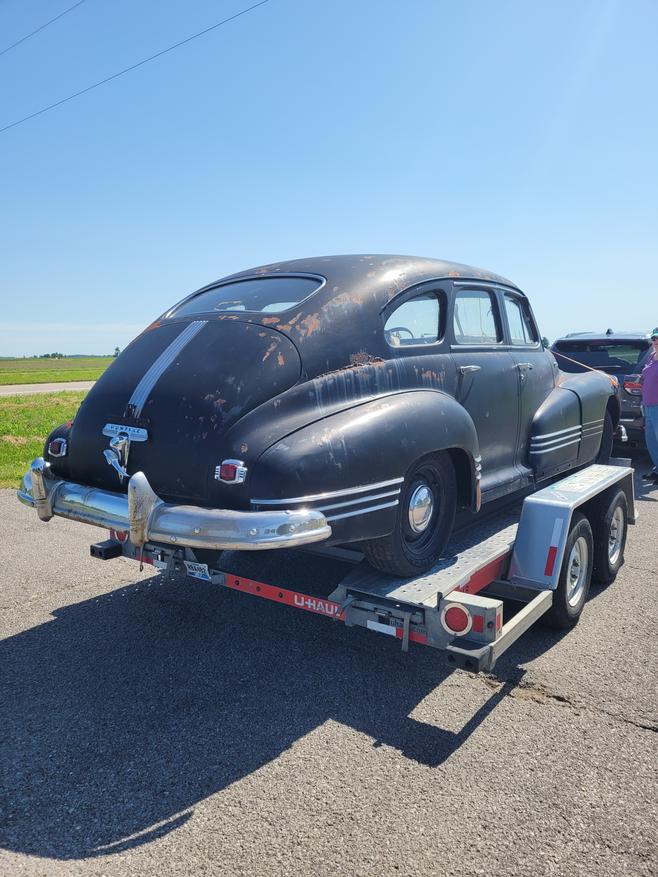
Now here is the shpt that clinched the deal.

The only real rot is the floorboards and spare tire well. The engine will run. The big problem is someone started to convert to 12v and I am not sure it is done any where near right. Also no brakes. The clutch engages and disengages ok ant the trans shifts into all the gears. I heard the engine run on a little gas in the carb, just a few seconds but no big plumes of blue smoke so there is hope.
First order of business is brakes. Looking into converting to a dual master and front discs but don't want to got to different wheels. I have some pondering to do about that. Second thing is at least sort out enough wiring to run the engine. then a lot of other things.
Looks pretty clean underneath! Cool car
zordak
HalfDork
5/25/25 10:11 a.m.
In reply to AxeHealey :
That is the main reason for getting it.
One of my 11th graders is restoring one. Shows me pics every Monday of his progress.

wawazat
UltraDork
5/25/25 2:19 p.m.
I really REALLY like all the GM brand streamliners in both 2 and 4 door configurations. Other brands as well-Packard, Hudson, Nash.
Congratulations on getting this one!
I always wanted to build one of these with a big diesel turbo 6 and a modern 8 speed, dropped on bags.
zordak
HalfDork
5/26/25 4:16 p.m.
This finding a bucket list car does take a little getting used to. I normally spend a lot of time scouring want ads for cars that are in decent enough condition to work on but not out of the price range. I realize I should be using the want ad browse time to work on the car but a couple of decades of browsing want ads is a habit that is a little hard to break.
That out of the way. Here is the first "Oh my I did not see that".

Yes someone broke off the heads of the bolts for the thermostat housing. So after getting the brakes, electrical and fuel sorted I need to drill out the bolts and get the housing off, then drill and tap new threads in the head.
In taking a closer look at everything(yes I did only a quick look over for serious rot and missing major pieces.) someone started to do some repair work on this. But instead of cleaning everything up and then replacing stuff they picked a spot and did some work. it looks like a new gas tank yet right next to it is the rotted out spare tire well. Some of the inner fender wells are new looking yet some of the other underside sheet metal has seen better days. And no I did not take pictures of all this stuff. This documenting thing is new to me and I don't always think of stopping to take some pictures.
I did get all 4 drums off (they came off with no problems)and looked at the brakes except for the left front it looks like newer hardware. here is the left front.

Yes that is the adjuster and spring in my hand and that explains the rattling and dragging noises when getting it in the garage. The others all look good but my pucker factor wants me to just replace all the hardware and master and wheel cylinders. Best I can tell the brakes use a pressure switch on the master to turn on the brake lights.
In other interesting things I am finding out I can not locate the dip stick. There is not one in side the breather/fill tube, I got a little scare when i stuck a rod down the tube and came back with no oil on it. I cracked the drain plug and it dripped a little oil before I got it all the way out so the running it when I looked at did not do any damage.
Second thing I found is an electric blower up front that draws air from in front of the radiator and blows it through a tube under the car to a vent in the floor. Early fresh air I guess.
So I am off to get sticker shock on the brake parts.
zordak
HalfDork
5/28/25 7:51 p.m.
Went shopping for brake parts and found out no one specs a brake adjusting screw. I need one because when the spring broke on the left front it took out the adjuster screw. Anyway I looked through specs for other brake adjusters and found this one.

Despite what the picture shows they are the same size. It is an Oreilly's Brake Best brand H1500. That along with the other parts I ordered should get me a new brake system.
zordak
HalfDork
5/30/25 3:26 p.m.
Brake parts still arriving. Looking over other stuff. Found the problem with the hood latch. Turned out to be a stuck release cable. Replaced it with an aftermarket one and now it works nicely. The wiring conversion is rough enough to make even 30 years ago me cringe. But it has turn signals and head lights, no tail lights and not sure about brake lights because of the pressure switch to activate. Thinking fuel system after brakes then a crawl around the block then redo the wiring.
zordak
HalfDork
5/31/25 5:42 p.m.
I got both rear brakes and the rubber hose done today. I had to replace the right side line from the T to the wheel cylinder. My brake line bending skills are really rusty, but it is serviceable and will not hit anything. On the front the rubber hose routes through the frame and there are sheet metal pans that nee to be removed for access.
zordak
HalfDork
6/2/25 5:24 p.m.
Front brakes are now done. New hoses, shoes and wheel cylinders. Next up rebuild the master cylinder and measure it up for mounting a dual master adapter. I have also been poking around with wiring an found the switch for the aftermarket back up light and it still works. I need to work out the head light switch as it only turns on the head lights and not the tail lights.
Super interesting and I'm enjoying reading about your new ride. Please keep updating!
In reply to zordak :
I love those chrome accents toward the bottom of the sides. Classy. Looking forward to watching this thread.
In reply to zordak :
I stared at this for a minute:

wondering "WTF is a Cordomatic" before realizing it's the back of your work light. 🤣
zordak
HalfDork
6/3/25 8:29 p.m.
I found the rest of the trim in the back seat with some of interior trim. Today's progress or lack of. I got the master cylinder and took it apart. really bad rust in the bottom of the bore. I had hope of honing it out but after running through a set of stones and opening it up about .008"-.010" it is still there. So do I splurge on a new one or get a modern dual master the same bore dia. and have some what safer brakes. Leaning towards the latter. The other pain is some previous owner cut the line for the rear brakes and put it back together with a compression fittings. So now I have to fabricate a new lie to the back. I hope I can do a better job than on the rear axle.
Nicopp. If you haven't used it yet, it Ben's and flares super easy. Put it inside some stainless brake line armor coil, and forget it exists.
You should definitely upgrade to dual circuit MC, and since you already have to make a new line to the rear, this is a great time to do it.
one tech tip I learned here, IIRC either from Trent or from Shawn G, is when you do the second step of the double flare, don't crank the tool to full stop. This leaves a little extra crush in the flare and helps it seal.
In reply to AngryCorvair (Forum Supporter) :
Thank you sir! I will file that tip away.
zordak
HalfDork
6/4/25 4:06 p.m.
Thanks for the tip. I am not afraid to bend my own lines it just looks ugly when I get done, if I have not done for awhile. I will not be going to a dual master. Two reasons, #1 no one makes a kit to do it. #2 there is not enough width to use any other same bore master cylinder. Since I retired I do not have access to machines to make a billet one using the guts out of a dual master. Would have been a nice lunch/after work project. So a new stock master it is, with a week wait. In the mean time I will look at other issues preventing me from doing a crawl around the block.
zordak
HalfDork
6/7/25 7:51 p.m.
I felt like tackling the thermostat housing. Started with using a spotting punch to center punch the screws. I drilled all but around 3/8". Using a mallet and pry bars I got the housing off.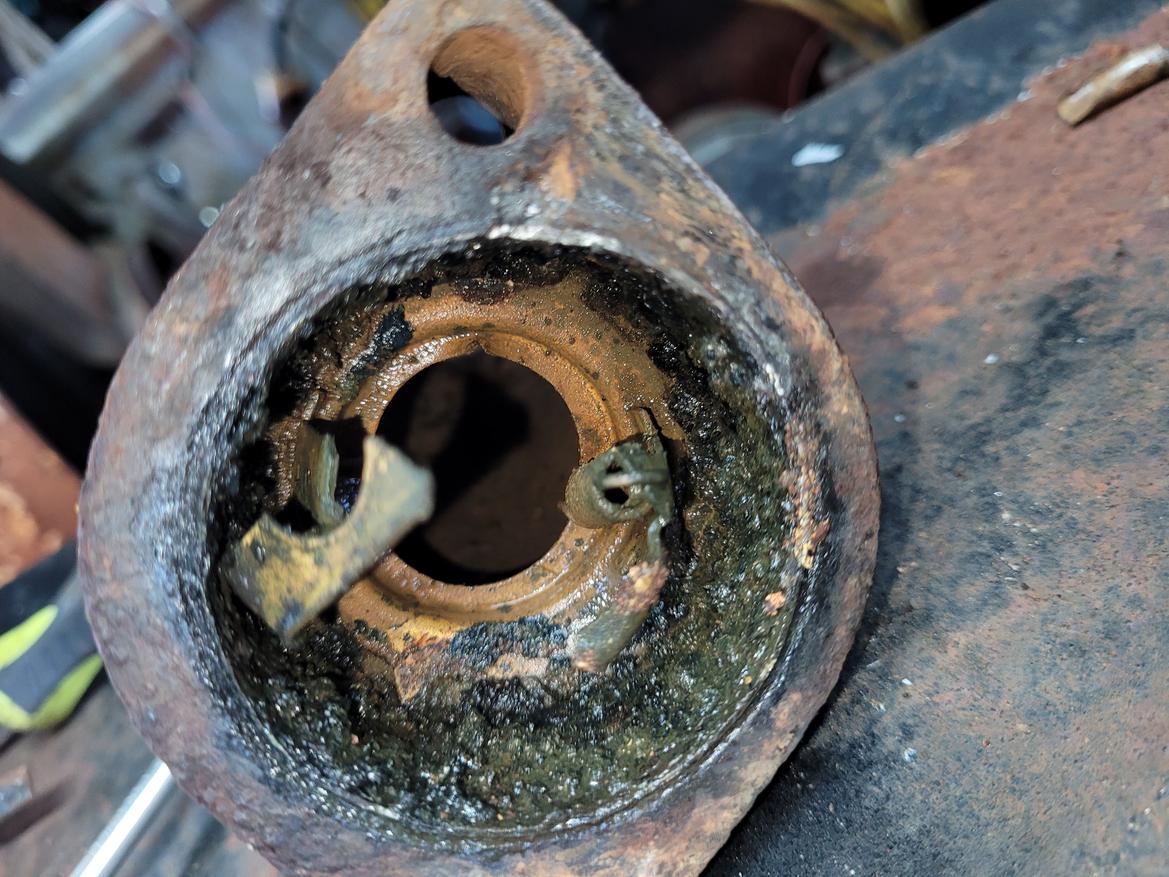
This left a short piece of the screws sticking out. Using a death wheel I flattened the screws off and then stuck a nut on to center punch the screw.

Leaving the nut on to help locate the drill, I drilled out the rest of the screw. The first one worked very well, and I was able to just tap the hole out. The second one the drill moved off center and I had to use the housing as a guide to drill out for a helical thread insert.

I made a gasket out of some old sheet of gasket I had sitting around.

Add a couple of new screws and lockwashers and anti-sieze and you get this.
I just received the new master so after finishing some honey-do jobs I can get the brakes working.
zordak
HalfDork
6/11/25 4:25 p.m.
I have brakes. Or at least a brake pedal that does not go to the floor. Next is a carburetor. I removed the carb and soaking it to clean it up a little and have a kit on order.
Progress so far looks great! I look forward to keeping up with this thread.