AngryCorvair (Forum Supporter)
AngryCorvair (Forum Supporter) MegaDork
9/16/24 2:34 p.m.
TurnerX19 said:

Do not shorten the teeth. The failure to engage when spaced back proves all of the tooth length is required. Relief cut the aluminum flywheel sounds like the easy job, but did you confirm that the starter to engine ratio is adequit? Would be a shame to clearance the flywheel and still not have enough torque to keep the starter itself alive.

i believe relief cut to flywheel is one of the steps to confirm starter to engine ratio.

TurnerX19
TurnerX19 UberDork
9/16/24 11:27 p.m.

In reply to AngryCorvair (Forum Supporter) :

A starter dynamometer is a tool, so budget exempt. Prove the starter's torque first...

PMRacing
PMRacing UltraDork
9/17/24 7:07 a.m.
AngryCorvair (Forum Supporter) said:
TurnerX19 said:

Do not shorten the teeth. The failure to engage when spaced back proves all of the tooth length is required. Relief cut the aluminum flywheel sounds like the easy job, but did you confirm that the starter to engine ratio is adequit? Would be a shame to clearance the flywheel and still not have enough torque to keep the starter itself alive.

i believe relief cut to flywheel is one of the steps to confirm starter to engine ratio.

But now you'll loose your cool timing marks...

I'll see myself out.

stafford1500
stafford1500 Dork
9/17/24 7:08 a.m.

Start the engine with the starter as it is and run the grinder at the tooth overrun location until the marks are no longer showing. Use the engine as the lathe drive and the grinder as the cutting tool. Once cleared you could take the time to remove/cleanup/balance if you wanted to get all fancy.

akylekoz
akylekoz UberDork
9/17/24 7:13 a.m.

In reply to stafford1500 :

That's what I was going to suggest except the danger way with a lathe tool and adjustable rest.  It's just aluminum.

Easy for me to say as I sit in my own machine shop, well the one I work in.

AngryCorvair (Forum Supporter)
AngryCorvair (Forum Supporter) MegaDork
9/17/24 10:27 p.m.

Today I started the engine with no transaxle in place, and the behavior was unchanged. I shot video, but haven't reviewed yet. One thing I noted is that the starter gear didn't fully retract from the flywheel when it slow-cranked, so I think chasing tooth clearance is the right thing to do. I didn't know E36 M3 about starter to flywheel tooth clearance design when I chose the starter location. 

stafford1500 said:

Start the engine with the starter as it is and run the grinder at the tooth overrun location until the marks are no longer showing. Use the engine as the lathe drive and the grinder as the cutting tool. Once cleared you could take the time to remove/cleanup/balance if you wanted to get all fancy.

While this method scares me a little, it is indeed what I will do tomorrow afternoon.


Indy - Guy
Indy - Guy UltimaDork
9/18/24 8:44 a.m.

In reply to AngryCorvair (Forum Supporter) :

I'm not saying don't do it, I'm just saying be careful. 😜 

MuSTANK
MuSTANK Reader
9/18/24 9:32 a.m.

I'm saying be careful as well . . . the best of them always want blood.

AngryCorvair (Forum Supporter)
AngryCorvair (Forum Supporter) MegaDork
10/9/24 10:01 a.m.

Minor bummer update: one of my C4 ZR1 17x11 sawblades is berkeleyed beyond saving, according to a very respected wheel repair shop nearby. Not only is the barrel severely out of round, but it is twisted relative to the wheel face. I couldn't even get them to do a "no guarantee, no warranty, get it the best you can" waiver. Oh well, silver lining is I won't be buying *four* 335 A7s.

AngryCorvair (Forum Supporter)
AngryCorvair (Forum Supporter) MegaDork
10/20/24 11:04 p.m.

TL;dr - starter issue seems to be whipped, now working on minor mods and reassembly.

Longer version, some of which is a little repetitive, so please forgive me. back in the day, to minimize the thickness (and therefore the cost) of the bellhousing adapter plate, i chose to use the Audi starter and flywheel ring gear. I designed the drive gear to ring gear interface a little too tight, and it was obvious that the drive gear teeth were crashing into the aluminum behind the ring gear.
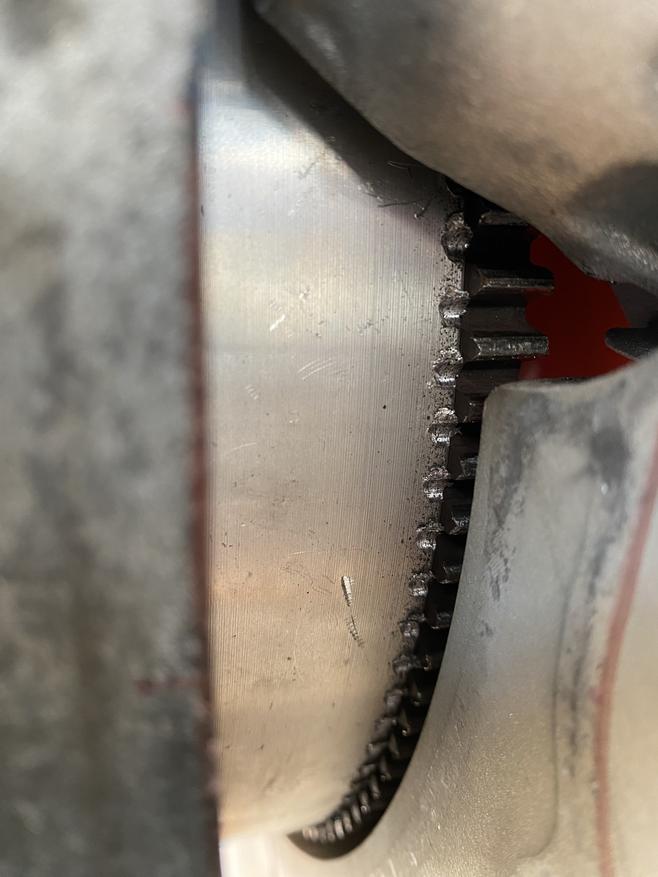
here's some pertinent starting system math:

  • Audi: starter power = 1.2 kW; ring gear teeth = 116; starter drive gear teeth = 9.  so 1.2 * 116 / 9 = 15.47
  • LT1: starter power = 1.4 kW; ring gear teeth = 153; starter drive gear teeth = 10.  so 1.4 * 153 / 10 = 21.42

so by comparison, the Audi starting system was at a [ 1 - ( 15.47 / 21.42 ) ], or 28% disadvantage relative to the LT1 system. berkeley that.

i removed the adapter plate and got an LT1 starter and flexplate and mocked things up. this ring gear is proud of the back of the block by almost a full inch, which is exactly the thickness of the adapter plate. That's no bueno, because opening up the adapter plate for the 13" diameter x 1" depth would remove all the threaded holes and I couldn't attach the transaxle anymore. Trans bolts are M12, and minimum thread engagement should be 1x diameter. This means I can hog about 1/2" deep into the plate.  OK, so I need to space the plate away from the block by 1/2".  Fortunately, it's no big deal to make (or buy, copy, and return) a 1/2" spacer, so I bought 2x 1/4" spacers and longer bellhousing alignment dowels. note to self: get adapter bolts 1/2" longer than current.
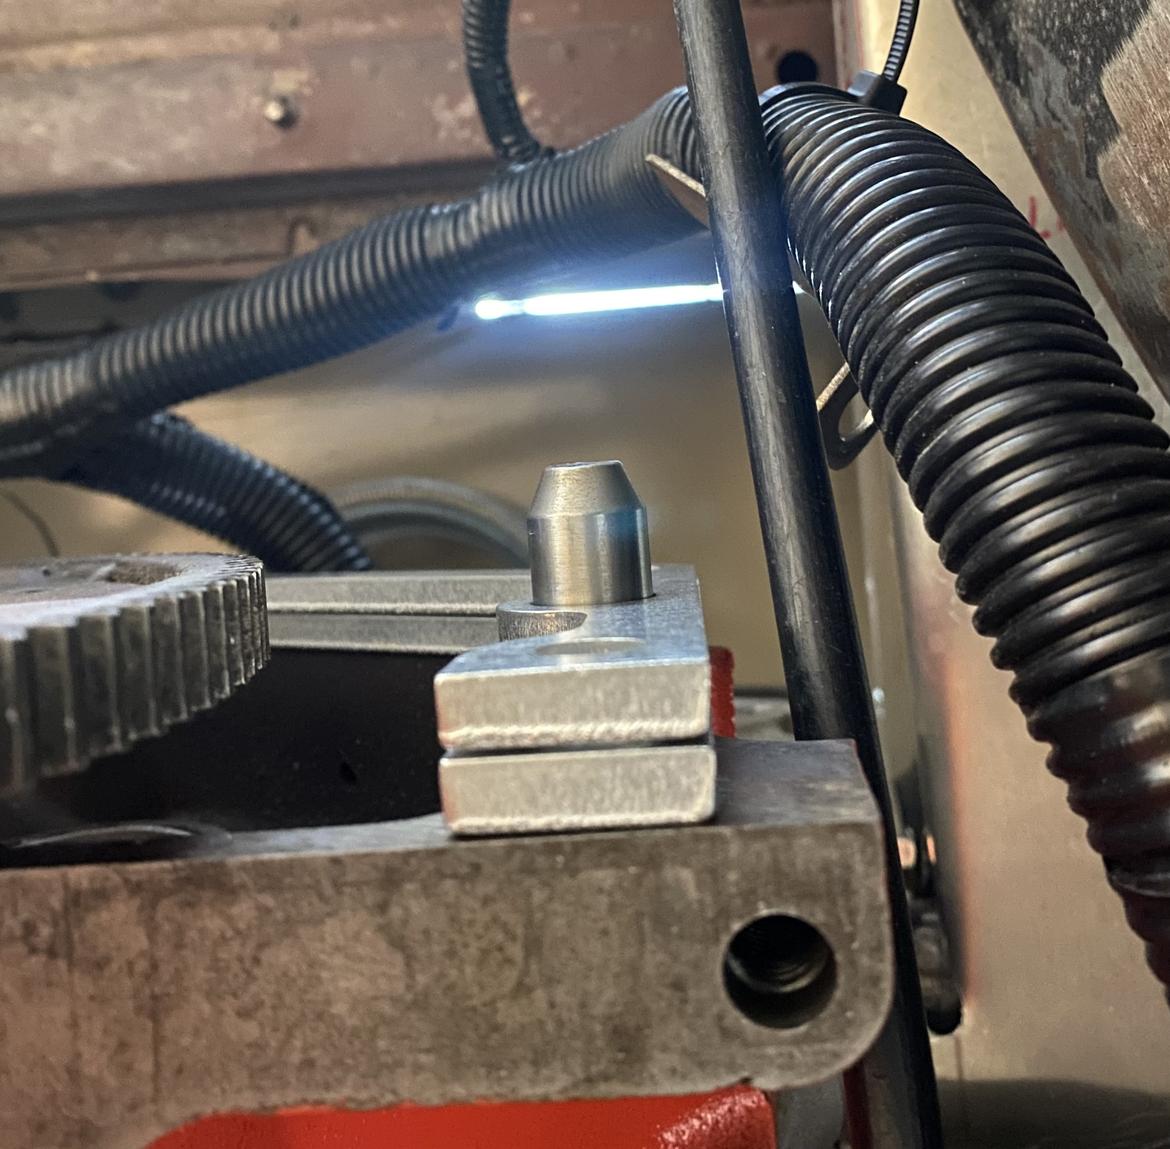
Next hurdle: the throwout bearing needs to be in the same place relative to the clutch fork, which is now 1/2" farther rearward. this will require spacing the Audi flywheel rearward by 1/2" minus the thickness of the LT1 flexplate, or 3/8". This is also no big deal, either to stack readily available shims or machine one up. For now, I bought 2 variety packs of shims. Even when i'm not making parts, there's a bit of CAD going on.
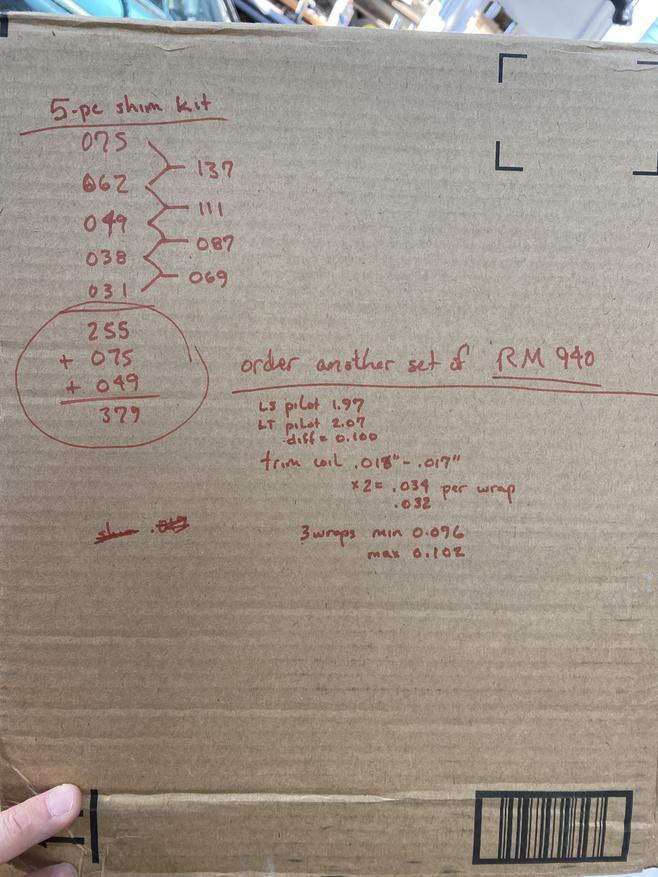
Next hurdle: those shims need a pilot, as does the Audi flywheel. Again no big deal, I bought a crank pilot extension, but to make it sufficiently janky i bought one for an LS, which is the same diameter into the crank, but is about 0.100" smaller OD. Good thing we are having the siding replaced on AngryHouse, and I've got a dumpster of scrap siding and trim in the driveway.
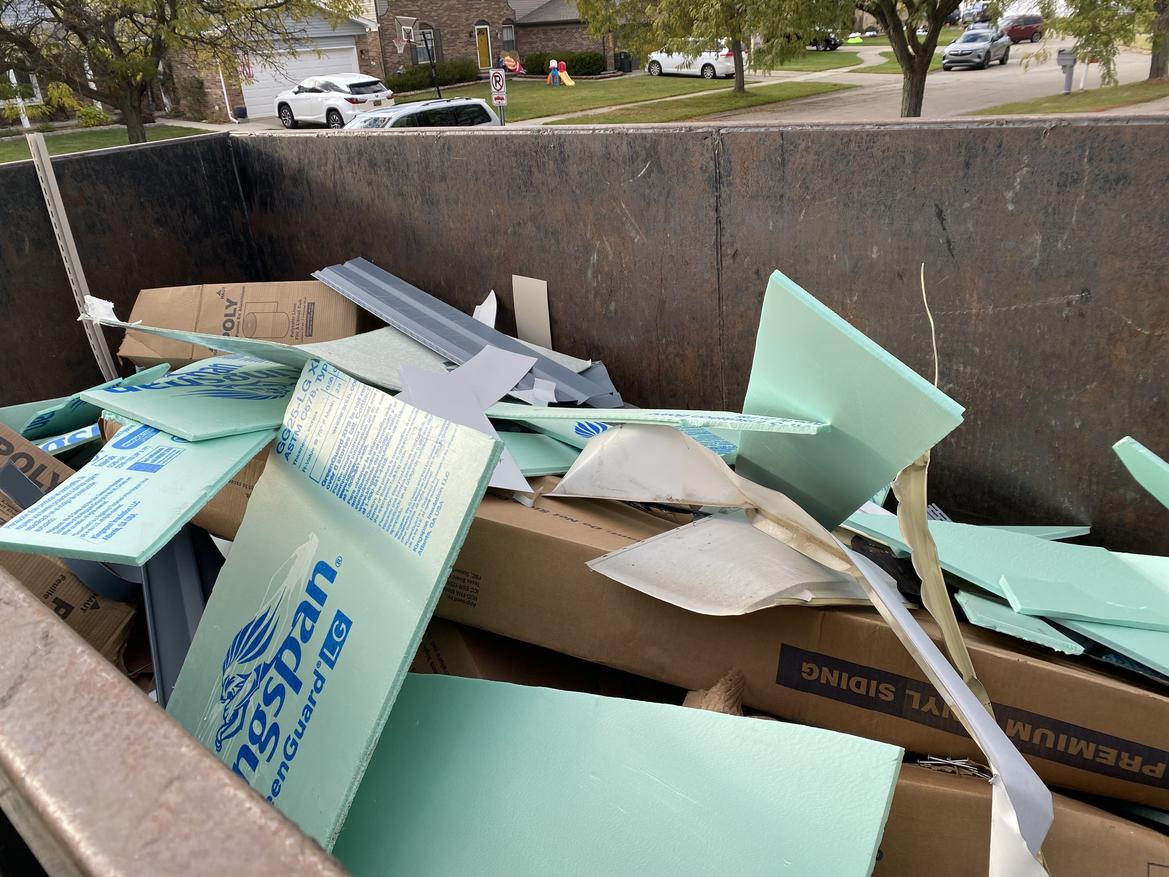
Turns out the flashing is 0.016"-0.017" thick, so three wraps gives 0.096"-0.102".  With a combination square and tin snips, i made the required shims and all the bits are a nice slip fit.
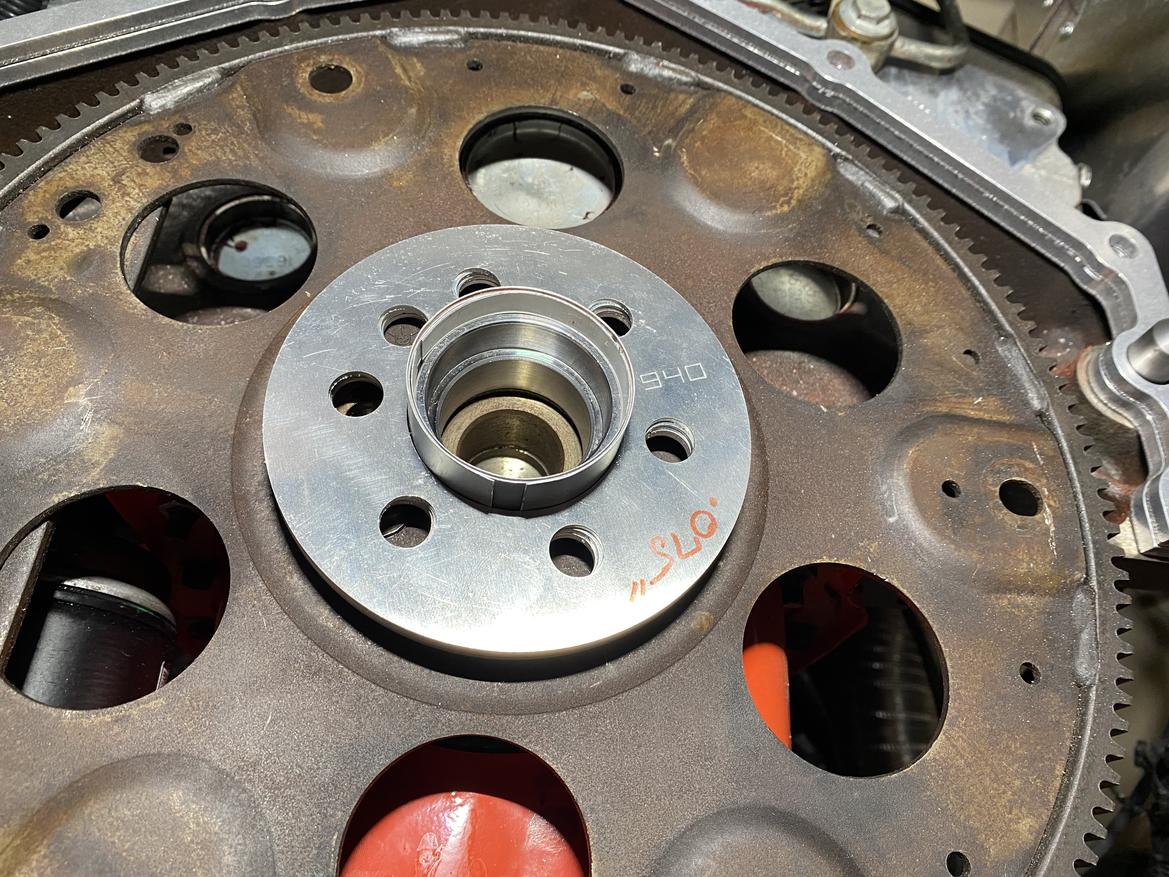
next step is to meet up with whiskey_business and get some quality time on his Bridgeport. Mod to adapter plate should not be too difficult. Note to self: i still need to get flywheel bolts and an alignment pin 1/2" longer than current. Next step after that will be to relocate trans mount 1/2" rearward.

AngryCorvair (Forum Supporter)
AngryCorvair (Forum Supporter) MegaDork
10/22/24 9:15 p.m.

Today started off as Bridgeport Day, but it became Bridgeport Day One. Setup takes forever for 2 engineers who don't make chips every day. First, we had to center the 10" rotary table under the spindle. Then we had to figure out how to attach a plate with an 11" hole in the middle to said 10" rotary table, while simultaneously centering said 11" hole on said 10" rotary table. Here's what we came up with:

and it worked well. But, we ran out of time after 3 of 10 required cutting passes. So tomorrow is Bridgeport Day Two.

i also got the shakes before arriving at Bridgeport Day One, because I had to stop at the same fastener store that I was leaving when SSheila got crashed, and had to drive through the same intersection, in the same direction. Fortunately, there were no landscape trailers in sight, so SSheila and I made it through the hood unscathed. And everything I needed was in stock. Hooray!

zordak
zordak HalfDork
10/23/24 11:41 a.m.

When working with a rotary table(my god I haven't used one in 20 or more years.) indicate or center the part to the rotary table first then indicate or center the mill spindle to the part.

AngryCorvair (Forum Supporter)
AngryCorvair (Forum Supporter) MegaDork
12/7/24 2:01 p.m.

Life got in the way for a minute, but whiskey_business came through on the adapter plate mods and assembly begins today!

wawazat
wawazat SuperDork
12/7/24 8:02 p.m.

That guy rocks!

AngryCorvair (Forum Supporter)
AngryCorvair (Forum Supporter) MegaDork
12/8/24 10:32 a.m.
wawazat said:

That guy rocks!

Indeed he does.

So, on to the installation. Step 1: bolt adapter to trans, to see how much I need to shorten the four bolts that would crash with the flexplate. Worst one shown below:

Step 2 (not shown): don we now our PPI, fa la la. Step 3, also not shown, cut bolts with death wheel, dress ends on belt sander. Results:

After that, I removed adapter from trans and bolted to engine so I could measure axial clearance to flexplate. It's about 1/8", as intended. Here's how it looks at this point:

and that's where I stopped for the night. I'll get back at it later today. I'm a bit sore from the floor routine gymnastics of working under a car on jackstands. Well, that plus being old.

TurboFource
TurboFource Dork
12/8/24 3:18 p.m.

I think it's more about getting old .... can relate to that!

AngryCorvair (Forum Supporter)
AngryCorvair (Forum Supporter) MegaDork
12/20/24 10:36 p.m.

I did not get back out to the garage the next day. Or the day after. Or any other day until today. But I got after it today, so here's the summary.

Installed and torqued the flexplate / spacers / flywheel, then aligned, installed, and torqued the clutch disc and pressure plate:

(Mostly) Installed the transaxle. I mean, it's bolted to the adapter plate:

Then I cut off and relocated trans mount supports 1/2" rearward, so the transaxle is no longer held in place by ratchet straps or a jack:

So here's where I left off for the night:

I still have to modify shift linkage and clutch hydraulic line, then I can install the rear suspension and the exhaust, and take her for a spin. Woohoo.

TurboFource
TurboFource Dork
12/21/24 7:04 a.m.

Always looking forward to new postings on this!

AngryCorvair (Forum Supporter)
AngryCorvair (Forum Supporter) MegaDork
12/21/24 12:35 p.m.

In reply to TurboFource :

Thanks man, I appreciate the kind words.

vwcorvette (Forum Supporter)
vwcorvette (Forum Supporter) PowerDork
12/21/24 5:01 p.m.

Yayyyy!

Kendall Frederick
Kendall Frederick Reader
12/21/24 5:12 p.m.

I also enjoy seeing updates; the car should be an absolute blast when it's sorted.  I've been doing car task avoidance by getting enmeshed in woodworking projects before Christmas.. and reading about other people's progress.  :-)


AngryCorvair (Forum Supporter)
AngryCorvair (Forum Supporter) MegaDork
12/22/24 11:07 p.m.

Riding the wave of Friday's progress, I hit the garage for a bit today and kept things moving along. Whiteboard before:

and after:

I added the same number of things as I crossed off, but I'm really glad to have the rear suspension in the car again. That accomplishment freed up a lot of floor space, and gave me a big mental lift.

NOHOME
NOHOME MegaDork
12/22/24 11:33 p.m.

I very much approve of the development cycle that you are working through. The initial build project gets done on a wave of enthusiasm in pursuit of a dream. This stage is more like life after marriage.

AngryCorvair (Forum Supporter)
AngryCorvair (Forum Supporter) MegaDork
12/22/24 11:52 p.m.

In reply to NOHOME :

I am grateful for you and all the other high-level builders who document projects here for us to learn from and enjoy. I am grateful for the skills I have developed and the tools I have acquired as I have stumbled through this build. And I appreciate your encouraging words along the way.

AngryCorvair (Forum Supporter)
AngryCorvair (Forum Supporter) MegaDork
12/23/24 11:33 p.m.

Today is my 58th birthday, so I hit the rowing machine for 5800 meters, then had breakfast with the family and hit the garage for a few hours. Put away tools, rearranged some things, then cleaned up the to do list and knocked out a few items:

"shorten LH linkage" got ugly, as it was a piece of aluminum tubing with all-thread loctited into drilled and tapped end plugs. the loctite made its presence known as it gassed through the last little bit of welding. I cleaned it up on the belt sander and reassembled it and it's all good. No pix, but you can trust me when I say it was hideous.

i got about halfway through "move cable attach to RH linkage" before it was time to go to Ichiban (our local Benihana wannabe) for what is generally my favorite dinner of the year. Emperor's Feast Deluxe (filet, shrimp, lobster tail), GET IN MY BELLAH! So much salt, so much garlic, so much butter (probably margarine), so good.

With family stuff from now through Christmas, I doubt I'll be in the garage again until the 27th. I will post when I have something to update. 

You'll need to log in to post.

Our Preferred Partners
brUigPFiCtRrkh6BQNmAINalEpwKLJLqR18o9JjBOONnrGYvNyxoVqb1dSOtmxXK