In reply to Stampie:
amen. in all the right ways.
im allowed to bring a full blown race car to the challenge, right?
In reply to Stampie:
amen. in all the right ways.
im allowed to bring a full blown race car to the challenge, right?
Dusterbd13 wrote: And bullitt wheels come down to budget. 100 dollars on wheels, or 100 towards 3.73 gears and a limited slip?
Just getting caught up here. Still looking for some 3.73s? Ford rear right? I might have a set on a shelf here.
Still have the amc15 rear with 2.76 open. Plans call for an 8.8 if budget allows. And i can find one with 3.73 posi.
Thanks for the offer though.
Lol. I just did the turn pinion and count axle rotation. May be 2.31. It higher than denver, i know that.
Awesome thread - Mom had an AMC Eagle Wagon when I was young. It was a black woody, with black vinyl interior. On sunny summer days, the thing would fry the back of your legs like bacon in a hot skillet. It was a beast though - AWD 6 cylinder - it was a tank that couldnt be stopped. Ive loved 80's AMC stuff since I was a kid. I dont know why I dont think of them when Im daydreaming about fun, funky chassis to start projects with. I love this thread!
Dusterbd13 wrote: Grinder tree is something that blackhurst made in the project binkey series to hold all the grinders. Its pretty neat.
You finally pushed me into watching the Project Binky series. Those dudes are hilarious!
Also, you just raised the bar for my body swap. LOL
Howdy. Newbie here. Very impressed with your build and others. Must say that after I stumbled into GRM, this and PeteGossets C4 build prompted me to join up. Thanks for your team's hard work. Best of luck. In keeping with the interior, paint the exterior Ferguson Gray tractor paint .
Glad i could enable you to join!
Probably going to stay with what paint is left. Because in all honesty, im lazy and it photographs well enough.
If it does get painted, would probably be the copper coler that the bottom is. I kinda like it.
I know all about lazy, ask my wife. The reference to tractor paint was a poor attempt at lousy humor, from a post on John Deere black paint. (I like to tinker with old tractors) I'll go sit in the corner and be quiet.
We have talked about using tractor paint on this car as well. Thought i may have mentioned it somewhere in pages back.
Ease, keep being an active part of discussions. Its what makes this place great.
I've always had a soft spot for AMC/Rambler. Back in the 70's a friend had a Javelin with a worked 390, it could haul ash, and took the smirk off the face of a lot guys.
We did some stuff that didn't cost any money. Chipping away at that last 20% that takes the other 100% of the time.
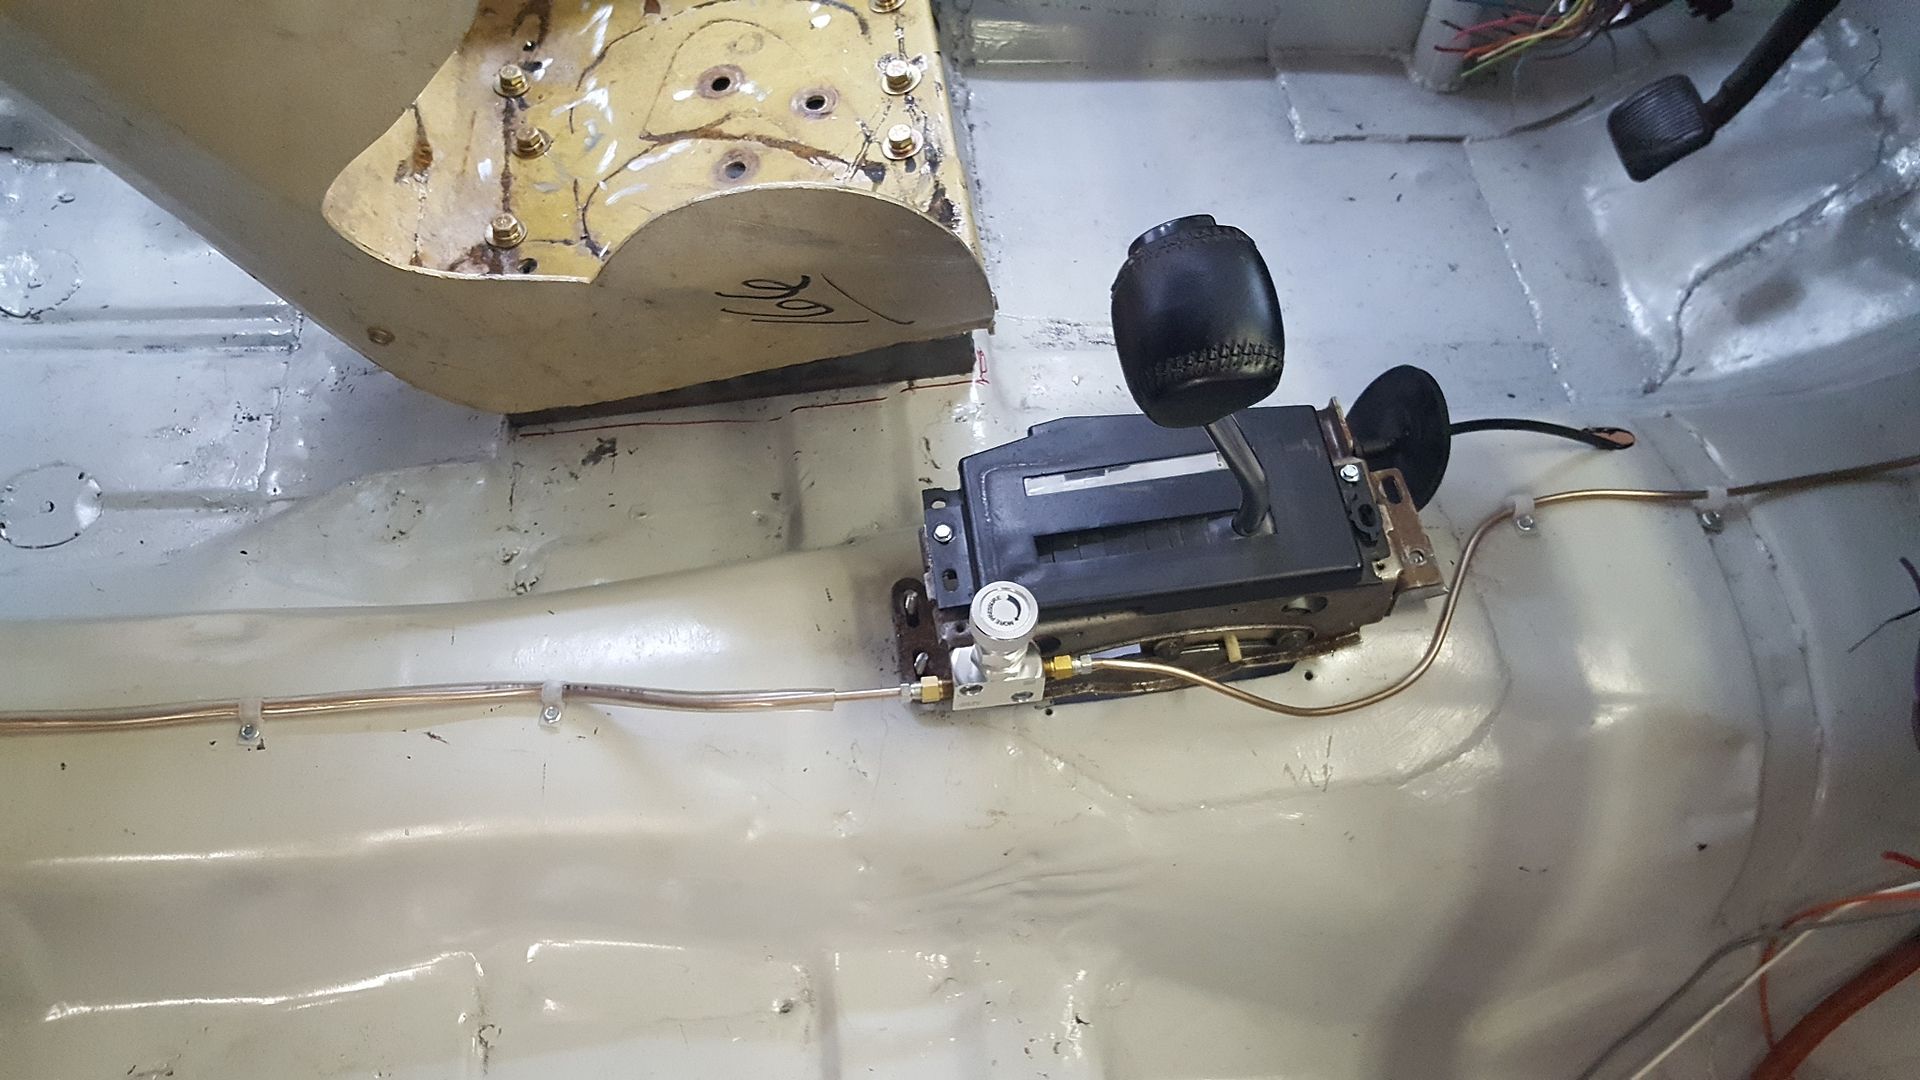
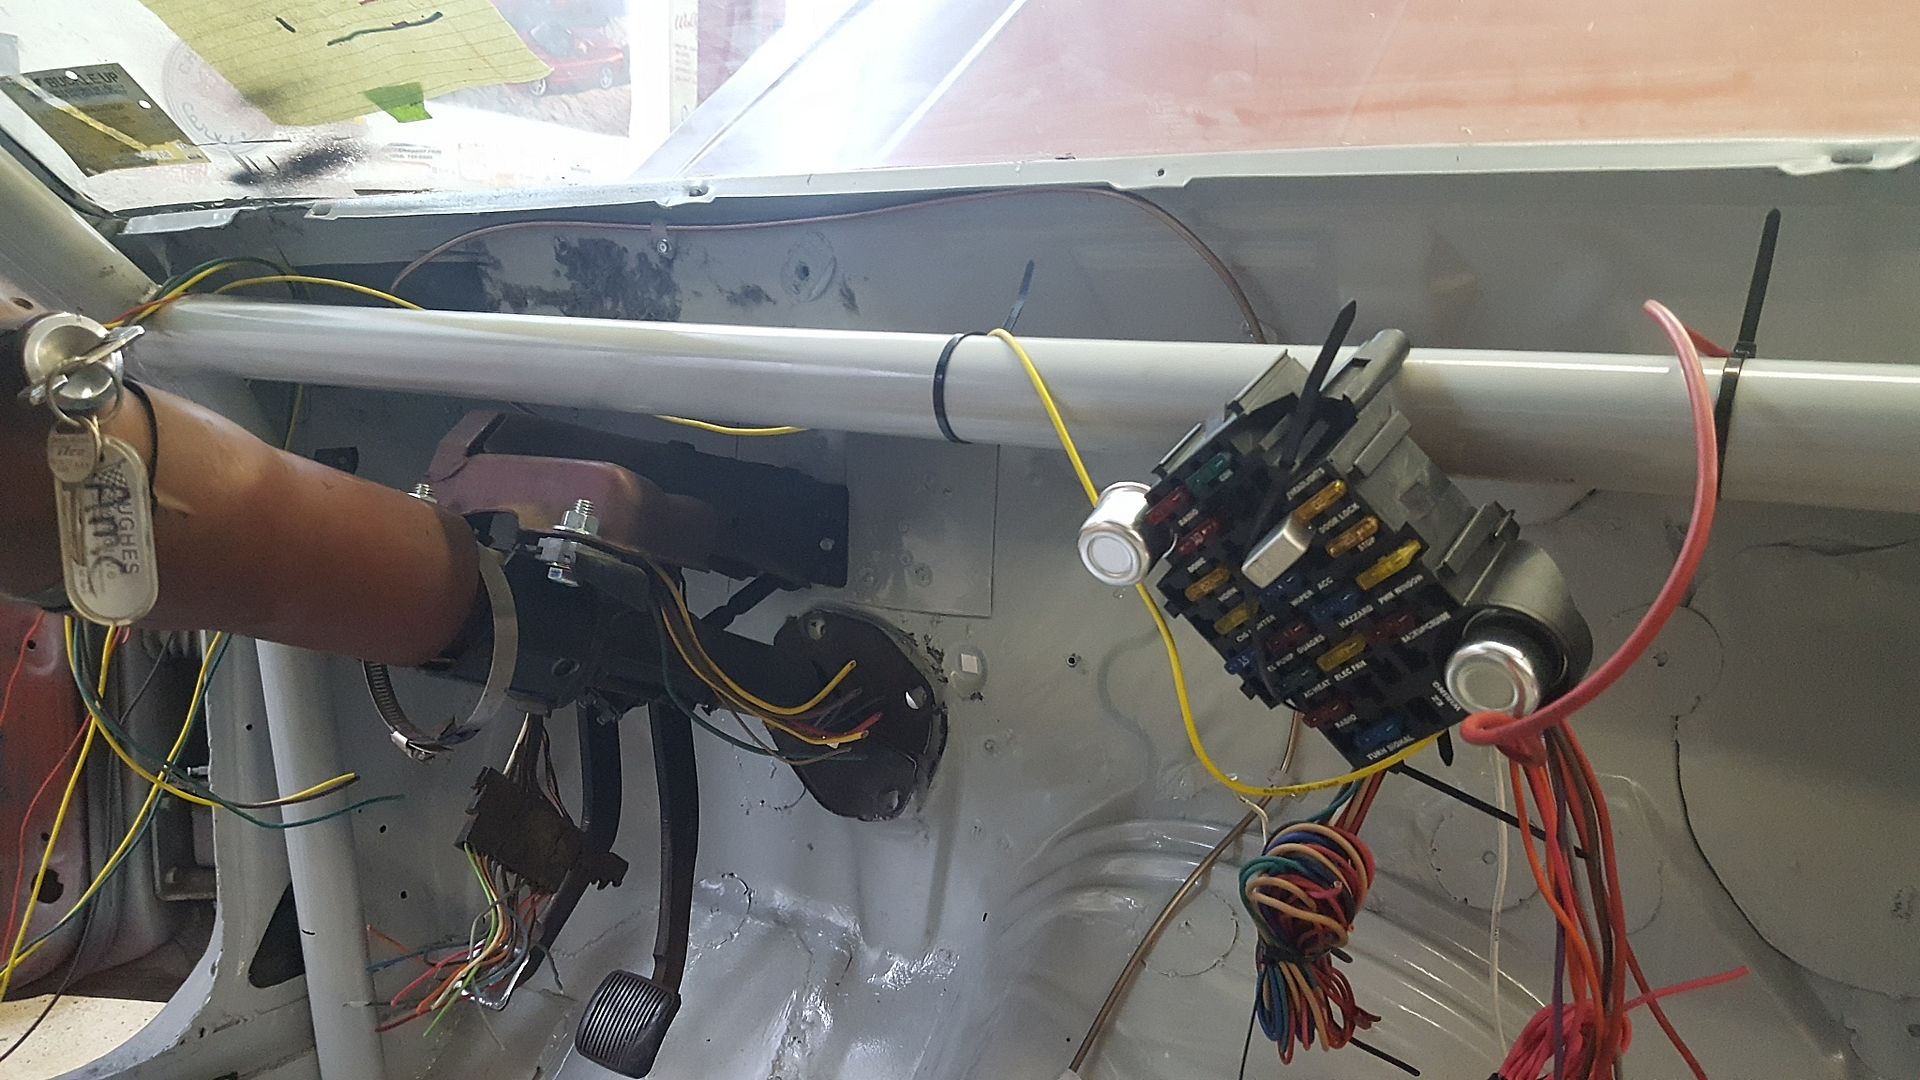
First. We got the negative cable terminated to chassis ground. Forgot to take a picture pf that specifically, but you might can see it hanging out in the corner of other pictures. Second. We got the shifter mounted. Used a crap of strap steel mounted in front and bent to an angle, and 3 1/4 inch bolts run through the floor to act like studs. Still have to mount the cable to the transmission, as I couldn't wrap my head around it last night and was thinking it was too short. But had an epiphany that woke me up at about 3am, of flipping the shift lever over and coming in from the tailshaft end. Looking through some google images, it appears that's the way its supposed to work. Oops.
[URL=http://s54.photobucket.com/user/dusterbd13/media/amc/20170327_213213_zpsit5hwphu.jpg.html]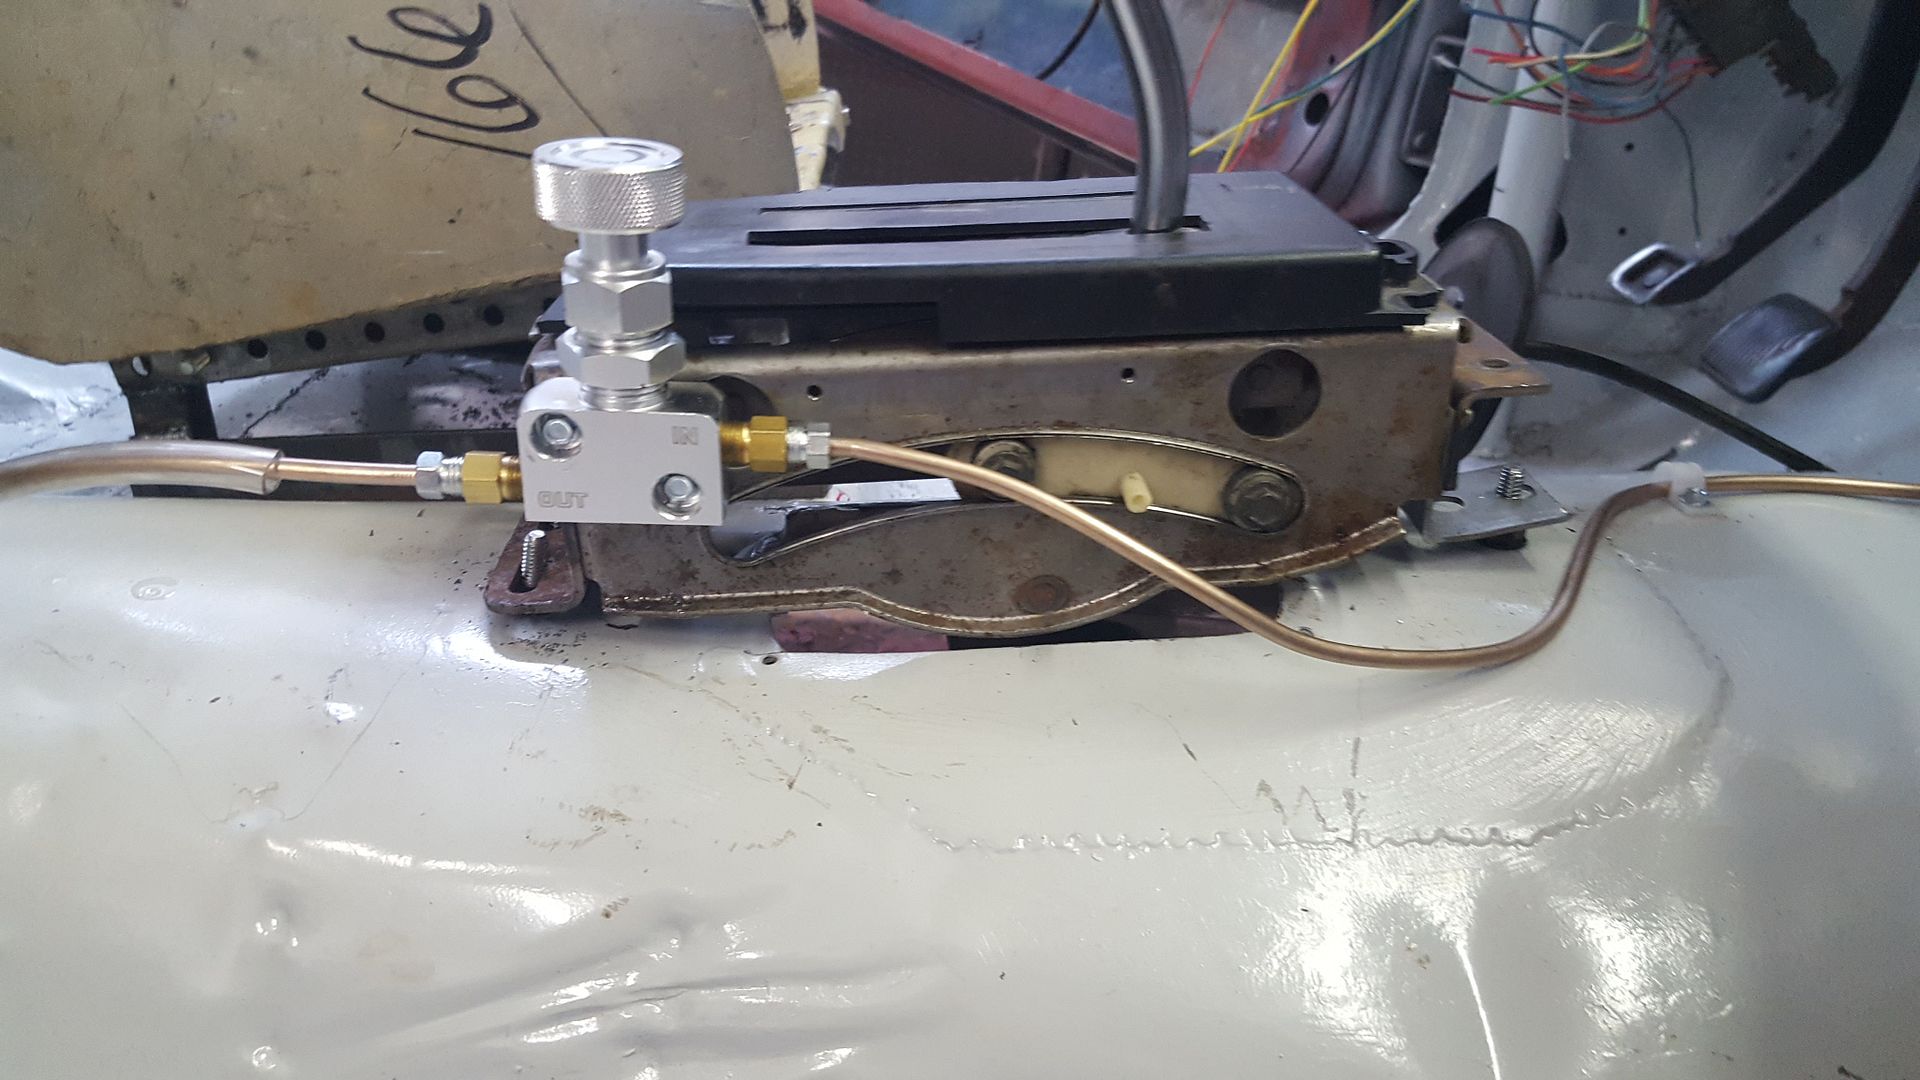 [/URL]
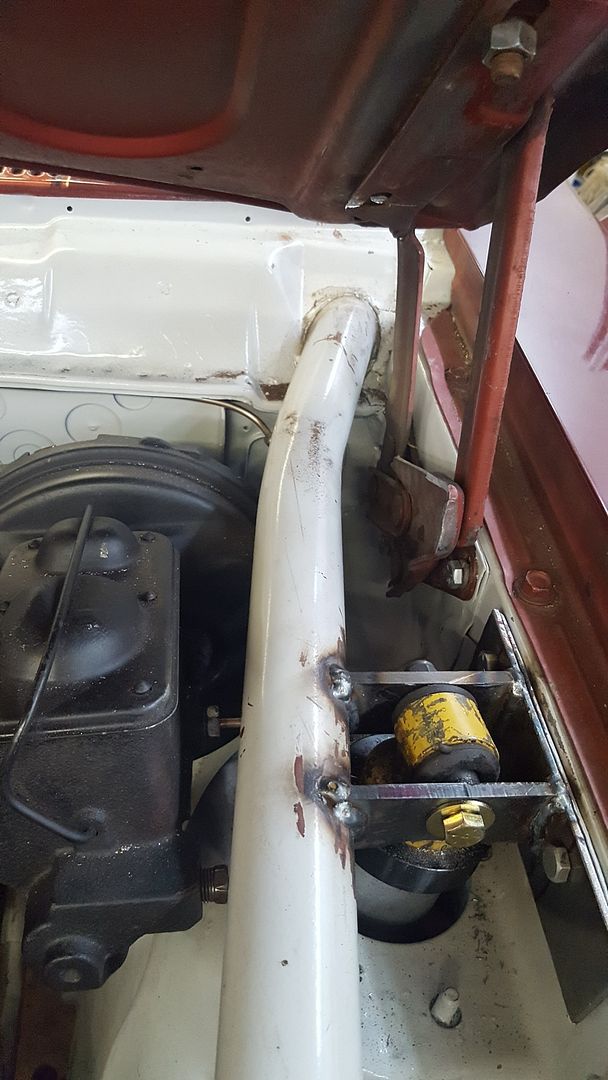
Third. We got the last of the brake lines ran, and the prop valve in. Mounted the prop valve to the shifter, as it was easy and accessible. Rear hard line sleeved in surgical vinyl tubing that a nurse friend of mine gave me. Just wanted to protect it from harm....
I also strapped it down as much as seemed prudent to keep it from harm. All that's left on the brakes are new flex lines (budget exempt rubber parts) double check everything for tightness and proper lubrication, attach pushrod to brake pedal, attach brake pedal to clutch pedal for bigger pad for left foot braking, and bleed it.
[URL=http://s54.photobucket.com/user/dusterbd13/media/amc/20170327_213201_zpszw6sixrj.jpg.html]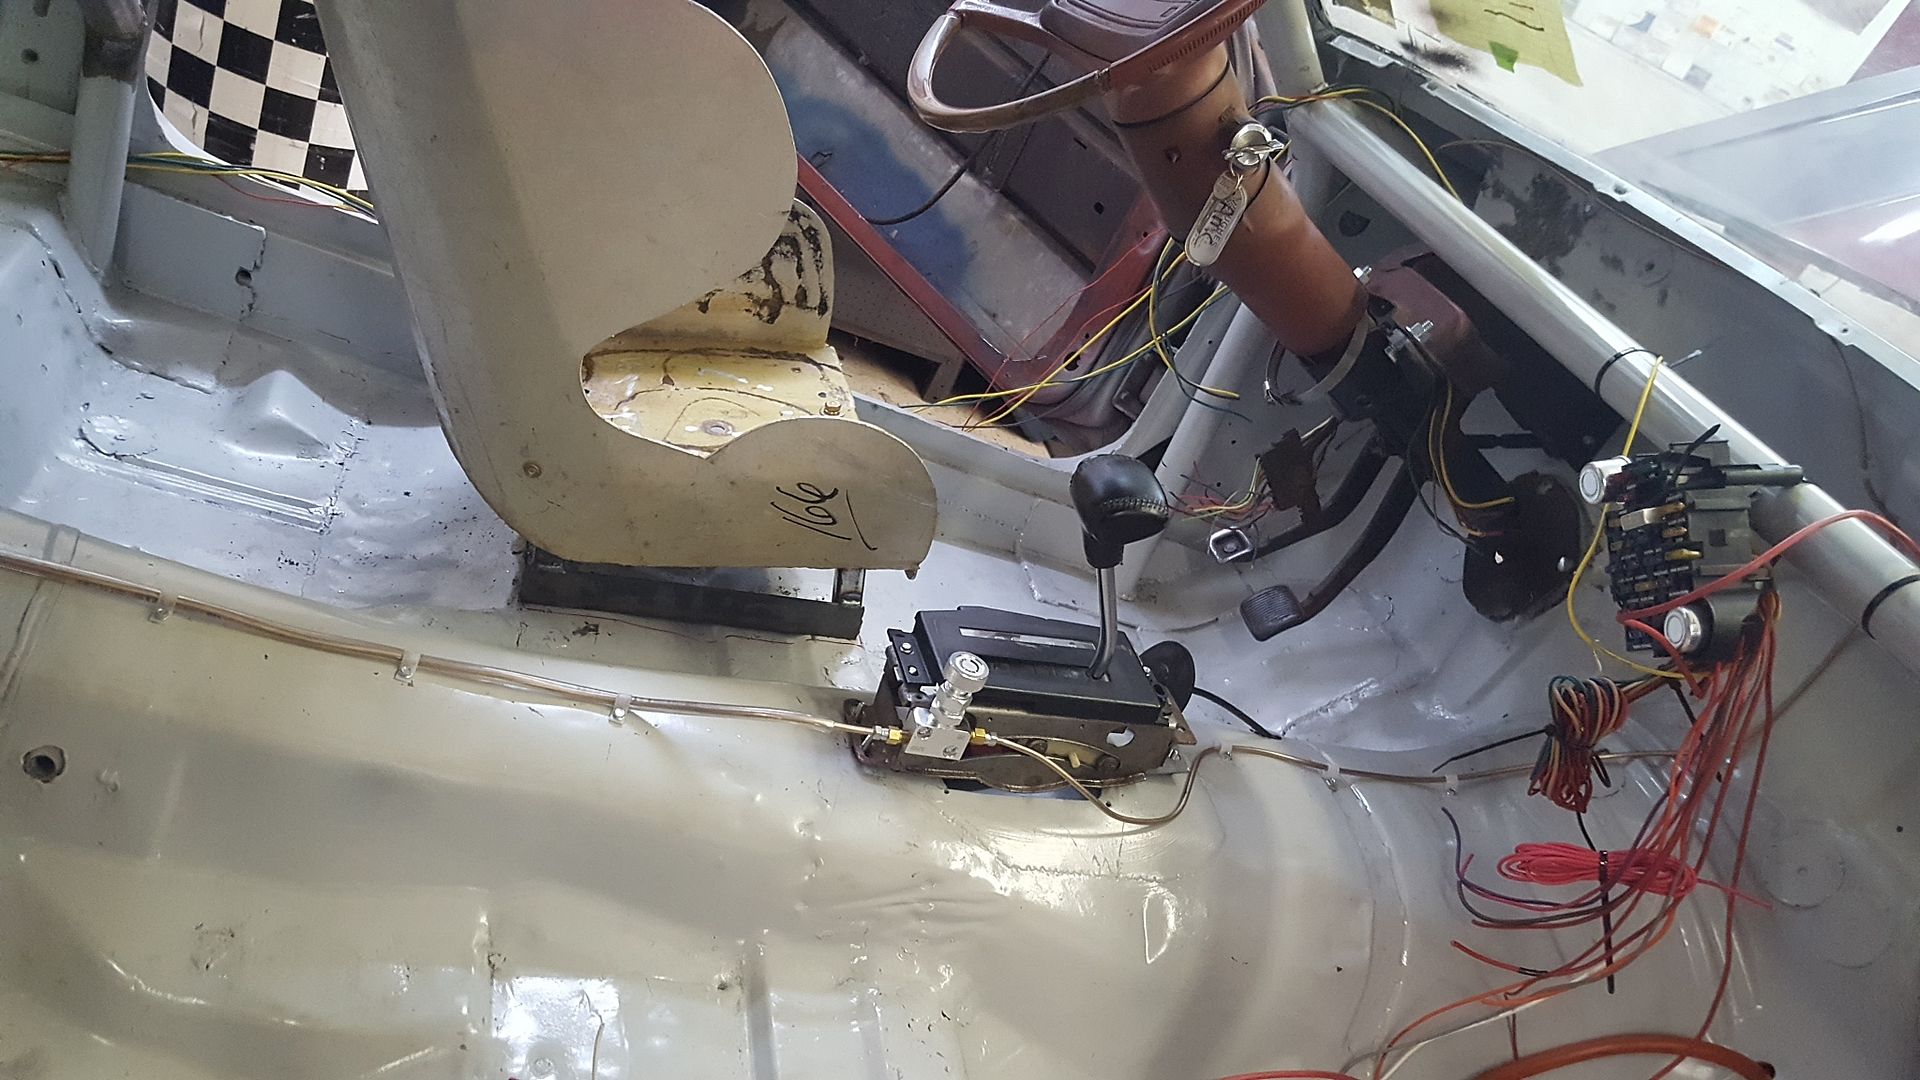 [/URL]
[URL=http://s54.photobucket.com/user/dusterbd13/media/amc/20170327_213205_zpsppykwuoe.jpg.html]
 [/URL]
[URL=http://s54.photobucket.com/user/dusterbd13/media/amc/20170327_213208_zpslspzo9xb.jpg.html]
 [/URL]
[URL=http://s54.photobucket.com/user/dusterbd13/media/amc/20170327_213236_zpsaf729veb.jpg.html]
 [/URL]
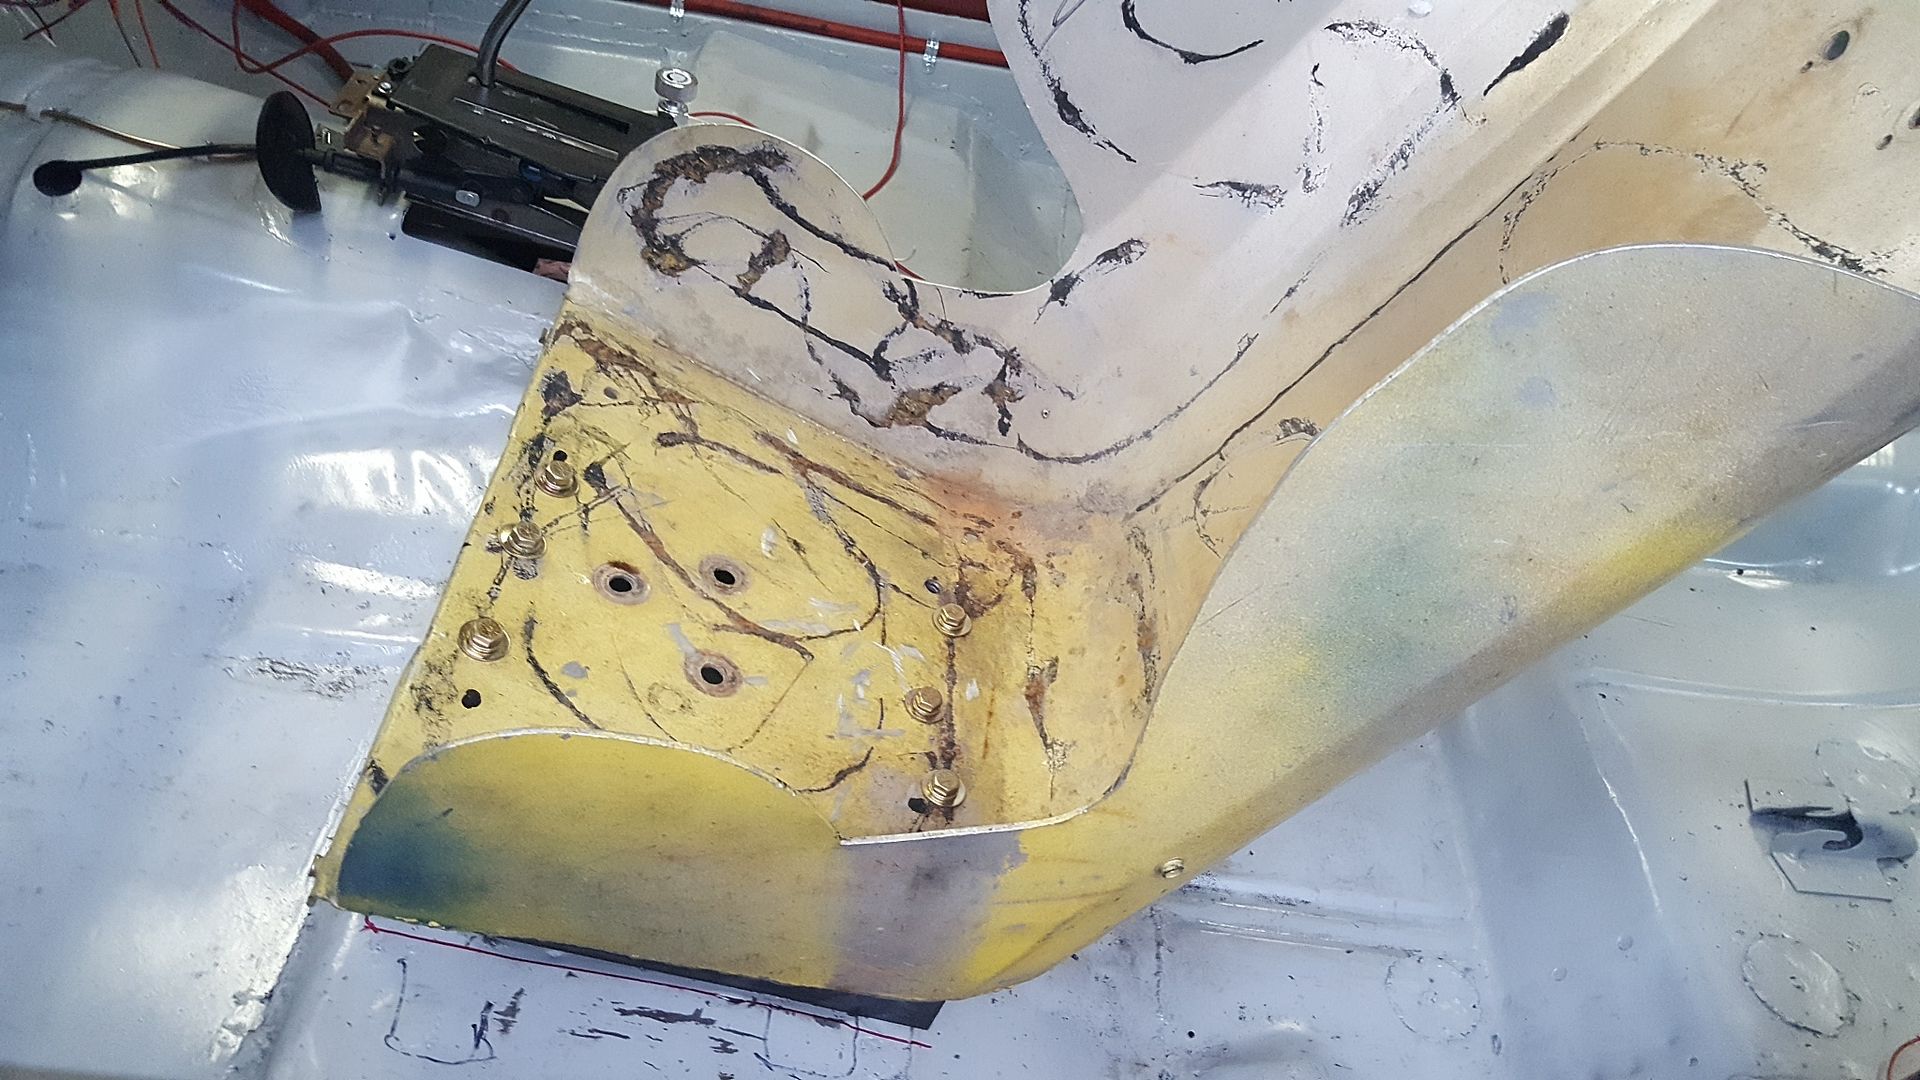
Lastly, we took a couple of pieces of angle iron and made rails to mount the seat to the seat brackets and still be adjustable. Yes, you have to loosen and remove 4 bolts to move it, so its not exactly convenient, but its doable. We also got the brackets mounted through the factory crossmember in the front, and spreader plates in the rear, as well as mounted the seat fully. Other seat will be completely fixed when it gets mounted.
[URL=http://s54.photobucket.com/user/dusterbd13/media/amc/20170327_213249_zpsyedepodk.jpg.html]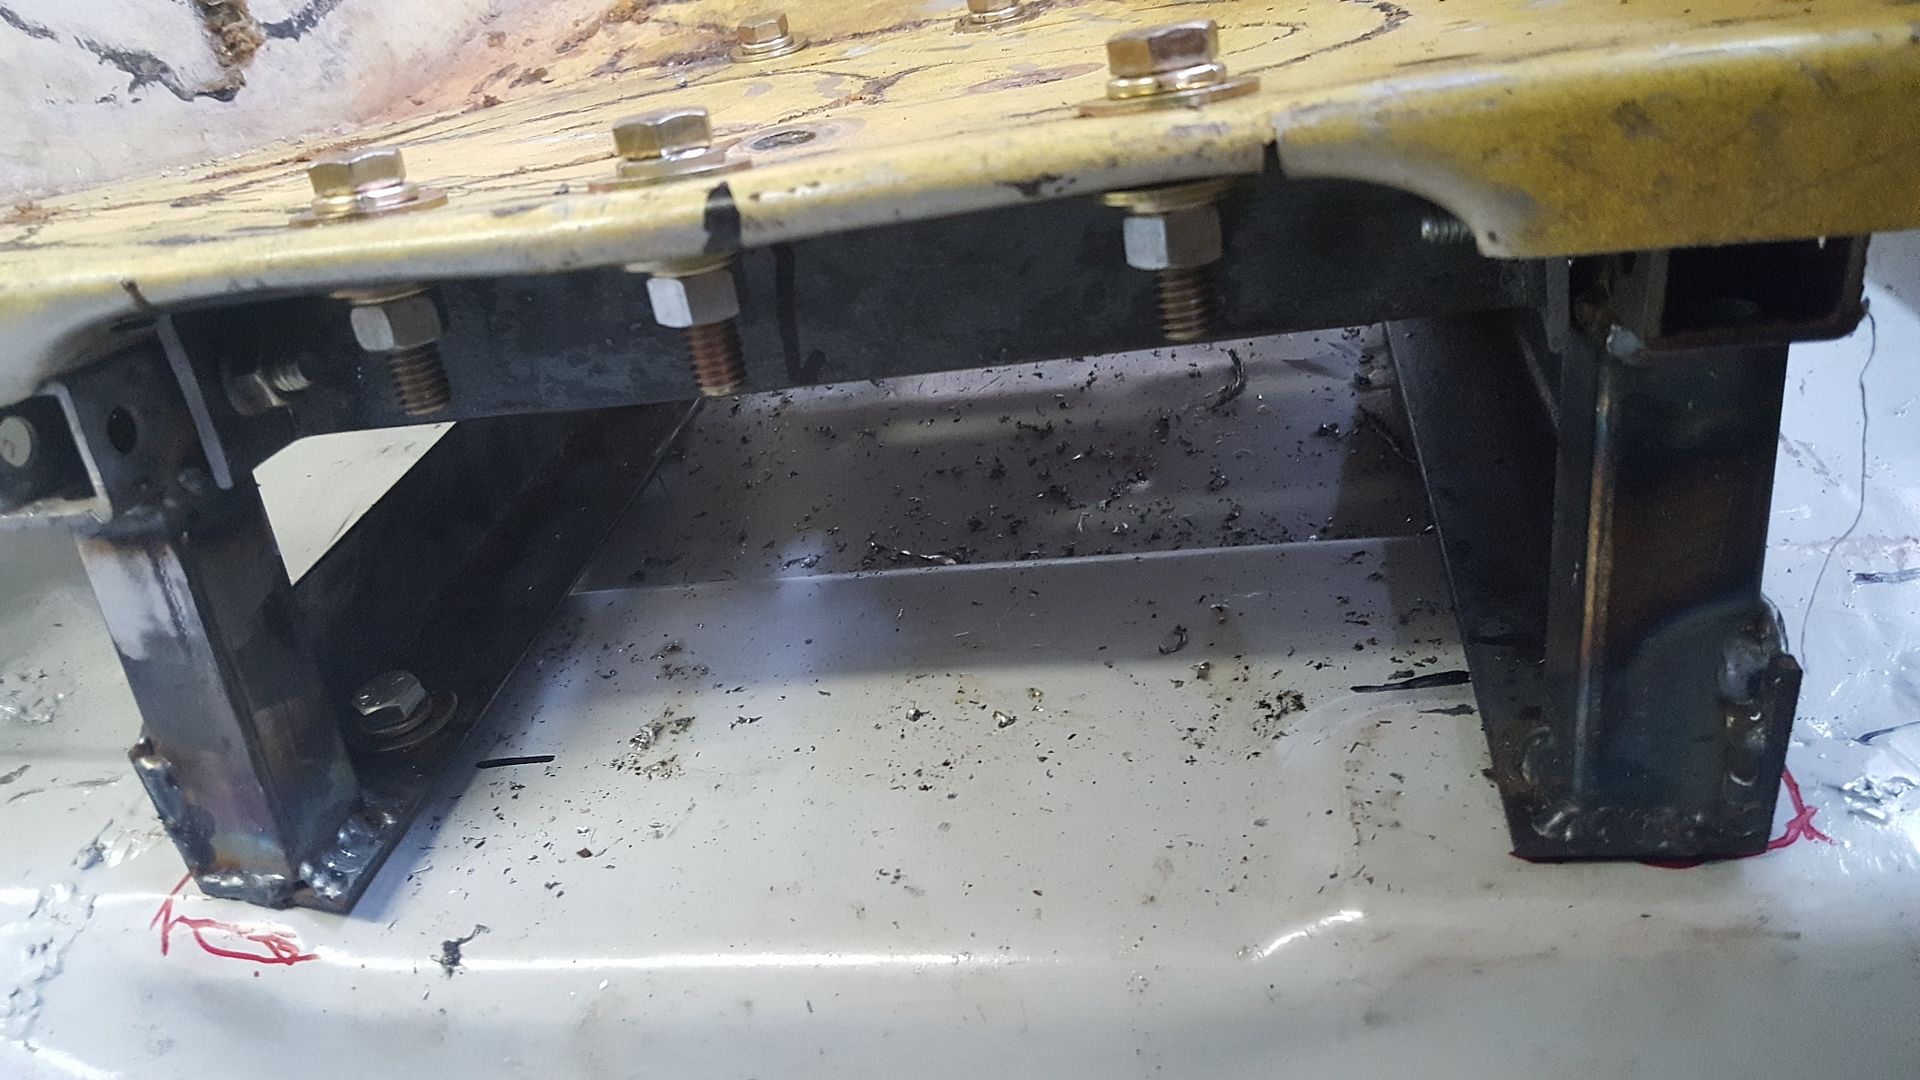 [/URL]
[URL=http://s54.photobucket.com/user/dusterbd13/media/amc/20170327_213245_zpskvz1lqmo.jpg.html]
 [/URL]
Next is steering column finishing, brake finishing, filling the last 3 holes in cowl and floor, and mounting the other seat. Then wiring and firing!
Very impressive. A whole lot of fabrication in a short amount of time. For the seats, do the rules allow something like a hitch pin instead of bolts, to allow for seat placement? Pins in front bolts in back? Might be easier to move around. You mentioned something about the good side of the Mason-Dixon. Been sniffing around for quite a while in areas between Raleigh and Charlotte. Better winters, more Home for the money, and easy on my pension..
For fun I started looking for info on the AMC-15 axle. Found this; https://en.wikipedia.org/wiki/Dana_35
Wondering what kind of locker and gears might be around for cheap for your car. This is also Internet Knowledge so the usual caveats apply.
Albemarle, nc. 40 miles from charlotte, 70 from Winston salem, 1:45 to Raleigh....
CHEAP real estate.
I thought about hitch pins. don't know about the rules on them, but so far the only driver that we have that would need different seat placement (in theory) is steve. dallas and I are similar enough in build to have the same seat setting. steve is taller and skinnier. so...
were trying to knock the list out. were not going to make track night in America at CMP, but still want to get a little testing in.
In reply to pres589:
hmm.... im going to need to dig into this more. my main concern is that the hubs are splined and woodruff keyed, instead of a one piece axle. I think that ould be the point of failure in this application. but, if the dana axles fit....
Yeah, I don't know why they did that on the -20 and -15 axles. Easier to machine maybe, I don't know, but it's an issue. If there are common-ish axles that fit, and a LSD of some sort, and a gear that starts with 3 (or 4!) I think that would be an improvement.
Thanks for the heads up on realty. I guess that explains who gets to drive it first. With a little luck, you should be good to go.
In reply to pres589:
after i figure that out, ill compare to what it would cost to stuff an 8.8 under there. as much as I like the easy button, it also needs to be cheap. still have to get the slicks ordered.....
speaking of which: anyone near daystar motorsports out in texas and headed east with enough room for a set of slicks? shipping is stupid expensive from them.....
I remember reading some where about a Jeep rear swap in an AMC Eagle. It may have been an XJ, don't remember. I know the rears are pretty strong considering the abuse my son inflicted on his off-road adventures.
I'm pretty sure XJ axles are going to be more money than an 8.8.
How long until we see a burnout video?
In reply to Crackers:
Dunno. Hopefully a few weeks. Next few weekends are full though, with girlscouts, soccer, anniversary, etc. But we will keep chipping away.
Challenge Budget: Car/parts $200
Donor Lincoln town car: 410
Engine crossmember: 120
Sold transmission crossmember from Lincoln: 10 Sold rear axle from lincoln: -50 Scrapped what was left of lincoln: -89
trans cooler: 2
Engine swap: 5.0 plus 300 boot
Sold kelstar wheels-200 (cant recoup more than we spent)
2x2 angle iron, tractor supply 12.05
Brand new Watkins glen nascar slicks and wheels, which were bought for $50, and promptly sold to Dallas dad for $50 and some weld wheels with really old drag slicks. So, slicks were $0, but $50 taken out of the recoup limit.
6 5/8 heim and jamb nuts, as well as threaded tube for the front suspension: $65
Pair of aluminum seats, $40 and on;y usng 1 so $20. .
Sheet of flame retardant high density foam $10
Fire suppression system parts (not included in challenge budget. But ive had 2nd degree burns on the boys before, so were getting safety gear come hell or high water)
Solid steel lowering blocks, with the holes drilled to offset the rear axle rearwards. $5
1/4 plate, scrap metal yard: 7.50
Mustang convertible mounts 22
Bending plate cost 25
Swedged tubing, ebay: 31.90
Threaded adjusters and 650lb springs, SRI performance: 65
2 used billstein shocks, pull-a-part: 14
Cage materials: 271.40
Spool welding wire: 33
Leaf spring sliders: 40
Clamps for spring adjusters: 23.59
Adjustable brake bias valve 18 (amazon)
2 cans of flat black spray paint (lowes project source) .97 ea
Half melted, used 21 circuit ez wiring harness cut from my duster after the mice chewed it up and it had a meltdown. $5 is what I was quoted as FMV due to the fact that copper prices are down.
Accessories and flexplate: see link in update
Battery cables and relays, pull-a-part: 12.75
Steering box, pull-a-part: 27.50
25feet 3/8 steel fuel line, ebay: 25.75
Bypass fuel pressure regulator, ebay: 29.23
Used and noisy fuel pump: 6.50
Used mix and match nitrous kit: 32
Used cast coat aluminum paint: 3.50 (advance price is $7 new, and the can was half empty)
Two half cans of ford engine blue $7
3/8 plastic line clamps, lowes: 1.78
1/2 metal line clamps, lowes: 3.48
Throttle return springs and brackets: 5
3/8 2x compression fittings, 3x npt-compression, 1x t fitting from plumbing supply house: 6
battery hold down, oriellys 5.99
2x 36 inch 1x1 holey tube: 2
Driveshaft safety loop (dad bought it at an auction last week) 5
Tractor supply run for bolts and angle iron: 18.08
Wheels for monster slicks: 50 from facebook marketplace
Shifter material (going to retain the 7.50 number for now, unsure of what fair market value for this stuff would be)
Lower radiator hose: 14.82
Crimping a splice in power steering hose: 13.69
Oil filter: 4.17
Bucket of hose clamps (pull-a-part doesn't charge for these, so I added the admission charge to the yard): 1
Scrap chunk of 16gauge sheetmetal: ????
New challenge budget total: 1516.12
Weve been steadily getting our asses kicked. By a car. Thats supposed to be at track night in America on april 20th. That aint gonna happen. Just not going to make it.
So, heres what we have been doing.
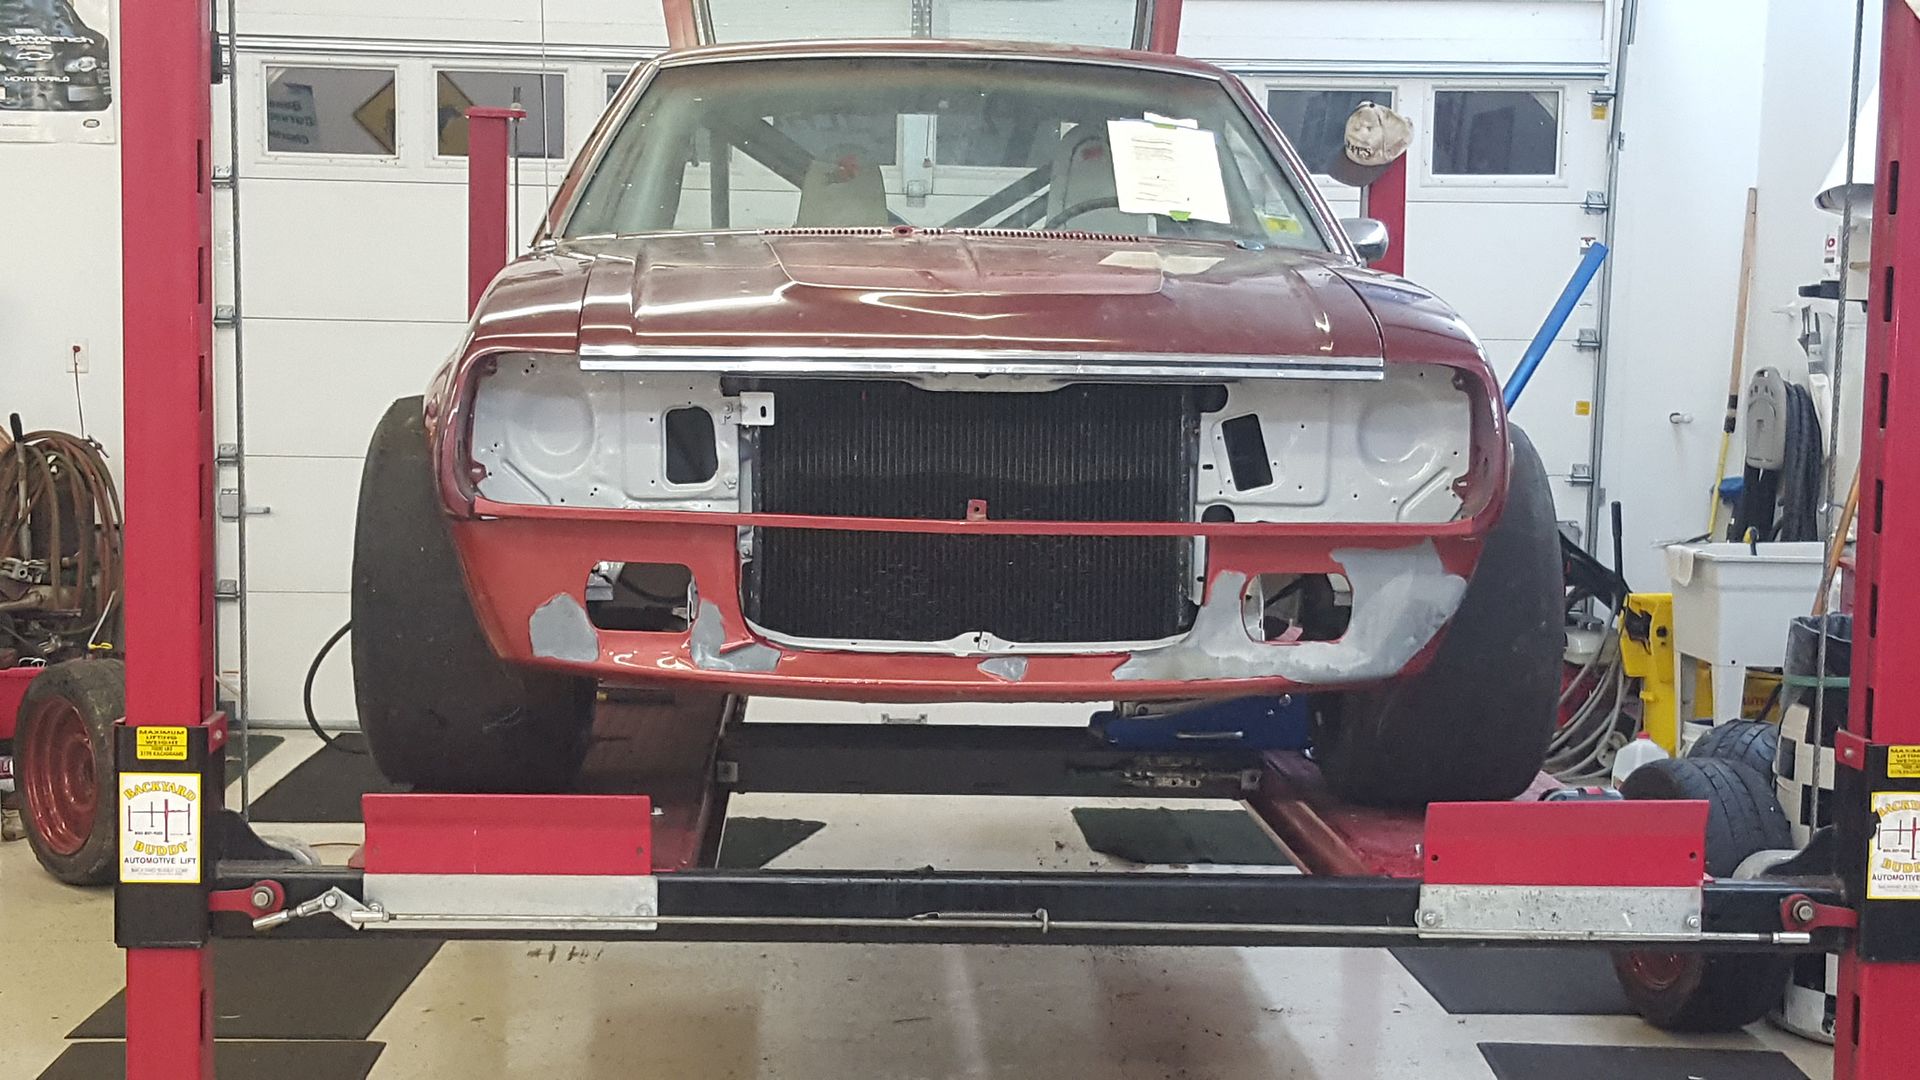
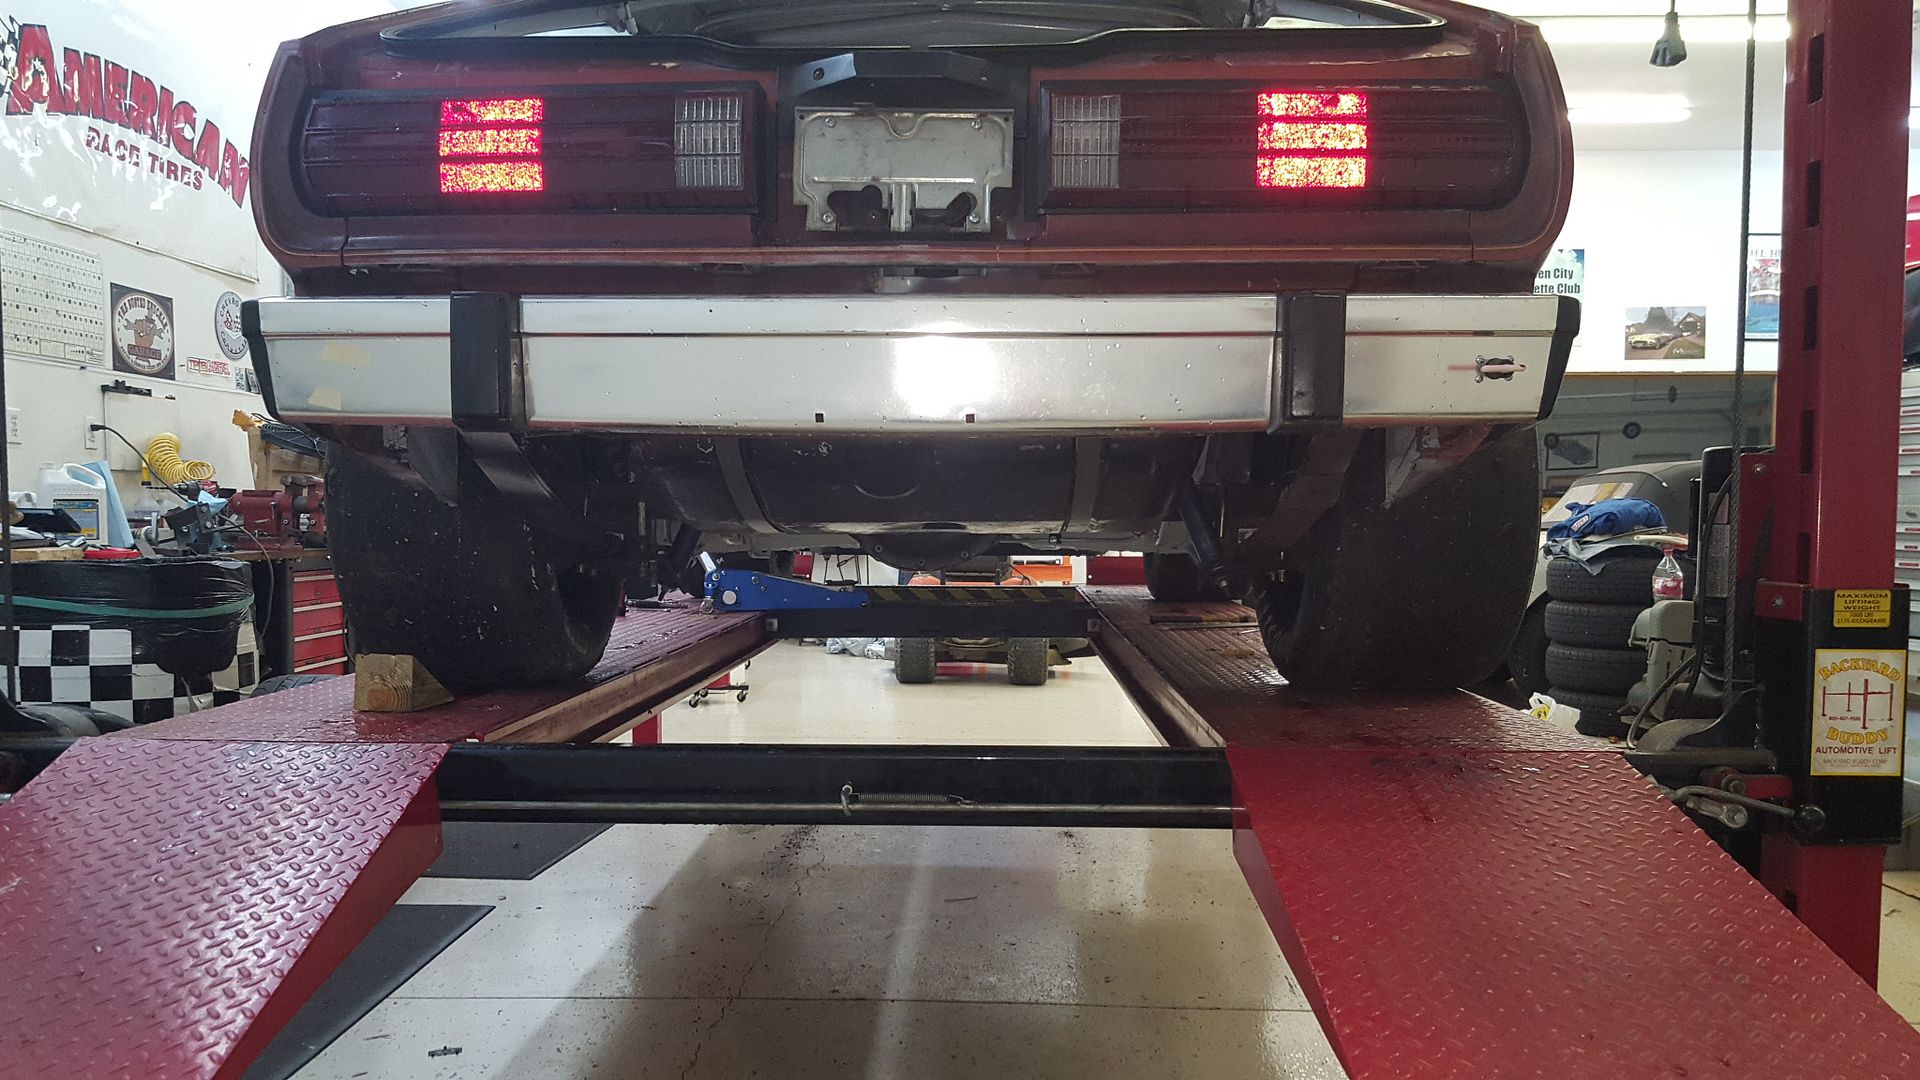
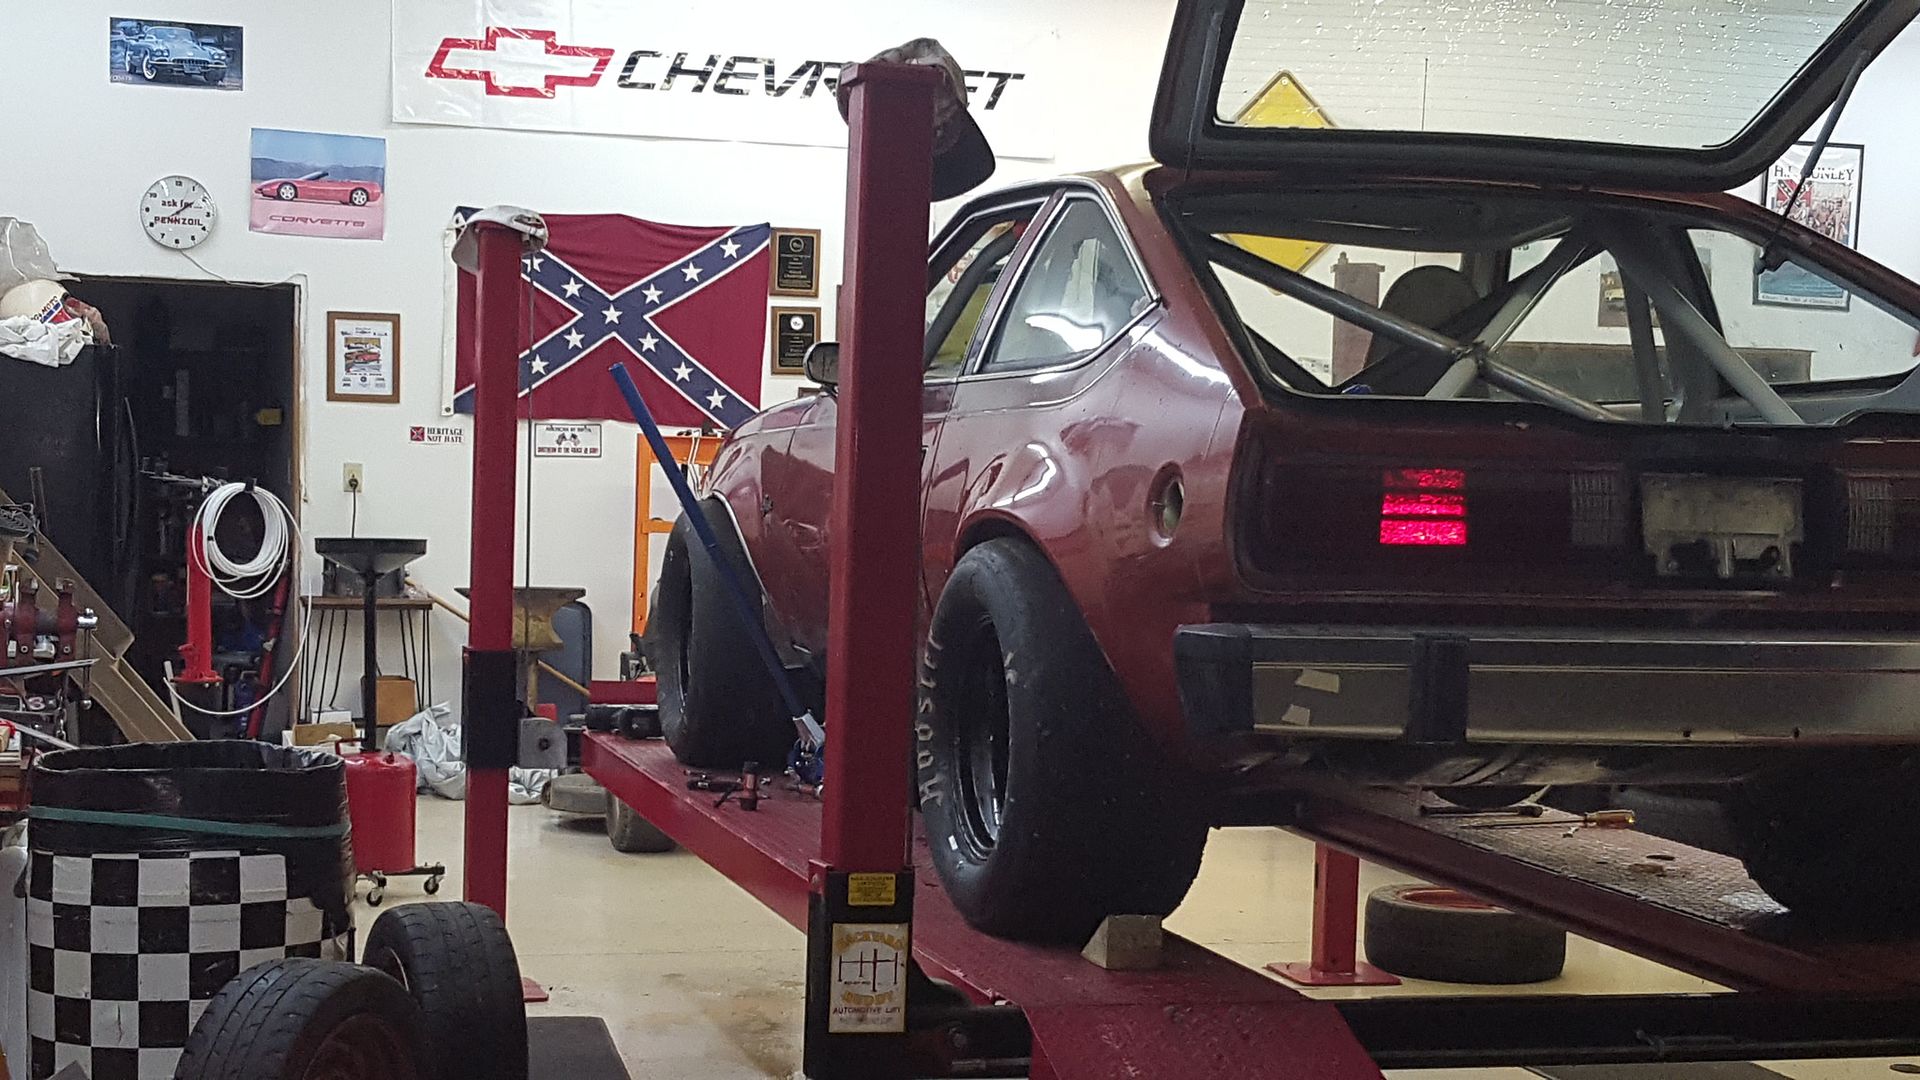
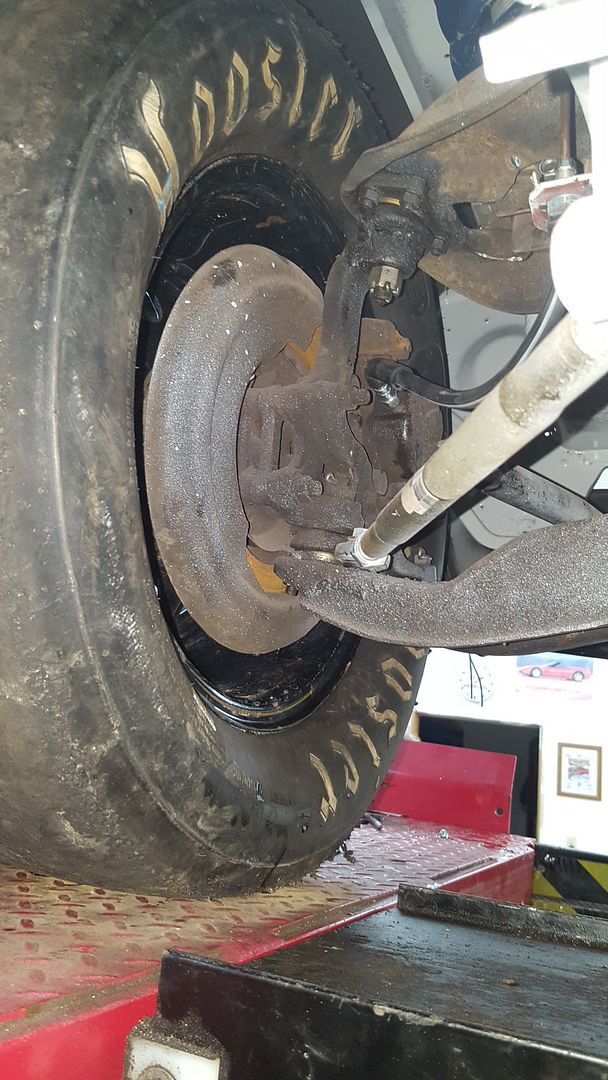
First up we scored a set of ex rockcrawler wheels from facebook marketplace. 15x10, curbing, 4.5 bolt circle, and 3.5 of backspacing. Supposedly they are bassett wheels, but I cant find any manufacturer stamping, and frankly don't care.
[URL=http://s54.photobucket.com/user/dusterbd13/media/amc/imagejpeg_0_zpsx6pwzfow.jpg.html]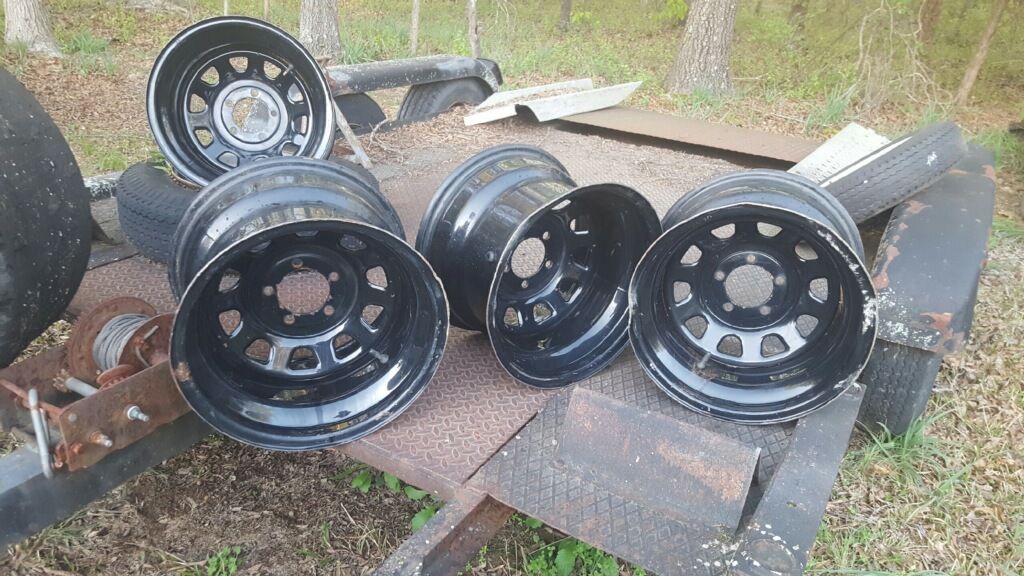 [/URL]
We promptly mounted up a set of f45 compound 27x10x15 hoosier circle track slicks that I got for free. They still have some life left in them, and are good enough for what we paid. [URL=http://s54.photobucket.com/user/dusterbd13/media/amc/20170405_174312_zpsdauyuip3.jpg.html]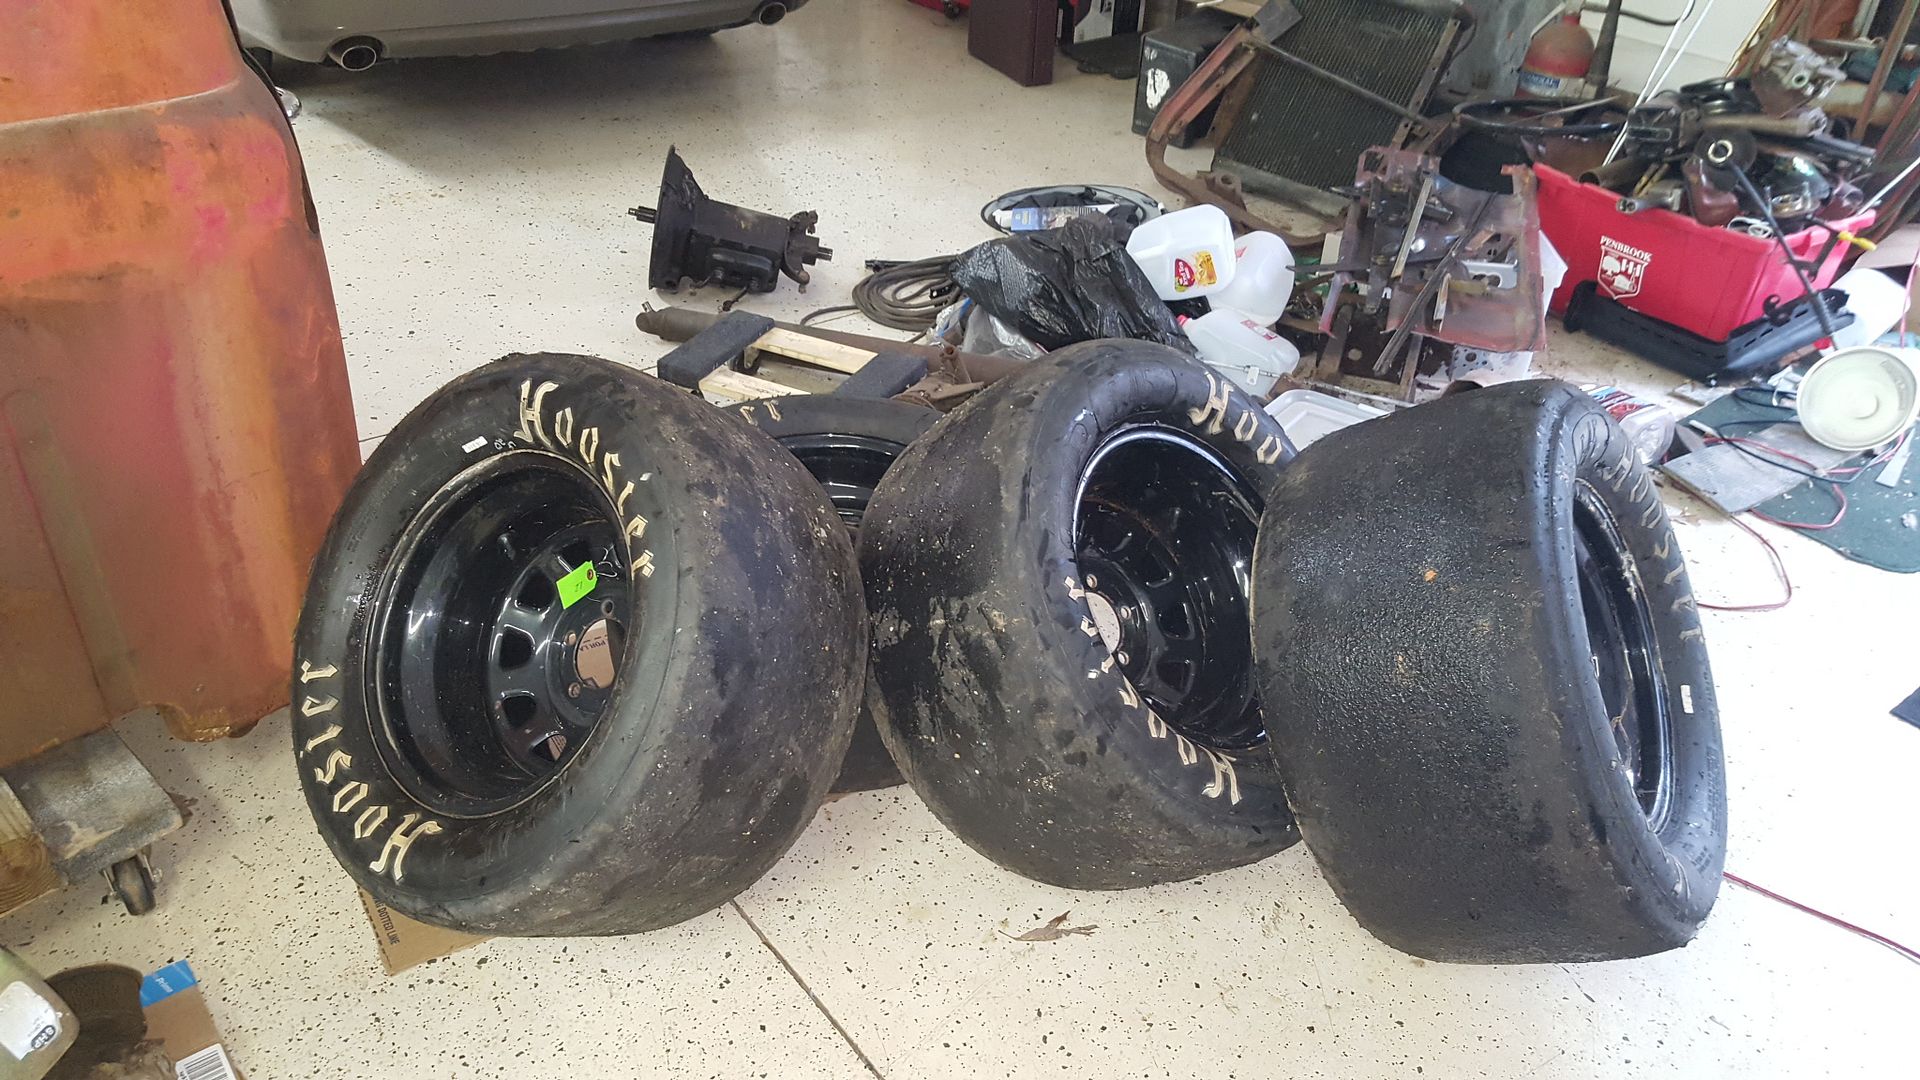 [/URL]
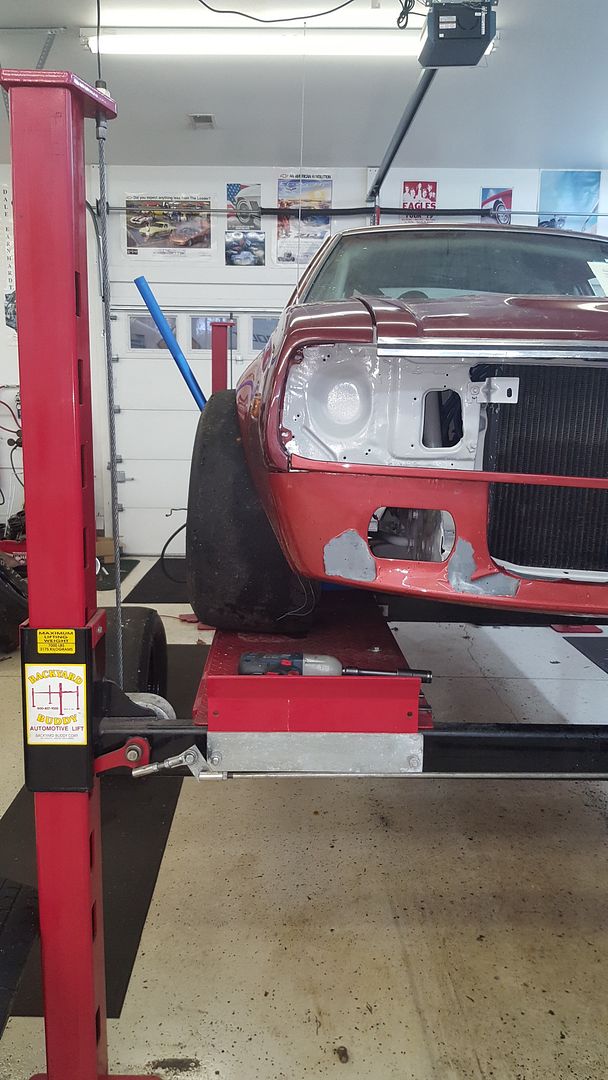
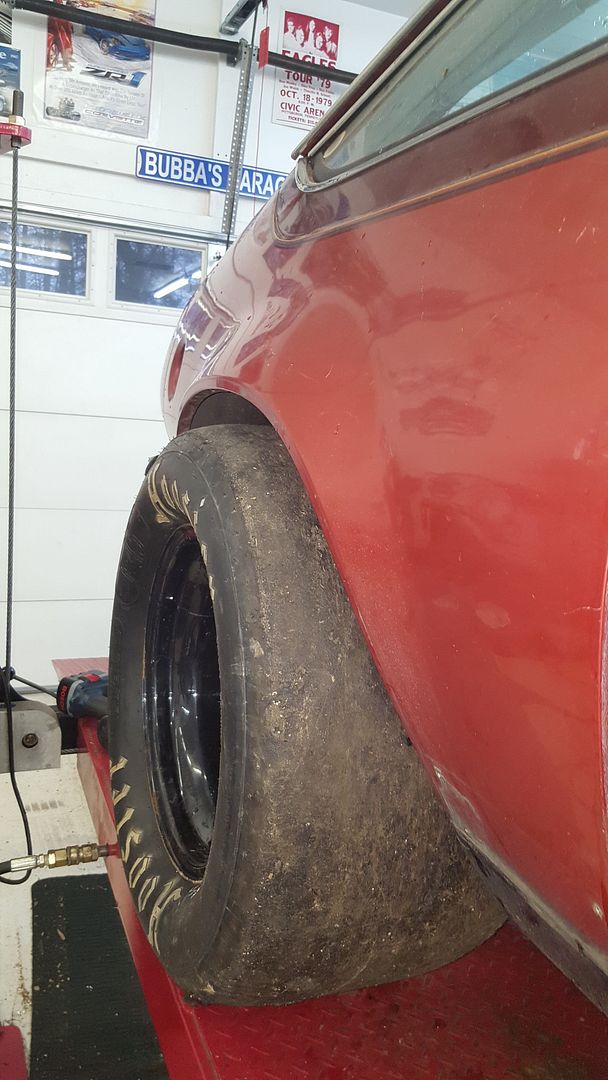
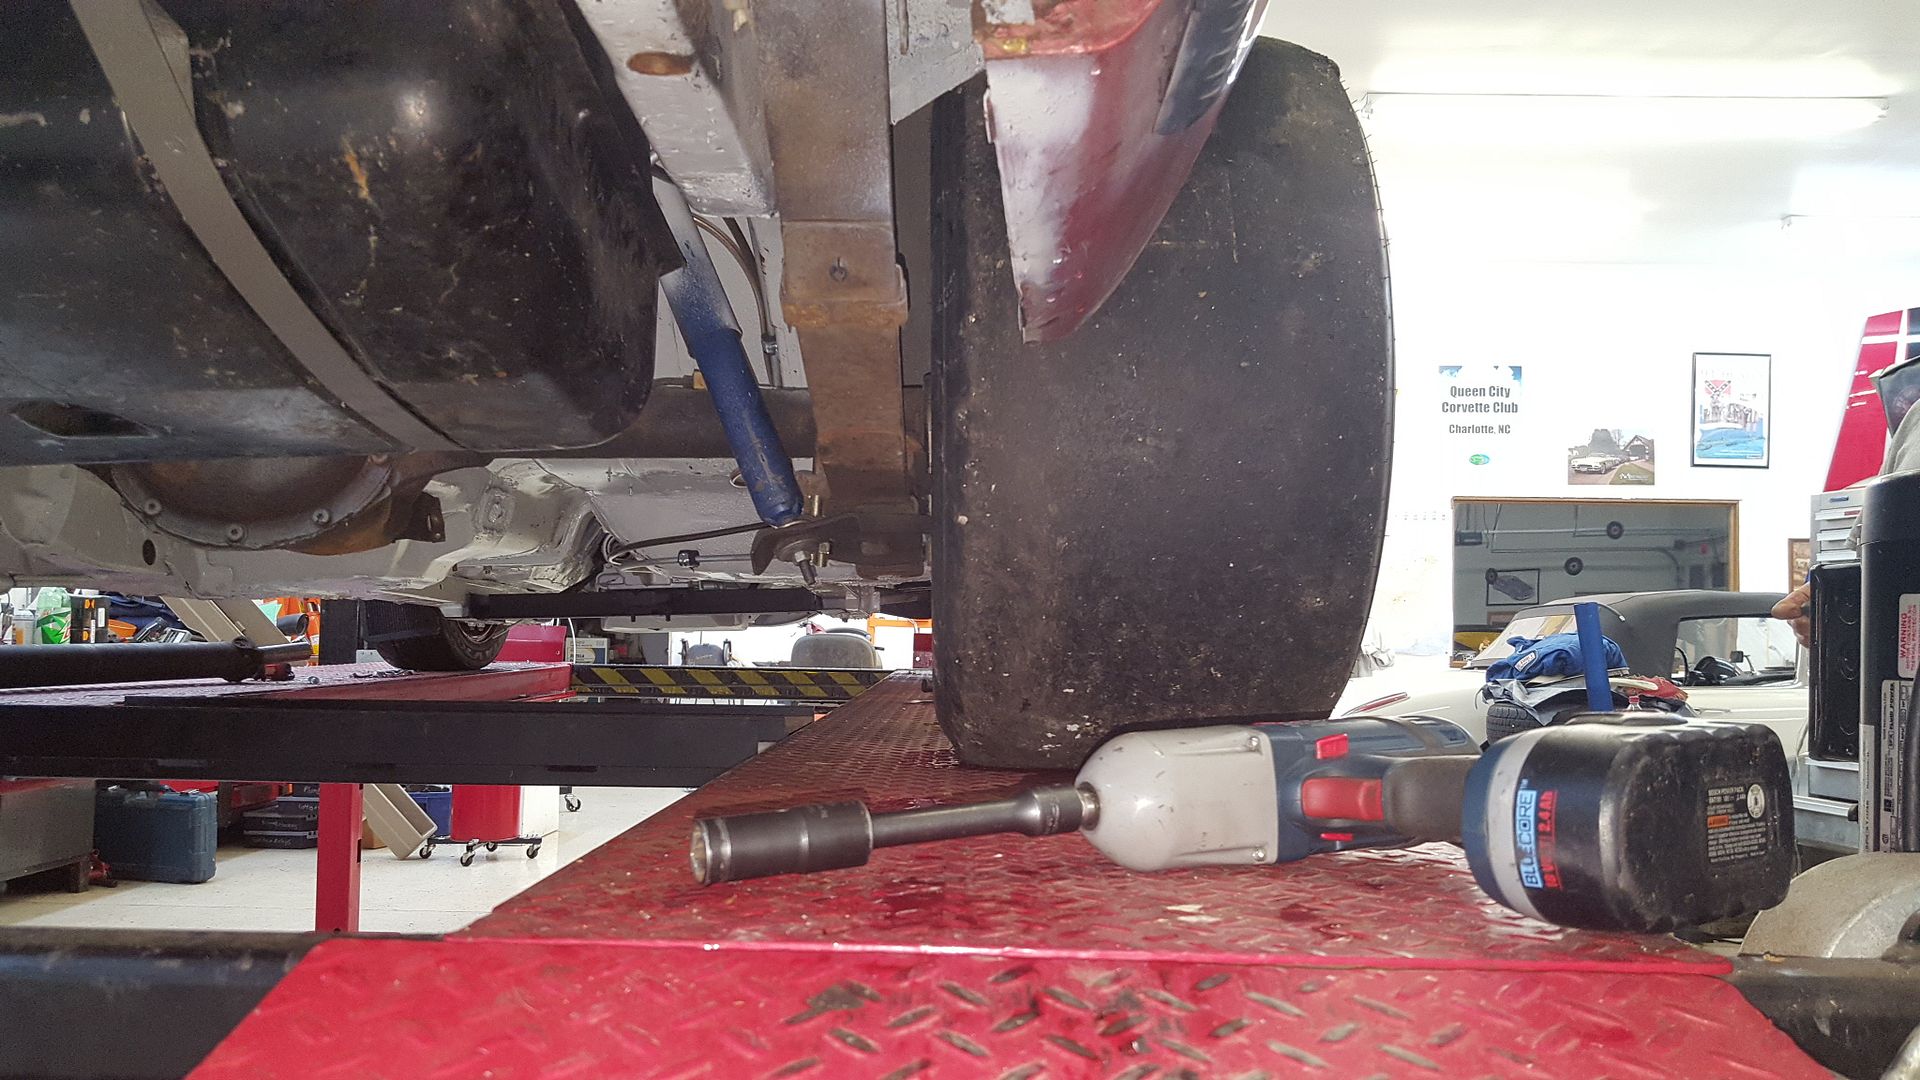
They were immediately mounted to the car to test for fitment. We are going to have to do a little massaging to the sheetmetal. But only a smidge...
[URL=http://s54.photobucket.com/user/dusterbd13/media/amc/20170405_192403_zpslmeszw2g.jpg.html]
 [/URL]
[URL=http://s54.photobucket.com/user/dusterbd13/media/amc/20170405_193153_zpsny2mk1di.jpg.html]
 [/URL]
[URL=http://s54.photobucket.com/user/dusterbd13/media/amc/20170405_193208_zps2o81yzyg.jpg.html]
 [/URL]
[URL=http://s54.photobucket.com/user/dusterbd13/media/amc/20170405_195313_zpsgfh3y4tu.jpg.html]
 [/URL]
[URL=http://s54.photobucket.com/user/dusterbd13/media/amc/20170405_195422_zpswrjoekxe.jpg.html]
 [/URL]
[URL=http://s54.photobucket.com/user/dusterbd13/media/amc/20170405_195911_zpsicctjwhc.jpg.html]
 [/URL]
[URL=http://s54.photobucket.com/user/dusterbd13/media/amc/20170405_201553_zpsf1z0lnan.jpg.html]
 [/URL]
I gotta say, this makes me fantastically happy. I love monster rubber, and full wheel wells, and flares, and......
Anyway, we pulled them back off for now, as were not there yet. Putting the spec miata stuff back on made me sad....
We next went to work on hooking up the shifter. This should have been quick and easy. 10 berkeleying hours later, after making bellcranks, extensions, brackets, etc, I ripped the ford thing out, threw it into the woods, and made my own damned shifter. I don't know what I have in it for budget purposes, as I had all this laying around. 1 inch wide 1/8 sheetmetal strap sock, angle iron from a bedframe, couple of bolts, a piece of an old cutting board, and a control rod from a totalled zero turn mower I bought the engine out of. But here it it in the final ford version that didn't work.
[URL=http://s54.photobucket.com/user/dusterbd13/media/amc/20170407_223326_zpsrugcqcui.jpg.html]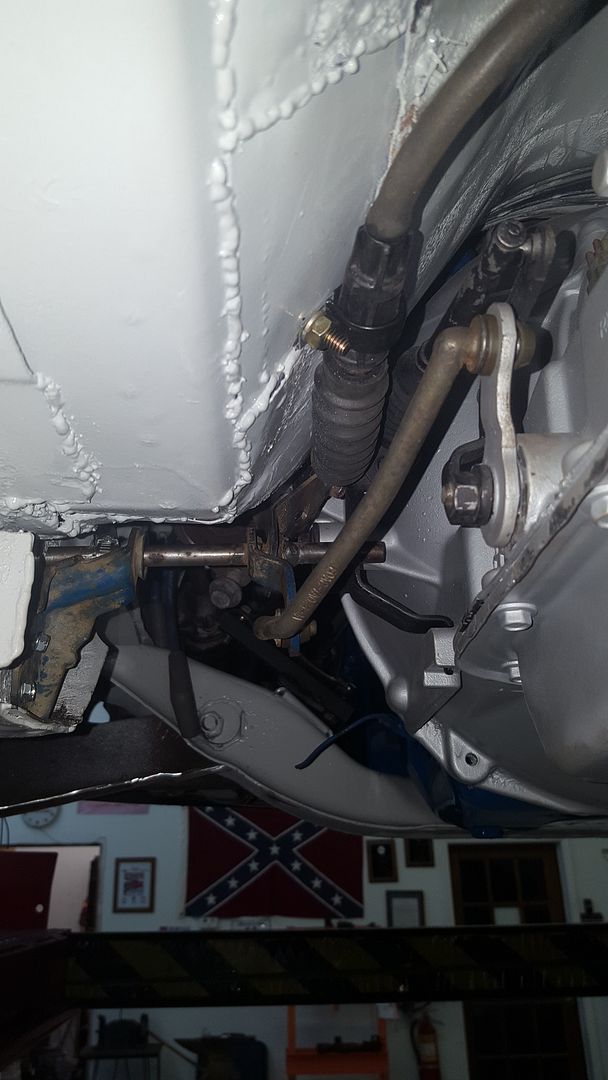 [/URL]
And heres what I made that works perfect. 30 minutes from ripping ford stuff out to shifting gears. I need to figure out a way to add reverse lockout, and finish it for looks/safety, but its off the list.
[URL=http://s54.photobucket.com/user/dusterbd13/media/amc/20170409_174402_zpshzmw3l6e.jpg.html]
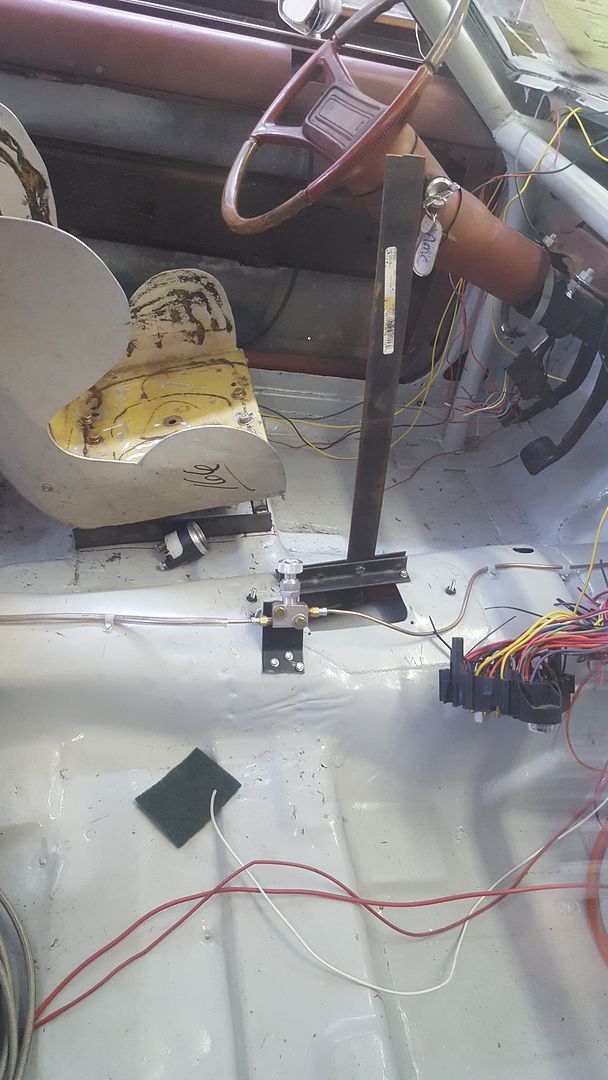 [/URL]
[URL=http://s54.photobucket.com/user/dusterbd13/media/amc/20170409_163403_zpssalsirce.jpg.html]
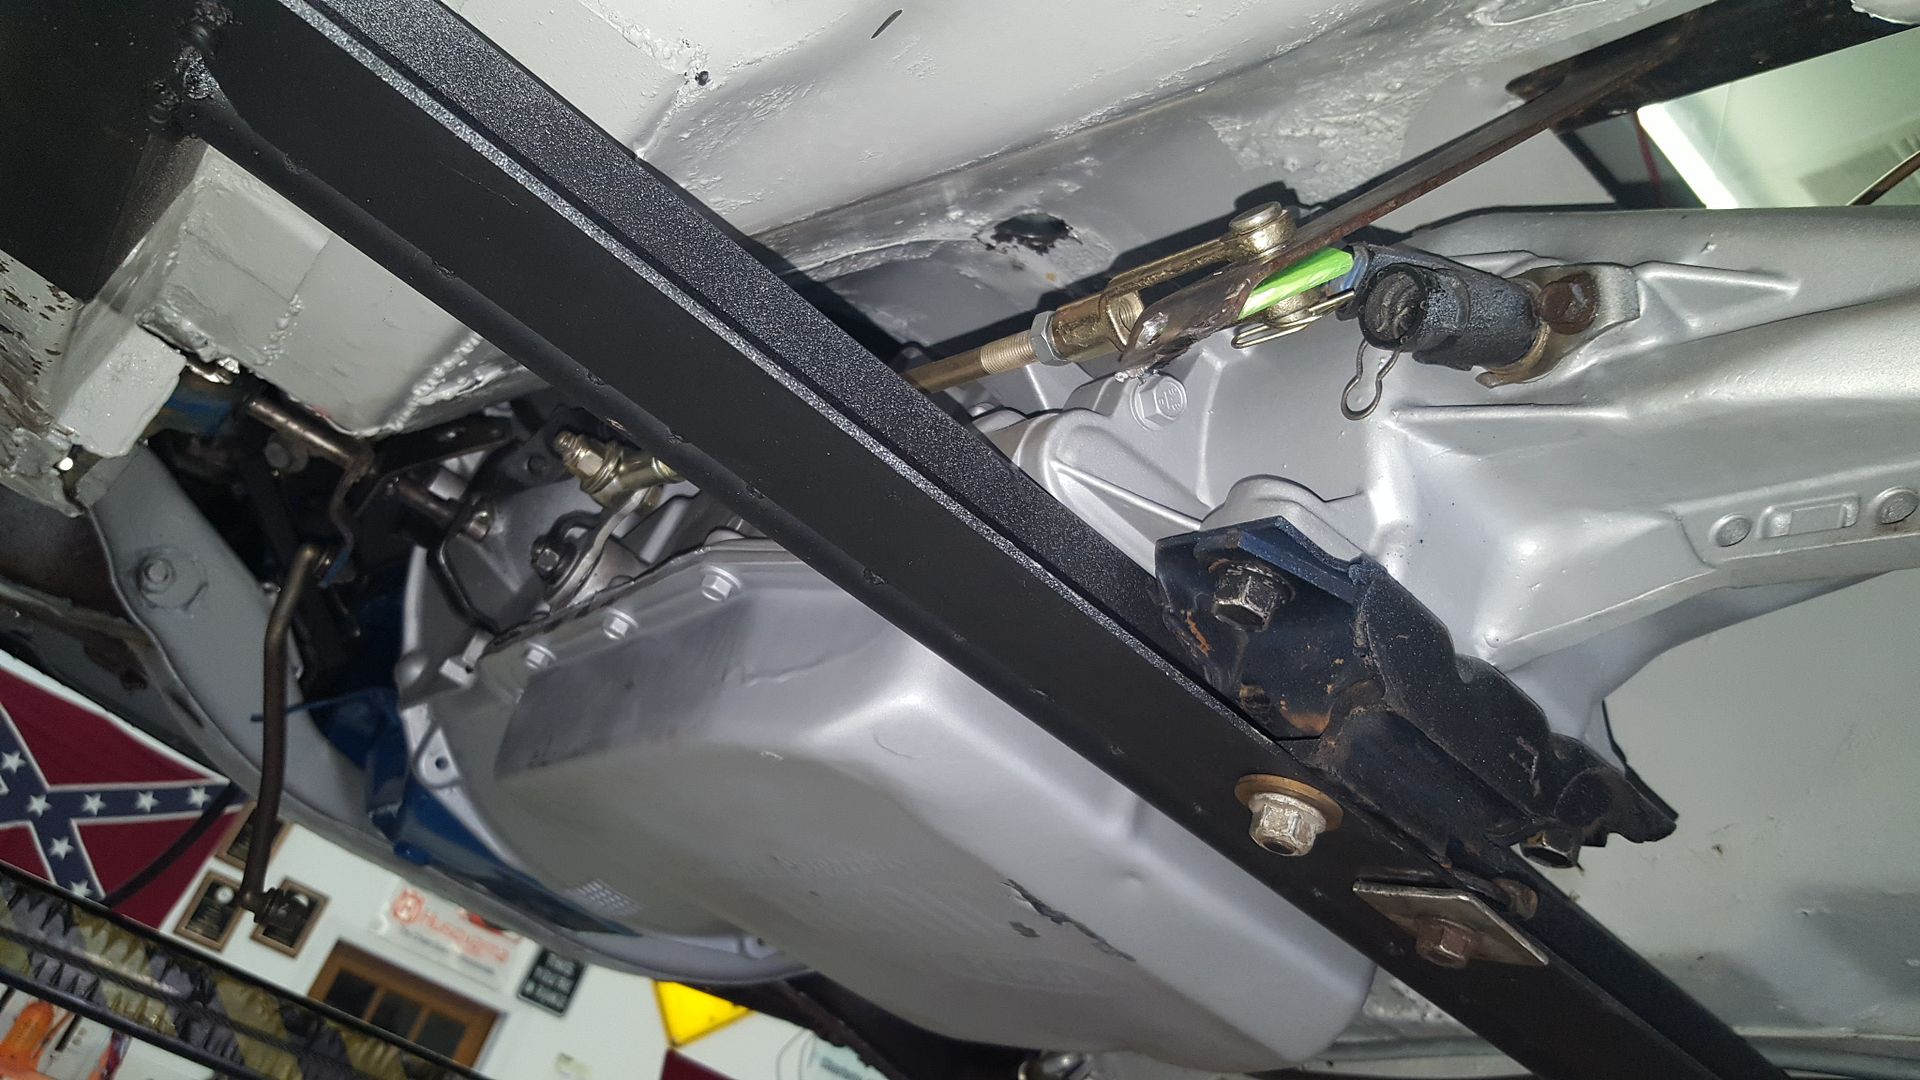 [/URL]
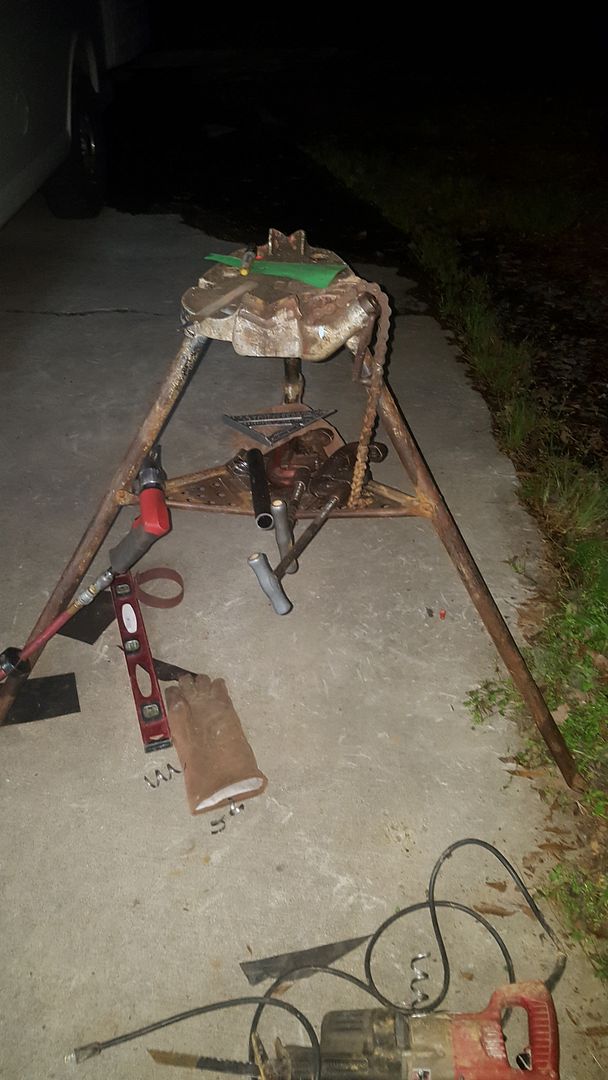
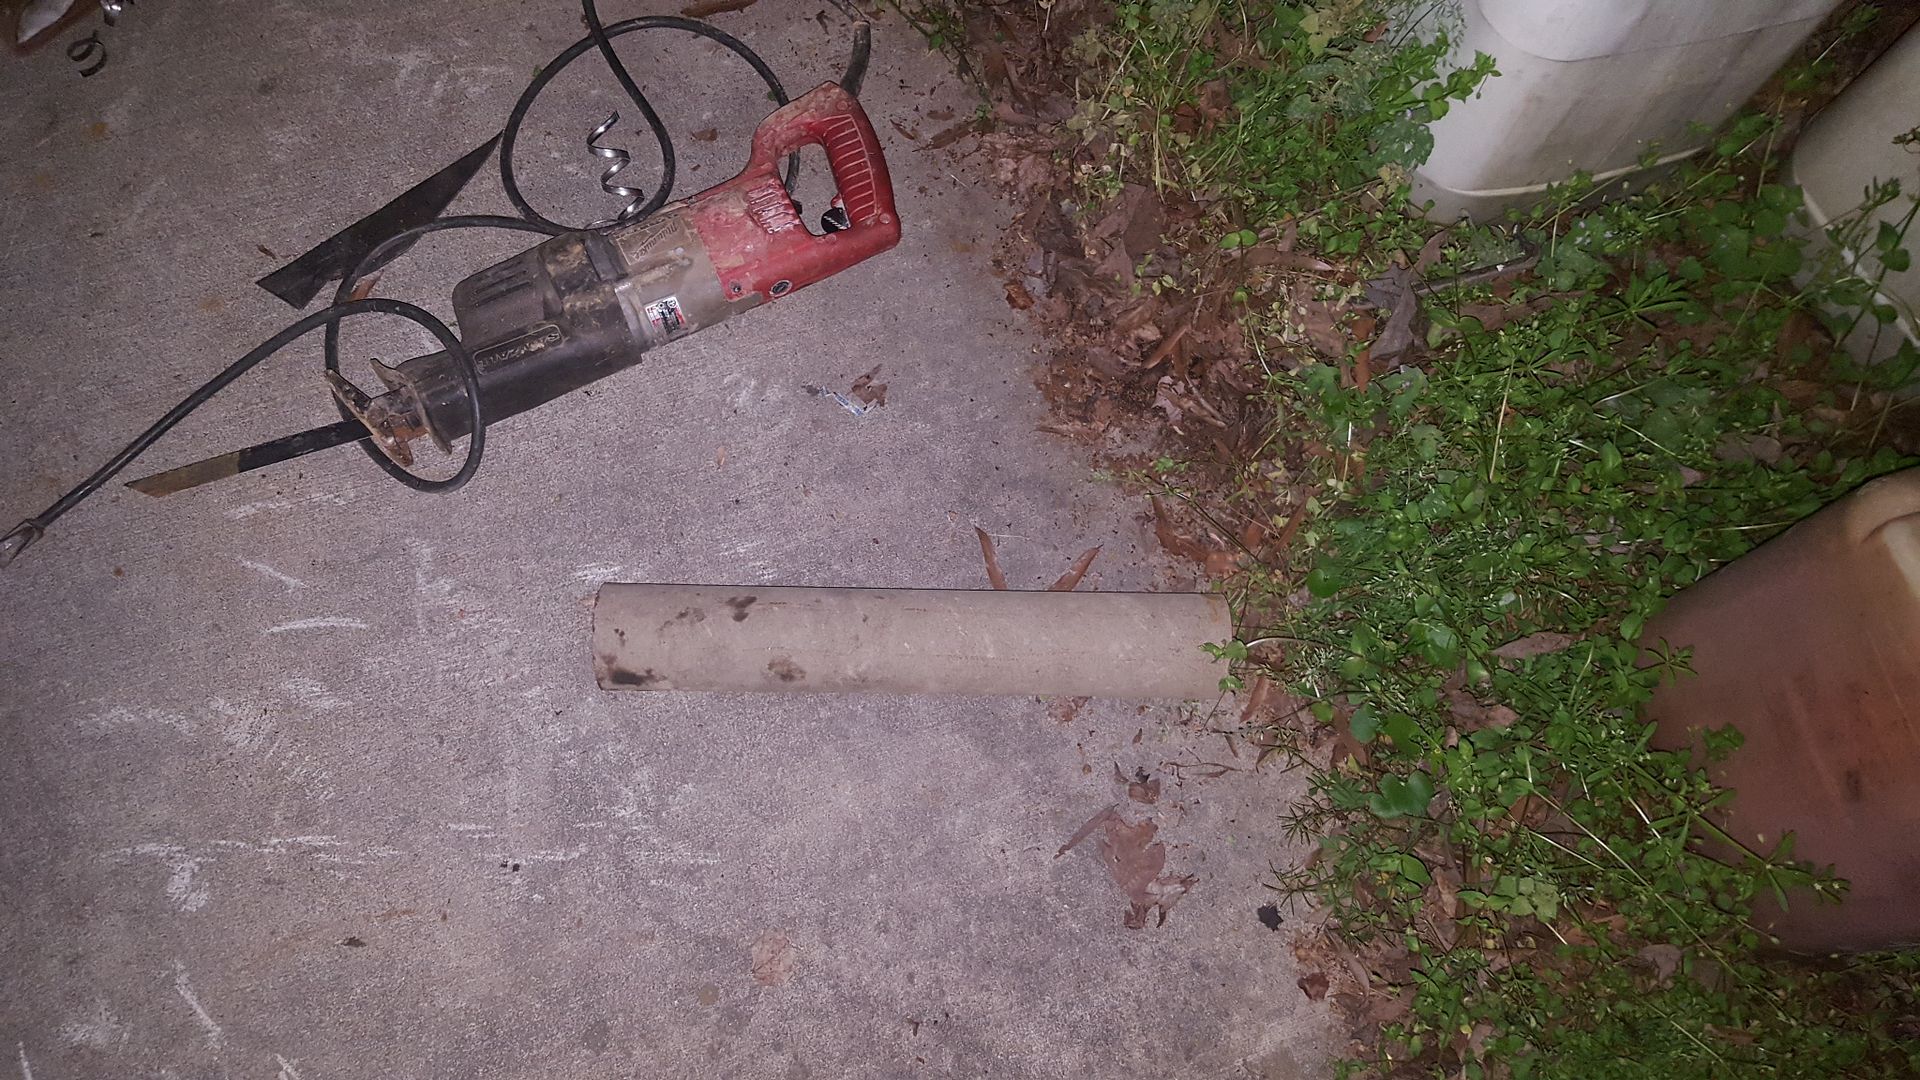
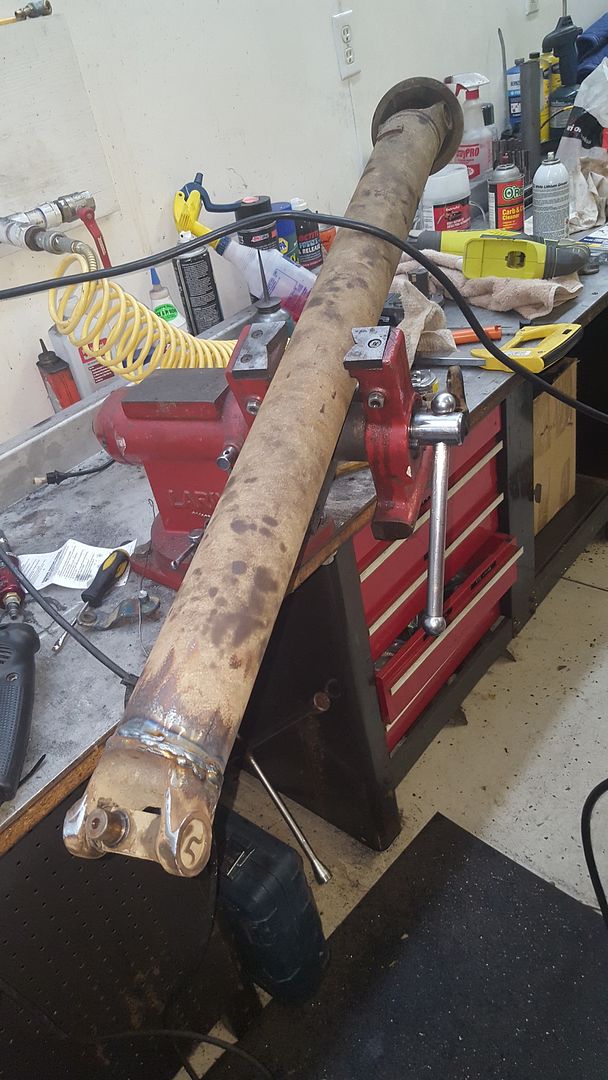
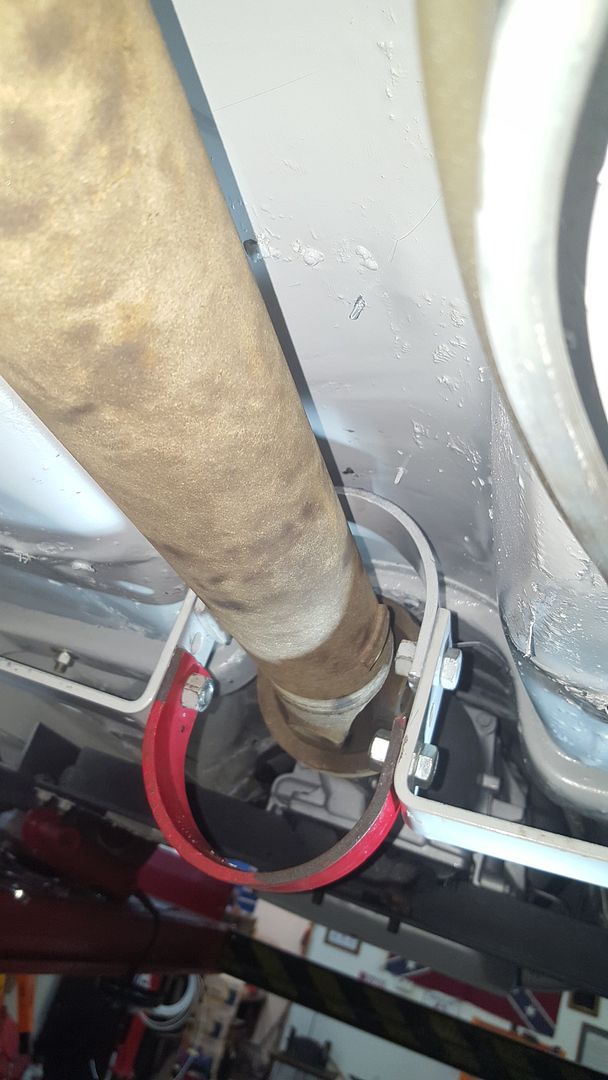
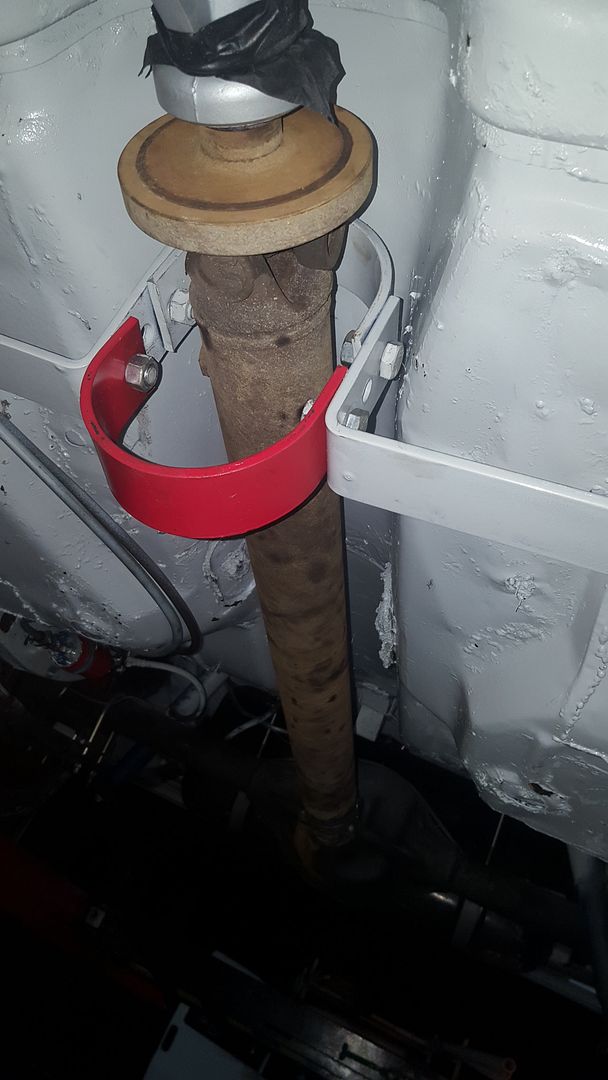
The next workaround we needed was a driveshaft. We had a couple in the car when we bought it, and one was close. Only 3 inches too long. We also had the loncoln driveshaft from the parts car. It was only 21 inches too long. We figured that people have been working on driveshafts for a hundred years, and that hell, its only metal. So we shortened the lincoln shaft. We ground/cut through the weld holding the yoke on, cut the driveshaft to length with a pipe cutter, squared it up the best we could, welded it on, and put it in. We also got our driveshaft safety loop welded in while we were doing this.
[URL=http://s54.photobucket.com/user/dusterbd13/media/amc/20170407_182718_zpsnnmacnov.jpg.html]
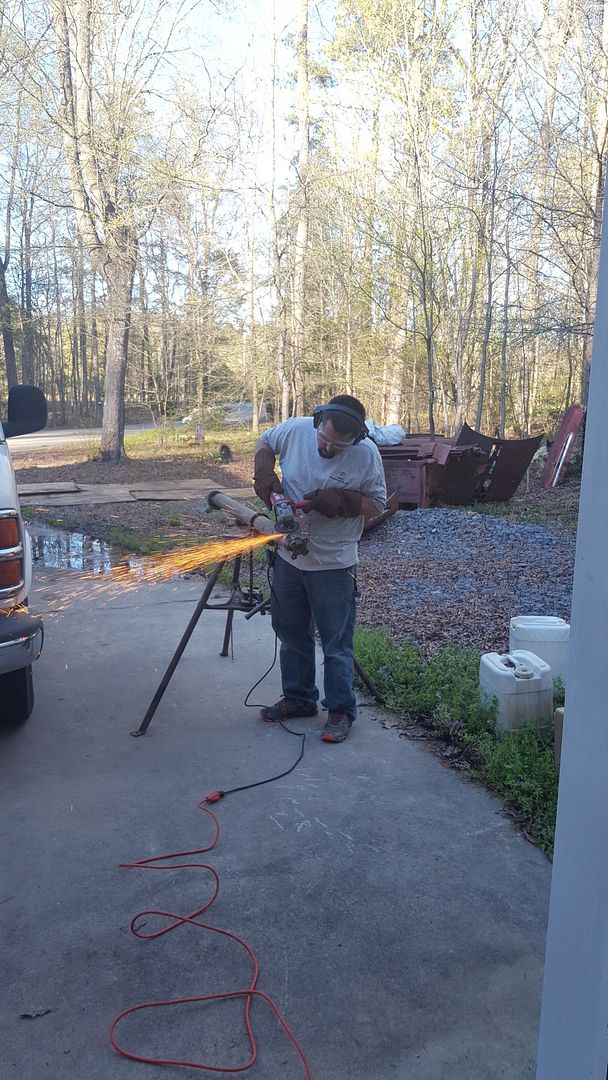 [/URL]
[URL=http://s54.photobucket.com/user/dusterbd13/media/amc/20170407_210944_zpsafwtljt9.jpg.html]
 [/URL]
[URL=http://s54.photobucket.com/user/dusterbd13/media/amc/20170407_210940_zpsskc1ot84.jpg.html]
 [/URL]
[URL=http://s54.photobucket.com/user/dusterbd13/media/amc/20170407_210928_zps7gyzeb6o.jpg.html]
 [/URL]
[URL=http://s54.photobucket.com/user/dusterbd13/media/amc/20170407_223310_zpsziv9rz4t.jpg.html]
 [/URL]
[URL=http://s54.photobucket.com/user/dusterbd13/media/amc/20170408_002702_zpsd91nt8pa.jpg.html]
 [/URL]
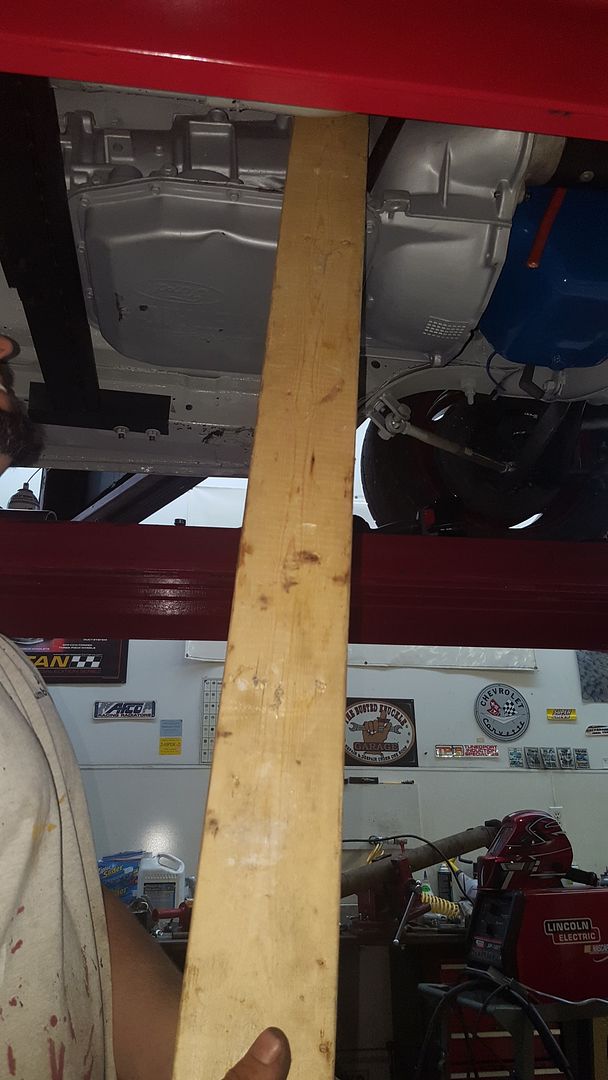
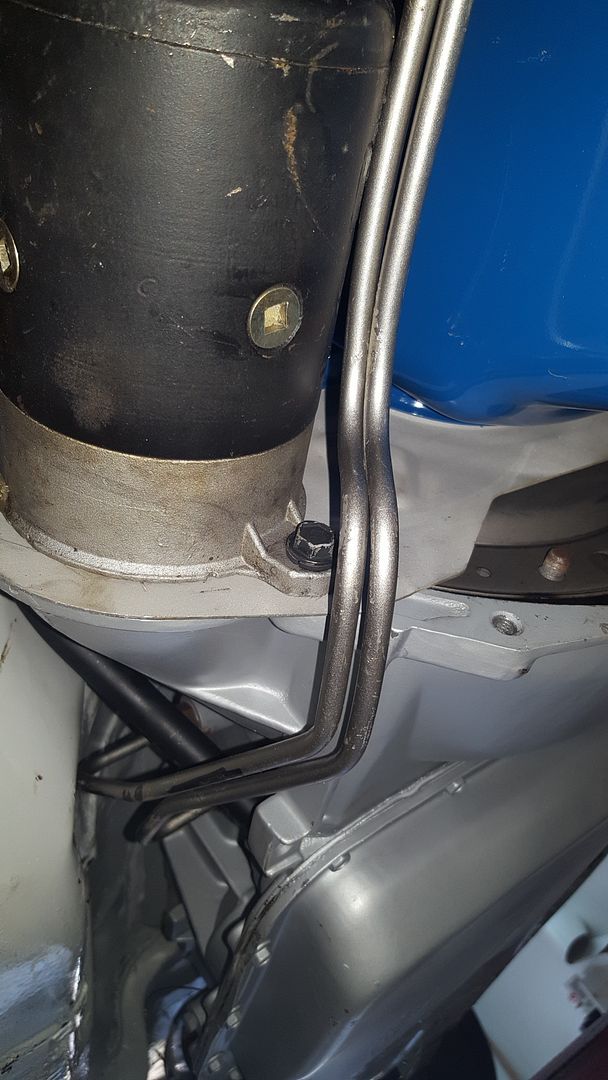
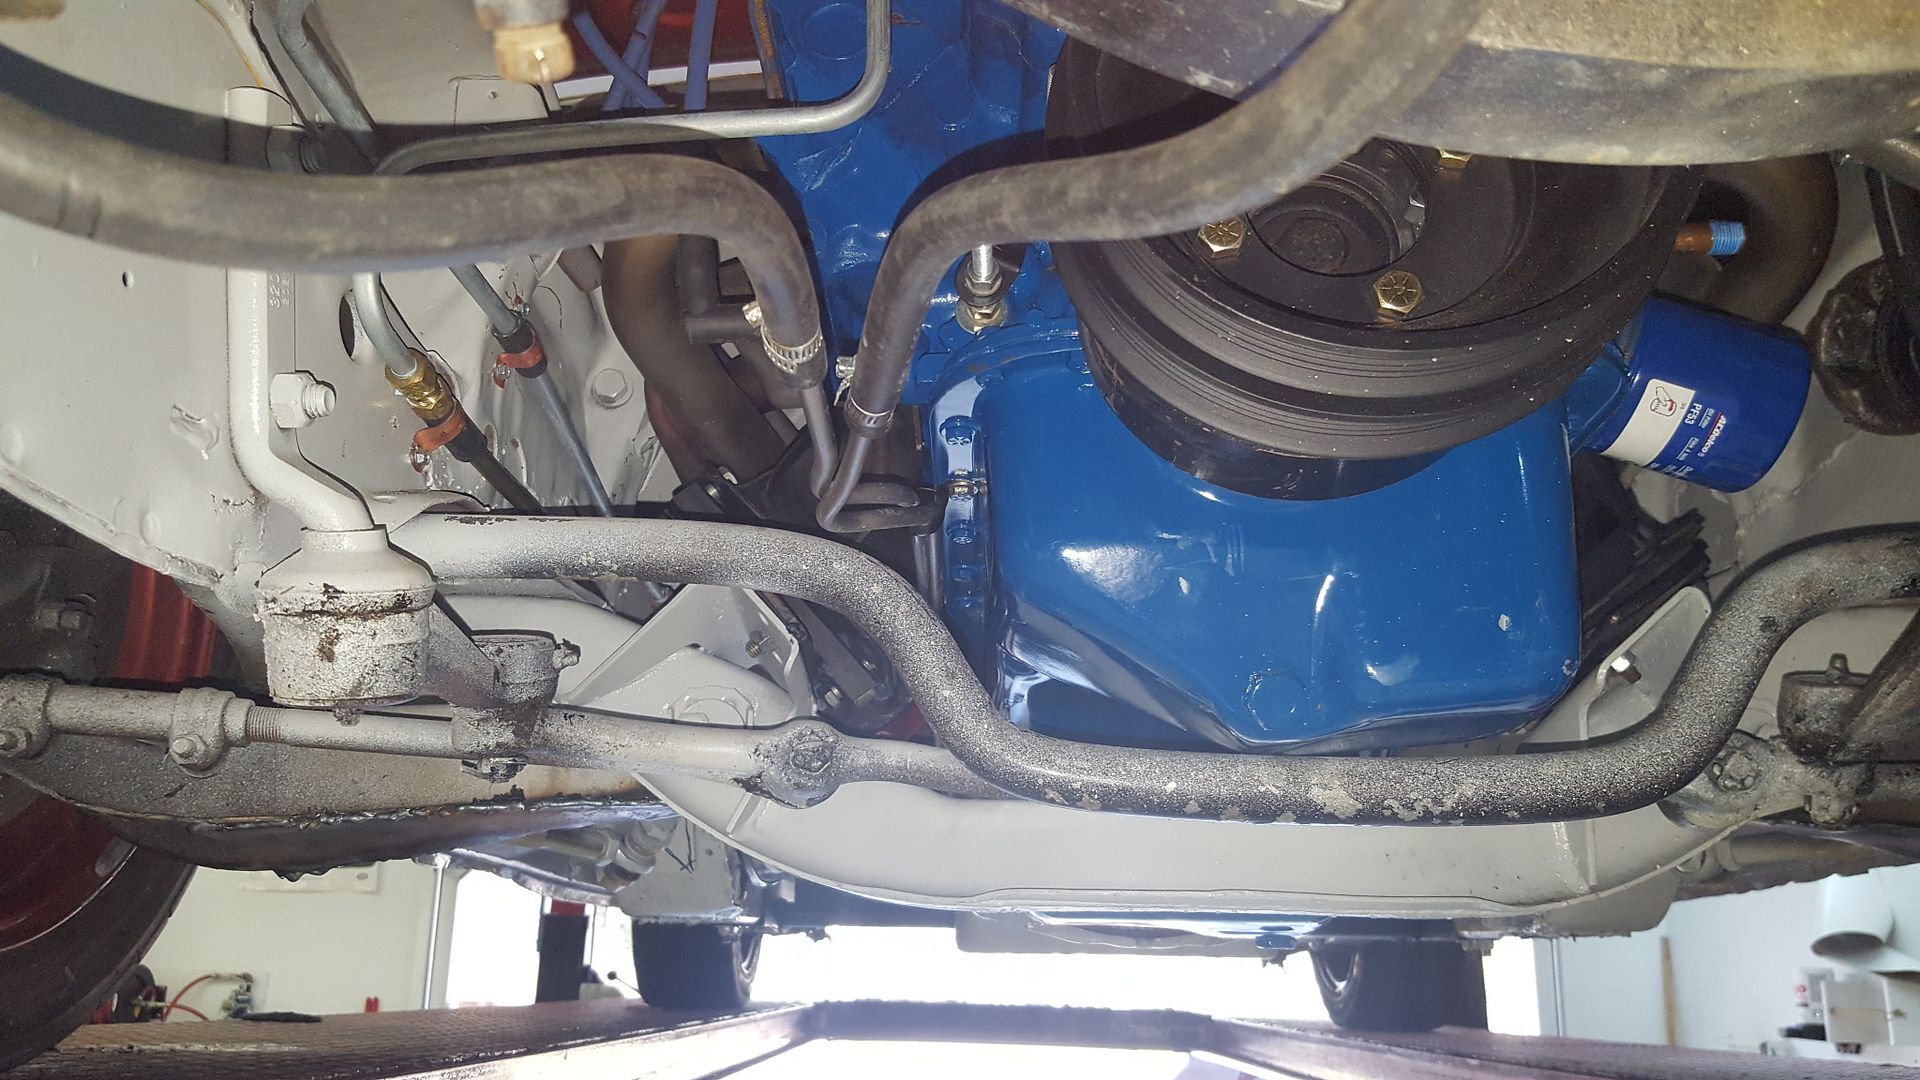
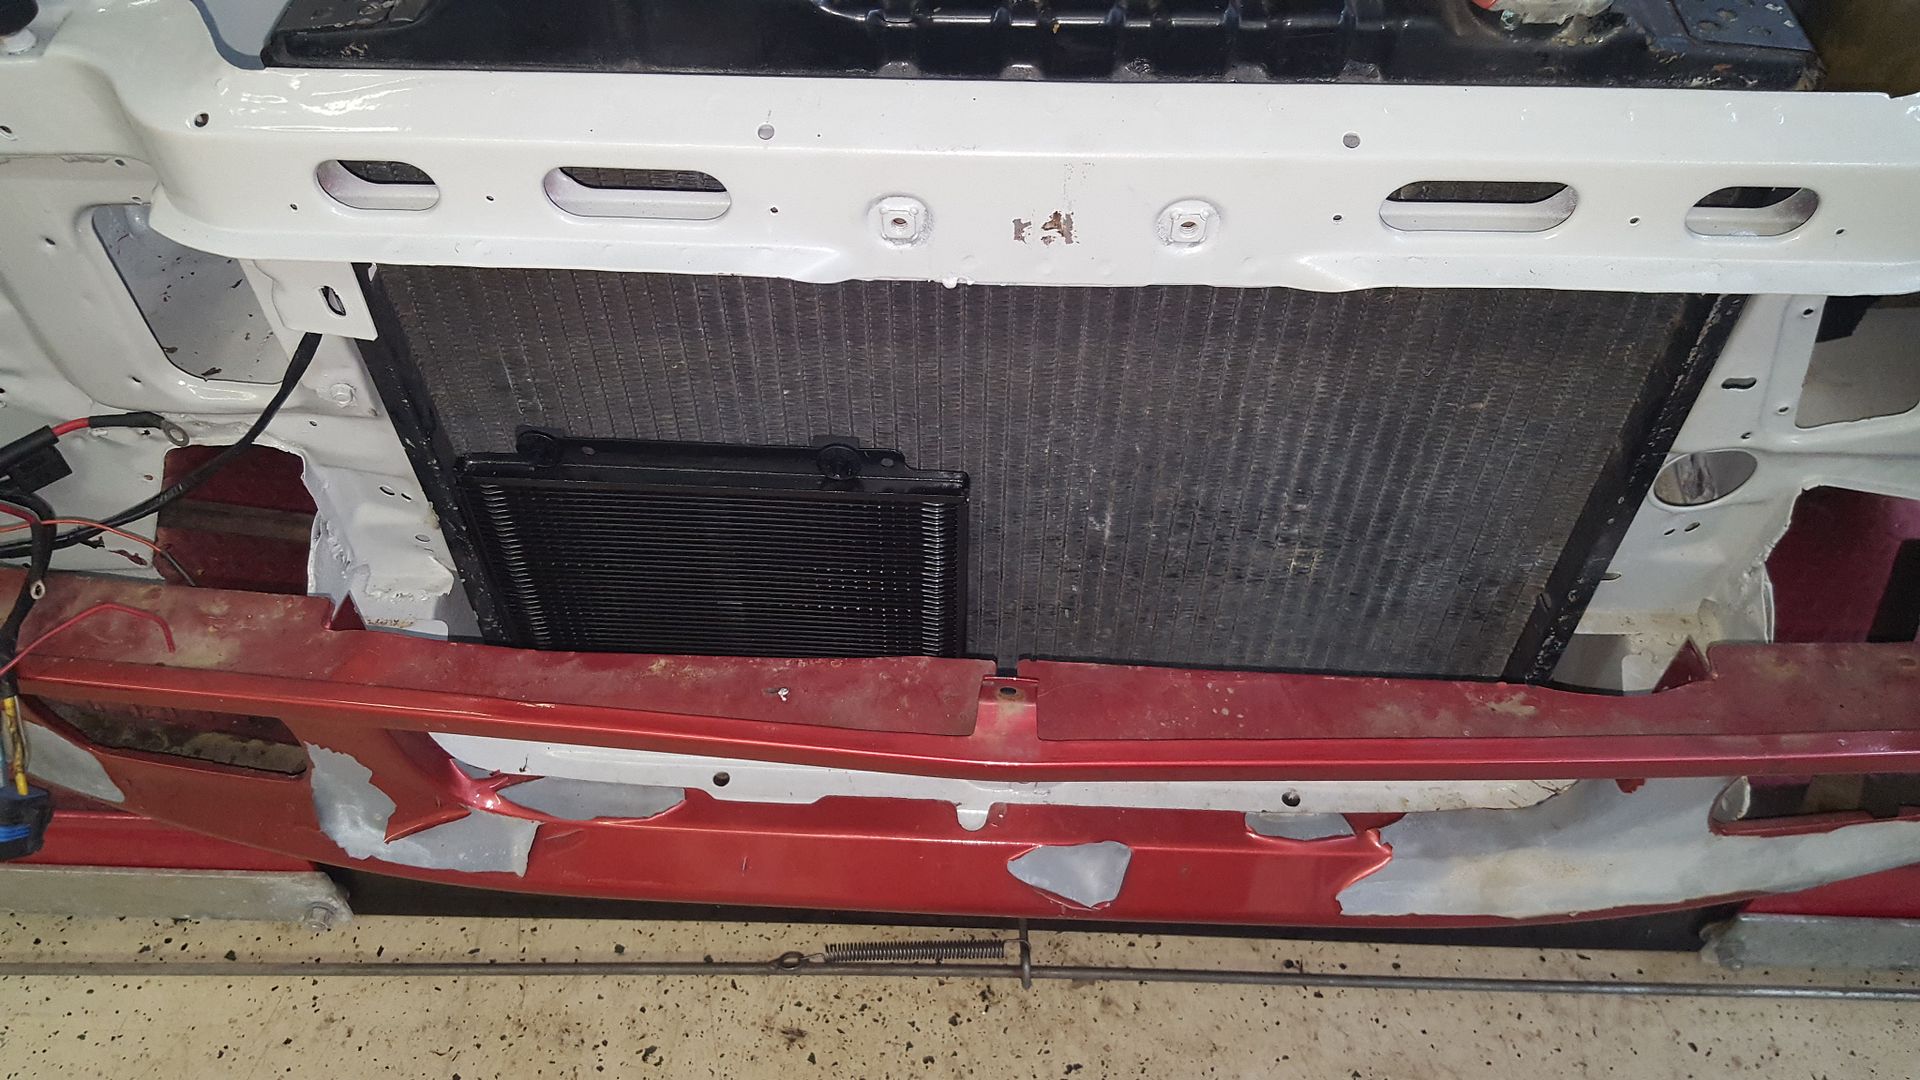
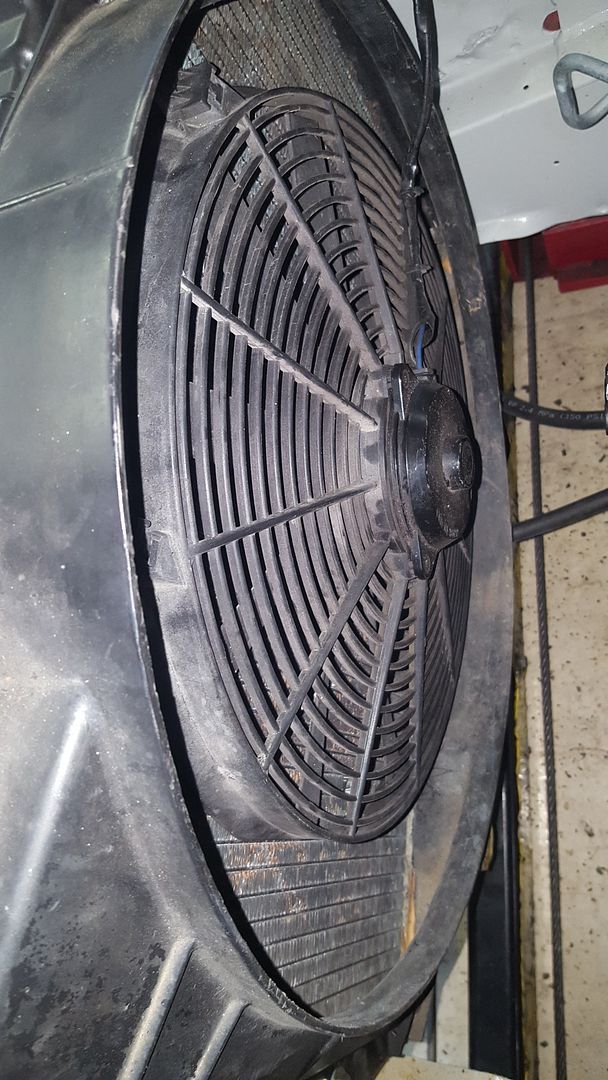
Next was transmission cooler lines. We reused as much of the stock lincoln stuff as we could, because it is paid for. We had to add a little clearance for the lines to the trans tunnel. So, with the proper application of redneck ingenuity and leverage, we got there. We also put in our trans cooler. It came with 4 mounting straps (two in cooler, two in fan) and some hose, which was enough for the trans cooler and power steering cooler.
[URL=http://s54.photobucket.com/user/dusterbd13/media/amc/20170407_211515_zps6taongv6.jpg.html]
 [/URL]
[URL=http://s54.photobucket.com/user/dusterbd13/media/amc/20170409_165449_zpszspdbgol.jpg.html]
 [/URL]
[URL=http://s54.photobucket.com/user/dusterbd13/media/amc/20170409_165442_zpsrrbs8iqt.jpg.html]
 [/URL]
[URL=http://s54.photobucket.com/user/dusterbd13/media/amc/20170409_161649_zpsftenm5wo.jpg.html]
 [/URL]
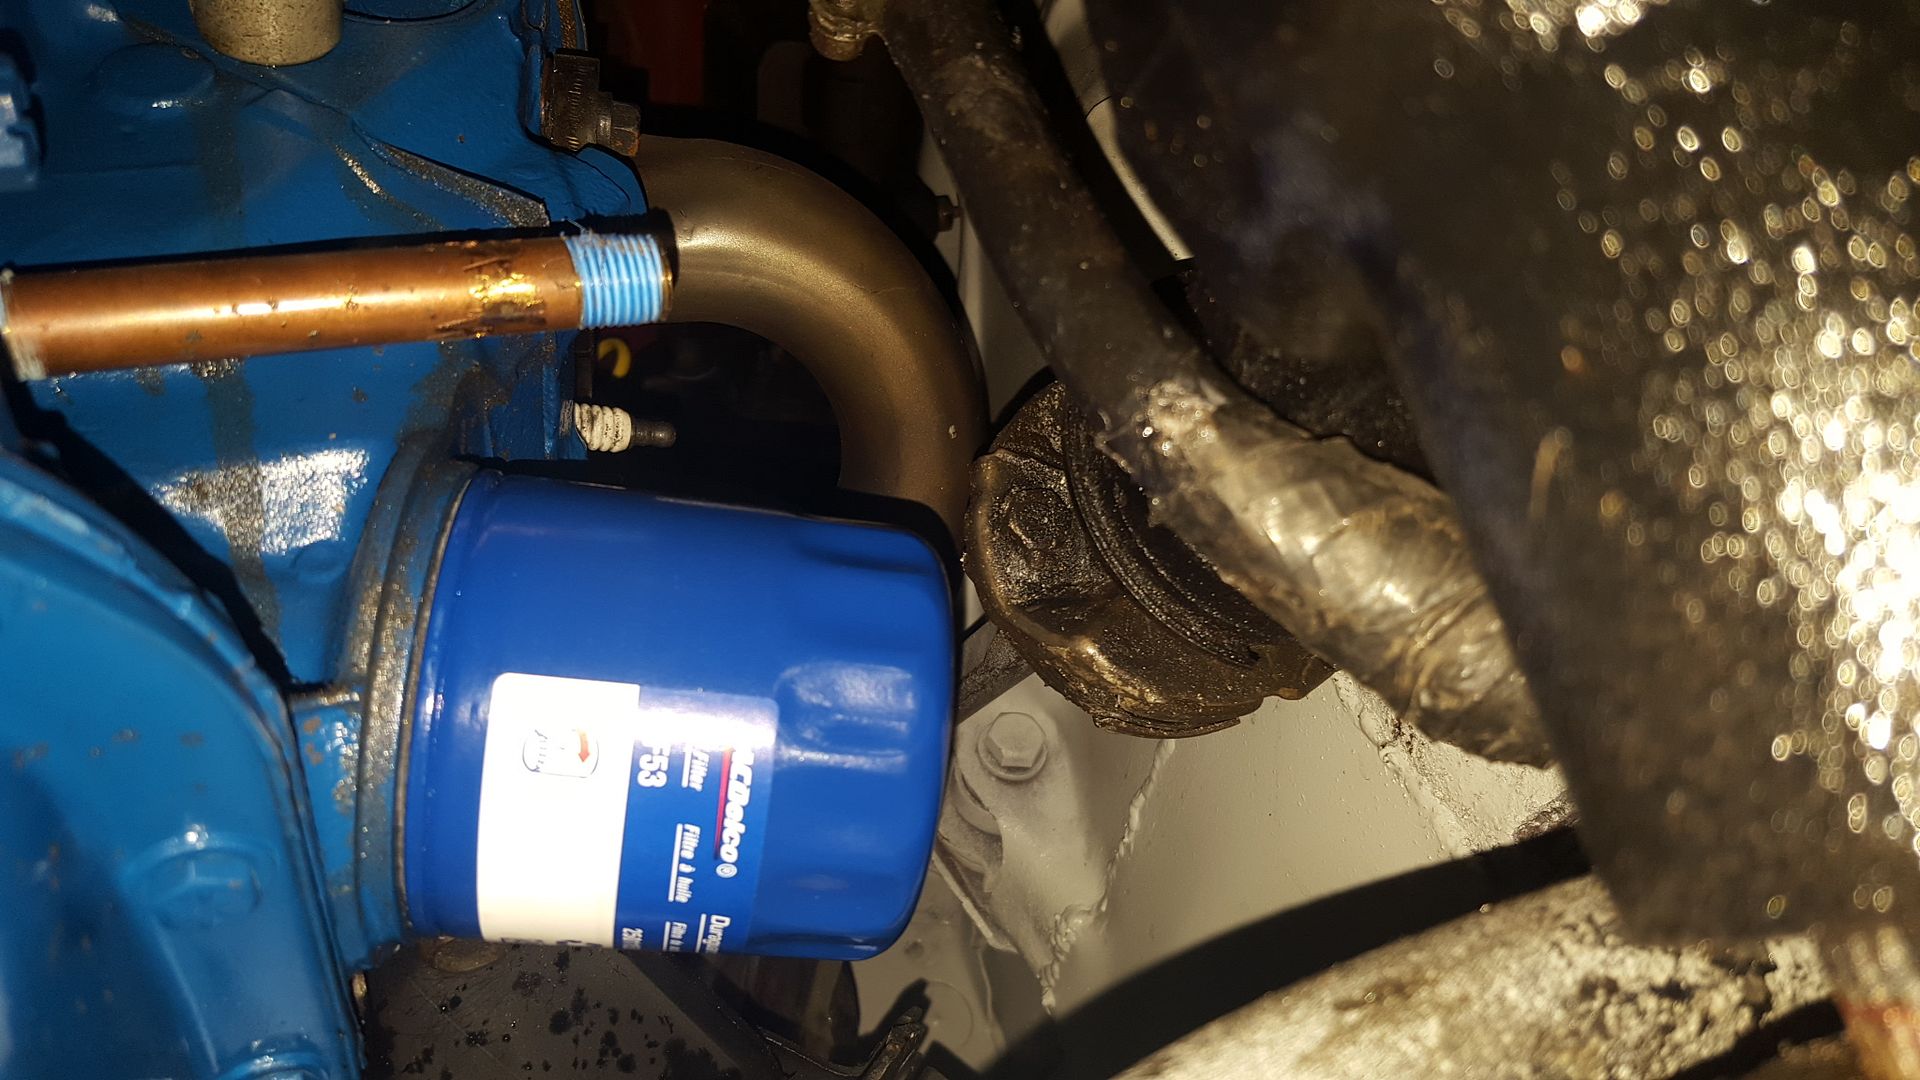
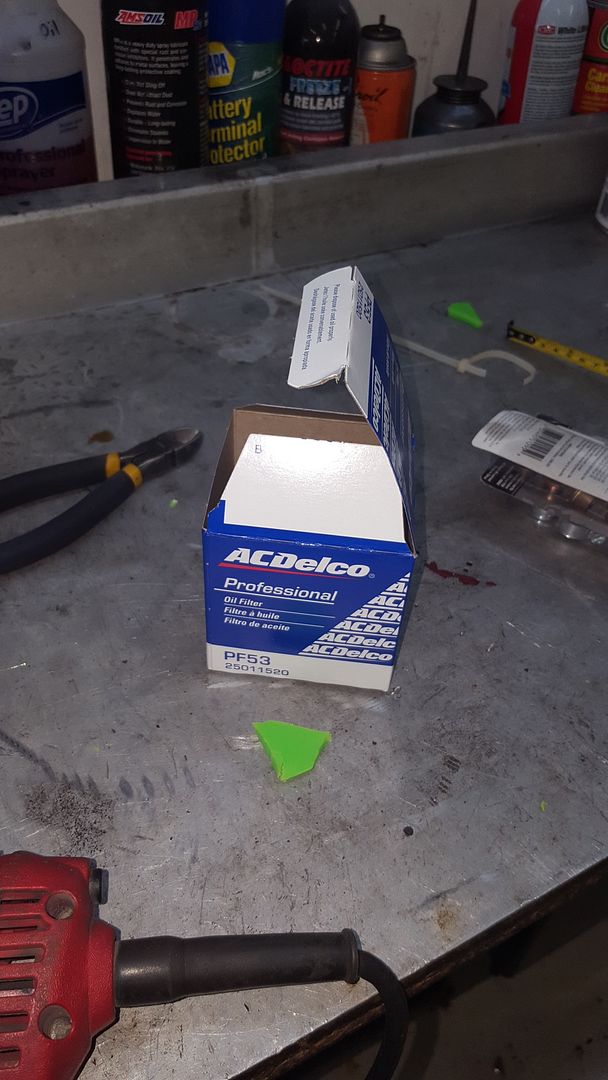
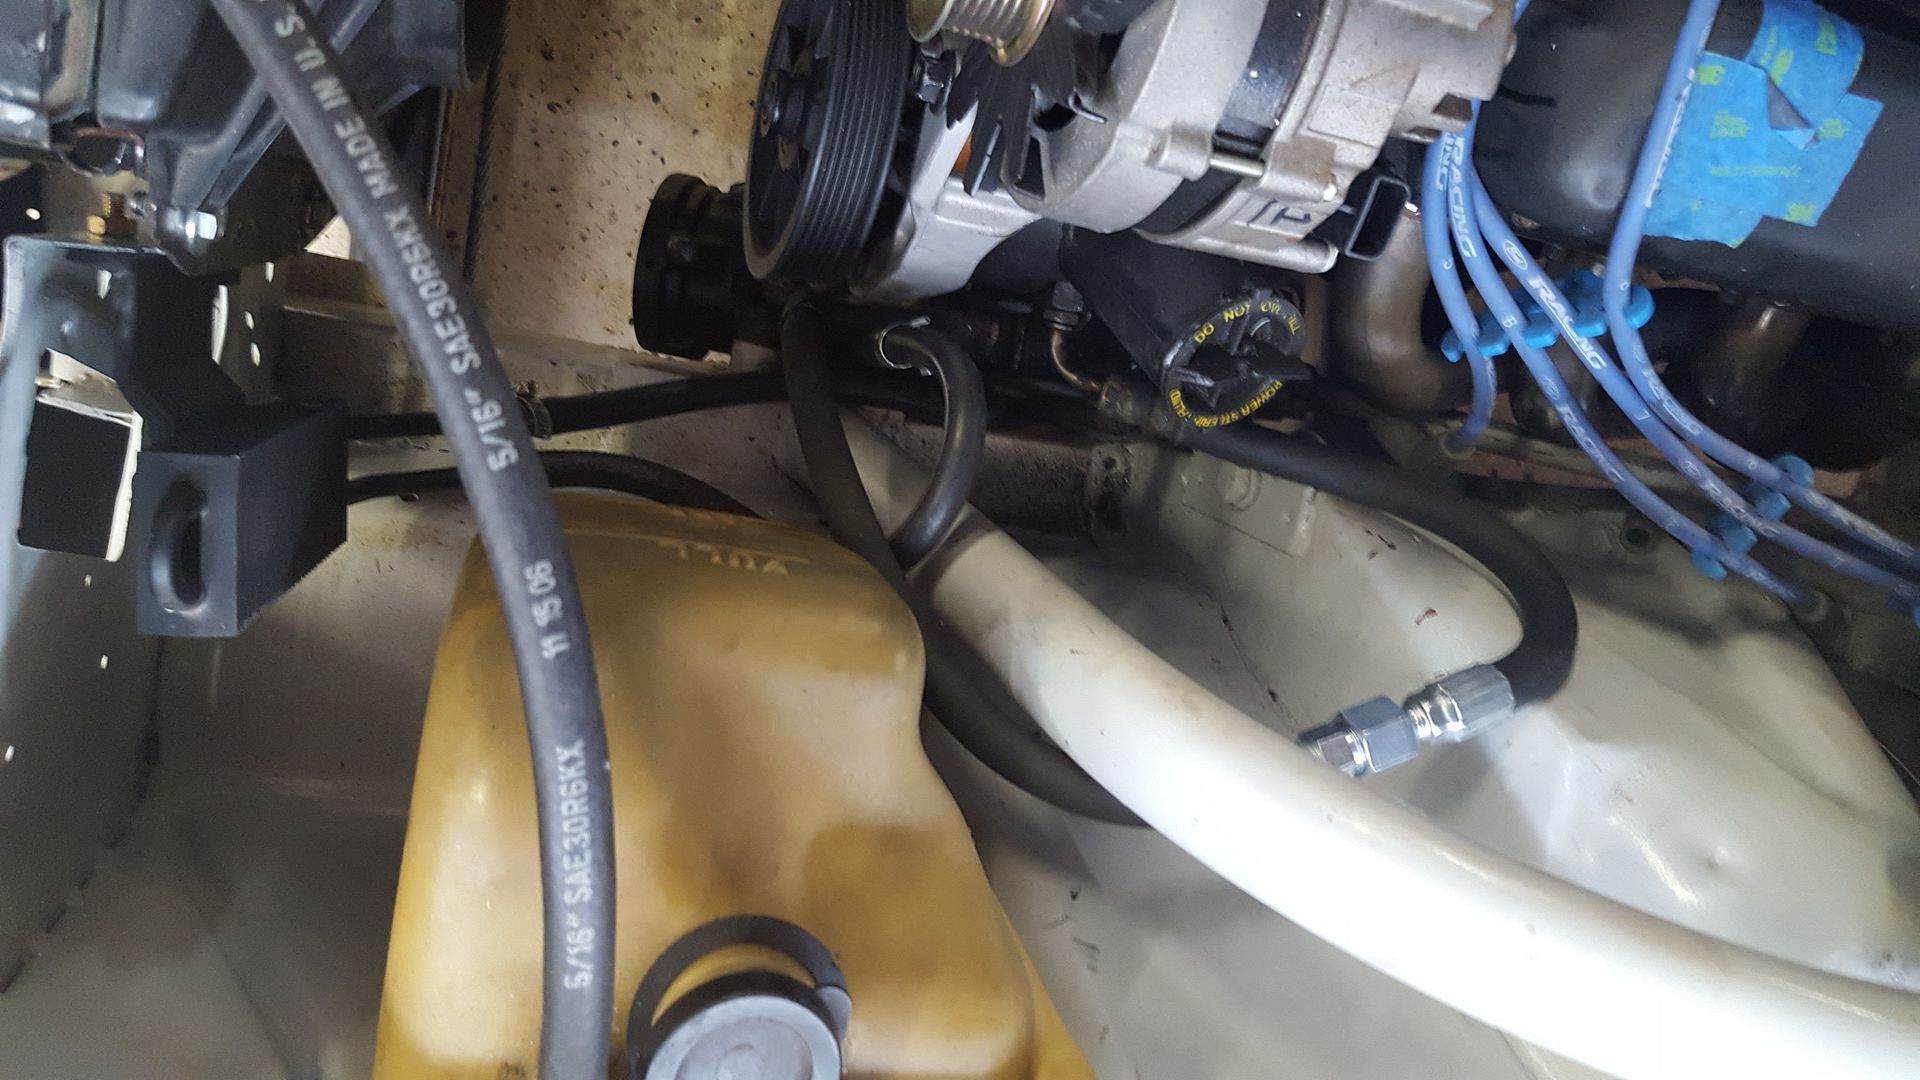
Got the fan mounted up, spliced the ford power steering pressure hose to the jeep power steering pressure hose, and plumbed in the power steering cooler. Also finally found an oil filter that fits.
[URL=http://s54.photobucket.com/user/dusterbd13/media/amc/20170409_161633_zps4ufduxfd.jpg.html]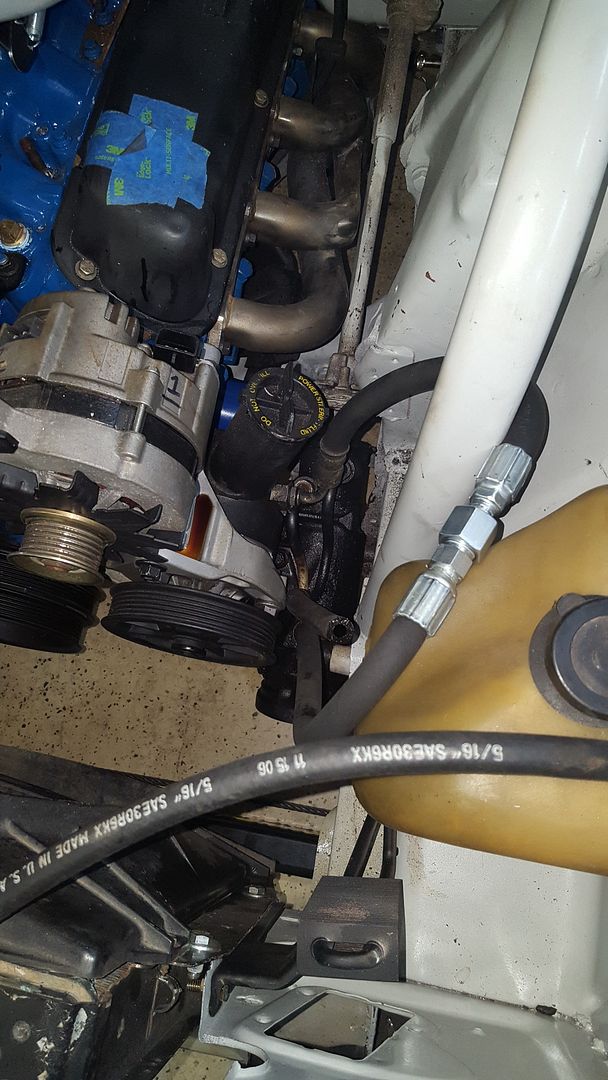 [/URL]
[URL=http://s54.photobucket.com/user/dusterbd13/media/amc/20170409_163433_zpsvaah6hbu.jpg.html]
 [/URL]
[URL=http://s54.photobucket.com/user/dusterbd13/media/amc/20170409_161747_zpsstuwkvj3.jpg.html]
 [/URL]
[URL=http://s54.photobucket.com/user/dusterbd13/media/amc/20170409_174413_zpstvcft4gn.jpg.html]
 [/URL]
[URL=http://s54.photobucket.com/user/dusterbd13/media/amc/20170409_161644_zpszrkjw0x7.jpg.html]
 [/URL]
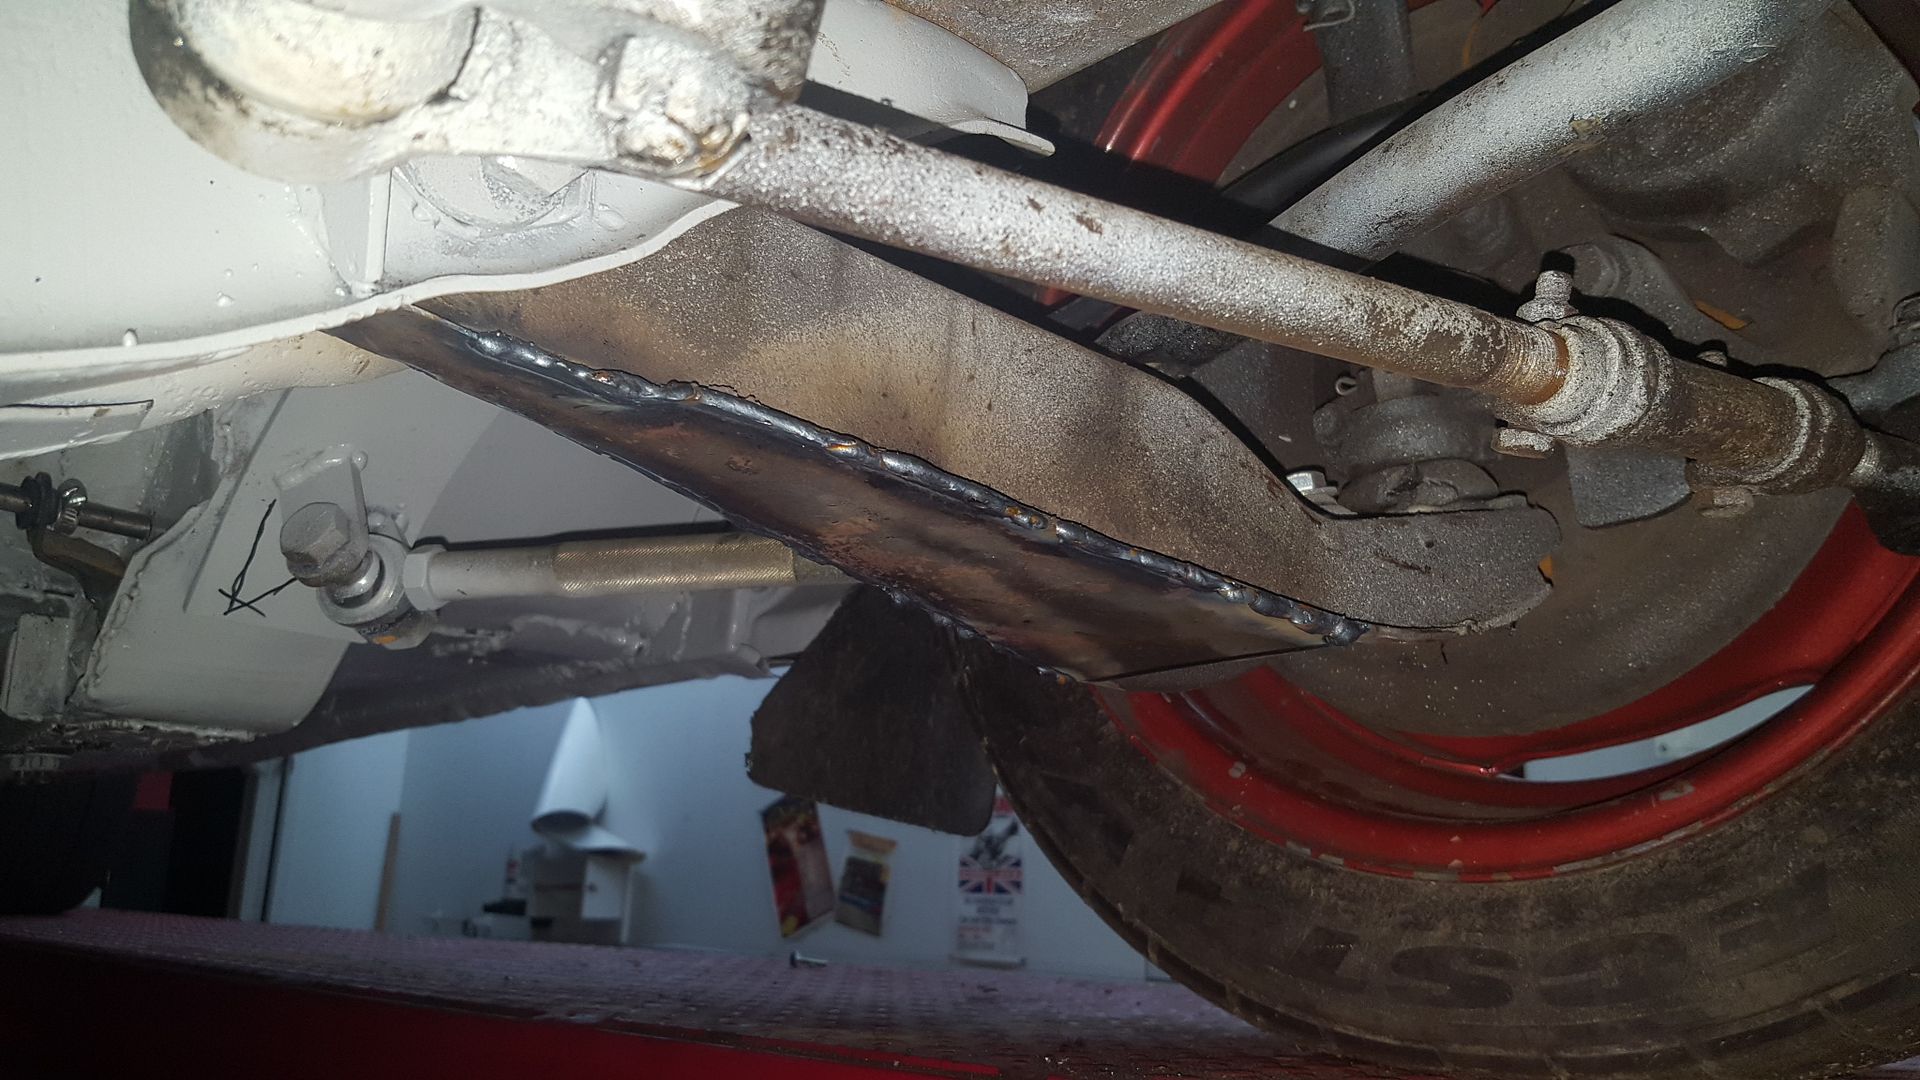
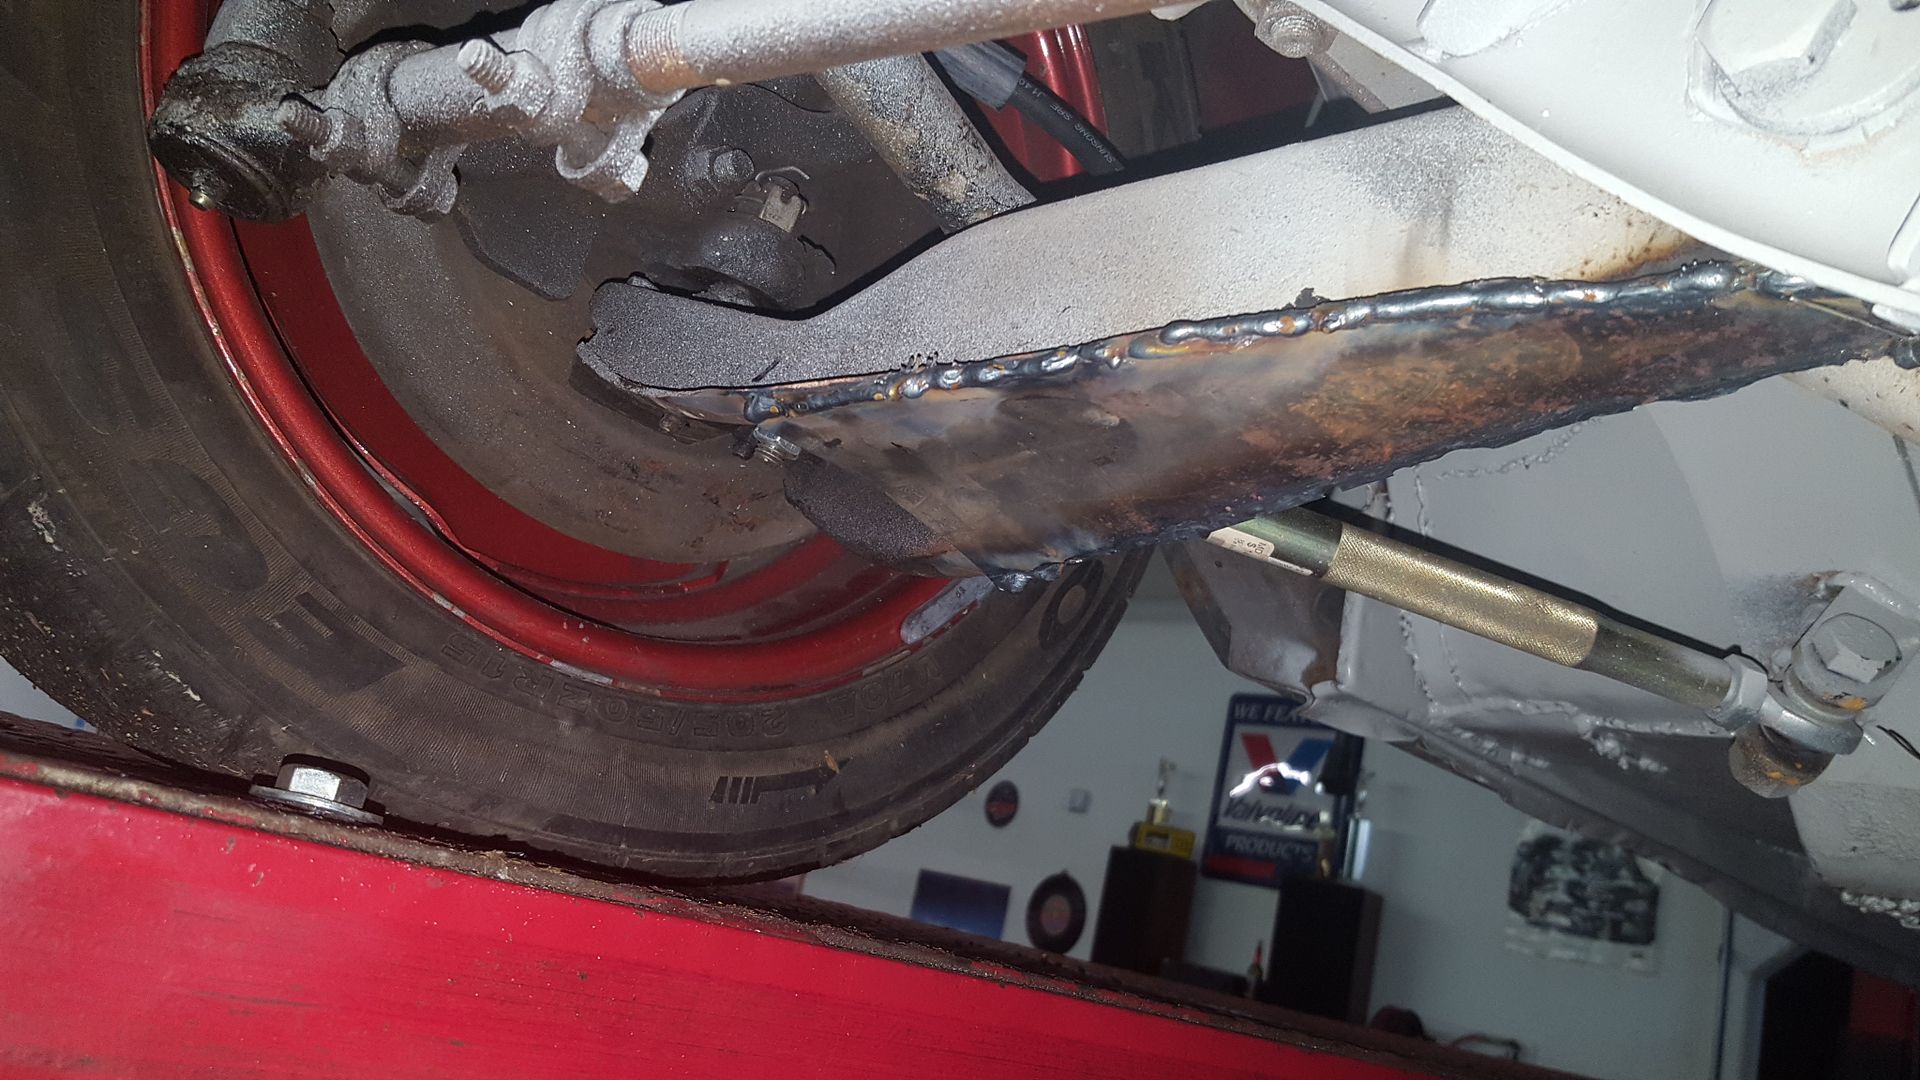
Dallas found a chunk of 16 gauge steel in the barn left over from god only knows, so we cut it and boxed our lower control arms with it.
[URL=http://s54.photobucket.com/user/dusterbd13/media/amc/20170408_002645_zps1pd7vkx4.jpg.html]
 [/URL]
[URL=http://s54.photobucket.com/user/dusterbd13/media/amc/20170408_002649_zpsq5b6idi4.jpg.html]
 [/URL]
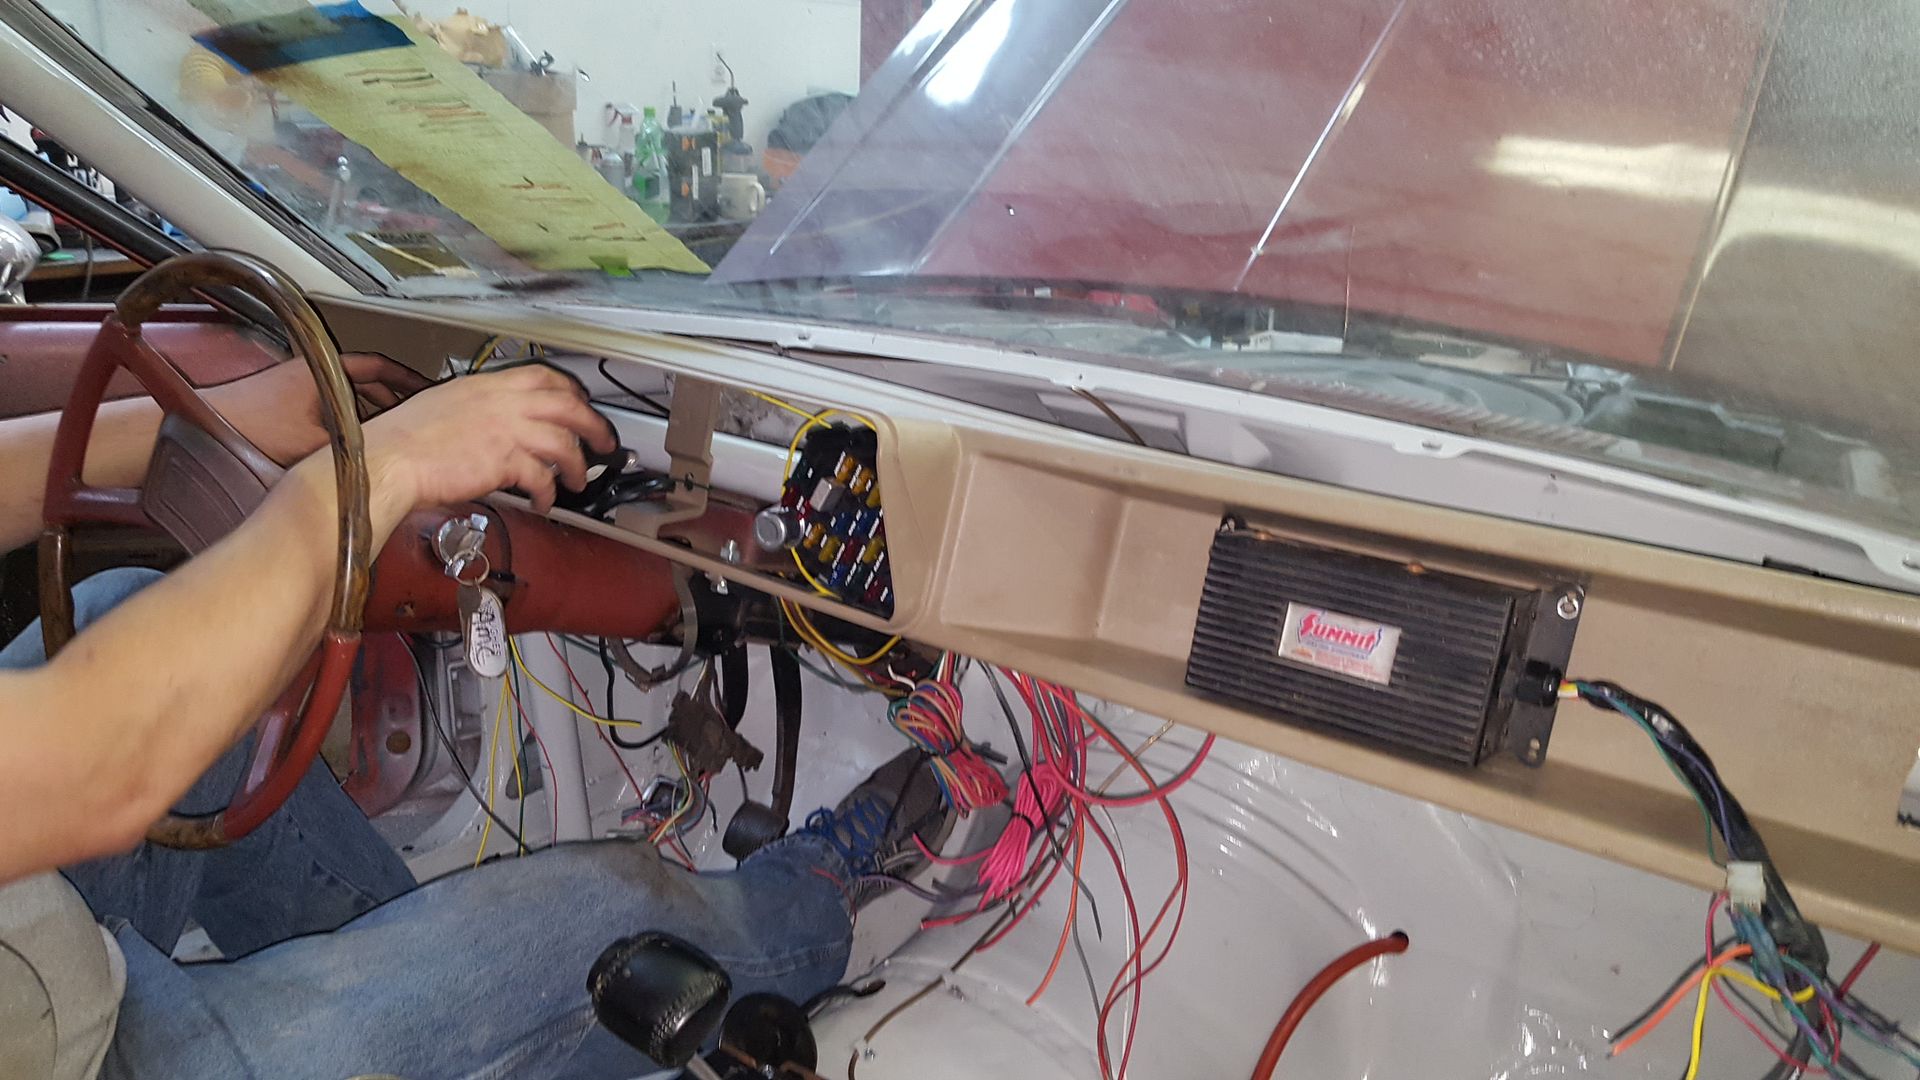
Somewhere in here, we decided we needed a dash. We grabbed that tan plastic thing we got from the dumpster at the autofair in the fall, and cut it till we liked it.
[URL=http://s54.photobucket.com/user/dusterbd13/media/amc/20170405_215930_zpstk7fuxlz.jpg.html]
 [/URL]
Lastly, remounted the brake proportioning valve to a chunk of metal from the scrap metal pile. I think it was the old water storage heater bracket to the motorhome from when dad replaced it this fall.
[URL=http://s54.photobucket.com/user/dusterbd13/media/amc/20170409_174402_zpshzmw3l6e.jpg.html]
 [/URL]
Tomorrow night is brake bleeding, cooling system install, and steering column finishing.
You'll need to log in to post.