1 2 3 4 5
volvoclearinghouse
volvoclearinghouse UberDork
11/21/18 9:09 p.m.

With the two engine mounts in place, and a Harbor Freight floor jack providing the 3rd point of support (under the transmission) I decided to shift gears and work on the radiator mount.  Since the radiator was a bit snug up against the water pump pulley in the above picture, yet I still wanted to use the front frame cross piece as a radiator perch, some elective surgery would need to take place.

First, a highly technical sketch:

Interestingly, I make things that are more life-like-looking with a plasma cutter and a Lincoln welder than I do with a pen and pad.

Remember to pick up the correct gun!  

To make a flat surface for the bottom of the radiator to set on, I cut the top of the frame cross piece on 3 sides (it sort of angles up from the center of the car towards the side frame rails) and then battered it down to horizontal.  Then I cut out some pieces of steel and boxed it in.  

Mirror image, right and left side.  All this was done with bits of scrap metal I had scrounged up and saved.

This turned out to be a pretty good base for the radiator to set upon.

The water pump to radiator clearance was now about 3", plenty to squeeze an electric fan setup between.  

I made the width of the bottom support (between the sides where it kicks up) about 1/4" wider on each side of the radiator, in order to allow space for some rubber isolation mounts.  

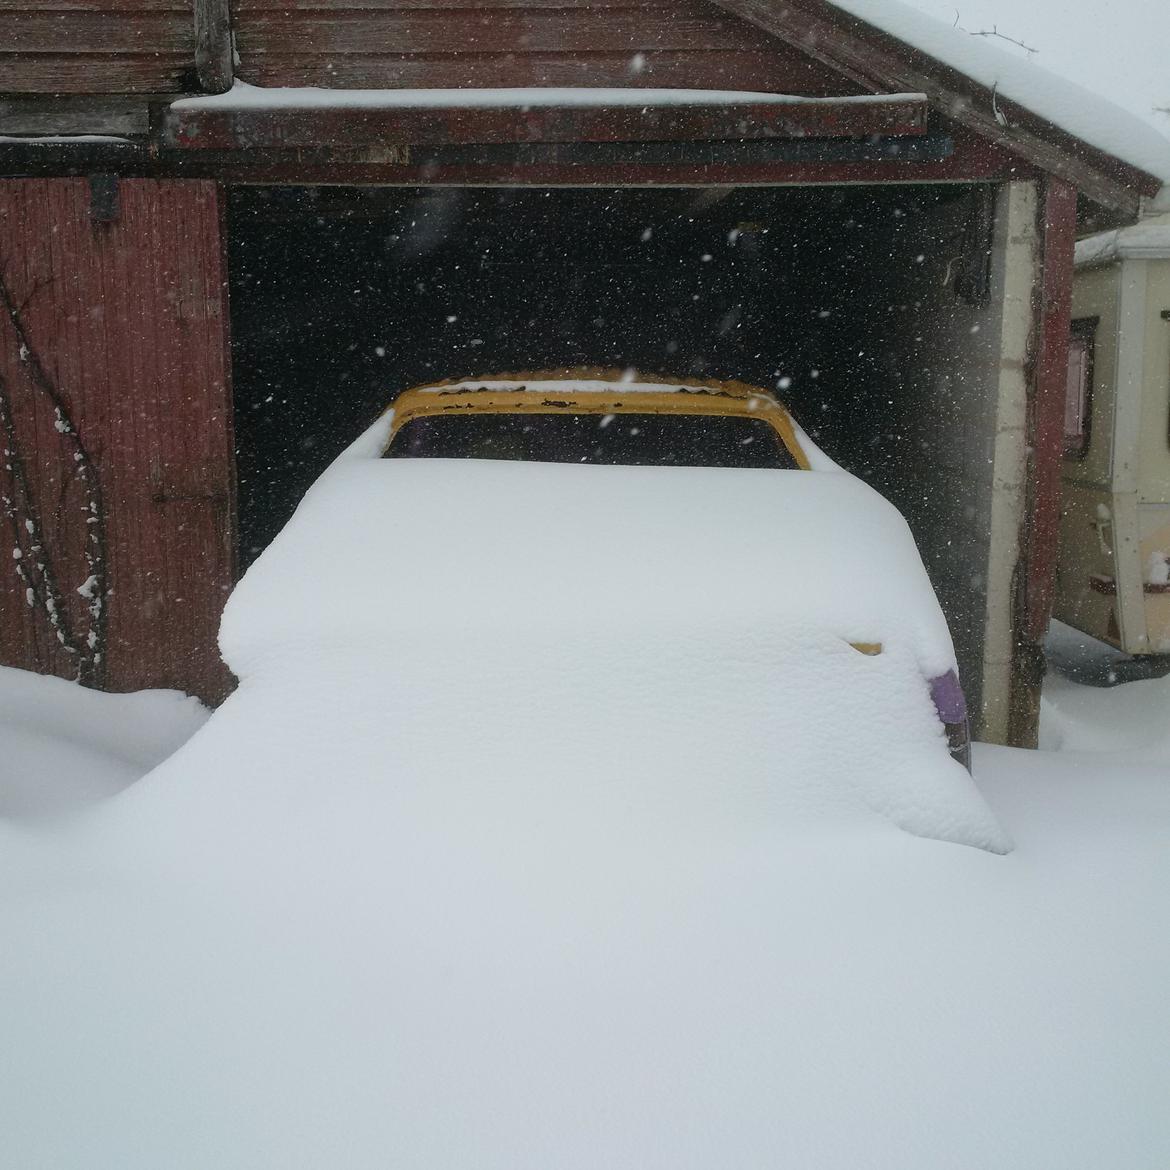
Meanwhile...did I mention this lousy Smarch weather that was going on?  Jeesh.  The Plymouth body rests under the Maple tree, silently, patiently awaiting its fate...

volvoclearinghouse
volvoclearinghouse UberDork
11/21/18 9:47 p.m.

Looking back through team emails, I see that as of late April of this year, this was about where the project stood.  I'm amazed that between April and November the Plymford went from a not-yet-running project to....well..you'll see soon enough.  Incidentally, I just got word today that I have to travel down to southern GA (about an hour north of Jacksonville, FL) next week after Thanksgiving.  That means a lot fo late nights in the hotel with nothing to do other than pound out some more of this story.  :-)

As things stand...now, it was April.  And after this melted...
The transmission mount was the next thing on the list.

The stock LTD trans mount was a crossmember that mounted to two rear-facing frame appendages.  Those appendages don't stick far enough back for the new trans location.  I didn't want to lengthen them, as this would have created an even longer, cantilevered beam.  So, the plan was to borrow a page from Chevrolet's playbook, and do it lke they did it on a late 60's Impala:

Inline image 1

which is to say, frame rail to frame rail.  Above pic is a '68 Impala underframe.  Kinda neat how GM had two sets of mounting points for the crossmember- probably one for the manual trans, and the other for the auto.  Anyway, that's basically how I planned to do it on the LTD- mounting tabs welded under the frame on each side, and a big ole C channel, facing up, from side to side (straight, though, not bent).
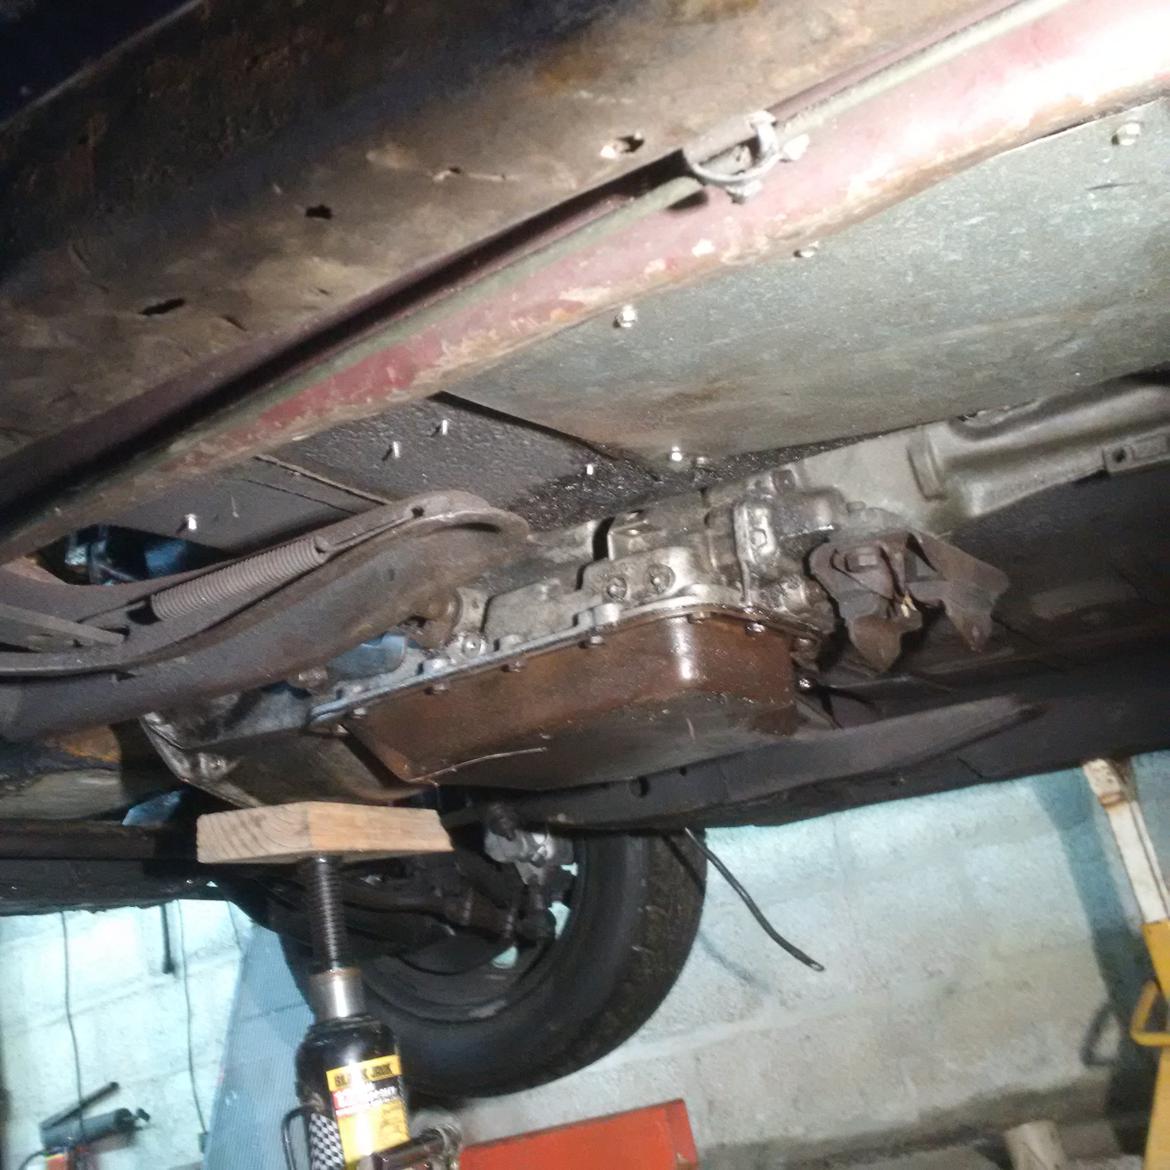
Without a lift, it's kinda hard to show what all I was dealing with under the car, but the above picture shows the two rearward-extending frame horns and the transmission between them.  This whole setup was a bit hokey when it was originally conceived ("Hey!  I've got an idea!  Let's cantilever the rear drivetrain support right off into thin air!  That'll totally work and not at all fatigue and fail!"...which, in all fairness, it hadn't...yet) but my redneck garage engineerin' was going to be a real thing of beauty and elegance.
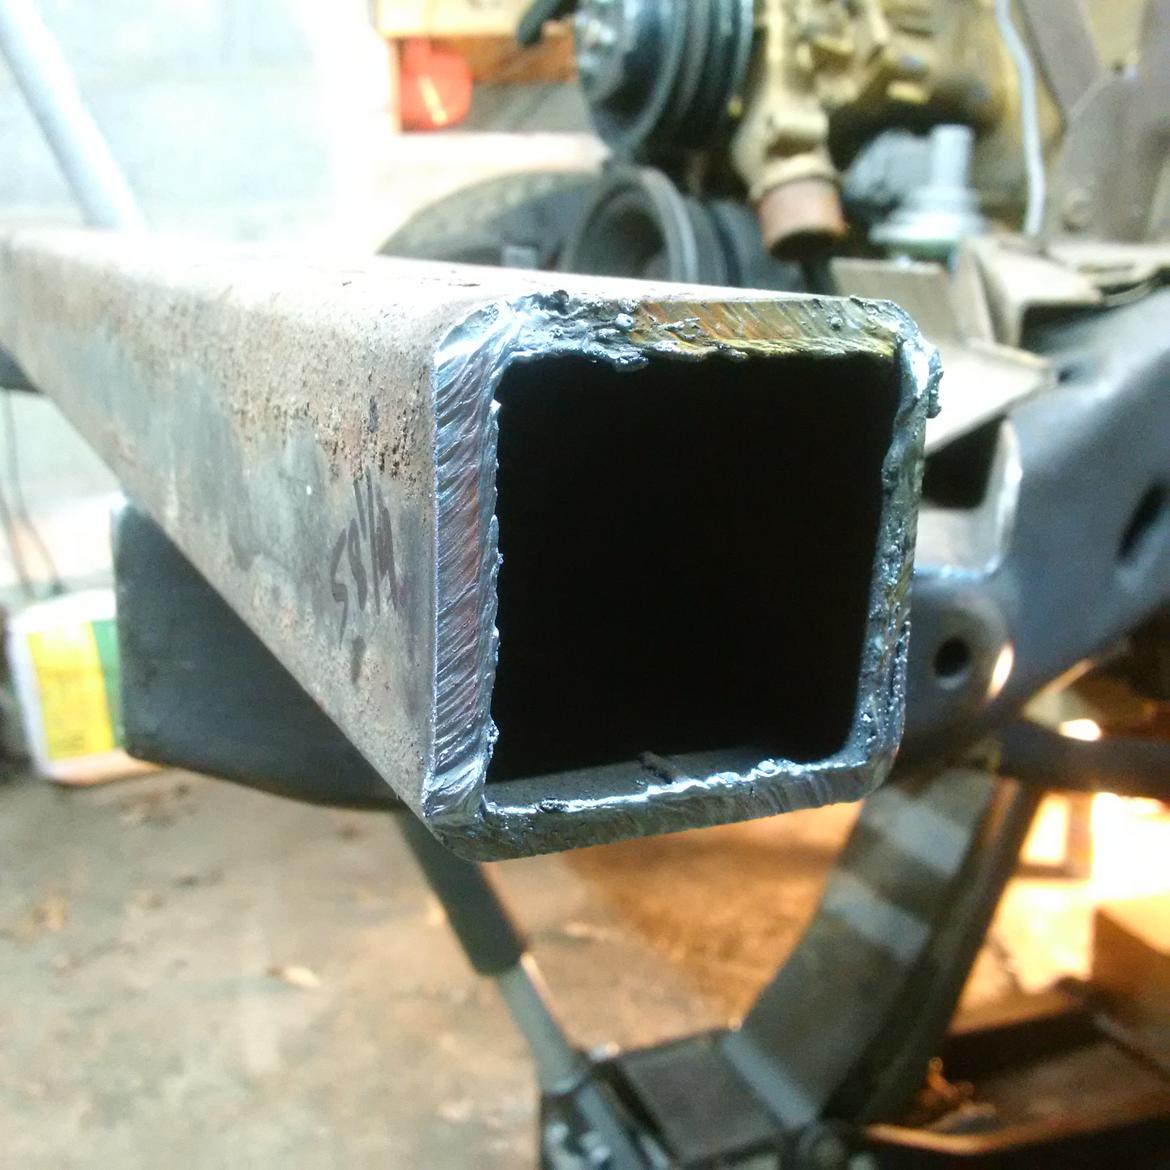
 

Or....whatever steel box channel I happened to have laying around that was long enough to span the left and right frame rail separation.  In case you were wondering, that's from the tongue of a decrepit trailer I cut up for scrap a few years ago.  

A straightedge long enough to span the width of the giant ridiculous car is a nice tool to have on hand.
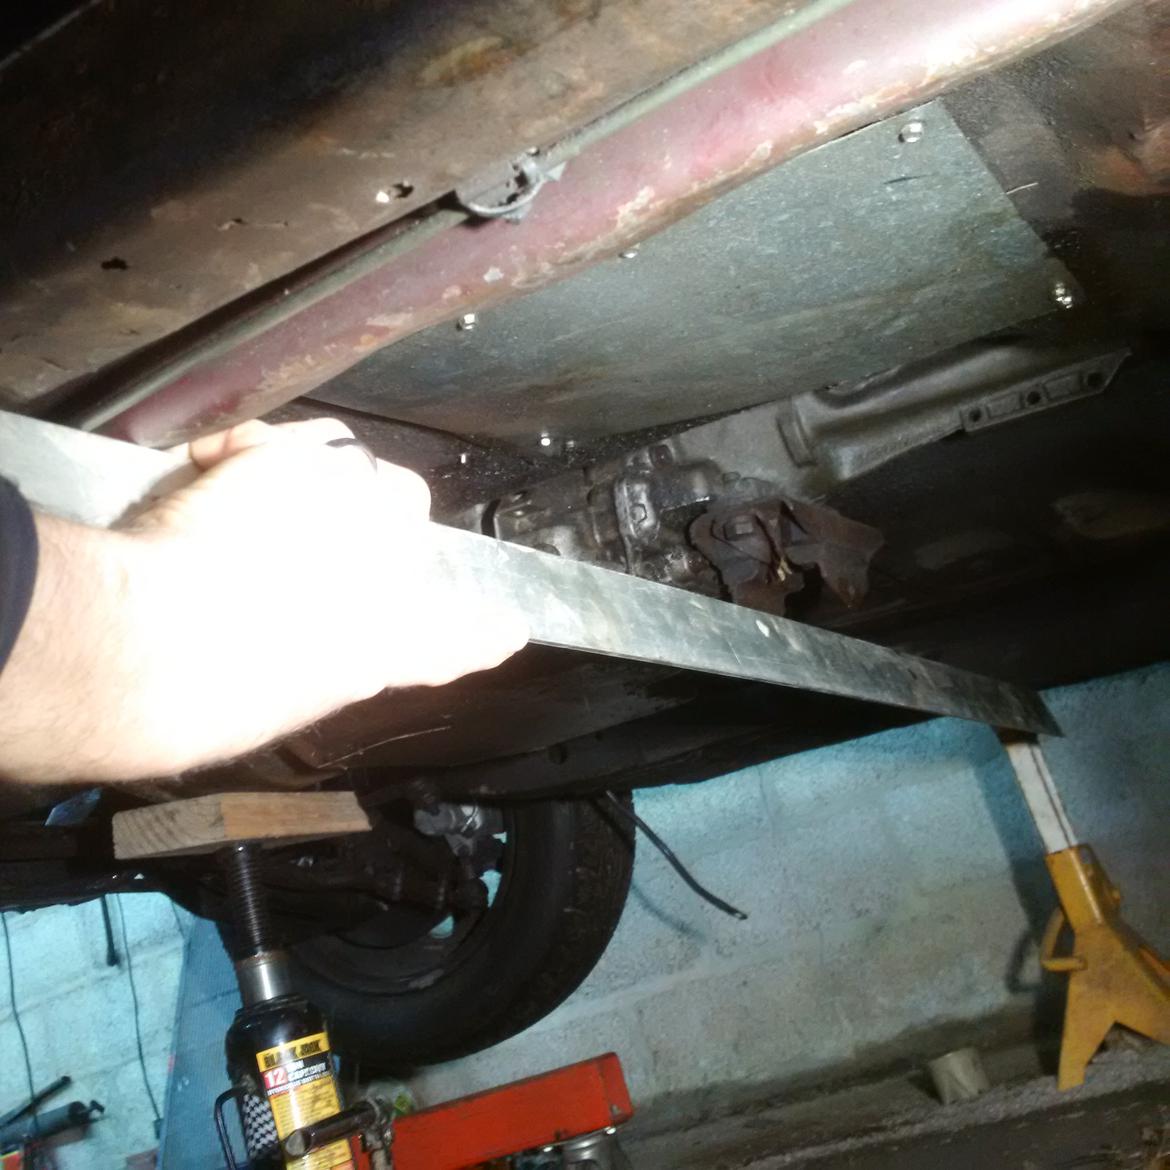
More hieroglyphics.  
The frame rails of the 1975 LTD are extremely beefy.  Actually, the whole car feels very solid.  As one team mate said, it's like they took a full perimeter frame, and then designed a unibody car, and then combined the two.  It's like a freaking tank.  The frame rails run right inside the rocker panels.  I'm not entirely unconvinced that this setup provides more side impact protection than the stoutest modern SUV.  Regardless, the frame rails made for perfect locations to cut out and weld in some mounting pads.
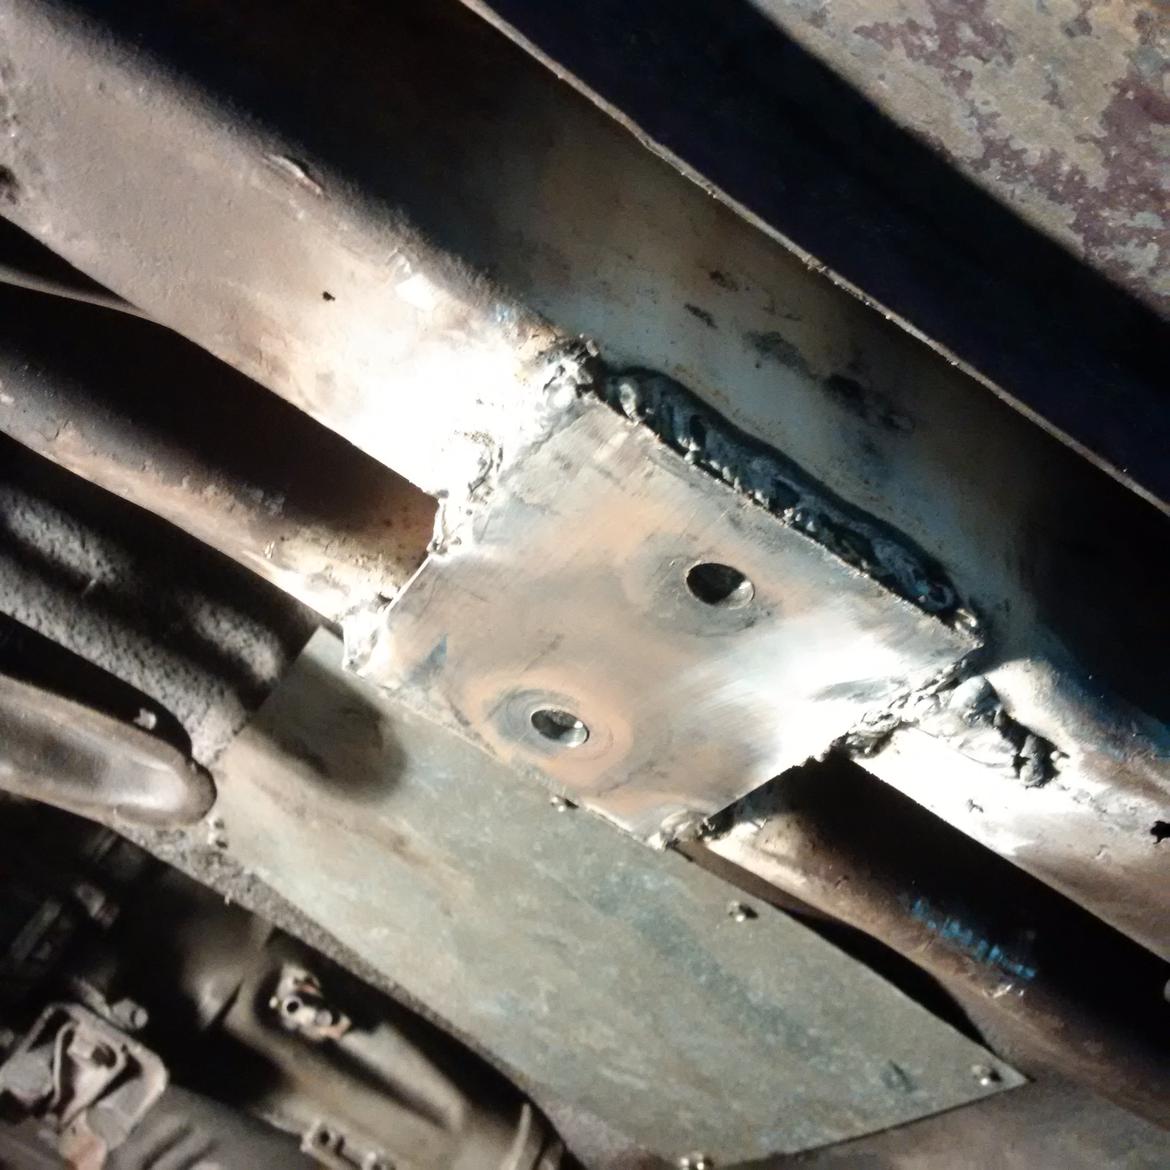
Wish I had some more pictures here to fully show what all is going on.  These plates were cut out of 1/4" steel, drilled and mounting nuts welded onto the back.  I then plasma'd holes in frame rails for the mounting nuts to go up inside, so the plate mounts just 1/4" down from the frame.  Then the whole plate was perimeter welded into place.  

Oh, and before welding the plates to the frame, I match-drilled the holes in the plates to that hulking chunk of box channel that's meant to span from one frame rail to the other.
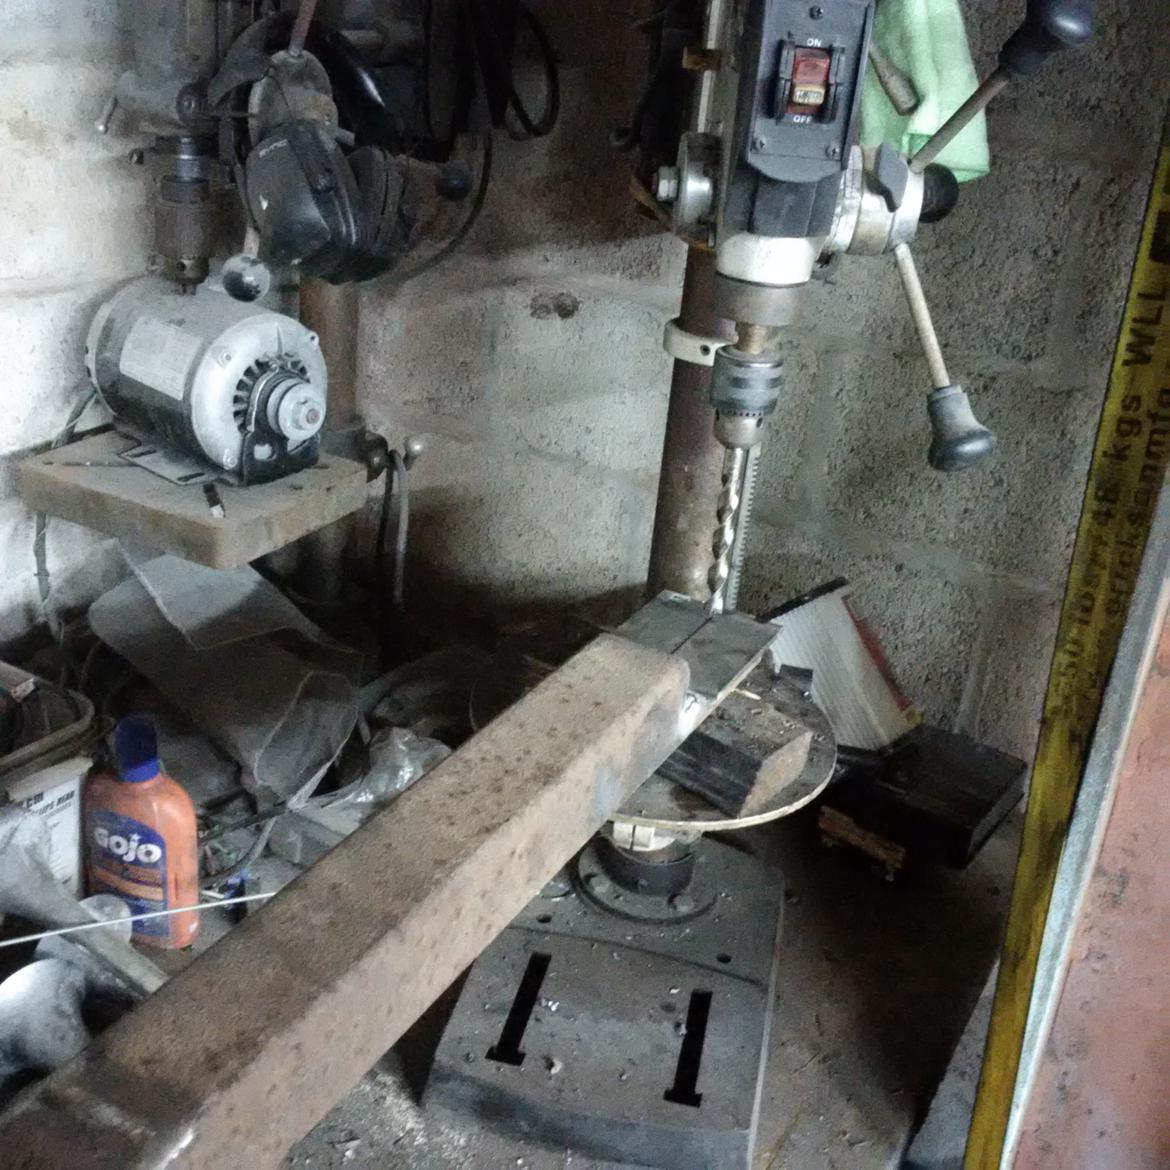
AND- notched the box channel at each end to provide the correct mounting height for the back of the transmission mount.  

There was just so much geometry going on here...and calculations...and measurements.  It was sort of like putting together a giant erector set, only the pieces are all custom-made, and everything has to be cut apart and put together with fire.  And there's no instructions.  

Both frame rail pads in place, it was time to test fit the transmission crossmember. 
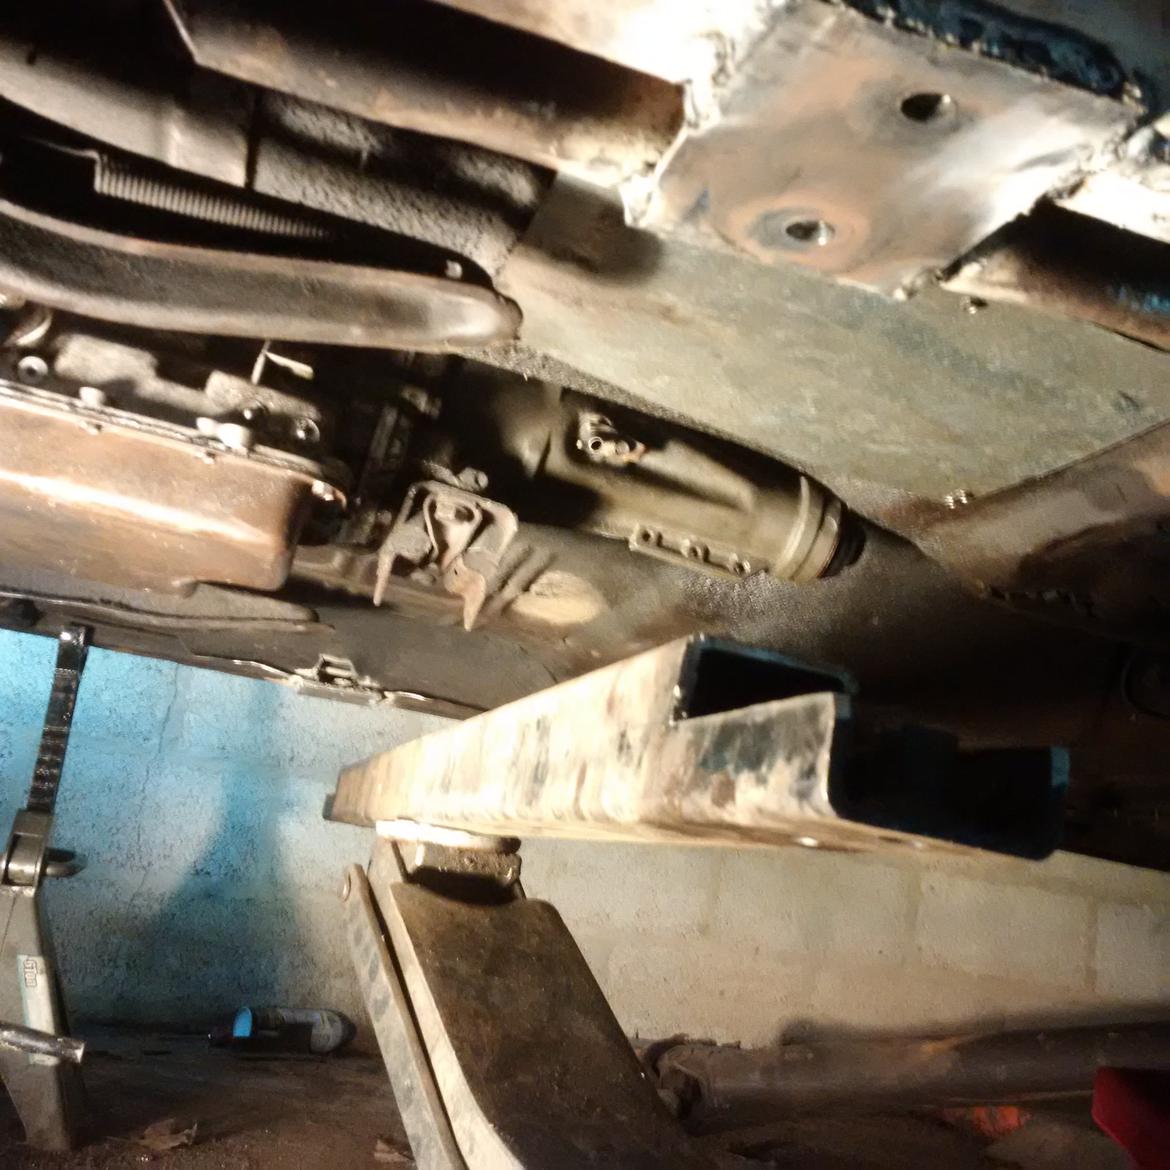
(This is the part where we cut to a commercial.  Everyone, hold your breath!)
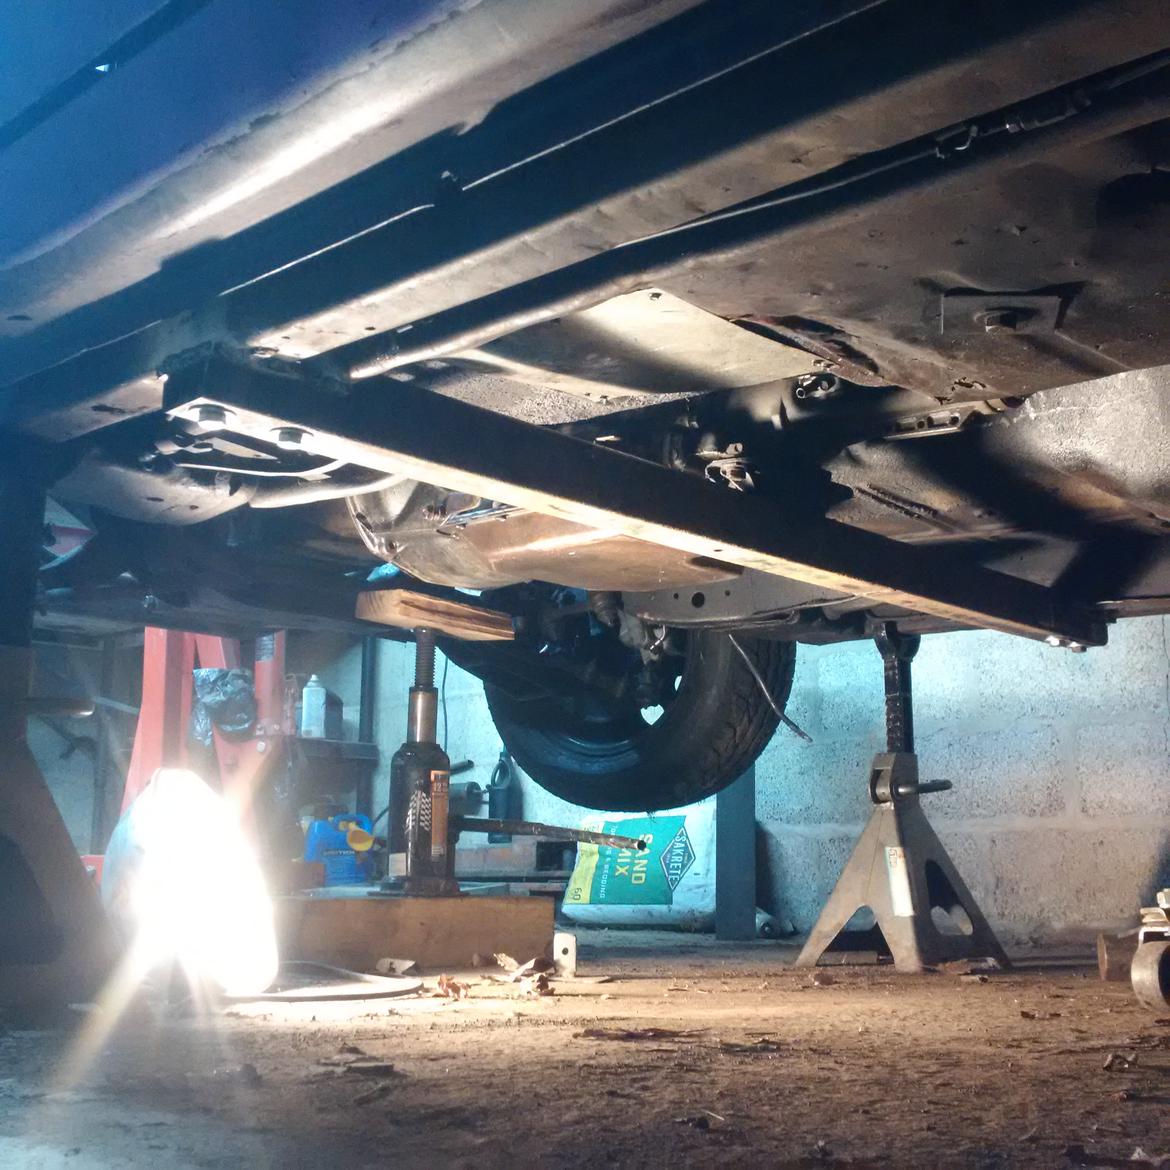
It's in!  And hey, look at that- the box channel is exactly the same width as the clearance inside the transmission mount bracket.  It's like..someone actually thought of that beforehand!

The bolts all go in, and everything.  Wow.  This sure felt good.
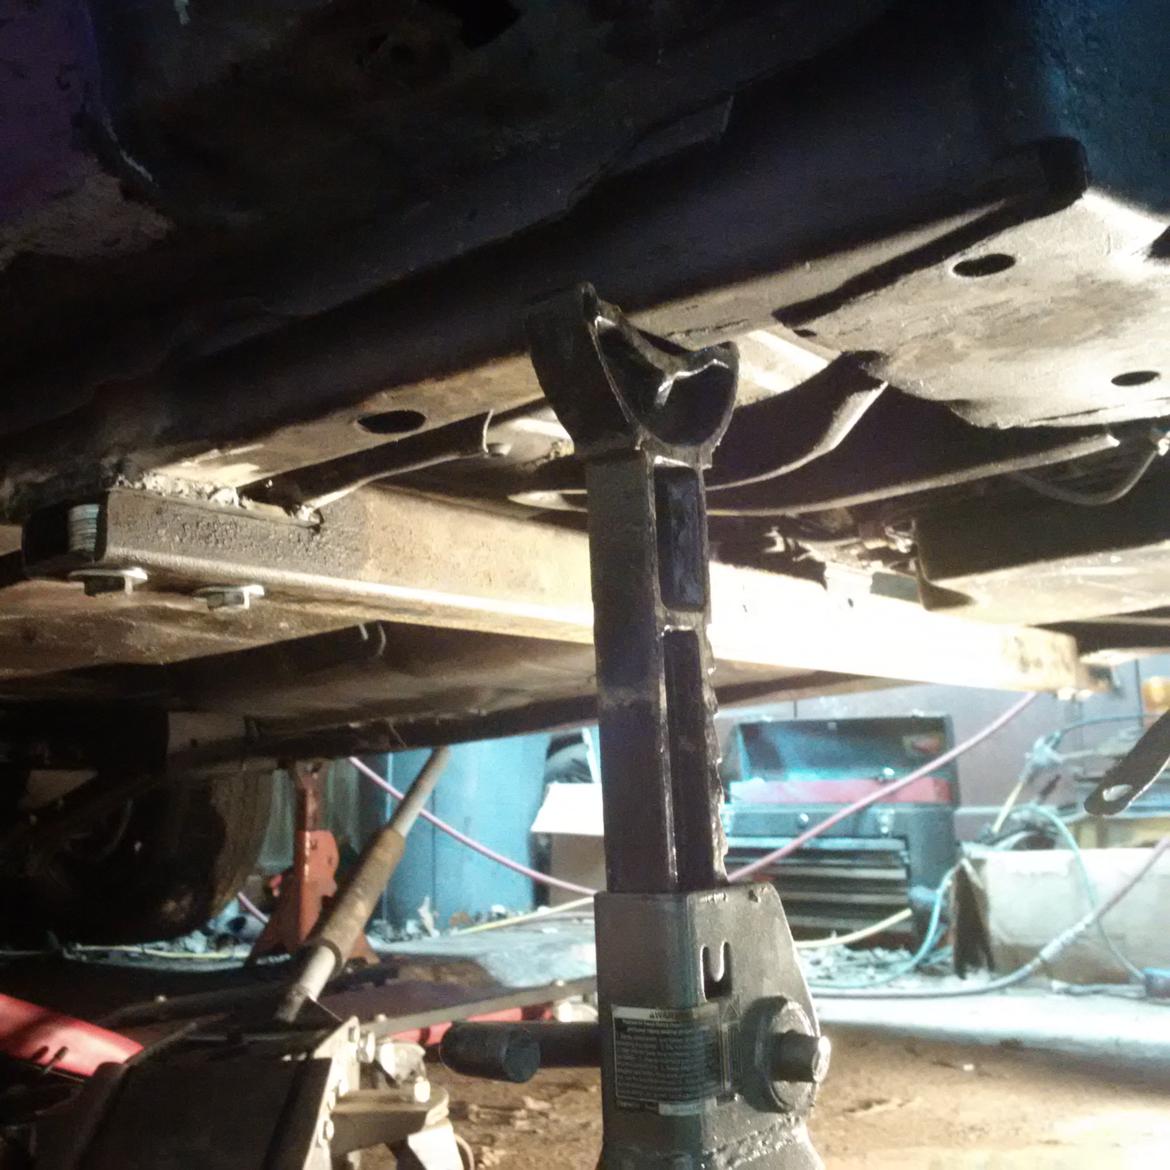
You can sort-of see inside the crossmember there, at the end, there's a stack of washers for each bolt to go through (4 bolts total, 2 per side).  That's so the open section of channel there doesn't bend is as the bolts tighten.  The stacks of washers were welded together to make spacers.  Not particularly elegant, but it works. I wasn't super happy about the whole transmission crossmember jutting down an inch or so from the bottom of the frame....but berk it, it's a race car.  It'll be _fiiine_.  

And now we can cross "mount transmission mount" off the list. 

volvoclearinghouse
volvoclearinghouse UberDork
11/23/18 9:20 p.m.

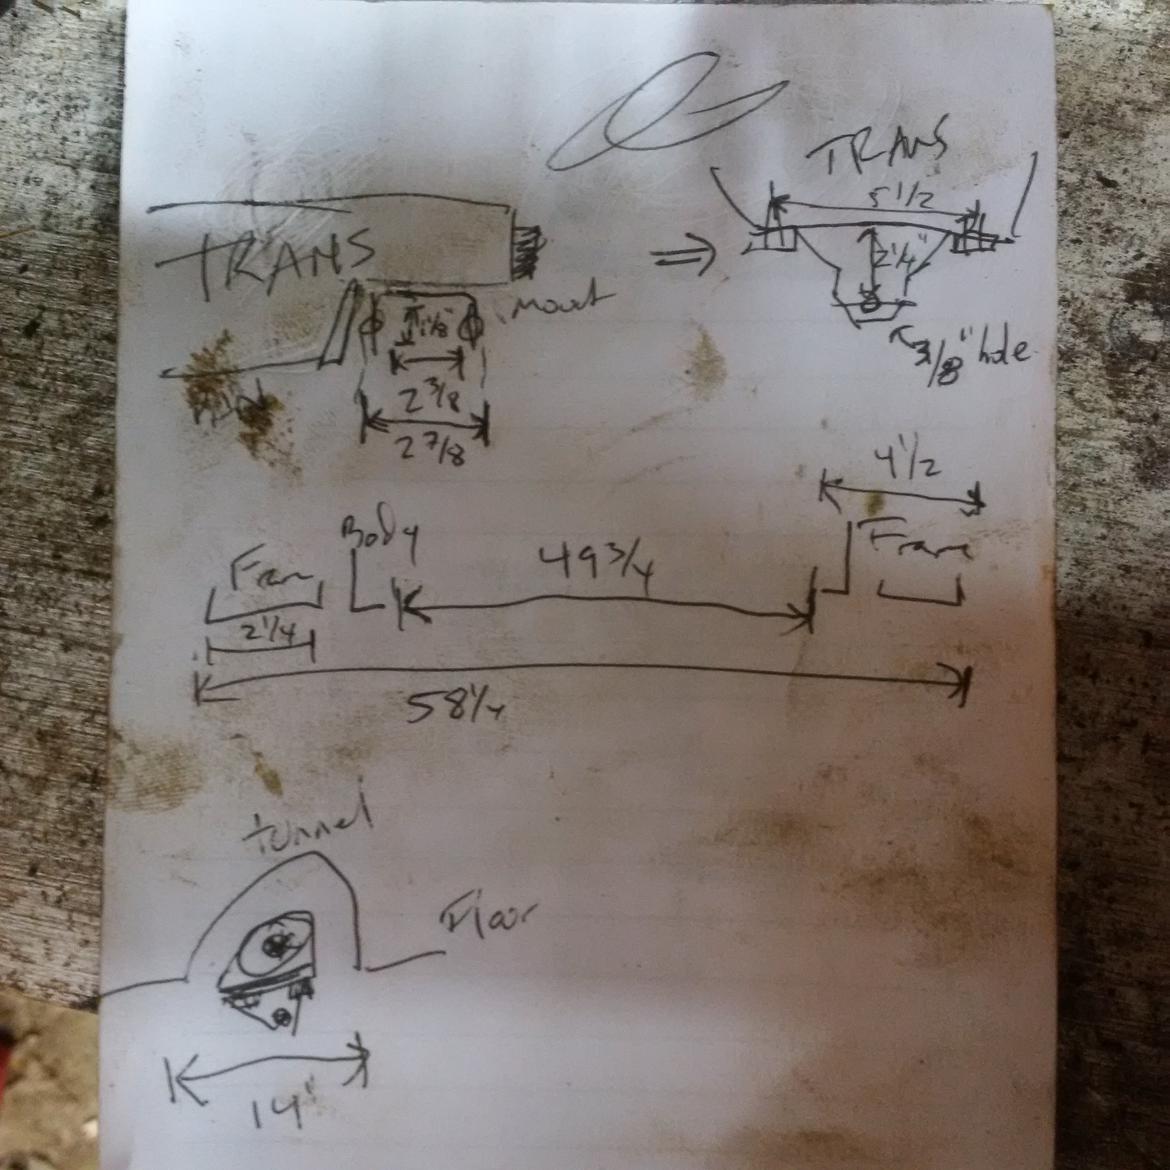
Now that the engine and transmission were located precisely where they were to remain, the driveshaft could be shortened to the correct length.  This was a pretty exciting event for me, as I'd never had my shaft shortened before.  I drew this sketch to commemorate  the occasion, and to give to the man who'd be shortening my shaft for me as instruction.

I stuck my shaft into the back of my Volvo 240 wagon, and hauled it off to the shop.

While I was waiting for my shaft to get shortened and balanced (and, no, I'm never going to get tired of making vaguely sexual suggestions when referring to the driveshaft), I needed something to divert my attention from the concern that I'd mismeasured something and the shaft was going to be all wrong.  The radiator needed something to support it, other than a hacked-up and modified frame crossmember.  And I had a hankerin' to do some welding.

Wanting to make this all somewhat serviceable, for when the radiator inevitably needs to come out again, I fabbed up mounting tabs (you can see one in the picture) so that the side supports could be held in place with bolted joints.  

The radiator fan cluster pictured has an interesting, GRM- related history.  A few years back (and I just did a search and cannot locate the forum thread of it, dangit!) someone posted here on GRM that they had a whole berk-ton of stuff at their Aunt's (I may be misremembering; it could have been their mother or something) house and they needed it vanished.  I'm local, had an F350, and love free stuff, so it was rather serendipitous.  I remember the stipulation being that I had to take _everything_.  Besides a very experienced engine hoist, a bunch of interesting scrap metal, an aluminum fuel tank that must have been 5 feet long, and several buckets of odd, fun parts, there were also 6 or 7 electric fans of various sizes.  I tested them all; all worked, and they got lined up nicely on a shelf in one of my hoarding-enabling buildings.  

Yep.  That's oneadem fans.  It has a Nissan label on it; I'm guessing it may have been for a Maxima?  Anyway, it was very nearly a dead-on-balls accurate fit for the Summit universal aluminum radiator we run on the LTD.  

The radiator is getting more secure... (the intimate affirmation talks helped)

And then I got the call...my shaft was ready.


buzzboy
buzzboy Reader
11/23/18 11:51 p.m.

Something looks different, but I can't figure out exactly what

Sorry to clutter your thread, just found this pic from Fall 2012, the first race I attended.

wraith
wraith New Reader
11/24/18 7:32 a.m.

Can't wait to see the ending of this one seems like a pretty ambitious project.

volvoclearinghouse
volvoclearinghouse UberDork
11/24/18 1:33 p.m.

In reply to buzzboy :

I love seeing old pictures of our racing adventures.  Thanks!  I was on youtube a few days ago and happened across the awards ceremony from the 2008 CMP when we won our first IOE trophy, with that Volvo Amazon we used to race.

Back to work.

Shaft in hand, I rolled under the Plymford and slid the splined end of the shortened and balanced driveshaft into the end of the C6 transmission (after installing a new output shaft seal, of course).

Then I fitted the bearings into the U-joint cups int he Ford 9" out back.

And measured the free play at the end of the transmission.  Success!

With 'driveshaft' crossed off the TO DO list, I returned to welding more bed frame around the radiator.

This all clamps down pretty snugly around the radiator, and those angled braces make it nice and sturdy.  

Now, a few years back, we achieved some amount of notoriety and infamy by loading (by most counts) 44 people onto the LTD and cruising around the paddock at the race Saturday night.  After doing this for a couple of races (the next time we had over 50 people atop the car!) the event organizers got wind of our shenanigans and decided to put a stop to it; hence the "No Stuntin' or 'Splodin'" rule came into effect.  While this ended that fun (but oh, the memories!) the exhaust of the LTD still bore the many scrapes and dents and hastily-welded repairs borne of dragging the undercarriage across the asphalt with 10,000 pounds of humanity piled on top.  Moving the engine back in the car meant the exhaust would have to be modified anyway, so this was a good time to just scrap it all and start from new.  

One issue arose, though- the driver's side exhaust dump from the manifold was now _right next to_ the steering back.  I think there might have been 1/8" of clearance.  I was pretty sure this was not ideal, so a solution was needed.  Headers were too much money and custom headers were too much work (at this point it was June already- recall the race is in September!)

As is often the case, surfing eBay found the solution: Lincolns from the early 70's used a driver's side manifold that dumped further aft than the 80's truck manifolds currently on the 460.  A press of the Buy-it-Now button and 5 days later, a freshly sandblasted exhaust manifold was waiting on my doorstep.

The silver manifold contrast nicely with the gold paint on the engine.


And, better yet, the exhaust proximity to the steering box has been decreased.


With things coming together mechanically, I was ready to start tossing some sheetmetal on this pig and getting creative.  

volvoclearinghouse
volvoclearinghouse UberDork
11/25/18 8:15 p.m.

It was really cool, the way that rebodying the LTD with a '51 Plymouth also forced me into a whole slew of "firsts" that also had to be done- relocating a whole drivetrain, for example, and all that entailed.  The pictures and words I've strung together don't really do it justice.  Not only was it a lot of work, but it was a lot of fun.  I enjoy working on cars; doing it in a way that was creative and different and "problem solving" really awoke my inner engineer and my inner artist.  

Now came the big test- how well could I execute on the aesthetic part of this build?  With the drivetrain locked down, I started hanging sheetmetal off the Plymford.

You can see in the upper right how I notched the firewall of the LTD so that the Plymouth hood would come down and sit level with the bottom of the windshield.  I'd made the decision to retain as much of the LTD's firewall and floorpan and possible, given that the steering column, pedal assembly, roll cage, and sundry related bits were all pretty much "good to go" in terms of LeMons racing.  

A problem was slowly manifesting itself, though...

The LTD was FAR wider than the Plymouth.  I think my measurements showed it was dang near a FOOT wider.  

The Plymouth had those cool, wide 50's style fenders that bulge outward over the wheels, but it was becoming plain that that wouldn't be enough.  Bash on, regardless!

The hood fit nicely over the relocated radiator.

And the fenders lined up well, just as they had when I first draped the entire front clip of the Plymouth over the LTD way back about a year prior to this point.  That front clip was so rusty and terrible that I'd decided to just disassemble the whole business and recreate it from scratch over the LTD.  

Using vice grips and whatever props I could find around the garage, slowly the front end started to come together.

Once again, this was an extremely motivating experience.  In my mind's eye, the shovel and metal bar were gone, and the whole thing was one.  It was all I could do to click off the lights and radio that night and go to bed.  This was going to be great.  

volvoclearinghouse
volvoclearinghouse UberDork
11/25/18 8:26 p.m.
Patrick said:

Are you going to do burnouts in front of Justin’s muffler shop?

This still makes me chuckle.

The Plymford will scare the pants of off Justin.  

mazdeuce - Seth
mazdeuce - Seth Mod Squad
11/25/18 8:35 p.m.

I love that "so it won't be as ugly" is solid justification for hundreds of man hours of work. This is fun. 

volvoclearinghouse
volvoclearinghouse UberDork
11/26/18 9:57 a.m.

In reply to mazdeuce - Seth :

You're married too, aren't you?  wink

Adrian_Thompson
Adrian_Thompson MegaDork
11/26/18 10:18 a.m.

Even working to the aesthetic standards of Chump racing, this thread again shows I don't have the skill, time or motivation to do things like this.  May the flying Spaghetti Monster bless your offspring for a thousand generations for sharing this unholy creation with us.  

RedGT
RedGT Dork
11/26/18 10:47 a.m.
volvoclearinghouse said:

The radiator fan cluster pictured has an interesting, GRM- related history.  A few years back (and I just did a search and cannot locate the forum thread of it, dangit!) someone posted here on GRM that they had a whole berk-ton of stuff at their Aunt's (I may be misremembering; it could have been their mother or something) house and they needed it vanished.  I'm local, had an F350, and love free stuff, so it was rather serendipitous.  I remember the stipulation being that I had to take _everything_.  Besides a very experienced engine hoist, a bunch of interesting scrap metal, an aluminum fuel tank that must have been 5 feet long, and several buckets of odd, fun parts, there were also 6 or 7 electric fans of various sizes.  I tested them all; all worked, and they got lined up nicely on a shelf in one of my hoarding-enabling buildings.  

Yep.  That's oneadem fans.  It has a Nissan label on it; I'm guessing it may have been for a Maxima?  Anyway, it was very nearly a dead-on-balls accurate fit for the Summit universal aluminum radiator we run on the LTD.  

Sweet.  Glad to see the stuff getting used.  It was my mom's house being sold and that was the rest of my late father's 60 years of Ford stuff that my brother and I had no use for.  It was a shockingly small portion of what we started with, after splitting it between us and selling/giving away a LOT before that point.  At the end I couldn't get there in the necessary timeframe and we didn't want to send a random scrapper to meet mom.  So thanks for making it all magically go away!

No clue what the fan was off of, it was a byproduct of junkyard hunting for electric fans approximately sized to Ford radiators.  So there ya go.

Here's the thread.  Photobucket killed the pics though.  https://grassrootsmotorsports.com/forum/201x-classifieds/ford-v8-stuff-pretty-much-free/108171/page1/

volvoclearinghouse
volvoclearinghouse UberDork
11/26/18 11:25 a.m.

In reply to RedGT :

Thanks again for the stuff!  The engine hoist, engine, and trannies all found good homes, and the raw materials found there way into my supply stream for projects.  A few of the fans look like Taurus fans, which are supposed to be pretty butch.  The Summit aluminum radiator in the Plymford is approximately te size of the old LTD radiator, so I guess it makes sense (in a slightly convoluted way) that the Nissan fan fits it.  ;-)

I still owe you a beer or six, if you're ever in the area.  You can admire the implementation of the fans you donated, too.  

volvoclearinghouse
volvoclearinghouse UberDork
11/26/18 11:27 a.m.
Adrian_Thompson said:

Even working to the aesthetic standards of Chump racing, this thread again shows I don't have the skill, time or motivation to do things like this.  May the flying Spaghetti Monster bless your offspring for a thousand generations for sharing this unholy creation with us.  

This is for LeMons racing.  Their standards clearly are much, much lower.  

volvoclearinghouse
volvoclearinghouse UberDork
11/26/18 2:59 p.m.

Having never done a body swap on a car before, I was a little unsure where to begin.  Part of the benefit of only working an hour or two per day on the project means that I can't get too far along in any one night, so if I decide to back track and do it another way, not a whole lot of work has been lost.  And, part of the benefit of having lots of different parts of the project to work on (exhaust, radiator, body) is that I can pause on one part to think it over and make progress on something else I'm more sure about.  

After a lot of thinking it over, it seemed like the cowl was the natural place to begin the body swap in earnest.  The cowl would locate the windshield base, which was sort-of critical to the rest of the driver-related geometry.  It would also located the hood and, by extension, the front fenders.  Yes, the cowl seemed to tie it all together.  And since the cowl provided a nice place for the trailing edge of the hood to rest upon, and line up the fenders with, the idea came to me, why not just cut the cowl off the Plymouth and stick it onto the LTD's firewall, like a cap?

First, the roof had to be cut off.  

A pillars were sawed off at the base, and the roof supported by ratchet straps from the garage ceiling beam.  


The base of the A pillar, driver's side.


Next, the B pillar were cut off.

Cutting the C pillar off required a lot of effort, and, as it turned out, noise.  The first night I went to do it, I received an angry text message from Mrs. VCH to "stop doing whatever you're doing", as it was keeping up the baby.  It didn't help that the C pillars were outside the garage, either.  So I had to wait until a convenient weekend day to finish the job.  

Videotaped for posterity. Or insurance purposes.


Like the crazy feller in the video says, now we have a convertible!

Mrs VCH, being into this "natural playground" trend (you know, where the kids crawl around on logs and play with worms and dirt and splash in creeks and walk on rocks and stuff) should have been pleased that our children had a new playground.

My son, of course, had to show off in front of his sister.

To cut the cowl out of the Plymouth, the roof had to come off of it, too.  Much of the work of the removal of the Plymouth's roof had already been taken care of...by nature.  

The back doors...well, they kinda just fell off.  

This was like 25 minutes worth of work.  I badmouth rust a lot, but here it was pretty helpful.  Oxide-assisted component disassembly.  

Amazingly, and conveniently, the roofs (rooves?) of the 1975 LTD and the 1951 Plymouth were practically identical in length.

Now, to get that next critical piece of the puzzle:  The Cowl.  


Patrick
Patrick MegaDork
11/26/18 4:44 p.m.

Your line of thinking about the cowl is exactly how I did Darth Nader.  Base of windshield in same location.  With the exception of me leaving the new body intact, i trimmed the cowl of donor until the new body slid over it

volvoclearinghouse
volvoclearinghouse UberDork
11/26/18 9:23 p.m.

In reply to Patrick :

Glad there's at least one other geek out there who thinks the same way I do.  That proves we're not insane.  Right?

To extract the cowl from the '51 Plymouth, I hauled the plasma and compressed air over to where the carcass was laying next to the shed.  Fun discovery: plasma cutters set 60 year old carpet and sound deadener on fire with remarkable aplomb.

The smoke drifted inside the house too.  "What are you burning out there??"

I doused it with water...and then started cutting again.  And it caught on fire.  Again.

But, eventually, the cowl was liberated.  And after some trimming of the LTD's firewall...

It fit!  And the hood mated up!

After a fashion, anyway.  Since the Plymouth cowl had an integrated defroster (all those little slits you can see that go along the base of the windshield) I decided to seal off the defroster ductwork in the cowl 9which was all eaten up with rust) in the event that we ever got ambitious and hooked a fan and heater core up to it.  

Of course, I did it the most lemonny way possible: scraps of old Rubbermaid containers, Liquid Nails, and black undercoating.

We have achieved Full Cowl.

To be super precise about it all, I leveled up the frame of the Plymford on the jackstands.

So that the cowl could then be level, too.

Much trimming and fitting and trimming and fitting and trimming and fitting later, and it's nearly ready to be welded onto the firewall.  

With the cowl in place, the rest of the body bits should really just fall right into place.  Totally.  Without any unforseen problems.  

Absolutely.  

BirgerBuilder
BirgerBuilder Reader
11/27/18 2:13 p.m.

Keep up this great work!

I'm off to the doctors though, looking at several of those pictures gave me tetanus. 

Robbie
Robbie UltimaDork
11/27/18 2:16 p.m.

Is that an Amazon supercharger?

volvoclearinghouse
volvoclearinghouse UberDork
11/27/18 3:12 p.m.
Robbie said:

Is that an Amazon supercharger?

Yes.  I asked Alexa for more power.

BirgerBuilder said:

Keep up this great work!

I'm off to the doctors though, looking at several of those pictures gave me tetanus. 

I had to get a booster a few years back after an unfortunate incident wth a sawzall...


volvoclearinghouse
volvoclearinghouse UberDork
11/27/18 3:32 p.m.

Sitting in the driver's seat and looking out over that Plymouth hood was even better than looking at the new stylings of the car from the outside.  I couldn't wait to be barreling down the straightaways at CMP at a hundred and ten per while staring down that gorgeous hood.  

Now, which way to go: forward or backwards?  I picked backwards.

...and put the Plymouth roof on top of the LTD.  Seems to fit pretty well from the front!  Out back was, well...

another story.  Once again, the width of the LTD compared to the Plymouth was manifesting itself in unpleasant ways.  

And despite the roofs of the two cars being nearly identical in length, when it came time to insert the Plymouth roof where the LTD one had been, somehow space became warped and the roof ended up more than a few inches short.

The next step, which should be obvious was to remove the fuel cell.

Don't worry, there is a plan here.  Sometimes, things just got worked on slightly out of sequence.  I wouldn't want to clean any of this up and make it seem like I was organized or thorough or had some awesome, well-planned plan.  Because clearly, I did not.  The fuel cell did need to come out though.  Not only was some welding and modification going to have to take place in the trunkal region, but there was significant and somewhat scary corrosion under the fuel cell that really ought to be dealt with.  

To get you all mixed up now....back to the roof!  

The angle of the windshield of the '51 Plymouth is, in case you hadn't noticed, much more upright than that of the '75 LTD.  The roll cage had been fabricated to match the slope of the LTD's windshield; as a result it looked pretty ridiculous with the upright Plymouth A pillars in place.  Rather than modify the cage, why not lay the windshield of the Plymouth back?  

Before:

I then pie cut at the top and bottom of the A pillar (which I'd already welded in to the cowl, which was tack-welded into place on the firewall) and supporting the back of the roof in the fashion of neon green ratchet straps from the ceiling

I angled the A-pillar back using the time-honored tradition of sitting my 185 pound ass on the roof.  And ended up with:

It's streamlined!  It's aerodynamic!  It's futuristic!  And it (sort of) matches the angle of the roll cage.  It also effectively 'chopped' the top, so that I had to cut about 3" off of the bottom of the C pillar to keep the roof level.  As an added bonus, it moved the roof back a bit, so that it mated up with the package shelf of the LTD more betterer.

We'll see some more pictures of this later.  

volvoclearinghouse
volvoclearinghouse UberDork
11/27/18 9:26 p.m.

The weekend after my birthday (this would be mid July now) the rest of the team came over for a weekend work party.  Our team is sort of scattered all down the east cost, from Maryland to South Carolina.  it was decided to try to hammer out a few of the other things the car was going to need.  Like, the wiring.

From the log book:

"I tossed something out of whack in my back a few days ago and, simultaneously, came down with a cold.  So, sneezing and coughing, which made my back hurt more.  Fun times.  I have been able to get out in the garage a little and pick away at stuff that doesn't require much contortioning.  I got the cowl all patched up so the defroster will work, and it fits over the LTD cowl pretty close to where it needs to.  I've been keeping my trusty 8' Stanley tape measure handy and checking measurements from centerline, sill height, etc to get it where it needs to be.  I even put a level on the car and set the jack stands so the LTD is more or less plumb and cross-level.  Cowl fits up, hood lines up, fenders are dang close.  Pretty soon it'll be time to put the Plymouth roof on!  "

Anyway, I guess I got all that done by mid July and my back felt better (thanks, chiropractor!).  On to the work party!

The battery box got remounted and we fabricated an electrical mounting plate (out of what used to be a stove) to put the spark control Duraspark module, some starter solenoids, and whatever fuses and terminal boards and relays we'd need.  Oh, and the voltage regulator.

I'd sanded and painted up the fuel cell to make it look cosmetically less sketchy (we had no idea how old it was; we'd bought it second hand in a hurry to replace the badly corroded stock fuel tank during the first race with the LTD) and we made a list of stuff still needing done on Plymford.

The stuff we got done (from my log book):

  • Mounting and Wiring up the electric fan
  • Installing alternator
  • Wiring alternator
  • Wiring ignition
  • Exhaust

And making toasty marshmallows for several feral children, 2 of which were half mine.

Notes on the exhaust:

"Exhaust stuff ordered.  $203 worth of pipes, mufflers, bends, hangers, and connectors.  Mufflers are "FULL BOAR SINGLE CHAMBER RACE MUFFLERS" so I'm sure they will be great.  They were also $25 each, and small. 

And they may or may not contain actual boars. "

I know I'm weird, but I actually kindof enjoy exhaust work.  It's usually quiet under the car, and I get to cut and weld things together and it doesn't even have to look particularly good.

"Full Boar Race Mufflers"

The eagle-eyed among you will note the exhausts turn up into the rear seat floor area.  There is a plan for finishing this...that needs to wait until more Plymfording has taken place.  So, for now, they end like this, inside the car.  


Gunchsta
Gunchsta HalfDork
11/28/18 7:11 a.m.
volvoclearinghouse said:

"Exhaust stuff ordered.  $203 worth of pipes, mufflers, bends, hangers, and connectors.  Mufflers are "FULL BOAR SINGLE CHAMBER RACE MUFFLERS" so I'm sure they will be great.  They were also $25 each, and small. 

And they may or may not contain actual boars. "

I know I'm weird, but I actually kindof enjoy exhaust work.  It's usually quiet under the car, and I get to cut and weld things together and it doesn't even have to look particularly good.

This last update made me chuckle, especially the full boar mufflers. Which look nearly identical to the Flowmaster 10 series I had some years back.

For what it's worth I too enjoy exhaust work. I think partially due to the fact that as a kid I remember taking my dad's project cars somewhere to pay somebody else do exhaust on them, so being able to do it myself now makes me feel a certain sense of pride & accomplishment.


volvoclearinghouse
volvoclearinghouse UberDork
11/28/18 7:29 a.m.

In reply to Gunchsta :

For the price, and the fact that they were USA made, I really couldn't justify anything else.  They sound great, too.  

I still remember the first exhaust work I ever did- putting a new 3" single exhaust on my 1977 Suburban (first vehicle I ever bought).  Like you, my dad always paid someone to do exhaust work.  I remember that huge 3" pipe sticking down from the truck visibly, so I painted it with black hi-temp BBQ paint.  Which actually held up pretty well.  

The exhaust on the Plymford is 2-1/2 inch each, all the way from the manifolds to the exit.  The pipes that go over the transmission crossmember had to be "ovalized" (read: squished) to fit between the beam and the floor.  I thought about notching the beam, but realized that even squishing the pipe down to 1-1/2" high the cross-sectional area would still be equivalent to like a 2" round pipe.  I made the ovalized straight sections using some chunks of wood and my 10 ton press.  Came out pretty well, actually.  Would do again.  

Gunchsta
Gunchsta HalfDork
11/28/18 8:48 a.m.

In reply to volvoclearinghouse :

That's awesome, our experiences are quite similar - I had 3" single on a small block Chevy as well. I used VHT high temp header paint for mine though. 


Thread related question, and if this will be answered in further updates I don't want to spoil anything, but do you think you lost weight going to the Plymouth Body? Seems like you probably cut a lot of Ford off and presumably didn't re-create all of the structure when putting the Plymouth skin back on. 


1 2 3 4 5

You'll need to log in to post.

Our Preferred Partners
03iNnfR2pvwEqWiqlRr7nxPh2MOZ5GF6ZOjCExBD9It3BOqvWPDf36Fdp3tPKQD2