I don't even need to paint them, I can get them off the shelf in all kinds of colors and even marbled! ![]()
![]()
I don't even need to paint them, I can get them off the shelf in all kinds of colors and even marbled! ![]()
![]()
So that track event at Lausitzring was largely a success for me, with a caveat. Prior to the event the organizer had asked me if I wanted to sign up for the time attack series since it was happening this last weekend at the same track. I declined since I felt the car was not going to be competitive seeing as I had thought I still had a ways to go in the suspension setup, plus I did not have real aero or made any effort to lighten the car.
Well, come to find out that was not the case. Last week I threw the car back on the scales and found out that my rear right of the car was way out since the last corner balance. I rectified that and made some adjustments to the rebound and compression. This 95% solved all of the handling quirkiness that had been plaguing the car. It felt great, it released predictably and other than understeer, made me very happy.
So according to the lap timer in the car I logged a best time of 1:41.77 which would have been enough to place me second. The quickest car in the class ran a ~1:39.5. For reference the quickest car of the weekend was a factory team that brought out a Nissan GTR GT3 car which ran around a 1:25.5 time. Talk about bringing a tactical nuke to a knife fight.
now... the hockey puck.. it lasted the entire weekend! Initially it looked like it was starting to tear around where the nut was but this was solved by putting on a larger diameter washer.
As good as it did, the puck is getting removed. The SPL solid bushings arrived today. That'll do pig...
I'm at the crossroads now. Making up 2 seconds or more is going to be very hard without changing the car. looking at the accelerometer data my best theoretical lap could have been a low 1:40.The cheapest and simple way would be to strip the car to the limits of the class, I think I could shave 200 lbs at least doing that.
The car does understeer pretty good which is expected with the staggered setup so I may be able to sneak some time in with a square setup. I've already been talking to someone for a set of RPF1's at 18x10.5 et +15 so I can run a 295 or 305 square setup. Losing the understeer might get me the time between.
The next option is a major aero revision and more power. If I did this it would be in conjuction with option 1. So I guess full race car? I'm not sure I want to do that. I like driving the car to work on sunny days.
I could do option 2 and add power as well and do it I suppose. That would make me laugh to take a pro street win with a full interior and no aero...
Wow, this is a cool project.
But I'm very curious about the whole "CARB-legal" thing. Because in most states, an emissions inspection for any OBD-II car involves plugging it onto a scanner, and I'm not sure your setup would pass that.
The EROD setup has its own OBD2 port for scanning, that has been signed off by CARB and comes with its own EO #. For me, I put it into the factory location for the OBD2 port on the nissan.
Granted, me Camming the motor is going to nullify the CARB cert if they catch it, so I would likely swap in the original cam if I ever had to get it re-smogged.
How on earth did I miss this thread?! Very nice, did you happen to keep the corner-weights before and after the swap? I've seen a few LS-into-Z33 swaps in the US and I haven't been able to get a good weight distribution comparison.
It cracks me up that the instigator for a full LS3 EROD drivetrain swap was a bad clutch slave cylinder ![]() Makes my engine built slippery-slope look like a molehill
Makes my engine built slippery-slope look like a molehill ![]() And in a NISMO Z to top it off!
And in a NISMO Z to top it off!
Well, to be fair, it was a bunch of things... I had the EROD motor and transmission already sitting in my workshop, I would be lying if I said that it was not a factor in the decision.
With the battery in a box in the hatch, the car sat at a 53.4/46.6 front to rear distribution. I did not check before but nissan claims it as a flat 53/47. After the huge CSF radiator and oil cooler install however it went to 54.1/45.9 front to rear...
I don't have any of the math numbers to back this up, but the majority of the wieght over the nose is MUCH lower that the VQ so the CG is lower. The top of the heads are a full 3 inches lower than the VQ's and the engine is much further back.
Originally I was planning a cam and long tubes but this past weekend I was already bumping very close to the Db limits on my current exhaust so it might just be cam only or maybe cam and LSA blower, I need to look at class rules regarding the blower.
As for Aero, I like the way the nismo looks as is so I would likely need a second kit to make for the track and a second hatch to put a lexan window in with slots to make chassis mounts for the wing.
A BTR cam and associated hardware has been ordered so I'll get a healthy bump from that.
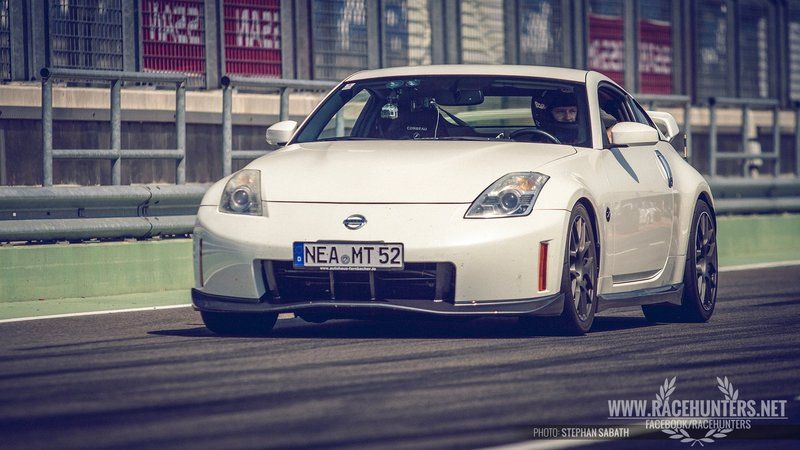
Also I found a decent picture from the last track day so here is a gratuitous shot![]()
I'm in the process of designing a rear wing right now, I want to see if I can still do it since I have not used any of the aerodynamics related stuff since college and I really want to see if I can. I've got the model made in CAD and I'll run it through CFD software hopefully within the week. If the design looks favorable in CFD I'll 3d print a full size wing out for road testing. Following that, I'll make one out of CF.
For the front I'll look into the APR splitter but as far as I know its a flat piece of CF. I would rather make a custom one that I can slope up in the back and other areas while making use of the nismo V3 front design.
So over a beer last night, I started playing around with designing a wing. My line of thinking was to take a SARD wing and copy the profile and maybe make some changes to improve it. Well, long story short, the SARD 3D wing design is horrible for the 350Z. So I set out making one myself. I came up with this...
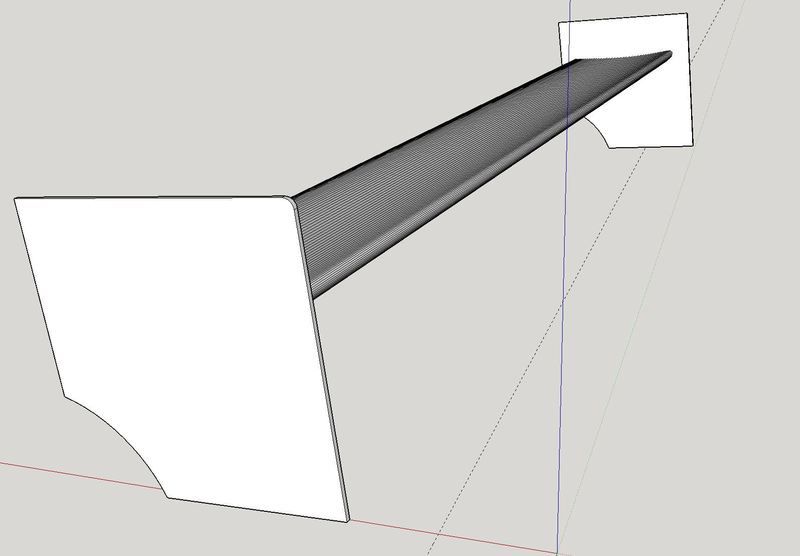
If my math is right, downforce looks to be just above 147 lbs of downforce at 60 mph with around 43 lbs of drag at 8 degrees
The endplates are not finished as they are just a bit too big for what I'm doing.
I ran it through some rudimentary CFD software and came out with...
From that I learned some pretty good stuff about the wing. First off, at 0 degrees the wing creates 117 lbs of downforce with 27lbs of drag. It makes zero downforce at around -2.5 degrees.
Next, I was off by a large margin on downforce at 8 degrees, but in a good way, it made much more downforce and not much more drag.
The airflow starts separating from the bottom the wing past 8 degrees. Any further angle of attack results in rapid increases in drag because of this. I've changed a couple of things from what you see here that improved the numbers.
I'm in the process of cleaning up the model and will start making my full size prototype of the wing.
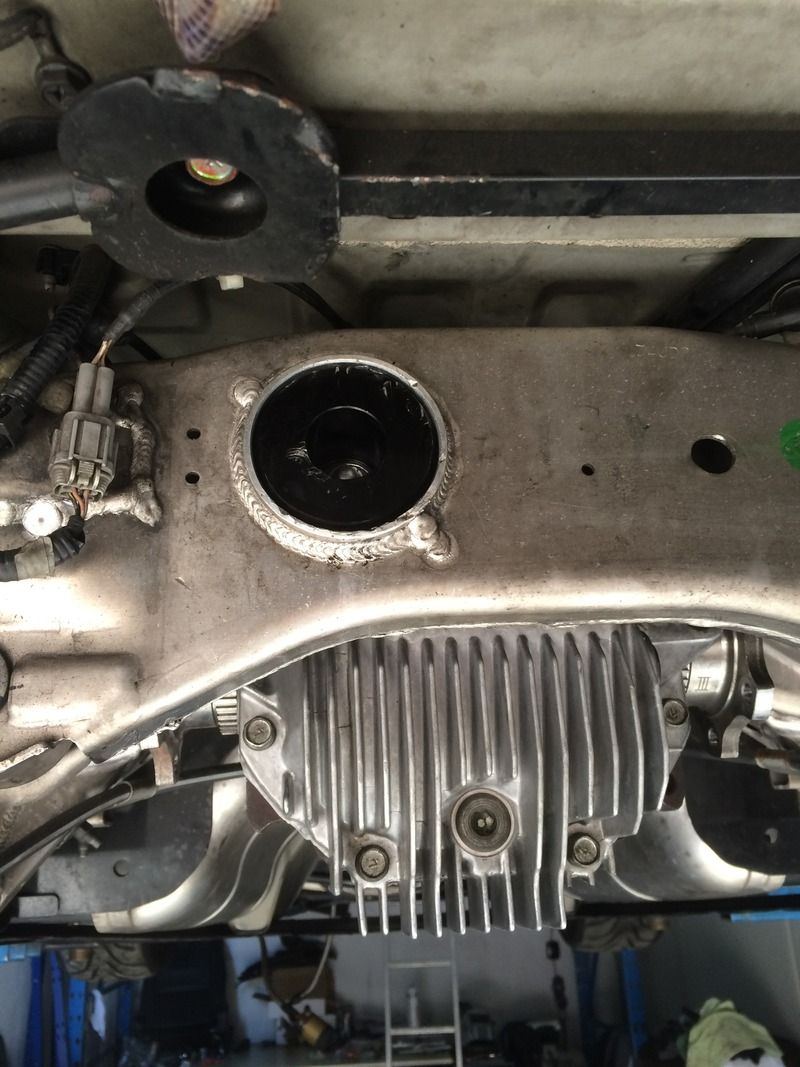
So the track time has finally started wearing on the car a bit which is expected and normal so it was time to do some mid season servicing on the car. First off was getting the differential in order. It was time to replace the hockey puck mod I had to do when the whiteline bushing failed. I had bought a set of SPL solid bushings by they did not arrive in time for the last track event. Well in any case, here is what a hockey puck looks like after 500 miles and 3 hours on a track.
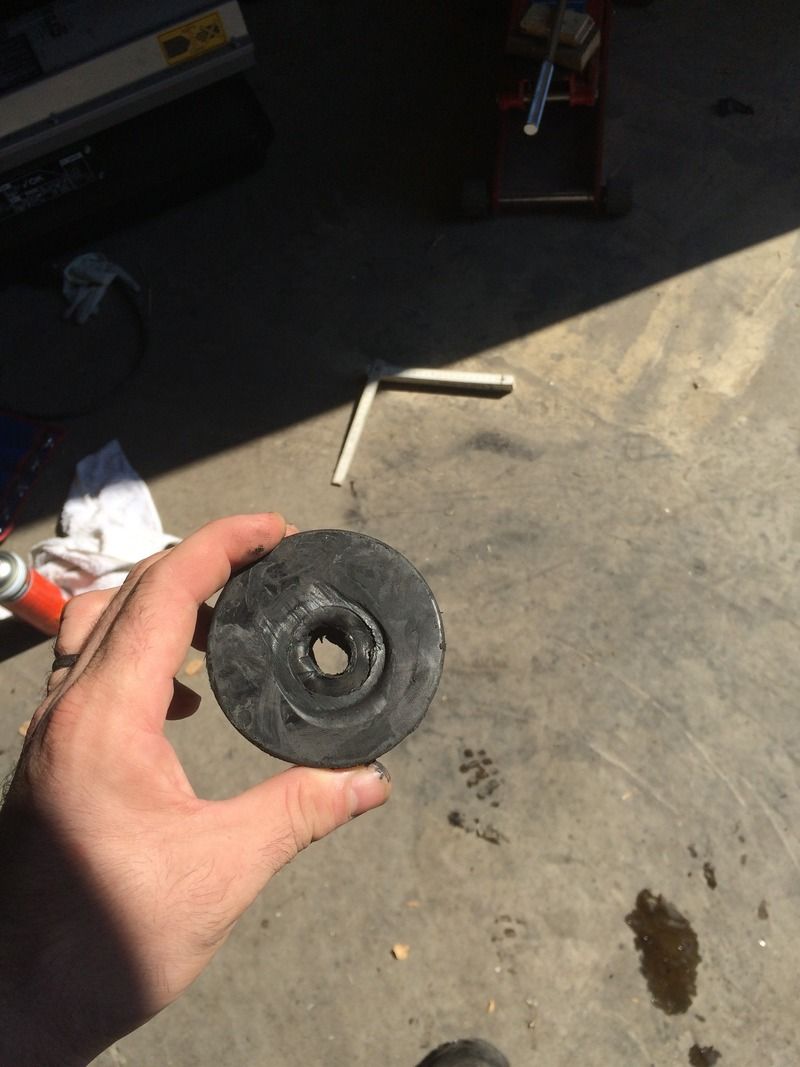 It held up just as good as the whiteline bushing if I'm honest. So lesson learned, fellow swappers, just go solid differential bushings. So SPL it is...
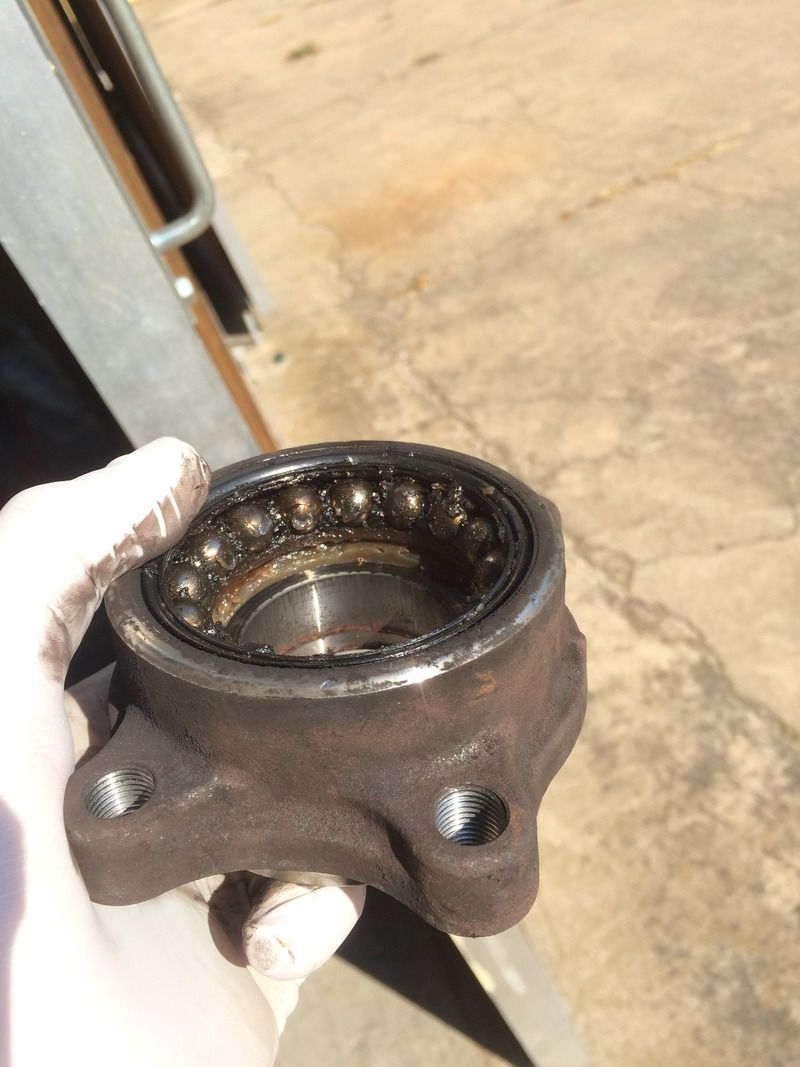
 Next was wheel bearing replacement. I was not getting any play but I was getting a hum that increased intensity with speed. Here it was when I got it off, its kind of hard to see, but the first of the 2 ball bearings was on its way out. Grease at the top was breaking down and the balls had flat spots. If you look at the lower bearing in the set you can see the clean white grease.
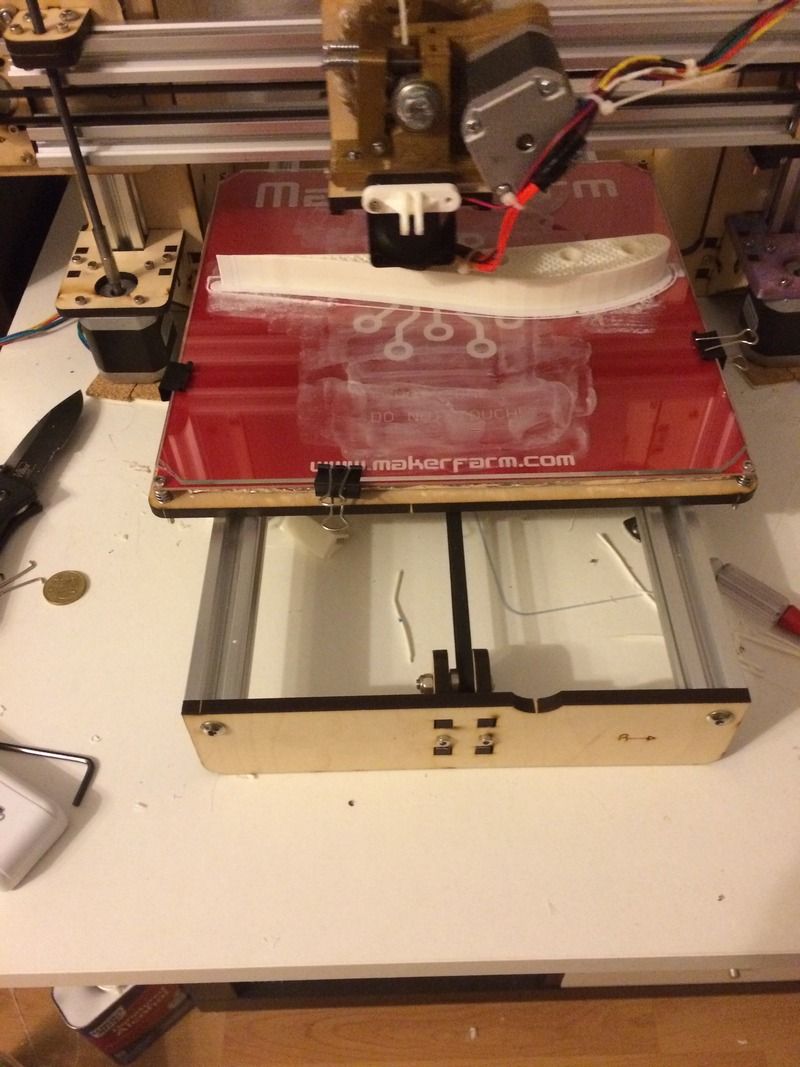
Also, I've moved forward to producing a prototype rear wing, Its going to take a while for this, its a very slow process.
Up next is dropping the motor out for the rear main seal inspection and oil pan gasket replacement. Oh yeah, and also the cam install.
Nice build. I'm curious as to why you went with 3D printing for the wing, instead of something more traditional, like in the GRM LeGrand Build?
The 3d printed parts are just for prototyping and then if it works as desired, making a mold and then a finished product out of composites. The main reason I am making my own is I wanted to use my own wing profile and the fact that most of the available after market wings were mediocre or outright bad. I have really not made use of any of the classes I took for my engineering degree so its kind of a personal challange to make one from start to finish, myself. I had not actually seen that thread so thank you!
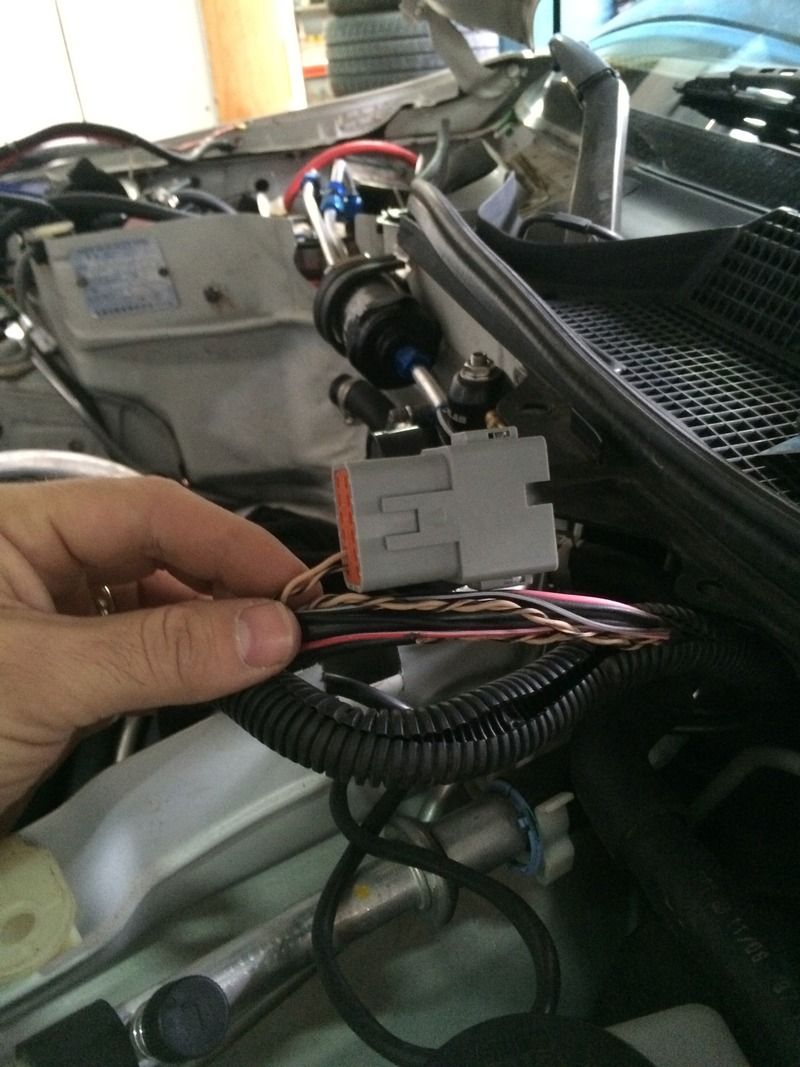
I finally found the time to do a bit more work on the car yesterday. I got around to doing something that I had wanted to do which is changing the throttle and OBD2 port wiring to having quick disconnect plugs. If I don't it takes a lot of time to get under the dash and disconnect and run everything bach through the fire wall. Here is what I used:
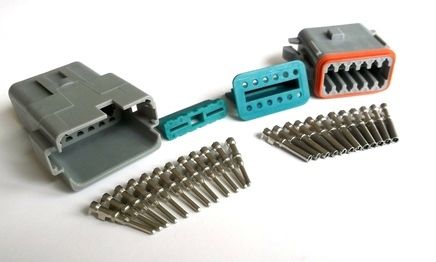
Originally I was going to use mil spec bulkhead conectors but at over $100 for a matched pair, it just was not cost effective. Luckily amphenol makes these sealed units that run about $12 per. One note on these, you need to either crimp the pins with a special crimping tool, or you can solder them in. I have had better luck with crimping since chasing a cold solder sucks. It was very easy, just snip, crimp and plug.
I then dropped the motor out and started fixing all the small issues I had acrrued throughout the season. First up was replacing the melted up clutch bleed line.
This was my trackside fix when it happened, it held but obviously was not permanant.
And now the new line is in with a bleeder
Then in prep for the cam install I had to remove the crank pulley. A pain in the ass on any car. I used some spare tooling iron I had laying around and made a flywheel lock so I could get enough torque on the bolt.
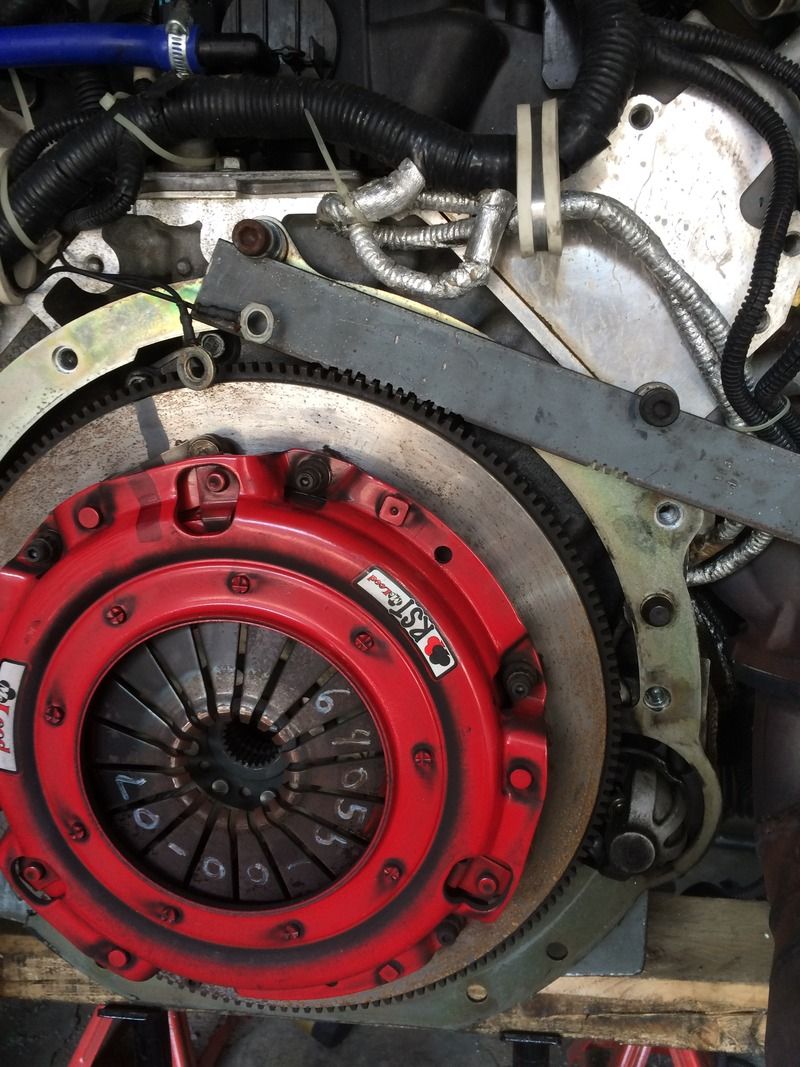
Hopefully today or tomorrow I can get the front accessories off and get the cam swapped out then replace the oil pan gasket and start the rebuild.
So I finally got around to swapping cams. The cam going is is a BTR ground cam focusing on mid range power. with it came hardened pushrods, dual valve springs, titanium retainers etc. I'm also switching from an LS3 style chain and tensioner to a C5R chain and tensioner.
Also i'm going from a 1 bolt cam to a 3 bolt cam.
Here is the cam and and the new tensioner, chain and gear installed .
It was all going so well up until THIS.
What your looking at is my spring compressor tool. While putting in the springs onto the last cylinder the composite substance bent. This in turn bent the valve and broke off the valve seal seat/valve guide in the head...
This pretty much ends the season for me. The head is garbage now and I won't be able to get a replacement for at least 2 weeks if not longer depending how long it takes to come up with funds. The only silver lining here that brand new ported LS3 heads run only about $150 more than OEM heads so I'll get a slight power bump from that if I go that route.
I'm still pretty pissed of about the tool breaking like that and taking the head with it. I'm at a loss for words honestly. I may later look at seeing if I can get the seat TIG'ed back on but I'm not sure about it yet.
The part that broke was part of the head casting. On the last photo where the grey ring is around the valve should be a cast aluminum valve seal seat. If you look just right of the valve you can see the valve seal and that seat. I wish it was just a brass insert but its not... the brass valve guide is actually still ok.
maybe my simple mind is just confused (it usually is ![]() ) but isnt the valve guide and what the valve seal sits on? like this:
) but isnt the valve guide and what the valve seal sits on? like this:
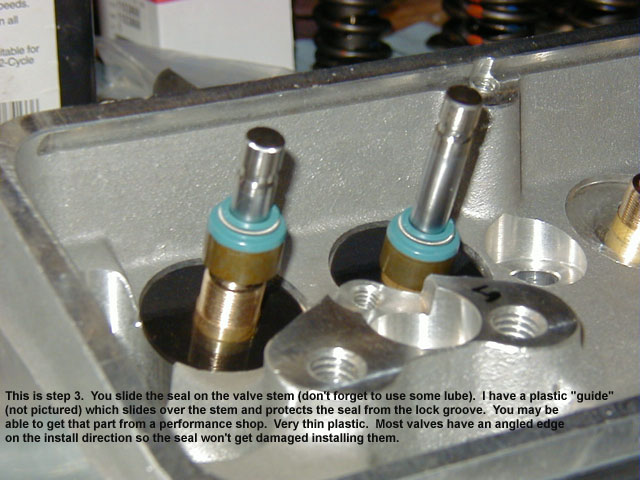
just need a new set like these?

or am i still missing something? and trust me I would be just as mad having to replace heads for something so small too
Here is the best photo I could find. The portion that broke is cast/ machined aluminum on the heads.
Trust me, I REALLY wish I could just press a new brass insert in like every other manufacturers head I've worked on. But now you have me thinking... maybe I can drill out the stock location and press in some aftermarket guides... off to summit and jegs.
Call someone like Mast or something that really knows LS motors. There has to be a solution for this.
Also, call up the company who made the spring compressor and scream your head off at them.
Its hazet tools which is usually a high quality tool company here. Unfortunately I'm 3 years past the 2 year warranty. German companies are not known for their customer service attitudes.
It looks like I may have been mistaken, the FSM shows a part number for something in that area. But the metal that is broken is definitely sintered metal.
I managed to find a suitable solution. So the guides can be replaced for about $8 dollars each. Unfortunately there is no machine shop in Germany that is tooled to deal with inches that I trust. I've got a shop out of Texas that will do all 8 valve guides for $120, so with shipping I am guessing around $200 and it would likely be a 6 week process with shipping back and forth.
For anyone who might run into a broken LS3 valve guide. They switched to a sintered valve guide for the LS3, if you break one don't expect to see a standard manganese/bronze or iron valve guide.
You'll need to log in to post.