motomoron
motomoron Dork
8/8/12 3:04 p.m.

I've been going on about the unending process of taking apart "The World's Cheapest Radical" to swap in a Suzuki 1300 Hayabusa engine while also taking time to rectify a lot of really dodgy legacy work done by the previous owner's "race shop".

In short - in D sports racer trim w/ a GSXR1000 motor the car scaled at 1227# w/ it's (old, fat) driver and post race fuel load. Class minimum weight w/ driver is 900# though - so it would never be competitive, even regionally. CSR is 1300#, however, and a Suzuki Hayabusa 1300 bolts in. This, it would seem is the answer.

(I've never done a "build thread" with all the delicious pictures, so I figured this was my one shot. I'm aware that a guy with both machine and fabrication shops at home working on his fancy English sports racer isn't necessarily "GRM" - but I'm 100% DIY where I can, and maybe I can share tips about designing and fabricating good parts that work the first time)

The car was disassembled at the end of last season and the search for a motor began. Simultaneously, I demolished our master bathroom out to bare studs, masonry and joists. The race was on to see which would render me bankrupt and crazy, first.

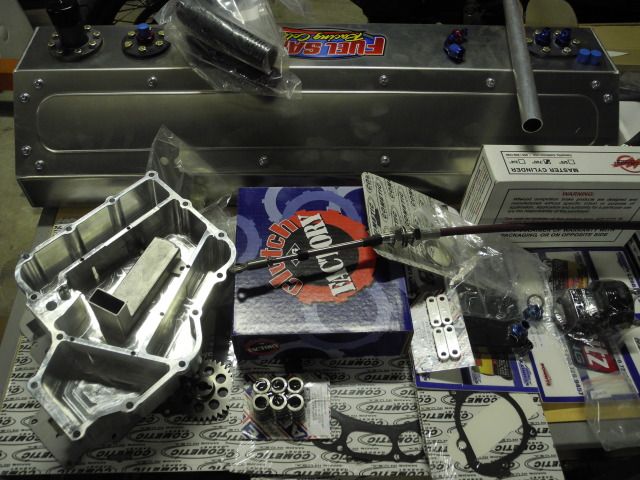
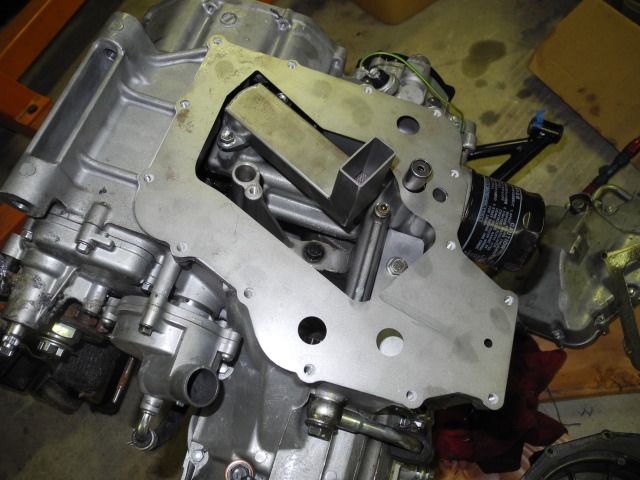
Acquiring all the parts was not terribly hard, just painful. If you want a flapper-baffle oil sump for a Hayabusa motor in a car that pulls more than 2Gs, you options are limited, and expensive. The car it turned out had a welded sheet aluminum tank - not a legal fuel cell. 4 places on earth will make something that will fit, fuel safe takes an interest in actually doing the work. Cha-ching...

The exhaust system was a bitch. The system on the car had been built by a decent fabricator for when the car had a carburated Kawasaki ZX10 motor. That had been modified w/ GSXR1000 spigots for it's next incarnation, and I tried to find someone to build something. I can TIG weld OK - but not great, and I'm disinclined to spend 100s of hours designing and fabrication to get to a system that actually makes power. Eventually I'd found a guy who'd build a stainless 4-2-1 tri-Y header for about $1300. I made a fixture for him to work from, and spent a weekend modifying the existing system to the Hayabusa as a stopgap measure. It still fit miserably, and the primary lengths weren't uniform.

I gave up and pulled the trigger on the full system available from Radical. Again, spendy, but it fits perfectly and the lengths should be optimal for the motor.

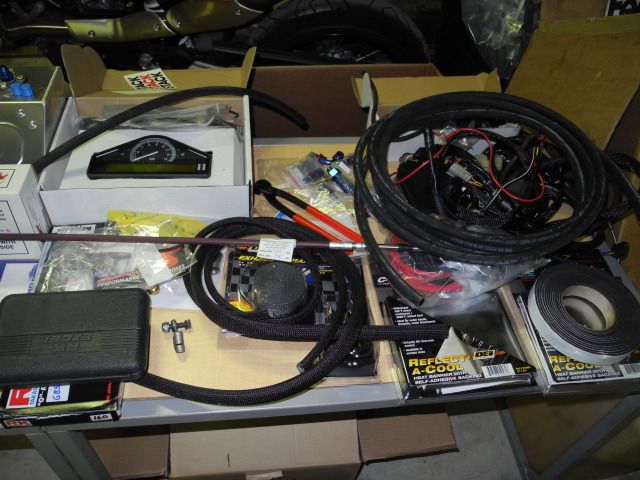
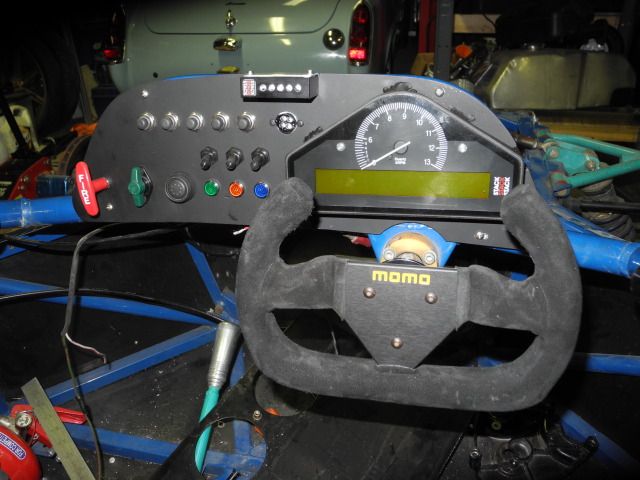
The car's wiring was a mess, and a GSXR1000 tach and a couple Autometer gauges made up the dash. I'd need to do something about this, and figured that while I'd fallen down the fiscal worm hole, why stop now? I ordered a Stack dash w/ coolant and oil temps and oil and fuel pressure plus a tach that displays 0-6k rpm the first 1/4 of it's travel, and 6-13 over the last 3/4. I popped for the programmable 5-LED sequential shift light.

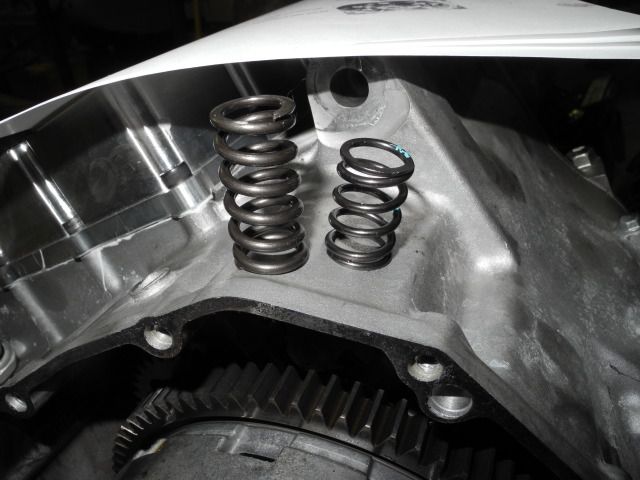
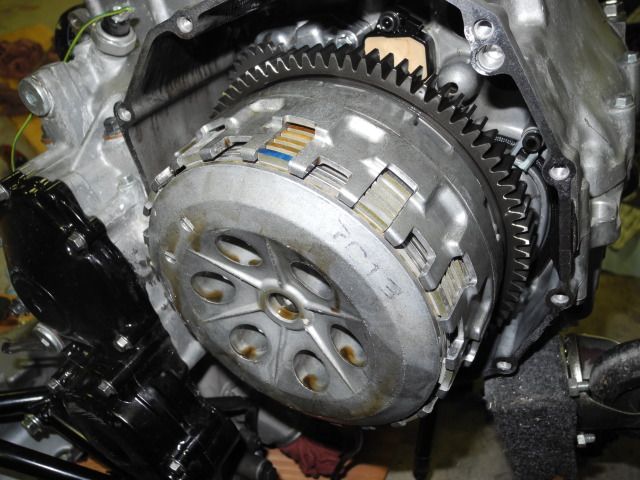
Numerous other orders covered motor mounts+suspension hardware kits from Radical, a burly clutch pack/springs/clutch slave brace/EGR port covers/low profile breather/oil cooler AN fittings/gauge sender fittings from Schnitz, and a ton of little stuff from Jegs and McMaster-Carr.

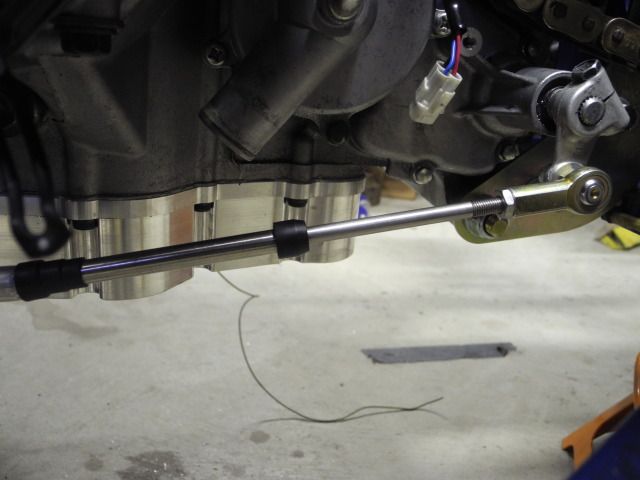
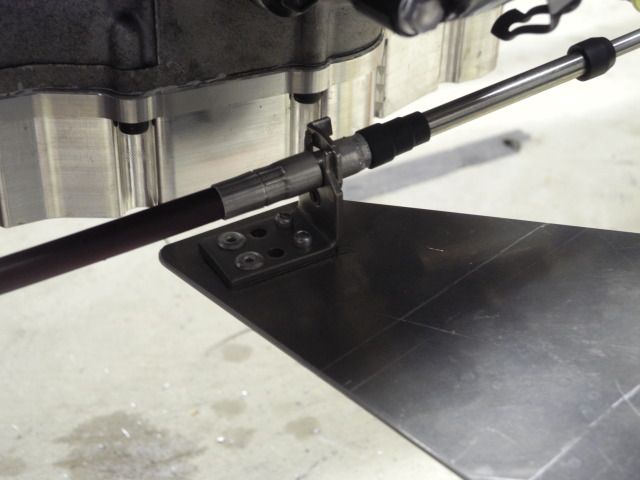
As the shifter pushrod can no longer go through the fuel tank, I got a Morse cable and some Heim joints to run it below the fuel cell. After months of demolition, design, framing, plumbing, electrical, HVAC, drywall, paint, tile, and trim carpentry - I could finally dig in.

I design, machine and fabricate stuff for a living and have most everything already. I needed to buy a Riv-nut tool and a set of Oetiker clamp pliers. I did finally buy a new welding helmet which helps a lot...

I started with:

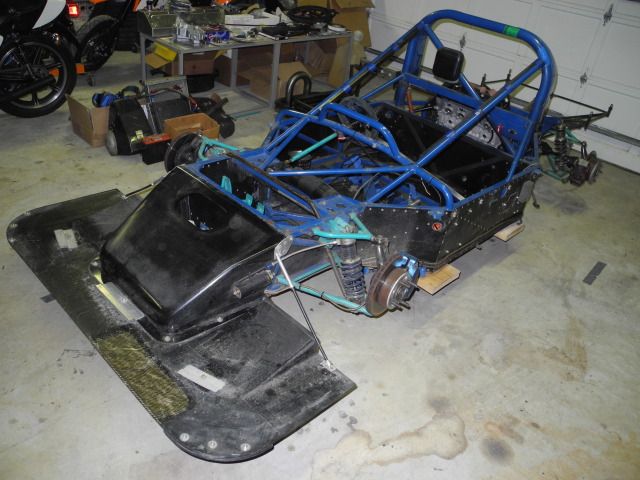
A chassis on stands
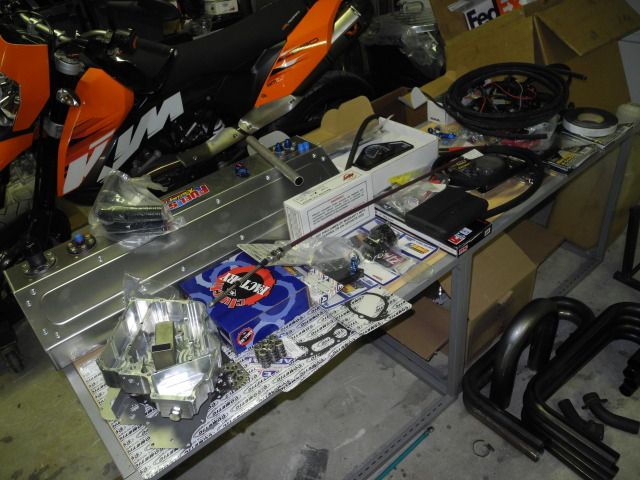
A table of parts
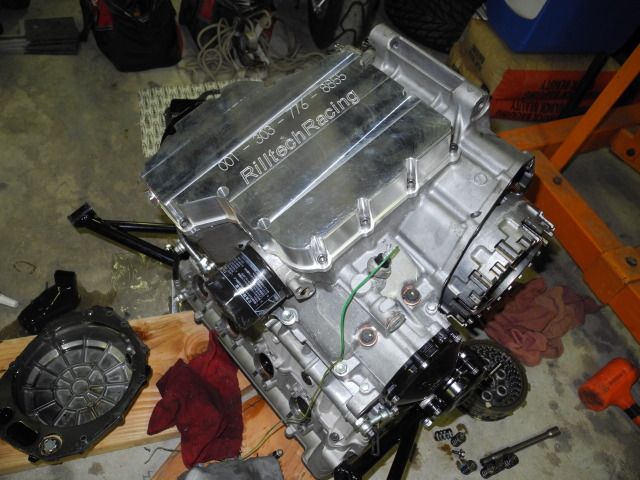
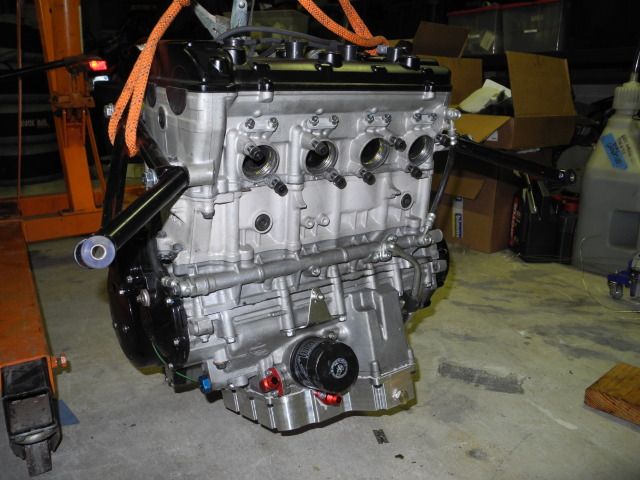
Hayabusa motor fits...
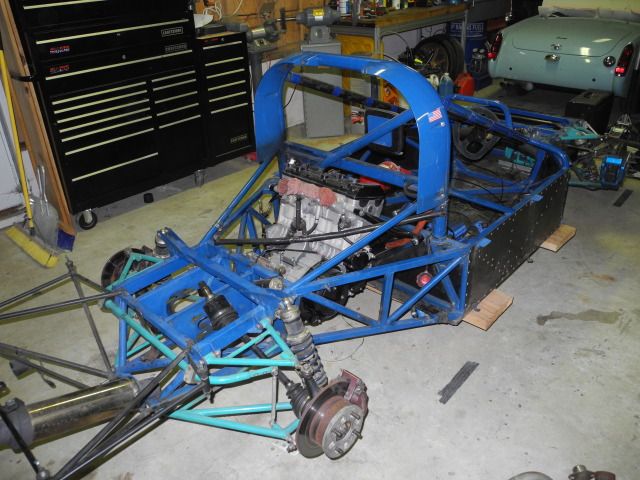
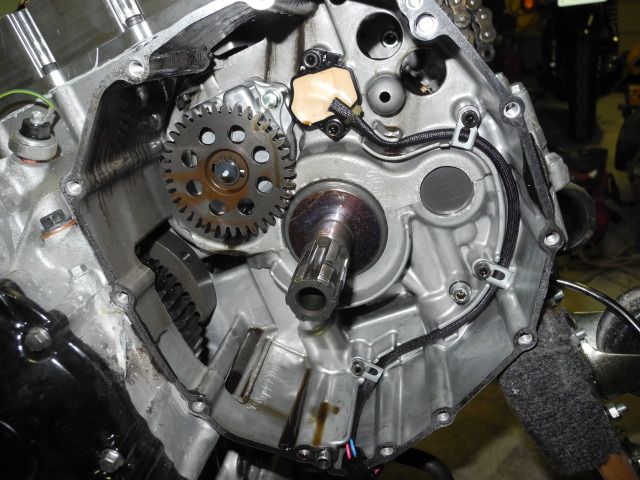
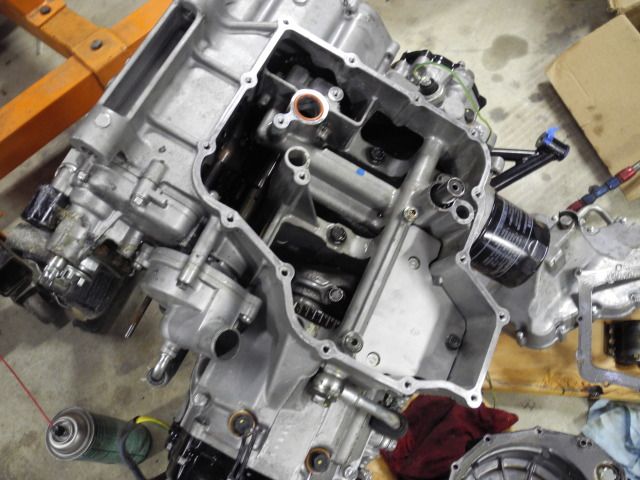
Comes back out for shiny bits...
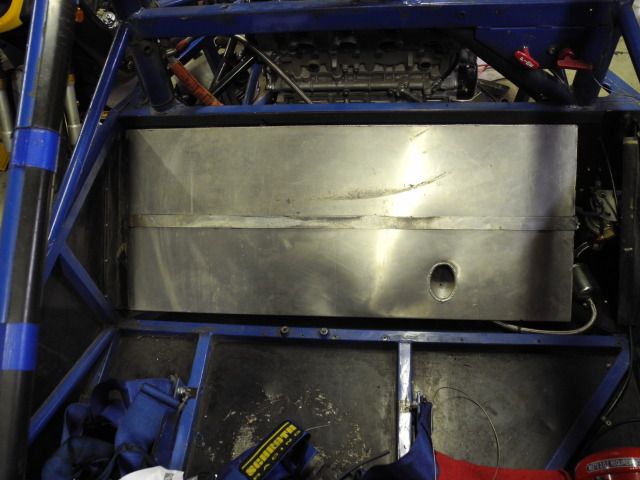
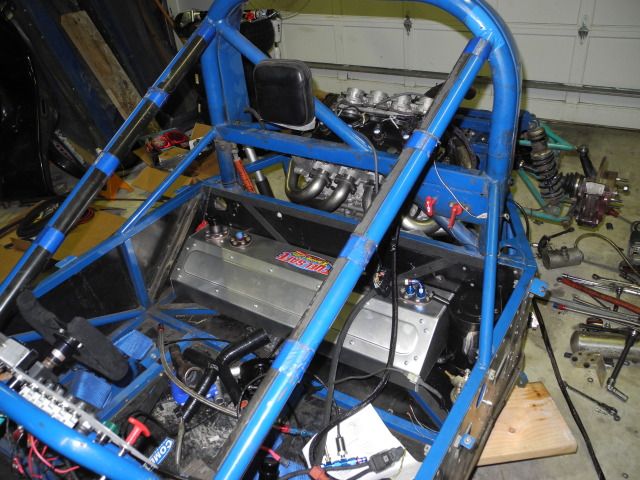
Fuel cell fits...
And the exhaust is awesome, but it occupies space formerly held by the high-pressure fuel pump in it's big-ass swirl pot.
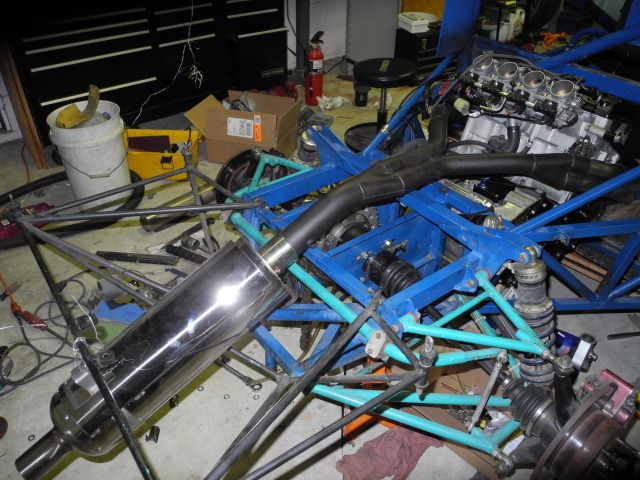
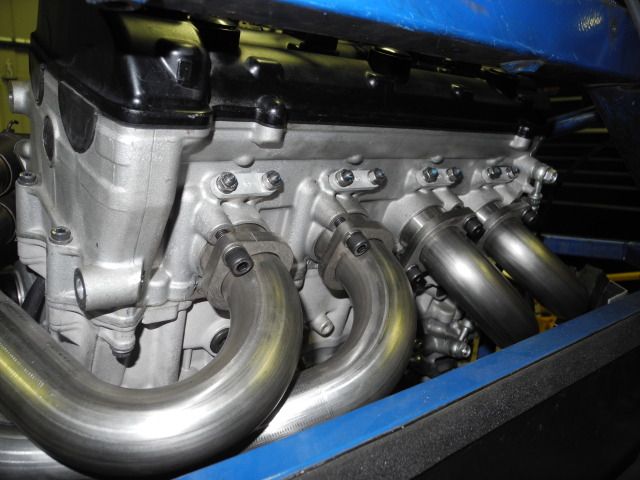
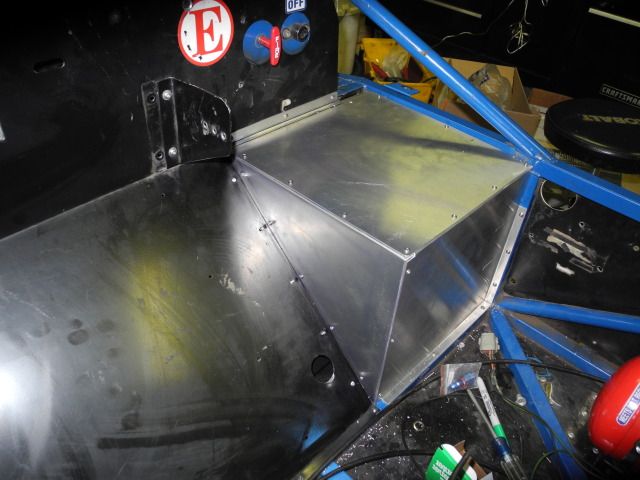
It appears there's room to move both pumps into the cockpit inside the perimeter of the cage, but the rear bulkhead needs a pump-dormer...
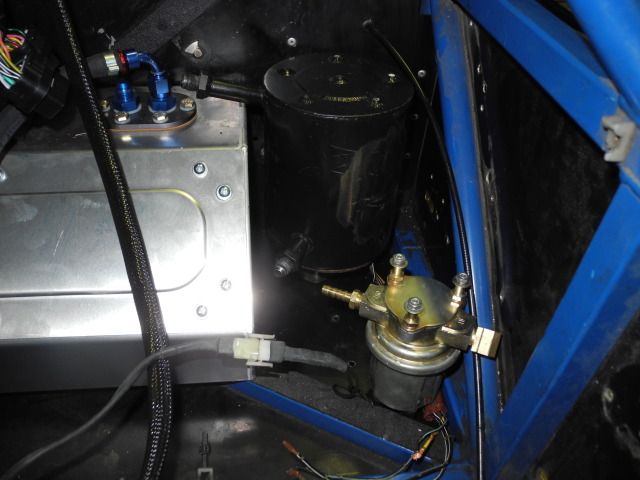
Like this...
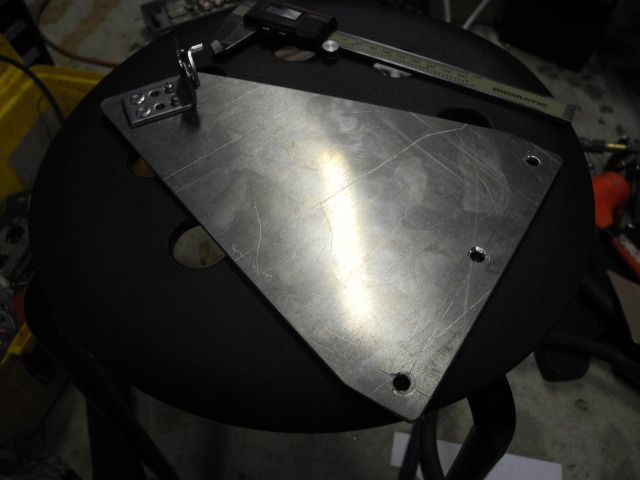
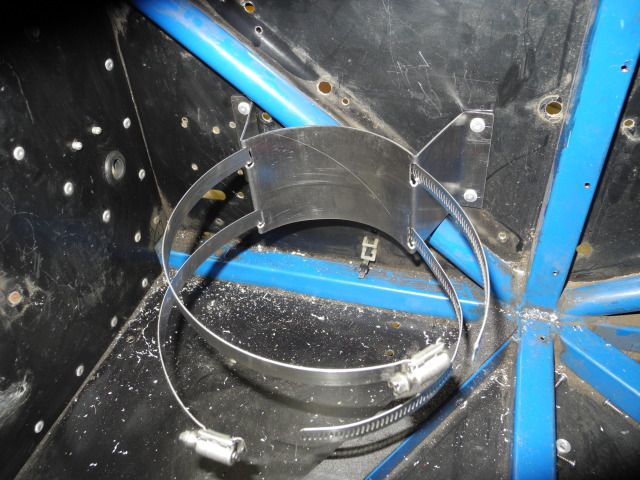
For which I need to hold the swirl pot firmly but removably and clear a chassis tube, so I made this...
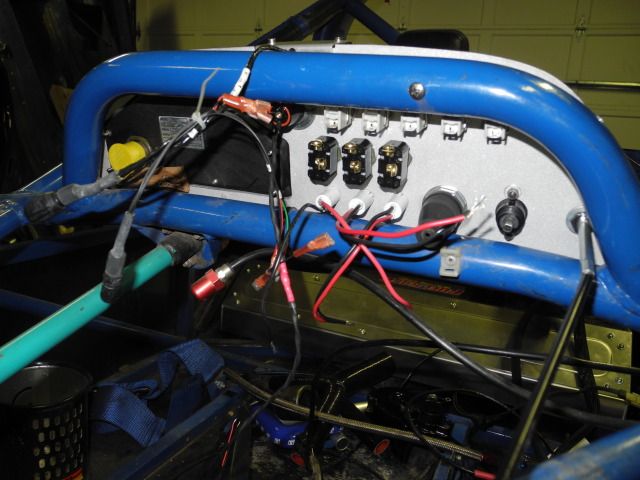
The dash is finished and fitted. TIG welding the .060 aluminum instrument well to the panel was not easy.
Rear of dash:
Javelin
Javelin MegaDork
8/8/12 3:12 p.m.

Nice! And remember, the definition of GRM is DIY, so this build is definitely worthy!

Chet
Chet New Reader
8/9/12 11:52 a.m.

Nice work!

Chet

PS - you may want to consider a clutch stop if you don't already have one. The Hayabusa clutch will likely go overcenter without one.

fasted58
fasted58 UltraDork
8/9/12 12:37 p.m.

wow, never knew they were 1200 # +, yowza, that's a E36 M3 load

nice build n good luck

motomoron
motomoron Dork
8/9/12 12:38 p.m.

In reply to Chet:

Solid advice - the car has an adjustable stop from it's GSXR-a-thousand days. Also, I've got the APE slave cover brace to counter those massive APE clutch springs.

Fast Ted:

The car is under 1000# dry. With my fat ass + post race fuel it was typically 1225#-ish. Bear in mind that current national caliber DSRs from Stohr are closer to 750# and have full aero undersides w/ tunnels. My sled is flat bottom.

SCCA is doing something next season to split the national DSR/CSR tunnel cars from the old flat bottom cars. Last I saw it'll be SR1 for the tunnels cars both D+CSR, SR2 for the flat bottom cars, and SR3 for SCCA Spec Racer Fords.

If SR2 includes old cars of both D+C, I'll be competitive. If all C cars are in SR1 I'll be racing regionally in a very small group. Again.

oldtin
oldtin SuperDork
8/9/12 1:40 p.m.

Cool build - somehow looks different under the skin than I imagined. BTW - happy birthday!

Per Schroeder
Per Schroeder Technical Editor/Advertising Director
8/9/12 3:30 p.m.

Those are beefy girls, aren't they? Looks real nice!

motomoron
motomoron Dork
8/10/12 6:41 p.m.

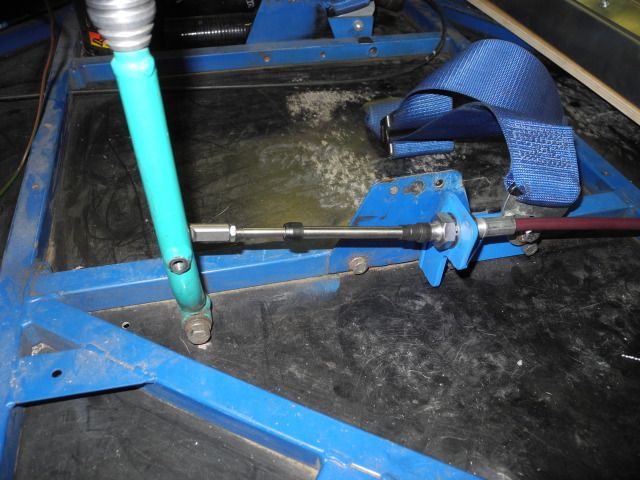
I managed to get a few things done yesterday and today. The shifter cable needed to be routed and brackets made in order to fit the platform/spacer under the fuel cell. This in turn revealed the the exact location for the low pressure fuel pump and routing for the fuel lines.

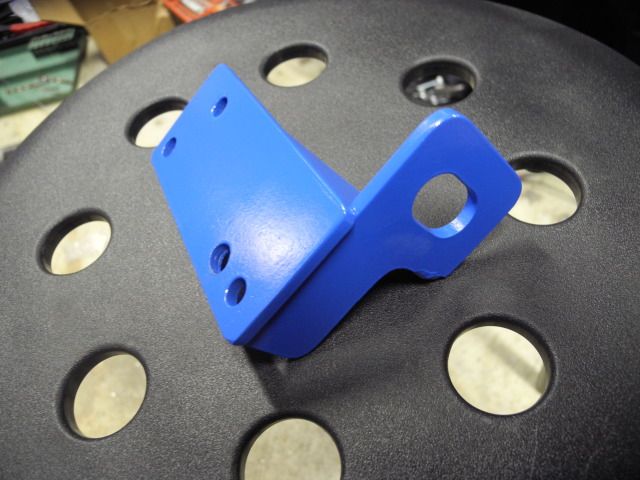
The shift lever end of the cable is anchored w/ a pair of 15/16" opposing nuts - They were in the general vicinity of a pair of steel plate lap harness plates I made the beginning of last season (what was on the car when I got it was totally unsafe and a topic for another day) so welding a boss+gusset to the plate would be the easiest approach. I sawed a length of 2" wide, 3/16" hot-rolled steel and milled the slot w/ a 5/8" endmill w/ about .040" step over for clearance. I flipped the part in the vise, scribed lines for the cutaway, and chewed it out by eye. I radiused the corners on the disc/belt sander. The gusset was sawed out of the same plate. I bead blasted the scale+paint off everything and using a TIG welder, tacked it together, ran a bead between the plate and boss, and a few short beads between gusset/plate/boss. I primed and painted it after it cooled.

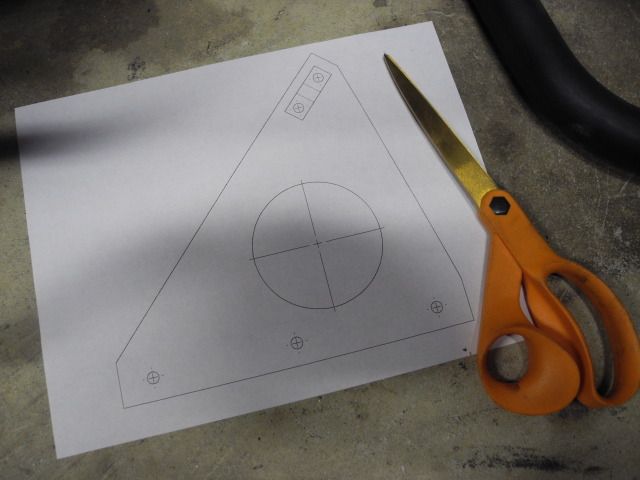
The rear bracket was made from 1/8" aluminum plate and a Morse cable anchor bracket from Jeg's. I made a cardboard template, modeled in it SolidWorks from that, printed the drawing 1:1, and verified fit. This morning I realized I needed to capture the cable, not the floating tubular extension, so I made a new template and transferred that directly to 1/8" AL plate. Band sawed the part, cleaned it up on the disc/belt sander, and mounted it to the chassis to 3, 1/4-20 Riv-nuts on the bottom of the tube. The cable retainer was clipped to the cable and it's location marked on the plate. It was drilled and Pop-riveted in one location, then the other 3 were drilled and riveted. It will get a brace from the plate near the retainer up to near the top of the nearest chassis vertical tube to add stiffness in Z.

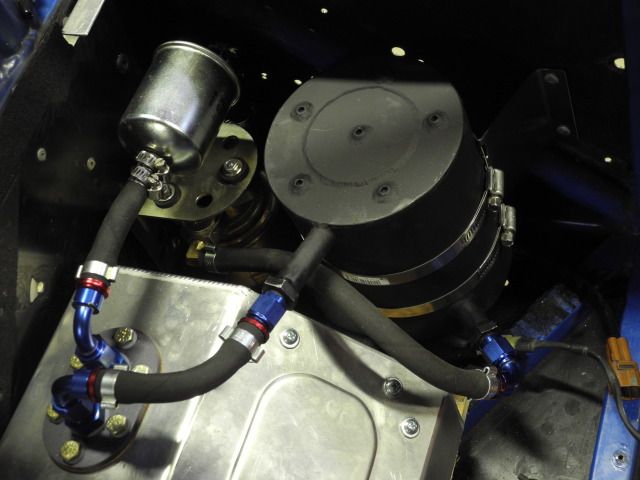
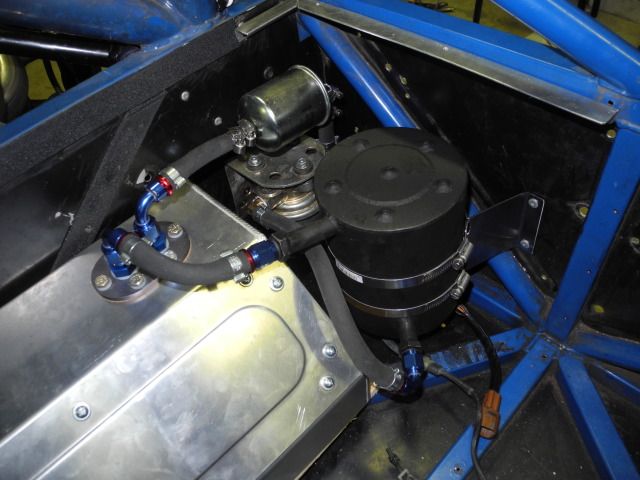
With the cable in place I could measure to make a cellulose fiber-composite fuel cell spacer to raise the tank above the shift cable. This part is made of scrap birch plywood...Once the cell was in I marked the location of the bracket for the Carter rotary vane pump that feeds the swirl pot w/ the Suzuki GSXR1000 pump that in turn feeds the fuel rail. Then the bracket was Pop-riveted to the firewall, the pump had short lengths of hose attached w/ Oetiker clamps, and it was finally mounted to it's bracket. Once the swirl pot was attached and the high-pressure hose routed through the firewall. the balance of fuel lines were made up and installed.

Before shot of fuel tank and plumbing.

Tomorrow+Sunday the Stack senders will get plumbed and connected to the engine and it's harness routed. The fuel pump relays, start and neutral wires, brake and rain light harness need to be made, and the trimmed and simplified Hayabusa harness routed.

Once wiring is finished there's a new, smaller front brake master - .7" vs. the .75" on both F+R now - that will fix the persistent brake bias issue from last season. The clutch slave cover+bracing plate will go on once the new chain is cut and riveted on. The right side pod goes on w/ the oil cooler, the left one w/ the radiator - cooling plumbing gets sorted, catch bottles, air box, throttle cable. The fuel tank filler neck and vent need to be figured out and installed, and the battery.

The next build thread is the renovation of the ghetto 6x14 deck-over ATV trailer I got for $400 to replace my car trailer that was stolen over the winter. I've got a huge pile of new wheel+tires, bearings, brakes, wiring, lights...I'm reusing the welded steel parts, tongue, springs and axles - That gets wire wheeled, Rustoleum rusty metal primer, and a new pressure treated deck. All the new junk goes on, and I have a race effort.

motomoron
motomoron Dork
12/20/12 10:15 p.m.

Update:

I finished the car in time to make the last session of the day of the Friday practice preceding the MARRS Labor Day Double at Summit Point. The car hauled ass, turned as well as ever, and on the last lap of the session instantly quit running at the beginning of the braking zone for T1. I was very fortunate to find the rear wheel weight that flung off at a buck-30 and disconnected the crank position sensor harness connector, and fix the problem in about 5 minutes.

Saturday qualifying went ok - I was gridded P1 and tried to find a balance between getting used to the car and getting in a flyer. I didn't improve in the qualifying race,and in the main race had a huge lurid spin about lap 2 passing for position on the brakes in T1. I finished mid pack with a very soft brake pedal and a fried rear caliper. I made one from a box of Wilwood bits, bled 'em, and dialed in all the front bias I could find.

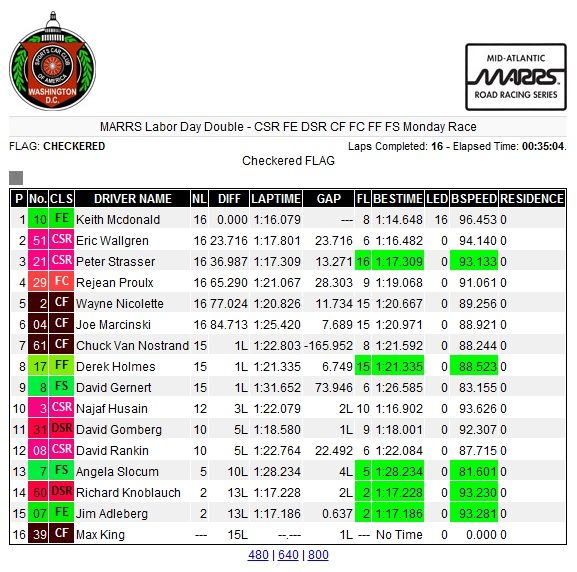
Sunday quals went better, then it rained like hell all day, finally ending during the spec miata race preceding our group. With the sun out and what appeared to be a dry line, I went out on slicks which turned out to be the right choice. I got past the the CSR gridded next to me on the start lap, got the one in front of me the next, and pushed to stay w/ an FE car and a DSR to take a class win. Monday was an action packed race. Again I got the CSR who was gridded next to me on the start and the pole CSR spun shortly after in T3. A DSR/FE crash in T5 brought out a full course black. In the hot pit there was some controversy regarding something dragging under my car. (Oh, right, I neglected to mention I spun in fluid on the track in T5) but eventually the marshalls let me take my spot in P2 for the single file restart. I tried to stay w/ the lead FE car, but couldn't hang. I finished 2nd overall, 1st in class.

Back in the shop I discovered the root of the brake bias issue: At some point the car had been converted for 2-pot to 4-pot rear calipers. Unfortunately no one considered front caliper bore size.

It had 1.375" 4-pot F, 1.75" 4-pot rear - the opposite of what you want. I threw down for a set of 4 Wilwood forged Dynalites in the correct sizes, reused the Performance Friction PF1 pads, and filled the system w/ Motul 600.

At an SCCA time trial the new brakes transformed the car. I went from mid 1'16"s to a 1'14.758". I'd also removed the front dive planes and dialed out a bit of rear wing.

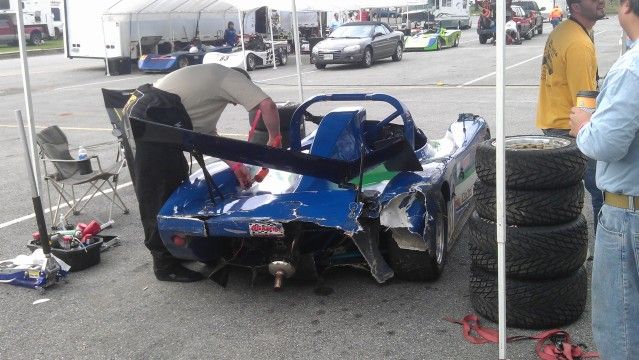
At the last event of the season I was all hope and determination, which promptly turned to sh!t when in qualifying I snap spun past the exit of T8, and backed into a tire wall going quite quickly.

The rear half of the chassis and suspension weren't damaged, but everything else on the back of the car was toast; wing, wing mount, rear sub-frame, difuser, rear body, (expensive, new) muffler.

Sheeee-it.

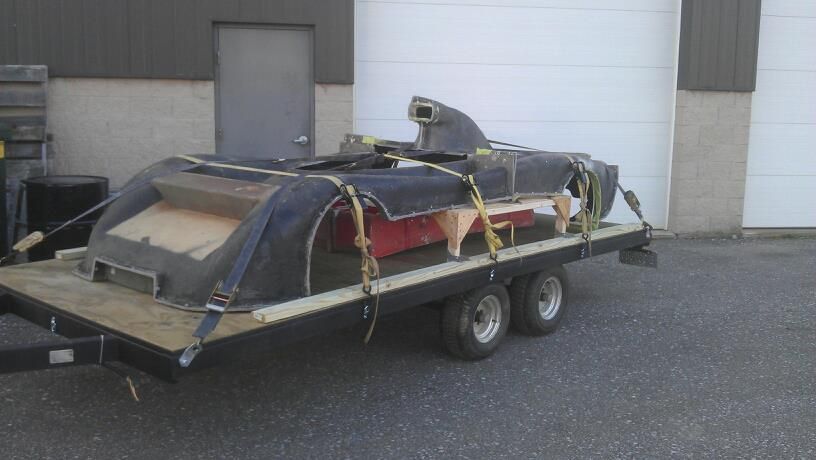
Bodywork, when you need new for one of these ain't cheap. After some research I ended up making inquiries at Radical in the UK and at Beasley Fiberglass in Ohio. It turned out that Beasley hadn't sold any panels for one of these in a while, and after some discussion and negotiation, I ended up buying his molds for less than a new body costs.

The plan is to heat the garage so I can do composite work in the winter, and set up to pull a full set of parts form the molds. Vacuum bagged, cored carbon fiber difusers and splitters I can do indoors as epoxy doesn't stink like polyester resin. The car will come apart, I'll finally verify the chassis is straight, paint it black, and reassemble the suspension w/ new heim joints, bushings and bearings and generally tidy the car up the rest of the way.

I'll be ready to test in March, and shouldn't be chasing setup or much of anything beyond my own driving. That's the plan anyway.

On to pics.

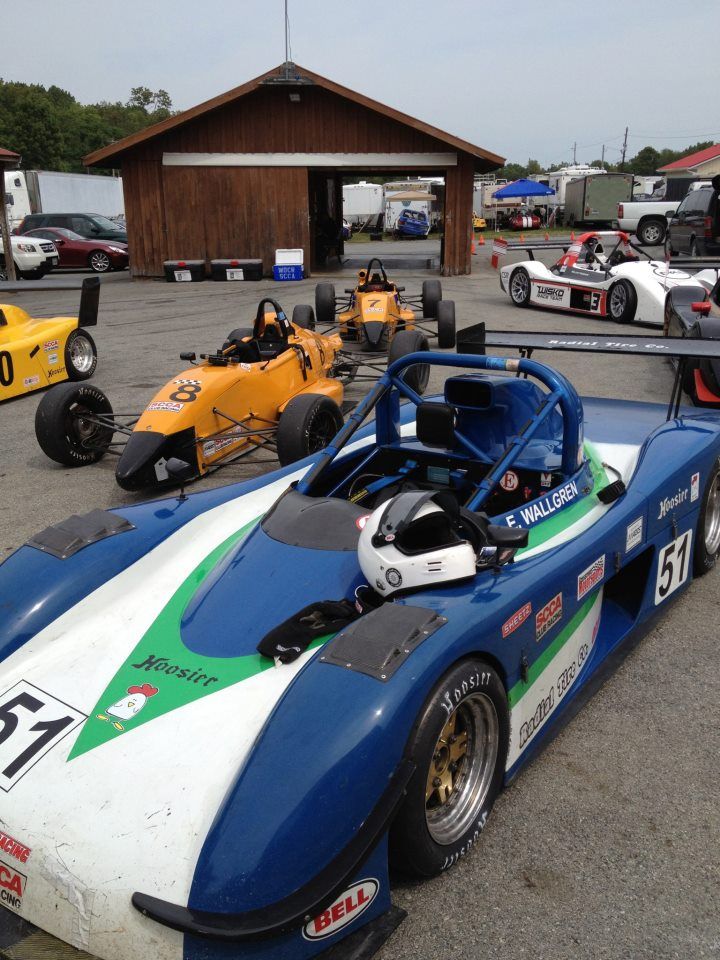
Looks nice, yes?

Monday race results-

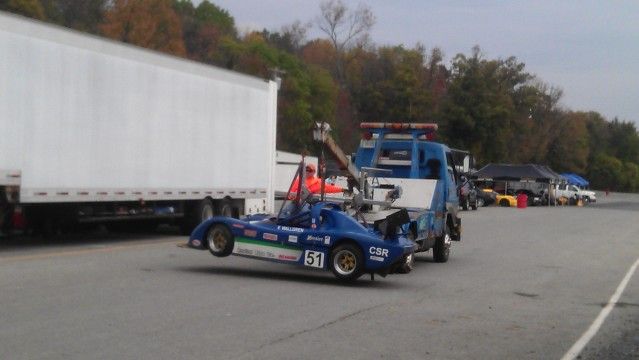
Oops.

That'll buff out. Not.

Instant car body, just add materials and skill.

1manwolfpack
1manwolfpack New Reader
12/20/12 10:32 p.m.

That thing looks like a ton of fun!

Good luck with it!

ransom
ransom SuperDork
12/20/12 11:41 p.m.

Lovely!

That was a lot of progress, congratulations. Maybe one step back at the end, but that was a couple of solid steps forward

Any news on where you'll land with the SR1/SR2 split for 2013?

GameboyRMH
GameboyRMH PowerDork
12/21/12 7:52 a.m.

Wow pretty good results, what was all that stuff about not even being regionally competitive?

Why not save some money by using aluminum for the diffuser and splitter instead of CF? Especially considering they're the closest thing this car has to bumpers, I'd make them cheaply replaceable.

Maybe also mount the muffler laterally next time and run a pipe out the back with a flex section in between to minimize the stuff that's in harm's way? That will also give you the option of running a bigger diffuser.

alfadriver
alfadriver PowerDork
12/21/12 8:35 a.m.
motomoron wrote: The plan is to heat the garage so I can do composite work in the winter, and set up to pull a full set of parts form the molds. Vacuum bagged, cored carbon fiber difusers and splitters I can do indoors as epoxy doesn't stink like polyester resin. The car will come apart, I'll finally verify the chassis is straight, paint it black, and reassemble the suspension w/ new heim joints, bushings and bearings and generally tidy the car up the rest of the way.

On the opposite of what Gameboy asks...

If you like working with CF and Epoxy over polyester resin, why don't you work out a way to do the body that way? You have the molds and all- it's a matter of figuring out how to do it.

And I know CF and Epoxy materials are much more expensive than glass and glue, but in the whole scheme of things, for your enjoyment, might it not be worth it? (besides not being all that much, relative to the whole work).

motomoron
motomoron Dork
12/21/12 3:04 p.m.

I have molds for nose, tail, R+L side pods, difuser, splitter, fender louvers.

A complete body in white gelcoat, E-glass and polyester resin will be about $600 in materials. A Difuser in carbon/divinycell/epoxy about $180, a splitter about $150.

At retail a 4-piece body in 'glass w/ a CF splitter and difuser is about $7500 before shipping.

So my plan is to make one set as above, plus a spare nose, tail, splitter and difuser. I'll keep the molds as long as I have the car.

Regarding the SR1-SR2 split it's not clear. It looks like the "modern" CSR-DSR tunnel cars, Wests and Stohrs and such will all be SR1, and flat bottom DSRs will be SR2. I'm not sure if flat bottom CSRs will be in SR2 or SR1. Hopefully SR2...

In any case SR2 will provide a place for the old Radical Clubsports and Prosports to play, and I may have the opportunity of selling some body parts.

You'll need to log in to post.

Our Preferred Partners
fNCvIBYTGEbM3vbHx1KjopYgOPx9pmq4H2dQWrUbIE0GAdKkBK2ueEYgfgfFrcrL