maybe this is better......

a simple comparison... right port is just about finished, left port is still untouched.
More to come.... ![]()
maybe this is better......

a simple comparison... right port is just about finished, left port is still untouched.
More to come.... ![]()
most of what you are saying is going over my head... and is what I know about porting a head is that I don't know enough to jump in on my own I'd just make things worse.
is what I know about 4ag heads... the big ports already had to big of ports, people saw more gains with making the ports smaller and cleaning up everything... or doing the simple thing and going to a later model smallport head
MY work... usually runs well under $1000. Some work does get sublet out (3 angle valve job for example).
The big ports are too big.... but the real fault of the big ports ports being too big is a bit less low end torque. The torque curve on a largeport is a curve, while the torque curve on the smallport heads has a bit more in the low end, so the torque curve is a bit flatter for the smallport head - all other variables being similar...
The real porting work begins on the exhaust side of the head...I should be getting to that by early next week
From the intake side to the exhaust side.... Getting the bowls and seats correct on the exhaust side took almost 2 days.... now all 16 bowls and seats have been ported

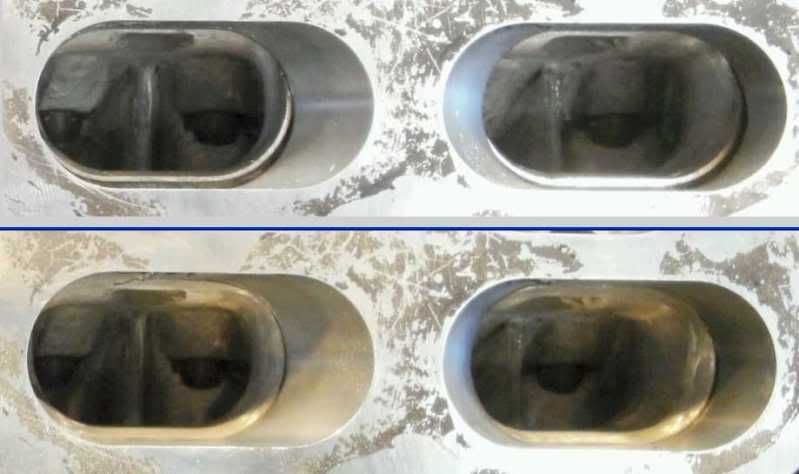
with the intake ports, and bowls and seats now prepared, the process moves to the exhaust side of the equation... another interesting 2 panel, below is #1 exhaust port... 2 views into it
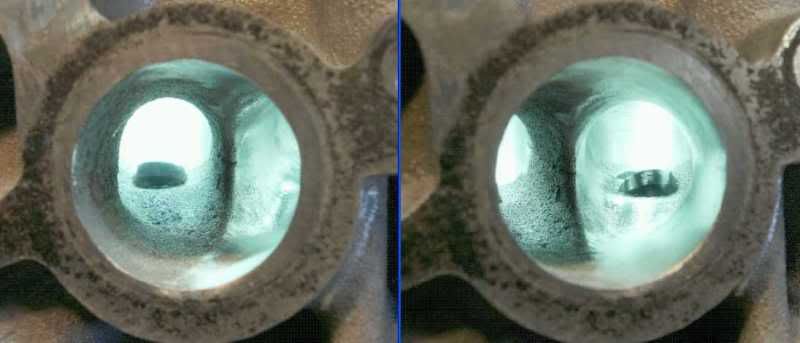
The left side is still untouched, while the right side has been opened up by having the ports taper changed. The wall has been pushed out about 3mm, it now blends into the bowl smoothly - there is no "corner" for the exhaust gasses to have to flow around. The port roof has been worked so that exhaust flow moves down the port smoothly, allowing a more gradual transition for the exhaust gasses to flow together.
from another forum wrote: Learning alot here d:)b Are the wall thick enough that you can just take out 3mm from it?
depending WHERE........ there is a lot more than 3mm available.... but in a few places.... it isn't even that thick ![]()
The ports themselves.... have SUBSTANTIAL room for enlargement.... for example, the TRD exhaust gasket is 38mm in diameter, where as the stock gasket is 33mm, and the stock port is about 30mm :shock:
here is a head with ports opened up to nearly 38mm
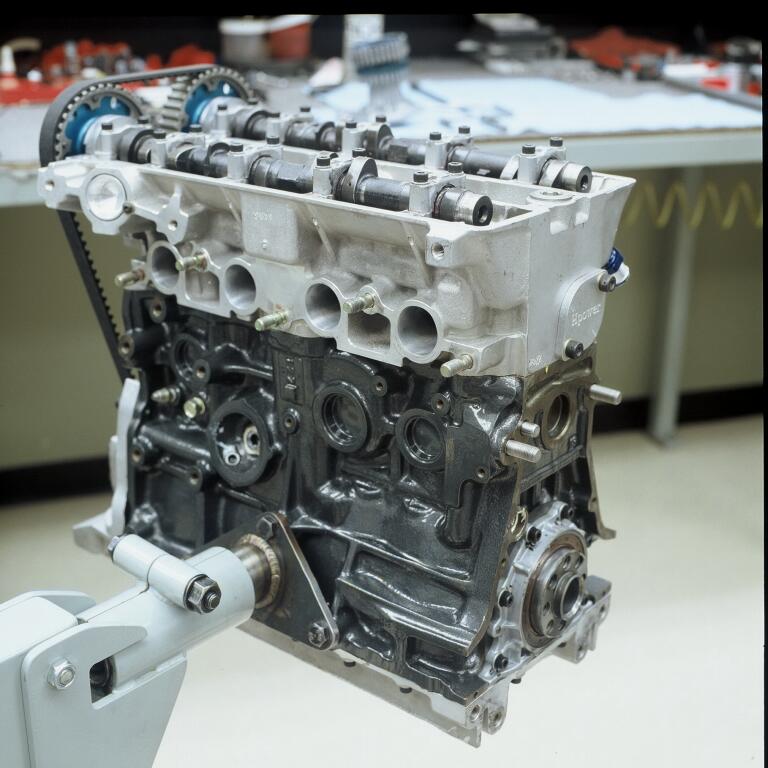
for those with 4AG experience... there are a few things in the above photo that is VERY unique to Formula Atlantic... can you find them???
![]()
oldeskewltoy wrote: 1) This is a dry sump engine...... the oil filter housing has been completely blocked off... the oil filter fits on to the dry sump pump instead. The front of the engine(oil pump in normal apps) is now a machined plate ready to accommodate a crank sensor - http://hasselgren.com/wp-content/uploads/2010/05/4ag-engine-complete.jpg 2) The mounting ears for a conventional transmission have been cut off, there are studs in the back of the block. 3) cam lobes are drilled (note intake cam behind exh cam also has drilled lobes) for additional oiling. oil drain added @ back of head to the dry sump pump. 4) hardware is updated, no cam cover mounting studs I'm sure I'm leaving out somethings... but you guys did pick up most of whats what
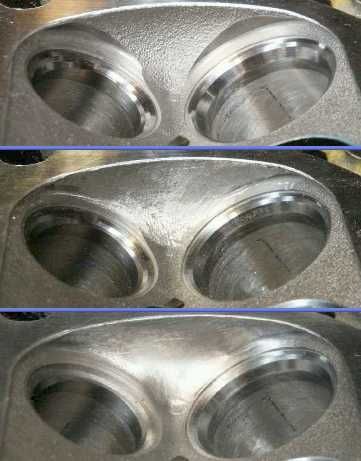
A new common site in my head porting posts.... a 3 panel of one port straight down the throat....
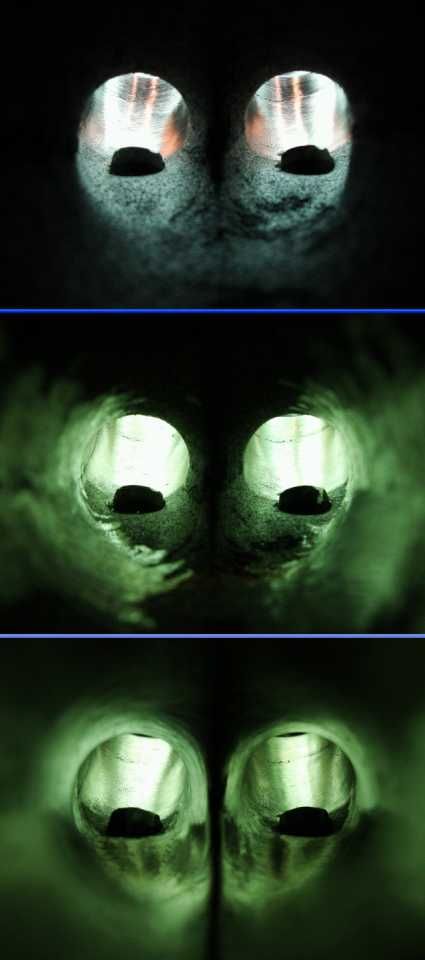 the typical caveat... the bottom photo is showing only about 1/2 the light of the other 2 because anymore and the photo would have washed out.
The top photo is just the matched bowls and seats, the middle is with the majority of the material removed, and finally the bottom, nearly finished.
oldeskewltoy wrote: for those with 4AG experience... there are a few things in the above photo that is VERY unique to Formula Atlantic... can you find them???
I see a distributor blockoff, in addition to the drilled cams and dry sump and bellhousing modification. Also something that looks like a cooling system roroute...
sobe_death wrote:oldeskewltoy wrote: for those with 4AG experience... there are a few things in the above photo that is VERY unique to Formula Atlantic... can you find them???I see a distributor blockoff, in addition to the drilled cams and dry sump and bellhousing modification. Also something that looks like a cooling system roroute...
true.........
I'll take more photos in the morning, but I managed to get to my friends mill.

The holes in the adapter have been elongated. Tomorrow I'll drill and tap the 2 ends so that I can set the adapter to the correct height. There is a bit of a space issue, so I'll be using Allen head set-screws to properly locate the adapter.
More to come.......![]()
Below.... the finished adapter. I ended up using 6mm allen set screws. You can see them on the ends... and how much the adapter needed to be raised....
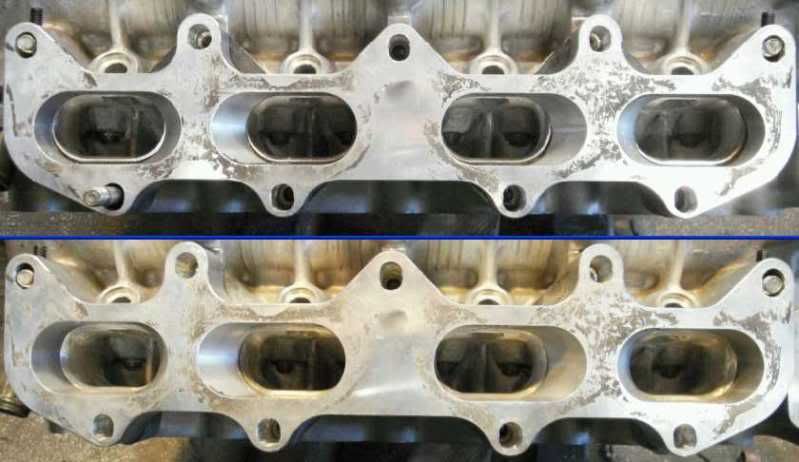
I used Loctite green to keep the set screws in their place. the nice thing about green loctite is you use it after, it chases down the threads setting up in a few minutes. This also allows me to be confident that after shipping, and the installer, the plate should be in the same place.
Here is a slight more focused view of the problem.....
.... and after adjustment. The port has also gotten a bit more of a flair to it, since the adapter is exactly the size of the gasket, the ports edges also had to be the size of the gasket.
Maybe I missed it earlier, but why are the ports in the adapter so large? Is that the difference between the small and large port heads? ![]()
sobe_death wrote: Maybe I missed it earlier, but why are the ports in the adapter so large? Is that the difference between the small and large port heads?
yes....
The clients head went off to Loynings this am.... the guides are being replaced, and the valve seats are going to be getting a 3 angle. Along with the 3 angle, the heads surface is getting milled down .020" This should lower the chamber volume from about 36cc to about 34.75cc, allowing me enough material to deshroud the chambers and bring them back to 36cc albeit without those nasty machining edges in the chambers that can lead to pre-ignition(ping).
With luck I'll see the head back end of the week, or the beginning of next.
oldeskewltoy wrote: The clients head went off to Loynings this am.... the guides are being replaced, With luck I'll see the head back end of the week, or the beginning of next.
Well.... The Supertech guides will not be used ![]() the O/D of the guide is .4342"-.4344". The guide holes in some cases are as large as .4340". The size is mostly because this is an old used head, it has seen thousands of heat cycles.
the O/D of the guide is .4342"-.4344". The guide holes in some cases are as large as .4340". The size is mostly because this is an old used head, it has seen thousands of heat cycles.
Loynings feels that a 2 to 4 ten thousandths (.0002" -.0004") interference fit is not enough, they prefer at least a .001" interference fit. Sooo the Supertech guides are not large enough in diameter and so will not be used. Its a shame really....the aftermarket frequently only caters to standard parts... even when the factory offers std and O/S.
Replacing the Supertech guides will be a set of OEM guides that ARE O/S... they are .0019"(.05mm) larger O/D then the standard valve guide.
THIS is one reason I try NOT to replace valve guides... there is no way prior to removing the old guides to know if std or O/S is required.
So the head will likely be @ the shop for closer to 2 weeks so the parts can arrive from Toyota's Cincinnati depot
oldeskewltoy wrote: So the head will likely be @ the shop for closer to 2 weeks so the parts can arrive from Toyota's Cincinnati depot
Another soap opera...... LOOOONG story short... Supertech guides on the intake, and OEM O/S guides for the exhaust. Oh... and it is about 2 weeks ![]()
Well, with the head back here, the last bit of work is now in order. The head has large crescent shaped machining marks left over in the head from production. These machining marks will be smoothed out into the surrounding area of the chamber. This will remove a sharp edged protrusion in the chamber, allowing the chamber to support more compression without pre-ignition.
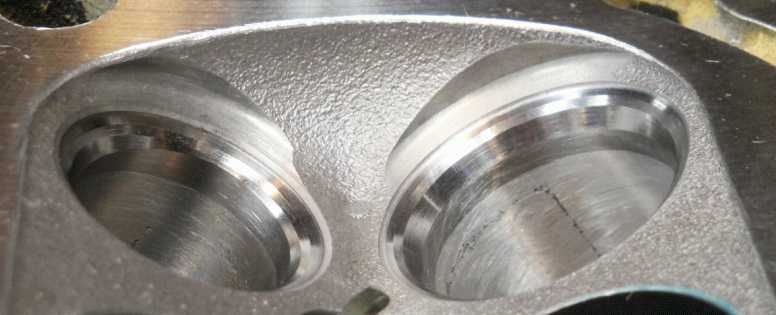
Also note the 3 angle valve job.... On the 4AGE, there are different angles for intake and exhaust.... and they can be seen in this view
I had the head cut .015" estimating the amount of material I'll be removing to de-shroud the chambers. I set up the burette
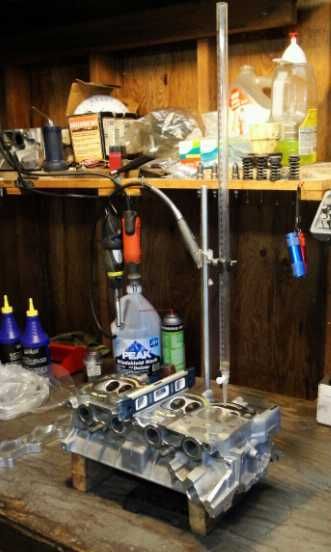
I measured all the chambers, their volume ranges between 34.7cc, and 34.8cc. The chamber below is the one measuring 34.7cc.
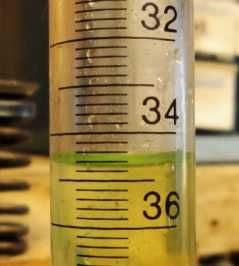
I use the bottom of the meniscus for my measurement.
So, that "gives" me 1.2 to 1.3cc of volume I can add to these chambers volume (to get them back to stock 36cc) while removing the machining marks.
More to come...... ![]()
oldeskewltoy wrote: So, that "gives" me 1.2 to 1.3cc of volume I can add to these chambers volume (to get them back to stock 36cc) while removing the machining marks.
Chamber #3... The chambers are now de-shrouded, and chamber volume is back up to 36cc.... same as stock
The above chamber can now(bottom panel) withstand considerably more compression without pre-ignition, then it could when I started(top panel)
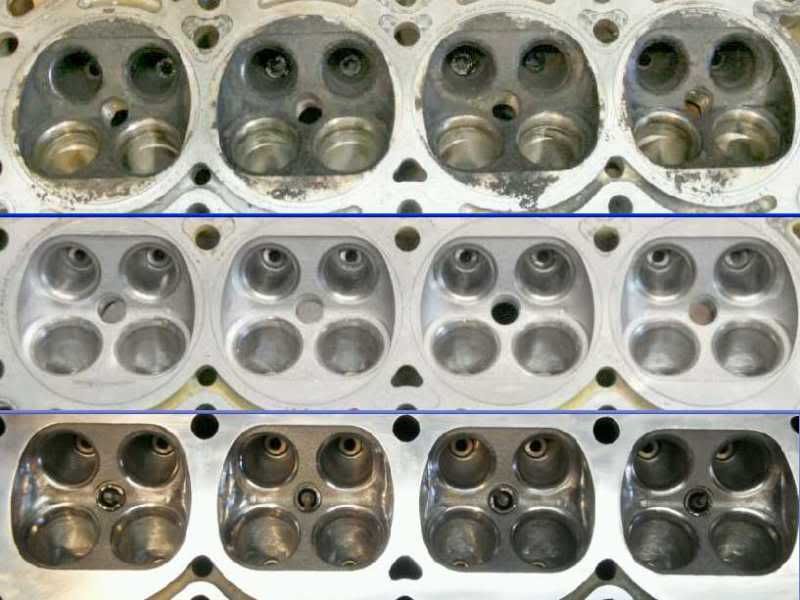
The head is now finished, as is the largeport to smallport adapter. The head went together with no issues, or hang-ups. I used Royal Purple assembly lube on the stems, this should provide decent lubrication until the engine builds oil pressure. Because of the guide issue, the intake guides required the use of the Supertech seals, while the O/S OEM exhaust guides took conventional sized seals.
You'll need to log in to post.