1 2
DILYSI Dave
DILYSI Dave MegaDork
1/3/15 7:33 p.m.

Short version - I really like it, it installs easy, it's a good value, etc.

Long version - When I moved into this house 8 years ago I wanted to plumb the shop for air before things got too settled. HA! Fast forward to now and my Christmas list this year consisted of a bunch of part numbers from Northern Tool. It was the RapidAir 3/4" system, and a bunch of various fittings and accessories. I got most of what I asked for, and got the rest of the needed stuff in a couple of trips back to Northern or Home Depot.

The system -

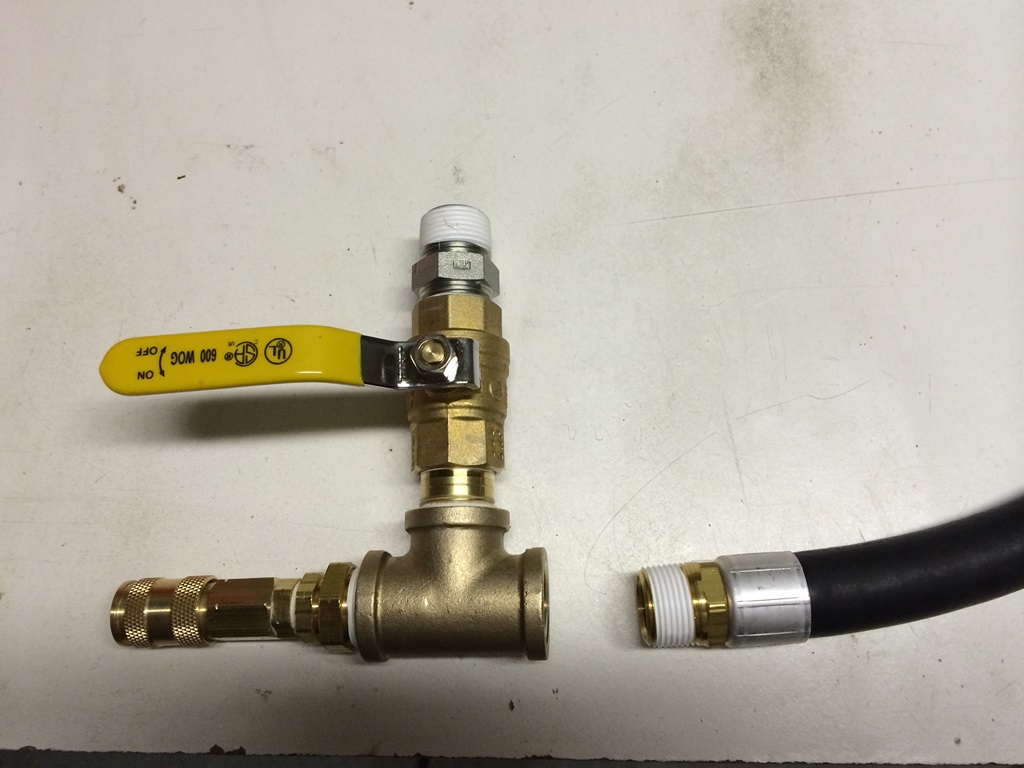
I started out by pre-assembling all of the major subassemblies. This is the main valve assembly coming out of the tank. Of course, none of this is the RapidAir stuff - just brass fittings. Everything is 3/4" into the system. The tee is to allow me a quick connect right at the tank without burning up one of the 3 included outlets.

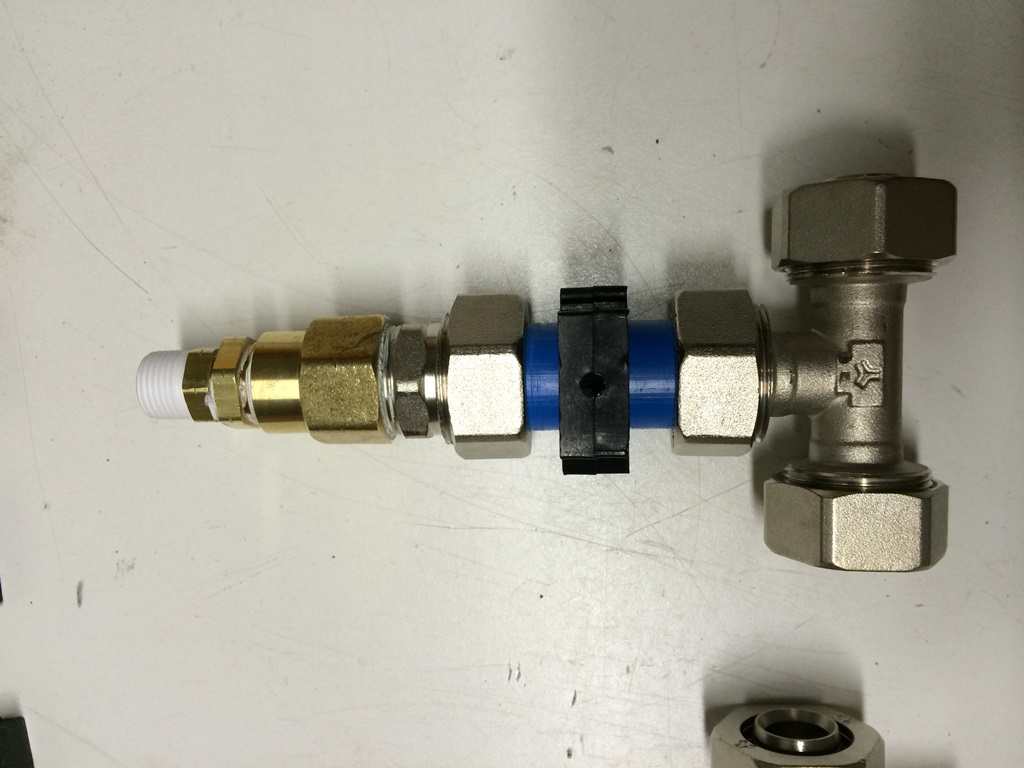
This is the assembly that will feed the ceiling mounted reel.

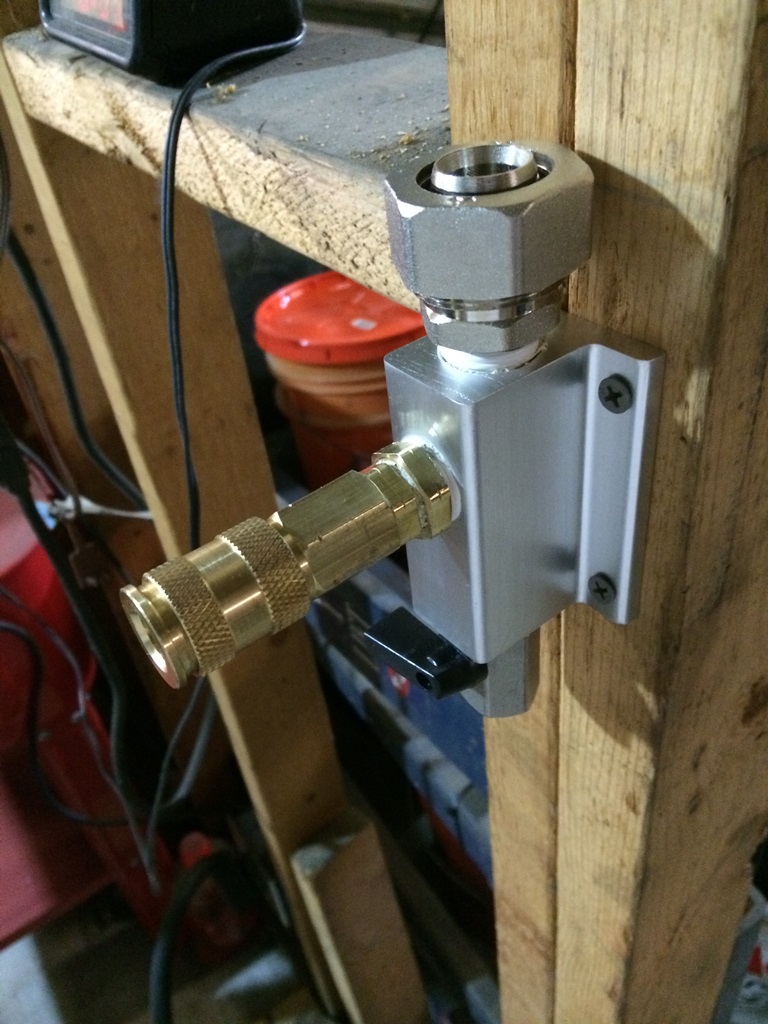
Also pre-assembled and mounted all 3 of the outlets.

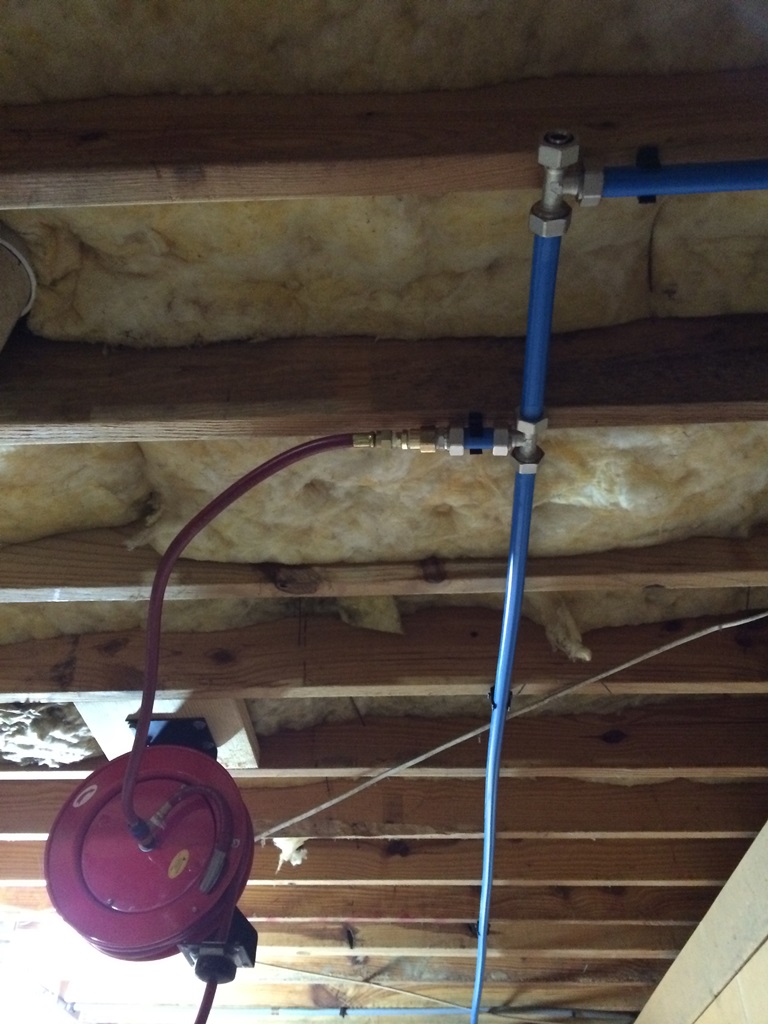
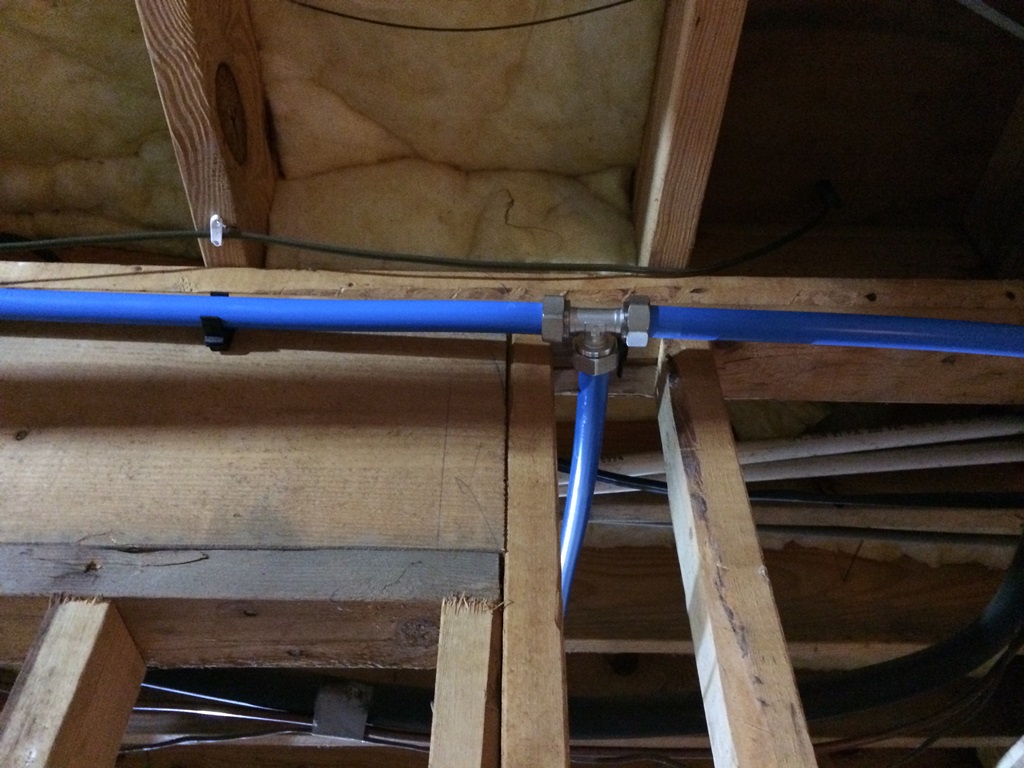
The first run. I started at the far end of the system and worked back towards the tank. Mostly this was because I wanted to keep air functional if I needed it during the install (I didn't). Starting at the far end meant that tapping into the compressor would be my last step. So this is the run to the far outlet, by the door, and then the tee to the reel, and another tee to a second outlet.

This is going further upstream - The piece passing thru the wall is from the previously empty lug, with the left leg going to the third outlet, and the right leg headed to the compressor.

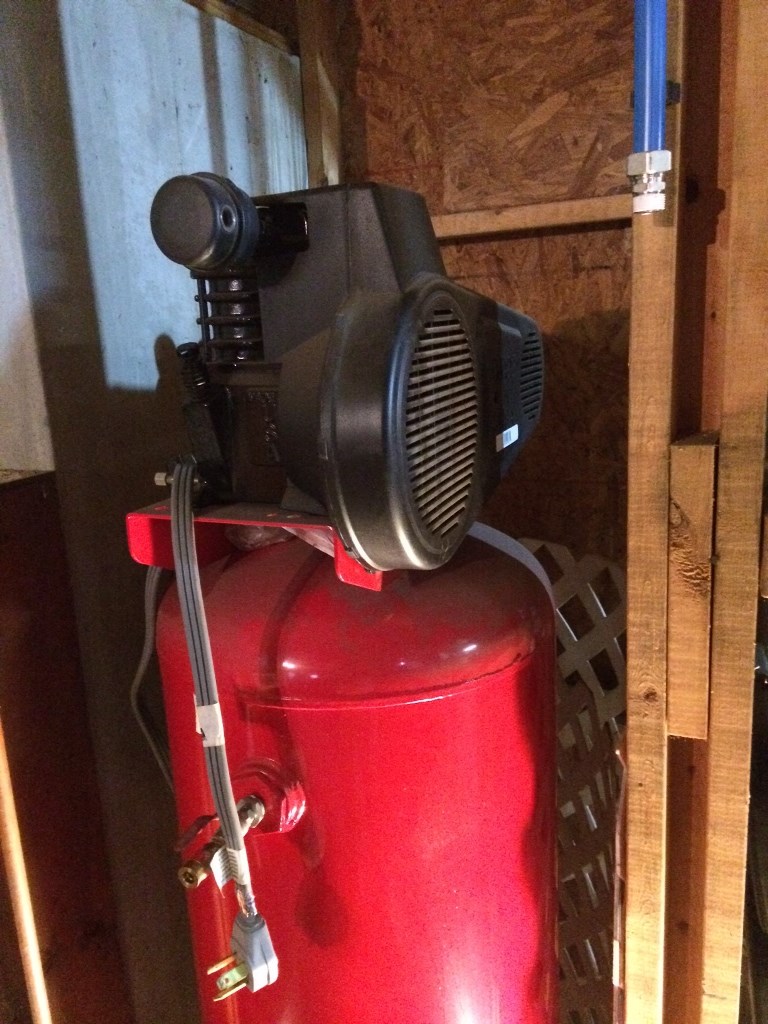
This is where I terminated the RapidAir system - with a RapidAit-to-3/4" NPT lug. You can see on the compressor my old setup - a single 1/4" NPT quick-connect.

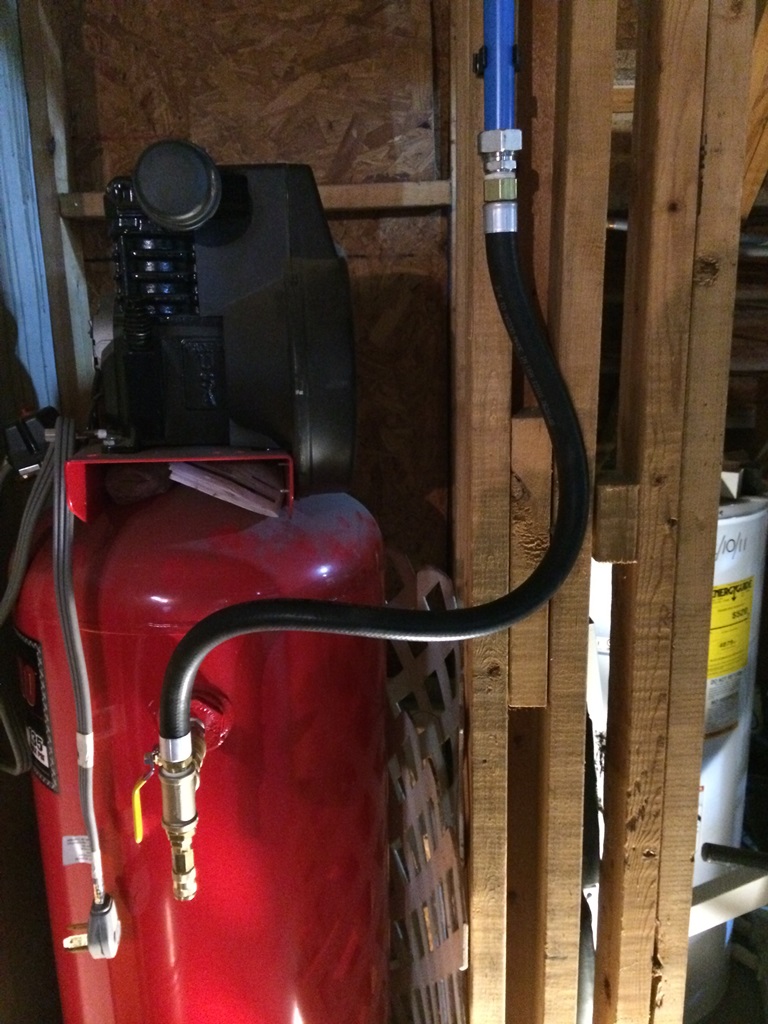
...And the new setup coming out of the tank - all 3/4" plumbing.

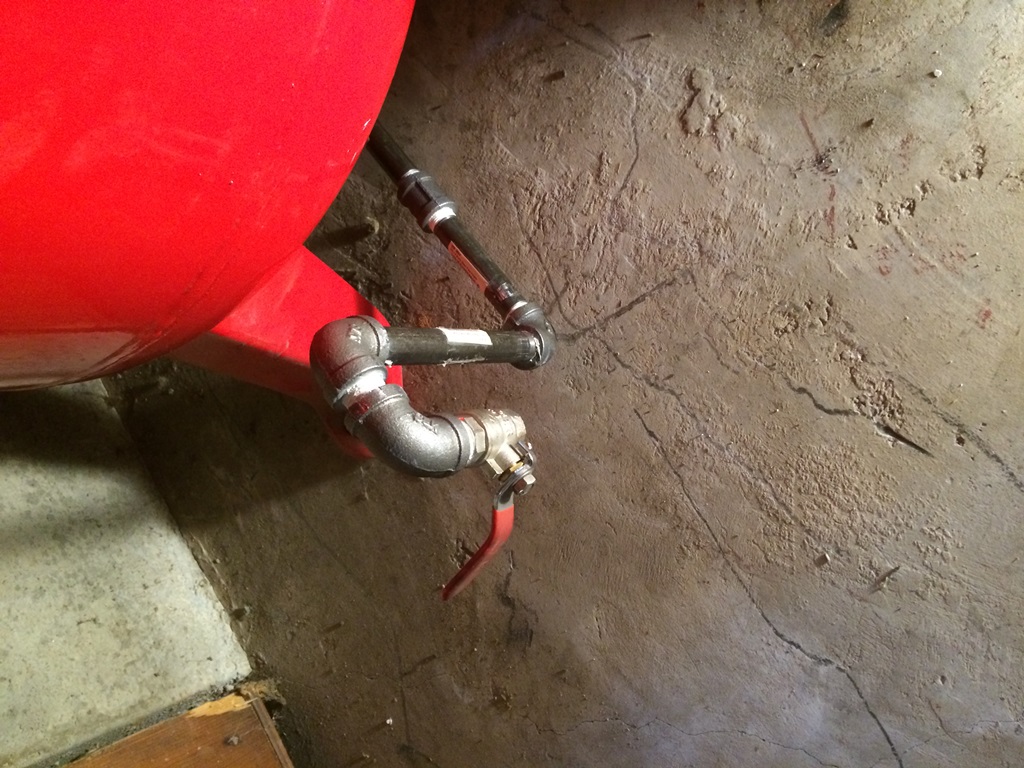
While I was at it I drained the tank, and decided that the lay on the floor to berkeley with a valve under the air tank method sucks. So I plumbed in an easy to get to outlet and valve. Now to drain the tank, instead of berkeleying with shallow pans that I can fit under the valve and doing it all laying on my stomach, I can now just put a bucket under the valve and open it. Should make draining the tank a non-event, and therefore done much more often.

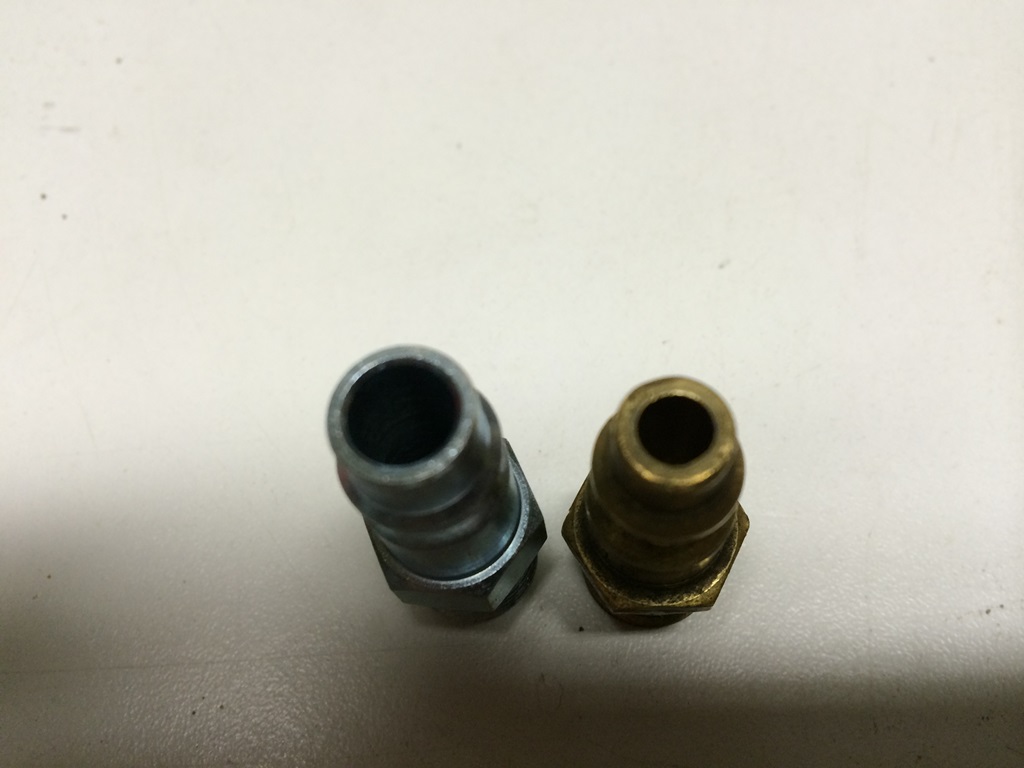
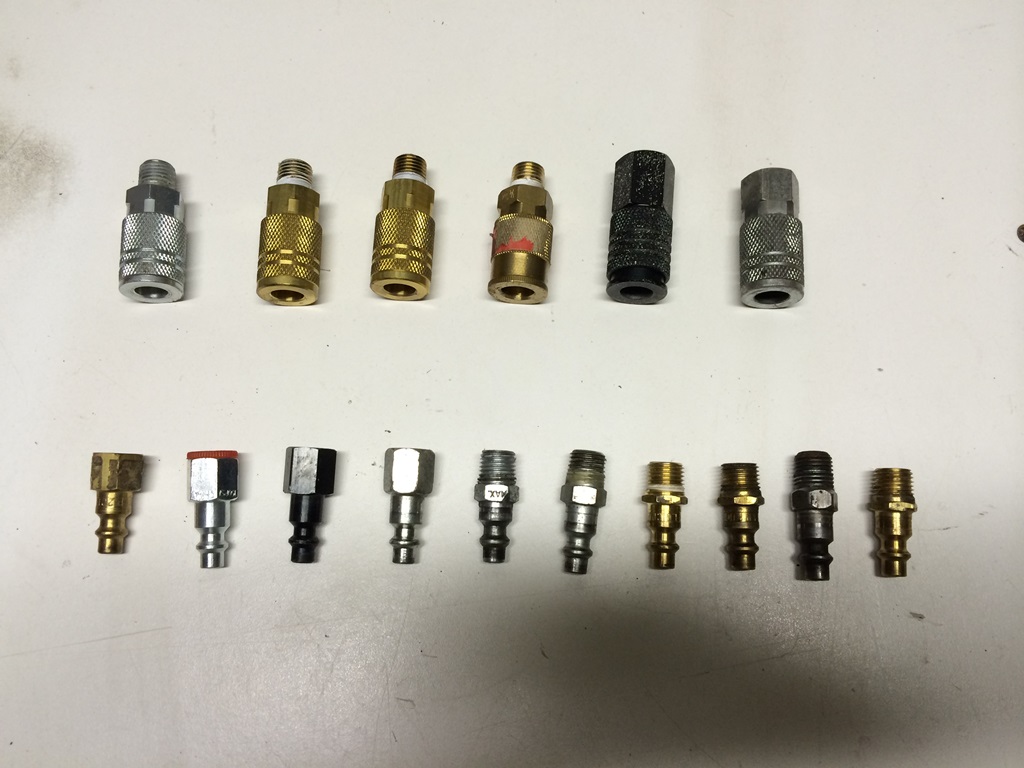
Also, while I was at it, I replaced all of my previous M-type fittings with V-type. You can see how much better they will flow. I read up on it before picking them out and it's ~2X the flow of an M-Type. M-type males will plug into V-type outlets (tough obviously not taking advantage of the bigger air path), but I also replaced any fittings that matter ( impact wrench, die grinders, etc) with V-type males as well, and updated a couple of hoses too. The only upside I can find to the M-Type is that they are a bit more common, so if you want to be compatible with traveling tools then M is the safer bet. Also - M-Type is what Depot sells. Both are available on the shelf though at Northern.

...consequently, I now have a E36 M3-ton of M-type fittings I'm never going to use. If you are going to ignore my suggestion above to skip M and use V, then throw a few bucks my way and I can ship all of this stuff to you.

Install took probably 8 hours all in, doing it solo. Two people would have been helpful a few times, but it was completely manageable solo. Upon putting air in the system, I found one leak - A hole in the body of one of the tee's. Looked like a manufacturing defect, but I might have done it with a wrench while putting stuff together. Not sure. But Northern swapped it out no questions asked. Test number 2 revealed no leaks. Given that there were probably 50+ joints, I was impressed with this. I did follow their directions on the NPT stuff - 2 wraps of teflon tape, plus pipe dope. Never used them both like that, but the lack of hissing speaks to the effectiveness. Also - pre-assembling the outlets, the reel junction, and the tank valve assembly on the bench with a vice meant I could get some good muscle on all of those joints, versus field installing them with wrenches on a ladder.

With the system, the additional fittings, the tank drain, the outlet upgrades, etc., I'm into it for between 3 and 4 bills. To get 5 outlets fed by 3/4" line, I think the value is there. Throw in the easy install and the solid look of the finished system and I give it an A+. Would recommend.

wheelsmithy
wheelsmithy Reader
1/3/15 8:04 p.m.

I used the exact same system. Additionally, I added a couple of tweaks. It was kind of embarrassing, using one Northern coupon, taking, taking a load of stuff to the car, returning for a smaller load, repeating, etc, etc, but wow, what an easy installation. Sort of like PEX plumbing. If I am pushed, the only downside I can mention is it is really tough to get the coiled lines rolled out straight. Other than that, the kit is excellent.

WonkoTheSane
WonkoTheSane Reader
1/3/15 8:33 p.m.

Thanks for the thorough review to the question I haven't gotten around to asking yet!

I have a "new" 1965 Quincy dual engine compressor to reassemble and plumb one of these days..

DILYSI Dave
DILYSI Dave MegaDork
1/3/15 8:40 p.m.

I didn't really have much issue straightening the tube. Step 1 was to weight down one end and unroll it against the floor. That netted a broad arc versus the coil. I would unroll as much as I needed for a given run, cut it, and then pick it up and bend it around my chest to straighten what was left of the curve. Worked for me.

noddaz
noddaz Dork
1/3/15 8:43 p.m.

looks excellent... I need some of this...

ProDarwin
ProDarwin UberDork
1/3/15 8:46 p.m.

This looks awesome. Awesome write-up too.

Question: Won't your drain still trap moisture in the system because its not the lowest point?

DILYSI Dave
DILYSI Dave MegaDork
1/3/15 8:52 p.m.

Thanks.

As for the drain, it's draining from the lowest point in the tank, and has air pressure behind it to push it up and over the hump.

Tom_Spangler
Tom_Spangler SuperDork
1/3/15 8:55 p.m.

Love it. I've been eyeballing the RapidAir system for my barn for the better part of a year. Maybe in the spring when Ugly will (hopefully) be mobile so I can get it out of the way.

irish44j
irish44j PowerDork
1/3/15 9:46 p.m.

I shouldn't have read this. I recently decided to hold off on a good air compressor setup in favor of buying a new welder. Now I want both again

wheelsmithy
wheelsmithy Reader
1/3/15 10:10 p.m.
DILYSI Dave wrote: I didn't really have much issue straightening the tube.

To be clear, I did an exposed installation in kind of a deluxe shop (painted drywall, etc.). All I meant is that to get PERFECTLYstraight runs, you have to do a good bit of work. Aesthetics aide, A+++ product. Most shops could be considered "tricked out" with nothing more than the basic $100 kit. Also, the Northern easy fit couplings are awesome.Try them, and you will never go back. I made a couple of 6' hoses for stuff in my shop, since I now have air outlets everywhere-very nice.

DILYSI Dave
DILYSI Dave MegaDork
1/3/15 10:17 p.m.

Copy. Yeah, that would take some work.

EvanR
EvanR Dork
1/4/15 2:17 a.m.

We just installed this in my shop at work. It is good, and it is easy.

singleslammer
singleslammer UltraDork
1/4/15 9:16 a.m.

Thanks for the writeup! Looks like great stuff.

dean1484
dean1484 UltimaDork
1/4/15 10:03 a.m.

Anyone claim the fittings old fittings. I could always use more of them if no one has.

DILYSI Dave
DILYSI Dave MegaDork
1/4/15 11:44 a.m.

Already claimed.

Knurled
Knurled UltimaDork
1/4/15 11:53 a.m.
DILYSI Dave wrote: Now to drain the tank, instead of berkeleying with shallow pans that I can fit under the valve and doing it all laying on my stomach, I can now just put a bucket under the valve and open it. Should make draining the tank a non-event, and therefore done much more often.

100%. Maintenance that is easy to do is maintenance that you don't put off.

I feel somewhat proud of the huge air compressor rig we have at one of our locations, because I saw what a PITA it would be to change the oil in the compressors and replaced the side-exit drain plug with a section of 3/8" pipe and a cap. Now the oil can be changed without removing the compressors from the tanks.

SyntheticBlinkerFluid
SyntheticBlinkerFluid PowerDork
1/4/15 12:26 p.m.

Thanks for the write up. I like this set up.

What size is your compressor?

I have a 33 gallon Craftsman compressor. I would love a larger tank, but that's not in the cards for a while.

I dig the drain valve. The craftsman one is ridiculous.

Keith Tanner
Keith Tanner MegaDork
1/4/15 3:39 p.m.

I did something similar at home years ago using rubber hose. I'm finding I'm having to go around and fix various leaks as the hose ages, so I may go and replace the whole setup. This may be a good option.

mikeatrpi
mikeatrpi Reader
1/4/15 6:16 p.m.

It looks like the hook-ups have a ball valve drain built-in, true? That would be handy.

mightymike
mightymike Reader
1/4/15 6:48 p.m.

I installed this in my shop a few months ago and have been very pleased.

One thing I did, recommended by the compressor manufacturer, was to have about a 20' run of pipe before I placed the inline water-separating filter, regulator, etc. and then placed all of the outlets beyond that. They explained that this allowed adequate distance for the compressed air to cool and that allows the filters to work better.

DILYSI Dave
DILYSI Dave MegaDork
1/5/15 10:04 a.m.

Compressor is a 60 gallon Husky with a single stage iron piston pump. I still have my old 25 gallon roll around tank - compressor died on that one. But I will probably put a short length of hose, a valve, and a male quick connect on that one. Leave it plugged into the outlet at the tank and now I've got 85 Gallons.

Yes, each outlet has a drain valve.

Fortunately, and surprisingly since I'm in GA, I have never had any moisture issues worth addressing using this compressor. So I don't have a drier. But yeah, I can see where room to condensate would be a good thing.

Mad_Ratel
Mad_Ratel Reader
1/5/15 10:25 a.m.

what is the OD of the pipe? (i need to run through an existing wall since the compressor is mounted in my crawlspace/future workshop to get air to the garage.)

EvanB
EvanB UltimaDork
1/5/15 10:31 a.m.

In reply to Mad_Ratel:

Based on the RapidAir description the tubing would be 3/4" od.

Kenny_McCormic
Kenny_McCormic PowerDork
1/5/15 10:33 a.m.

Looks like a nicely packaged system for those who don't want to go the trouble of doing it all in copper. Is there any stated life expectancy for the plastic hardline?

DILYSI Dave
DILYSI Dave MegaDork
1/5/15 10:39 a.m.

Pretty sure it is 3/4" ID, and I'd guess 1" OD. I can measure some drops when I get home.

EDIT - Found on the RapidAir site - .98 OD x .80 ID

1 2

You'll need to log in to post.

Our Preferred Partners
s2Vy2Pf7DILi4UENdnvX9pbxu5RpFb51CBduaxlVg3XnLpZS09VyZRnxdQBADqr4