
With a pile of fresh parts and the sun still low on the horizon, we set on another day of restoration work.
The floorpans had already been replaced once, but the work was subpar and needed to be redone.

We cut the seems around the existing floor so they could be adjusted into the proper position.
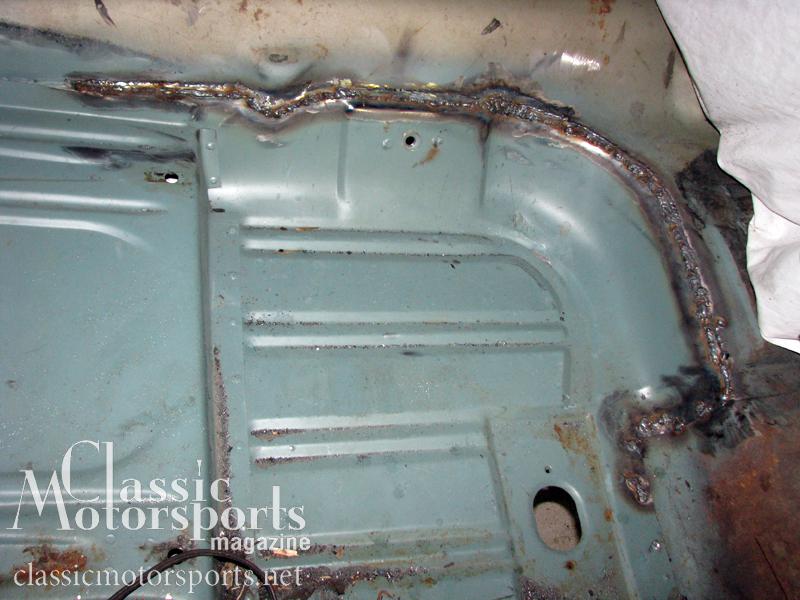
Once the existing floorpan was adjusted, we simply cleaned up the weld area and move on.

We also reworked the hood hinges with a process called parkerization for a concours-correct finish. Look for an in-depth explanation of the process in an upcoming article.
Grinding and cutting and welding in new floors is dirty, nasty work.
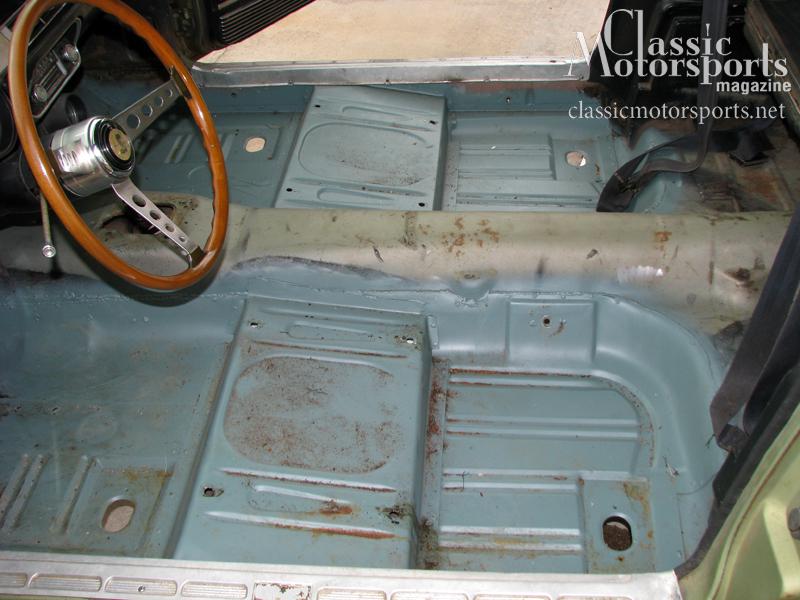
With the driveline out, most of the suspension in pieces, and other parts replaced, powder coated and/or painted, it was time to start the metalwork on our Shelby GT 350. In a perfect world, we would have steam cleaned the chassis first, but both of the steam cleaning machines we had available to us were broken. Fortunately, the area that we needed to fix—the floors—had already been repaired once. The muck and sealant around them had been cleaned away years ago.
We ordered new floor pans from NPD, but decided to try saving what already existed in the car. After much study and discussion, we decided to just cut some of the seam on the floor pans that were already in the car. In places where the pans weren’t positioned correctly, we would seam weld them into the right position. The pans just needed to be moved down a bit—a mere 1/8 to 1/4 inch—and a good welder can easily fill a gap that size.
We then tackled the battery box area. The replacement panel we bought from NPD fit perfectly. In the old days, replacement panels weren’t available and we had to make our own. When they did come on the market, it became popular to replace an entire panel. Today, however, it’s important to keep a collector car as intact as possible, especially a car with date codes all over it like our Shelby. Because of this, we used as little of the replacement panel as we could, cutting our panel patches slightly smaller than the holes we wanted to fix and then butt welding them in place. We bought a 2x3-foot replacement right-inner fender well and only used some 6x10 inches of it.
On to the Floors Grinding and cutting and welding in new floors is dirty, nasty work. We headed to Orlando Mustang to study another Shelby Mustang of the same vintage as our own that still had original floor pans. We decided the pans on our car were a lot closer than we thought.
So, we welded a patch in the right-front floor using a panel (toe board) that we got from NPD. While one member of our team tackled that job, another went back to bead blasting, painting and Parkerizing our few remaining parts.
Everything is date coded on these cars—even the horns. Once we determined they were still working correctly, we blocked the opening and refurbished them with a quick bead blasting and a coat of black semigloss spray paint.
The hood hinges had to be perfectly bead blasted and Parkerized, along with the distributor hold-down, throttle linkage, and a couple other little bits. If you need to perform a process on multiple components, it’s much more efficient to do them as a batch.
We ended the day with pretty much every part done and the floors rewelded nearly to perfection. With some some careful finishing, the welds on the floor pan will look just right on a restored car. We would have liked to pat ourselves on the back, there was still a lot of work to do.
View all comments on the CMS forums
You'll need to log in to post.
![]()

![]()


