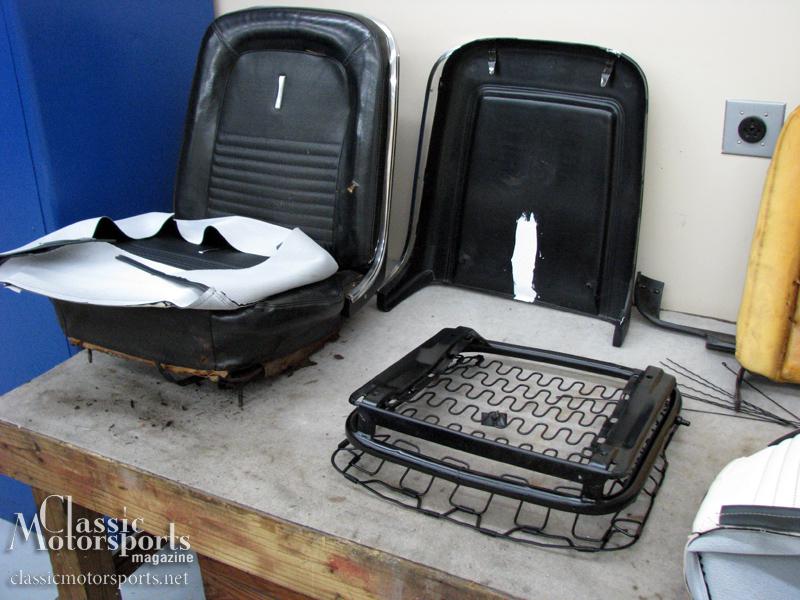
The is what we started with. They aren't beautiful, but we've worked with worse.

Our next step was to remove the hog rings that secure the seat cover.

With the seat covers removed, we could evaluate the condition of the seat foam.

We repainted the seat frame before reassembly.

We're very happy with the way the seats turned out.
We studied, photographed and took our time as we did each one so we could use the other as a pattern if we ran into trouble.
Our original Shelby GT 350 seats had some rips in the seams, but they were in remarkably good shape compared to the rest of the car. We found none of the common seat frame rust or cracking, and our foam was in surprisingly good shape. The guys at Orlando Mustang recommended we keep the original foam if we could, because it fits and looks better when the job is completed.
We ordered a Deluxe 1967 Mustang seat cover kit from NPD. It fit very well and was very well made. We reused our original emblems on the center of the seat backs: We were trying to keep as much of the car as original as we could. We also ordered some seat burlap pieces, as ours had rotted away in typical fashion.
Unlike other seats we have done, these Mustang seats proved to be cheap and easy to restore. With only a couple of hundred dollars’ worth of materials, we got started by cutting out the old hog rings and removing the old seat covers. We studied, photographed and took our time as we did each one so we could use the other as a pattern if we ran into trouble.
We painted up the seat frames and original wires that go through the seat covers to connect new hog rings to. Once everything was dry, we quickly assembled the seats and screwed the plastic seat back covers—repaired with epoxy—onto the seat backs. We were thrilled with the look and feel of our repaired seats.
| If you aren’t reading the print version of Classic Motorsports, you’re missing out. Subscribe now to get 6 big issues delivered to your door!
|
View all comments on the CMS forums
You'll need to log in to post.