2 3 4
greggearhead
greggearhead Reader
5/26/20 3:00 p.m.

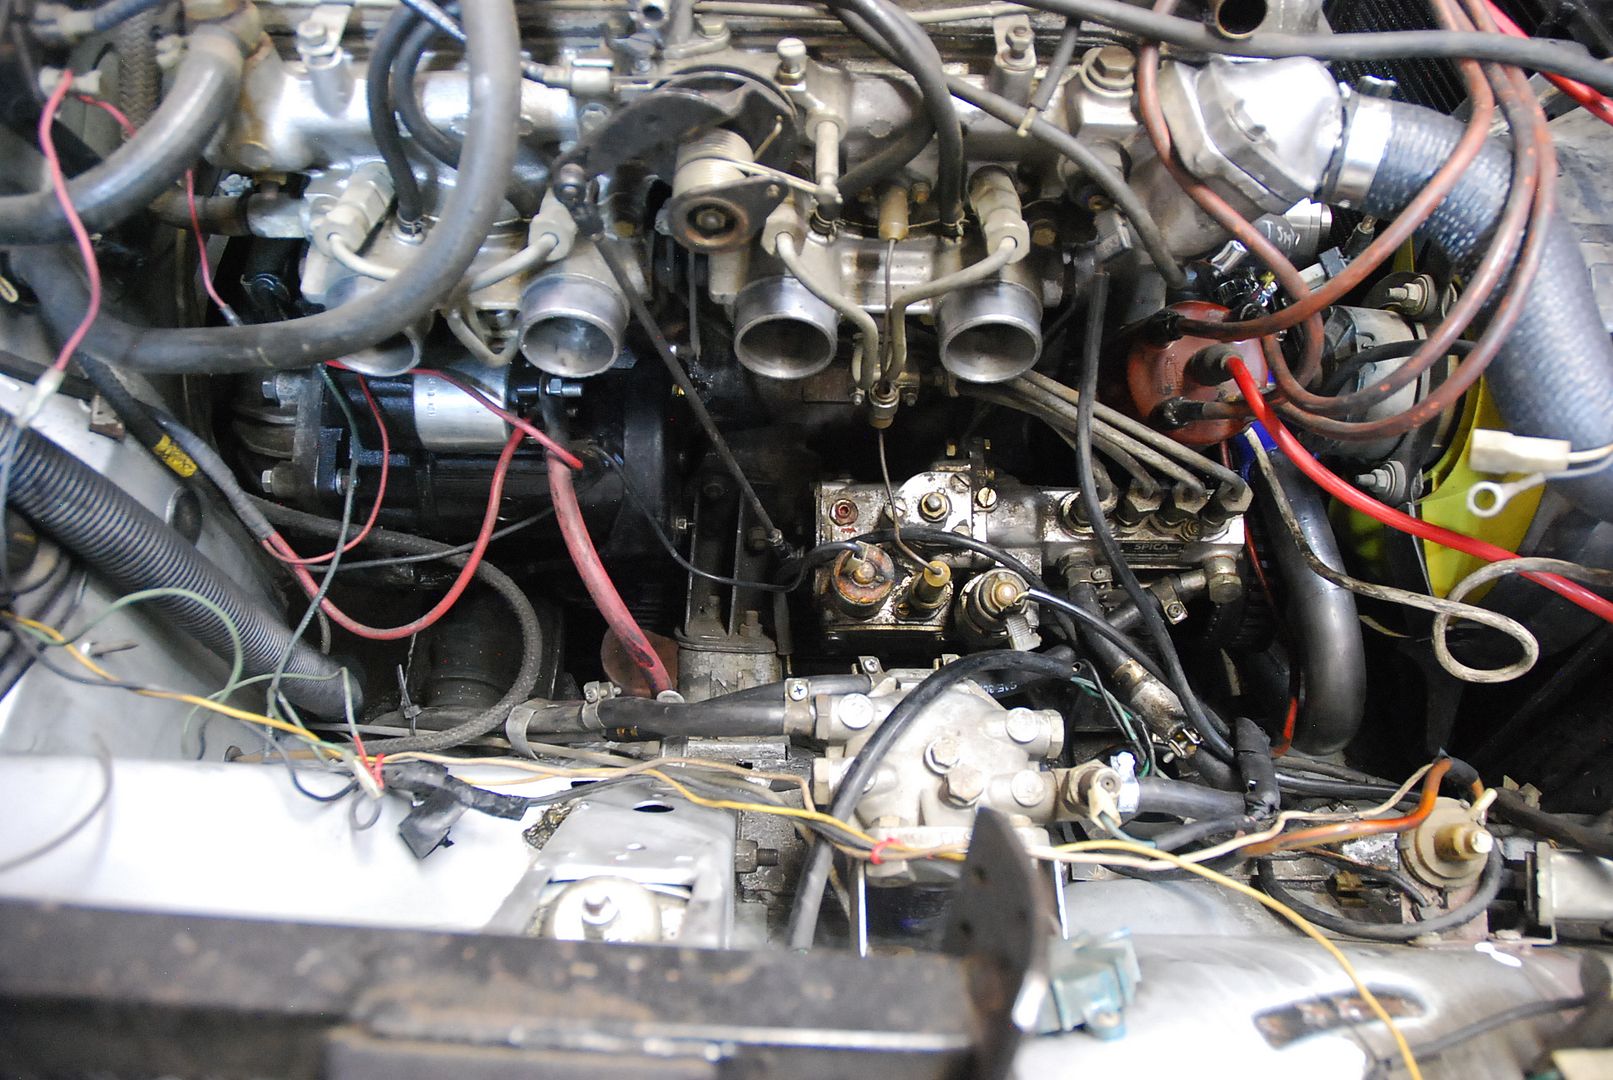
I'm adding cams that are bigger than what the SPICA can handle, according to the experts.  Hence my need for the sure start.  I would assume, if the thermostatic actuator can finely adjust the fuel curve for colder temps, the sure start should do the same thing, albeit with fine movement adjustments at the lever.  hence the need for an air fuel ratio gauge, which I have planned and have an O2 sensor bung in the downpipe already.  


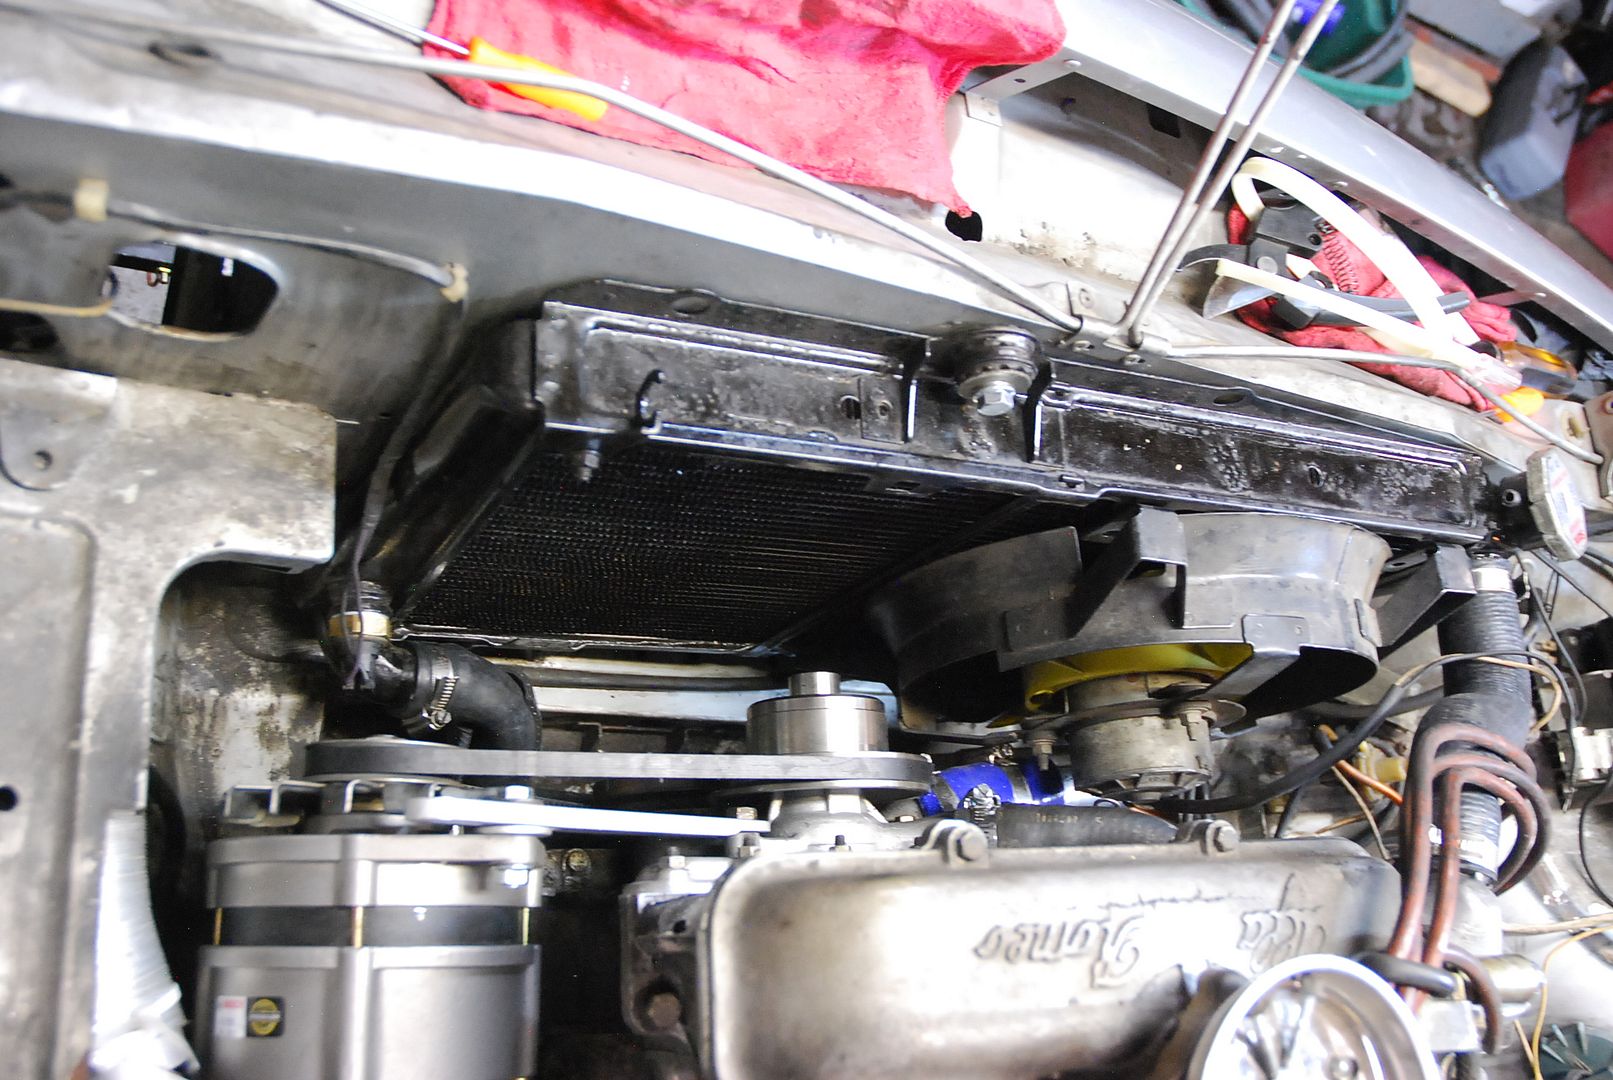
So got the right length belt (3rd try's a charm) and got the upper hose mounted, and the lower hose mounted, but decided to make it much easier to fit the other hoses.  For the lower hose metal pipe, I welded it up at the connection so that a straight (not reducer) piece of hose will work for it.  Universal, easy to replace in the future.  Found some VW type heater hose that fits the alternator shroud pretty well too.  Not much progress, but at least some.  Radiator is in - hopefully for good.  

greggearhead
greggearhead Reader
5/30/20 8:38 p.m.

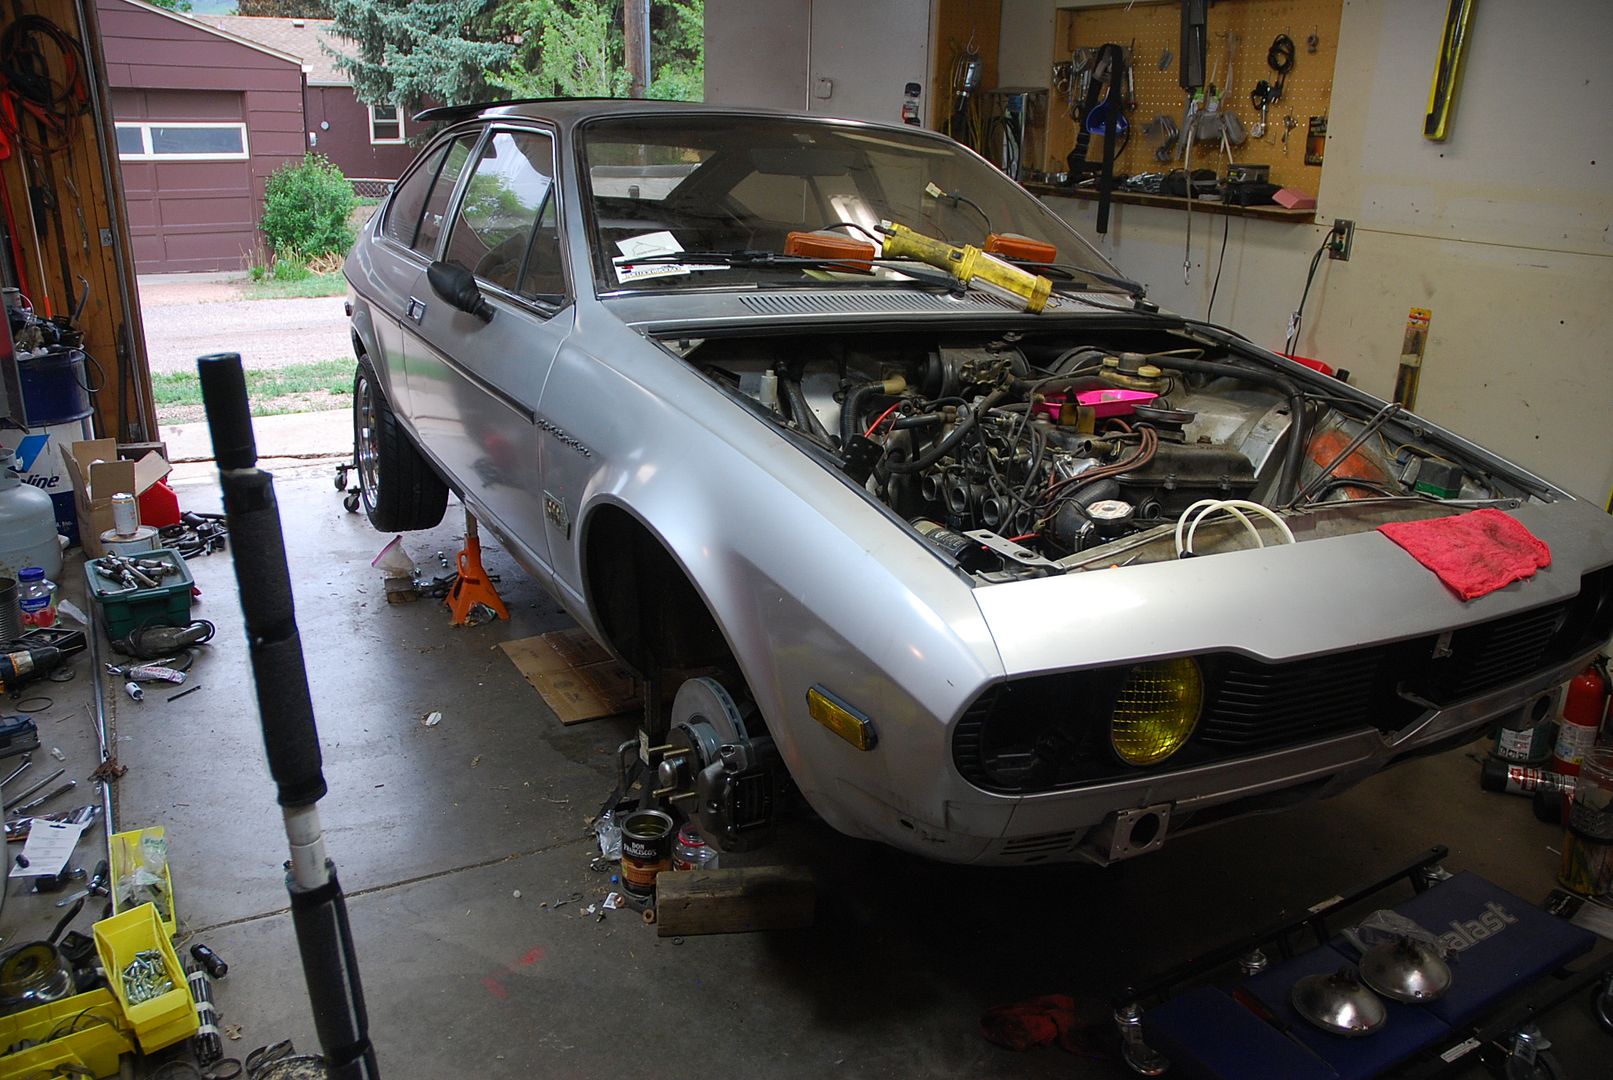
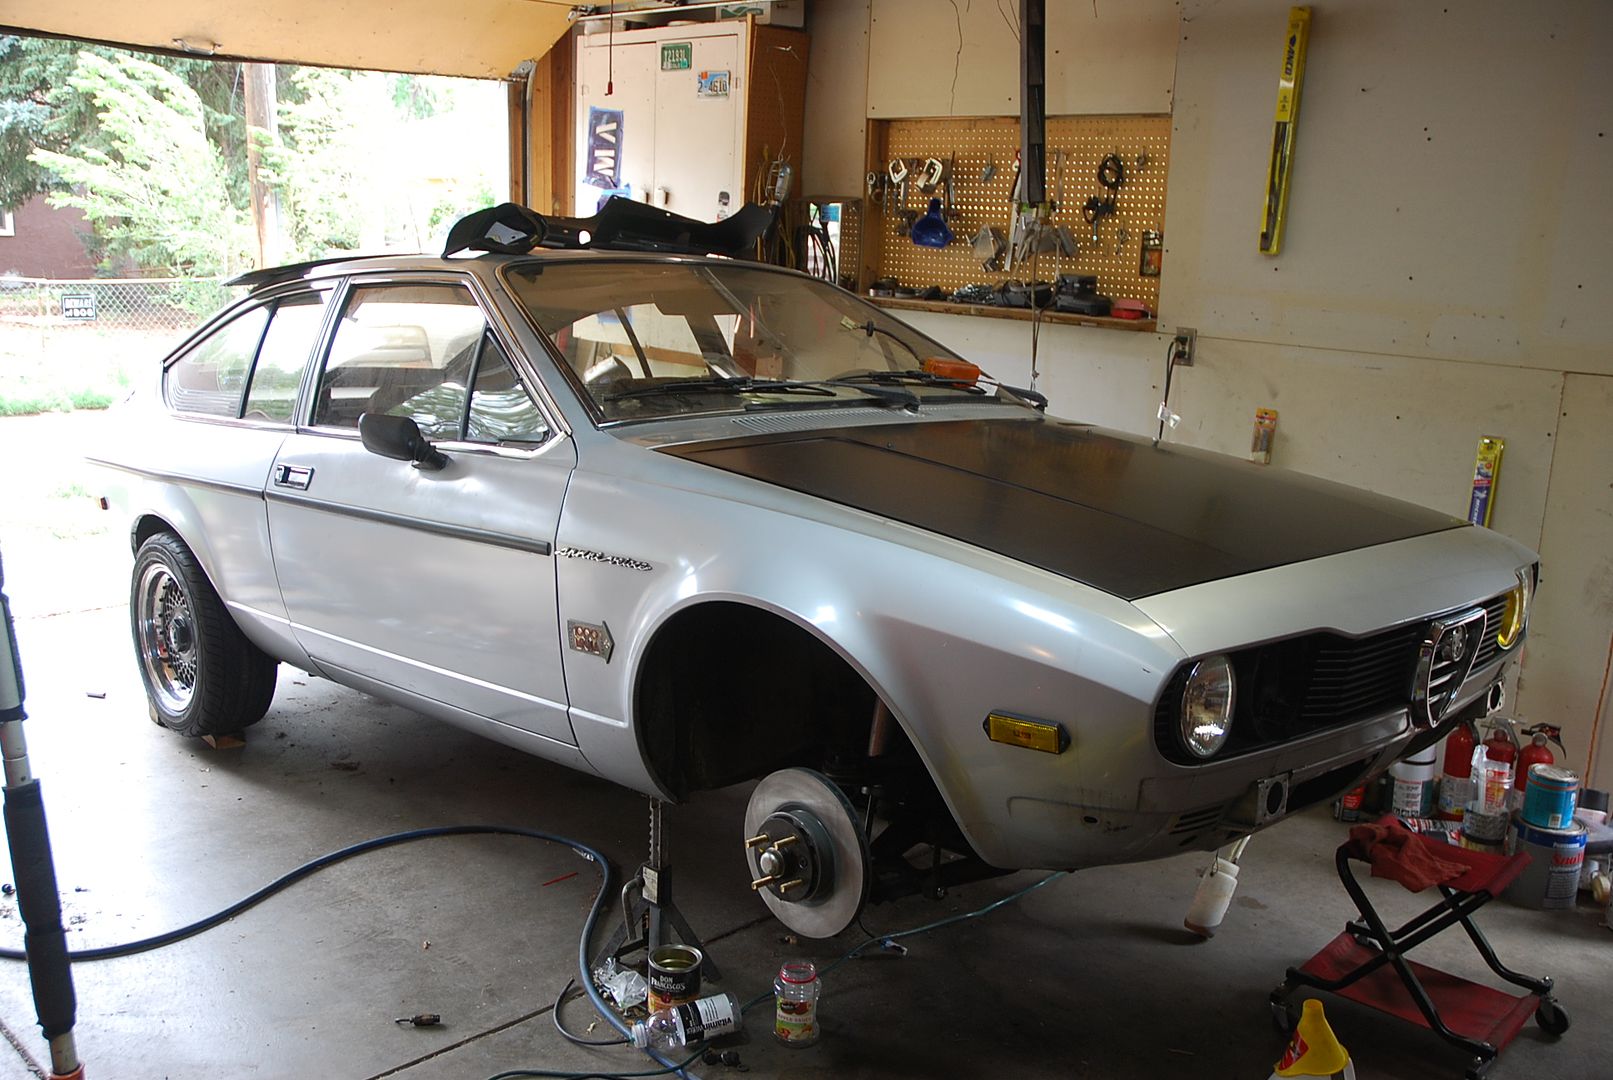
Little progress on the Alfa Romeo Alfetta GTV Sprint Veloce Mille Miglia today. Not much, but some, and on this car, anything forward is good.


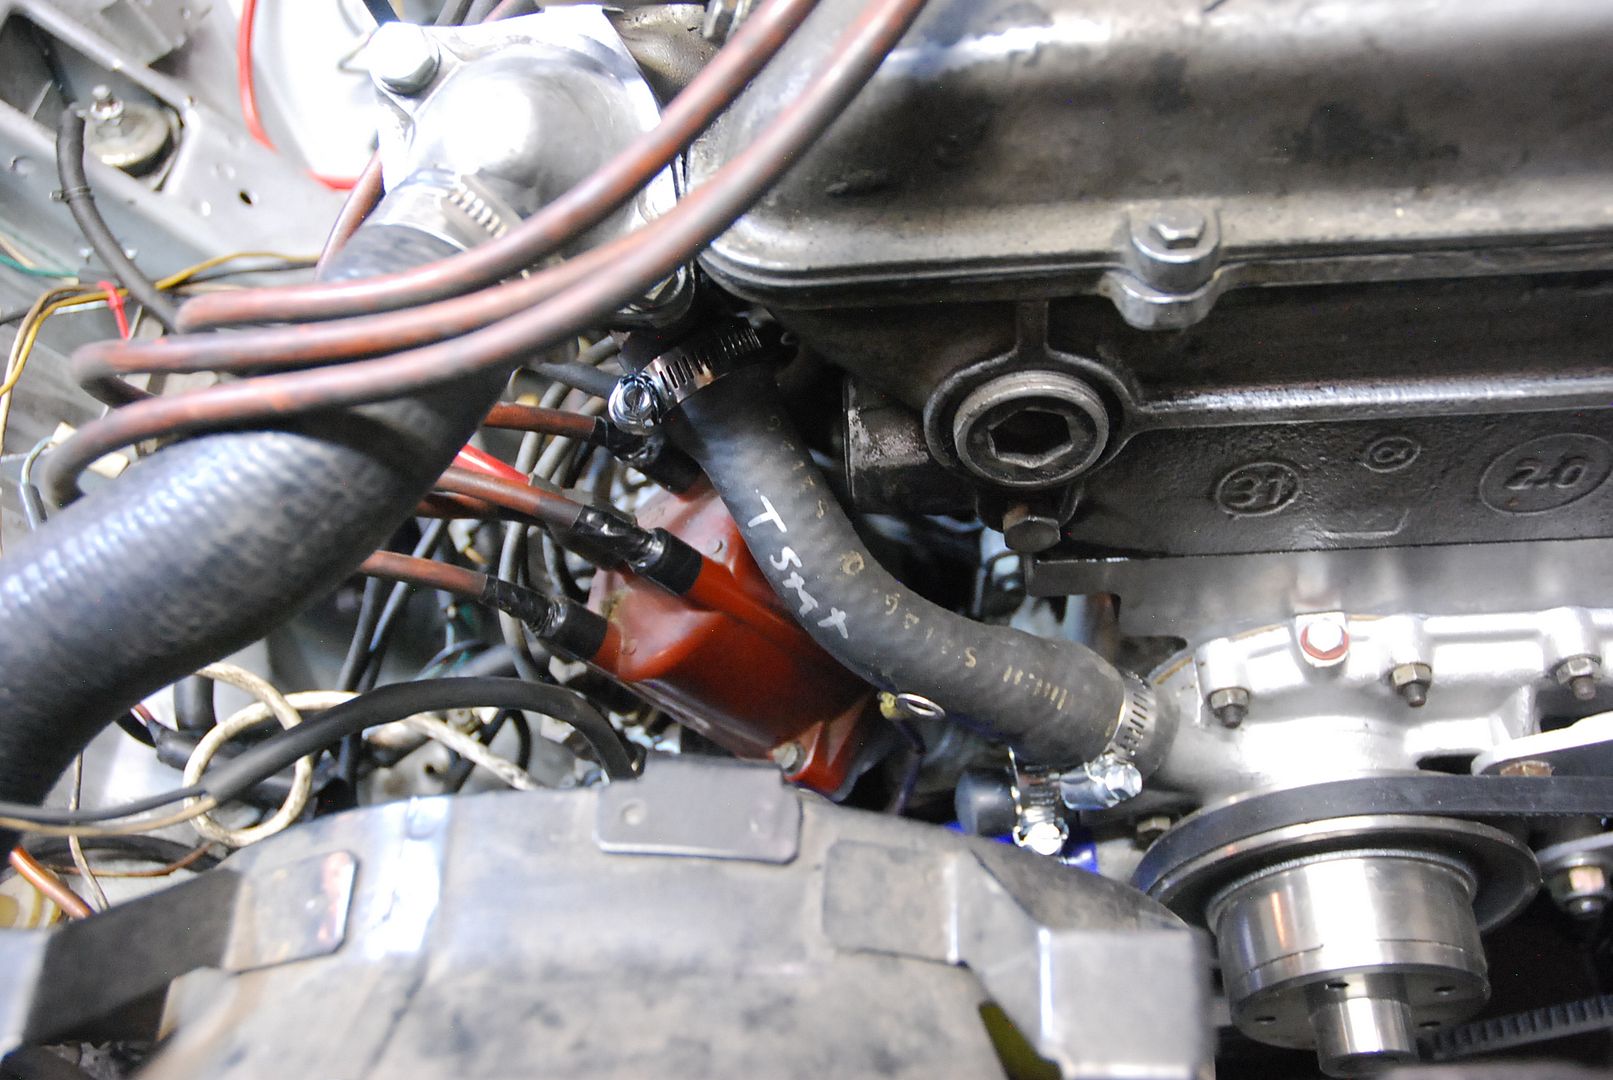
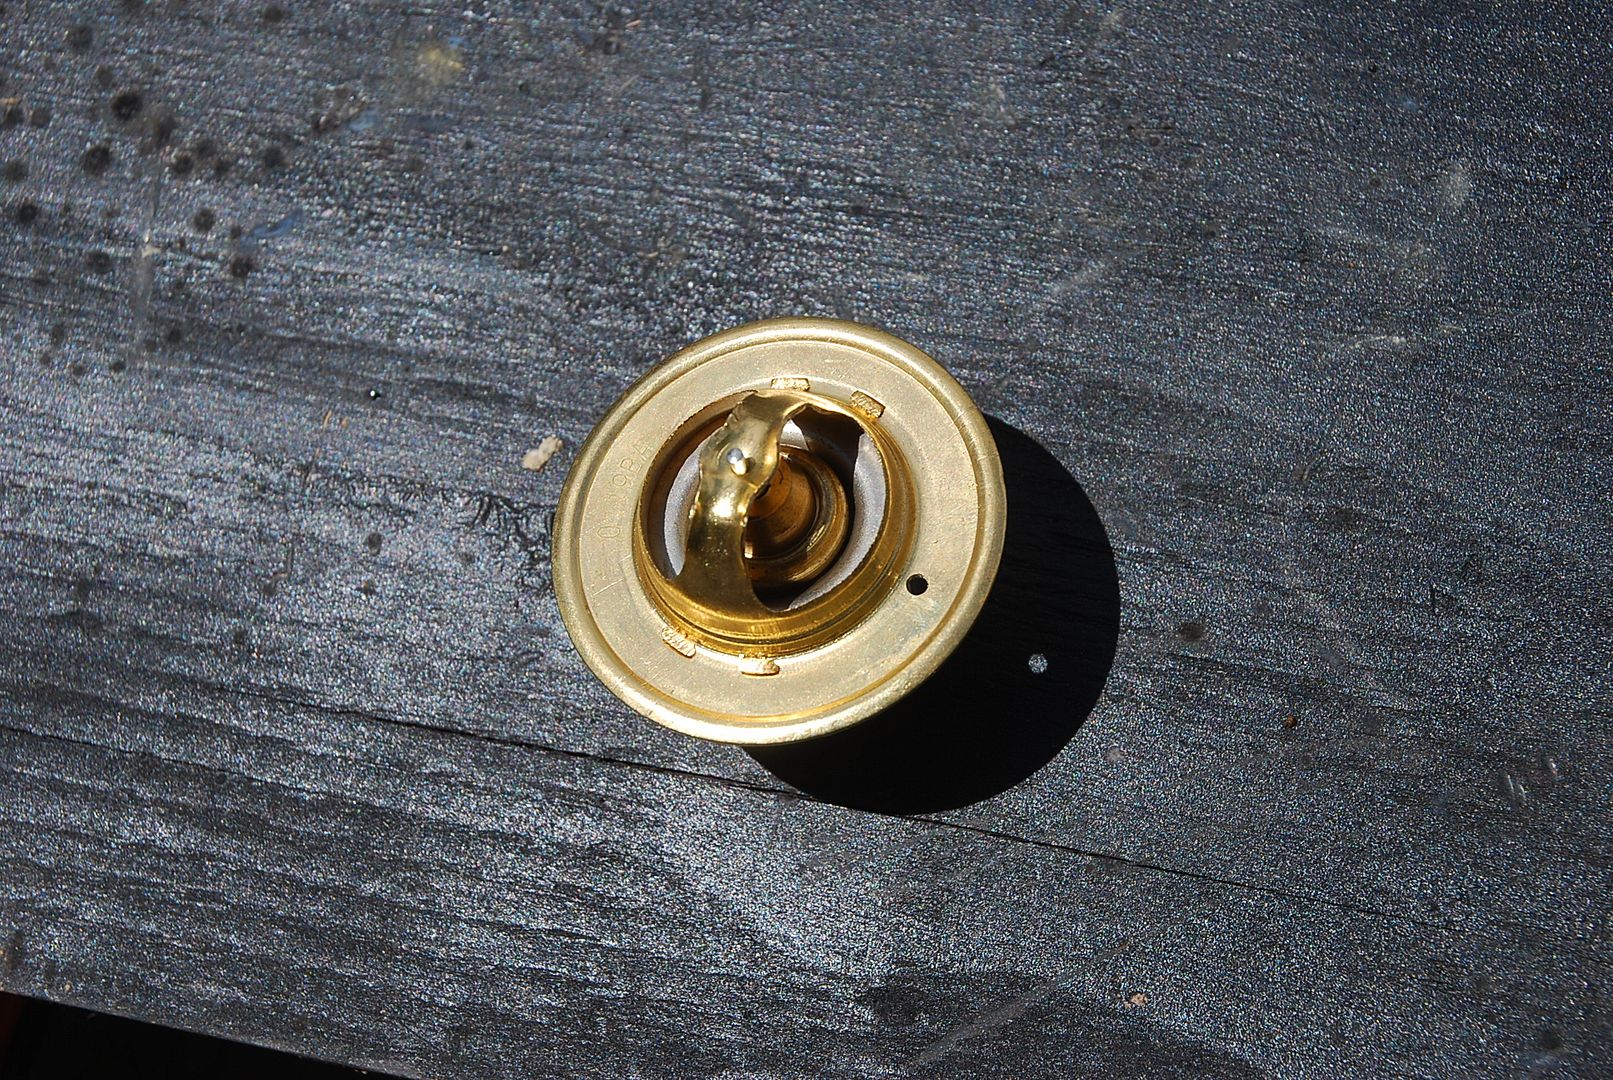
I got the thermostat installed, and drilled a small air bleed hole, because I'm not super familiar with Alfa Nord engines, and wanted to be sure it would not be a problem. Ahem. Not that anything else has been a problem...


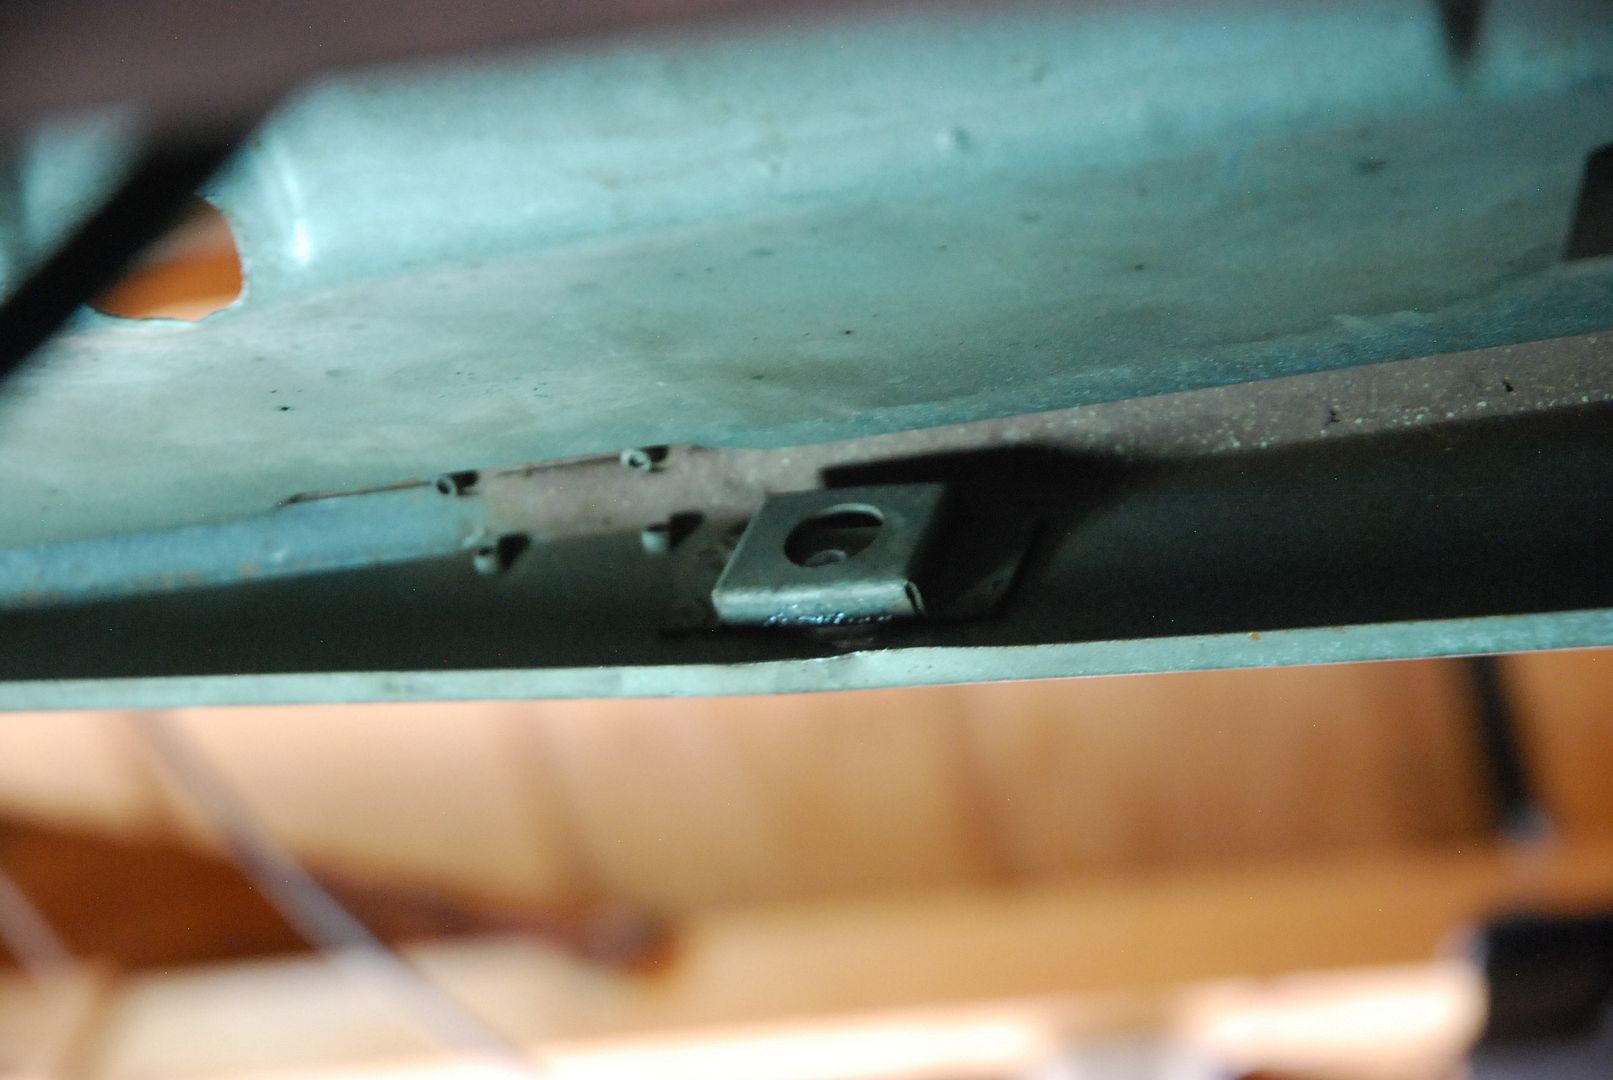
I started to install the top bolt for the radiator mount, which has a loose captive nut, that is a rectangle shape that is suppose to allow it to move for alignment, but not rotate so you can tighten it. When Flynn and I were removing it, it spun, which means you can't remove it, normally. We used an impact and spun it off, but no tightening it is a problem.


The rectangular nut has a slightly larger rectangular box it is inside, thus allowing the movement specified but not allowing it to rotate, or spin. The box, had been enlarged a bit for some reason in the past. When I started to thread in a new bolt, I discovered why. It was cross-threaded, and not just a little bit. Whoever cross-threaded it, drove it in deep, to the point where it would not even accept the bolt on the correct threads vs. the cross-threaded ones.


Simple, I'll chase the original (correct) threads with an 8mm x 1.25mm tap. Oh - I broke that tap the other week in my Porsche Recaro seat mount fixing those threads. Sigh.


A tap cuts new threads in bare metal, or is often used to repair damaged threads. As such, it's basically like a tapered bolt, with threads that cut into the metal. So, being that I'm trying very hard not to run to the store for every little thing, I put the broken tap on the grinder and made it's sharp cutting threads tapered. Not perfect, but hopefully good enough.


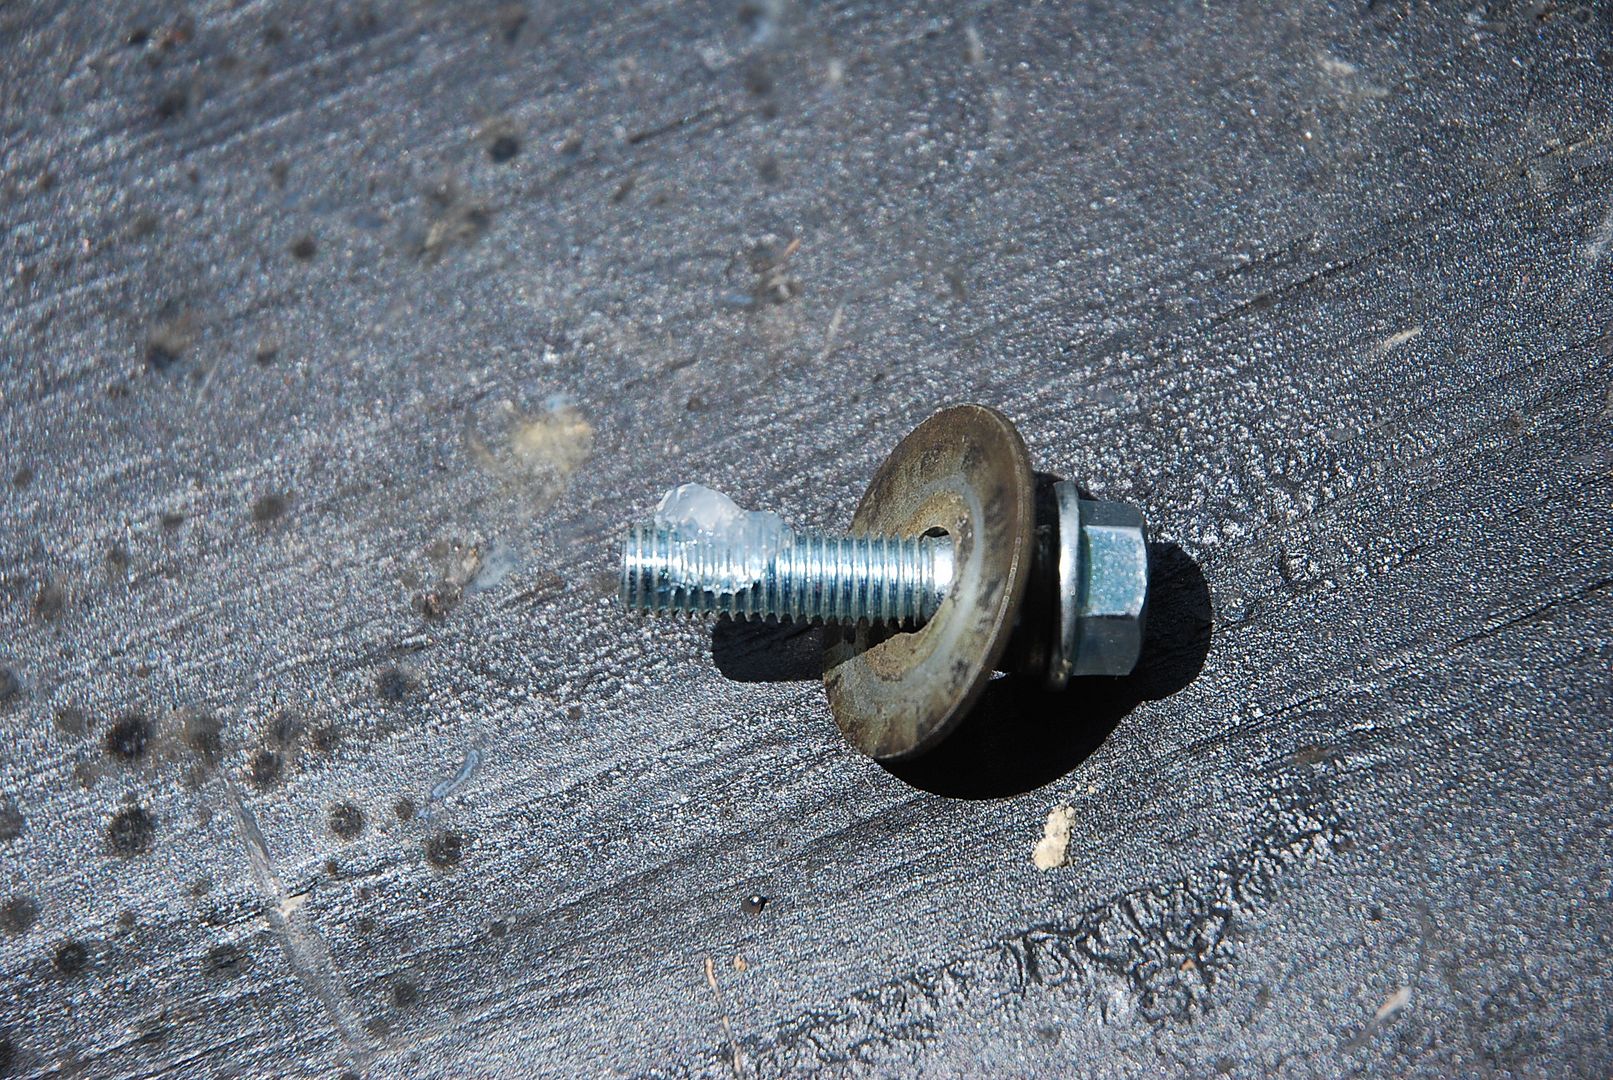
It worked great. I also went from beneath and in front of the semi-captive nut and used a punch and a hammer to 'tighten' down the larger rectangular box holding the rectangular nut from spinning. It worked. The nut can still slide around inside it's box, but not spin. Being that I wanted the radiator bolt to not loosen itself, but not be super tight (and enlarging the box it lives in again) I used some clear silicone RTV and very low strength loctite. It basically just prevents a bolt from loosening up from vibration, etc.


I used the same trick on the two thermostat housing bolts that often rust due to temperature, chemicals and differences in metals. There, it acts like the same low strength loctite, but also an insulator so the bolts don't rust in place.


I got some of the hoses finished as well - I used some surplus silicone hoses to cut into a straight for the lower radiator hose connector pipe piece that I modified (so it doesn't need a reducer (read, rare and hard to find) hose, and used some 1" straight heater hose for the thermostat bypass. However, it needs to have a bend, and if it was too long, to encourage a bend, it kinked. Shorter, it rubbed against the block which would cause the hose to cut and leak over time. so, I'll be ordering a custom 45 degree bent hose later. Sigh. The upper radiator hose (rad to thermostat housing) came out perfect with just a few cuts to trim it's length. Also reconnected the wires to the fan temperature switch in the radiator.


The alternator uses a cooling shroud on the back of it to suck in air, and needs a 2" flexible cardboard type tube ducted to it from the front radiator. I found some from an old VW that was just a smidge large in diameter, but the perfect length. However, it wouldn't fit through the hole in the front radiator support. I just cut four slits in it and made it reduce slightly, put it through the smaller hole, and then bend them back out. Done.


I also fixed the Fiat Spider shifter plate surround for the Fiat Spider I recently sold. I didn't have a template so I made a hole in the automatic metal shifter plate that ended up being too large. So the shifter boot with a foam seal would start to come up from underneath the transmission tunnel. I welded in some new small pieces of sheetmetal to make sure that doesn't happen.


Tomorrow, hopefully to bleed the brakes, install the cooling fan and maybe install the hood (gasp)!


[URL=https://s61.photobucket.com/user/greggearhead/media/Alfetta%20GTV/DSC_0664_zps4unyvc1k.jpg.html][/URL]
 

[URL=https://s61.photobucket.com/user/greggearhead/media/Alfetta%20GTV/DSC_0665_zpszk4doxy4.jpg.html][/URL]
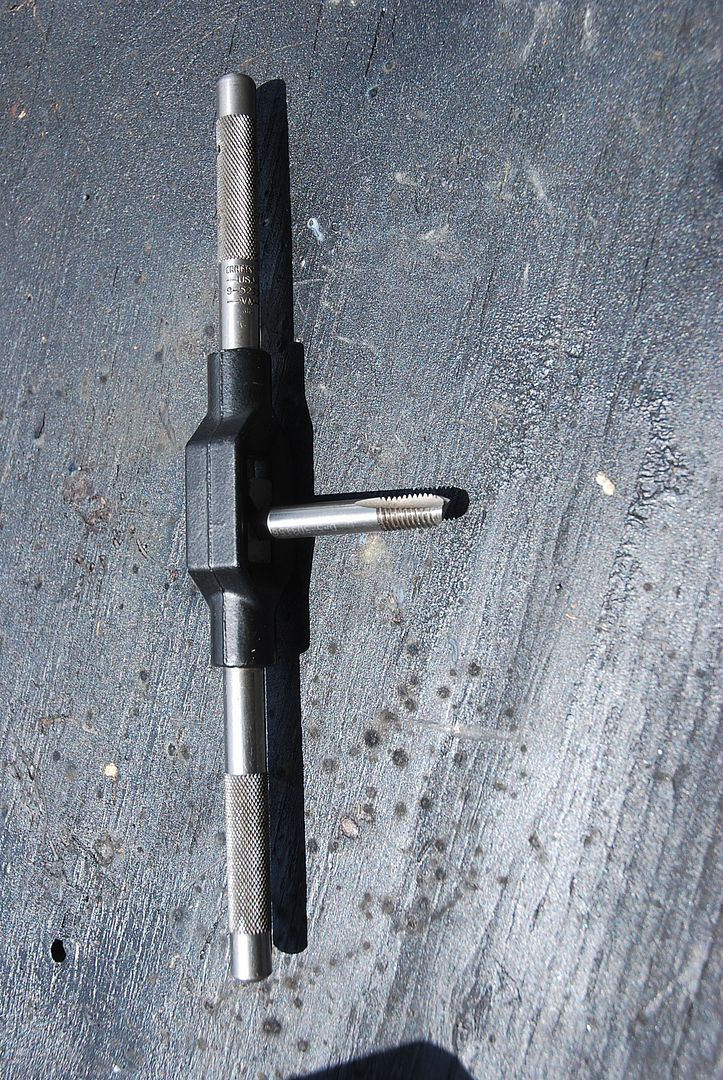
 

[URL=https://s61.photobucket.com/user/greggearhead/media/Alfetta%20GTV/DSC_0666_zpsshknrlap.jpg.html][/URL]
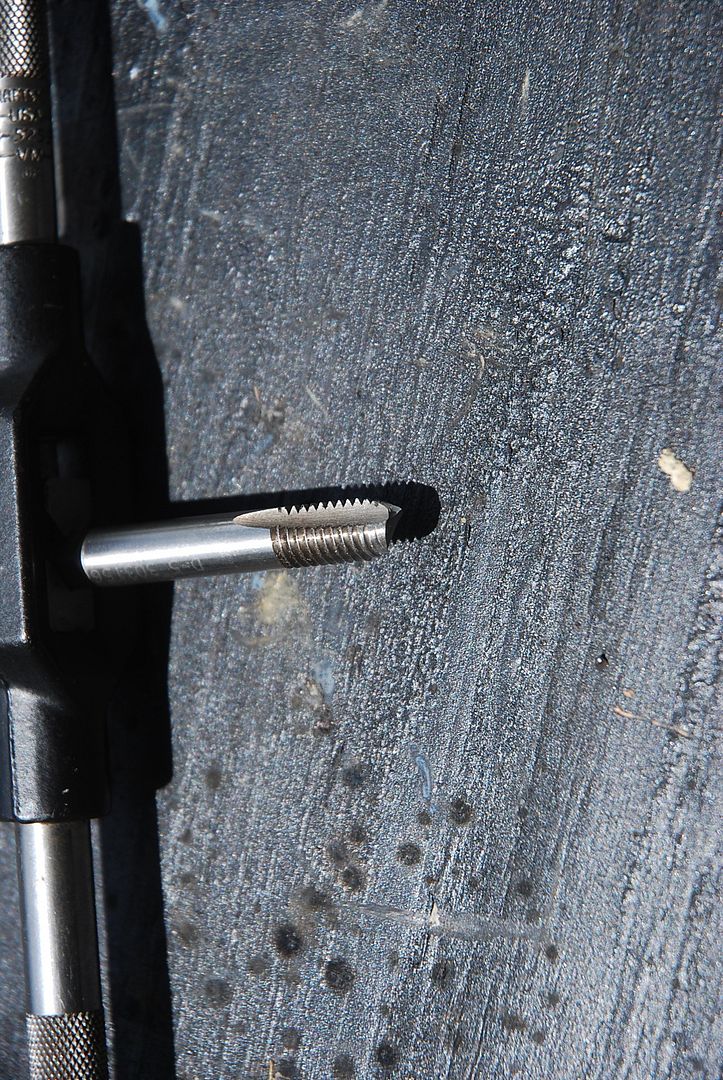
 

[URL=https://s61.photobucket.com/user/greggearhead/media/Alfetta%20GTV/DSC_0667_zpsl5lbeqr9.jpg.html][/URL]
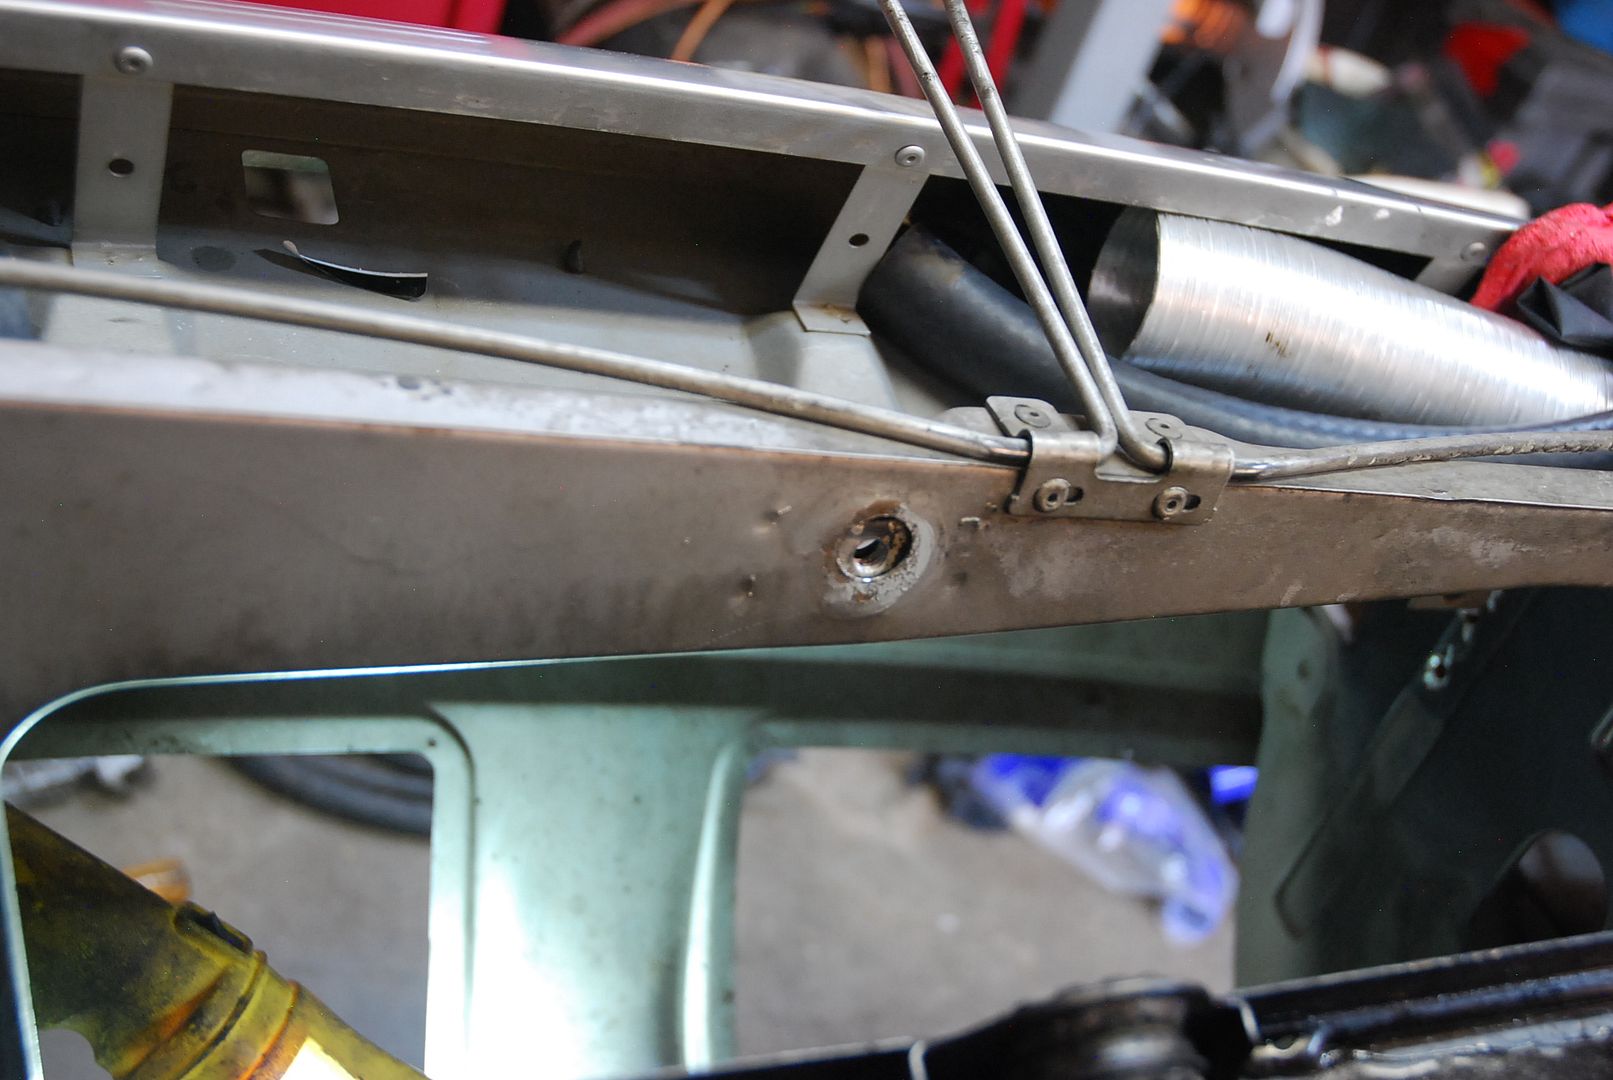
 

[URL=https://s61.photobucket.com/user/greggearhead/media/Alfetta%20GTV/DSC_0668_zpsf8iy5mqv.jpg.html][/URL]
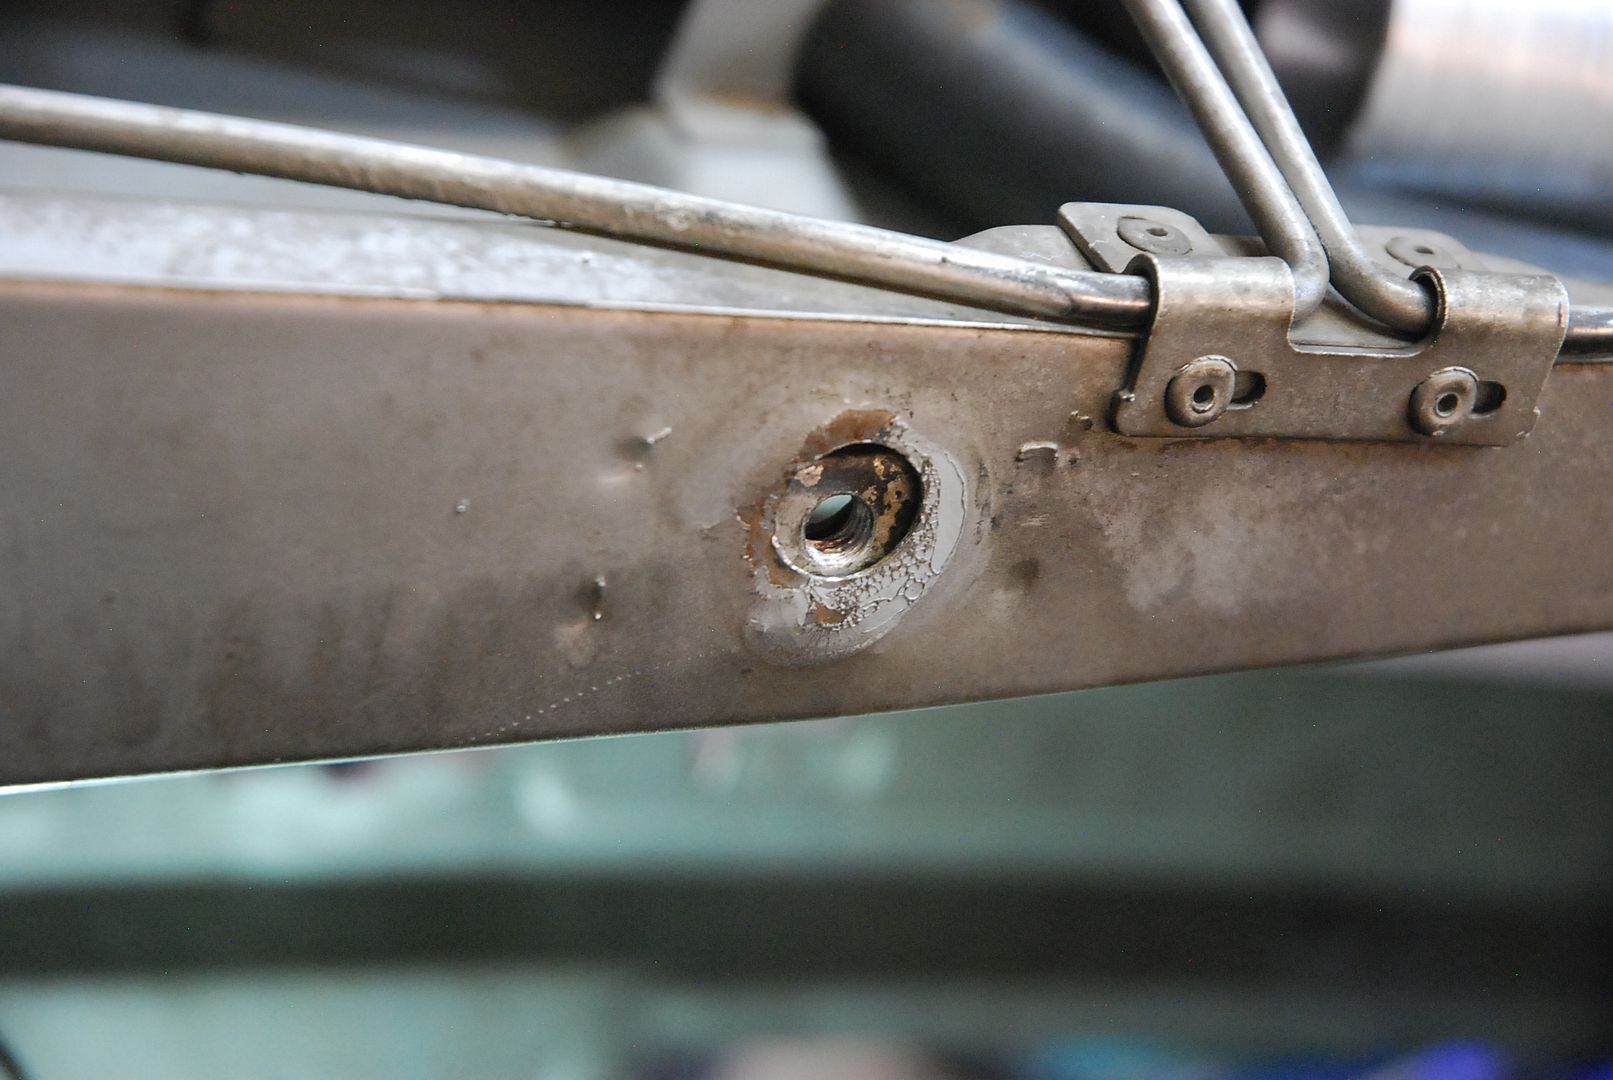
 

[URL=https://s61.photobucket.com/user/greggearhead/media/Alfetta%20GTV/DSC_0669_zpsspiy3mjo.jpg.html][/URL]
 

[URL=https://s61.photobucket.com/user/greggearhead/media/Alfetta%20GTV/DSC_0670_zpslywgsuh5.jpg.html][/URL]
greggearhead
greggearhead Reader
5/31/20 10:41 p.m.


Got the (rebuilt/recored) radiator installed completely, all hoses trimmed and installed with new clamps.  Only old hose was the thermostat bypass hose.  I simply had to reuse it.  There was no way to use a normal hose with an elbow or something like that.  Alfa made the outlet from the thermostat housing point RIGHT at a sharp corner of the block, before turning 45 degrees to go into the water pump.  Simply clocking the outlet of the casting in the design phase would prevent this issue and a normal elbow hose would be fine.  In this case, however, you have to use a custom bent hose, with a reduced diameter, to JUST barely miss the sharp corner of the block.  It's stuff like this that makes me shake my head at Alfa engineers.  I'll try to find a replacement in the future.  This hose looks fine, but is old, so I'll replace it and keep as a spare. 


I had two cooling fans (lots of spare parts when I purchased it) and tested them both.  Good thing - one of them squealed loudly and the other was quiet.  That one got installed. 


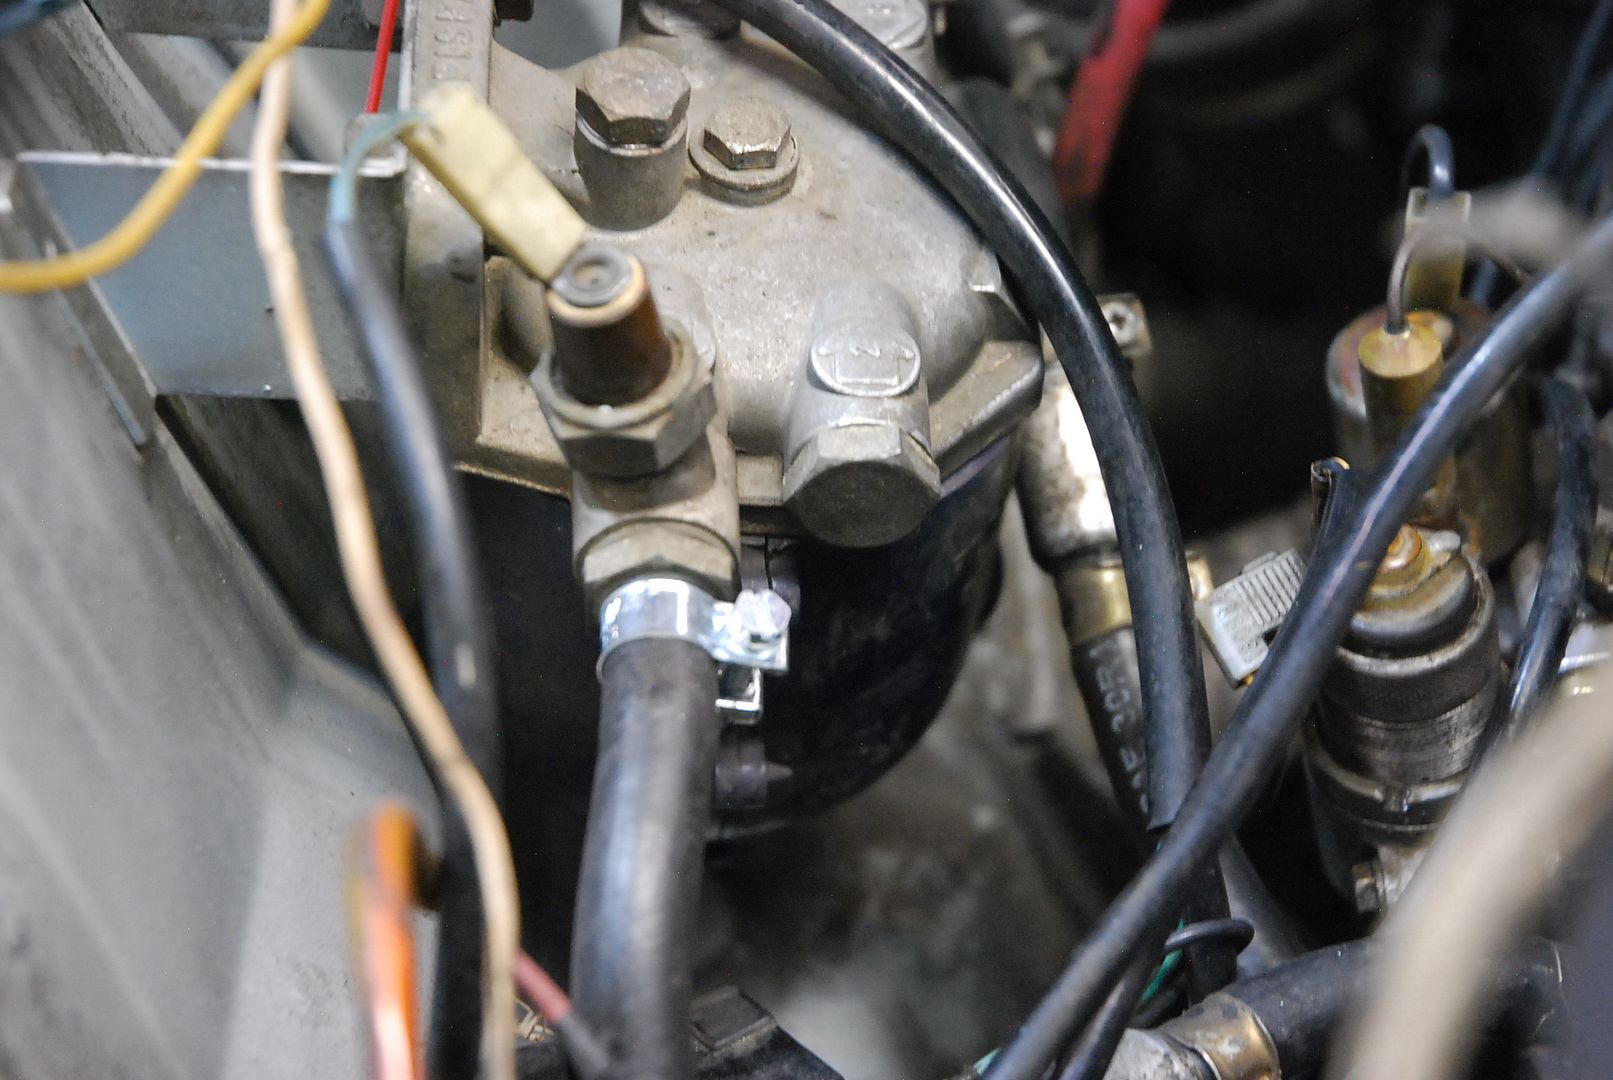
Once that was done, I decided to replace the fuel filter, as well as all the soft fuel hose in the engine compartment.  Luckily, I had plenty of the right diameter fuel hose on hand, and only one non-fuel clamp needed replaced with the correct type (so as not to cut the hose of course).  The old fuel filter came out OK, but access is kinda silly, and could be very easy.  For a normal maintenance item, it's another 'shake your head at Alfa' design. 


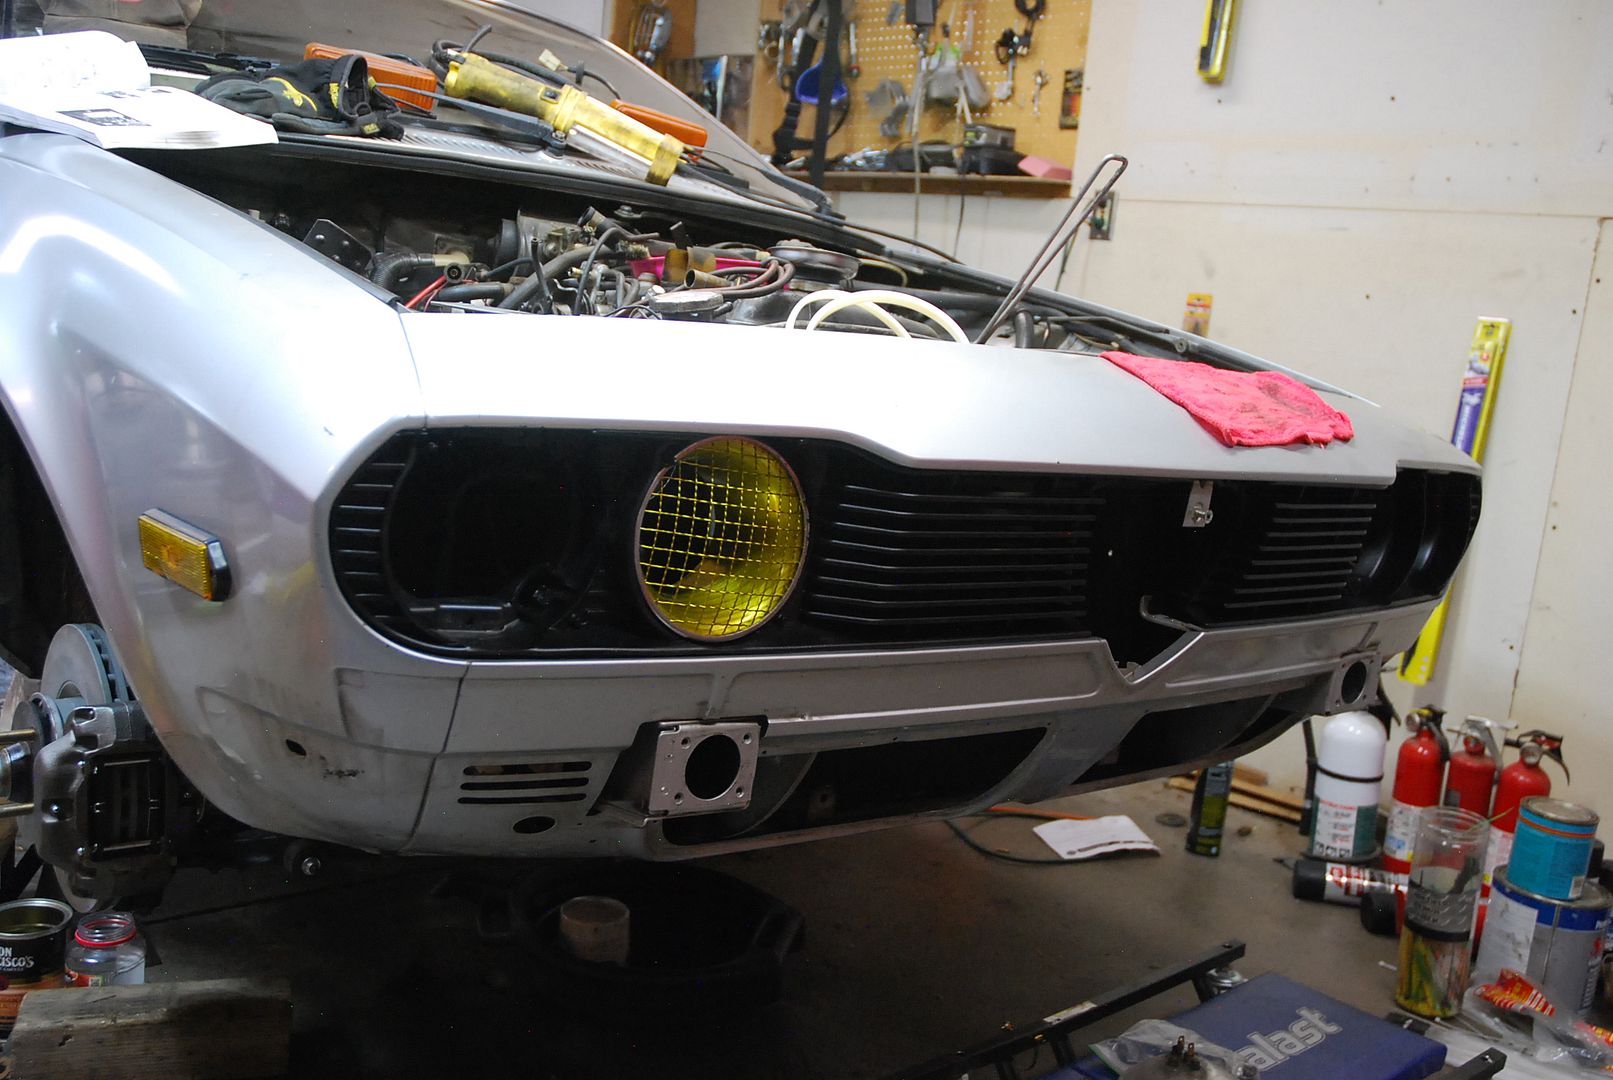
Finally, since the radiator is all the way in, I started to mock up the grilles and headlight intake for the new airbox.  I cut up a high beam headlight mount to hold the aluminum velocity stack, but only today realized that Alfa makes left and right side headlight mounts different.  Of course when I did it I didn't think of this and hacked up the wrong side one, so I'll be needing another one of those, and to repeat my work to hold the air intake, or come up with another mounting system.  Not a big deal, but frustrating. 


Hood mounting and brake bleeding takes place mid-week. 


Alfaromeoguy
Alfaromeoguy HalfDork
6/1/20 12:57 a.m.

In reply to greggearhead :once to do a starter removal 10=15 times its get much easier, i spent 10 years working on alfa romeos..over time it become second nature.


Alfaromeoguy
Alfaromeoguy HalfDork
6/1/20 1:06 a.m.
greggearhead said:

Staying home on Tuesdays and Thursdays now. More car progress.


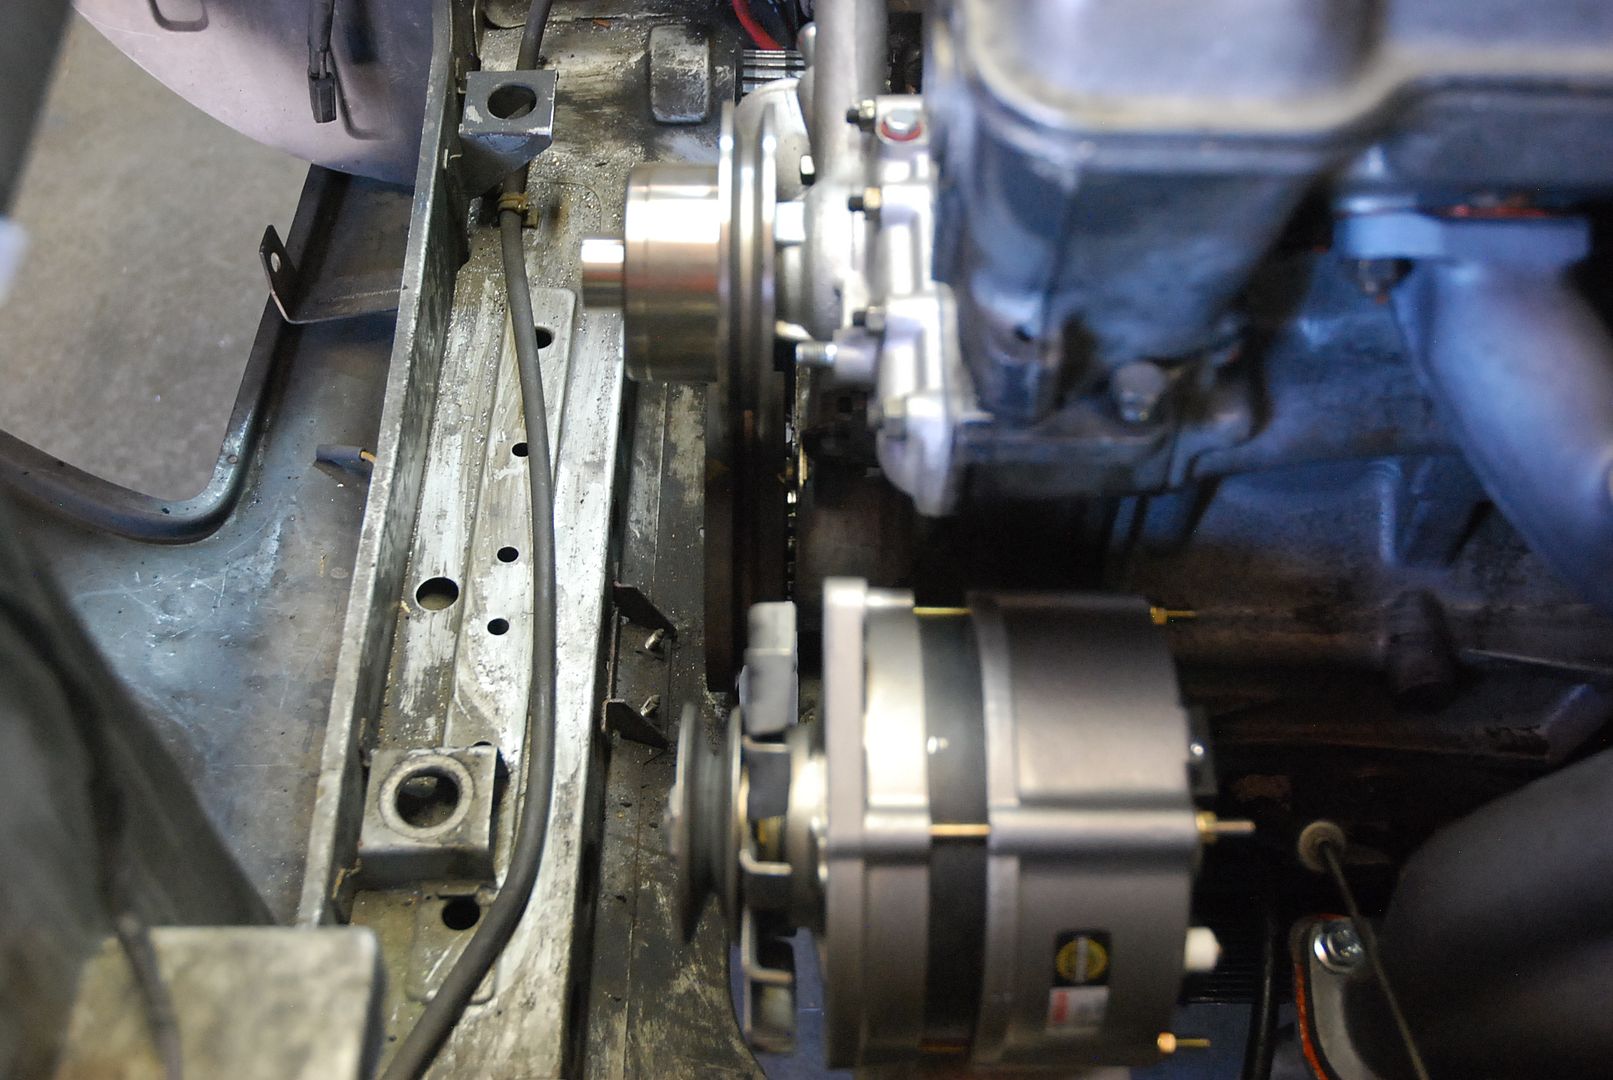
I got the freshly machined alternator test fit, and my tensioning bracket didn't work. So I'm making a new one.  I am wondering about a smaller oil filter to enable easier oil changes.  


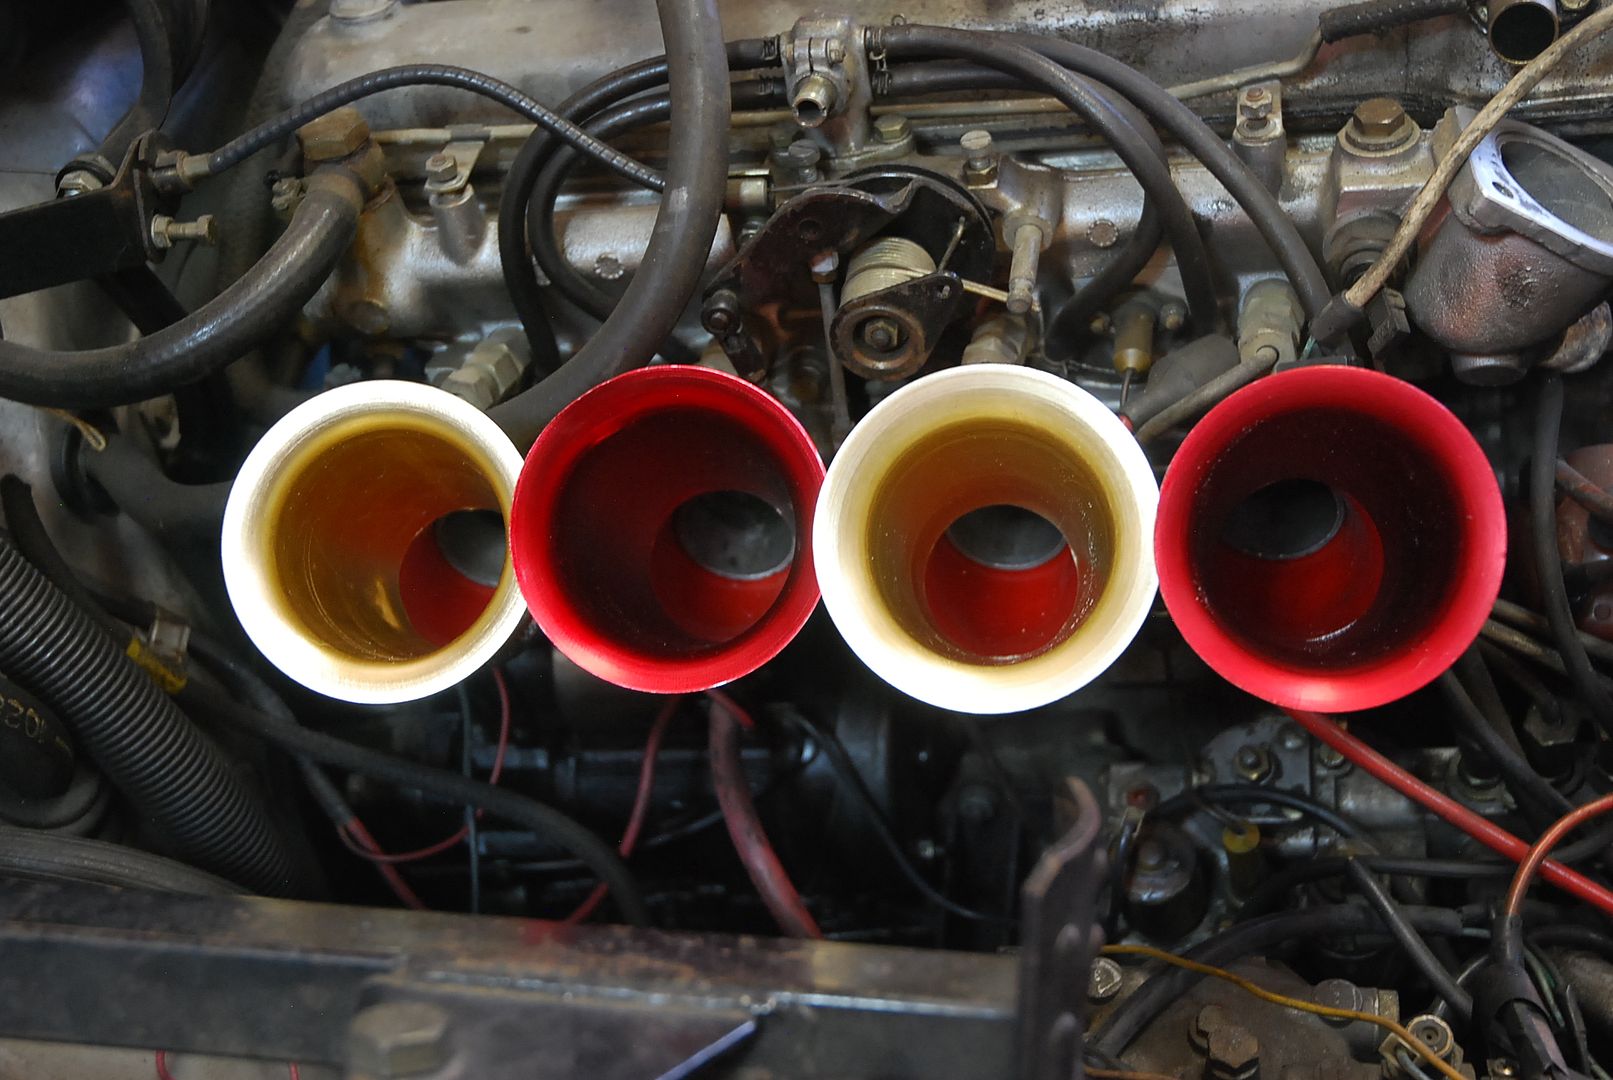
Finished cutting the bottoms off of my tumbers a.k.a. velocity stacks. Easiest way ended up being holding it with my hand in a non-tightened vice while using a hack saw. It will be covered up, so my bodgery isn't that visible.


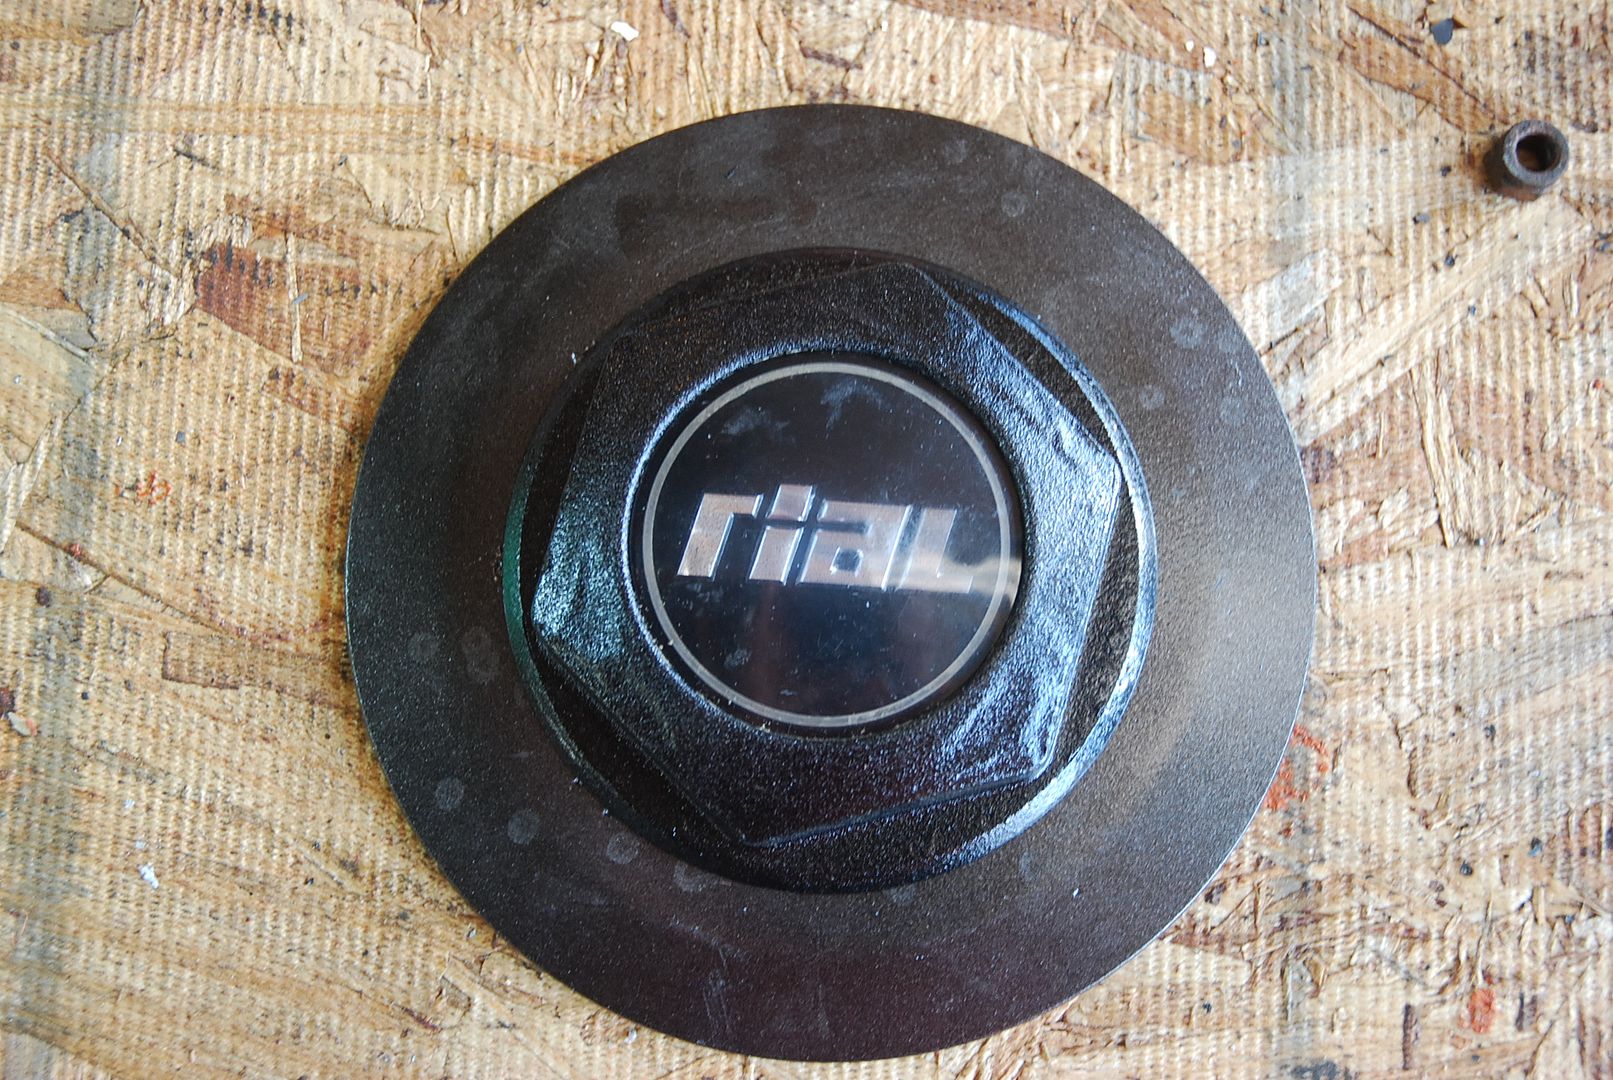
I got the Rial wheel centercaps done - domed plastic centers glued into the bedlined outer centers, before installing in the metal lug cover rings. Who uses this many parts on a center cap? These are German, not Italian!

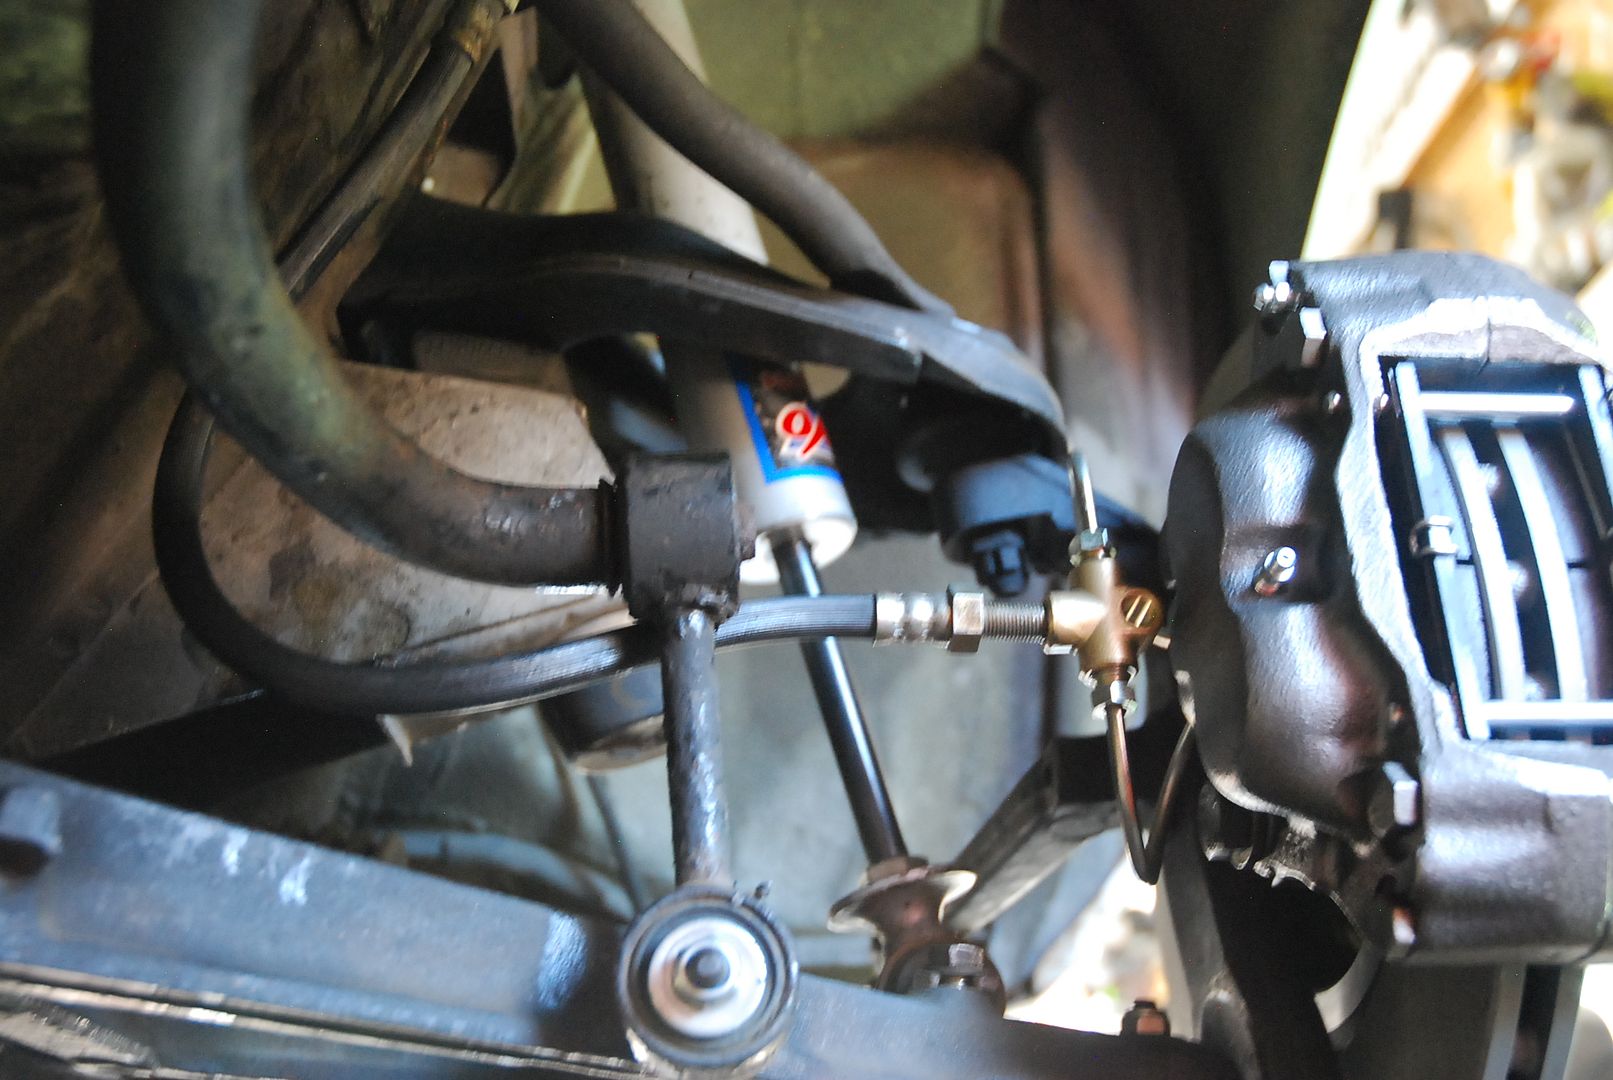
The most important progress, is that I got the front brake lines reassembled with the magic parts to keep them from leaking. At least that's the plan. I'll see when I put some pressure through them...


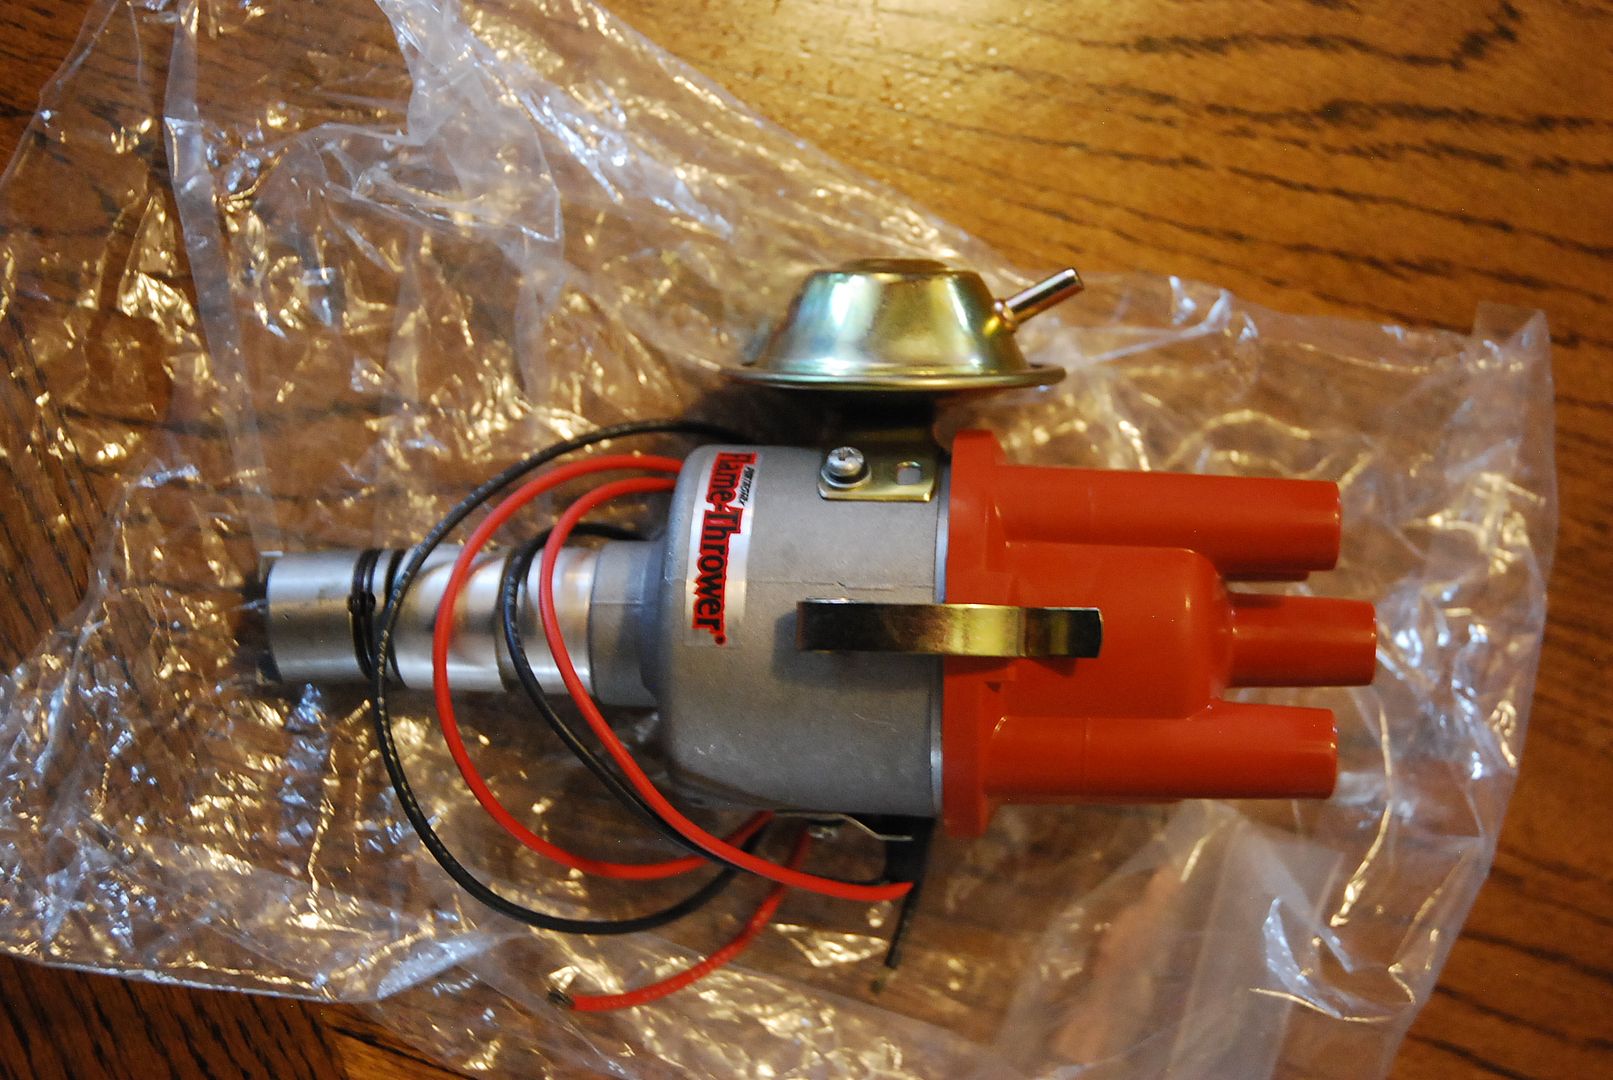
I also received the new Pertronix distributor to replace the Magnetti Marelli one.  I know the advance curve is more suited to a VW, but maybe with softer springs?  At this point I'm more concerned with reliability and will keep the Italian one as a backup.  Time will tell.  


[URL=https://s61.photobucket.com/user/greggearhead/media/Alfetta%20GTV/DSC_0172_zpsk3buz5cz.jpg.html][/URL]

[URL=https://s61.photobucket.com/user/greggearhead/media/Alfetta%20GTV/DSC_0173_zpsoaofiuno.jpg.html][/URL]

[URL=https://s61.photobucket.com/user/greggearhead/media/Alfetta%20GTV/DSC_0176_zpstw6tpw1v.jpg.html][/URL]

[URL=https://s61.photobucket.com/user/greggearhead/media/Alfetta%20GTV/DSC_0177_zpsbnwmj9ag.jpg.html][/URL]

[URL=https://s61.photobucket.com/user/greggearhead/media/Alfetta%20GTV/DSC_0181_zpszmuzjdib.jpg.html][/URL]please be carefull about micky mousing your brakes.. check local hydraulics shop they can custom make the hard lines and flex lines, does not cost to mush $$$$


greggearhead
greggearhead Reader
6/1/20 8:15 p.m.

I am not 'micky mousing (sic)' with my brakes.  I have built dozens of cars.  Most of them with modified and upgraded brakes.  This is my first Alfa and it is a constant curve ball.  I understand that brakes are supremely important to the safety of a car - unlike a throttle linkage or clutch setup, etc.  More like a ball joint or tie rod in terms of importance.  


The only thing that is holding me up is the flare fitting difference, and if this doesn't hold under high pressure (testing) - I will buy new calipers with single inlets and use the Alfa connectors and hoses and solve the problem that way.  

Alfaromeoguy
Alfaromeoguy HalfDork
6/1/20 9:08 p.m.

you can use banjo joints on the calipers to mount the lines. or just go to local wrecker and get the little brakets off aby mbz or bmw.. these bolt onto the caliper, and stablilize the line going into the caliper( if you are not using a banjo joint.... look on a spier to see what i am talking about..as for my skills..12 years at alffetta motors in vallejo ca. and many more elsewere. if you look closely on this photo, you can see the brake flex line going into the bracket

greggearhead
greggearhead Reader
6/1/20 9:12 p.m.

My lines are still mocked up.  


You CAN'T use a banjo fitting on a fitting designed for a flare.  Then, there are different angles of flares on different fittings and cars.  I am proving the design first, then finilizing the mounting.  If I made a billet or custom bracket to hold the line, but the end fitting wasn't right and I had to redesign the bracket, wouldn't be very smart.  

Alfaromeoguy
Alfaromeoguy HalfDork
6/1/20 10:53 p.m.

sorry i was so wrong, have no idea what i was talking about

Alfaromeoguy
Alfaromeoguy HalfDork
6/1/20 11:01 p.m.

just find the correct fitting and a new ss flex brake line and it will work, an example.. then again all those years waisted working on alfa romeos, fiats, ferraris, lanica, cool' auto bianchis '.. i guess i just had no idea what i was doing.., good luck..check my thread on ecotec into a alfa romeo spider...you will see just how unqualified vi am to give any advice..laugh

Alfaromeoguy
Alfaromeoguy HalfDork
6/2/20 12:57 a.m.

but i did love my gtv6. rebuilt the engine to 3 liters... so well balanced..

alfadriver (Forum Supporter)
alfadriver (Forum Supporter) MegaDork
6/2/20 12:54 p.m.

So is the brake issue about the flex line to the caliper?  

Can you use the OEM (Volvo?) flex line, and the just put the correct flare on the body hard line?

Knowing someone with a really good flaring tool is kinda nice.  My friend never gives it to anyone, so I do the work at home, and then take the parts to his place and do it.  I'm ok with that- even with the drive over and back- it's way faster than doing the flares with poor tooling.

greggearhead
greggearhead Reader
6/2/20 1:37 p.m.

if you look at the caliper I'm using (Volvo 240 turbo) it has two inlets, and they are both hard lines, as original.  The Tee I am using is also a hardline flare connection, but the Alfa softline going into it has a slightly different flare, now with a copper dished washer made for the purpose.  If it seals, great.  If it doesn't, I will replace the two inlet calipers with single inlet versions.  The Alfa soft hose has a flare different from German and Japanese cars I have messed with in the past.  

alfadriver (Forum Supporter)
alfadriver (Forum Supporter) MegaDork
6/2/20 3:20 p.m.

So if you got a Volvo soft line, and then modified the hard line on the body with the appropriate flare, it would work, wouldn't it?

If you could find some aluminum calipers from a Milano, I think they will bolt in, and work quite well.

The only other suggestion- see if you can figure out who makes the parts,  Ate is the Alfa brake supplier- no idea who Volvo gets theirs from.

greggearhead
greggearhead Reader
6/2/20 3:23 p.m.

No - the Volvo soft line doesn't end in a hard line flare, and the other end is wrong as well.  

greggearhead
greggearhead Reader
6/4/20 12:24 p.m.

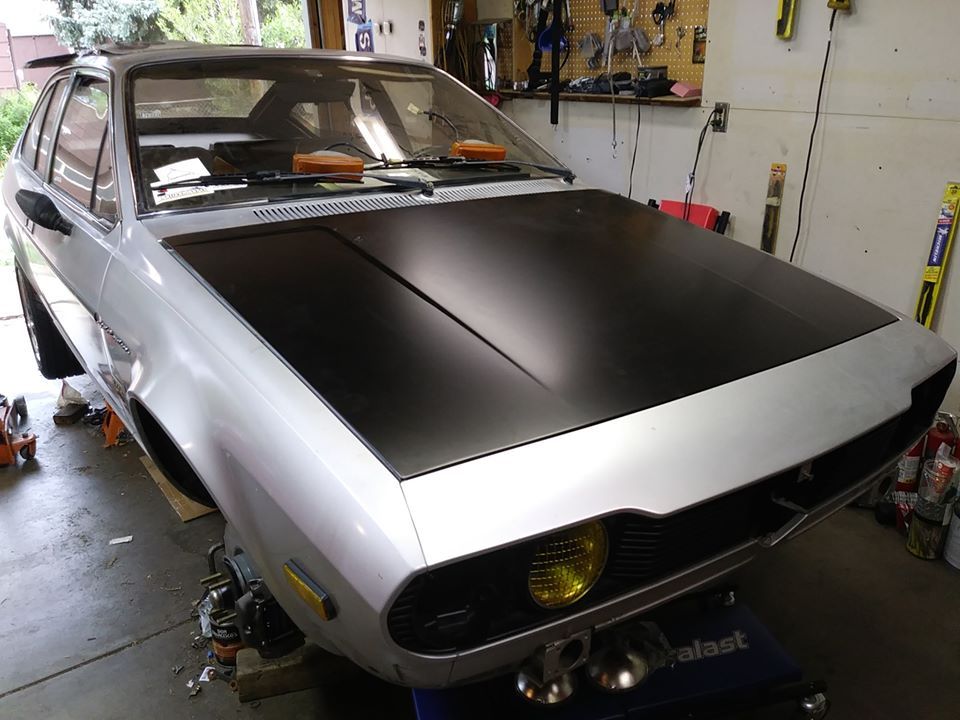
Looks better with the hood on it.  


[URL=https://s61.photobucket.com/user/greggearhead/media/Alfetta%20GTV/102848896_3625168107499741_4887395452514729984_o_zpsnwp2l4zr.jpg.html][/URL]

infinitenexus
infinitenexus HalfDork
6/4/20 12:37 p.m.

I can't wait to see those new rims on it with the lowering springs!

Righteous build.

greggearhead
greggearhead Reader
6/8/20 7:54 a.m.

Thanks for the compliments.  It feels good to get some affirmation that this thing is worth the time and effort I've thrown at it.  

I get it.  The Japanese and German engineering feel just seems more natural to me.  Anyway - 


Some progress on Alfa and Porsche this weekend, though not as much as I wanted.  


I got one of the Porsche 911 Zenith carburetors rebuilt - though really it was just cleaning and gaskets.  The gas had turned bad and the accelerator pump nozzles had clogged, as well as the mechanisms for them, getting gummed up.  I should have taken some before/dirty pictures, but believe me, it was dark fluid and smelled like turpentine.  Think I should drain the gas tank...   I'll rebuild the other one today at the shop so they are ready to bolt on later in the week.


[URL=https://s61.photobucket.com/user/greggearhead/media/Alfetta%20GTV/DSC_0734_zpsuqtbnez5.jpg.html][/URL]

[URL=https://s61.photobucket.com/user/greggearhead/media/Alfetta%20GTV/DSC_0735_zps1tg6v0ni.jpg.html][/URL]


On the Alfa, I got 2 of the headlights mounted, and replaced the plastic ball socket ends with metal ones on the throttle linkage.  It had very noticeable play - enough that the throttles on the intake manifold would almost an 1/8 of an inch before the lever on the SPICA fuel pump, so the delivery was not correct for airflow vs. fuel before.  The metal ends couldn't screw on as far, so I had to shorten the rods a bit to make them the same length as before with the plastic ends.  Something I do on a lot of non-critical threaded attachments that I don't want to loosen up with heat/vibration etc. is to use a clear silicone RTV as a low-strength thread locker.  It really isn't a thread locker, but it does prevent them from easily loosening up and protects from corrosion but not so strong to prevent easy future disassembly.   


[URL=https://s61.photobucket.com/user/greggearhead/media/Alfetta%20GTV/DSC_0726_zpshklaioww.jpg.html][/URL]

[URL=https://s61.photobucket.com/user/greggearhead/media/Alfetta%20GTV/DSC_0727_zpsdeqbw3rn.jpg.html][/URL]

[URL=https://s61.photobucket.com/user/greggearhead/media/Alfetta%20GTV/DSC_0728_zpswgxcij0v.jpg.html][/URL]

[URL=https://s61.photobucket.com/user/greggearhead/media/Alfetta%20GTV/DSC_0729_zpsbjfflt1x.jpg.html][/URL]


I installed the heated oxygen sensor in the merge of the downpipe, where I had welded in a bung.  I'll use it with a gauge to monitor fueling with an air-fuel ratio gauge.  It isn't really important for the stock setup, but because of the intake and exhaust changes, it will be interesting to baseline.  Next, when I install the cams that are a little past where the stock SPICA fueling will cover, it will be important to make sure I don't go lean, and can adjust the mixture if needed.  


[URL=https://s61.photobucket.com/user/greggearhead/media/Alfetta%20GTV/DSC_0730_zpsl9zha8ne.jpg.html][/URL]

Along those lines, I pulled the weird plastic panel one of the PO's had installed on the center console, with additional switches that didn't seem to do anything.  Reason they didn't do anything?  They weren't connected.  To anything.  At all.  Cosmetic switches.  I'll be adding the aforementioned air-fuel ratio gauge as well as a voltmeter.  The Alfetta comes with water temperature and oil pressure gauges.  Oil temp would be nice, but it shouldn't be an issue and I want to keep the console simple.  Mocking up on the old piece (which I'll use as a template) to mount the two gauges, and still have room for a few switches for some extra lights I'll be mounting up front.  


[URL=https://s61.photobucket.com/user/greggearhead/media/Alfetta%20GTV/DSC_0731_zps3lzeg16n.jpg.html][/URL]

[URL=https://s61.photobucket.com/user/greggearhead/media/Alfetta%20GTV/DSC_0732_zpsmgdjfqzv.jpg.html][/URL]

[URL=https://s61.photobucket.com/user/greggearhead/media/Alfetta%20GTV/DSC_0733_zpswi13qsn2.jpg.html][/URL]

greggearhead
greggearhead Reader
7/19/20 7:28 p.m.

OK, so I've fallen behind on my weekend car progress updates. Partially due to less progress. Anyway, made some significant progress this weekend.

Alfa Romeo - Got the battery hooked up and started it up a few weeks ago. No leaks - yeah! Exhaust sounds good without being obnoxious, which is what I always prefer, but the BMW wagon is obnoxious. But sounds good.

Anyway, I reinforced the rear exhaust hanger mount so it flexes less, and replaced to center rubber hangers with stiffer ones. Hopefully it doesn't hit anything while driving. I can make it hit a little if I really try to from moving the tailpipe around.

Torqued the lugs on the rear once it was on the ground. Had to grind down a socket to clear. These wheels are Rial Cobras, double drilled, and the small 4x98 Alfa pattern cuts into the center hub, so it's really tight on a socket. Works fine, just have to remember to leave it in the glovebox.

Once the lugs were torqued, I bounced the rear to try and settle it a touch, and feel the suspension. Felt WAY too soft. I had the instant wave of "The used racing shocks I bought were worn out." but I tested them when I got them. I clicked the adjusters 7 clicks stiffer and the suspension became almost solid! At least I've got a good range. Backed them off a bit and should be a good firm starting point. Race springs from a GTV6 don't let it sit too low, but that's OK for now.

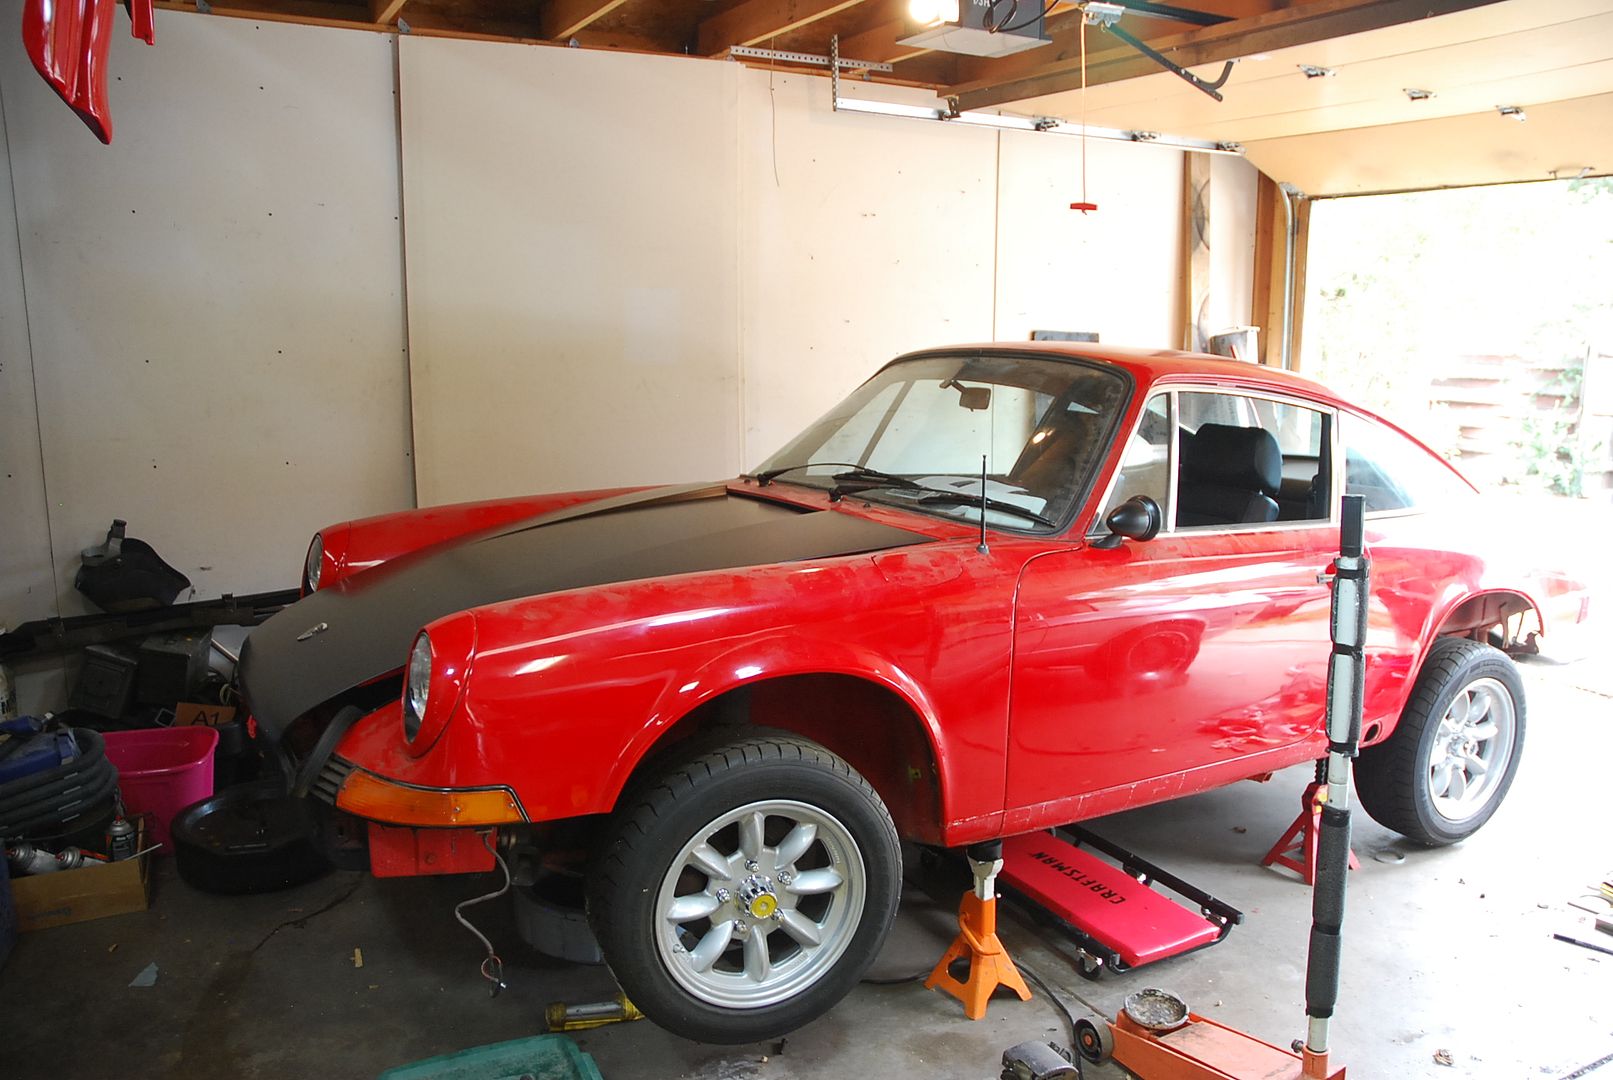
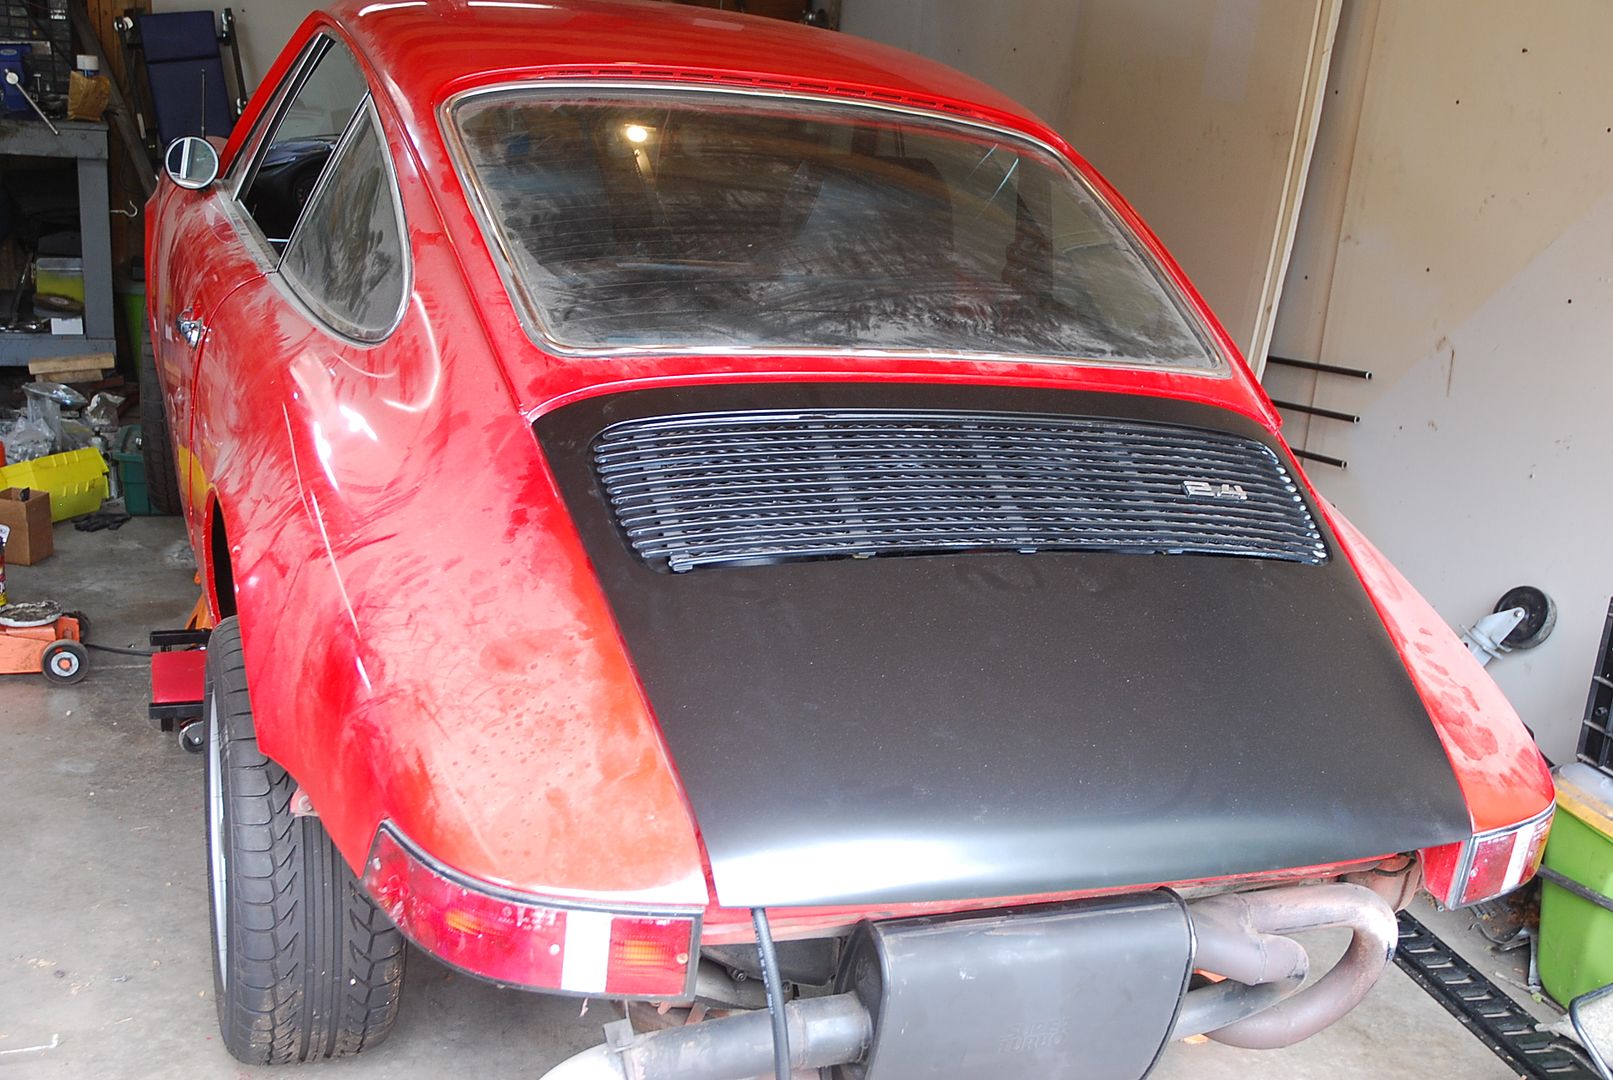
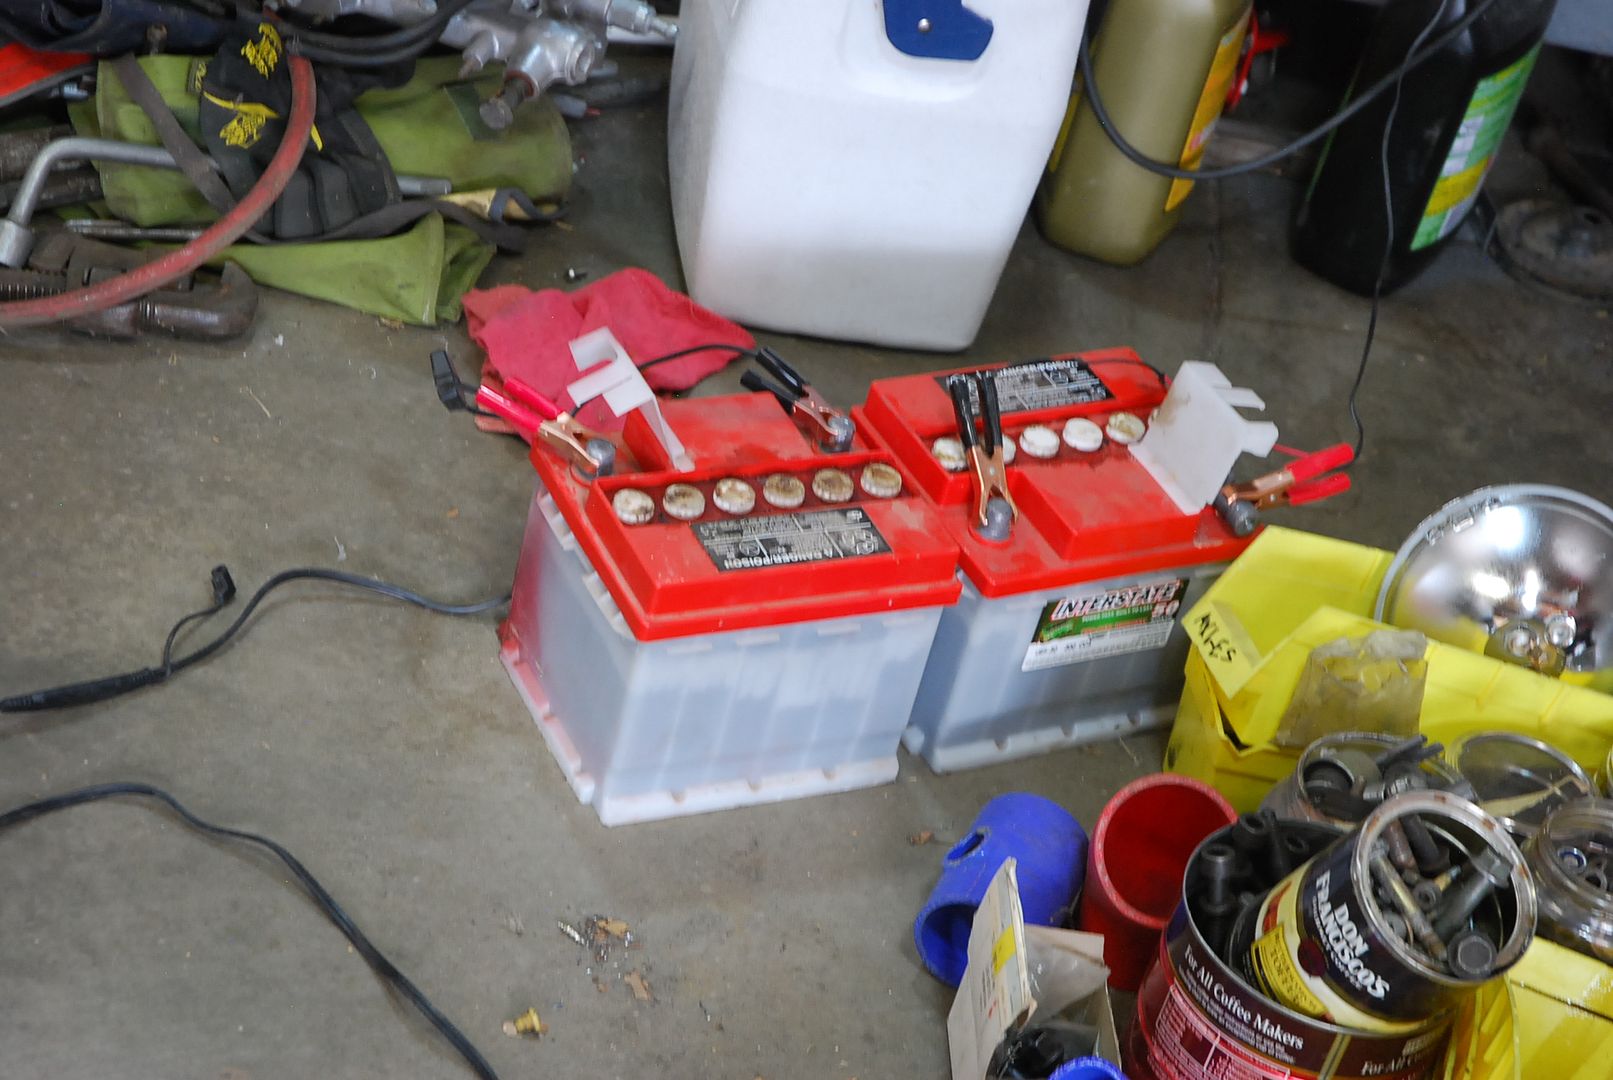
Porsche - Got the hood and decklid mounted. Not quite adjusted yet, but at least on after wrapping. Pulled the batteries and put one on a charger. Hope it comes back. Put it up on jack stands to see the easiest way to drain the old gas. Gonna be to jump the pump and just push it out the back into a bucket. Will have to wait til next week. Thew some wingnuts on the air cleaner lids. Installed the grille on the rear decklid, minus a couple missing nuts I'll pick up tomorrow.

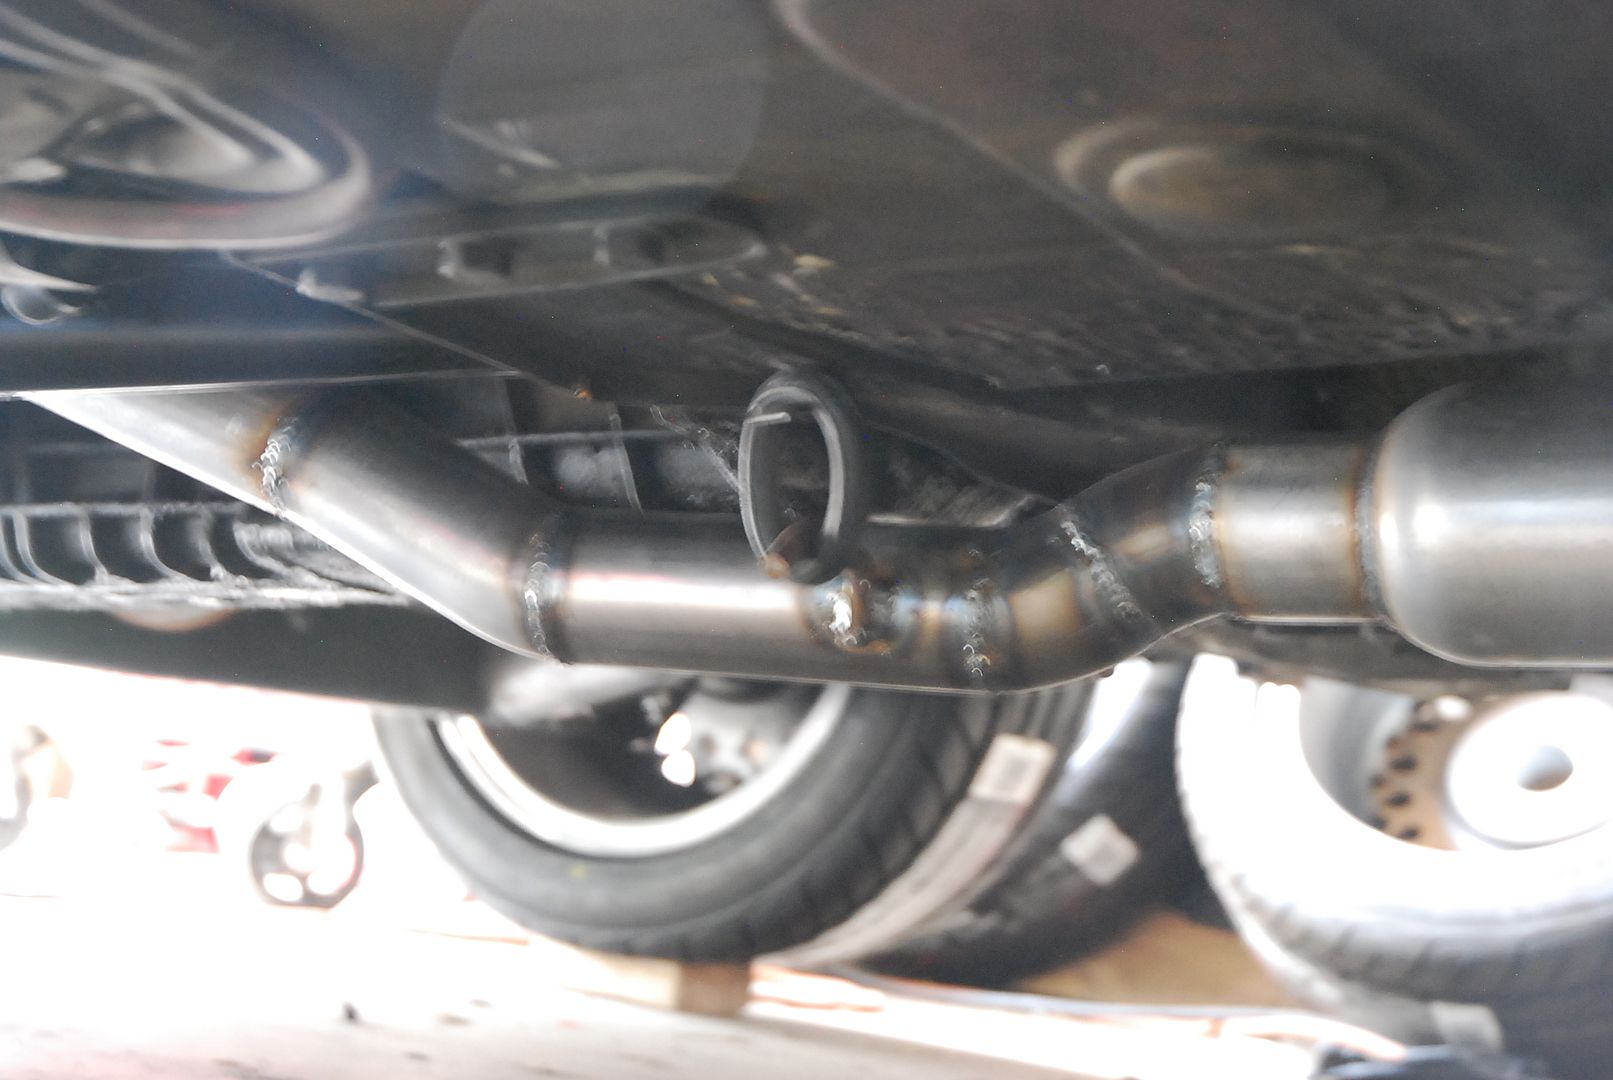
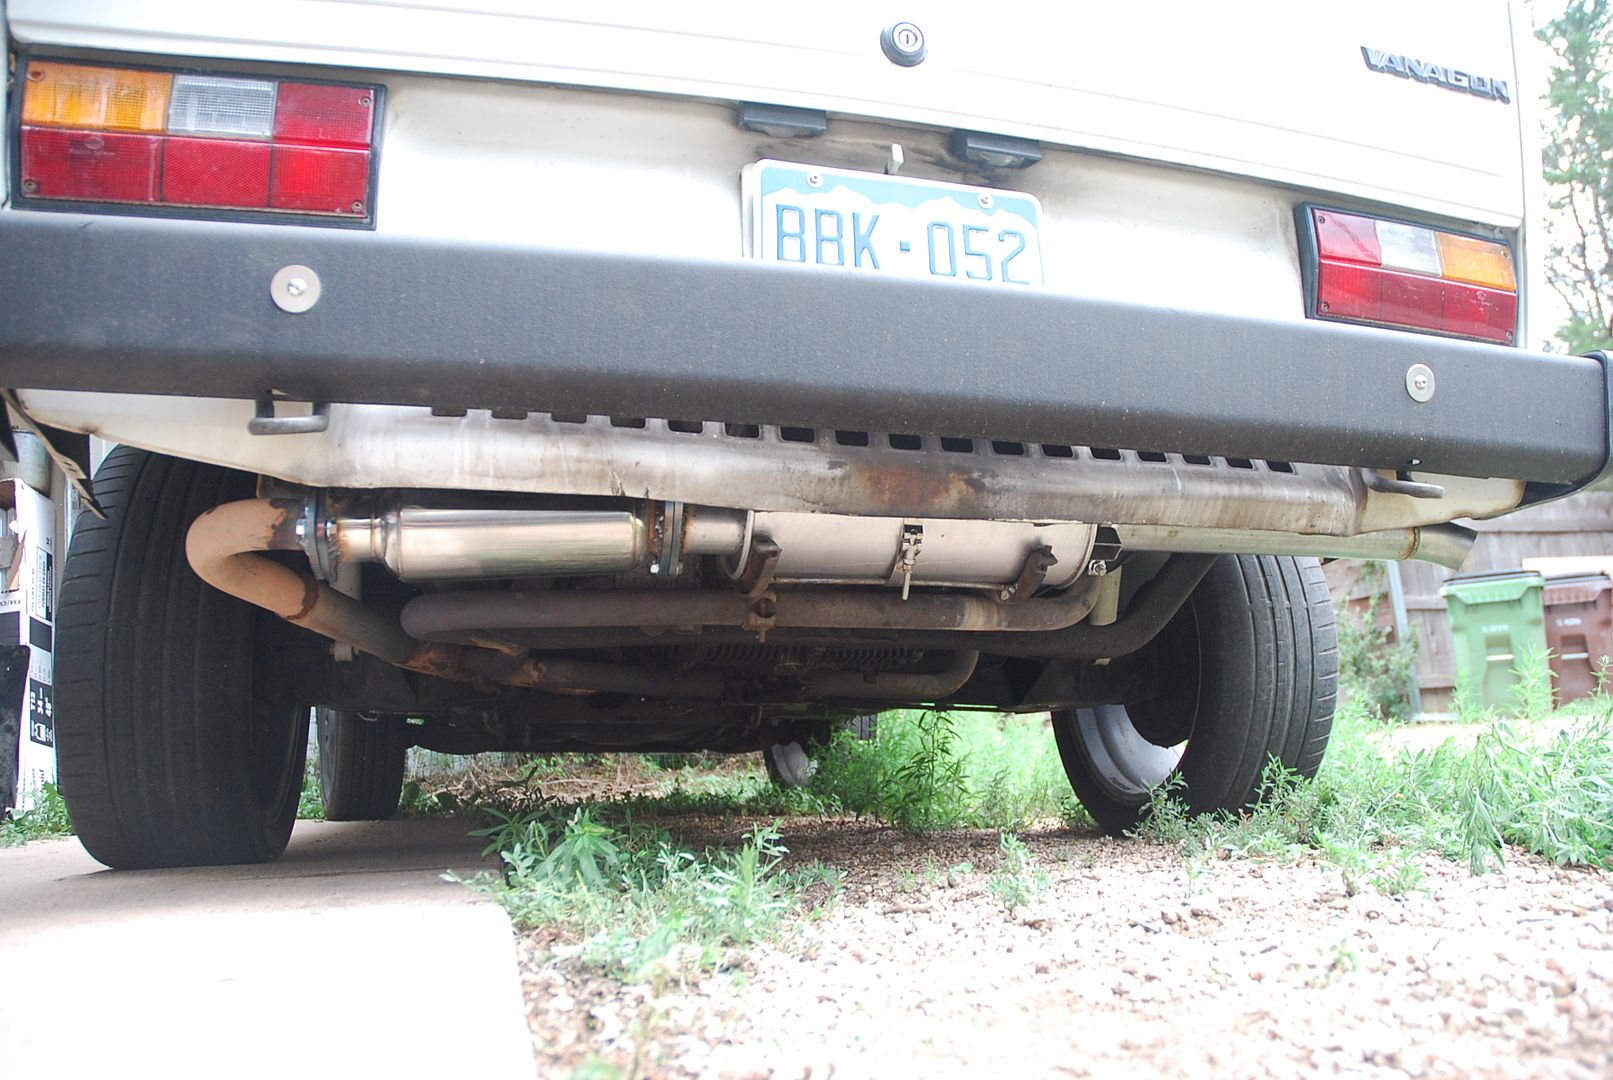
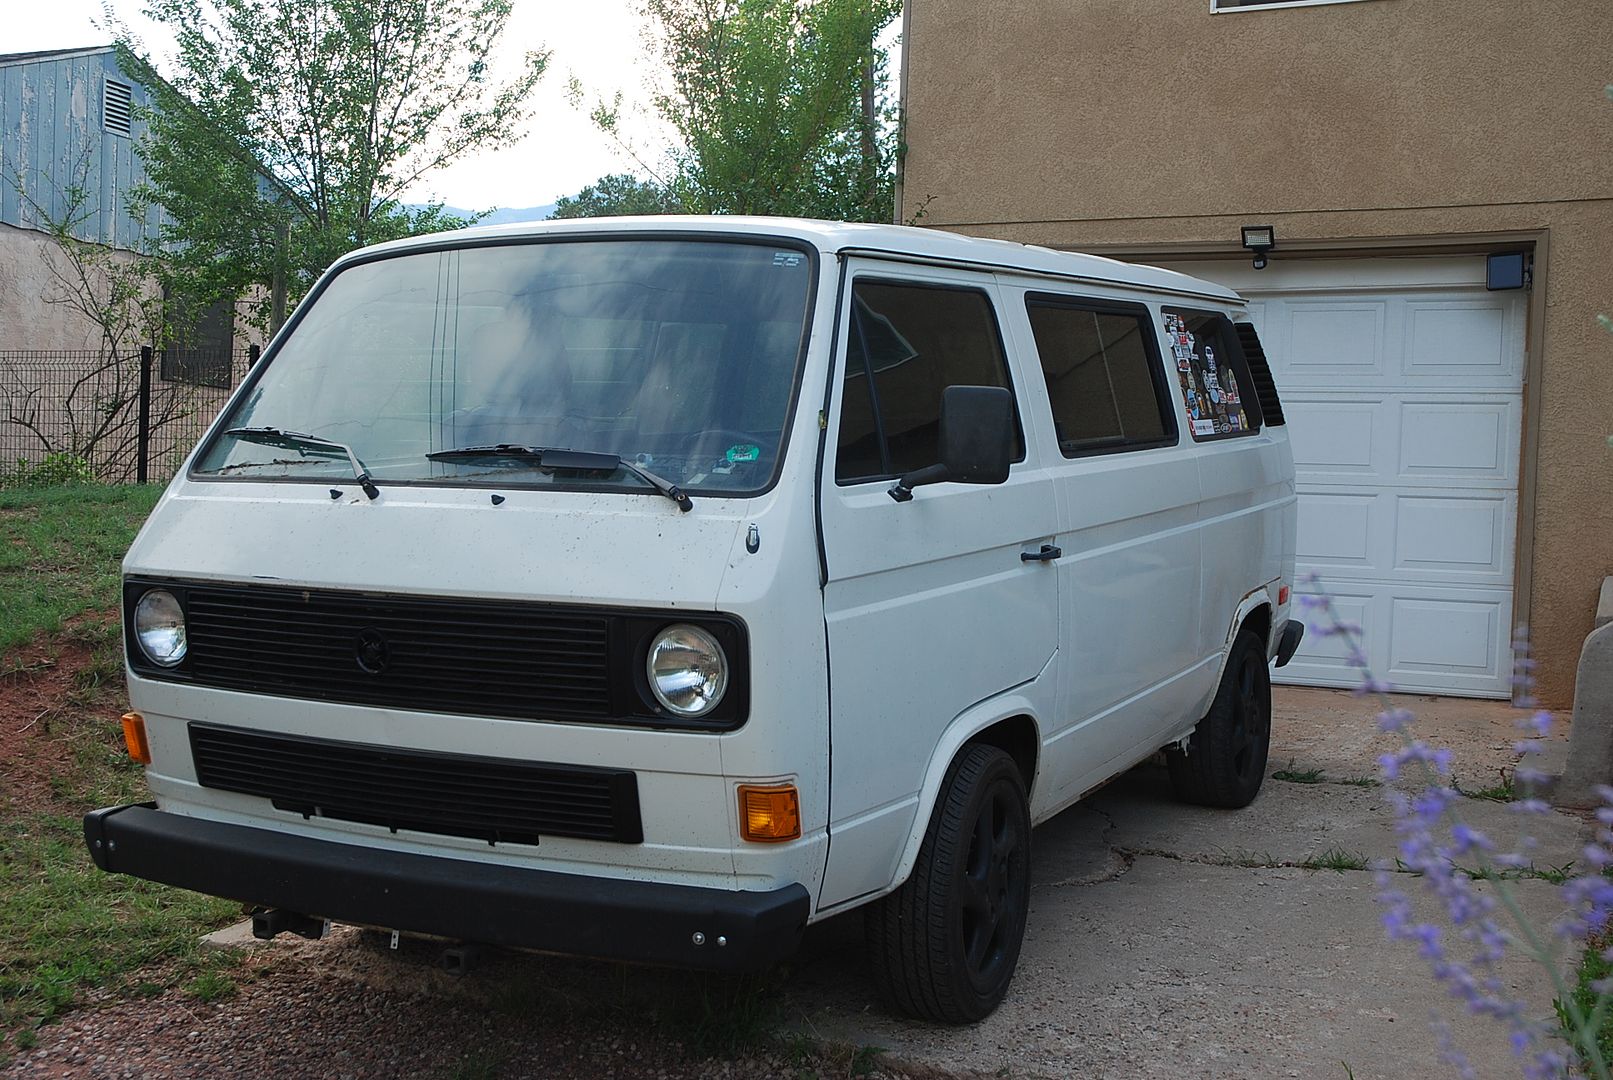
Vanagon - I got the Vanagon running a while back, but it still needs some TLC and ironing out. The exhaust was almost falling off, and I needed the catalytic converter for my Syncro Westy I'll be selling soon, so I cut it all off and just made a new exhaust from there back. Wasn't bad, but not as quick as I used to be, methinks. Same thing - sounds sporty without being loud. Can't wait to start driving it. Brake pedal is soft, and I replaced the master cylinder so have to look into that....  Just need to put on the lowering springs, big front brakes, shorter shocks, do bushings, install flares to cover the damaged flare, front spoiler, etc.  


[URL=https://app.photobucket.com/u/greggearhead/a/9b01ee41-1bac-4038-85c5-e5622c6e7d44/p/8597b336-bb5e-4f9a-b86d-7d948f3f0f81][/URL]
[URL=https://app.photobucket.com/u/greggearhead/a/9b01ee41-1bac-4038-85c5-e5622c6e7d44/p/41c03f2e-64fc-4b88-bcde-7c06b2e9bdb1][/URL]
[URL=https://app.photobucket.com/u/greggearhead/a/9b01ee41-1bac-4038-85c5-e5622c6e7d44/p/a457d534-4523-4f86-8f12-cb58f4d9ada7][/URL]
[URL=https://app.photobucket.com/u/greggearhead/a/9b01ee41-1bac-4038-85c5-e5622c6e7d44/p/8ec6c770-85b5-4916-8488-0917914c993b][/URL]
[URL=https://app.photobucket.com/u/greggearhead/a/9b01ee41-1bac-4038-85c5-e5622c6e7d44/p/41b88982-4b6c-44a3-af19-93fde4f5195b][/URL]
[URL=https://app.photobucket.com/u/greggearhead/a/9b01ee41-1bac-4038-85c5-e5622c6e7d44/p/380effb5-2cfd-4bdd-adc1-eaa4c054bb7b][/URL]
[URL=https://app.photobucket.com/u/greggearhead/a/9b01ee41-1bac-4038-85c5-e5622c6e7d44/p/9c41ecc6-b145-4cd0-ad1a-235082e66287][/URL]
[URL=https://app.photobucket.com/u/greggearhead/a/9b01ee41-1bac-4038-85c5-e5622c6e7d44/p/9941d986-7988-424c-a35d-30cb8a8798a9][/URL]


greggearhead
greggearhead Reader
8/4/20 12:30 p.m.

A little belated weekend update on car projects. I got small stuff done, but progress at least.

Alfetta - calipers dropped off at machinist to siamise the two inlets with a port, so I can just run one hydraulic line and simplify the plumbing and hopefully solve the leak issues. Hoping they are done by middle of next week...

Lower grilles mounted. Airbox support straps bolted up. Ignition coil mounted in it's new location. Front spoilers mounted up. Battery fully charged. Rear seat back reinstalled.

In the box of spares that came with the car (large amount of them - thanks Ross & Jacob), I found a cracked washer fluid reservoir, with the hose nipple broken off. Someone had tried to glue it in the past, but it obviously didn't hold. Washer fluid usually has methanol in it, and that alcohol is corrosive to most sealants and glue - except Goop. Learned that at my water-methanol injection part of my career, years ago. So I've repaired the crack, and drilling a hole and installing a brass hose nipple with sealant today.

Ordered a new washer pump, a pair of door seals and a pair of universal type front turn signals, since I won't have the stock bumper with the factory incorporated ones.

Porsche 911 - because the gas in the tank has gone bad, I dropped the fuel pump hoping to gravity drain the gas. No dice, even with the front more elevated. So I'll hook up a jump box to the pump, to pump the gas through. Added about a gallon of new gas to it, to hopefully mix and get all the bad gas out when I pump it. Then should be ready to start.

The batteries (yes, there are two small ones) simply aren't taking a charge, so I'm on the hunt to find some new ones that aren't $400-500 for the pair.

Tightened the decklid grille down - was missing a few nuts. Adjusted the fit of the decklid.

That was Saturday. Saturday evening, my back spasmed, and it's my fault from hucking around several different transmissions by myself. Sunday and Monday were a lot of pain. Thank goodness for the hot tub and anti-inflammatories, and some CBD oil. Today I can definitely still feel it, but I'm walking like a human again.

Tonight I'll do some work on the VW 412 wheel hub to test fit a 16x8 wheel on the back and a 16x7 on the front, so I can order new tires. Need to mount the new decklid and front spoiler.


2 3 4

You'll need to log in to post.

Our Preferred Partners
QRZWuclq0595cBaPoQPcHXHOfcupuZeSJQ26LXv2zq5pggWEtRVVhOGOqAE9WCRh