
ahaidet
New Reader
7/14/14 11:03 a.m.
Thanks to this board I am building a turbo Miata. A few years ago I blew up my Saab 92-x Aero on track. I came to this board and cried to you guys about how bad it sucked. I needed to find a car I could track and auto-x without fear of how I would get to work Monday morning when something happened.
To probably no ones surprise on this board... it was suggested many times that the answer to my automotive heartache was Miata. But I wanted a little bit more pep than Miata's are known for. So the answer became Turbo Miata. Here I will post pictures and words (hopefully in some sort of order that makes sense to others) that document my journey from clean, fun to drive, underpowered '93 Miata to cleaner, funner to drive, properly powered '93/96 hybrid Miata.
It begins with a photo of the car as I purchased it and as it currently exists:


It already has Koni Yellows, Ground Controls, Flyin Miata sways, 949 6ULs with RE11 tires, Boss Frog Clearview Roll Bar...a good start.
That's a gorgeous car to start with!
ahaidet
New Reader
7/14/14 11:09 a.m.
I started with a 96 1.8L motor from a junkyard in Pittsburgh last fall with a reported 77K miles.

Brought it home and threw it on the engine stand:
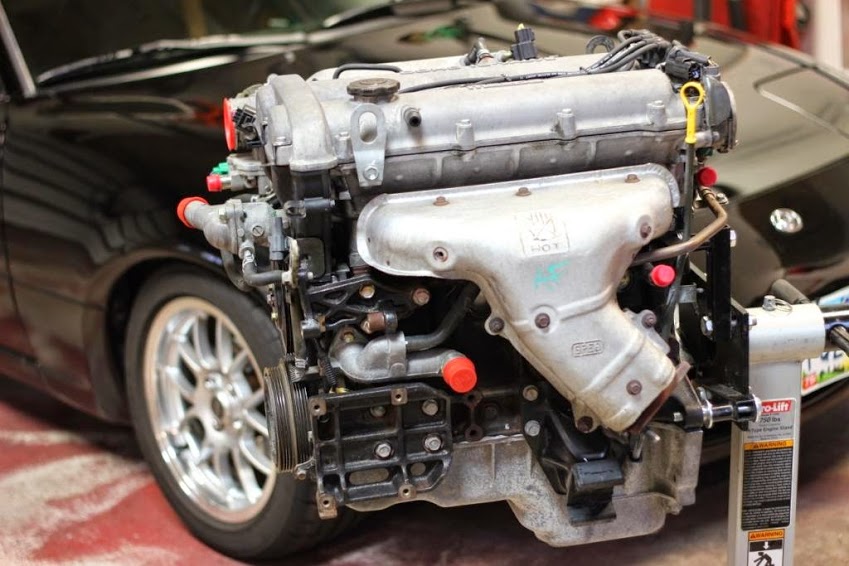
It sat there for a month or so until after the holidays and I ordered a timing belt kit with water pump and began tearing down the motor. I decided not to do a full rebuild based on how clean the motor was and the low mileage it was reported to have.
Around the same time I ordered a Megasquirt MS3x from Reverant on the MiataTurbo Forums.

ahaidet
New Reader
7/14/14 11:10 a.m.
In reply to Swank Force One:
Thanks. Its hard to find them this clean especially in Ohio.
Also: What kind of camera are you using? 
ahaidet
New Reader
7/14/14 11:46 a.m.
In reply to Swank Force One:
A mixture of cell phone camera pics (Galaxy GS4/5) and my Canon T3i DSLR. The shot of the car along side the road and the motor on the stand are DSLR shots. I try to use the DSLR more but its not always convenient.
ahaidet
New Reader
7/14/14 12:00 p.m.
The previous owner had some issues with overheating at track days with even the stock 1.6L. I decided to do a coolant reroute to start. 
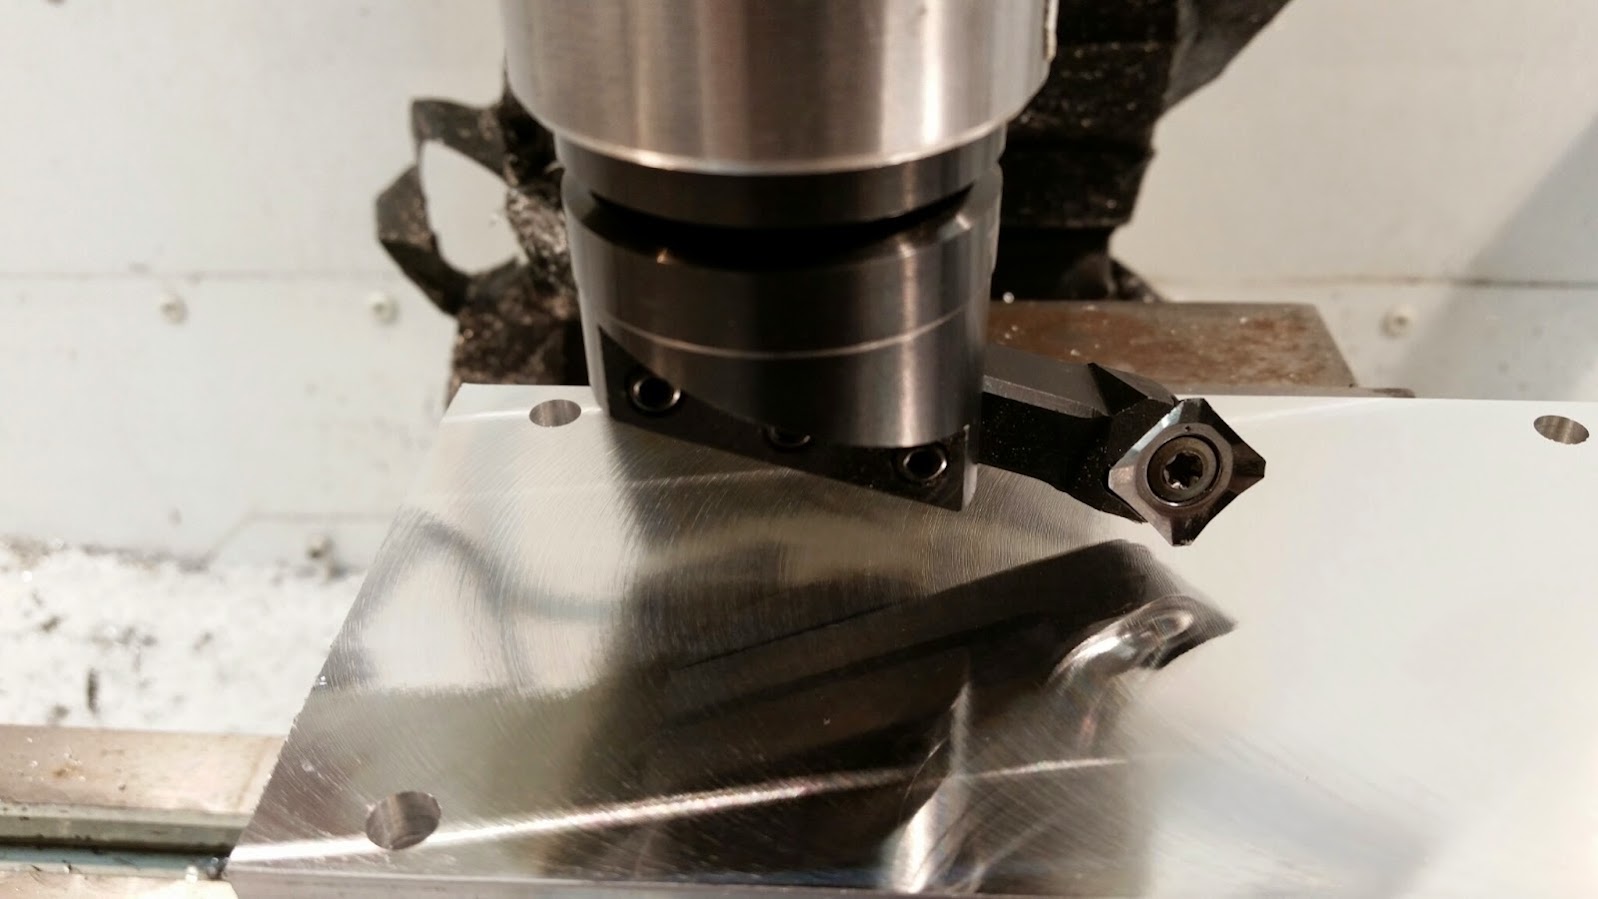
I purchased most of the parts needed from BEGI. However, I decided to make the block off plate myself on my DIY converted CNC benchtop mill. (I had some stock perfectly sized and needed a simple part to test some upgrades to the mill.)
I took one of the gaskets from BEGI and scanned it on my flatbed scanner. I imported that image into my CAD program and traced around the image to create a DXF file. I took the DXF file and exported it into my CAM (computer aided machining) program and created G-code file to input into my CNC machine.
My machining strategy was as follows.
First I machined both top and bottom of the 6061 aluminum stock with a fly cutter to be sure the sealing surface was perfectly flat:
Then I drilled both holes into the part to attach it to the jig.
Next I cut out the rough profile with a 1/2" roughing endmill.

I followed that up with a 1/2" finishing endmill.

Next I chamfered both edges with a 3/8" 90 chamfer mill:

I flipped the part on the jig and repeated the chamfer code.
Here is the finished product:

To complete my reroute I picked up the GM hose from Autozone that many others have used. I may still end up upgrading to a better/newer radiator but figured I would start here.
Welcome. I'm in Pittsburgh, but travel up to Canton for work from time to time.
It would be fun to have those machining capabilities at home. I'm jealous.
Alternately, when you're doing the timing belt change before the engine goes in, you could just pull the thermostat neck and stick a freeze plug in the hole
watching closely, as I get ready to do the same thing to my '90
ahaidet
New Reader
7/14/14 4:25 p.m.
Thanks Keith.
I thought about doing the freeze plug instead but was concerned that the turbo kit might want to tap into the coolant lines in the thermostat neck and if I removed it that I might make things harder when I went to install the turbo kit. I just recieved the FM no electronics kit this Friday. And began unpacking it. Based on what your saying it doesnt connect there at all. I guess I should have asked.
I will post some pictures of unpacking the kit tonight if I get some time, if not tomorrow.
ahaidet
New Reader
7/15/14 7:53 a.m.
My Flyin Miata No-Electronics kit arrived.
It was like digging for treasure...
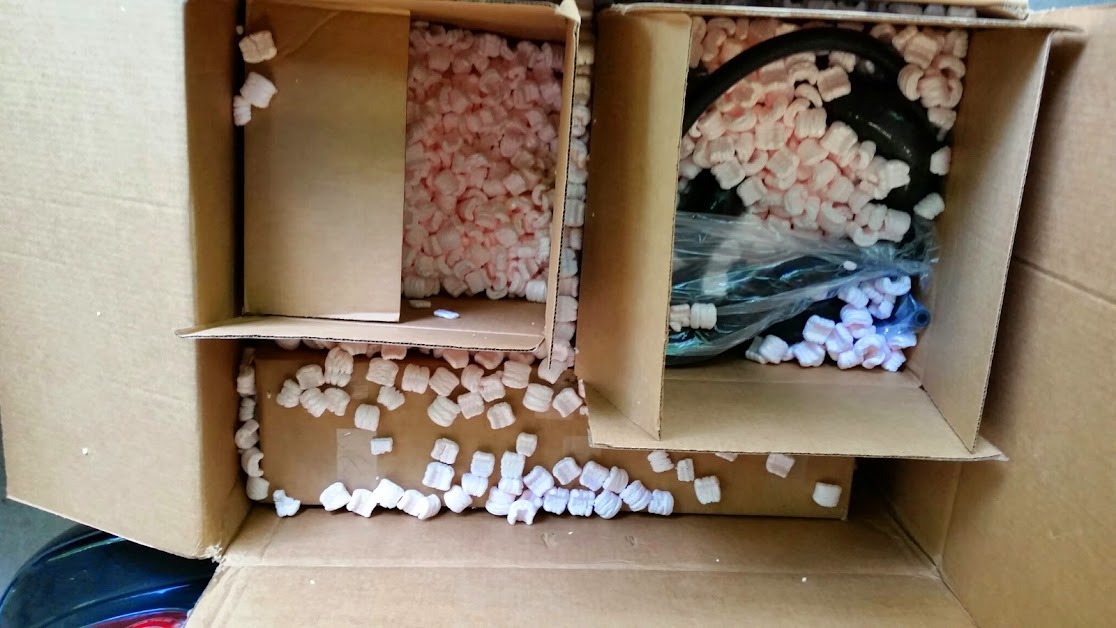 and after I filled up an entire contractor bag of packing peanuts...(this photo was only half way in)
 I found this...


I haven't had such mixed emotions upacking something ever. I hate packing peanuts... with a passion. They make a mess of everything and are wasteful... but I love turbos. So I went from moments of pure rage as the little pink bastards got stuck to everything to pure joy holding the shiny new parts.
Flyin Miata did a good job of sealing everything up to keep them out of the important bits of the kit. I am just suprised anyone is still using them in 2014. The quality of the parts looks great and everything appears to be very well documented.
ahaidet wrote:
I haven't had such mixed emotions upacking something ever. I hate packing peanuts... with a passion. They make a mess of everything and are wasteful... but I love turbos. So I went from moments of pure rage as the little pink bastards got stuck to everything to pure joy holding the shiny new parts.
I'm glad to see I'm not the only one. I've made a rule for giving eBay feedback because I've been tempted to rage-negative-feedback people that send me boxes filled with that E36 M3. I have a 24 hour waiting period to cool down. Even worse is the mixed packing material collection including Styrofoam sheet that flakes off on everything.
Love the build thread! I've always wanted to see what these kits are like.
The kit got there safe and sound - THAT is why our guys use packing peanuts. With the mass of some of those parts, it's the best way to keep them from rampaging around and damaging each other. You'll notice the use of bubble wrap as well as sub-boxes. The end result is that we almost never have a kit arrive damaged - which is the whole point.
I once had an eBay seller pack some wheels in garbage. Empty fabric softener bottles, cereal boxes, random paper, etc. Yuk.
Glad it's there, and nice pics!
ahaidet
New Reader
7/16/14 8:50 a.m.
In reply to Keith Tanner:
That is true Keith Tanner and something I took for granted. The outer box did have a small hole in it (fist sized that peanuts were leaking out of) but everything inside appears to be in great shape. I am glad you guys don't use fabric softner bottles for packing material I guess it could be worse.
Keith what coating is on the Exhaust Manifold and turbo outlet? Is it ceramic or something else? How durable is it?
It's black high temp paint. Mostly to prevent surface rust. We've played with typical ceramics (as opposed to the good stuff like Swain) and found they're about as effective as black paint in many cases and usually have a shorter lifespan.
ahaidet
New Reader
7/23/14 9:43 a.m.
I am still driving the car while I am stock piling parts. Trying to minimize down time during the prime Miata driving months in Ohio.
From what I read it's probably a good idea to replace the clutch hydraulics when upgrading clutches. I purchased the Flyin Miata stage 1 clutch.
Autozone and Orielly's both have replacement Master and Slave cylinders for $20-ish. Anyone tried using an Autozone/Orielly's/Advance/Cheapo with a FM1 clutch? OEM from Arlington Mazda is $128 for master and $86 for slave.
What about the clutch fork? Should it be replaced with the new FM Clutch?
I didn't change the hydraulics in my car with a clutch change. It worked fine. I'd say wait to see if they fail before prepping for more work. I've never changed a clutch fork in a Miata. I've owned five and tracked three. One was a turbo car with 160 hp at that time.

beans
Dork
7/24/14 1:19 p.m.
Packing peanuts are the devil. When I bought my 20G from Forced Performance last year, It came in a box with what looked like two halves of a plastic-bag encased foam brick that perfectly fit the turbo. I don't know what that packing stuff is, but it is absolutely awesome. Possibly goes in the box as a semi-liquid or something, parts dropped in, top put on, and then shot with air or whatever catalyst to expand around the parts. I was so impressed it kept the box and packing just in case I wanted something else and could ship the turbo in the original packaging. I did just that, and it worked out great.
That being said, this build looks great. Excellent choice of parts, and I'm a sucker for black NA Miatas, especially with tan interiors.
Our Level 1 clutches don't require anything special of the hydraulics.
ahaidet
New Reader
7/29/14 8:11 a.m.
Made some more progress last night. Timing belt is now installed and covers cleaned and installed.

Removed the EGR valve and installed the block off plate.


Good thing the block off plate came with instructions. I thought the plate blocked off the hole where the EGR tube attaches. It actually replaces the entire valve which makes sense and then there is no reason to block off the EGR tube hole.
Also my injectors from Fuel Injector Clinic and my NGK AFX wideband arrived.

For my injectors I just got the pigtail connectors. Does anyone know if I can use the injector harness on the 96 1.8 motor? Or will I need to use the injector harness on the 93 1.6 motor? I haven’t looked at the connectors or done any research on this yet. I know in general I use the majority of the 93 wiring harness.
Next is to paint the valve cover, drill and tap the oil pan and begin installing the turbo and manifold.
Re: packing peanuts, a shop vac makes short work of them ...
If you have a large model, first line the tub with a large garbage bag,
suck the peanuts out of the box before you remove the contents.
Just sayin ...
ahaidet
New Reader
7/29/14 2:56 p.m.
In reply to erohslc:
I thought about doing this, but I wasn't sure how small the parts and bags would be. I feared I would suck up a small package of bolts or hardware and may have not noticed it. It would have also filled up my shop vac at least 3 times maybe more. I did finally use the shop vac to suck up the last bits and pieces.
I also did the "No Electronics" kit a few years ago, and my cat was pooping styrofoam for a week...
But, all the contents in the boxes were pristine, despite significant damage to a couple of the boxes. And, the cat survived and was quickly back to terrorizing me.
As much as I despise packing-peanuts, they do the job quite well.
Looking forward to updates on the project!!!
ahaidet
New Reader
8/6/14 9:32 p.m.
Thanks for all the kind words guys.
I made more progress over the last week.
First I installed the BEGI coolant reroute. I used the basic instructions I found on:
http://revlimiter.net/blog/2011/05/coolant-re-route-1/
I installed the spacer on the rear of the head with all the proper plugs and fittings. 
The spacer seems well machined in general. It was super easy on the engine stand but would be a real pain in the ass in the car.

The one issue that the instructions don't seem to cover, the Kia waterneck used for this has a 1.375" OD but the stock radiator has a 1.25" OD inlet. I have found reducers meant for coolant lines at Pegasus racing but others who have done the reroute this way don't appear to use them.


