DDT wrote:
In reply to Doc Brown:
Is the Oring housing bottomed out on the head? I'm imagining a few ways where this whole assembly loosens and that aluminum puck goes to meet your cam.
Hmmmmm... That's a good point. I did manage to slogger a whole bunch of Hylmoar HPF between the two puck halves and on the bolt threads.
Looks like I have the weekend off... so the new challenge will be to get the car running within the next 72 hrs. It ain't going to be easy but I think I can pull it off.
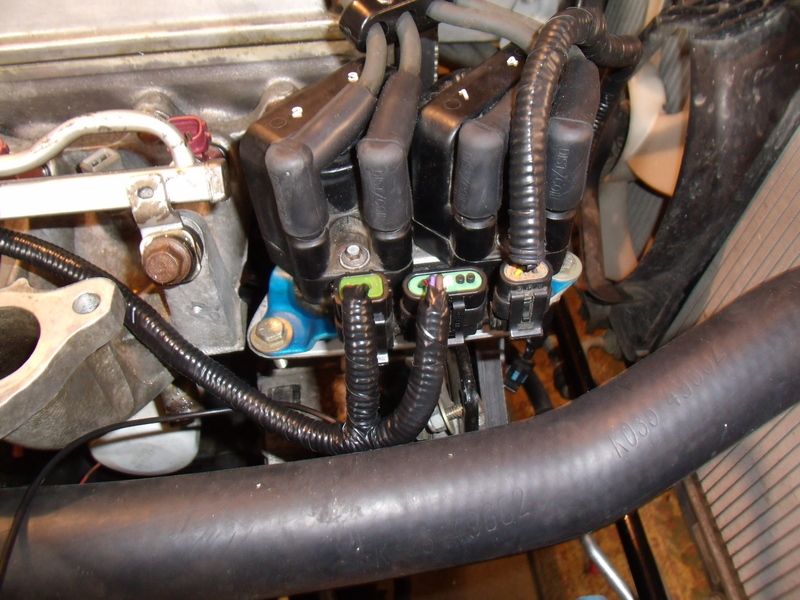 The ignition sub harness was finished tonight. This harness connects to the main harness at the firewall.
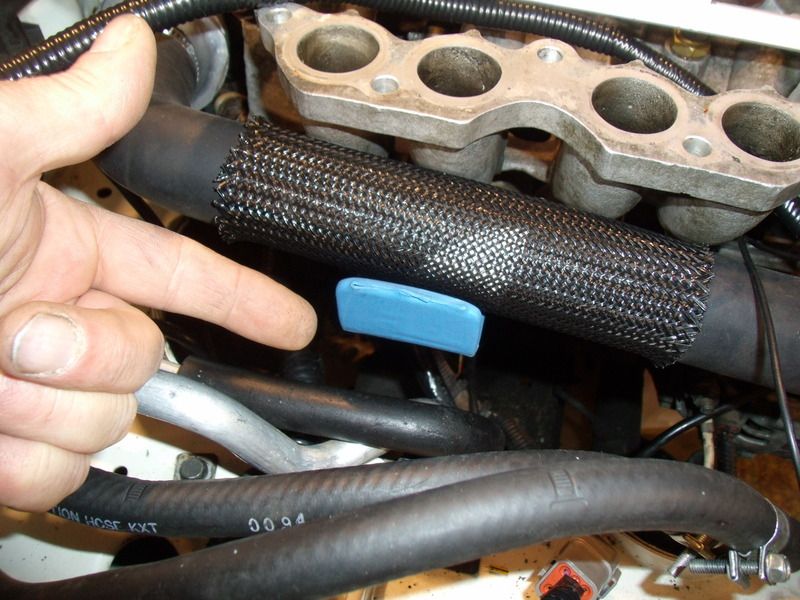 A special bracket was fabricated to support the coolant hose. The blue stuff is shrink wrap to give the bracket a softer contact patch with the hose.
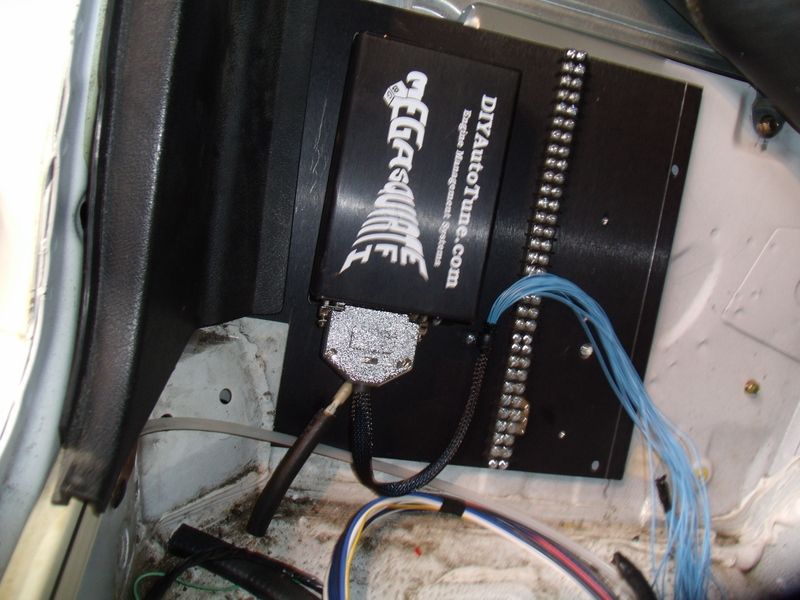 The megasquirt mounted to a new panel. Since I am constantly tweaking this car, I thought it would be a good idea to separate the Megasquirt from the main harness with a terminal block. Any future mods can be done cleanly at the terminal block and hopefully the harness will stay manageable for a while.
Still a lot more to do but I'm confident the engine will be running within 72 hrs.
Stay tuned!
Adventure!
An early Mazda 323 was listed in inventory at the local pick n pull... So naturally I put aside my plans and went on a mini adventure. As an additional bonus, everything was 35% off...
 A sad little 323 sits quietly while awaiting the crusher.
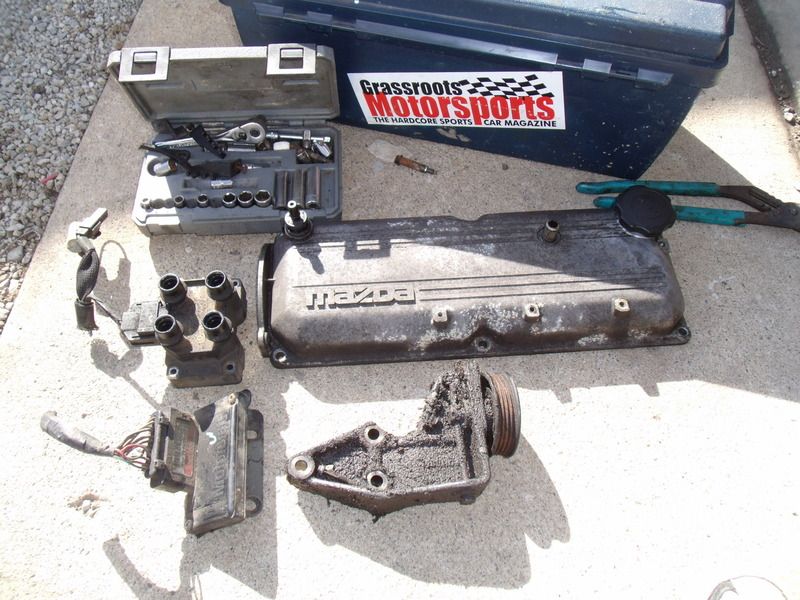 Some choice parts were harvested from the 323, A genuine Mazda B3 valve cover and a power steering delete idler pulley. Both parts were less than a five dollar bill.
I also picked up a Ford Escort EDIS thingy and coil pack. ... Like I really need another ignition project. 
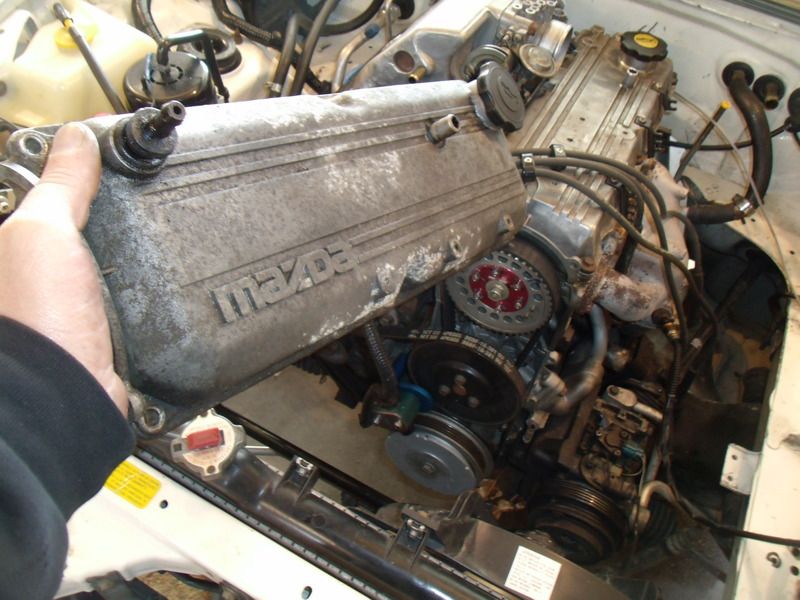 Once the valve cover is cleaned up it will be swapped with the no name valve cover. Interestingly enough, most of this engine was built by KIA in Korea. Although a Mazda design, it has very few Mazda parts in it. The 323 valve cover puts the Mazda label on something they never built.
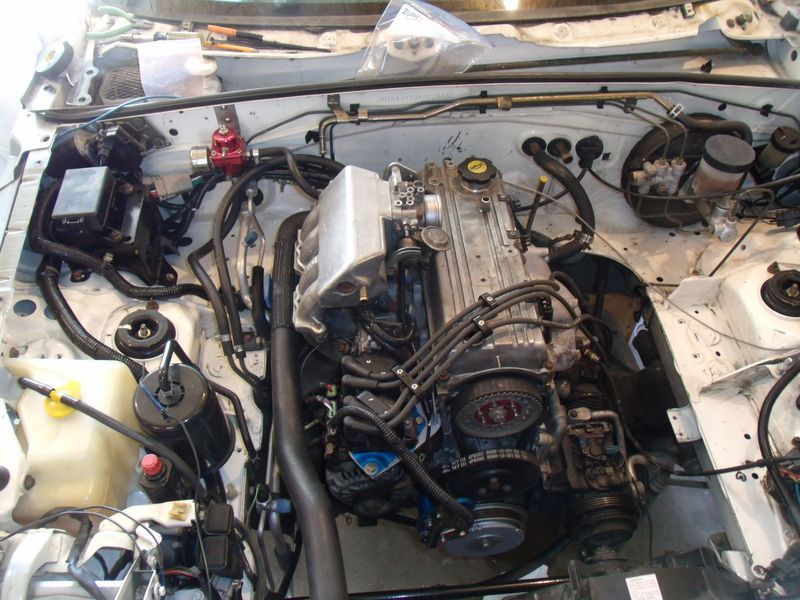 Ignition,injectors and sensors all wired up. Now all I have to do is mate the new harness to the Megasquirt.
Stay tuned!
In reply to Doc Brown:
Hey Doc, what yard is that? I'm on the other side of Ann Arbor from you, but always looking for alternatives to the Parts Galore juggernaut.
In reply to AngryCorvair:
The yard is called 'you pull it and save' 1325 N Cedar St, Mason, MI 48854. They also have one in Pontiac Mi. The Mason yard seems to get unusual cars. A few years ago they had 3 Citroen DS 19's 
TIL you guys live within an hour of me. Or in Doc's case, the next town over.
In reply to AngryCorvair:
I was a Parts Galore junkie for several years, but now I've started hitting the Fox yard too. Between Fox and the Rockwood PG lots I can usually find what I need. I have yet to get to the Regal lot in Howell, but it appears to be quite large.
In reply to Acme Lab Rat:
Hey neighbor!
In reply to DeadSkunk:
I haven't been to Regal in ten years or so. Are they a pick n pull type yard now?
In reply to Doc Brown:
http://regalrecycling.net/howellautoparts/
Yes, I think that's a fairly recent change though.
When the day comes I swap an EJ20T into this old OBS of mine, I might contract you for wiring purposes (there might be MS involved).
In reply to DeadSkunk:
Google earth view indicates the yard is huge and well organized. Time for a road trip!
In reply to Acme Lab Rat:
Hell yeah, I'll give you a hand with the electrical. While I ain't a Megasquirt guru, I do have several years of experience fooling with the ECU. If you ever feel the need to investigate what is involved with a Megasquirt setup, your more than welcome to check out the B3 Dyno.
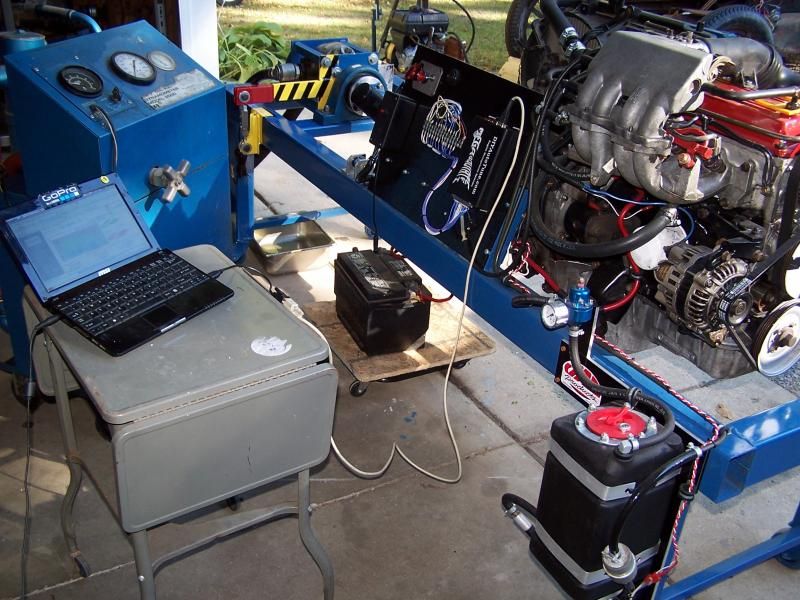 Due to my work scheduled, the dyno has been collecting dust all winter.
alfadriver wrote:
AngryCorvair wrote:
In reply to Doc Brown:
Hey Doc, what yard is that? I'm on the other side of Ann Arbor from you, but always looking for alternatives to the Parts Galore juggernaut.
What, What??? Ann Arbor?
On the other side of A^2 from Doc, ie he is west of, I am east of.
It runs!.... well sort of.
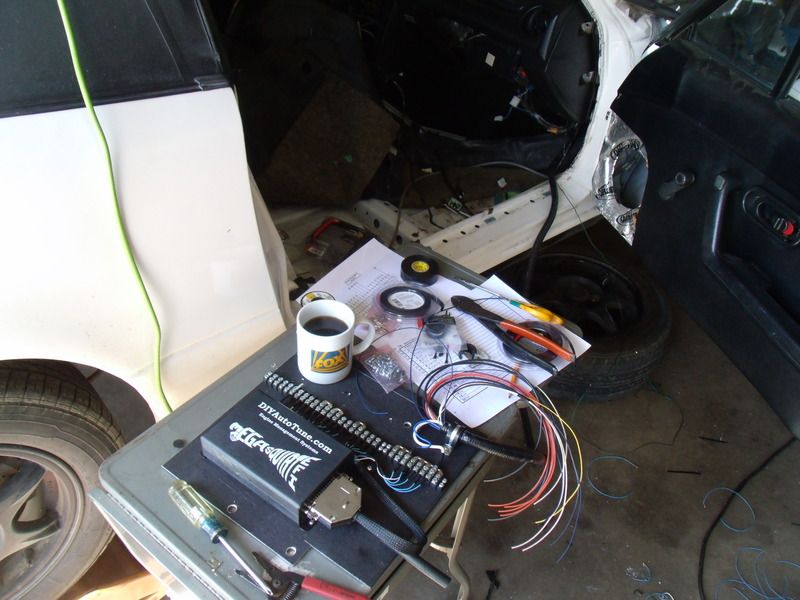 With a cup of coffee providing motivation, I set off on the last bit of electrical fabrication.
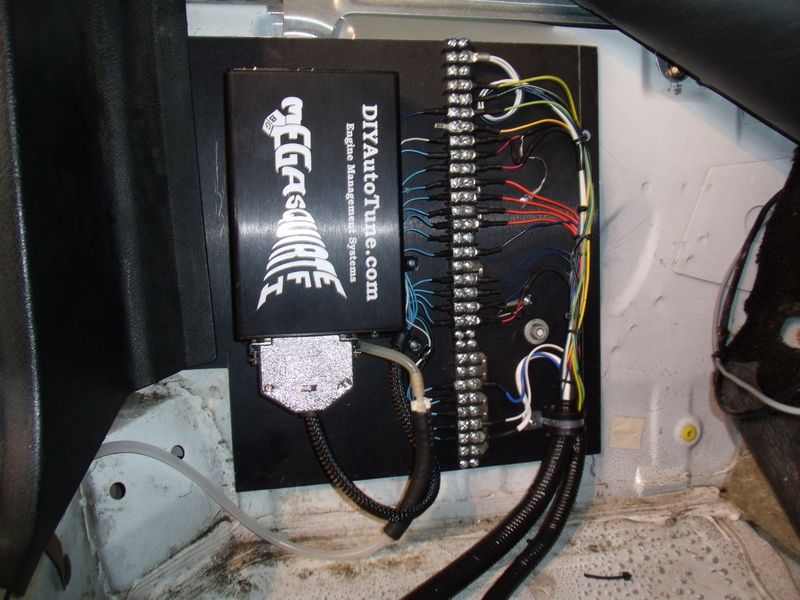 Many hours latter the Megasquirt was finally connected
 . The system is wired so any future mods should be clean and easy.
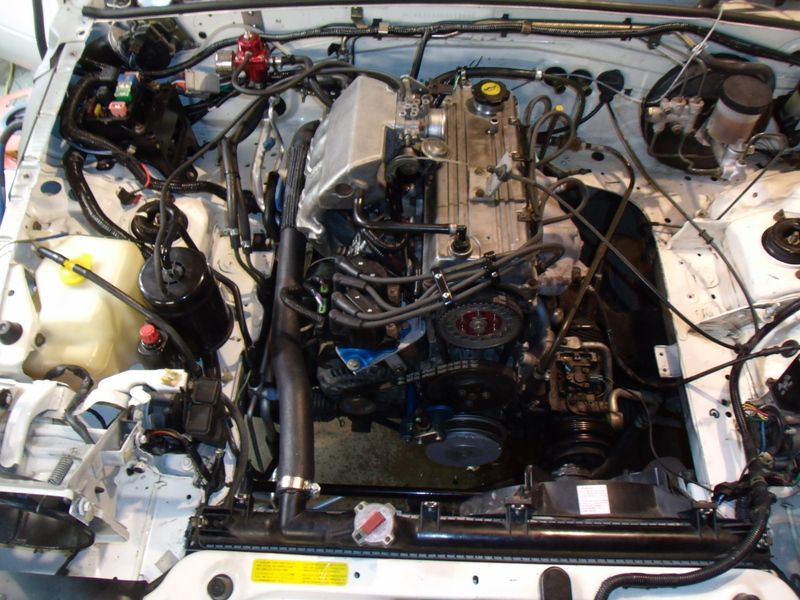 At this point a few cooling hoses need to be connected..... Hmmm... not today.
Time to twist the ignition key and see what happens.....
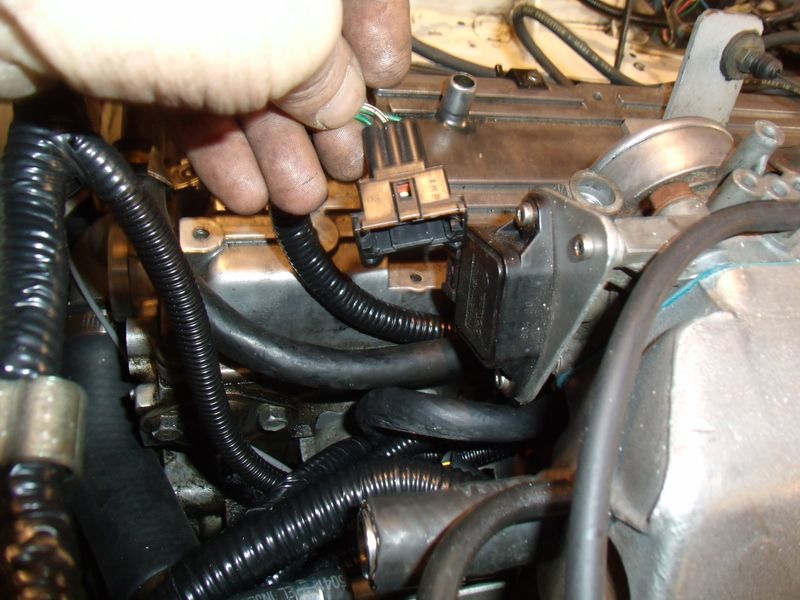 The good news is no smoke, The bad news is the engine didn't start
After a bit of thinking, it was determined the throttle position sensor was wired backwards. So I pulled the connector and tried starting the engine... Zoom Zoom, the little engine started right up. While not quite the success I was hoping for, I was nevertheless happy with the outcome.
Stay tuned!

RossD
UltimaDork
3/28/16 7:34 a.m.
Why jump to the Ford EDIS compared to the S10's you already had?
In reply to RossD:
I grabbed the EDIS parts because I'm a hopeless electronics nerd. They will go in my stash for now.
Making progress.....
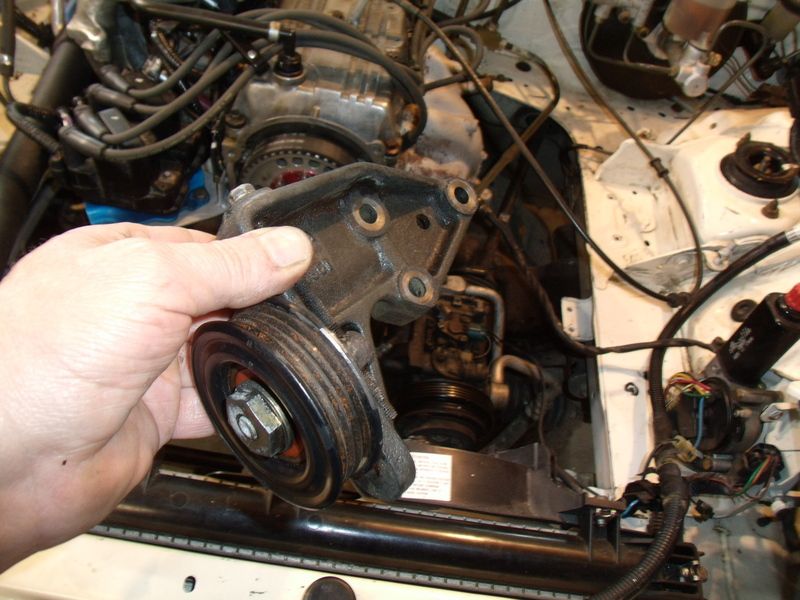 The Power steering delete pulley cleaned up nice. I reckon it's time to install it.
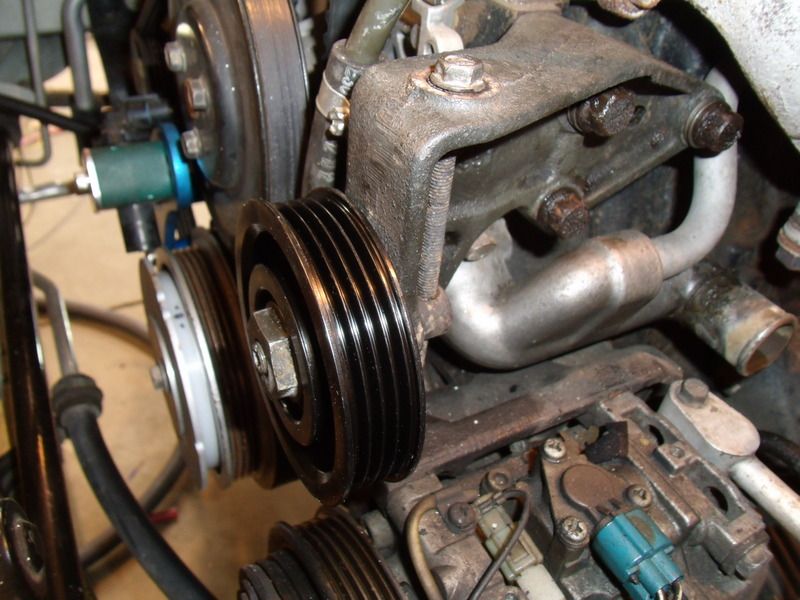 Fits like a glove! These power steering delete thingys command some decent coin on ebay. luckily I was able to find one for dirt cheap.
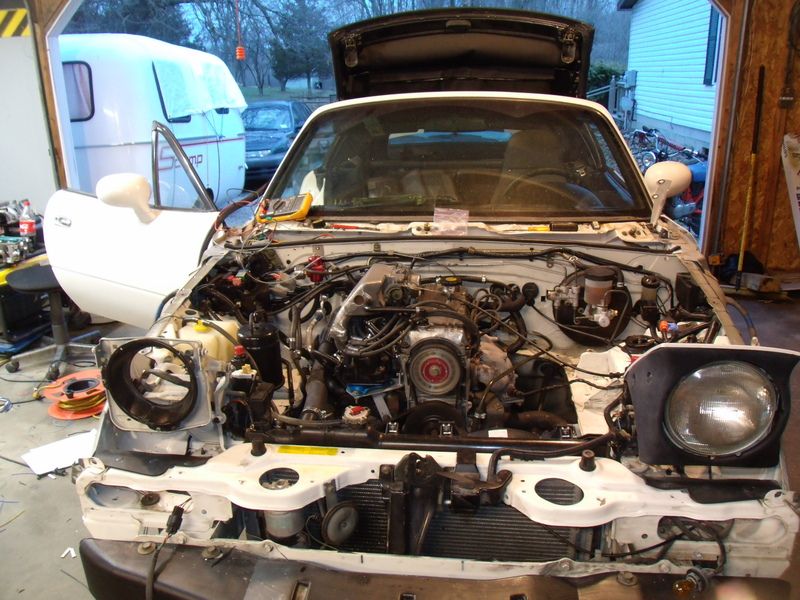 All systems checked out and the car is running again!
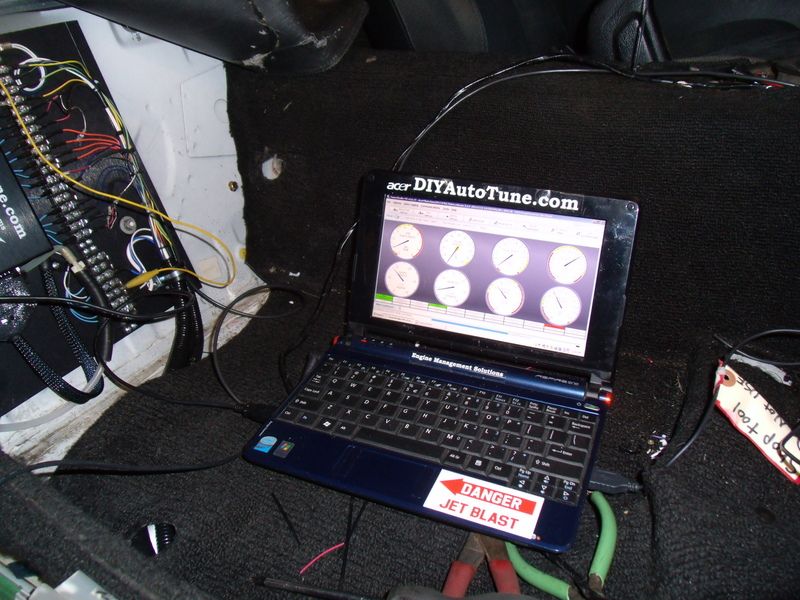 When I nuked the old harness, I accidentally cut out the temperature gage wire.
 I'll have to fix that before I put the interior back together. Anyway, according to megasquirt the engine is running a tad bit on the cold side. This frustrates me to no end.
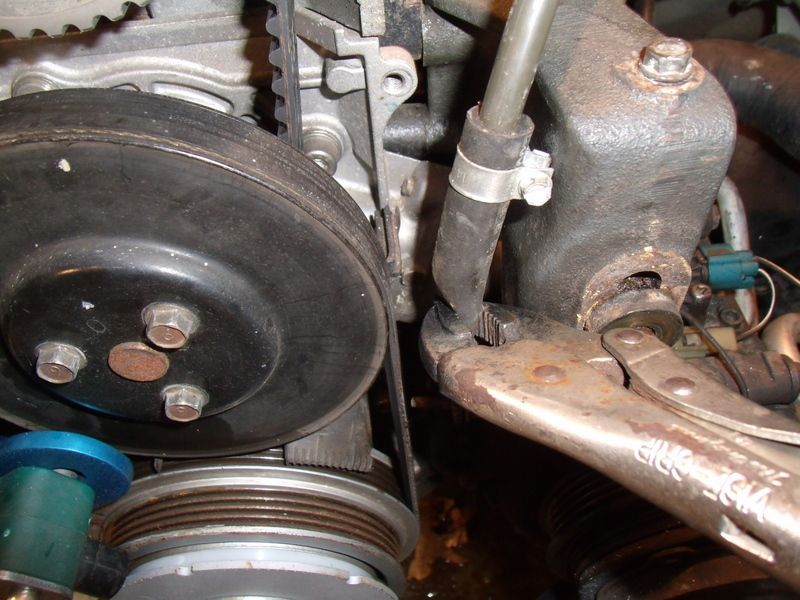 After some experimenting, I discovered that pinching this coolant hose makes the engine run hotter... I don't quite understand what is going on, but it appears I need to do some more experiments.
Stay tuned!

Progress on the car came to a complete halt as I battled some sort of crazy flu this past week and a half. Anyway, not one to sit still, I went ahead and started an investigation into adapting a drive by wire throttle to the megasquirt. Whelp, long story short... Megasquirt ain't got the hardware for drive by wire, but with a bit of magic I can make it work.
Let's take a look...
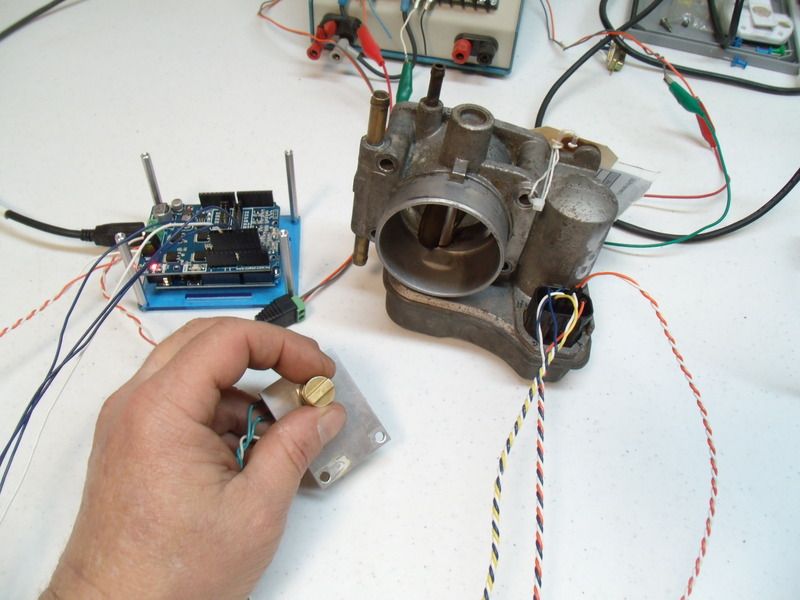 A working 'prototype' uses an Arduino UNO and a single channel H bridge to animate the throttle body. At some point I'll simplify this down to a Nano and a smaller H bridge. The purpose of the drive by wire is to develop a smart throttle system. The smart throttle will/should help improve fuel economy and with a few tricks I should see some performance gains as well.
I sorted through a bunch of drive by wire throttle bodies and discovered some Delphi units are equipped with two independent throttle position sensors. Now, it seems all drive by wire throttle bodies will have at least two sensors, but what makes the Delphi units desirable are both sensors are electrically isolated from each other. The independent throttle position sensors will allow me to use one sensor as a servo feedback sensor and the other sensor can be wired directly into the megasquirt. By splitting the sensors, I realize that the margin of safety is compromised but with a manual transmission and a somewhat anemic engine... I'm willing to take the risk.
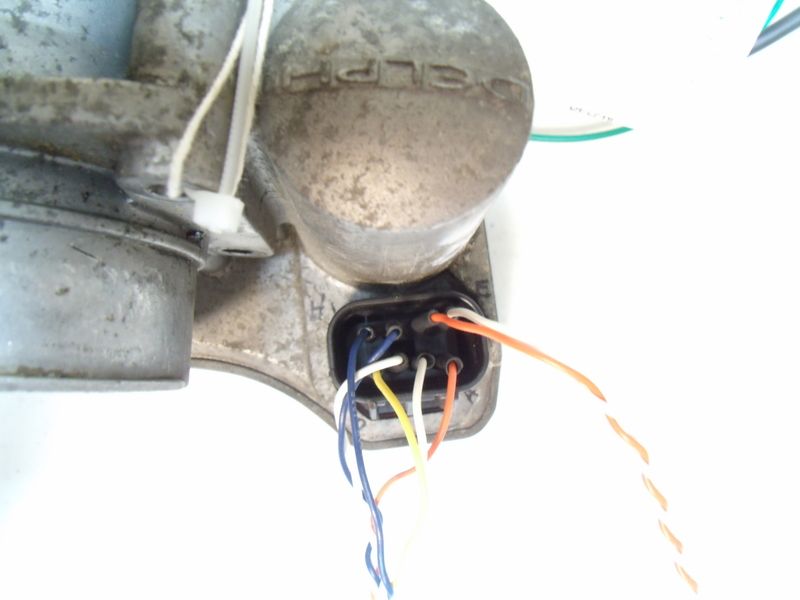 Some Delphi throttle bodied use a 6 pin connector and some have an 8 pin connector. The units with the 8 pin connector have the electrically isolated throttle position sensors. On the 6 pin units, both sensors use shared power and ground. The outputs of the 6 pin units mirror each other as part of some safety scheme. Although the 6 pin units could probably be modified to work, I rather not fool with them.
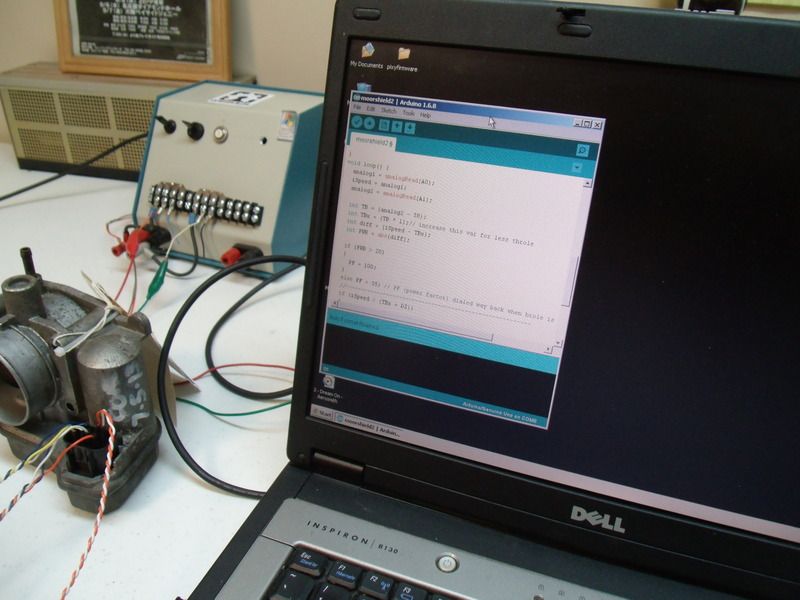 The 'prototype' only took a few lines of code to bring it to life. I'll probably add another 20 or 30 lines of code to for my smart throttle controls.
Stay tuned!
So cool. Thanks for sharing your tinkering.
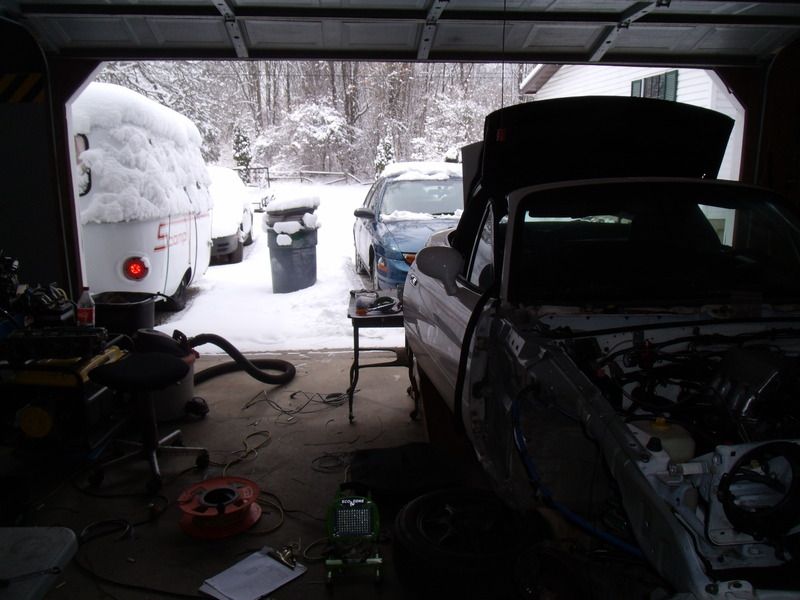 Meh..... Michigan. I reckon in a few days I'll need to cut the lawn. Anyway, aside from the snow, the real problem is the mess that has overtaken the garage.
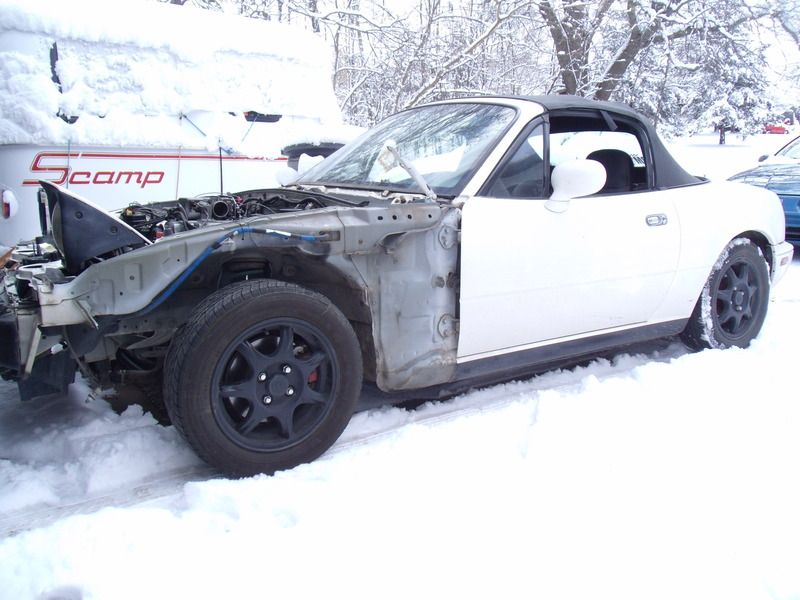 The first ride of the season ended up being a modest 25 feet. Oddly enough the torsen axle wasn't very helpful.
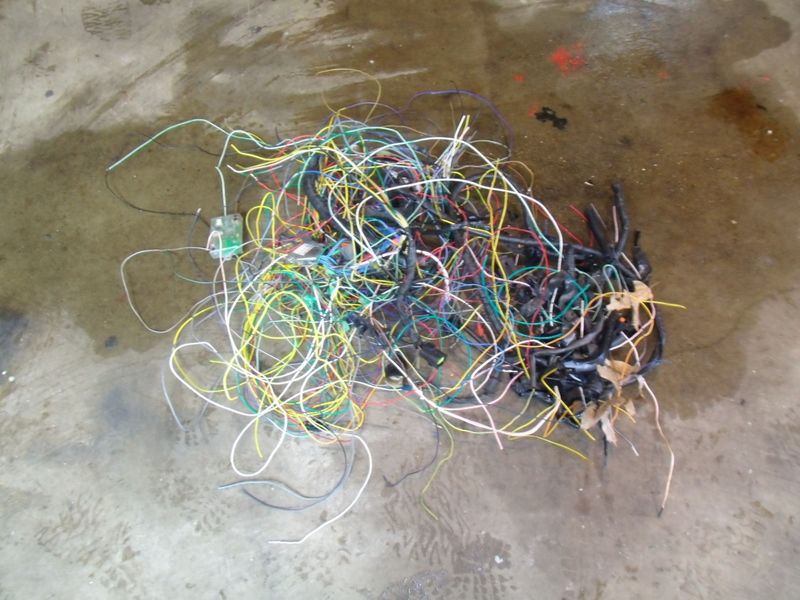 The old harness is ready for the dust bin. I find that cleaning up the work environment helps generates new motivation.
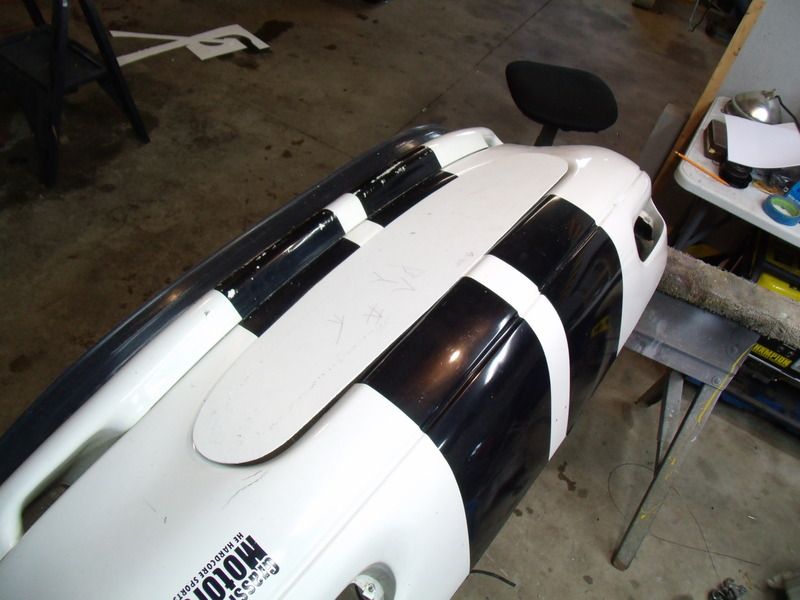 Although I have a lot of bits to reassemble, I took a moment and started working on the grill block off panel. For now I'm constructing a fiberglass template and installing mounting brackets. I'll use the template to build various panels in the near future.
Stay tuned!
In reply to crankwalk:
Thanks!
This simple project has gotten a bit complicated. 
I recently had a touch of the flu - Megasquirt pretty much covered how it felt.
Acme Lab Rat wrote:
I recently had a touch of the flu - Megasquirt pretty much covered how it felt.
Yeah, with the flu, you pretty much become a Megasquirt expert 

Whelp, the newly acquired valve cover is from a B4 or B5 and it ain't going to fit the B3....that sucks. 
Anyway, I'm a big fan of Hungary Bill's Alfa project and really liked how his red wrinkel valve covers came out so I thought I would give it a shot.
I'm totally shooting from the hip and dont know if my process is worth a E36 M3, but here is how I did mine
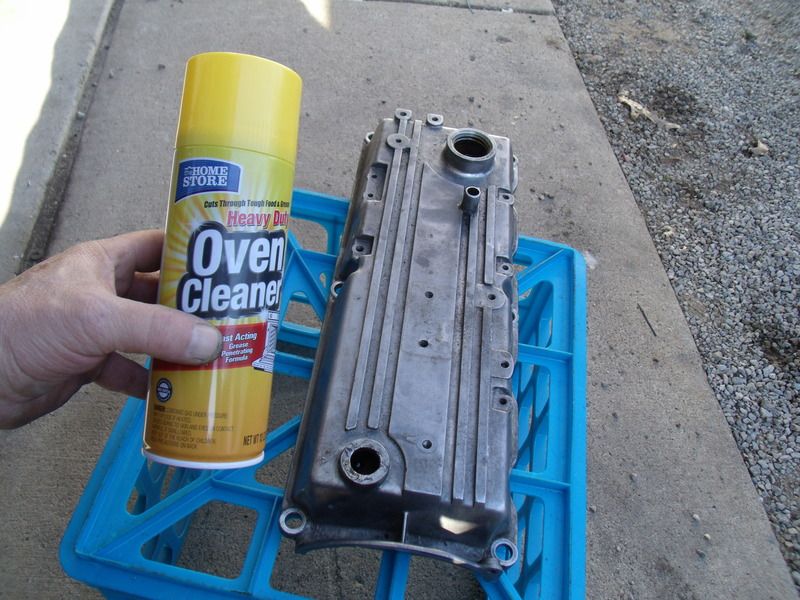
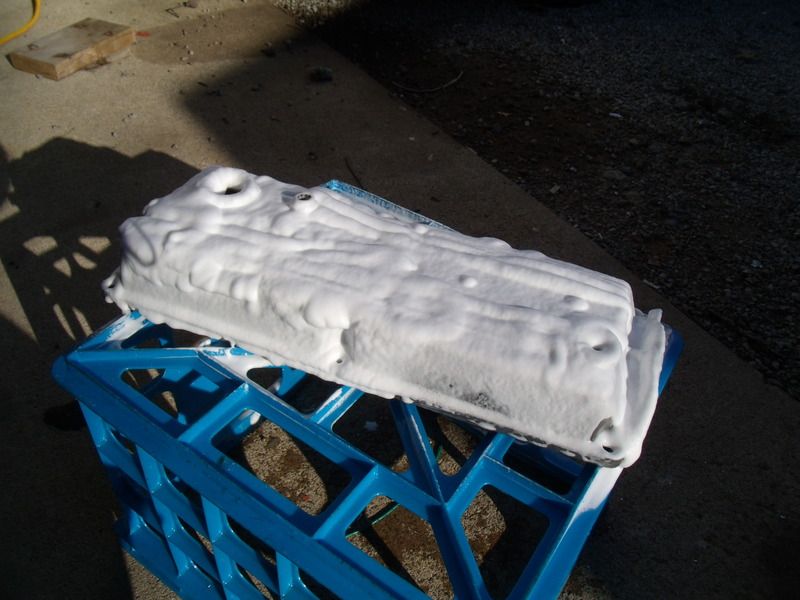 The already clean valve cover was bathed in dollar store oven cleaner to etch the surface for paint. Oven cleaner is nasty stuff and attacks aluminum pretty fast. After a few minuets, the oven cleaner was washed off leaving a dull and presumably paintable surface.
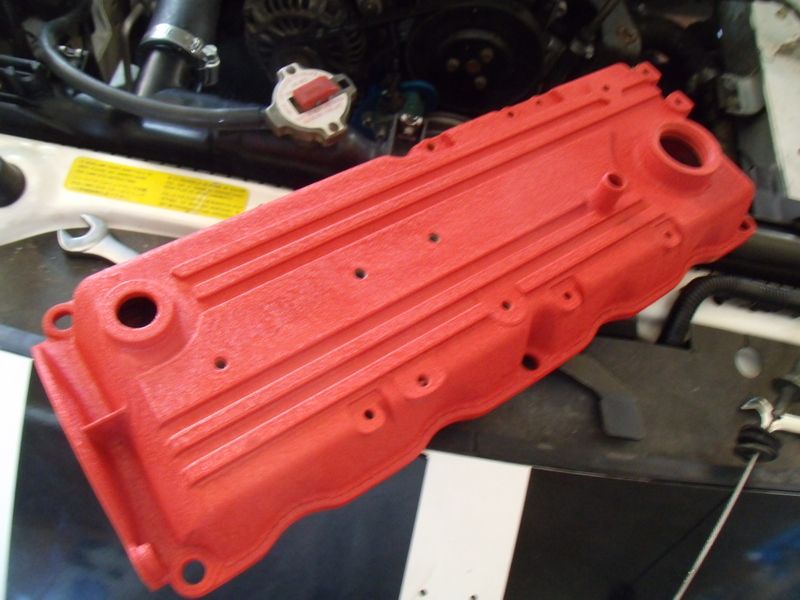 The valve cover was then baked for 20 min at 200F to dry the surface. Next the valve cover was removed from the oven and allowed to cool for a few min. When the surface temp cooled to about 120F I went ahead and misted the valve cover with the wrinkle paint. I continued misting the valve cover until it was full painted.
At this point the valve cover was set aside for 24 hours. The next day I preheated the oven to 200F and baked the valve cover for one hour.
The the end result looks great!
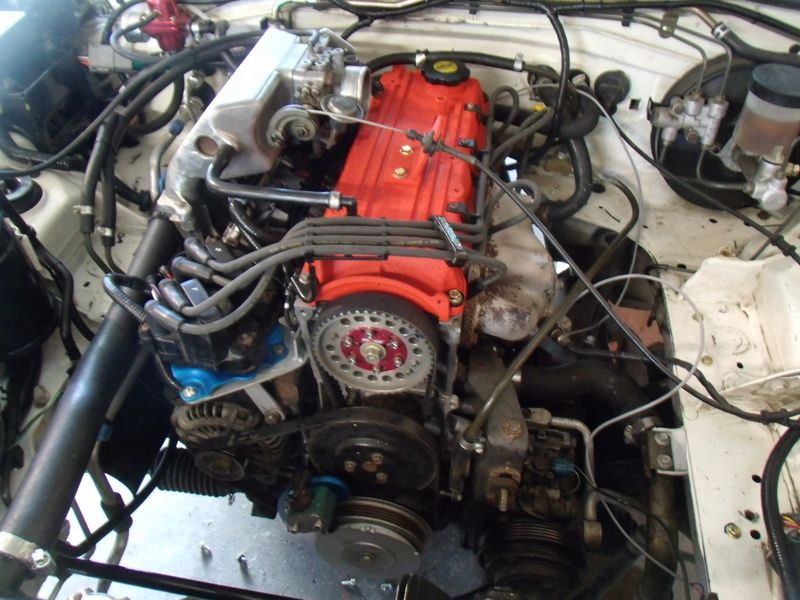 Testa Rossa!
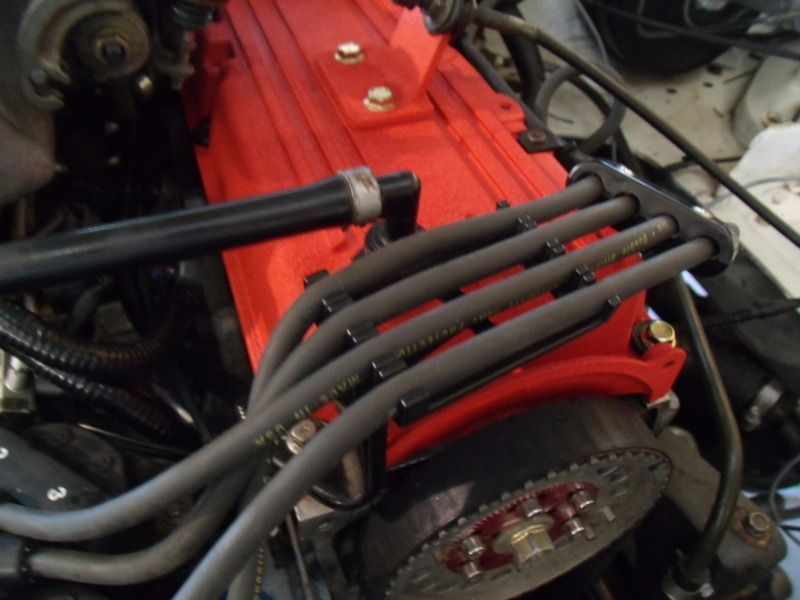 Due to the awkward position of the coil pack, a solution was needed to neatly rout the plug wires across the valve cover. A Nissan part was slightly modified and the problem was resolved.
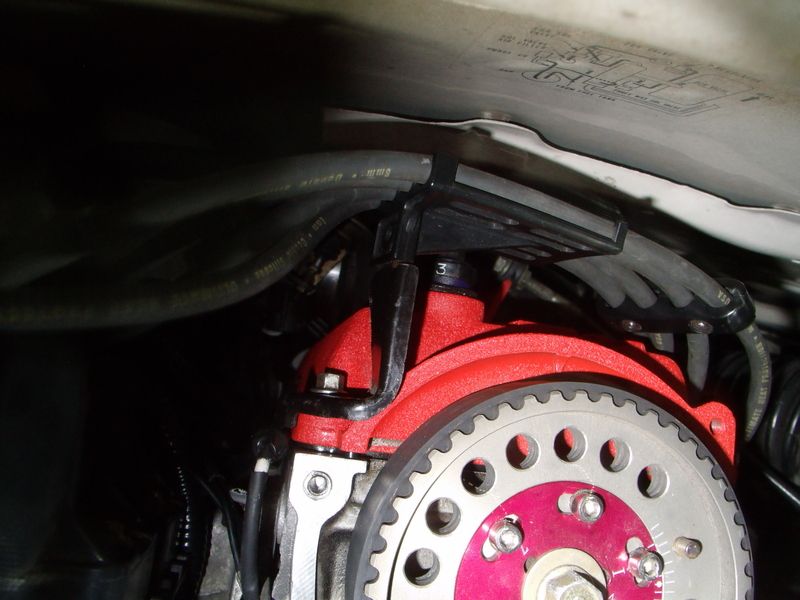 With the hood closed, I managed to shoot a picture of the new wire routing system. It appears there is plenty of clearence
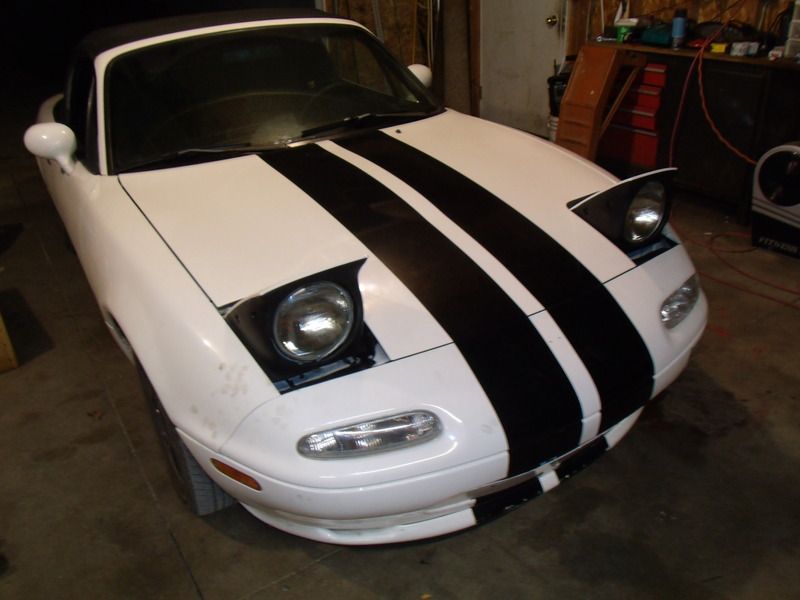 The Miata is all back together and ready for the 2016 driving season
Stay tuned!


 The ignition sub harness was finished tonight. This harness connects to the main harness at the firewall.
  A special bracket was fabricated to support the coolant hose. The blue stuff is shrink wrap to give the bracket a softer contact patch with the hose.
  The megasquirt mounted to a new panel. Since I am constantly tweaking this car, I thought it would be a good idea to separate the Megasquirt from the main harness with a terminal block. Any future mods can be done cleanly at the terminal block and hopefully the harness will stay manageable for a while.
 A sad little 323 sits quietly while awaiting the crusher.
  Some choice parts were harvested from the 323, A genuine Mazda B3 valve cover and a power steering delete idler pulley. Both parts were less than a five dollar bill.
 Once the valve cover is cleaned up it will be swapped with the no name valve cover. Interestingly enough, most of this engine was built by KIA in Korea. Although a Mazda design, it has very few Mazda parts in it. The 323 valve cover puts the Mazda label on something they never built.
  Ignition,injectors and sensors all wired up. Now all I have to do is mate the new harness to the Megasquirt.


 Due to my work scheduled, the dyno has been collecting dust all winter.
  With a cup of coffee providing motivation, I set off on the last bit of electrical fabrication.
  Many hours latter the Megasquirt was finally connected
 At this point a few cooling hoses need to be connected..... Hmmm... not today.
  The good news is no smoke, The bad news is the engine didn't start
 The Power steering delete pulley cleaned up nice. I reckon it's time to install it.
  Fits like a glove! These power steering delete thingys command some decent coin on ebay. luckily I was able to find one for dirt cheap.
  All systems checked out and the car is running again!
  When I nuked the old harness, I accidentally cut out the temperature gage wire.
 After some experimenting, I discovered that pinching this coolant hose makes the engine run hotter... I don't quite understand what is going on, but it appears I need to do some more experiments.
  A working 'prototype' uses an Arduino UNO and a single channel H bridge to animate the throttle body. At some point I'll simplify this down to a Nano and a smaller H bridge. The purpose of the drive by wire is to develop a smart throttle system. The smart throttle will/should help improve fuel economy and with a few tricks I should see some performance gains as well.
  Some Delphi throttle bodied use a 6 pin connector and some have an 8 pin connector. The units with the 8 pin connector have the electrically isolated throttle position sensors. On the 6 pin units, both sensors use shared power and ground. The outputs of the 6 pin units mirror each other as part of some safety scheme. Although the 6 pin units could probably be modified to work, I rather not fool with them.
  The 'prototype' only took a few lines of code to bring it to life. I'll probably add another 20 or 30 lines of code to for my smart throttle controls.
 Meh..... Michigan. I reckon in a few days I'll need to cut the lawn. Anyway, aside from the snow, the real problem is the mess that has overtaken the garage.
  The first ride of the season ended up being a modest 25 feet. Oddly enough the torsen axle wasn't very helpful.
 The old harness is ready for the dust bin. I find that cleaning up the work environment helps generates new motivation.
  Although I have a lot of bits to reassemble, I took a moment and started working on the grill block off panel. For now I'm constructing a fiberglass template and installing mounting brackets. I'll use the template to build various panels in the near future.
 The already clean valve cover was bathed in dollar store oven cleaner to etch the surface for paint. Oven cleaner is nasty stuff and attacks aluminum pretty fast. After a few minuets, the oven cleaner was washed off leaving a dull and presumably paintable surface.
  The valve cover was then baked for 20 min at 200F to dry the surface. Next the valve cover was removed from the oven and allowed to cool for a few min. When the surface temp cooled to about 120F I went ahead and misted the valve cover with the wrinkle paint. I continued misting the valve cover until it was full painted.
  Testa Rossa!
  Due to the awkward position of the coil pack, a solution was needed to neatly rout the plug wires across the valve cover. A Nissan part was slightly modified and the problem was resolved.
  With the hood closed, I managed to shoot a picture of the new wire routing system. It appears there is plenty of clearence
 The Miata is all back together and ready for the 2016 driving season


