1 2
HappyJack
HappyJack Reader
8/1/13 8:56 a.m.

This is mostly a "built" thread, than a "build" thread. Though I'm sure there will be updates with repairs and upgrades.

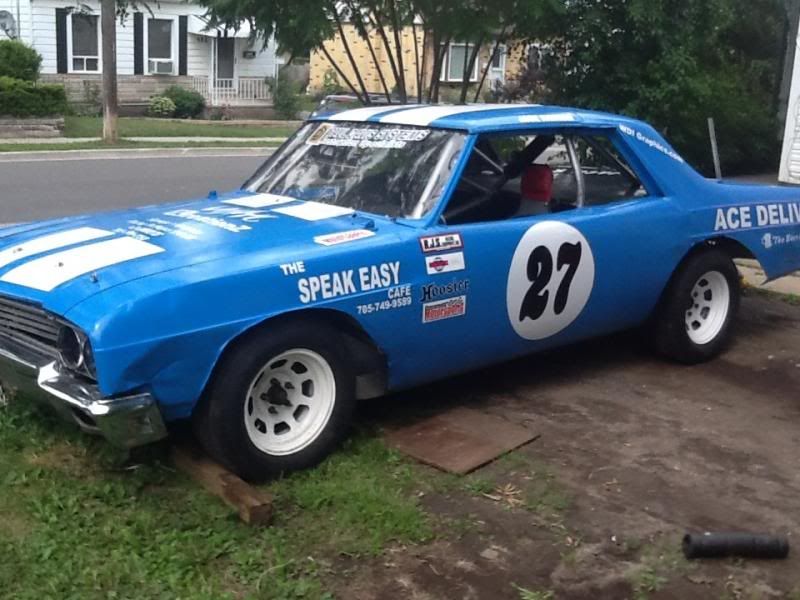
A while ago I bought a 65 Buick Skylark. It had been converted to an Enduro car, and had been raced a few times.
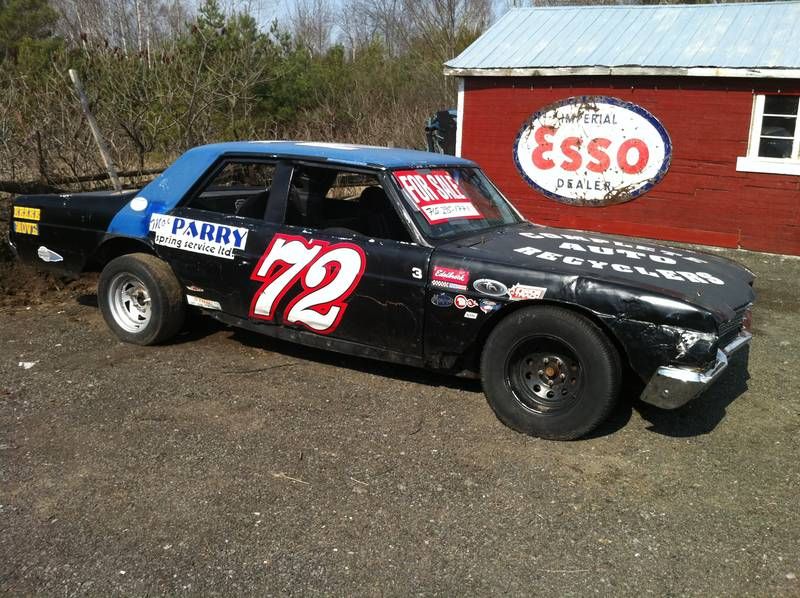
Enduro racing is a step up from demolition derbies. A lot of contact, and minimal prep for the car. Basically gut the interior, weld the doors shut and go. Roll cages are optional, but encouraged.

I bought the car cheap, with the plan to run it as is, and get experience with rear wheel drive racing. Since most of my racing experience was with FWD.

But once I started going over it, there was a bunch of stuff I wanted to change before racing it. Including changing the drum brakes off the front.

The project stalled for awhile, then the local circle track announce they were bringing back the Thunder car class. Also known as street stock, it is a v8, rwd class filled with Monte Carlos, and Camaros.

I've run the 4 cylinder class for years, and have wanted to do this class so I signed up with plans of using the Buick as a proper race car.

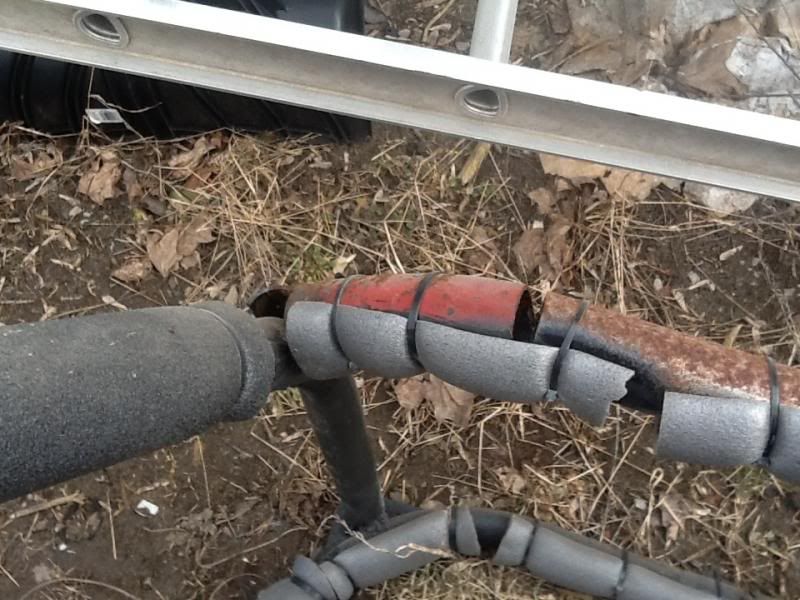
But as I tore into the Buick again, I found even more problems. Some minor, drum brakes on front, and a longer than ideal wheel base. Some scary problems. A roll cage not attached to the frame, and really sketchy welds and gaps that were all covered up with foam padding.
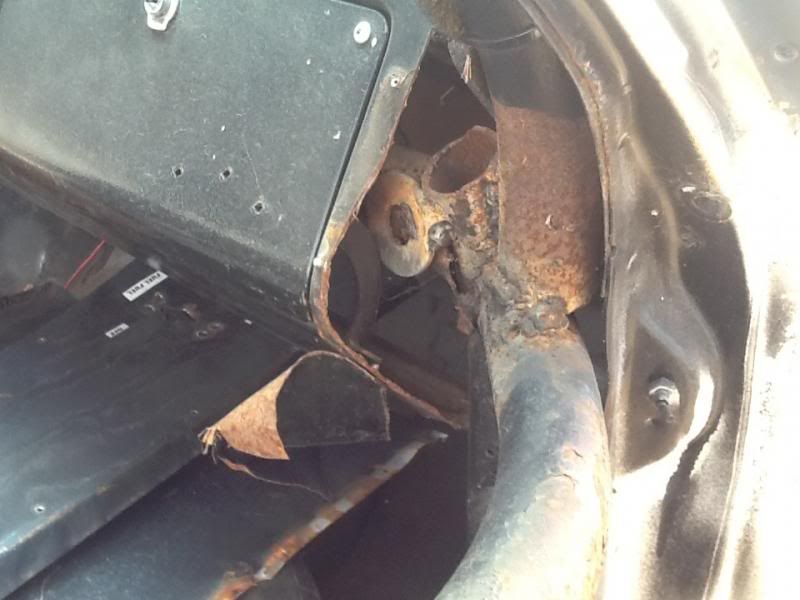
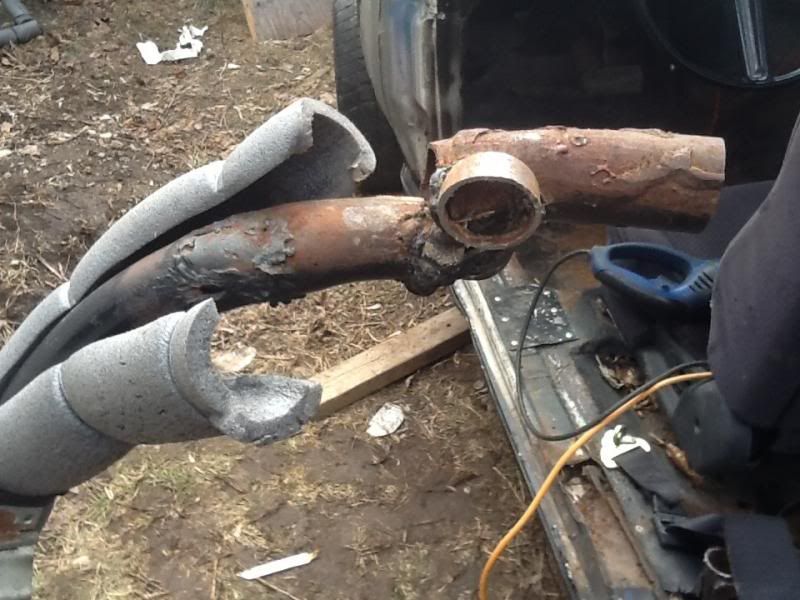
That is what I found as I cut the cage out of the car. The cage originally had been in another car, which I knew, but it had been cut up to fit the Buick, and welded and fitted back together badly.

So to save time, money and headaches I abandoned the idea of using this car. Instead I bought a chassis with a cage already welded on.
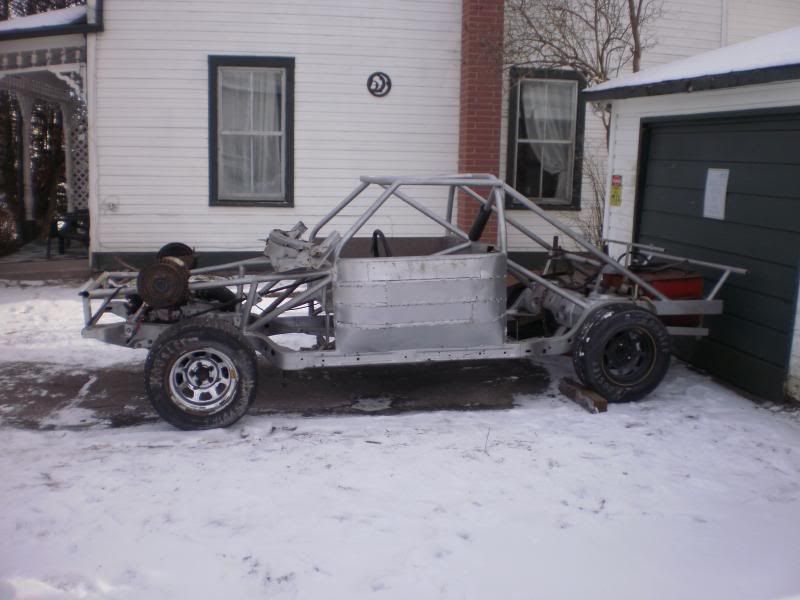
I found it on Kijiji. It was a 85 Monte Carlo. Someone had started to build a Thunder car properly, but didn't finish. So I bought the rolling chassis with cage, and he threw in tons of parts because his wife was making him clean out the garage. I got a fuel cell, spare axle, 7 race rims, gauges, exhaust, etc. Basically everything I needed except an engine, tranny, and body. It even already had the load bolts installed.

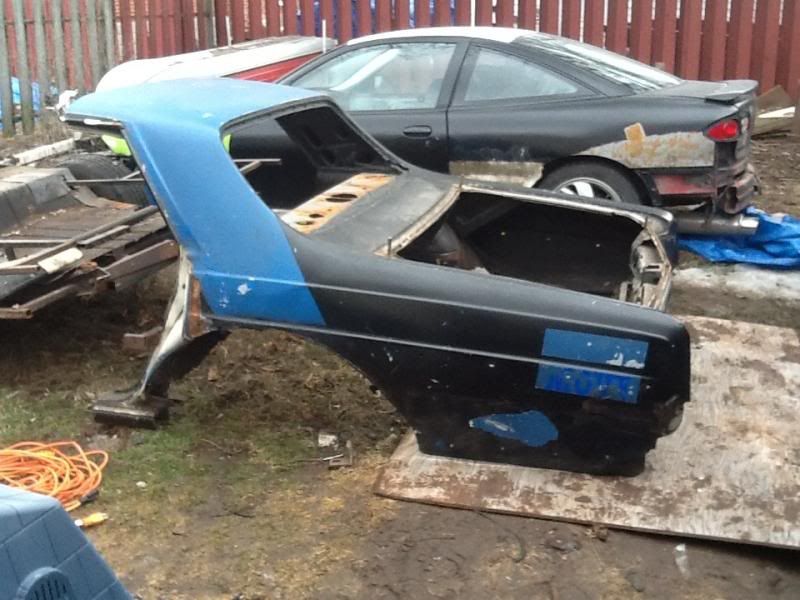
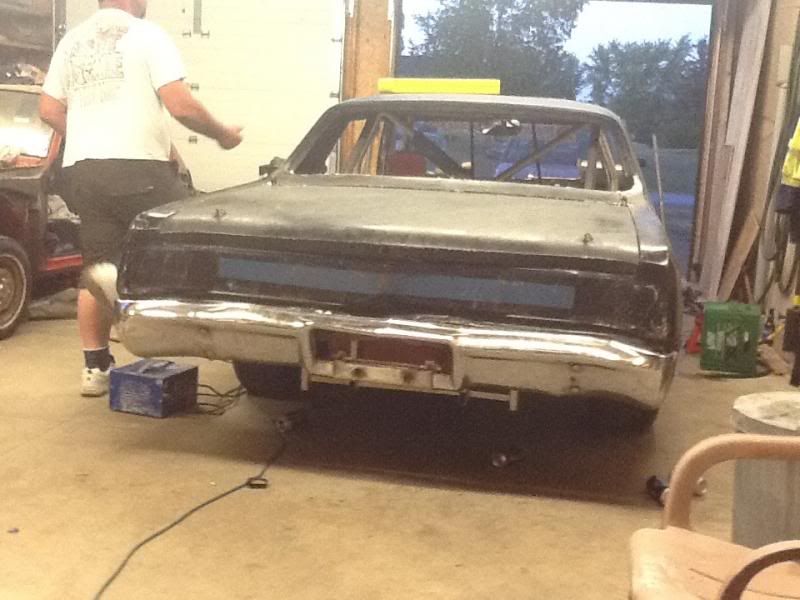
So my son and I chopped off the body of the Buick, and pulled out the driveline.
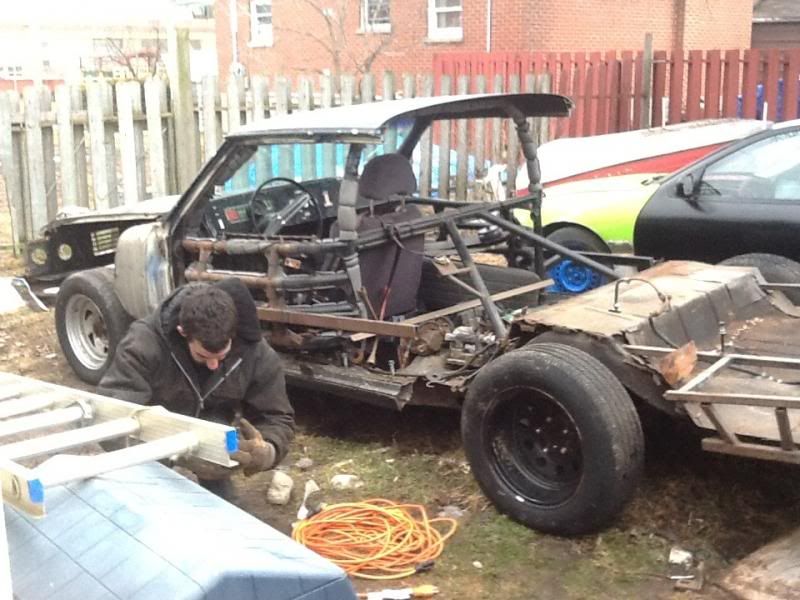
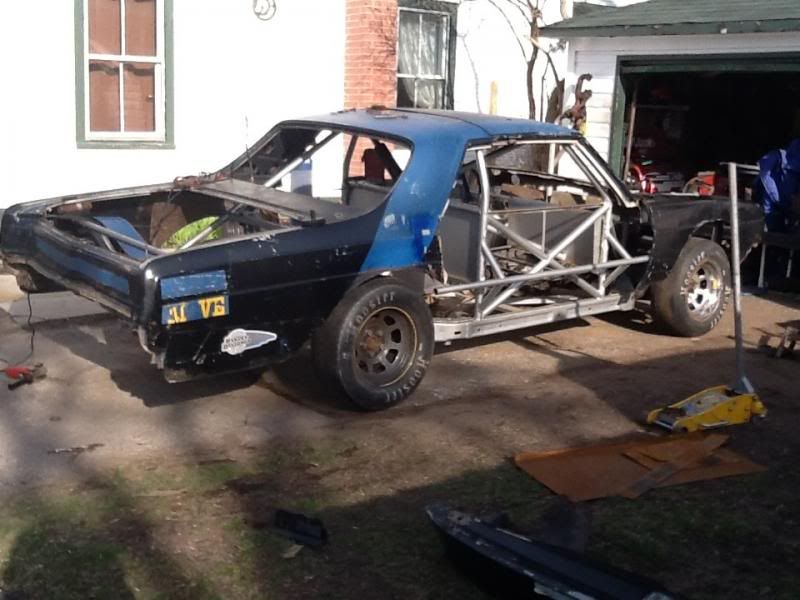
We had to cut out 9 inches from the center of the body to make it fit the chassis.
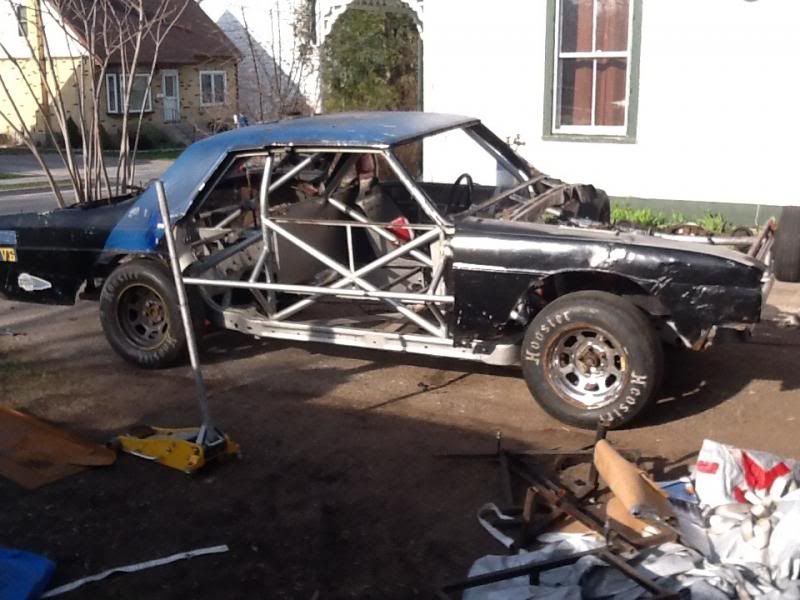
We dropped the engine in that was in the Buick. It is a low mileage, Chevy 350 with 4 bolt mains, originally out of a cube van.
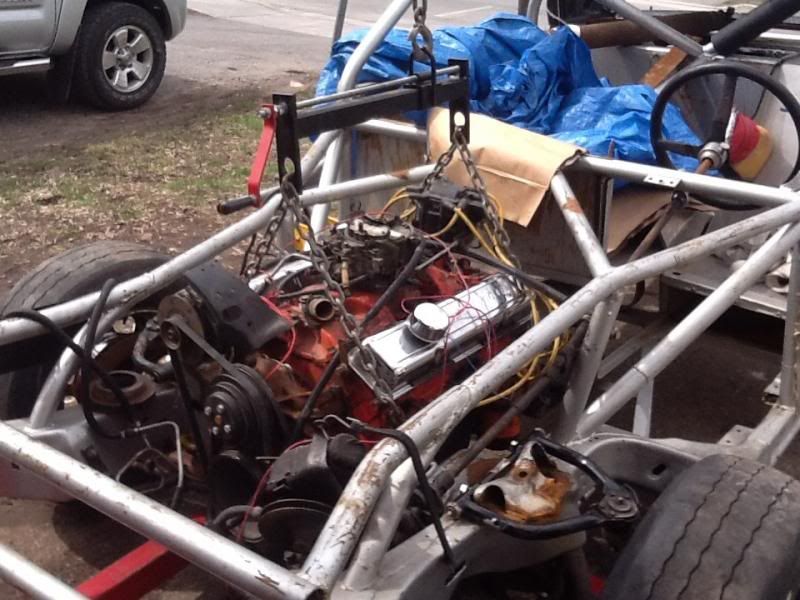
After reviewing the rules, and talking to other racers, we moved the engine 6 inches back, and dropped it a couple inches as well. Withe meant we had to notch the crossmember for clearance of the fuel pump.

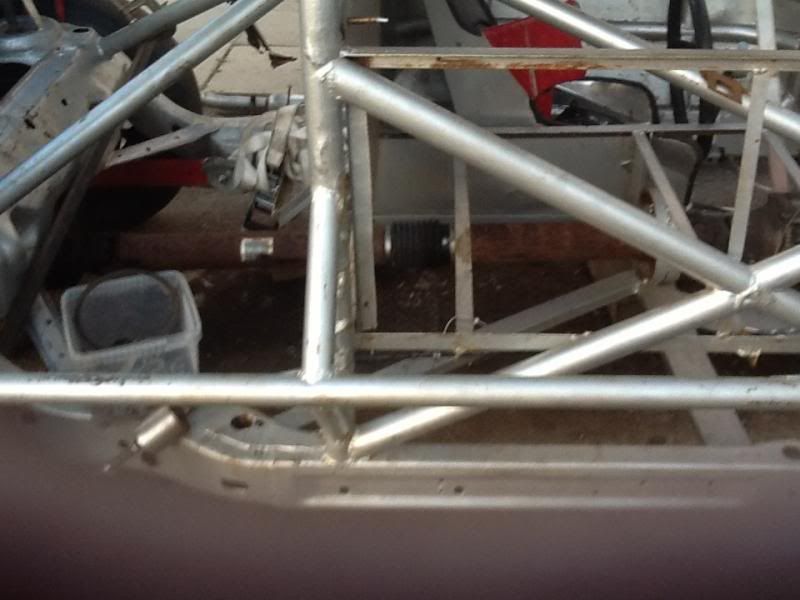
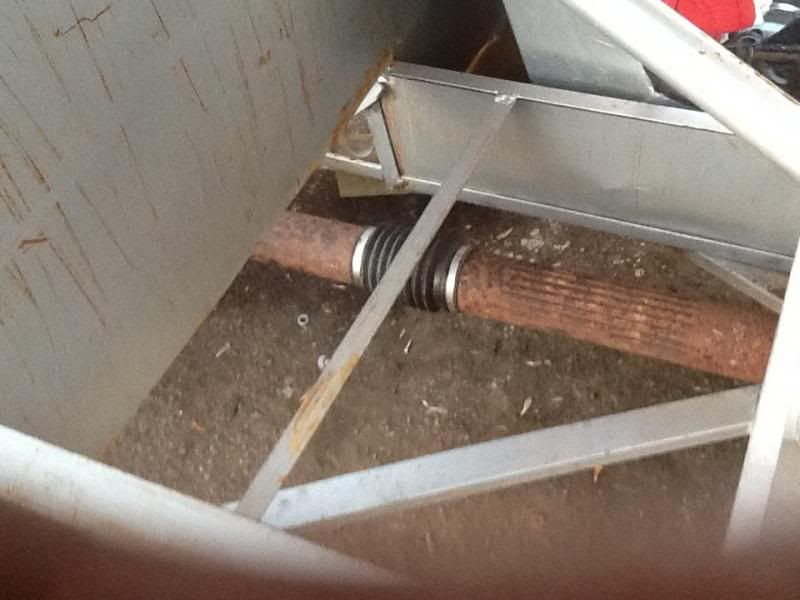
With moving the engine and tranny back, it created a problem with a driveshaft that was too long. Most guys just have a custom driveshaft made. But my budget is tight, and I do have an auto wreckers as a sponsor. So spent a day in the wreckers with a tape measure. The other catch was the transmission I was using (Turbo 400) doesn't have a slip yoke for the drive shaft. It is supposed to use a 2 piece drive shaft so there is some give when the axle moves up and down. Something else that the guys who built the Buick didn't consider, because it had a solid one piece driveshaft.

So after much searching the driveshaft from a 2002 Ford Explorer is the right length, and is a collapsible in the middle, giving me the flex I need.
That all for now, I'll have to continue later to show you how it came together.

cdowd
cdowd Reader
8/1/13 9:03 a.m.

that looks like it is going to be fun. can't wait for more updates.

fasted58
fasted58 PowerDork
8/1/13 9:06 a.m.

Nice build. Glad you made the car safe... and saved that classic body

AndreGT6
AndreGT6 SuperDork
8/1/13 9:54 a.m.

Add a loop around the drive shaft :)

DILYSI Dave
DILYSI Dave MegaDork
8/1/13 9:59 a.m.

Step 1. Find whoever is responsible for this abomination.
Step 2. Beat him with it until he is incapable of ever picking up a welding gun ever again.

HappyJack
HappyJack Reader
8/1/13 11:54 a.m.

Ok, time to continue on.

And BTW, there is a loop around the driveshaft now.

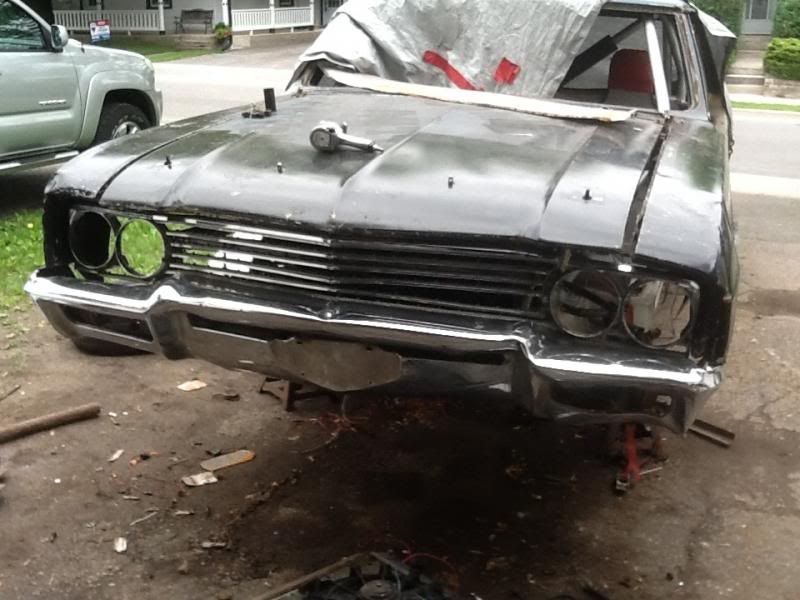
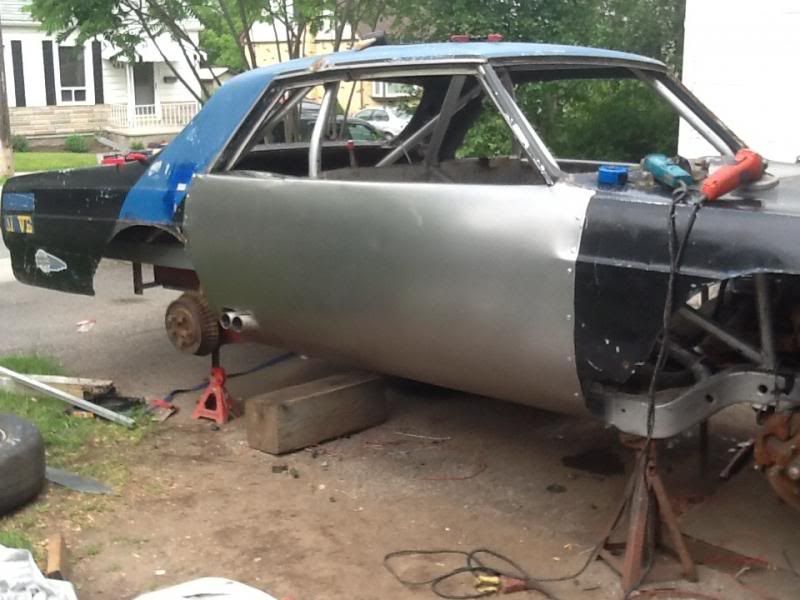
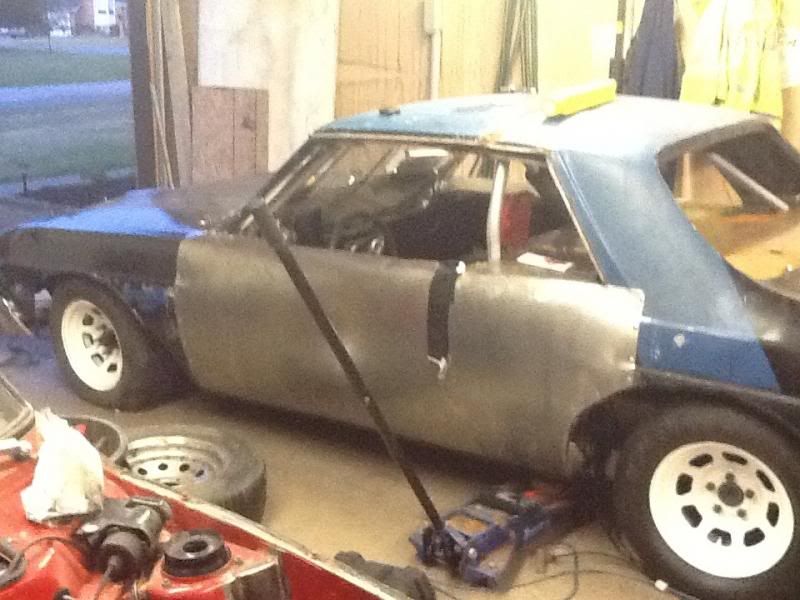
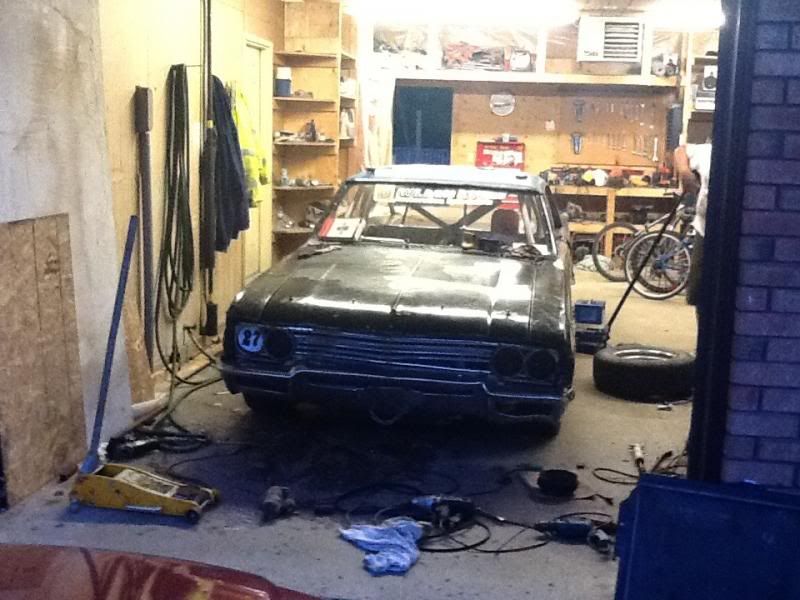
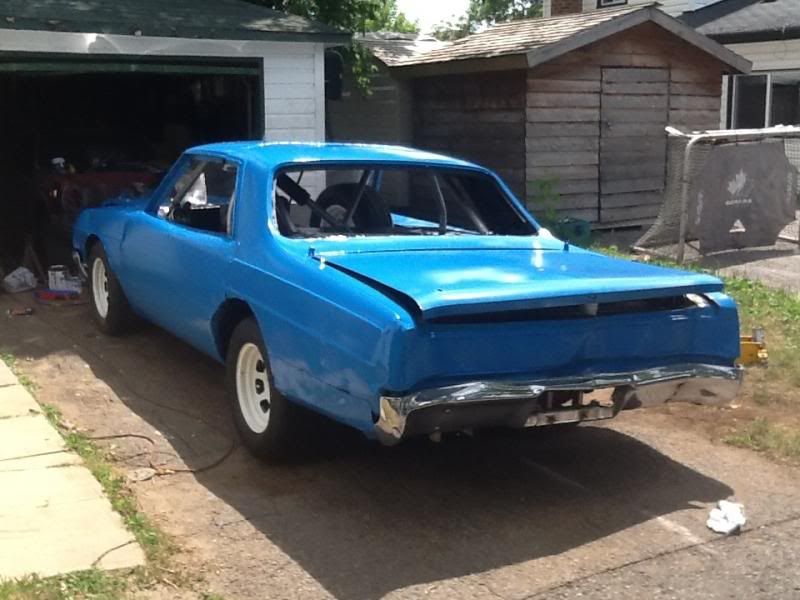
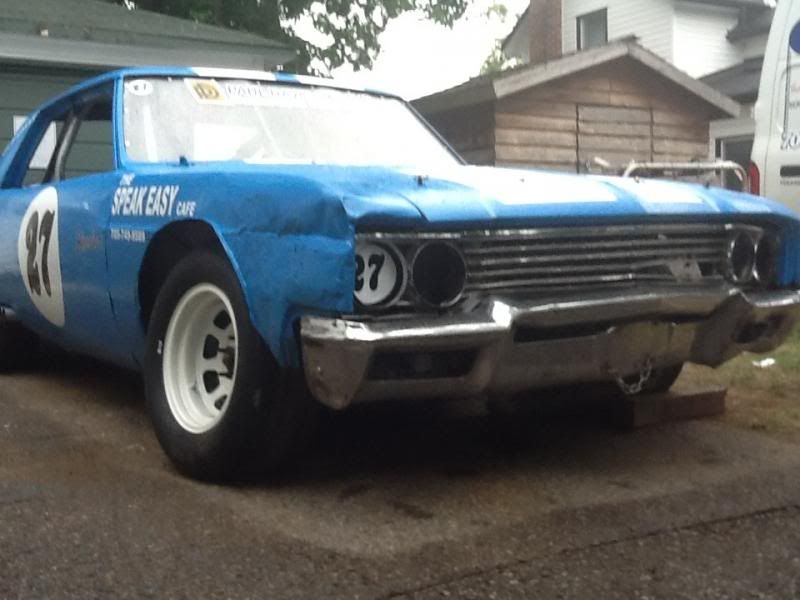
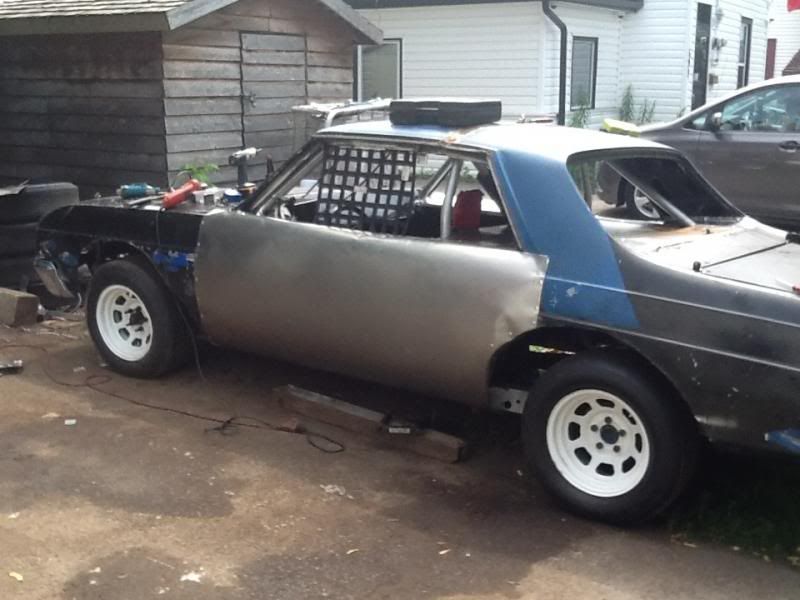
With the body attached we hung the bumpers and fenders. I had to keep the grille, (which is metal, not plastic) because it was too cool not to.

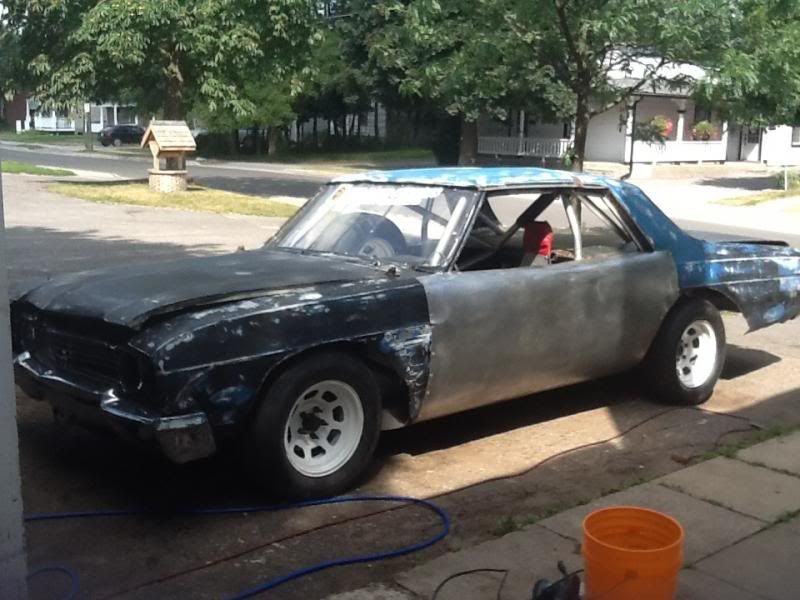
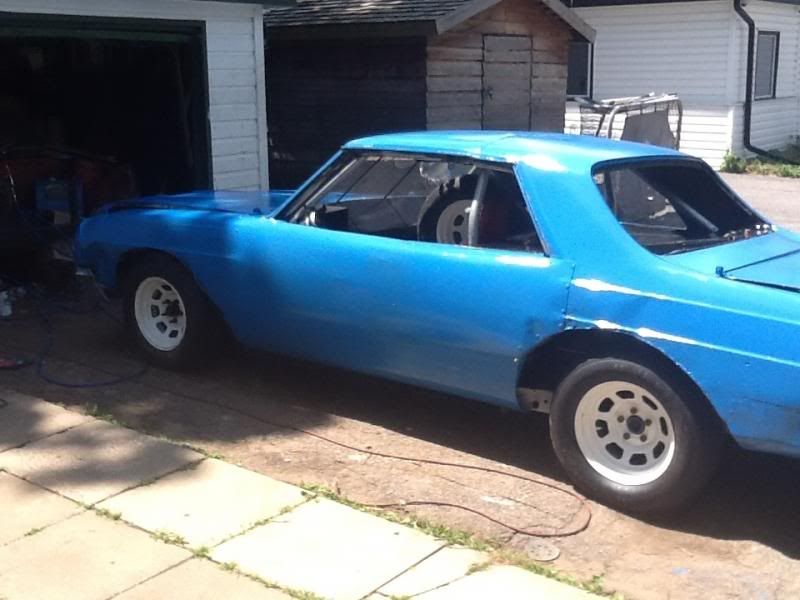
The "doors" are just sheet metal cut and bent to fit. My fab skills aren't good enough to put in the body line creases. But it only has to look good from the stands.

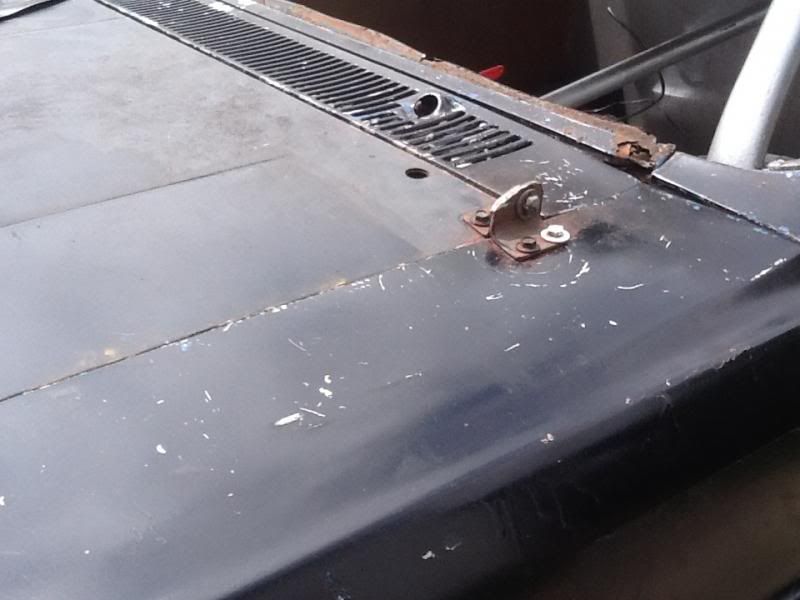
That pretty much finished up the body. Except for some hinges I fabricated for the hood and trunk. Previously the hood and trunk were just held down with 4 hood pins each. That made it a two person job to remove the hood to get at the engine. It was awkward to remove the hood when I was alone.

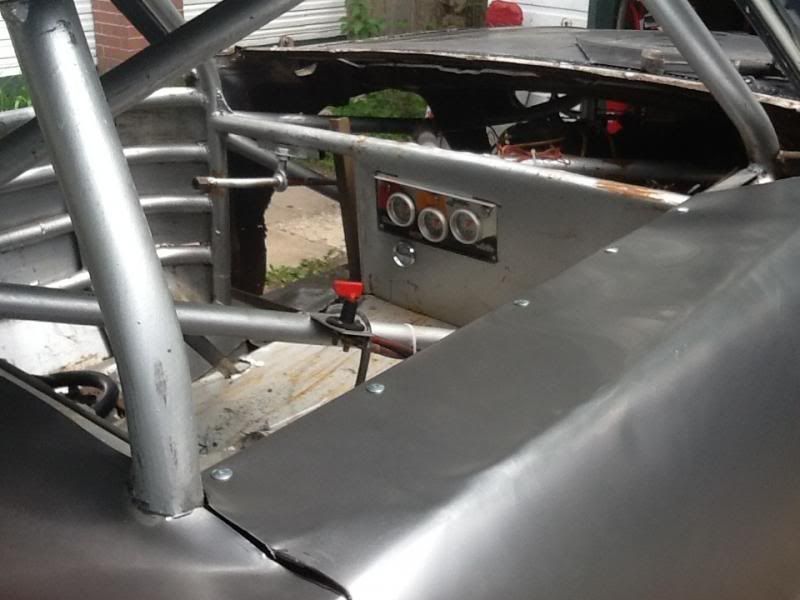
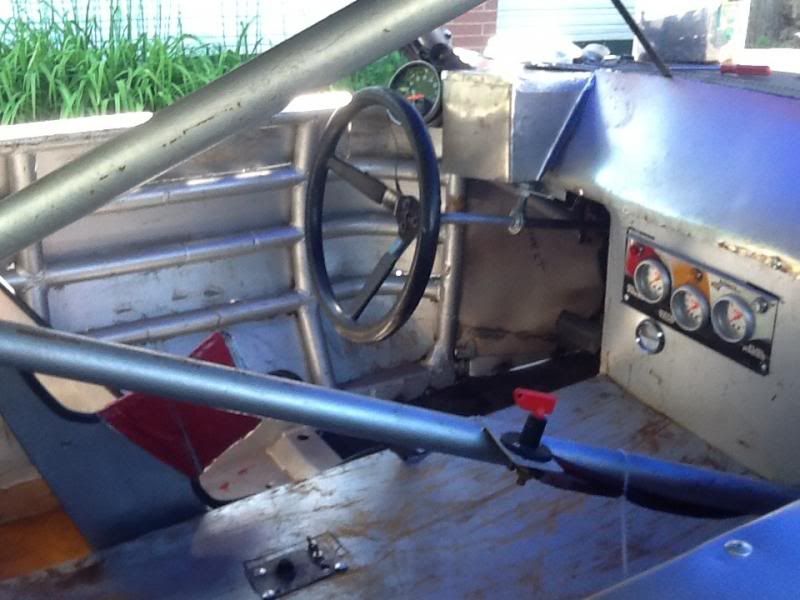
I am realizing now I didn't take as many pictures of the build as I thought. The interior was partially tinned when I bought the chassis. I mounted the gauges, but had lots more to do.

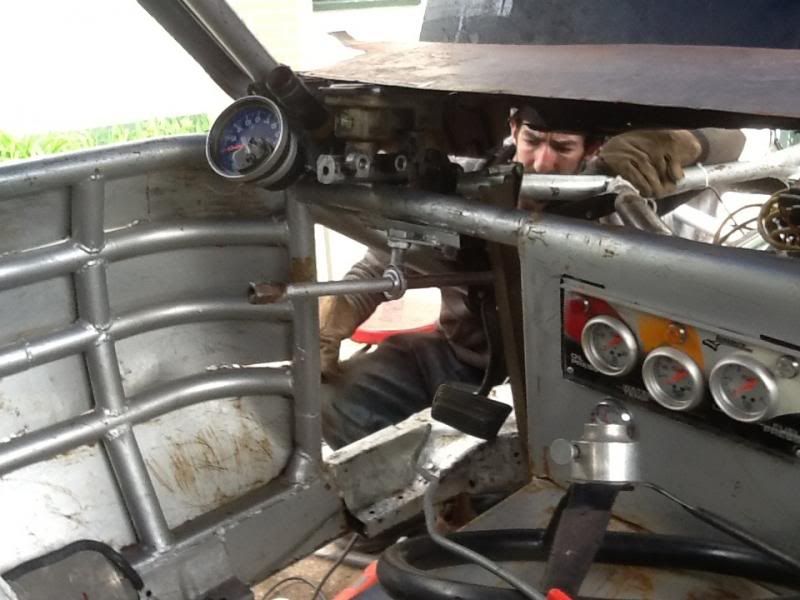
I see now I didn't take good pictures of my master brake cylinder setup. Since we moved the engine so far back, and I had to make a firewall and foot well from scratch there was no good way to mount the master cylinder. It was either too close to the engine, or a roll bar was in the way.

So we mounted the master cylinder facing the wrong way. We then welded on a bar to the top of the brake pedal arm and mounted the push rod to it. So now when you stepped on the brake it pushed the rod towards you, instead of away.

Doing the brakes was a whole nightmare by itself. The original single reservoir master cylinder from the Buick was replaced with one from a 2000 Chevy S-10. I ran all new lines. Replaced the Monte Carlo rear wheel cylinders with new ones. Added an adjustable brake proportioning valve, and ran new lines up to the existing front brakes on the car. Here is where the nightmare began. The problem was the previous owner of the chassis had upgraded the front brakes to bigger ones. But from what, I don't know. I even removed the calipers and took them into a parts place to try and figure out what they were from, so I knew what pads to buy, but also what flex lines to buy. Long story short I ended up buying new calipers, pads and flex lines so now I know what I have and it is all new. It wasn't too bad though, the calipers were cheaper than the brake pads for them.

So once the brakes were all done, I had to modify my dash to have access to the master cylinder. I built a small removable box over it.

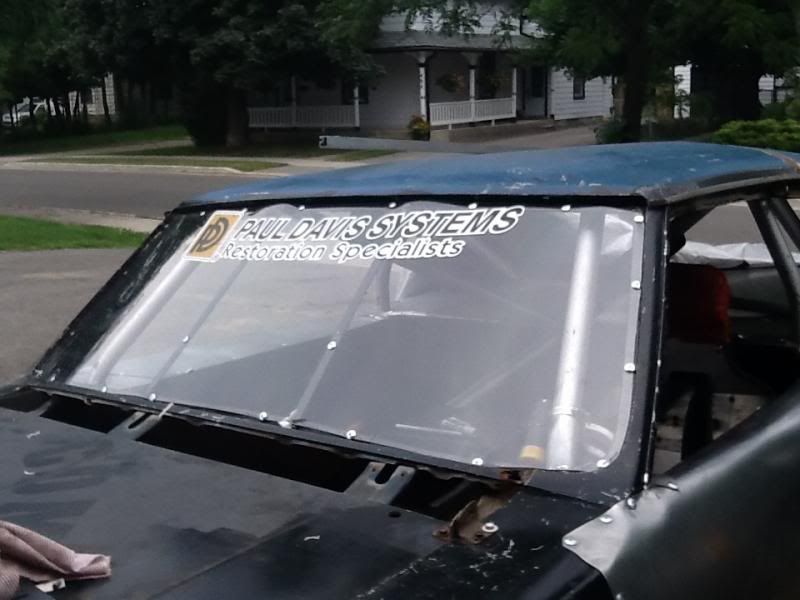
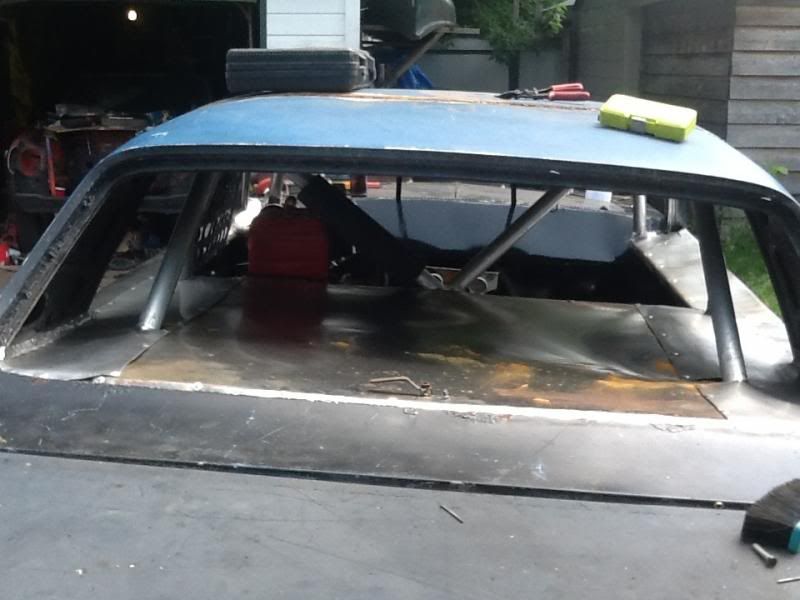
Once the interior was done I mounted the Lexan windsheild. The Buick still had the original glass windsheild in it, and it was scary how easy I pushed it out with my hands.

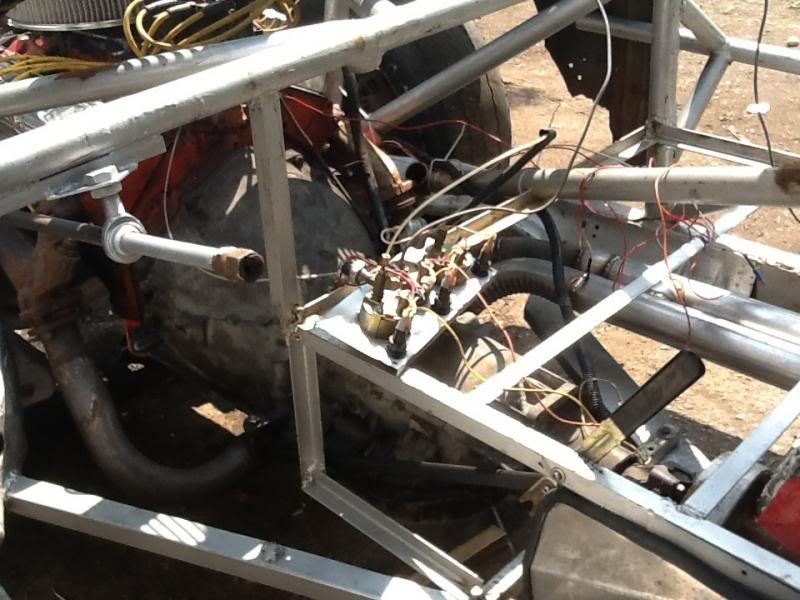
I know these aren't all in exact order, but it is close. Though I did skip the transmission. I had to make a home made shifter, using the jack handle from an old Astro van, I think.

This picture you can also see how I ran the exhaust uder the passender side. It is actually high enough up that the pipes exit from under the car ABOVE the frame.
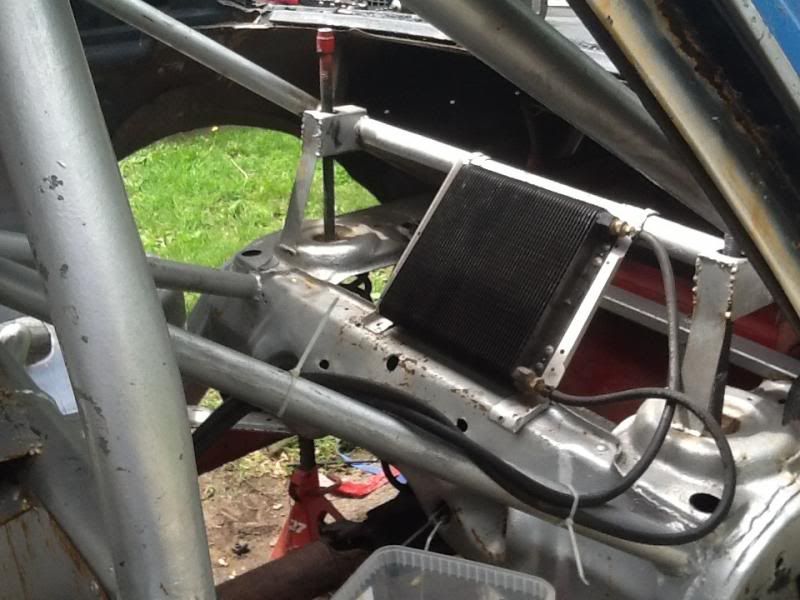
I also installed a tranny cooler at the rear of the car.

When I installed it originally I used the rubber lines that came with the cooler. After the first night out I replaced the lines with steel. More on that later.

I then tinned in the back covering up the battery (behind the seat) tranny cooler, axle etc.

I think I will finish this off on the next entry. This one is getting long.

HappyJack
HappyJack Reader
8/1/13 12:40 p.m.

Once the car was more or less together, and it looked like a car again, we started on set up and engine tuning.

The car sat fair high up. Rules said I had to have at least 6 inches of ground clearance at the frame rails. I had 9 1/2.

So we lowered the suspension. The car had adjustable load bolts at the back, and adjustable spring pockets at the front that the previous owner installed. That and he gave me a bunch of different springs as well. So it was actually pretty easy to get it where I needed.

Also my son races, and is a whiz with suspension geometry and happens to be a welder. So he relocated my upper control arms and modified the centre link to address bump steer, and Akerman issues that stock suspension has.

I didn't take pictures of his modifications, but you can see the car sitting lower. While he was doing that my brother and I tackled the engine. It was bone stock. The rules allow two options. You can buy a crate motor and have it sealed, which I wanted but couldn't afford, or you can build a motor. (with certain limitations) Since my budget didn't allow a crate motor, and I figured this season was to just get experience and work the bugs out. I used what I had. I'd be under powered, but I would out there, and hopefully handle well.

So the first thing was to tackle this weird thing called a carburetor. I'm a fuel injection guy. I don't know the first thing about carbs. So I had a guy who does rebuild one for me. But the car still ran like crap. Turns out I had an intake gasket leak. So I changed that, then figured while I'm in there might as well change the stock cam to a race one. And that turned into new timing chain and gears. And from there since I was that far apart I added an underdrive pulley to free up horsepower, and not spin the power steering too fast.

Here is a video of when it was fired up for the first time.

First run

The screeching noise is the alternator. We had to change the pulley to run a V groove belt and it turns out we didn't have the pulley tight.

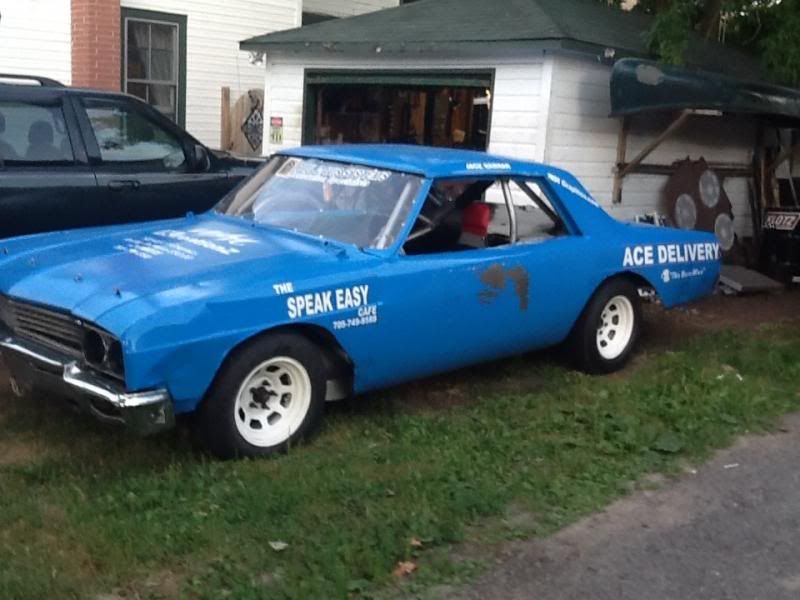
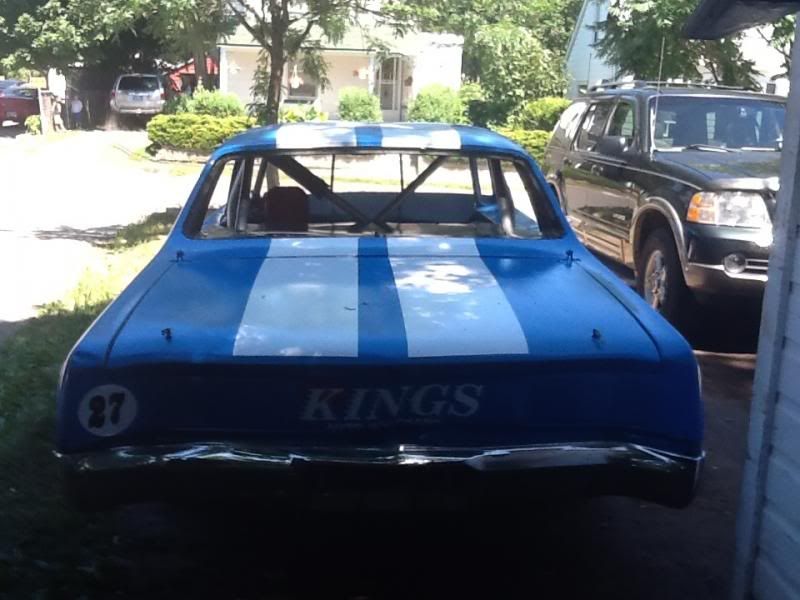
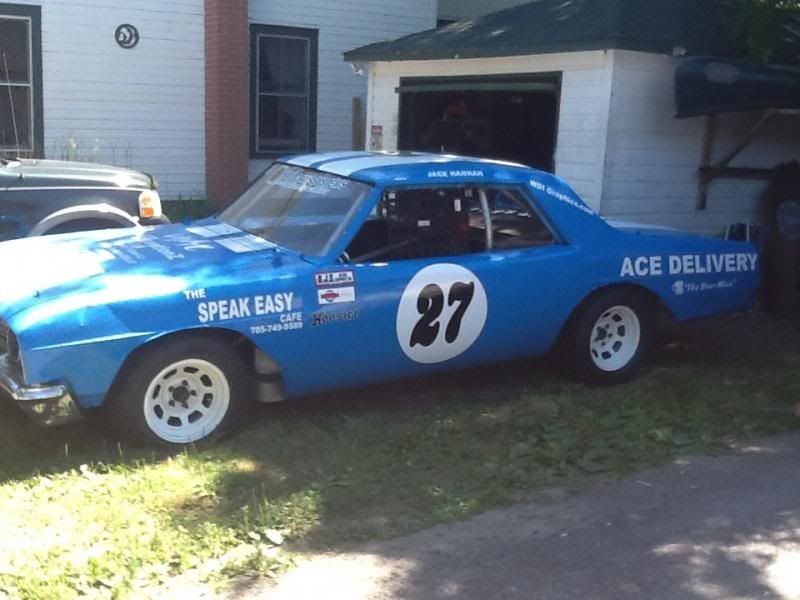
So after all this it was time for paint.

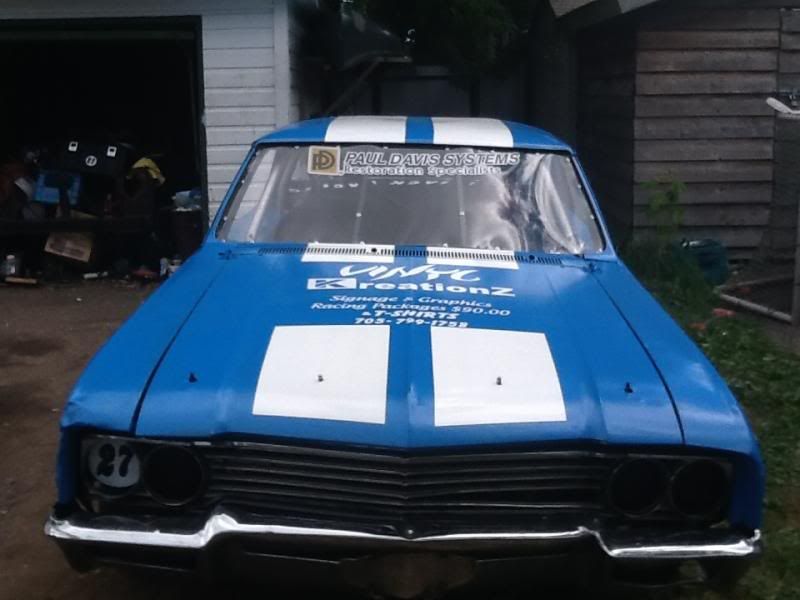
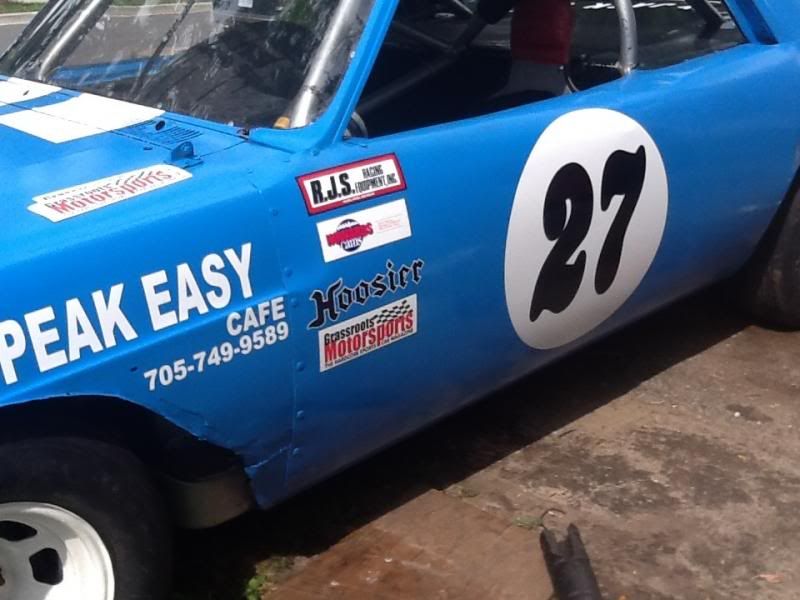
I didn't manage to get the numbers on or all the decals before race night. And I had a problem with paint sticking to the door.

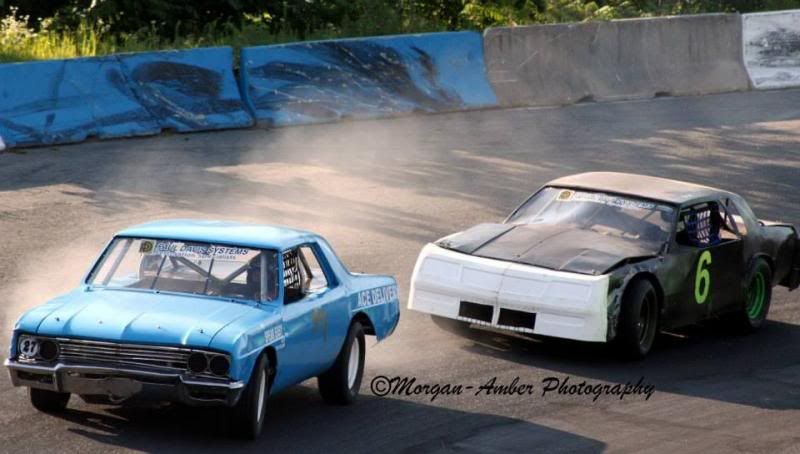
I borrowed this picture from a friends girlfriend who takes pictures at the track. First night on the track. I ended up being black flagged because of smoking. Remember those rubber lines I used for the tranny cooler? They leaked. Twice! So now they are all steel lines.

Car ran ok. Carb bogs a little. I have it geared so I can run in first gear, which should make it shoot out of the corners. The RPMs are right, (about 6000 at the end of the straight) but even though I have it manually in first, it will shift to second gear. Then I'm only turning 3500 RPMs at the end of the straight. So I have to sort that out.

Since the first night I finished the decals and paint, and well as fixed some bugs. I hope.

So that is where I am now. Last week was rained out, and this coming week just happens to be an off night for my class. So I'll keep you all posted.

Also I got an email from a guy who writes for Inside Track magazine. He asked for some pictures and a sponsor list and said he will put it in the magazine. I just need to get some completed on track photos now.

I know this was a quick and vague build thread. Feel free to ask any questions or ask for any more pictures.

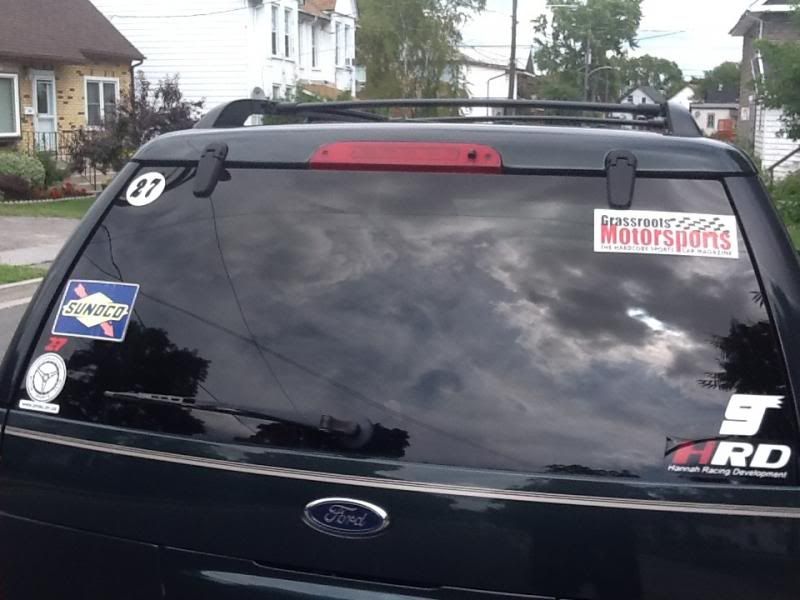
Now I just got to get some GRM stickers for it.

fasted58
fasted58 PowerDork
8/1/13 12:47 p.m.

luv it

reminds me of what ya'd see in the old dirt trackin' days

Xceler8x
Xceler8x UltraDork
8/1/13 1:29 p.m.

Really cool low buck build. Good work there.

warpedredneck
warpedredneck Reader
8/1/13 2:38 p.m.

you don't have the vacuum line hooked up to the modulator valve on the trans do you? it'll override and force the shift on you if you do hth

sachilles
sachilles SuperDork
8/1/13 2:41 p.m.

Like it.

Javelin
Javelin MegaDork
8/1/13 2:49 p.m.

Awesome build! I was wondering what happened to that car. That roll cage will give me nightmares...

HappyJack
HappyJack Reader
8/1/13 3:57 p.m.
warpedredneck wrote: you don't have the vacuum line hooked up to the modulator valve on the trans do you? it'll override and force the shift on you if you do hth

Yes, that is exactly what I had done. I disconnected it now. Tonight is practice night, so we'll see how it works now.

Thanks.

warpedredneck
warpedredneck Reader
8/1/13 6:17 p.m.

great! let me know how it works I may have a few more tricks up my sleeve, i'll see you next week anyway, coming over to race one of the crowes cars

HappyJack wrote:

warpedredneck wrote: you don't have the vacuum line hooked up to the modulator valve on the trans do you? it'll override and force the shift on you if you do hth

Yes, that is exactly what I had done. I disconnected it now. Tonight is practice night, so we'll see how it works now.

Thanks.

David S. Wallens
David S. Wallens Editorial Director
8/1/13 10:02 p.m.

Very, very cool. Did anyone get you those GRM stickers? If not, let me know.

HappyJack
HappyJack Reader
8/2/13 6:52 a.m.
David S. Wallens wrote: Very, very cool. Did anyone get you those GRM stickers? If not, let me know.

No, I haven't got GRM stickers yet. I don't know where to get them. But honestly I haven't looked into yet, been too busy trying to get the car together and working. I'll message you and see if we can fix my lack of sticker problem.

Practice last night didn't go well, as usual. Only got a few laps in before I started smoking again. This time I found out it is leaking where the dip stick goes into the engine. Which is behind the starter. I running out of different fluids and places to leak.

As for my transmission shifting... I took it easy at first, only got one hard lap before the smoke started. But it still shifts into second gear even though I disconnected the vacuum line.

So I'm not sure where to go from here. Shift kit? Change the rear gear to run in second gear? I dunno.

warpedredneck
warpedredneck Reader
8/2/13 7:08 a.m.

is that a 400 trans? I may have missed something. if it is you'll prob have to do the manual valve body mod (I think its available in the transgo kit)

HappyJack
HappyJack Reader
8/2/13 8:21 a.m.
warpedredneck wrote: is that a 400 trans? I may have missed something. if it is you'll prob have to do the manual valve body mod (I think its available in the transgo kit)

Yep, it is a turbo 400. Another case of running what I have available.

Javelin
Javelin MegaDork
8/2/13 1:03 p.m.

Manual valvebody is the only way to guarantee no upshift on a TH400.

HappyJack
HappyJack Reader
8/5/13 7:41 a.m.

Some pics from practice.

Ian F
Ian F PowerDork
8/5/13 7:53 a.m.

Looks great!

Where's the GRM sticker??

HappyJack
HappyJack Reader
8/5/13 8:04 a.m.
Ian F wrote: Looks great! Where's the GRM sticker??

It's on it's way! As soon as I get one, it will be on. Then more pictures.

David S. Wallens
David S. Wallens Editorial Director
8/5/13 1:13 p.m.

Yep, GRM stickers have been sent. Thanks for running them. Car looks great, too.

Wally
Wally MegaDork
8/5/13 3:42 p.m.

Nice work. I love seeing something besides a 80's cutlass with a beat up Lumina nose taped on like most of the cars here.

HappyJack
HappyJack Reader
8/8/13 2:22 p.m.

Look what came in the mail today.

Thanks GRM

Until I get an on track picture, this will do.

And since I had extras...

1 2

You'll need to log in to post.

Our Preferred Partners
9NGQrMg5sQ1gcQVzQjM848ZPSkFgMZ9Kb6vyh8Ahsd351HPrcxwIZI1bicKrq4RB