Got stainless brake lines from Inline Tube today. Look top quality. I had used Classic Tube in NY before and was happy, but just seemed to lack the little details.
I also ordered a fuel supply line, fuel return line, and vapor line in stainless. My car currently has none of the above, but when I go EFI it will be nice to have some factory bent lines to get from the front to the back. Plus, the money I saved on separate shipping basically made them half price.
I also went ahead and bought wheel cylinders, rear brake hose, front brake hoses, and other bits. That way I don't have to worry about careful disassembly and saving rusty threads. I can just hack out the old and install the new.
BTW... pre-bent stainless brake lines (all 7 pieces) with proper fittings was $179. Additional parts cost around $32. That gets a brand new brake system starting at the master and going all the way to the calipers in front and all the way through the cylinders in the rear.
Gotta love cheap parts for common vehicles.
I'm a pretty good weldor, but I have little experience with anything but mild steel. Now that I have a TIG machine, I'm also going to read up on doing Chromemoly. I'm thinking trailing arms, crossmembers, etc.
I bought pre bent lines for one of my 65 Mustangs, only to discover that the brake lines must have been the first thing installed at the factory. It was either cut and splice them or remove everything else to install them. I'm curious to hear how these work in the GM world.
I did it before on a 66 Bonneville. It sucked a little but wasn't bad. The front had a short section that got threaded through the boxed frame. Once you gently bent it around and above the tranny crossmember, it was cake. This one doesn't look so bad either.
Looking at the Moog parts list posted earlier you could use the F Body stiffer and lower fronts and the heaviest G body ones in the rear and you could get all 4 for just under $100. ![]()
Update. I sold some Impala SS interior parts to a guy. That's not the update. The good part is that he is a wealth of knowledge and has a ton of good hookups. He turned me on to Rick Kim (rkt56.com) who makes his living doing nothing but rebuilding and modifying T56 transmissions. I took him my box and he built it with all updated internals (steel shift forks, bronze fork pads, carbon synchros, etc. Got it back today and spent most of the afternoon/evening sanding and polishing it. Then I gave it a couple coats of Enamel primer and four coats of awesome graphite metallic paint. She's purdy.
I'm like a schoolboy.
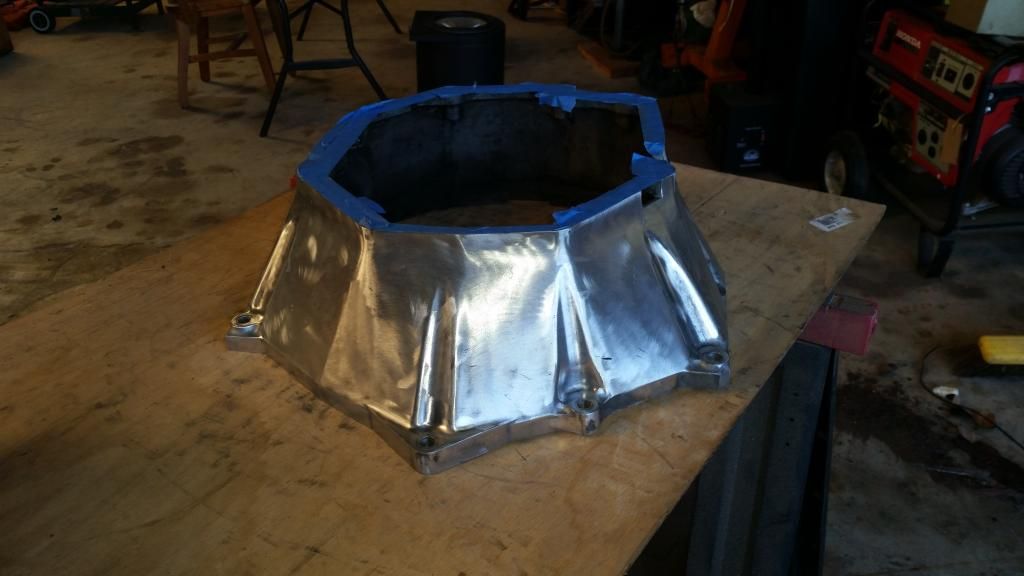
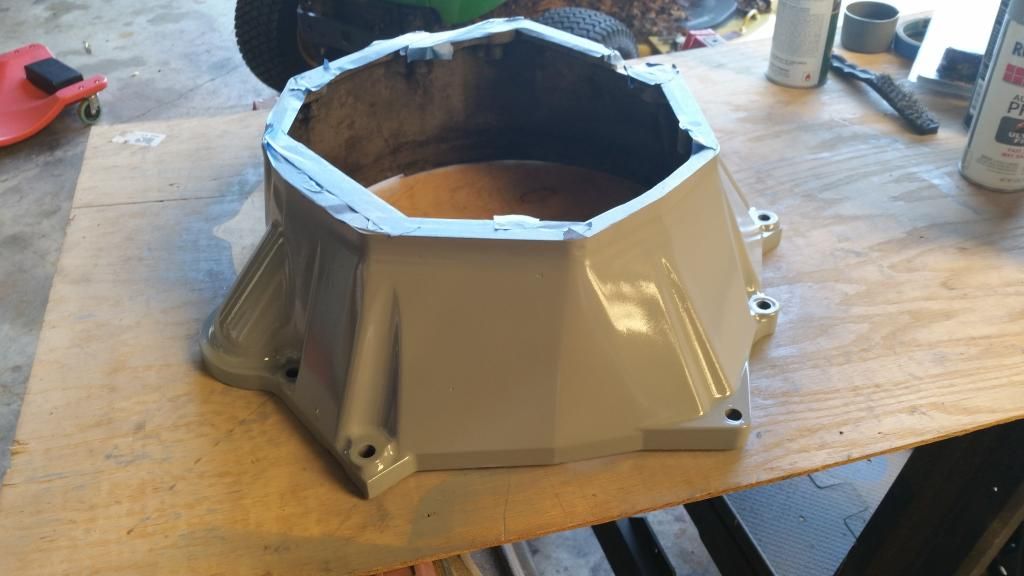
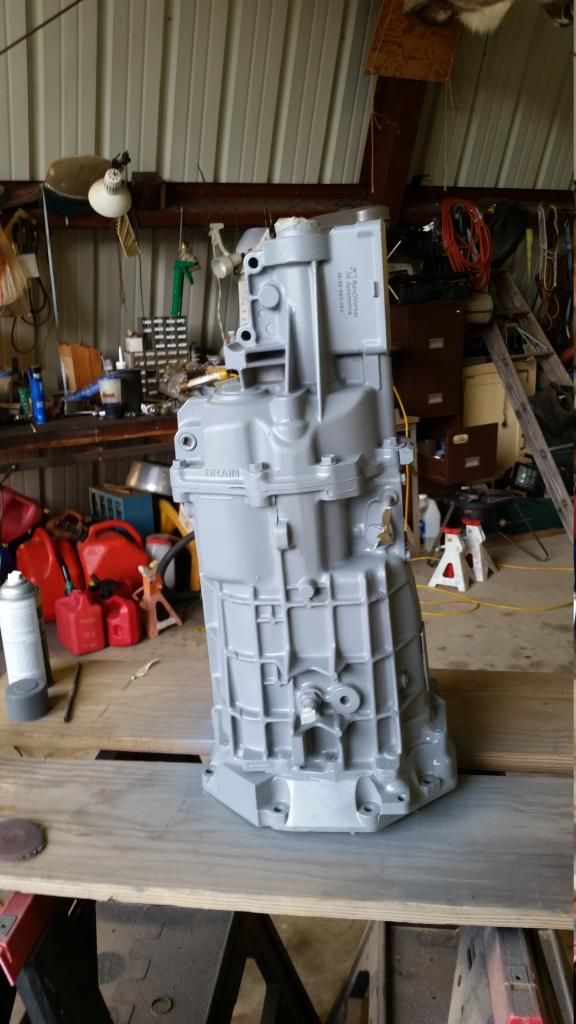
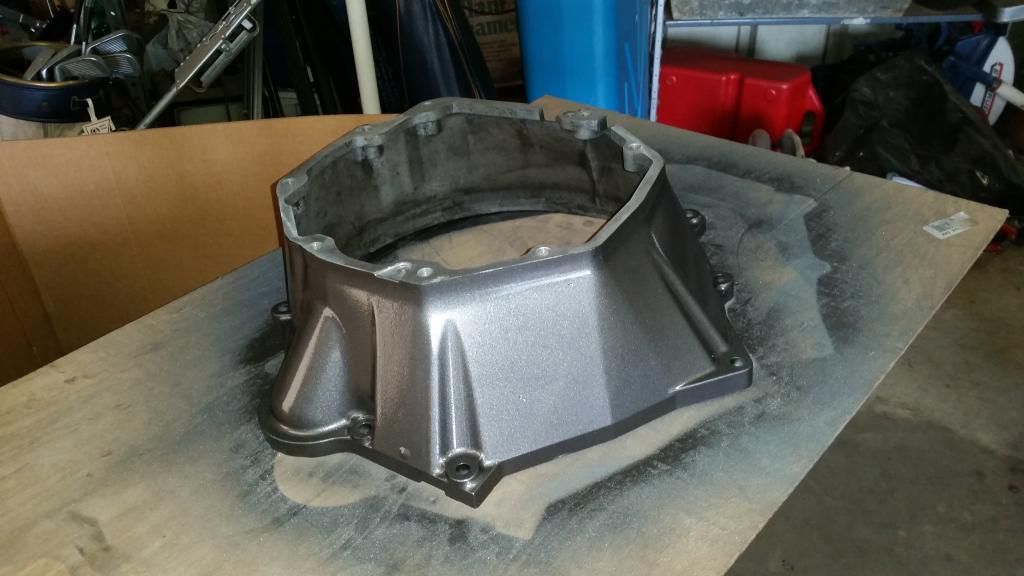
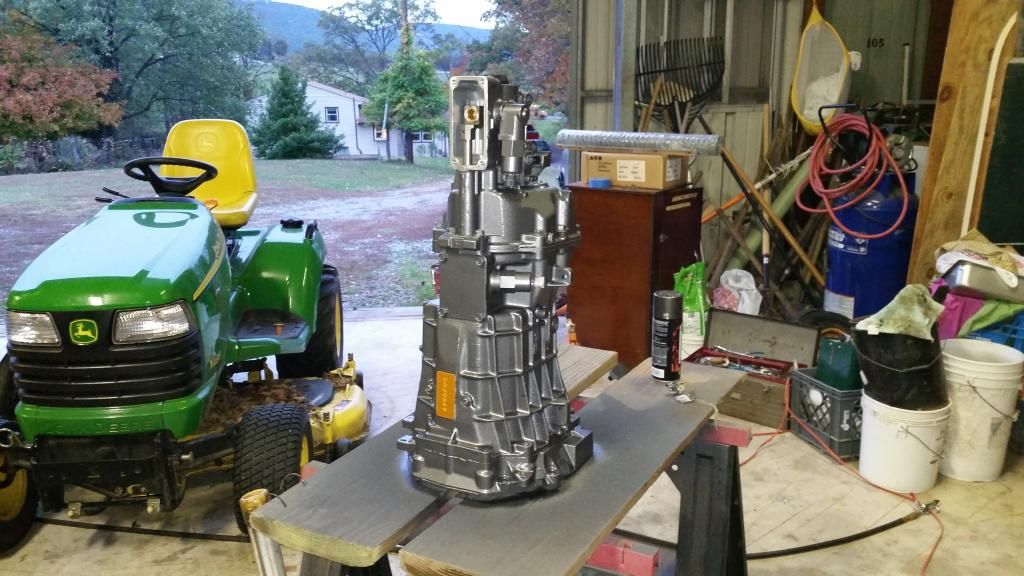
Its gloss. Its actually VHT's wheel paint. Stable to 250 degrees, and its name was graphite metallic.
I primed with an Enamel so I let it fully dry for a few days before the VHT because it is a urethane. I didn't really want urethane, but I thought it was an appropriate application as far as chip resistance and film strength was concerned.
I have to say... the VHT wheel urethane is a dream to apply. As you can see from that case, I was constantly angling the spray to make sure and get all of the sides of those ribs which means there is a ton of overlap. That stuff refuses to run or drip. It skins and dries so fast, that all of that overspray you see on the table was powder. I brushed it away with my hand. It calls for recoat in 10 minutes and all coats within 1 hour.
I probably killed baby seals with its VOCs, but its the best stuff in a can I've ever used.
Tore down the LQ9 to a shortblock today. This is one CLEAN engine. Firstly I was greeted with this when I pulled the valve covers. I promise, I didn't clean them or wipe them. This is really what it looked like.
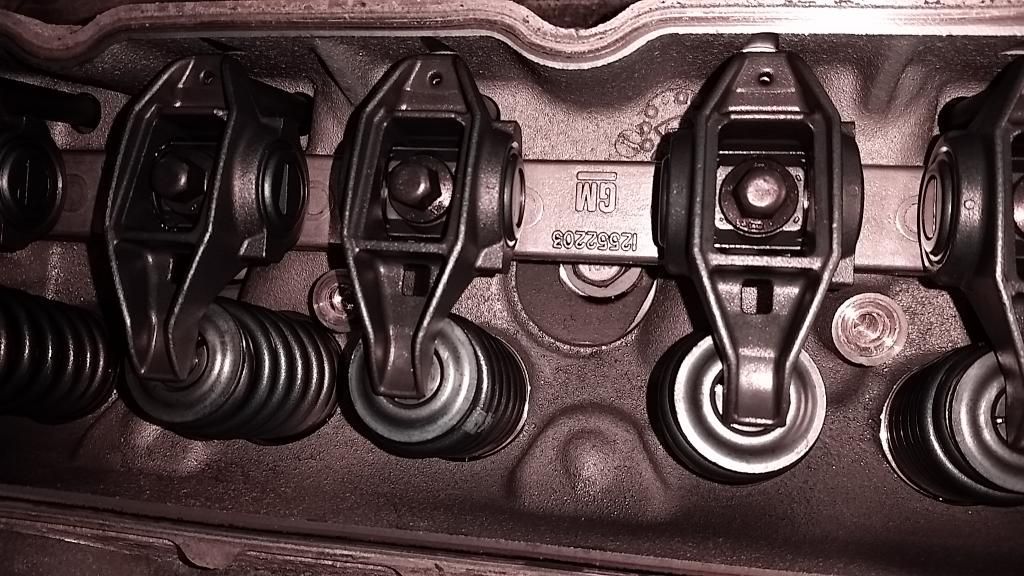
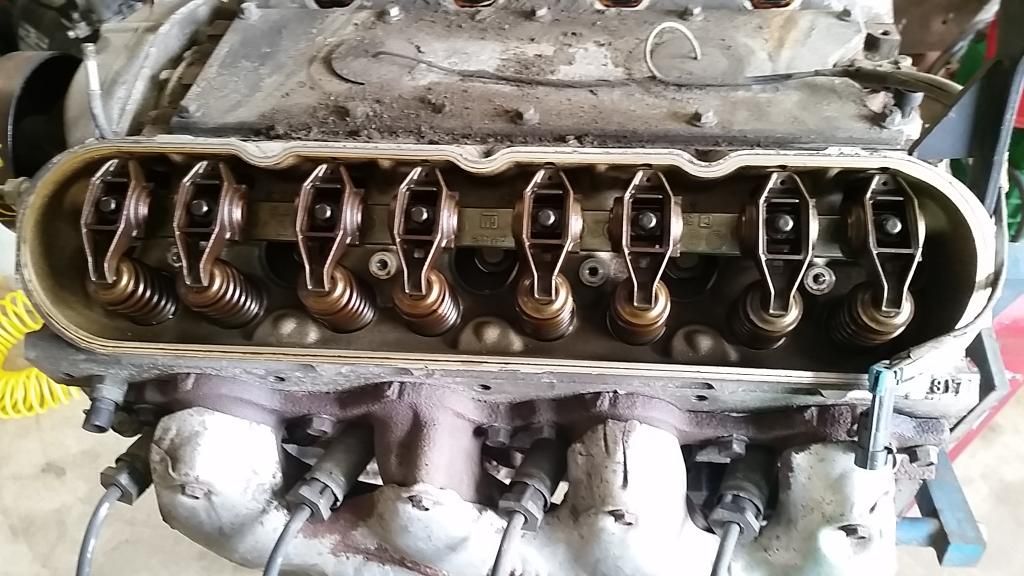
Then I pulled the valley cover, timing cover, heads, etc. I have to say that the bores look perfect.
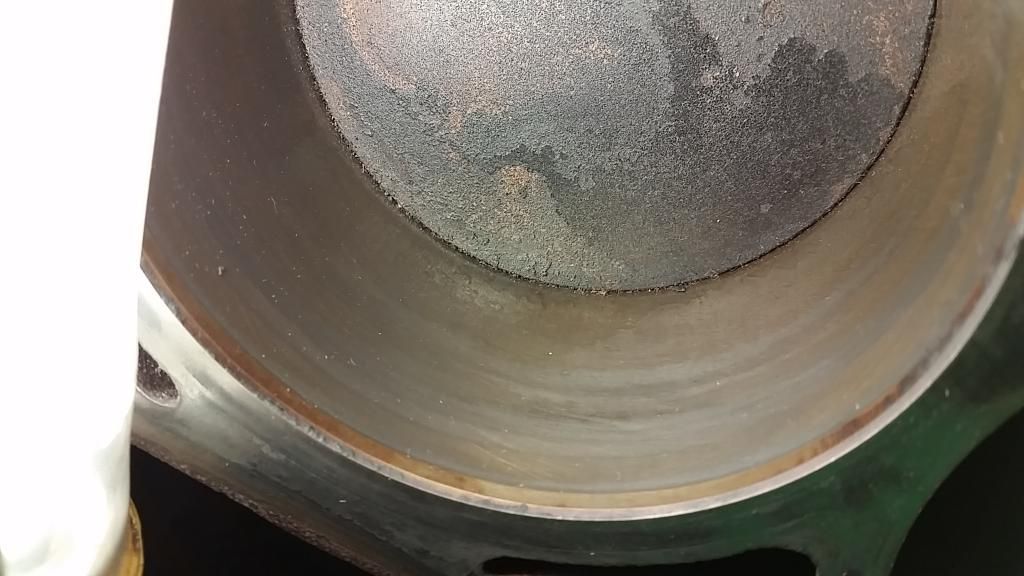
So I spent the afternoon with some acetone and a red scotch brite disc cleaning deck surfaces and piston crowns. I could not possibly be happier with the condition of this engine.
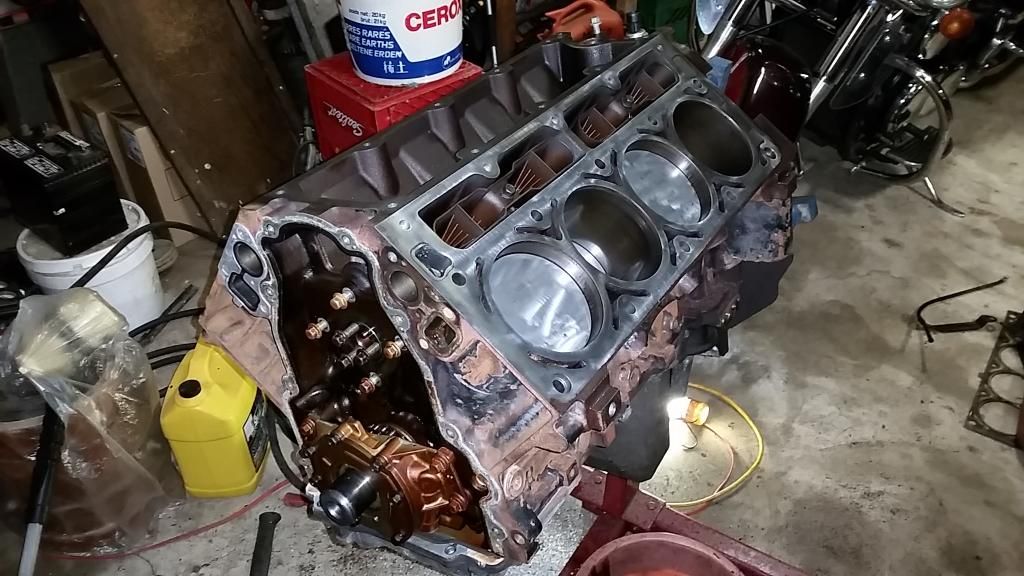
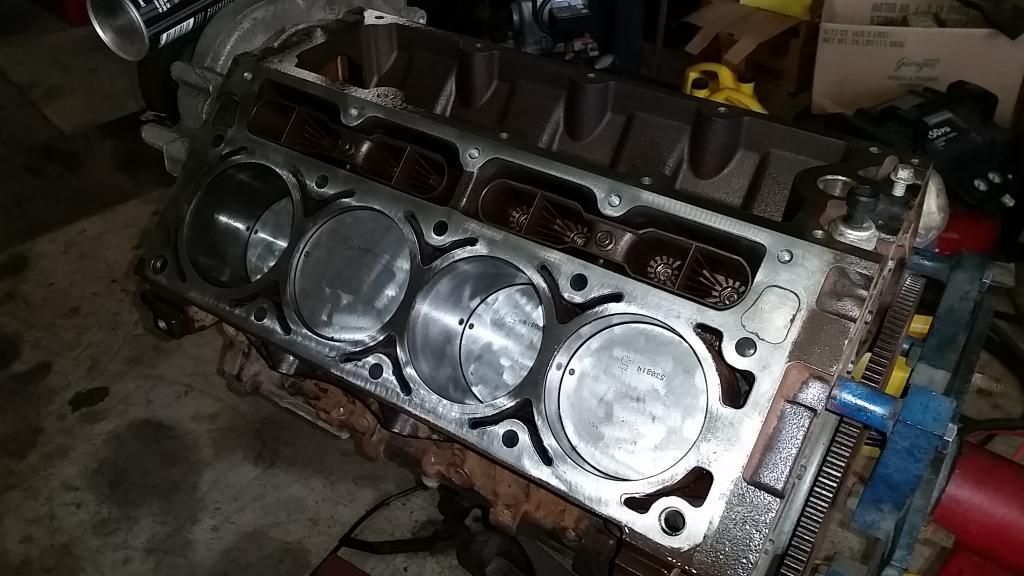
I think I have decided to get THESE HEADS instead of porting my 317s. The 243/799 LS6 heads are just enough superior to my 317s that its worth it. I could either have someone port the crap out of my 317s for $1000, or buy these new CNC ported 799s for $1100 and still be able to sell my 317s for $300.
The 64cc chambers should put me squarely at 11:1 compression. Then with a cam in the 230-degree intake duration range I should sound about like this:
http://www.compcams.com/Base/MultiMedia/SoundBytes/Cams/54-426-11_XR275HR-12.wav
Oy vay. Getting info out of LS1 forums is like pulling teeth. Any of y'all LSx experts?
I'm kinda taking a stab at some swap parts. Hooker/Holley is putting together a swap kit, but its going to cost $1200 or more. I'm trying some mounts to see if they work with my CTSV oil pan.
www.ls1gto.com you will be razed as a noob but chances are the information you want is stored there already. (just search with google...)
Mad_Ratel wrote: www.ls1gto.com you will be razed as a noob but chances are the information you want is stored there already. (just search with google...)
Imagine someone on another forum giving Curtis a hard time because he's a "noob".
Wait until they figure out he's a mechanical superhero...
This is a good place to be.
curtis,
i became a true believer in the LS engines when i bought a 176k mile ls4 to get the 243 heads, and it came apart just as clean as yours.
swap parts - do you have the caddy pan? if not check into the H3 pan, they have the far rear sump like big trucks but it is shorter.
on my impala i used ebay mount adapter plates with a camaro pan and notched the crossmember, because when i bought all my stuff the h3 with a 5.3 was not in existence.
i also took a chance and bought ebay OBX stainless 4th gen camaro long tube headers, and they required flattening the outermost tube on the passenger side to clear the frame a little bit, but with the huge primaries i was not concerned. on ls1tech they blast the ebay headers and delete posts about them because they are not a supporting vendor's product. 3 years later they still look new, all welds look good, no cracks or evidence of problems. the only issue was i had to slot the outer bolt holes on each side because they were a tiny bit pinched in from letting the bolts in. i would buy them again for any rwd gm swap seeing as they are all so similar that people use 2nd gen camaro headers in impalas, and chevelle stuff interchanges with 2nd gen stuff, etc... minus the s10 platform that's narrower. if you feel like giving it a shot measure the width between the rails in the header area between the camino and your impala. if same, then i would ebay up some headers.
Woody wrote:Mad_Ratel wrote: www.ls1gto.com you will be razed as a noob but chances are the information you want is stored there already. (just search with google...)Imagine someone on another forum giving Curtis a hard time because he's a "noob". Wait until they figure out he's a mechanical superhero... This is a good place to be.
I'm a professional. Don't try this at home ![]()
Thanks for the vote of confidence, brother.
patgizz wrote: curtis, i became a true believer in the LS engines when i bought a 176k mile ls4 to get the 243 heads, and it came apart just as clean as yours.
I'm loving the fact that all the gaskets are 0-ring. Expensive, but they work so well.
swap parts - do you have the caddy pan? if not check into the H3 pan, they have the far rear sump like big trucks but it is shorter.
Yup. Just took delivery of the CTS-v pan yesterday.
on my impala i used ebay mount adapter plates with a camaro pan and notched the crossmember, because when i bought all my stuff the h3 with a 5.3 was not in existence.
I'm going to try Hooker's mounts. They have the adapter plate but also have "ears" like the clamshell. They look like they'll fit down over the frame pads like a stock clamshell. I found free templates to download but for $100 that seems like good money to spend on someone else's engineering.
i also took a chance and bought ebay OBX stainless 4th gen camaro long tube headers, and they required flattening the outermost tube on the passenger side to clear the frame a little bit, but with the huge primaries i was not concerned. on ls1tech they blast the ebay headers and delete posts about them because they are not a supporting vendor's product. 3 years later they still look new, all welds look good, no cracks or evidence of problems. the only issue was i had to slot the outer bolt holes on each side because they were a tiny bit pinched in from letting the bolts in. i would buy them again for any rwd gm swap seeing as they are all so similar that people use 2nd gen camaro headers in impalas, and chevelle stuff interchanges with 2nd gen stuff, etc... minus the s10 platform that's narrower. if you feel like giving it a shot measure the width between the rails in the header area between the camino and your impala. if same, then i would ebay up some headers.
This is exactly the kind of info I need. One of the members over at ls1tech works for Hooker and he has all of them convinced that the only way to do it is to buy their $1200 headers (which aren't even in production yet.) I'm being told I'm an idiot for not doing it the expensive off-the-shelf way.
Thanks guys.
I follow this ls guy on youtube and his stuff is amazing and extremely grassroots. here is his wiki sloppy mechanics ls wiki
yeah on that gto board they auto change obx, but more as a lark due to a huge issue with falling prices falling quality of owners...
Holy cripes. I just went to a friend's auction sale today. It was an old drag racer who passed away. The cars went expensive but there was a complete Baja boat with I/O, trailer, and titles that went for $100. And I didn't buy it.
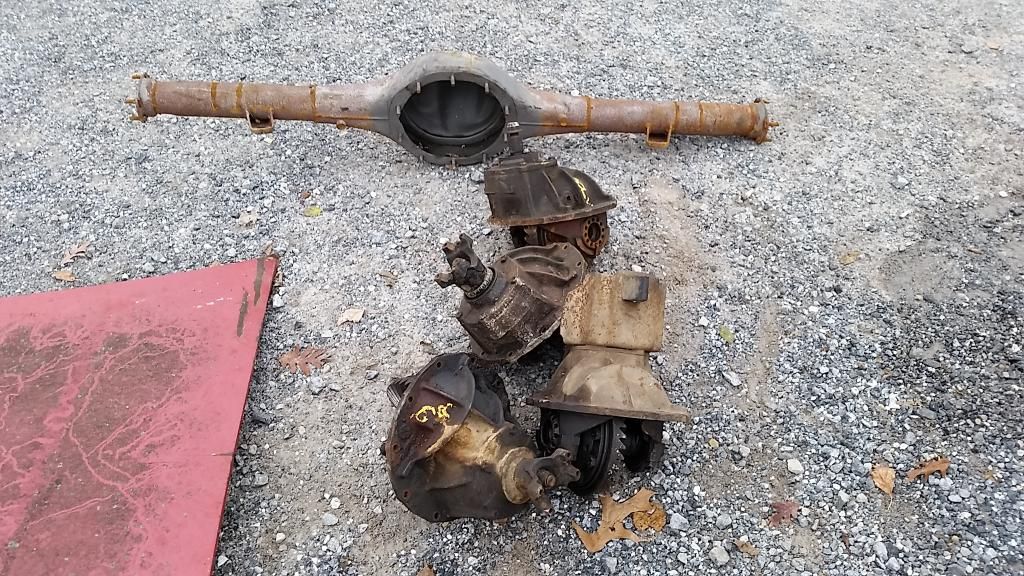
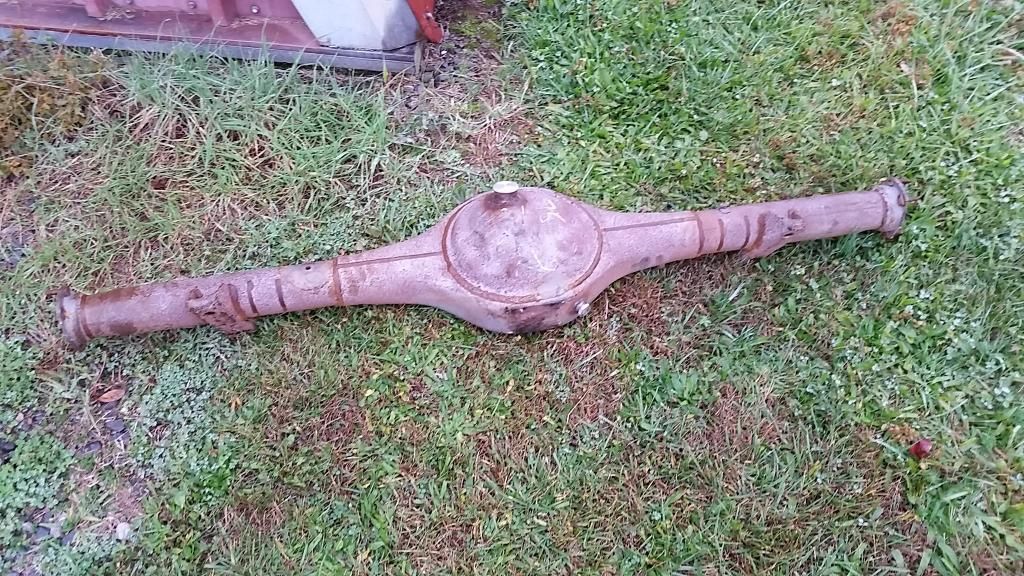
But guess who picked up an unused Nascar-style big-bearing Ford 9" housing and four 9" carriers for the grand total of $60? This guy.
You'll need to log in to post.