The work in this thread is mindblowing. Great job on the car. Wish I could do something similar but for now Ill just look at the pictures and enjoy.
Fitzauto wrote: The work in this thread is mindblowing. Great job on the car. Wish I could do something similar but for now Ill just look at the pictures and enjoy.
He's right. I'm drooling on myself at work now from the blowing of my mind.
Great work!
For Egghead's sake, we are thinking about ordering a couple dozen of these:
Anyone else want in?
We didn't get as much done on the car today as we have in the last couple of days. With the tunnel filled with wires and hoses, we finally go to install the tunnel cap.
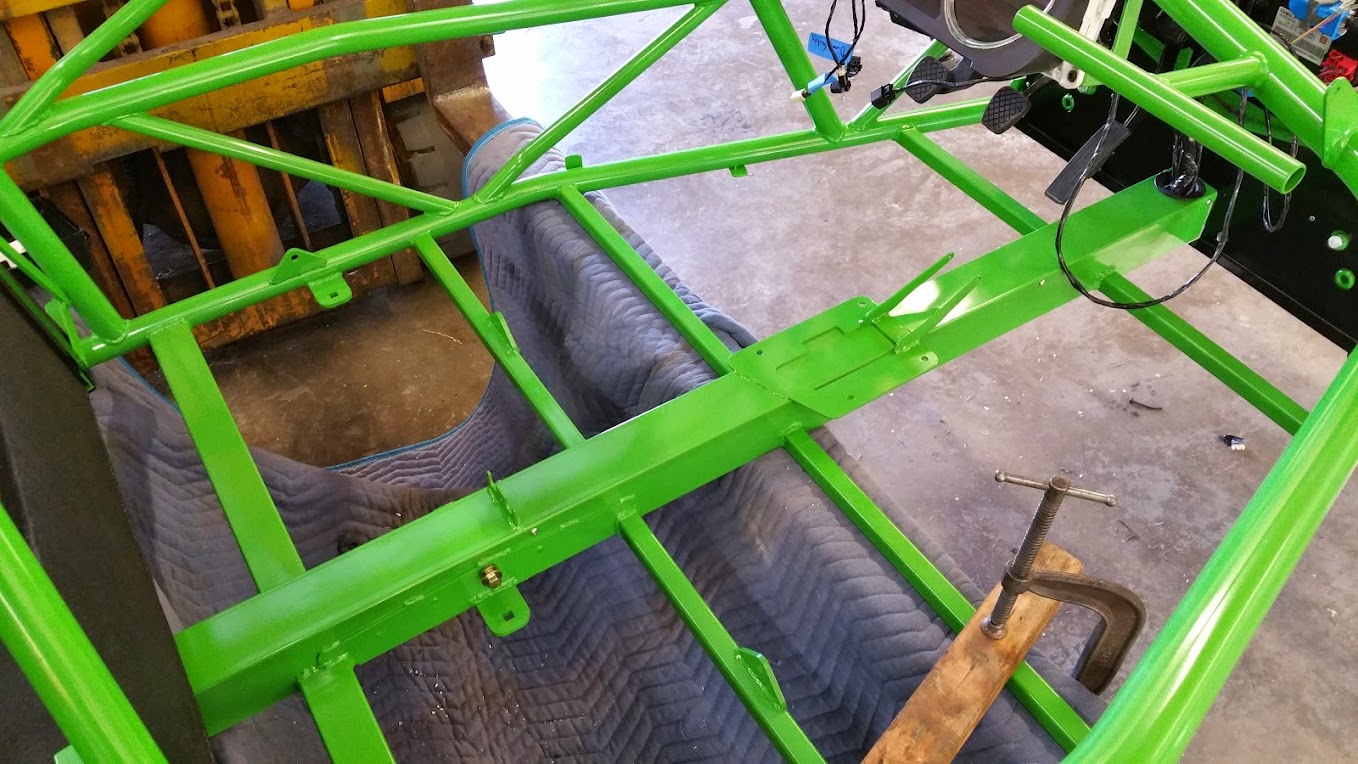
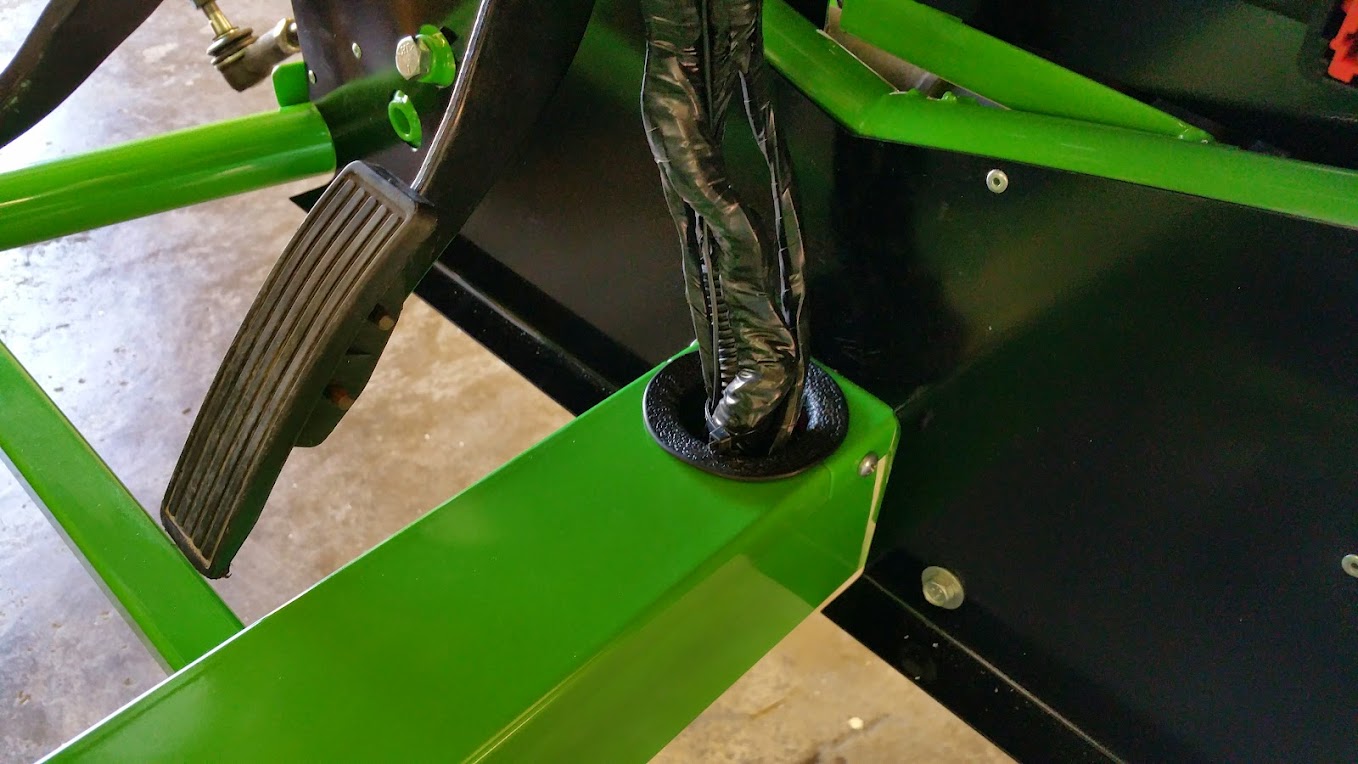
The BCM and dash wires exit the tunnel inside of the passenger compartment. We added some edge trim to make it look nice.
We used some more preformed radiator hoses to splice together the coolant plumbing near the engine. You can barely see it, but there is a bent metal holder near the upper splice junction that keeps the hoses plenty clear of the pulleys. I also installed the rear control arms. Instead of the stock steel arms we are using aluminum Cobalt SS arms.
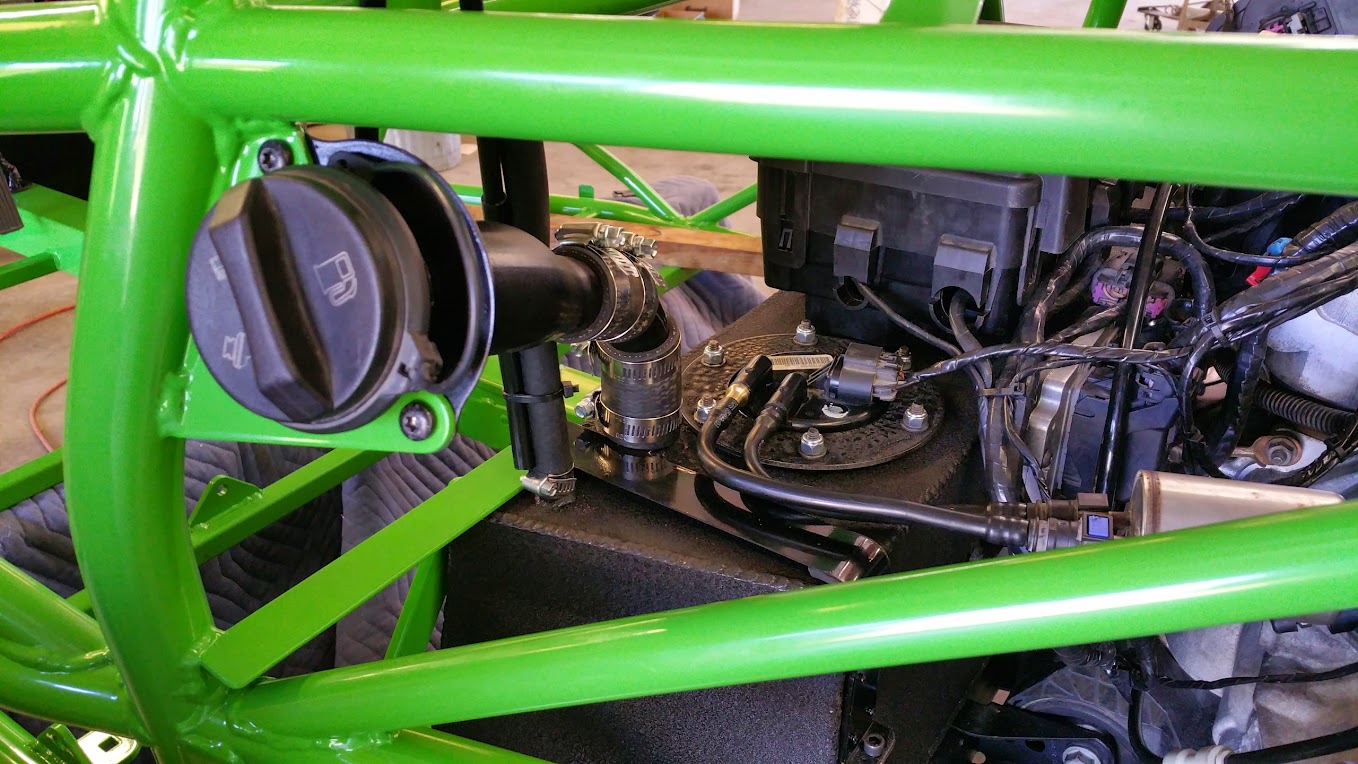
The last thing we finished up was the fuel system. This included installing the fuel pump, wires, hoses, filler neck and rollover valve hose.
We would love to go to UTCC. This car is lacking a turbo or supercharger so it isn't ready yet. We will have to wait and see what we do next year.
So we replaced the oil filter, added oil, poured in a little bit of fuel and double checked everything. We don't have an exhaust or intake on it at the moment but we fired it up anyway. It sounds about like you would expect it to but we are thrilled to have it running. Here is a very short video of it running: Prototype 2 first start
Adam/Lonny,
The car looks great! glad to see such a quality build. Congrats on the first start, that's always a great milestone.
We now have a functioning shifter:
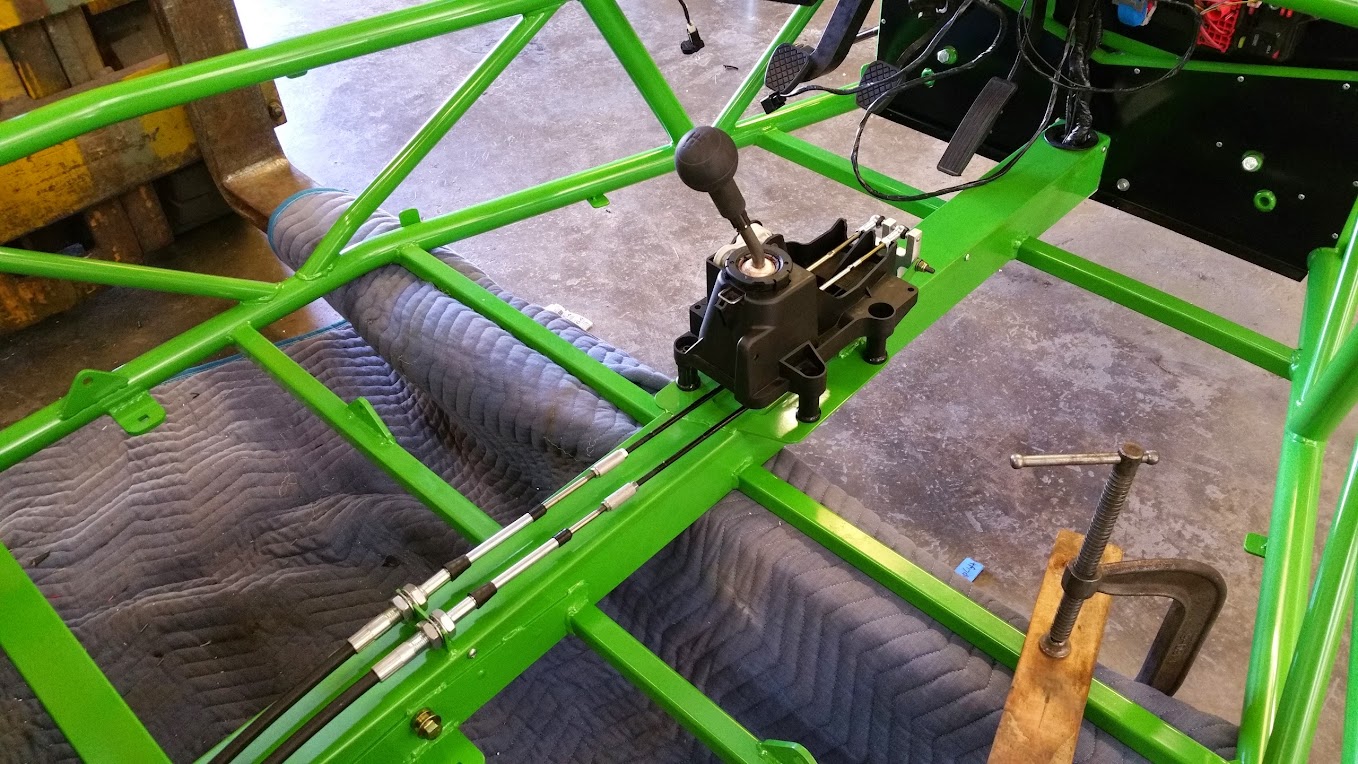
The gear selector of the automatic donor was very easy to adapt to Prototype 1 but the manual for Prototype 2 was a little more difficult. The first hurdle was that the shifter cables go forward from the shifter base in the donor. This means we had to reverse the direction to get the cables pointing to the back of the car. We did this using two pushrods attached to bell cranks.
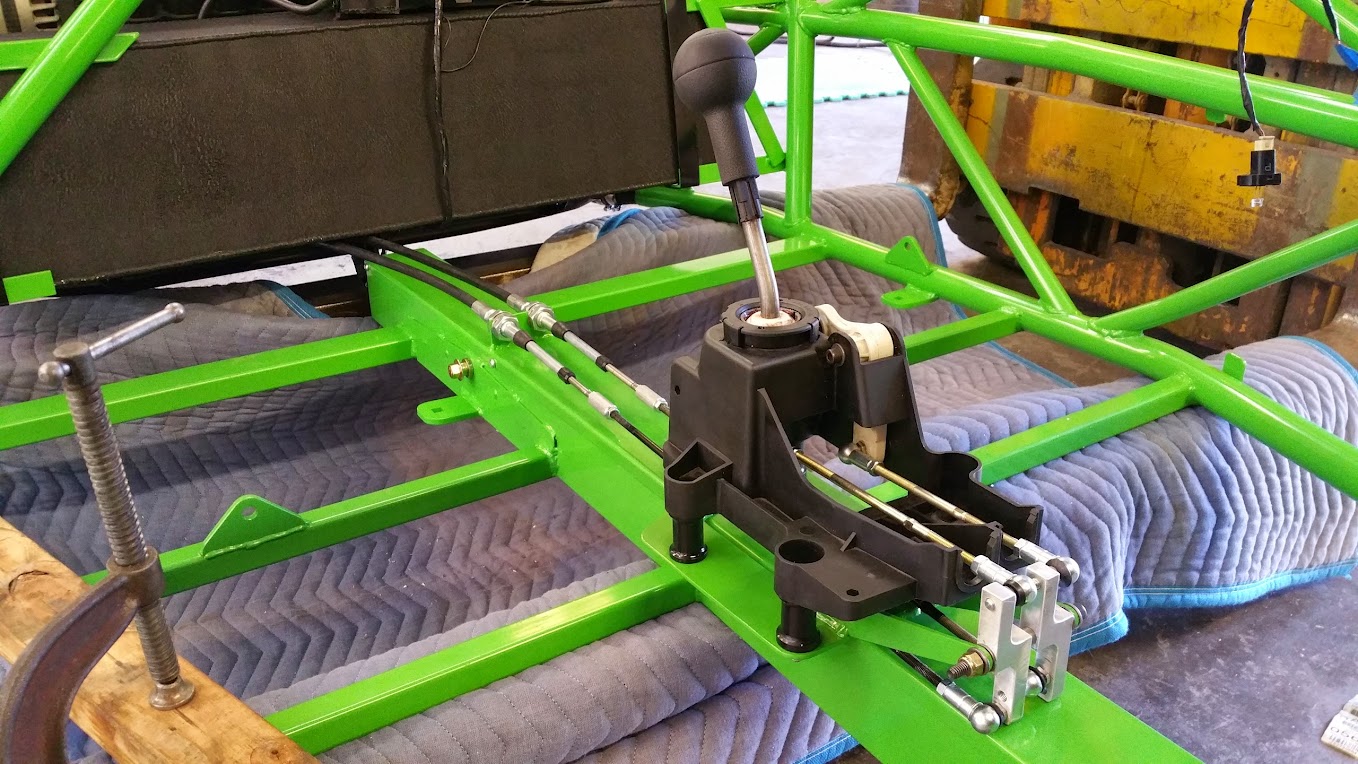
When drawing up the bellcranks, we took the opportunity to adjust the rod end locations so that we could shorten the shifter throw. For now we have only shortened the front to back throw but we can also shorten the side to side throw if we want (we drilled and tapped extra holes to make this adjustable).
From the bell cranks to the back of the car, the shift cables work just as they do on a Cobalt. We had to make a custom bracket to hold the ends of the cables, but other than that, they just snapped on like the originals.
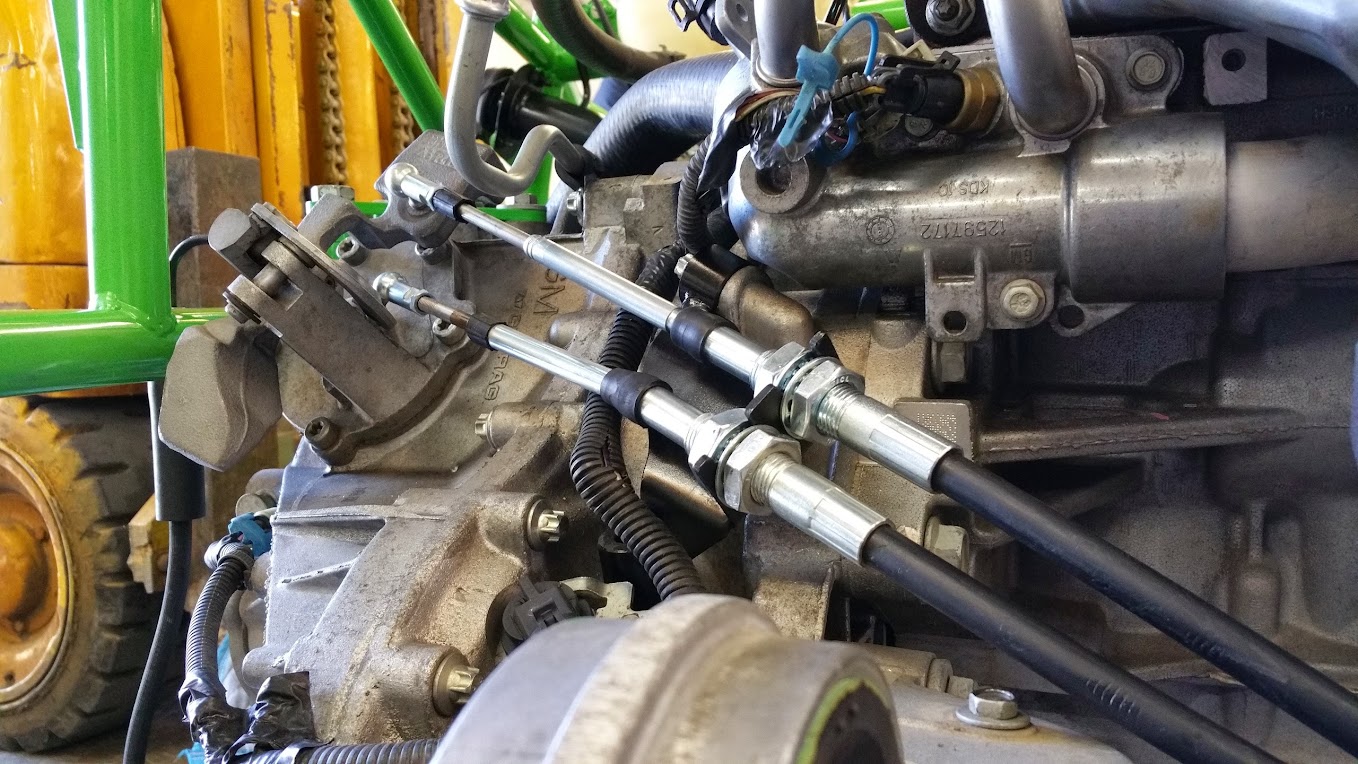
The shifter feels great and we can't wait to really test it out. Eventually we've got to design a boot/cover to hide the shifter base but we are unsure if we should cover up the cables on the tunnel. In my opinion, the cables being exposed looks kind of neat.
Another thing, we didn't make the shifter location adjustable. We thought about it and kept coming to the question that if a fixed shifter location can work in our daily driver cars, why couldn't it work in the Goblin? So we mounted it in a spot we think will work for different seat positions and we are going to test it out to see if it needs to be adjustable in the future.
We finished up the coolant plumbing and filled it up. We also tacked together the exhaust.
Then we ran the engine for 10 minutes or so until the radiator fan clicked on. We still don't have the intake with the MAF sensor and the exhaust doesn't have an O2 sensor installed.
Here is a short video of the engine running with the muffler on: Engine running with exhaust
I am interested (not doubtful, just curious) to see how the coolant hoses wear on the ends of the tubes. Please take a long look at that after some heat cycles and miles. It's a neat idea.
I love the hidden bits
like your forklift build table... great way to raise/lower it while you work on it.
Running the stuff inside the frame is really cool. Maybe this is common practice in the locost world, i dunno. I like the engineering going into this. Very impressive.
As for the shift cables - I'd put some kind of grid or wire basket cover over them so they were sill visible but protected from getting snagged or leaned on or something during operation. I've had that happen to brake cables on a road bike and it sucks. Maybe it's not a possibility, though, it's hard to tell without the seats and stuff in it.
In reply to tuna55:
I've got a kind of pre(and post)-flight checklist for the car. The hoses are definitely on the list as are the front shock towers, hydraulic lines and a few other things. I think I am going to try to prioritize them and determine a timeline for how often each item needs to be checked.
In reply to Mad_Ratel:
Building on the forklift is the best way to do it, no question. We have the frame clamped to the forks so that it can't tilt or topple and since it doesn't block much of the underside of the car, everything is very accessible with the exception of the side that is toward the forklift.
In reply to ultraclyde:
We got the idea for running the coolant through the frame from 4x4 forums, however they run the coolant directly inside of the tubes. We wanted to add a kind of bladder by running heater hose through the tubes.
The shift cables will be harder to get to once the seats are in but like you said, it is hard to tell without them in there. We will make the call once we have those in.
After welding up the exhaust for good (we still need to trim the tip), we decided our next task was to get the car on its tires again. Unfortunately, we were in such a rush all afternoon that I didn't get photos of the build.
We started with the front suspension. While I disassembled the hubs and cleaned them up for final assembly, my dad made some spacers to align the coilovers in the mounts on the control arms.
Next we built up the front suspension: control arms, coilovers, knuckles, spindles, rotors and tires. We'll get to the calipers soon.
At the rear of the car, we are using Koni's cut a strut inserts to modify the stock struts. For those who are not familiar with these, you drain your stock strut and cut the top of it off. The guts of the strut slide out and you slide in the Koni replacement. A large bolt on the bottom of the strut tube tightens the Koni strut down into the tube.
After cleaning the rear knuckles and painting the hubs, we assembled the rear suspension and threw on the tires.
Suddenly we had a roller!
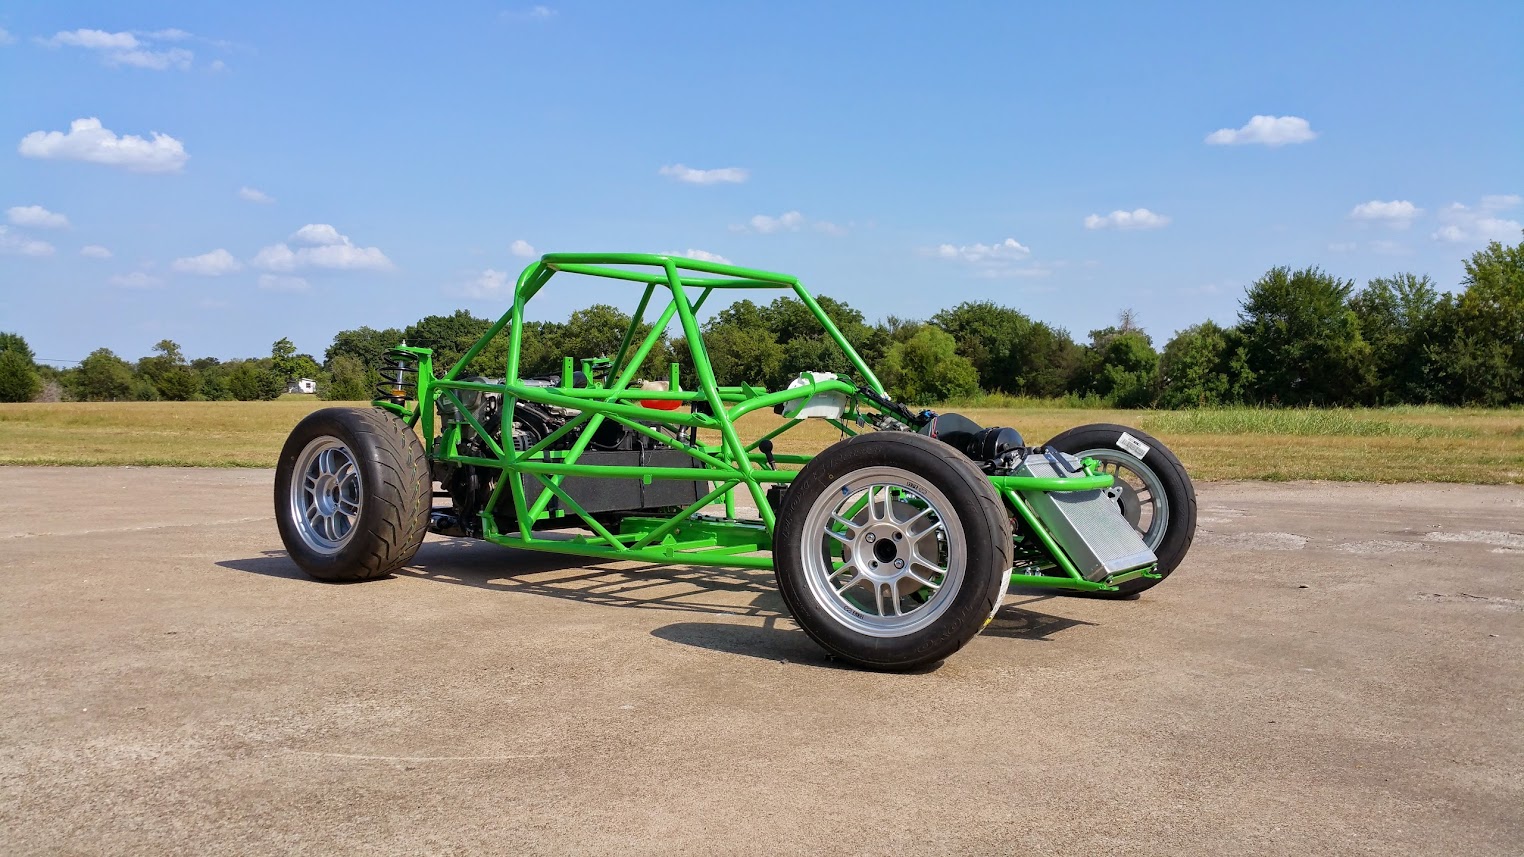
We made a lot of progress on the car but I failed to post as we went. So skipping past a good chunk of the build, here's a video of our first drive:
First Drive - DF Goblin Prototype 2
First impressions:
-The front suspension is way more composed than on the first prototype. The shallow angle of P1's shocks and springs allowed the front tires to bounce all over the place. P2's front suspension does not do this.
-The Corbeau seats feel a ton better than the stock Cobalt seats. They really hold onto you and allow you to sit lower in the car.
-The power steering makes the steering feel so much nicer. Hopefully it work out at the track as well.
-The brake booster did not make the pedal too sensitive. You can ease on the brakes for a smooth stop or you can get on it to lock the tires up. We had a problem with the front tires of P1 locking up before the rears so we installed a brake proportioning valve on P2 to decrease front pressure. With the front dialed down, the rears lock up before the fronts.
-The chambered muffler we put on P2 sounds better than the turbo muffler on P1.
Let us know what you think. I'll post some of the info and images of what we did between roller and the first drive later but for now it is bedtime.
Love the progress here.
One note on brake bias: You DEFINITELY want the front wheels to lock up before the back. Dialing the bias in so it is close is good, but rear wheels locking up before fronts makes for a very unstable car, and one prone to swapping ends.
In reply to Mezzanine:
Definitely. I didn't complete my thought there. We were able to get the rear to lock up before the front which means we have the range of adjustment we need.
Looking good!! I like to see a prototype that will get tested/abused before the final design is made. You guys are working fast.
It's not every day I browse the front page of reddit and see a GRM car. 1800 likes!
https://www.reddit.com/r/DIY/comments/3fvo28/df_goblin_prototype_2_assembly/
In reply to NOHOME:
It's not ours. It's being repaired by a guy who rents a building from us.
In reply to lnlogauge:
I was very surprised by how popular that post on reddit was. We got lots of feedback and many emails from that post.
We have scheduled the first track day for Saturday morning at Eagles Canyon Raceway. I'll update you guys afterwards.
So last Friday (the night before the track day), we woke bright and early to get the car ready for the track. 17 hours later, Friday had turned into Saturday, and we finally had the car on the trailer and the tools packed in the tow vehicle. There were so many little things that added up to a ton of work but we were able to get home and in bed shortly after midnight.
5 hours later, we rolled out of bed and took off for the 2 hour drive from the southeast side of the DFW metroplex (home) to northwest of the metroplex (the track - Eagle's Canyon).
We walked our driver, Ken Scheepers, around the car (this was his first time seeing prototype 2), showing him the changes we had made and letting him know the suspension settings we had made.
The track wasn't busy, which was kind of bittersweet. It was nice to just go on the track any time and not have to worry about traffic, but it was disappointing not being able to compare the car to other cars.
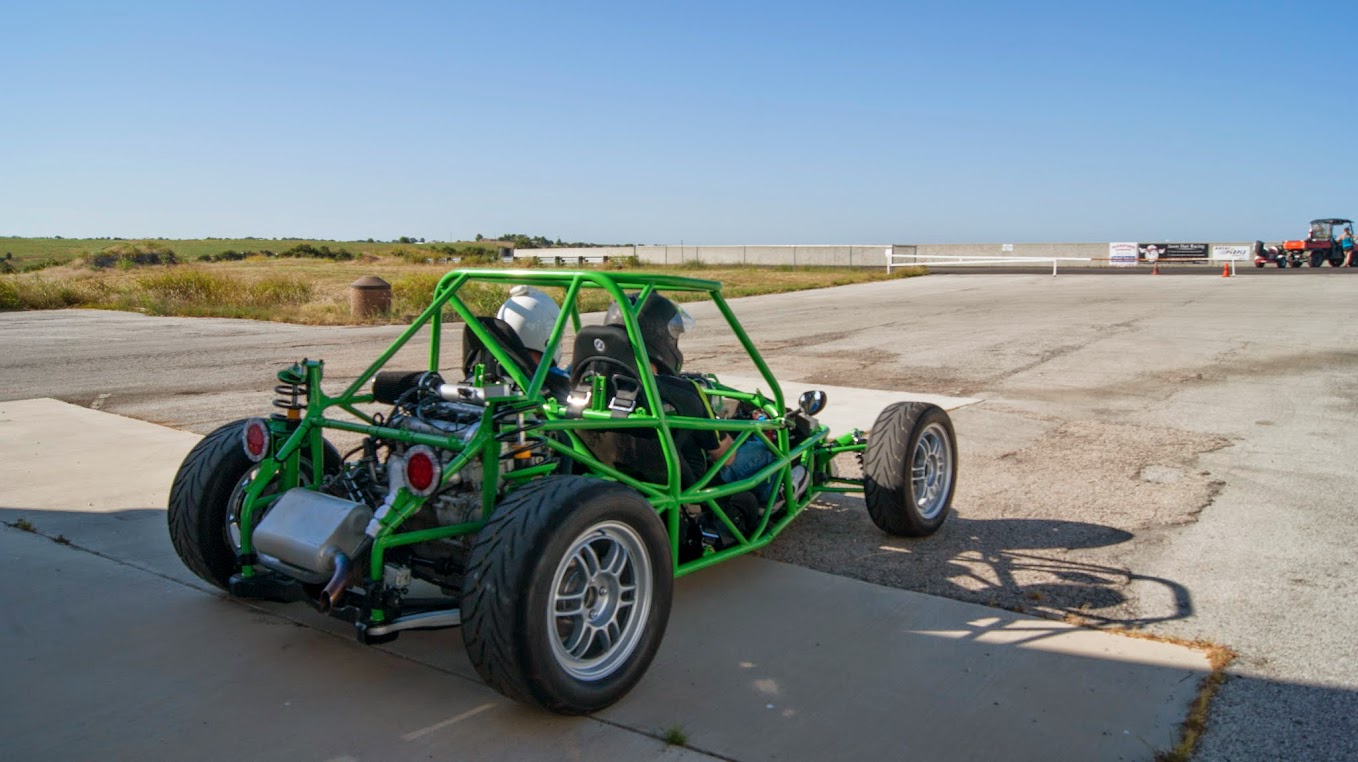
Ken drove my dad around the track for the first outings on the track. We immediately decided to go up 9 of the 18 clicks on the shocks on the front and the brake proportioning valve was set somewhere in the middle of its travel (which is good news since that means we have enough travel on the valve to go heavy braking front or rear if we like).
After a few more laps, we clicked the front shocks up to 14 clicks and double checked the rear toe using toe plates. It was toed out so we adjusted to heads up. I rode with Ken for a handful of laps at this point. This was my first time on a road course and it was a blast.
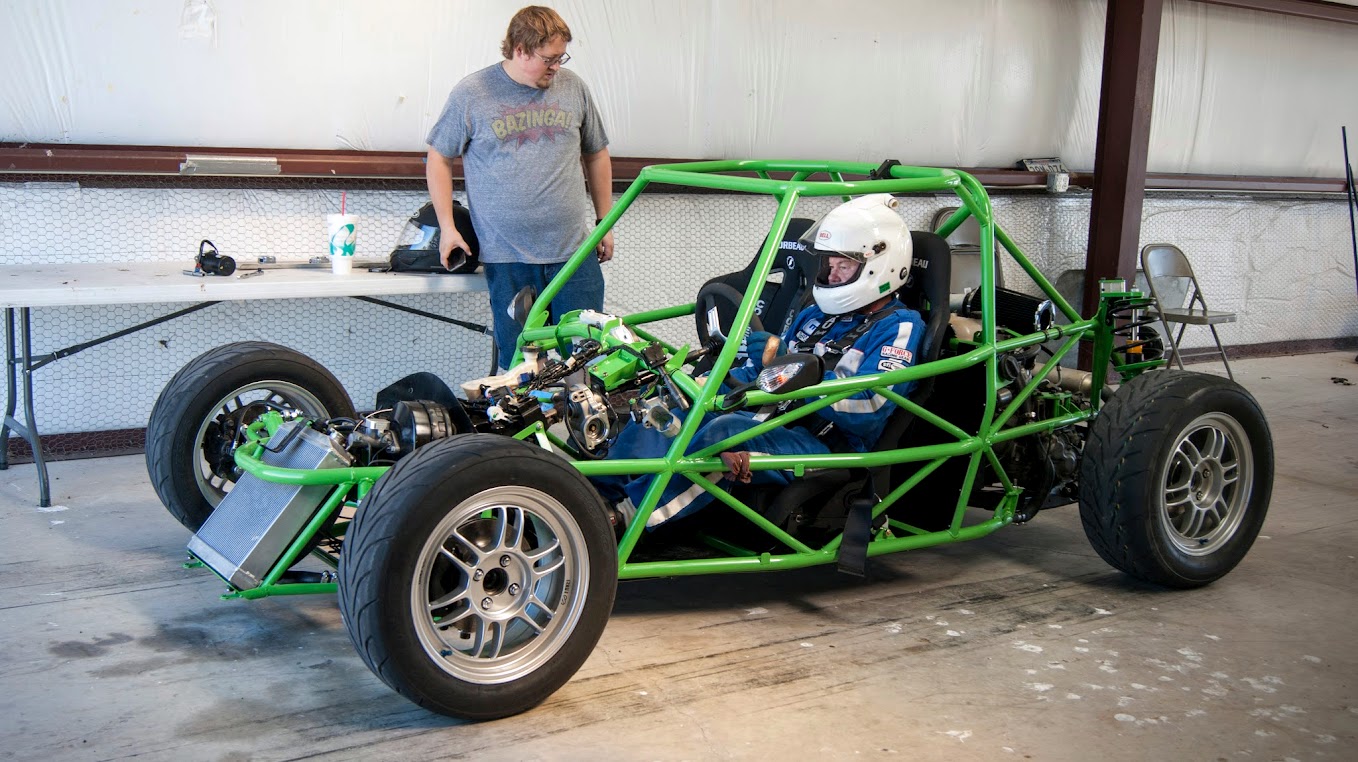
Finally we let Ken go out alone to make some laps. In his first session alone he said he was trying to find the limit, which resulted in a couple of spins (nothing too dramatic). Watching the footage, he was pushing it pretty hard each time it spun.
His times were getting quicker as he got more comfortable. The quickest we timed was 2 minutes 11 seconds. We don't really know what is considered quick at Eagle's Canyon but Ken said it isn't bad, especially considering we are on street tires.
Video Link: A lap around the track
The rear springs are way too soft and the rear roll center is too low, causing the rear to really roll over. We are going to change both of these before the next track day.
On a more positive note, even though it was an extremely hot day (100 degrees while we were out there), the radiator worked and the temps stayed low.
Ken says the car has a lot of potential and he has already called us a handful of times since Saturday. He's ready for the next track day.
You'll need to log in to post.