Dusterbd13 wrote:
Keith Tanner wrote:
mbruneaux wrote:
The great thing about a supercharger is that the power is ALWAYS there.
...as long as you're spinning it fast enough but not too fast 
I always wondered how a centrifugal supercharger would work out on a 1.8 miata. Seems like a better march due to rpm ranges involved, but i always see rpots style. Has to be a good reason why.
I've driven centrifugal, roots and twin screw 1.8 Miatas. The twin screws were always teetering on the edge of "not spinning fast enough" and "oops, there go the bearings". They seem to work best juuust at the RPM limit. Lots of failures. The centrifugals feel very different, as boost is directly related to engine speed. You end up with a bit of an odd behavior where the car pulls harder as you increase revs, and at part throttle it's a little weird to manage on the street. More importantly, it doesn't give the big increase in low-end torque that you get with the other supers or a turbo, and Miata owners always ask for "more power down low" - ie, torque.
So it's one of those deals where the roots isn't the engineering dream answer, but it's the supercharger that just plain works.
There have been a number of attempts over the years to bring a centrifugal to market. I've lost track of it there's one currently available or not - I think Kraftwerks has one. It was the magic bullet that the SoCal track guys were looking for, but now they all seem to be distracted by K series Honda motors instead.

Vigo
UltimaDork
7/30/17 10:50 p.m.
A centrifugal isn't going to give a ton of low rpm torque, but then again there is apparently some kind of market for people swapping 2.0-2.4L n/a motors that won't give a ton of low rpm torque either so what do i know about what miata people want. My local friend's 119mph turbo BP miata is on like its 9th year on original ebay parts and the main thing holding it back from the mid 11s is having to shift 4 times in a 1/4 mile and if he makes any more power it'll be 5 shifts. Miata people are not always logical about where or how to go looking for power. But hey, who cares. All their money looks the same and there's room for everyone.

Made some more progress!
I worked on mounting the supercharger to the engine along with the belt tensioner.
I put my junk engine up on a stand to make fabrication easier and started building the top mount for the M45.
There were two tapped holes in the cylinder head. I used these to start with on the top blower mount. I cut two pieces out of 1/4" steel and positioned the blower as close to the mock up I did earlier. After lots of test fitting here's what I came up with.

I used a ruler to keep the A/C pulley and the M45 pulley aligned:

It isn't the prettiest thing but it should work. I've learned that in most cases iteration is important. If I spend all my time trying to get perfect brackets the blower will never get done. I can always redo these later if I want to.
After the top bracket was built, I made some test fits under the hood using my 2.5" tube. I then moved to the lower bracket. For this I started with a power steering pump bracket. I built a brace going from the three mounting holes to the rear mounting hole of the blower. After that I used the slot on the front of the bracket to build a brace to the front mounting hole on the blower.
The next step was the belt and the tensioner. I took some rough measurements of the belt length needed. I went to Napa and found four belts close to my measurements along with a GM belt tensioner. After some test fitting I found the best fitting belt and returned the rest. The belt and tensionser cost just over $50
The mounting of the tensioner took a couple tries but it worked in the end. I also had to redo the front blower bracket. Good thing I didn't finish weld it till the end!
Here is the original and new holes for the tensioner:
![IMG_3788[1] (1)](https://farm5.staticflickr.com/4314/35495411953_1642e79d06_b.jpg)
Here are all the brackets on the engine:

And here it is all assembled:


I see we have decided against PS and AC I was wondering how you were going to do belt routing.
IIRC the Sebring M45 (aka Downing/Atlanta, aka Jackson Racing) used those same two holes in the head. I don't think their blower was as well supported as yours otherwise, though - I know there were some cracking incidents. That looks to be a good solid mount and belt setup.
Should the tensioner be on the other side of the belt?

RedGT
Dork
8/1/17 7:36 a.m.
In reply to Keith Tanner:
The Sebring for a 1.8 used the forward hole in the head, and then a bracket off the center two exhaust manifold studs that sticks up to provide the 2nd primary mounting point a bit further rearward than the one in the head. Just FYI. And a piece of 1/4" bar stock sticking up roughly where he has the 1x1.5ish box tube.
Now that I look at it again, you probably should throw a water pump and pulley on there and check that clearance. The pulley nose and mounting bolts protrude forward of the WP belt path, potentially interfering with your SC belt.
Keith, my car doesn't have power steering or A/C, making my life a little easier with the packaging and belt routing.
SkinnyG, I talked with my dad after you pointed that out and we think you are right. I'm going to leave the tensioner where it is for now and see how it works.
RedGT, The belt comes close but does clear the water pump pulley. Good catch though!
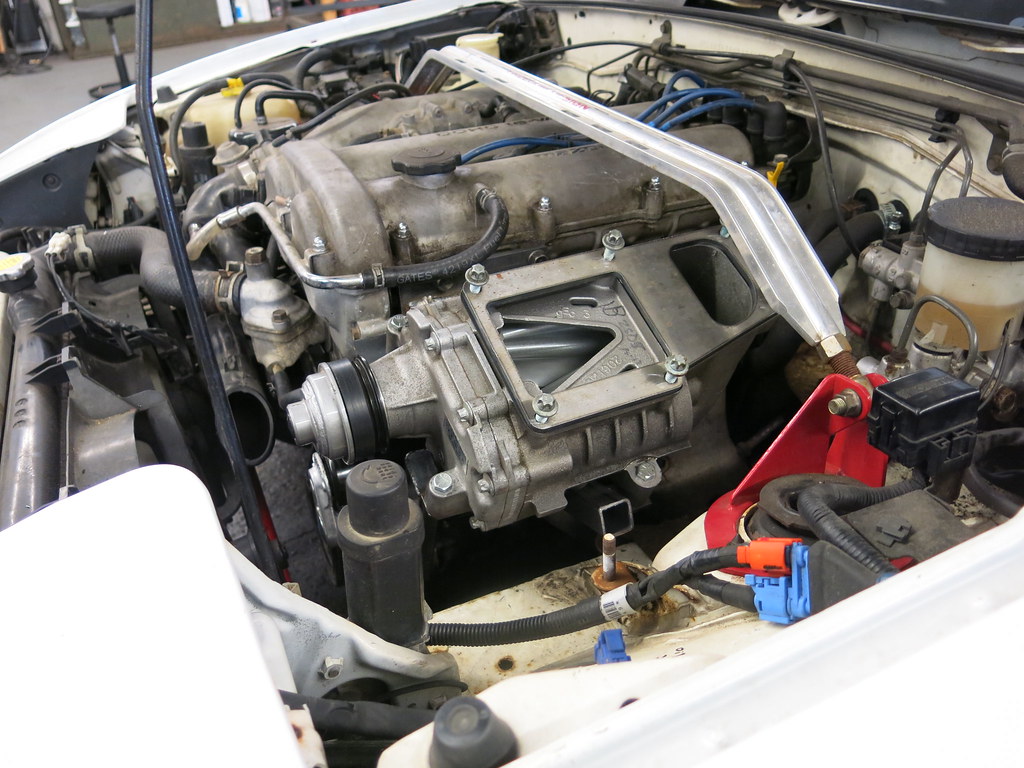
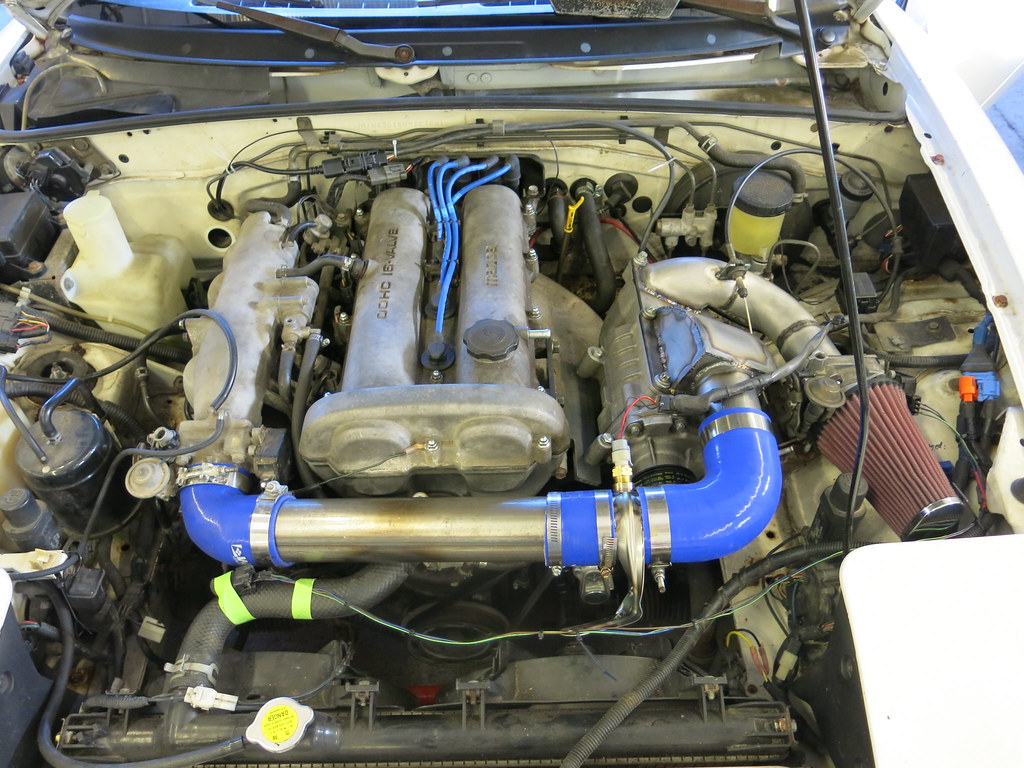
Here is a picture of the supercharger mounted in the car:
![IMG_3792[1]](https://farm5.staticflickr.com/4390/36335082005_4106090627_b.jpg)
Jack Heideman wrote:
SkinnyG, I talked with my dad after you pointed that out and we think you are right. Although i'm going to leave the tensioner where it is for now and see how it works.
The tensioner / belt path looks OK from here. You want as much wrap as possible around the S/C pulley, to keep the belt from slipping, with the least amount of tensioner pressure pulling on the crank nose.
do you ever race with the furrin group? they are good people.
Yes I do. I haven't missed a Furrin autocross in three years!
He's being modest. Not only does he not miss them, he's kind of really fast 
From the furrin groups last 2 events (sorted by FTD)
Note that the 3 guys below him are all multi time national event winners:

No national event winners in this one, which resulted in an even more commanding win:

Updates on the charge pipe!
I used the school plasma table to cut out a base plate. Here it is on the blower:
I 3D printed (thanks again, Hope College) a simple exit for the blower to check for hood clearance. Fortunately, it fit. From there I traced it and started to replicate it out of steel. I know it's not very pretty and probably won't flow like butter, but I'm really in proof-of-concept mode and am planning to iterate/refine/replace many of the proof-of-concept parts as this thing develops.

Here are the sides of the charge pipe cut out:

Once the side plates were made I tacked in a top plate:

The next step was the actual outlet. I "borrowed" some 2.5" tube laying around in my dad's shop and used a 2.5" hole saw to cut a hole in another piece of sheet metal for the front face of the outlet

Once the finished the outlet, I tacked it onto the base plate. I was a little worried the 2.5" tube would be too long and not clear the hood but fortunately it didn't rub. Here it is under the hood:

Next I'll start working on the inlet side.
If you use "hump hose" connectors, it could make connecting the sections of hard pipe a little easier, and it allows for a little movement between parts.
So far all I can add, nicely done. Should be a fun project and should be good fun after finished.
So I started on the intake side of the blower.
We had a rusty 60's Porsche 911 exhaust in the scrap bin at our shop. This exhaust had a shape I thought could work for the inlet so I cut it off and fit it to the blower. Here is what I ended up with:
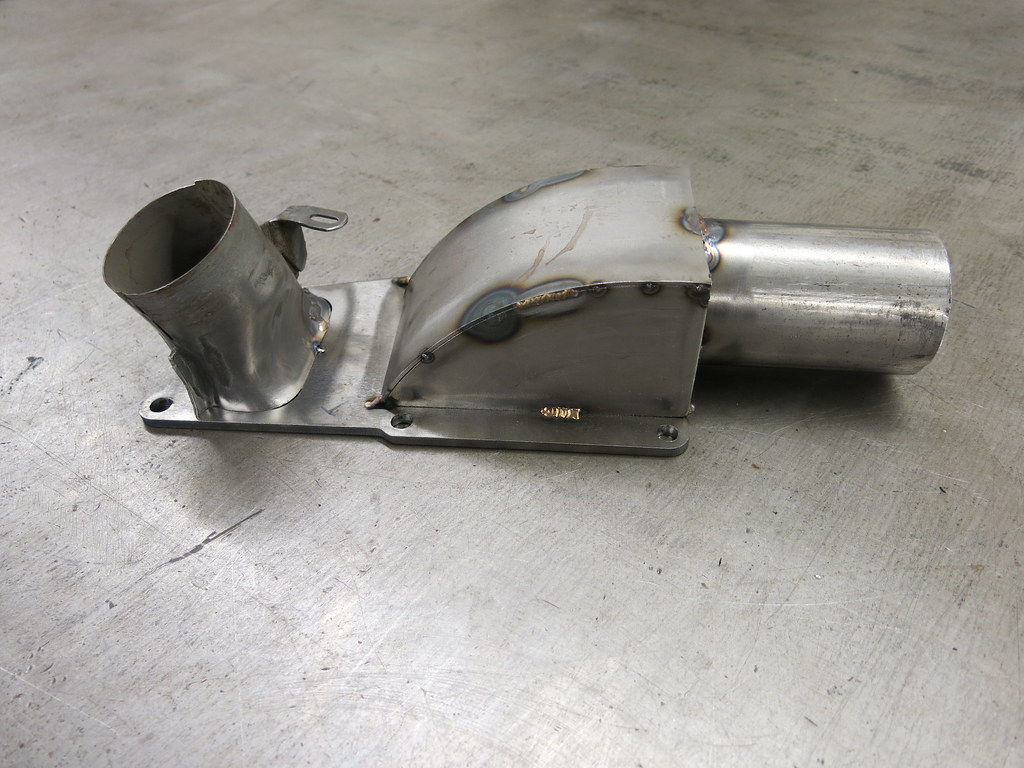
I mocked the blower up in the car and I didn't think I could fit this intake under the hood.
So I'm on to plan B:

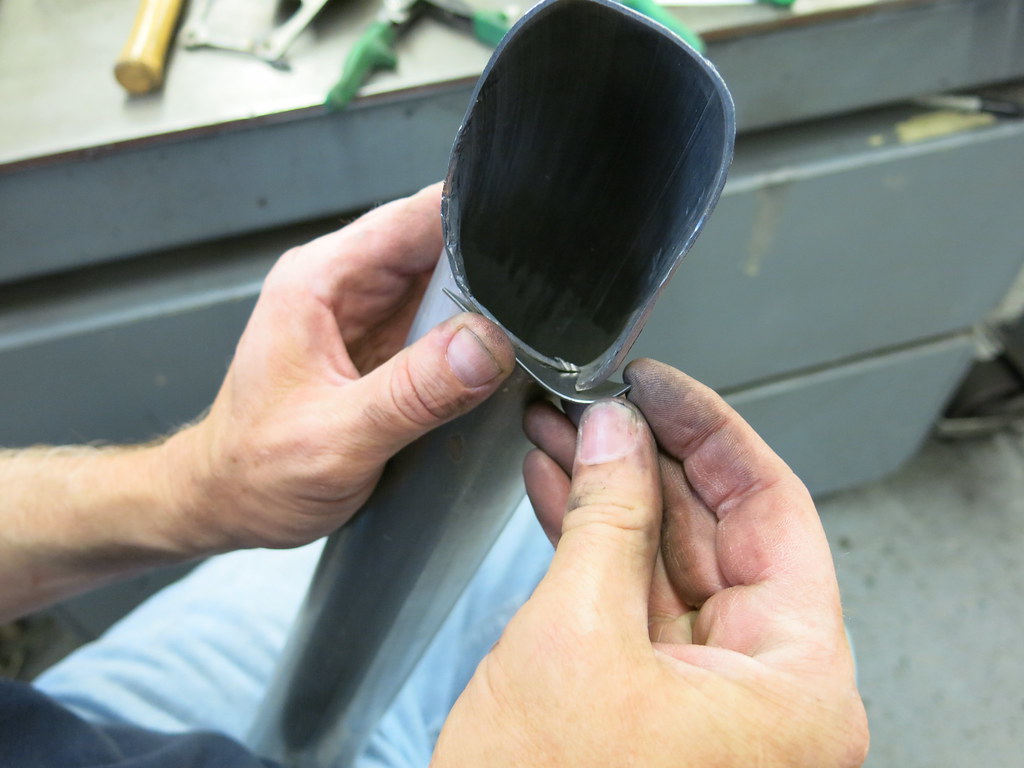
I figured out the intake and had a bit of a marathon weekend.
After cutting up the 2.5" U-bend my dad showed me a couple of metal forming techniques to make the tube fit the outlet of the blower better.
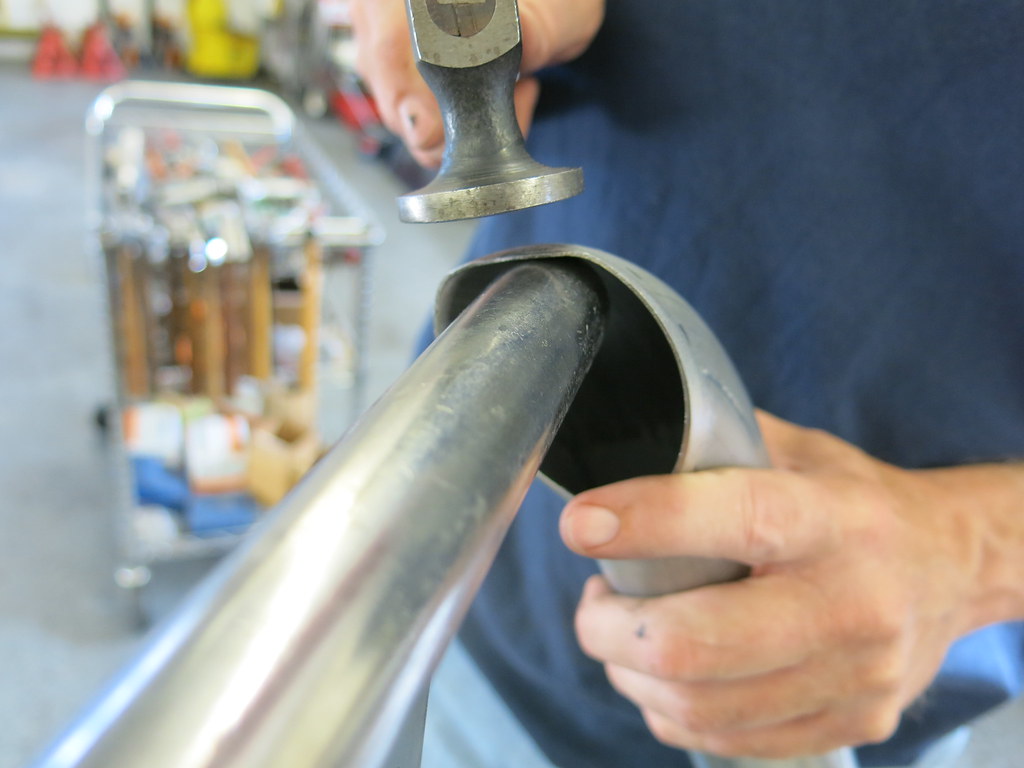
It fit alright but the back side still needed a lot of work.

To make the back side fit up better I cut a small piece of sheet metal and bent it to shape.

I welded in the sheet metal piece. Here I learned that I should have bought a non coated U-bend. I couldn't seem to get this one clean enough to weld.

The shape was looking better to the M45s outlet.

From there I started mocking up the rest of the intake on the car.

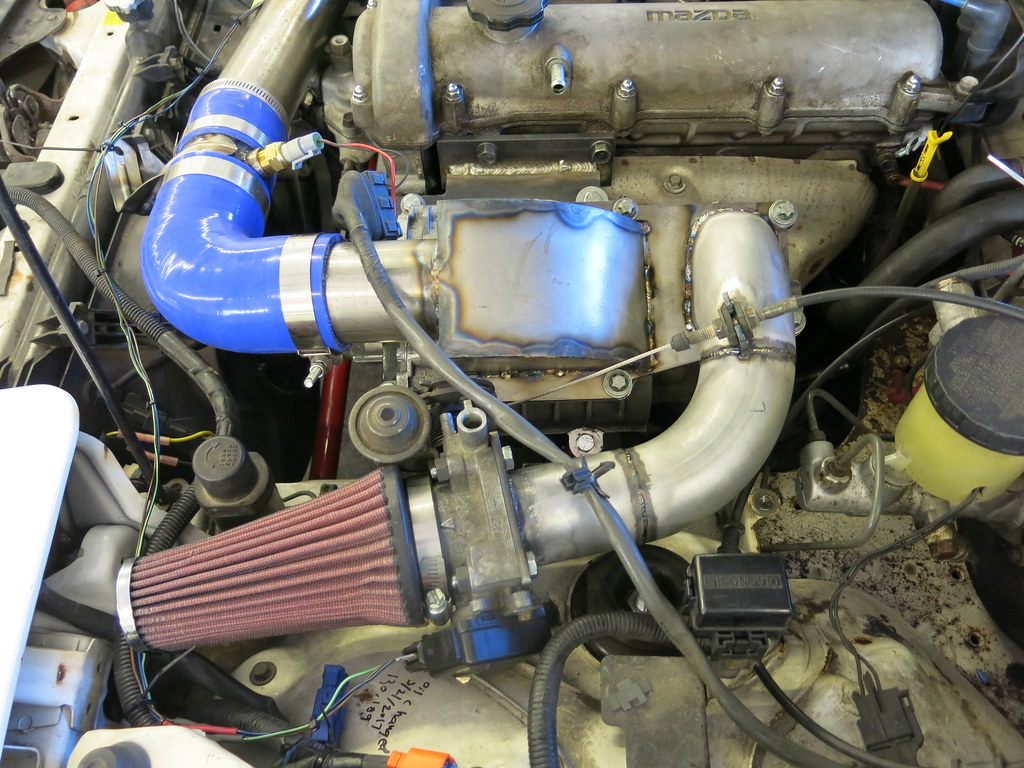
I added on an extension to the 90 degree bend and built a bracket to mate up with the stock throttle body

I spent about 2.5 hours finish welding the full intake but it was ready to be put on for good

When I was welding my dad built a temporary charge pipe so we could try to start the car. It sorta fit under the hood...
Once all this was done we fired it up and went for a drive. The Megasquirt base tune we were running had some compensation for boost in it, so we felt safe. It ran pretty well but only felt a tiny bit faster. Boost was about 7 psi, so I got lucky with the pulley. As we looked at the tune, we saw that it took a lot of timing away with boost and timing all in was in the 19 degree range. We added timing one degree at a time and stopped at 25 degrees all in. We felt safe there, based off of my dad's Midget, MGB, and TR6 supercharger tuning experience
At 25 degrees, the car feels a lot faster and the low-end torque is a game changer. We did a bit more more base tuning on the street but plan on doing the rest on a dyno. We should have results as soon as we get some dyno time.
The car is way more fun now!
RedGT
Dork
8/24/17 2:10 p.m.
Glad to see it up and running.
If you have free time and level ground, feel like measuring acceleration time from 30 to 55 mph in 2nd gear? A free app like RaceChrono for the phone will get you zero-effort close-enough results when starting from a 15-20 mph roll.
Budget boost! Me gusta. How difficult would it be to plumb in an intercooler? Some universal water/air setups are pretty cheap and quite efficient.
RedGT, I couldn't find the free app but I timed 4.1 seconds from 30-55 mph in second gear. I also timed my 94 turbo car at 3.5 seconds
As far as an intercooler goes the 90 degree bends used in my intake came from a used $150 turbo kit which also had an intercooler. Id like to plumb it up at some point but Keith mentioned earlier that the intercooler could cause drivability problems, so it might not stay for long. It would be cool to compare the intercooler to a water/meth setup later down the road.
I applaud your "that'll do" attitude to getting this working. As someone around here once said, "perfect is the enemy of good enough".
In reply to mazdeuce:
Mazduce, thanks for picking up on that philosophy and phrase. It's one of my favorites and something I've really encouraged at Eclectic and with Jack...I think it's usually better to put something "good enough" together, then redo it if necessary. Almost every bracket I make, I make a 2nd one later that is nicer because of the lessons learned from the first one. This project has been evolving that way. Plus, he's enjoying it sooner than if he overthinks every little detail to make it perfect.

codrus
UltraDork
8/26/17 3:46 p.m.
Jack Heideman wrote:
At 25 degrees, the car feels a lot faster and the low-end torque is a game changer. We did a bit more more base tuning on the street but plan on doing the rest on a dyno. We should have results as soon as we get some dyno time.
25 degrees sounds a bit aggressive for 7 psi to me -- that's more than I'm running on my built-motor turbo car in the 7 psi row. Have you added a knock sensor to it yet? If not, an OEM NB one can be had for pretty cheap. I'd also recommend some DIY electronic "det cans" for your dyno tuning if you don't have them already.
Build looks good!
RedGT
Dork
8/27/17 7:23 p.m.
In reply to Jack Heideman:
I am no tuning expert but i just did a bunch of these runs the other night (75º, 70% humidity) trying to dial in my NB's timing card.
NB, 210k miles, generally a tired sad old lump with a 7 psi M45, consistent 3.2 sec
My full bolt on 1990 STS car (overclocked stock ecu, not megasquirt) runs 4.2- 4.1 seconds for this same test.
So it sounds like your SC'd car is being held back by something at the moment, probably the 25* timing.
Finally some dyno data!
As I mentioned before I was looking for around 140hp at the rear wheels with this blower and unlike normal dyno days I made more than expected!
The car stock made 98Hp and 90 ft-lbs at the rear wheels and the m45 brought it up to 153hp and 134 ft-lbs.
Heres the graph:

I still have the stock 1.6 injectors in the car and they maxed out around 6000 RPM. I just bought some used RX8 injectors for $100 to cure this problem.
RedGT
Dork
9/1/17 3:15 p.m.
Damn that is a healthy power bump for "$100."
What did you end up doing with the timing/detonation?