bgkast wrote:
Very crafty, I'm stealing this technique! Any similar tricks for round tube?
There's a bunch of sites that have pipe notch calculators, and let you print out a template to trace onto the pipe(s) to be cut, even allowing for offset. Like this one:
Pipe joint calculator
I would have thought though, that GRM readers would be all over this sort of stuff.

JoeyM
Mod Squad
10/7/13 8:26 a.m.
 http://www.trick-tools.com/Pipemaster_Contour_Gauges_150

ransom
UberDork
10/7/13 10:01 a.m.
I believe Rhino CAD does printable notch templates as well... Haven't worked with it myself, but a friend's gotten some pretty good mileage out of the trial version.

nocones
SuperDork
10/7/13 10:57 a.m.
I like to use masking tape for square tubing. Just run the correct width of tape (conveniently available in .5, .75, 1, 1.5 & 2" widths) from where you want to where you want. Stick it to the surface of the tubes where you intend the flat face to be. You can then measure the side angles from the masking tape and connect the dots for the 4th edge. Cut the masking tape off at the angles and stick it onto a piece of tube and just cut it out. I can try to get some photos.
JoeyM
Mod Squad
10/7/13 11:21 a.m.
nocones wrote:
I like to use masking tape for square tubing. Just run the correct width of tape (conveniently available in .5, .75, 1, 1.5 & 2" widths) from where you want to where you want. Stick it to the surface of the tubes where you intend the flat face to be. You can then measure the side angles from the masking tape and connect the dots for the 4th edge. Cut the masking tape off at the angles and stick it onto a piece of tube and just cut it out. I can try to get some photos.
Please do. I'd like to see how it's done.
Thanks for sharing your thoughts and ideas everybody!
Nocones: You should definitely post up few pics of the process to help illustrate the process. I remember watching you do it that way, and have been planning to do the same when I got to the 3D portion of my build.

WARNING!

After numerous unsatisfactory attempts to make adjustments to the settings of both ‘welders’ in the garage, the machine and myself, I needed a new piece of scrap to continue my slightly frustrating efforts at producing a consistently ‘good’ weld. I grabbed a drop off tube, cleaned the oily residue off of it, and ran the first weld bead. After finishing the weld, the glass on my auto-darkening helmet allowed me to once again see things other than sparks and molten metal. The first thing to catch my eye is the wisp of smoke twisting up from my steel work piece. Instantaneously my mind transports me just a minute or two back in time, as I was preparing the piece of tube. Instead of cleaning it off with acetone, as I normally would, I casually grabbed the can of brake cleaner that happened to be within arm’s reach. I sprayed the metal down and gave it a quick wipe with a paper towel, before setting it up on the table to begin my welding…Returning to the present, panic immediately sets in. Was the brake cleaner fully dried? Is that the normal smell from welding?? What’s that tingle in my lung?!?...
Now some people are acutely aware of the huge safety violation I just made, but others might be quite surprised to learn the potential severity of such seemingly insignificant actions. Either way, we all need the occasional reminder of how even brief instants of carelessness are capable of changing our lives forever. Even though the previous sequence of events happened over the course of only a second or two, before thinking clearly again and realizing I was completely safe, it is still worth bringing up for anybody that that actually reads through this build.
The problem arises when chlorinated hydrocarbons are exposed to oxygen and UV radiation or high temperatures. Even a few residual drops of chlorinated brake cleaner not fully dried off of a part can react to form Phosgene gas. While not a name heard much today, it is the chemical weapon from the trenches of WWI believed to be responsible for more deaths than any other…Not exactly something you want to be breathing in ANY quantity.
I thought I only kept non-chlorinated brake cleaner on hand, but it had been so long since using it last that I wasn’t completely certain. Thankfully I was able to quickly verify it and calm myself, since it is only the chlorinated type that has this extremely dangerous reaction. In some places, like California, I don’t think you can even get chlorinated brake cleaner anymore. Regardless, welding is a pretty intense process capable of numerous health and safety concerns. So you need to be conscious of everything you do around the welding too. Thus I can’t recommend strongly enough that it is best to ALWAYS make sure you’re using a solvent that does not have a variant capable of accidentally releasing a Schedule 3 chemical weapon in your garage. That way you’ll never even have a reason to question yourself.
JoeyM
Mod Squad
10/18/13 5:08 a.m.
good reminder. related links from prior GRM threads:
I almost killed myself
Read this and maybe save your life... seriously.
How to almost kill yourself with brake cleaner
two of those GRM discussions are referencing this article
http://www.brewracingframes.com/id75.htm
Wow…Looking back on my build log, I didn’t realize that I hadn’t updated it with any of my activities in as long as it has been. Over the past couple of months since my last update, I have not been simply been idle. While progress is almost never as fast as I would like, it is still happening. It never ceases to amaze me how quickly time slips away.
That’s not to say that all of my time has been productively moving the project forward by any means either. As SWEETA (She Who Enables Every Thing Automotive) will readily attest, I am constantly researching various aspects of exciting and interesting (to me) ideas. The theory behind this is to gain an understanding of the idea to the point of identifying the obstacles or shortcomings, and devising a method for overcoming them. However, frequently this obsession gets in the way of making other physical accomplishments as well. Some of the research does end up being for ideas ultimately related to this car, but are not really of concern for quite some time to come. The irony being that much of the time taken for the research now, subsequently pushes my actual timeframe to use the information gleaned even further out. Beyond that I often become totally obsessed with unconventional ideas for a period of time, completely unrelated to completing this project whatsoever. These will typically last anywhere from a couple of days to a few weeks. The most frequently recurring of these relapses are the ones that are most likely to be attempted as future projects…Provided I can stop researching them for long enough to finish this project first.
Meanwhile, back at the ranch, when we last left the project I was just getting ready to add blocks to jig the tubes in place prior to welding. These blocks are not built into the table itself, but rather are all on a separate sheet of (cull) MDF that can be stored separately without taking the jig blocks off. Following that was tube prep for the first attempt at executing my planned method for building the chassis sides. This would serve to prove out a host of ideas and methods I’m attempting, be they successful or not. More specific details will follow in subsequent entries over the next few days.

Once my first article was tacked together, I then focused on improving my welding skills until I could regularly run a bead that wouldn’t make me afraid to drive the car. I did decide to abandon my attempts at perfecting the ‘weave’ welding technique for now, which produces the stack-of-dimes look, in favor of sticking with the structurally equivalent but less attractive ‘stringer’ welds. I’d like to be able to say that the time saved was making up for the time I spent researching and gave me more time to work on the car, but there is no amount of time saved that can make up for the time I spend researching…And the reality is more likely that the time saved, just gave me more time to research.

With my welding skills turned all the way up to ‘adequate’ it was time to finish weld as much as possible on the first article piece, to see how badly it would potato-chip. As it turns out, almost not at all!
JoeyM
Mod Squad
12/17/13 7:12 a.m.
I really like the jig you made to fit the tubes.
Seconded on the kudos for the jig. Looks like it will make sure both sides are equal. Now, get back to work...
"Anything worth doing, is worth overdoing." - (Sir) Mick Jagger
So, it turns out I might be going a little overboard with tube prep. I start out with my jig board, that has now been expanded to accommodate the full length of the outboard cockpit sides.

Notice the 'flat pack' of tubes all cut to the correct length and angle, looking like they're in a police lineup.

Each number corresponds to a numbered location on the build table. They are also cataloged in an excel spreadsheet, including their raw stock length, for the purpose of maximizing tube cuts and minimizing odd length excess. It also might come in handy for future reference. The full set of tubes are then temporarily mocked up in the jig, where the edges of each tube intersection are marked with a Sharpie.

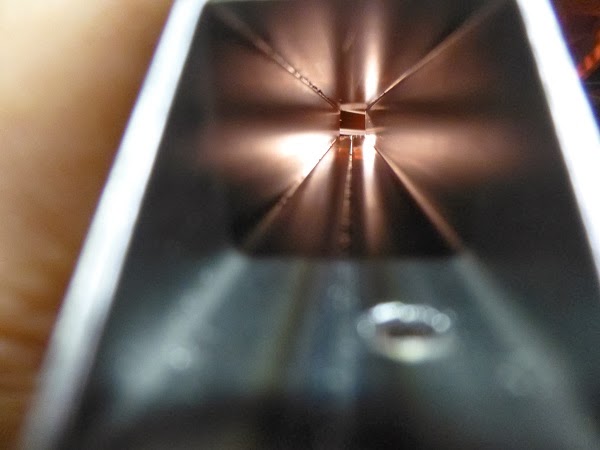
At each tube intersection where one tube dead ends into another, a hole is drilled. The end result is that the entire chassis will be one continuous interconnected volume.

One theory is that this improves the finish weld, as the heated (expanding) air has a means of escape other than past the weld arc and puddle. The other, more important aspect to me is that, should I choose to do so, I will be able to pour the rust inhibiting compound of my choice inside the chassis, rotate it a few times to get into every tube, then carefully drain it back out again. This would be all but guaranteed to have some 'pools' that would never be fully drained out, and will certainly add a little weight, but could also help the chassis longevity...Or could end up being little more than some quality time spent with my drill. Hence the quote from the great philosopher, Sir Jagger.
More overdoing it to come...

bgkast
Dork
12/19/13 10:48 a.m.
Interesting thought with the joint holes, I like it. My car will have riveted panels on nearly all of the tubes, so I am planing to get a can of waxoyl or similar and spray it inside the tubes before riveting the panels on.
I tweaked your paint stick idea when I was building the floor of my car...I used scrap 2x2 lumber instead, then used the bits I had cut off as blocks on the jig.
So now I've got a bunch of holes in my tubes, thanks to some ridiculous notion that it might provide some potential future benefit. That means it's time to put it all back together in the jig, and start welding it up, right? Well, that would be one option. But there's that nagging little voice in my head, convincing me it would be irresponsible to put this car together with tubes that have so much crap inside of them.

First up is getting rid of that nasty burr on the inside edge of each hole.

Now I could stop there, but why half-ass it? I'm not going to be satisfied until I've made a complete ass of myself. So I stuff a half sheet of paper towel in the end of the tube and use my highly specialized multipurpose tool to swab it through like cleaning the barrel of a rifle.

Most of the grime comes out with the first swabbing.

And the second swabbing leaving it clean as a whistle. Come to think of it, whistles get pretty gross...Hopefully cleaner than a whistle.
Then it's just a quick wipe down on the outside with Acetone, bevel all of the edges on the grinding wheel, final smoothing around all of the edges with the wire wheel, and putting it all back together in the jig as shown below in the picture that is not-at-all** the same picture used in my previous post.

My only thought for next time is swabbing the tubes before drilling the holes, rather than after deburring them. I'm not exactly the most skilled with a deburring tool, such that even with the big bits of burr gone there can still be just a little bit left poking up that can snag the paper towel a bit.
.
** "exactly"
...And then there were two.

A thought on making the chassis one continuous volume. I've thought of this many times, not to paint the inside, but to purge and pressurize it slightly(say 3-5psi) with an inert gas. This would both prevent internal rusting AND allow you to identify a stress crack as soon as it happens(you would lose pressure). This would require really good welds though, or a nice thick coat of epoxy primer, preferably painting it under a slight vacuum.
From the research I've done, attempting to pressurize the frame would be little more than an exercise in futility. If I do anything, I'll probably just stick with an internal rust inhibiting compound like Tubeseal or a some type of homemade linseed oil mixture. These types of materials have been used with great success in tube frame aircraft for many years.

Ian F
UltimaDork
12/22/13 3:56 p.m.
In reply to Driven5:
Or maybe this?
http://www.eastwood.com/internal-frame-coating-w-spray-nozzle-qt.html
Perhaps with some weld-through primer on the tubing ends as well?
Enjoying the build so far. 
In all reality as long as its reasonably air tight, there wont be enough trapped oxygen and water vapor in there to cause anything beyond a light orange coat before the reaction stops.

NOHOME
Dork
12/23/13 8:58 a.m.
I admire your OCD and devotion to prepping the joints in preparation for welding. When people admire the weld-porn on the net, they seldom are aware of how much the results depend on the proper preparation.
Since you seem to like over the top , have you considered purging the tubes with the welding shield gas during the welding? What this prevents is the backside of the weld bead starting out with a thin layer of oxide as a by-product of having molten steel in the presence of oxygen. Purging the interior will also give you better front seam results int that any hot air escaping from the tubes into your bead will be inert.
If it was economically reasonable to do so, I might have actually considered going so far as to purge the tubes. As it is, I'm resource-limited and just doing the best I can with what I have available...Which incidentally means there will still be absolutely no good excuse I can make for the distinct lack of weld-porn to follow.
NOHOME
Dork
12/23/13 2:18 p.m.
I can't see the additional gas adding up to much? Once you purge the pipes, its just a trickle to maintain? Hardware would not be more than a ball valve and a T fitting on the low side of the regulator.
And don't worry, I will never be the one to criticize another man's welds. As long as they are hot and safe, they are good.
I do like your methodical approach to fabrication. Keep up the work.
As with anything else, the more welding I do, the better my welds are becoming. It also means I'm figuring out those little tricks that create significant improvement in various specific welding scenarios that you don't even think about until after throwing yourself into those scenarios. By the time I'm done with the chassis, I might actually make a half way decent welder! Of course in the mean time, this means I get to look back on all of the welds up to the point of each new revelation and try to force myself not to simply start over. It may however mean that the earlier sections of chassis will be getting a little additional gusseting...Just in case.
On the other hand, my overall results have been good with keeping weld distortion to a minimum so far. After tacking the section all together, I pull it out of the 'jig' so that I can flip and rotate it around into whatever position will allow me to reach any given joint the most easily. My technique starts off with welding all of the fillet welds on the inside corners for the main boxed segments first, alternating corners around the chassis. Then doing the same with the outside corners. After that is the fillet welds on all of the diagonals. And last comes all of the the butt welds on either side. Really the primary source of what distortion I have seen appears to be coming from any minor variances in tube fitment. Wedge a tube in too tight, and when welded it bows the tubes on either side out. Leave a little gap, and the weld will pull it closed. None of this shows up well in pictures though.
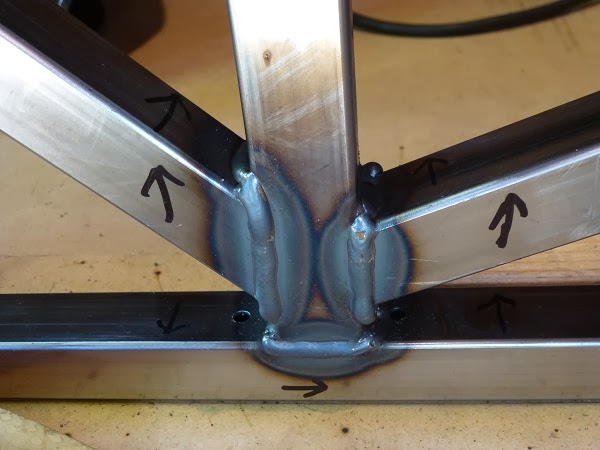
However, I do have a picture illustrating one other method I'm using. I find the hardest to reach weld for every tube joint, and figure out what position both of us (the chassis and myself) need to be in to most easily weld it. This includes determining which direction the weld will go. I then mark that next to the joint. Every other joint around that tube intersection is then welded moving the same direction, such that the coldest part of the weld at the beginning overlaps the hottest part at the end of a previous weld. Alternatively the hottest part of the weld at the end overlaps the coldest part at the beginning a previous weld.
bgkast wrote:
Paper towel tube.  Make a tight fitting joint with the cardboard tube, the trace onto metal. Thw paint stick should work for round to square tube joints.
I use sheets of construction paper - wrapped to the exact diameter and slipped over the tube... tape. Cut angle with scissors.
On my last roll cage build I went nuts and bought:
hJ5g~~60_35.JPG)
They are a bit pricey - but Joey is right... you get great results quickly.


