2 3 4 5 6
Giant Purple Snorklewacker
Giant Purple Snorklewacker MegaDork
1/7/14 7:49 a.m.
bgkast wrote: Paper towel tube. Make a tight fitting joint with the cardboard tube, the trace onto metal. Thw paint stick should work for round to square tube joints.

I use sheets of construction paper - wrapped to the exact diameter and slipped over the tube... tape. Cut angle with scissors.

On my last roll cage build I went nuts and bought:

camaroz1985
camaroz1985 Reader
1/7/14 9:58 a.m.

I bought a pipemaster when we did the cage in our lemons car. Took a little "operator training" but it did make very nice joints.

bgkast
bgkast Dork
1/7/14 11:45 a.m.

I have had very good luck building my cage using tube-width masking tape to measure angles and lengths to the inside of the fish mouth, then using templates printed from metalgeek.com.

Now the square to round tube intersections are another matter!

Driven5
Driven5 Reader
1/12/14 1:50 p.m.

So far I have gotten two batches of steel tube. The first was ASTM A500 and the second was ASTM A513. Each was all they had in stock for 1x1x0.065 tube at the time. So what’s the difference, besides about 13 whatchamadingers? In terms of mechanical properties, not enough for me to worry about. They’re both pretty standard hot rolled, seam welded steel tube. However, at least as stocked by my steel supplier, the A500 was protected by a light mill scale…Where as the A513 was cleaned and protected by an oily residue. Then which is better? During initial handling, neither is great. The A500 leaves black grime on everything it touches, and the A513 leaves oily residue on anything it touches. However, the oily residue cleans off easily with a quick wipe down of Acetone. The same cannot be said of the mill scale.

One of the popular ways to rid yourself of the Mill Scale plague, is by using a diluted acid solution, which can cause all manner of hazardous material problems that I have absolutely no interest in dealing with. To mechanically remove it though simply takes time…Much more than anybody wants to spend doing it. Some people simply do a half-assed cleaning of the tube, while only doing a whole-assed cleaning where the welds will be. The idea is that the mill scale is well adhered to the tube, and there are paints that at least adhere well enough to the mill scale for it to not be a problem…But if you couldn’t tell from my previous tube prep on the A513, I’ll be doing it the complete and total assed way.

As seen in the picture below, at the top is the original flat black mill scale wiped of the initial loose grime. Below that is the ‘half-assed’ cleanup. This is a few lighter passes with a wire wheel, and has basically polished the mill scale to kind of a satin black. The bottom shows the fully cleaned up steel, after numerous heavier passes with the wire wheel. Off to the right, you can see the pile of tubes in the semi-finished state, and the one tube on the left that is fully-finished.

So if your steel supplier tries to sell you on tube with mill scale…In the immortal words of Bing Crosby, “don’t think, don’t pause, don’t hesitate for a moment, just spit in his eye.”

Driven5
Driven5 Reader
2/3/14 1:03 a.m.

Today's brain teaser: Spot the differences...

Driven5
Driven5 Reader
2/10/14 1:14 a.m.

With the mill-scale scourge defeated, I'm almost ready to actually be productive again. I have but one mental block to break through before welding up the remaining two sections of cut chassis tubes. The amount of time it took to produce the second identical set of, now welded together, tubes was a mere fraction of the amount of time it took to produce this first set that I'm now finally preparing to weld together.

As my skills grow through the process of building this chassis, so too will the quality of my workmanship. I am confident that my fabrication of this chassis will be more than adequate for safely cruising around town or hitting the local autox. But I do also want to take this car to the race track, and I'm not yet sure of my confidence level in this same fabrication when traveling at speeds well into triple digit speeds...But I need to find a way to keep moving forward if I ever want to get this car on the road.

I also know that as much as I'd like to make it look like I can design everything perfectly on the first try as I go along, I know that I will have to make changes to previously 'completed' work, as well as there will be things I wish I had done a bit (or a lot) differently when seen in hindsight.

So to assuage my fears and bring me the inner peace I need to proceed, I am making templates of every tube. These will allow me to build a second chassis with relatively minimal effort, if at any point in the future I see fit to do so.

It's actually a quick and easy process, the hardest part of which was finding a suitably sized and priced material. I happened across 5/8 vinyl J-channel for cheap at my local hardware store.
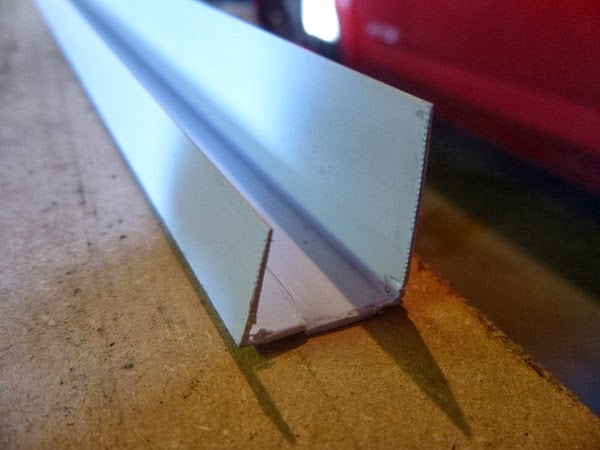
Using a utility knife, score down the full length of the inside corner on the shorter side. Fold the short side "open" to lay flat with the base, which will cause the vinyl to fracture along the scored line. Then peel the short side off leaving a vinyl L-channel.
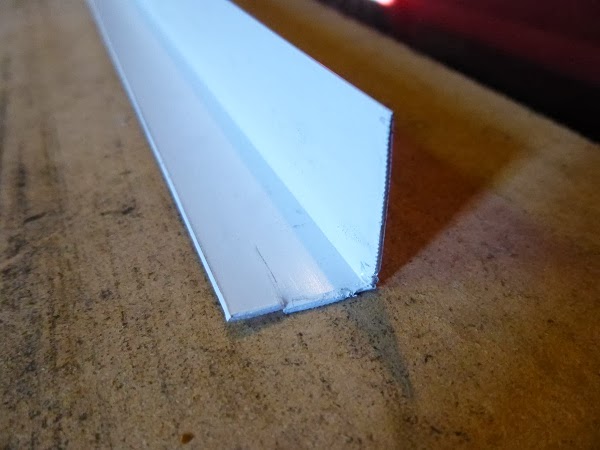
Orient the tube into the L-channel as necessary, use a sharpie to mark the tube end profiles, and cut with a tin snip to match. Lay it back over the tube to verify the angles and lengths are correct.
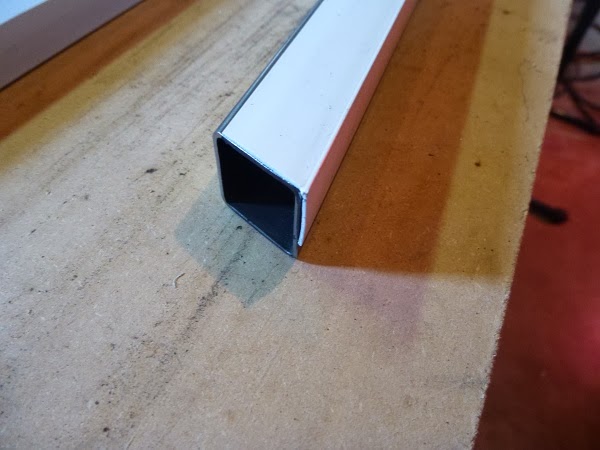
And before you know it, you've got a whole family of templates.
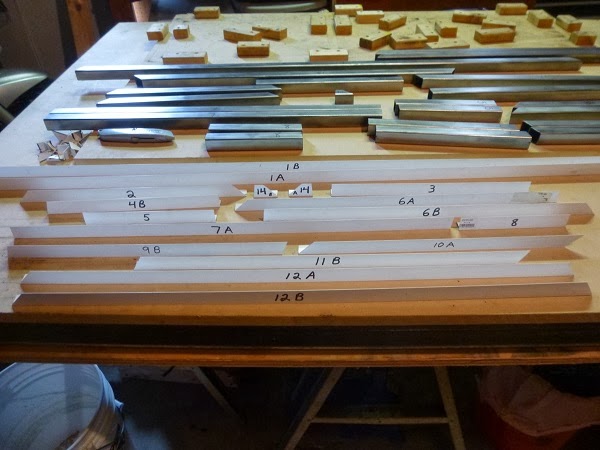
Note that some are simply numbered, while others have “A” and/or “B” associated with the number. As usual, there is a method to the madness. Due to my band saw only being able to make angles in one direction up to a 45 degree angle, numerous tubes needed templates that either oriented a specific way or needed one template for each side. It takes a bit of thought to get them all sorted out the right way, but apparently is nothing that the average idiot who thinks he can actually build a car from scratch in his own garage couldn’t figure out on the third or fourth try.

bgkast
bgkast Dork
2/11/14 2:50 p.m.

I'm not sure I'm following the reasoning behind the templates. In my build a good 75% of the tubes are custom made to fit with as little gap as possible. Beyond the floor (or in your case the sides) no two chassis will be exactly the same due to warpage, error stacking etc. If you are worried about your welding tack everything up and take it to a pro for the final welding, or practice, practice, practice. $20 in scrap and a weekend will have you welding like a pro.

Driven5
Driven5 Reader
2/12/14 3:16 a.m.

Even if I agreed that $20 of steel and a weekend of self-taught welding (been there, done that already) would have me making perfect welds (penetration, heat affected zone, bead) on every joint, it still doesn't address the fact that designing as you build will inevitably leave numerous "opportunities for improvement" on the final product. And the more jigs I use for various tube sub-assemblies, the more relevant the templates become.

I don't expect to both design and build a perfect car, but I am planning for it to be designed and built to the very best of my abilities...Even if that means not on the first attempt. It's the experience I am gaining from this build, including from validating ideas like this, and proving to myself that I can complete this that is the real goal here...Having a sweet car to drive at the end is almost as much a byproduct of that as it is a goal in of itself.

It's not that I'll necessarily feel the need to build another chassis either. This is just an idea for cheap and easy insurance to make the magnitude of even potentially doing so less prohibitive, should I end up desiring in any way to do so. And if nothing else, simply having that perceived safety net to help minimize one of my most common mental blocks preventing progress, is worth it to me.

Driven5
Driven5 Reader
2/16/14 1:34 p.m.

Mental note: Industrial Sharpie is almost as tough as mill scale. Acetone barely fades it. Stick with Original Sharpie for marking welds on Steel.

Ian F
Ian F UltimaDork
2/16/14 2:04 p.m.
Driven5 wrote: Today's brain teaser: Spot the differences...

I know the feeling... sometimes you just have to go, "ARRGGHHH!!!!" and spend a day cleaning up the work space. Sometimes I have to do that in a middle of a task if I'm starting to spend too much time searchign for a tool I just used. Then I stop, put everything away, and re-start.

Driven5
Driven5 Reader
2/25/14 12:43 a.m.

So that's what happens when you leave two chassis sections alone in the garage together!...

tuna55
tuna55 PowerDork
2/25/14 4:45 a.m.

very pretty.

Driven5
Driven5 Reader
3/9/14 4:21 p.m.

As usual, no matter how realistic you believe your goals to be, progress typically occurs at somewhere between 1/2 and 1/3 of the anticipated rate.

Since my last post I've been making progress, but nothing terribly interesting to take and share photos of...Not that most of my photo updates thus far have been overly 'exciting' either. I spent some time finish welding the second two chassis rails. Then some more time mocking up the chassis rails while debating between 17.5" wide seats with a 8" wide tunnel, 17.25" wide seats with a 7.5" wide tunnel, or 17" wide seats with a 7" wide tunnel. And finally this weekend, making the transverse tunnel tubes and prepping the two tunnel rails to be mated together.

To ease any potential issues with the differential pinion being offset to the passenger side, in addition to focusing on my personal seat width, I decided to keep moving forward with the originally planned 17" wide seats and 8" wide tunnel. As with every other decision, this has both advantages and disadvantages vs the alternatives...But all minor relative to each other, as well as in the big scheme of things.

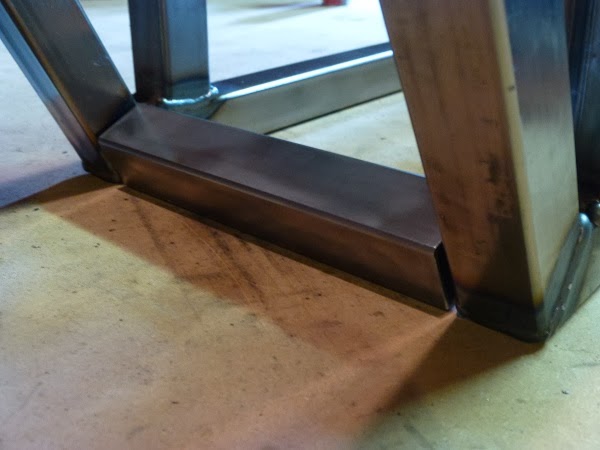
Everything is now prepped so that next weekend I will be almost certainly be going "3D" with at least a tacked up tunnel. I hope to get even further, but I'll direct you back to my first statement in this post. The last decision to make before doing so, is how I want to install the transverse tubes that will make up the bottom of the rear firewall. Options "A" and "B" are shown below...But I'm also considering secret Option "C" with some type of hybrid between the two shown by using additional portions of tubing or gusseting. Obviously this is one of the more 'detail oriented' decisions that will make little difference either way, but it does give me a little something to ponder until next weekend.

bgkast
bgkast Dork
3/9/14 6:23 p.m.

If you are attaching sheet metal option B is the way to go. If you are also attaching sheet metal to the bottom then option c sounds good

Driven5
Driven5 Reader
3/11/14 11:57 a.m.

That's pretty much what I'm thinking. Right now I'm leaning towards Option C, but saving myself some time/effort and accepting the whopping extra 2.5lbs from simply doubling the tubes. It would be Option A moved forward and Option B moved up just enough to where I could weld the upper rear edge of A to the lower forward edge of B.

bgkast
bgkast Dork
3/11/14 12:07 p.m.

Just use a piece of flat bar (or trimmed down angle if you really want to get fancy) and use it to finish off the other face that the square tube doesn't cover.

Driven5
Driven5 Reader
3/18/14 12:28 a.m.

For the first time ever...In 3D!

mazdeuce
mazdeuce UltraDork
3/18/14 6:37 a.m.

Front engine dragster!

Driven5
Driven5 Reader
3/19/14 2:00 p.m.

I was thinking more of the Air Force Mustang X-1...But front engine dragster is good too!

Mitchell
Mitchell UltraDork
3/19/14 5:43 p.m.
Driven5 wrote: As usual, no matter how realistic you believe your goals to be, progress typically occurs at somewhere between 1/2 and 1/3 of the anticipated rate.

And 2 - 3x the anticipated budget.

Driven5
Driven5 Reader
4/6/14 2:49 p.m.

In reply to Mitchell:

So far my projections indicate that I may actually end up at only 1.5x the originally anticipated budget!

Driven5
Driven5 Reader
4/6/14 2:50 p.m.

With preparations for the arrival of our “garage helper” kicking into high gear, my typical garage time has been increasingly filled with more important projects and events. Not the least of which included my solemn duty to keep some of the other ‘shower’ husbands occupied with a local wine, beer, and whiskey tasting tour. However, I had a break this weekend that allowed me to make some good progress.

It began with cleaning up my workspace from the other projects that had accumulated over the past two weeks. Following that, the next 12 tubes were cut and trimmed to length, cleaned, and prepped for installation. This morning I constructed my somewhat unconventional jigging of the chassis, that actually held everything surprisingly true according to my carpenters square.

A few conveniently placed tacks later, and the driver side is officially in place.

RossD
RossD PowerDork
4/9/14 8:11 a.m.

Come on, you sat in it and made vrrooom noises already, didn't you?

Nice work.

Driven5
Driven5 Reader
4/11/14 8:12 p.m.

While I had planned to hold off on the official 'vroom' photo op, I have surprised myself by not having even sat in it since tacking that side in place. At this point, I'm going to attempt waiting until the other side is tacked in place, in addition to the inboard side of both foot wells...Safety first and all, I can't be burning my feet on the imaginary engine.

jgrewe
jgrewe New Reader
4/11/14 11:42 p.m.

Install the imaginary Halon system first, problem solved

2 3 4 5 6

You'll need to log in to post.

Our Preferred Partners
pzreERtCqVrxIrag7OIyTrOLa6J5X1hre8gJmJxcOHdIRjHoqSx2P58Zb5PJqf3W