
The caliper piston area was chosen to be similar to stock, so there's no need to mess with the master. That's a misunderstood relationship at the best of times :) There is a remarkable variation in caliper bores used on other big brake kits for Vanagons, I think the 86+ vans may have a larger master which explains why people are willing to accept the large piston sizes being used. Or maybe they're just okay with loooong pedal travel.
Fluid will be good DOT4. That's all. It ends up being at least partially flushed on caliper installation anyhow.
One thing that will separate this kit from the more typical ones using a one-piece rotor is that they sandwich the rotor between the hub (with the stock rotor machined off) and the wheel. This means the front offset is increased by roughly 10mm and the caliper ends up very close to the inside of the wheel spokes. This design should fit a lot more wheel options. I only have one set of wheels, but I like the technical improvement over others in this regard.
Some prep work before I do the installation. I pressed (aka hammered aka tapped carefully with a dead blow) a set of bearing races into the new hubs and then decided to learn how to properly safety wire rotors. Armed with the Wilwood instructions, I set about the task after putting red loctite on the bolts.
Not bad!
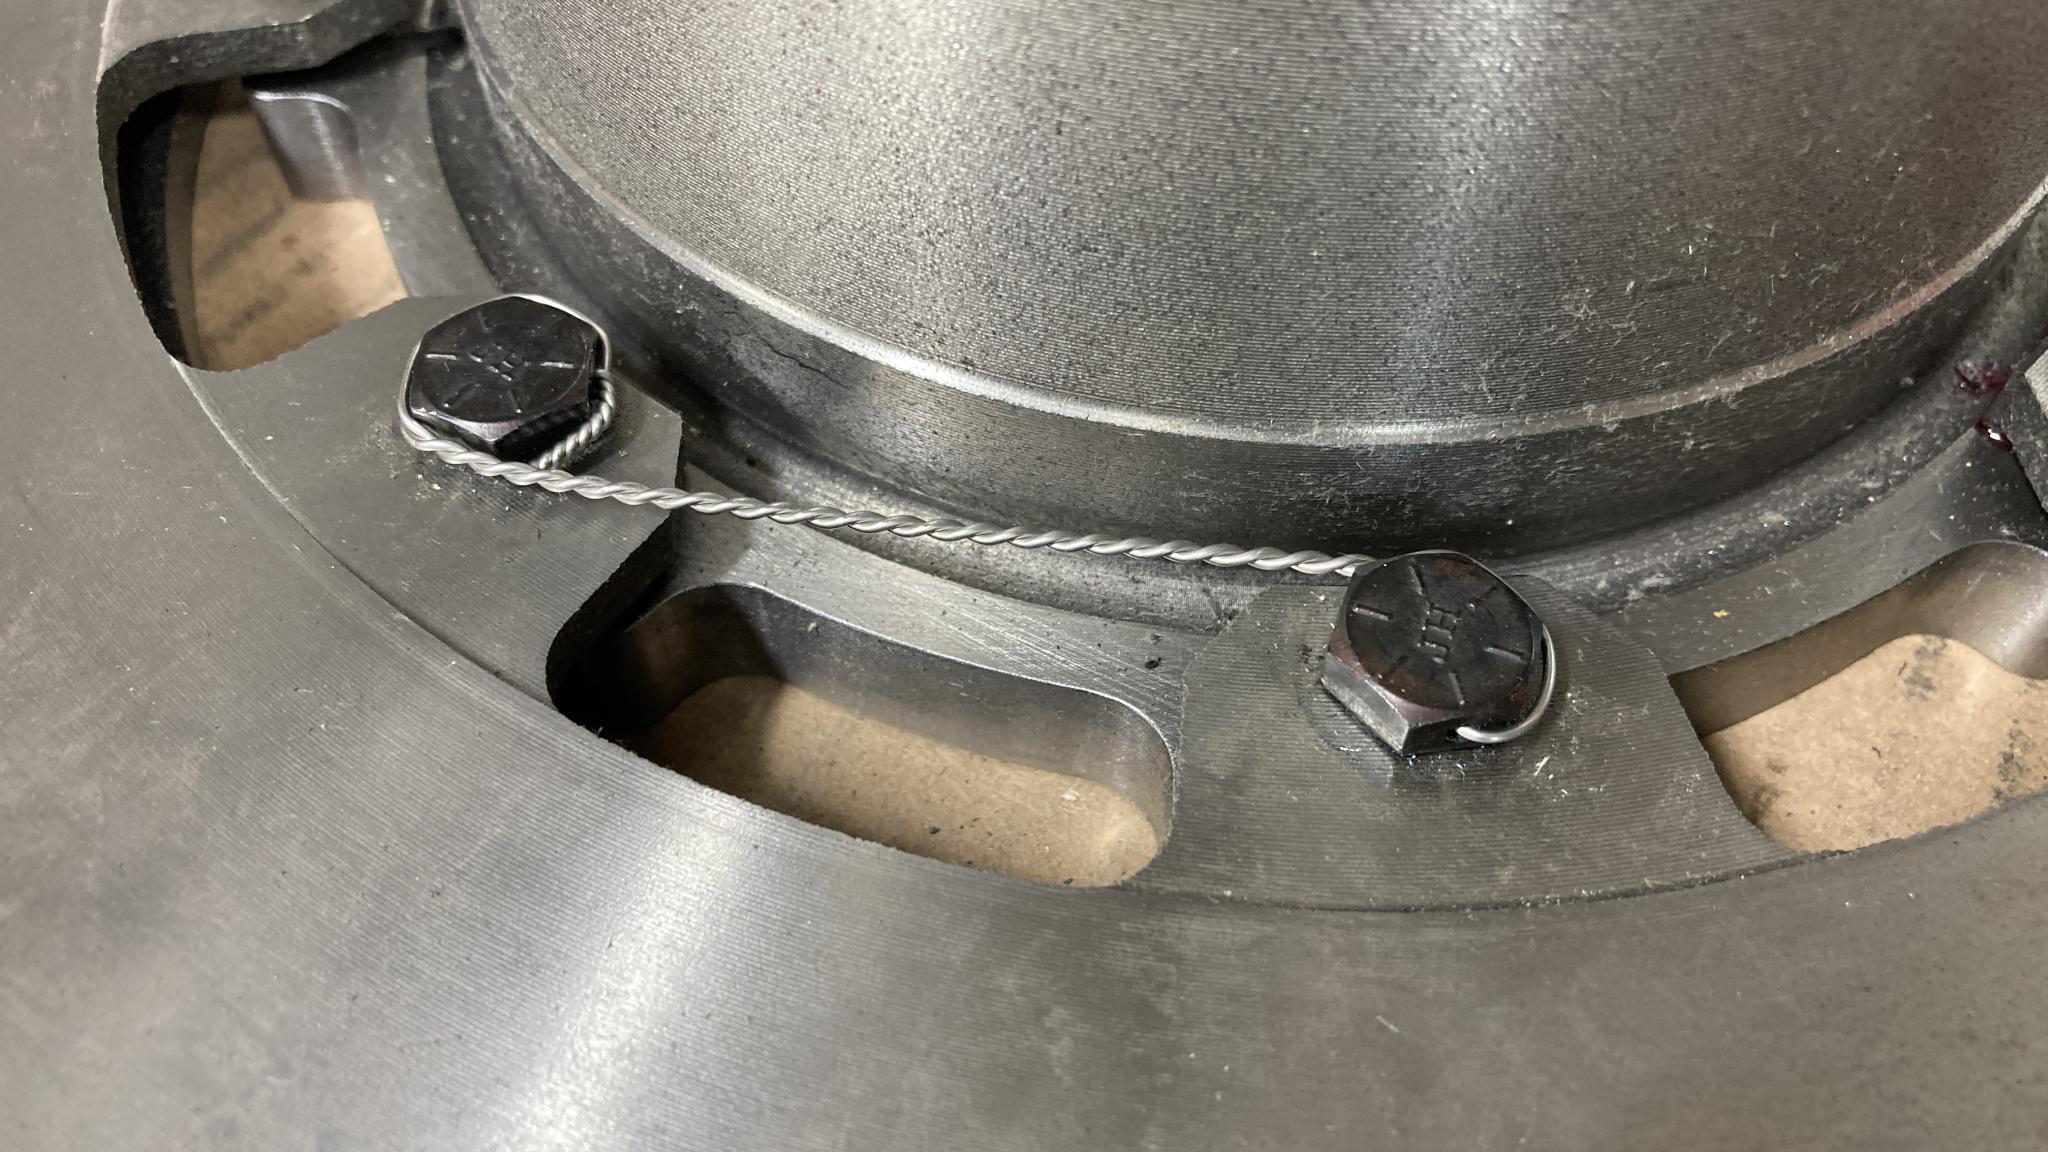
I was happy with my work until I realized I'd done 3 of the 4 pairs...backwards. Sheesh, forest, trees, etc. Snip snip, try again. Okay, that's better.
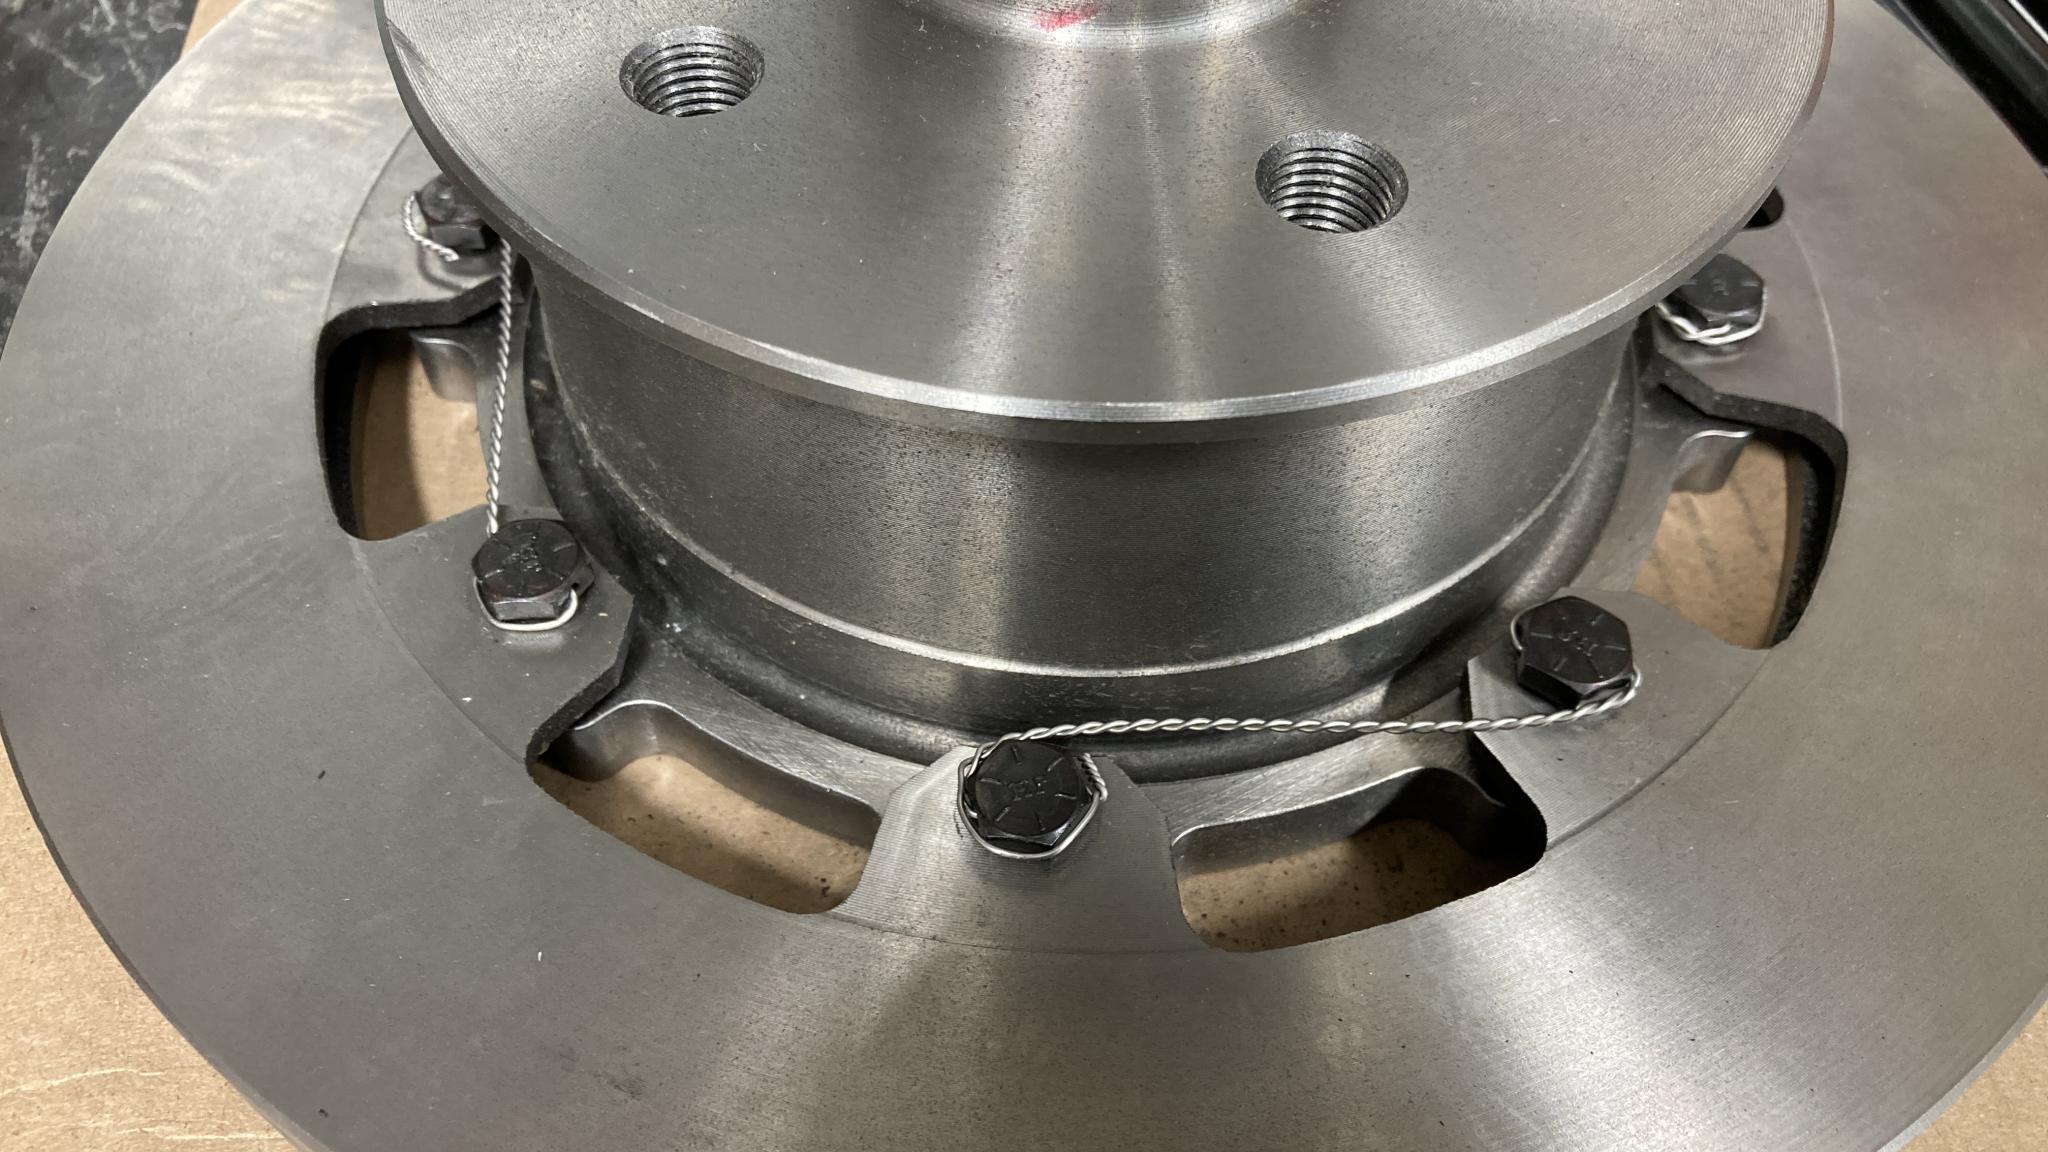
You have to admit those are some extremely over-sexed rotors for an old van.

Very sexy setup Keith! I'm eager to read a road test update!
The discussion right now is if I should try to DIY anodize the brackets before installation. I have the equipment but haven't tried it for a while...
It's installation day!
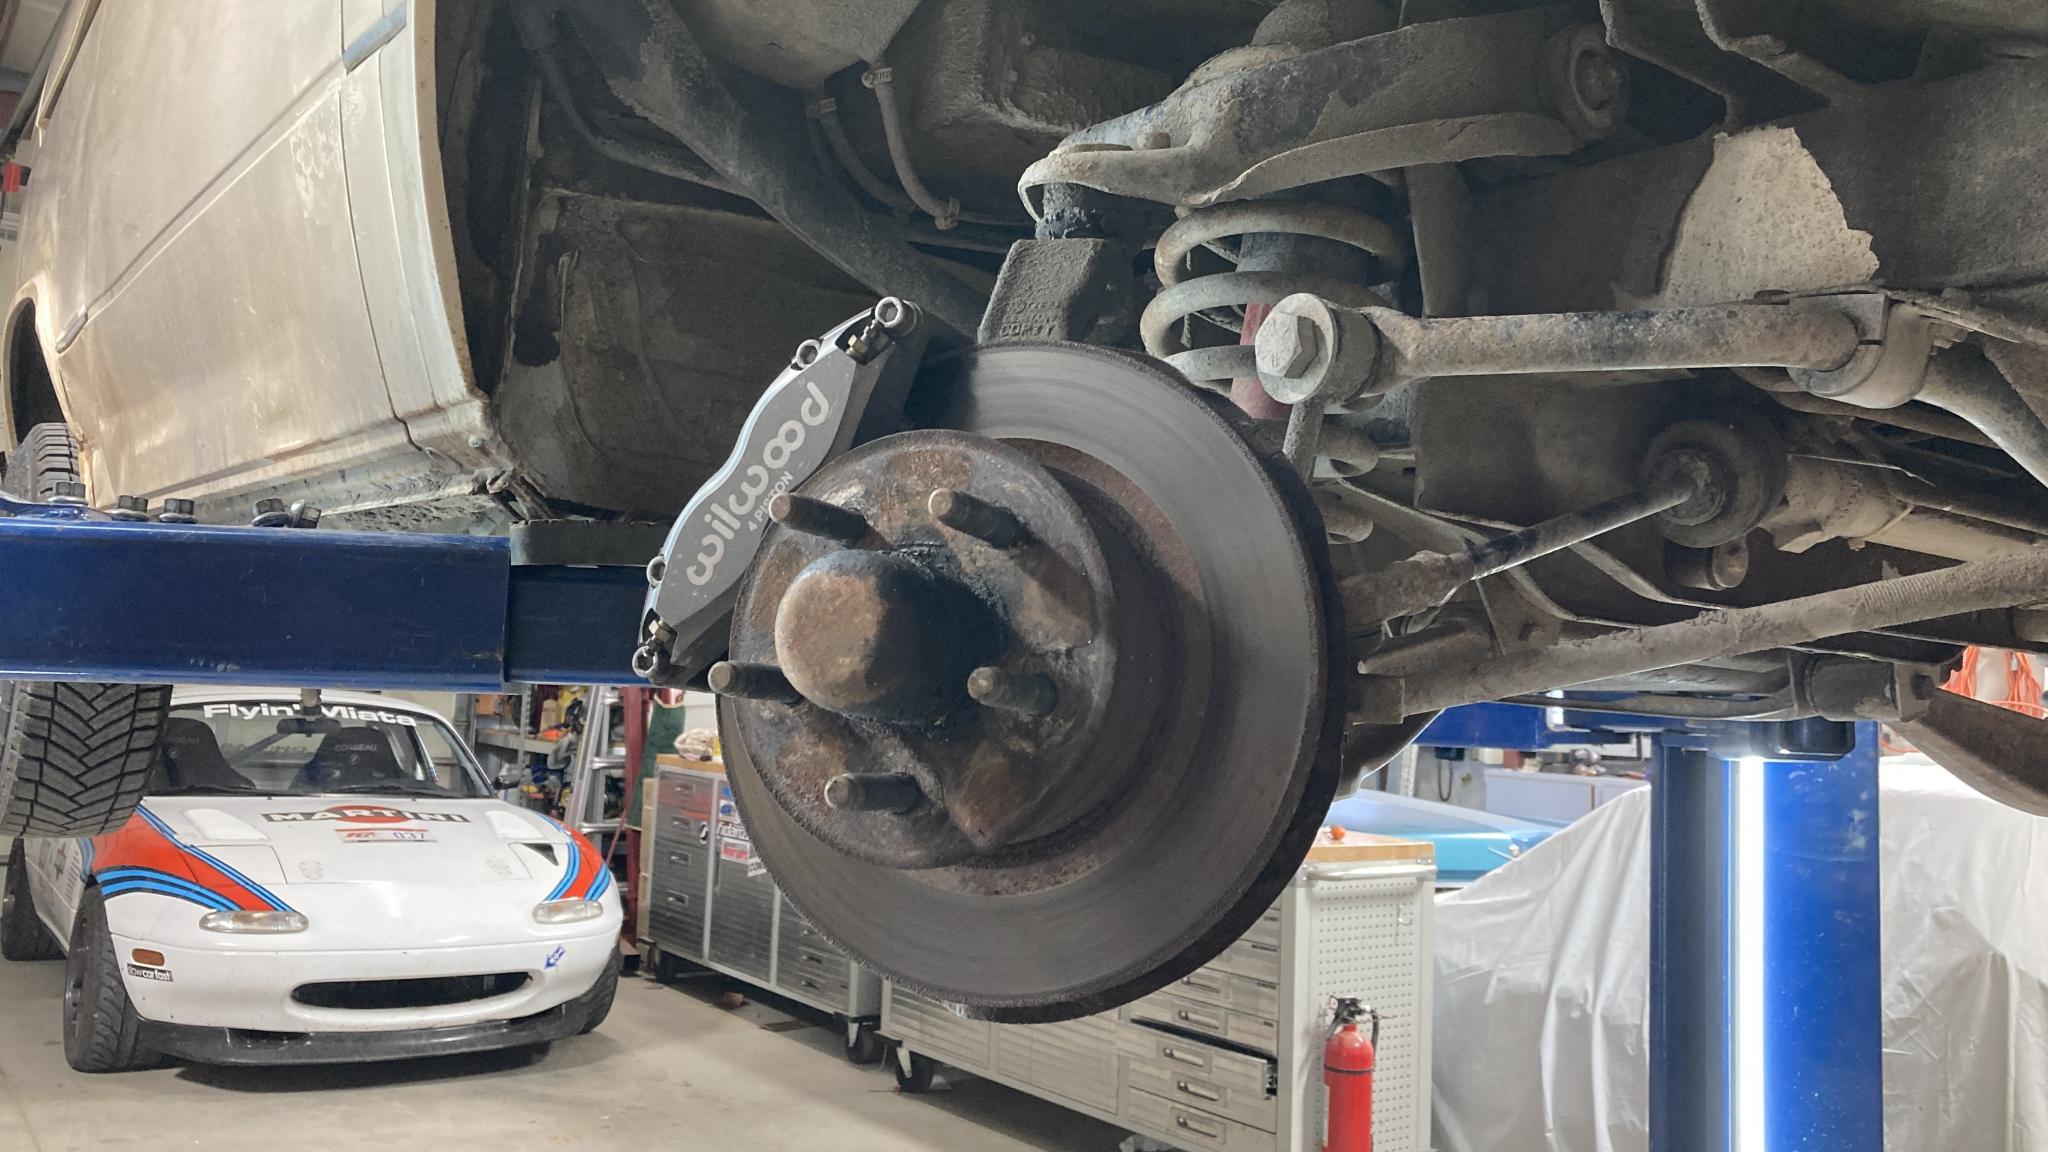
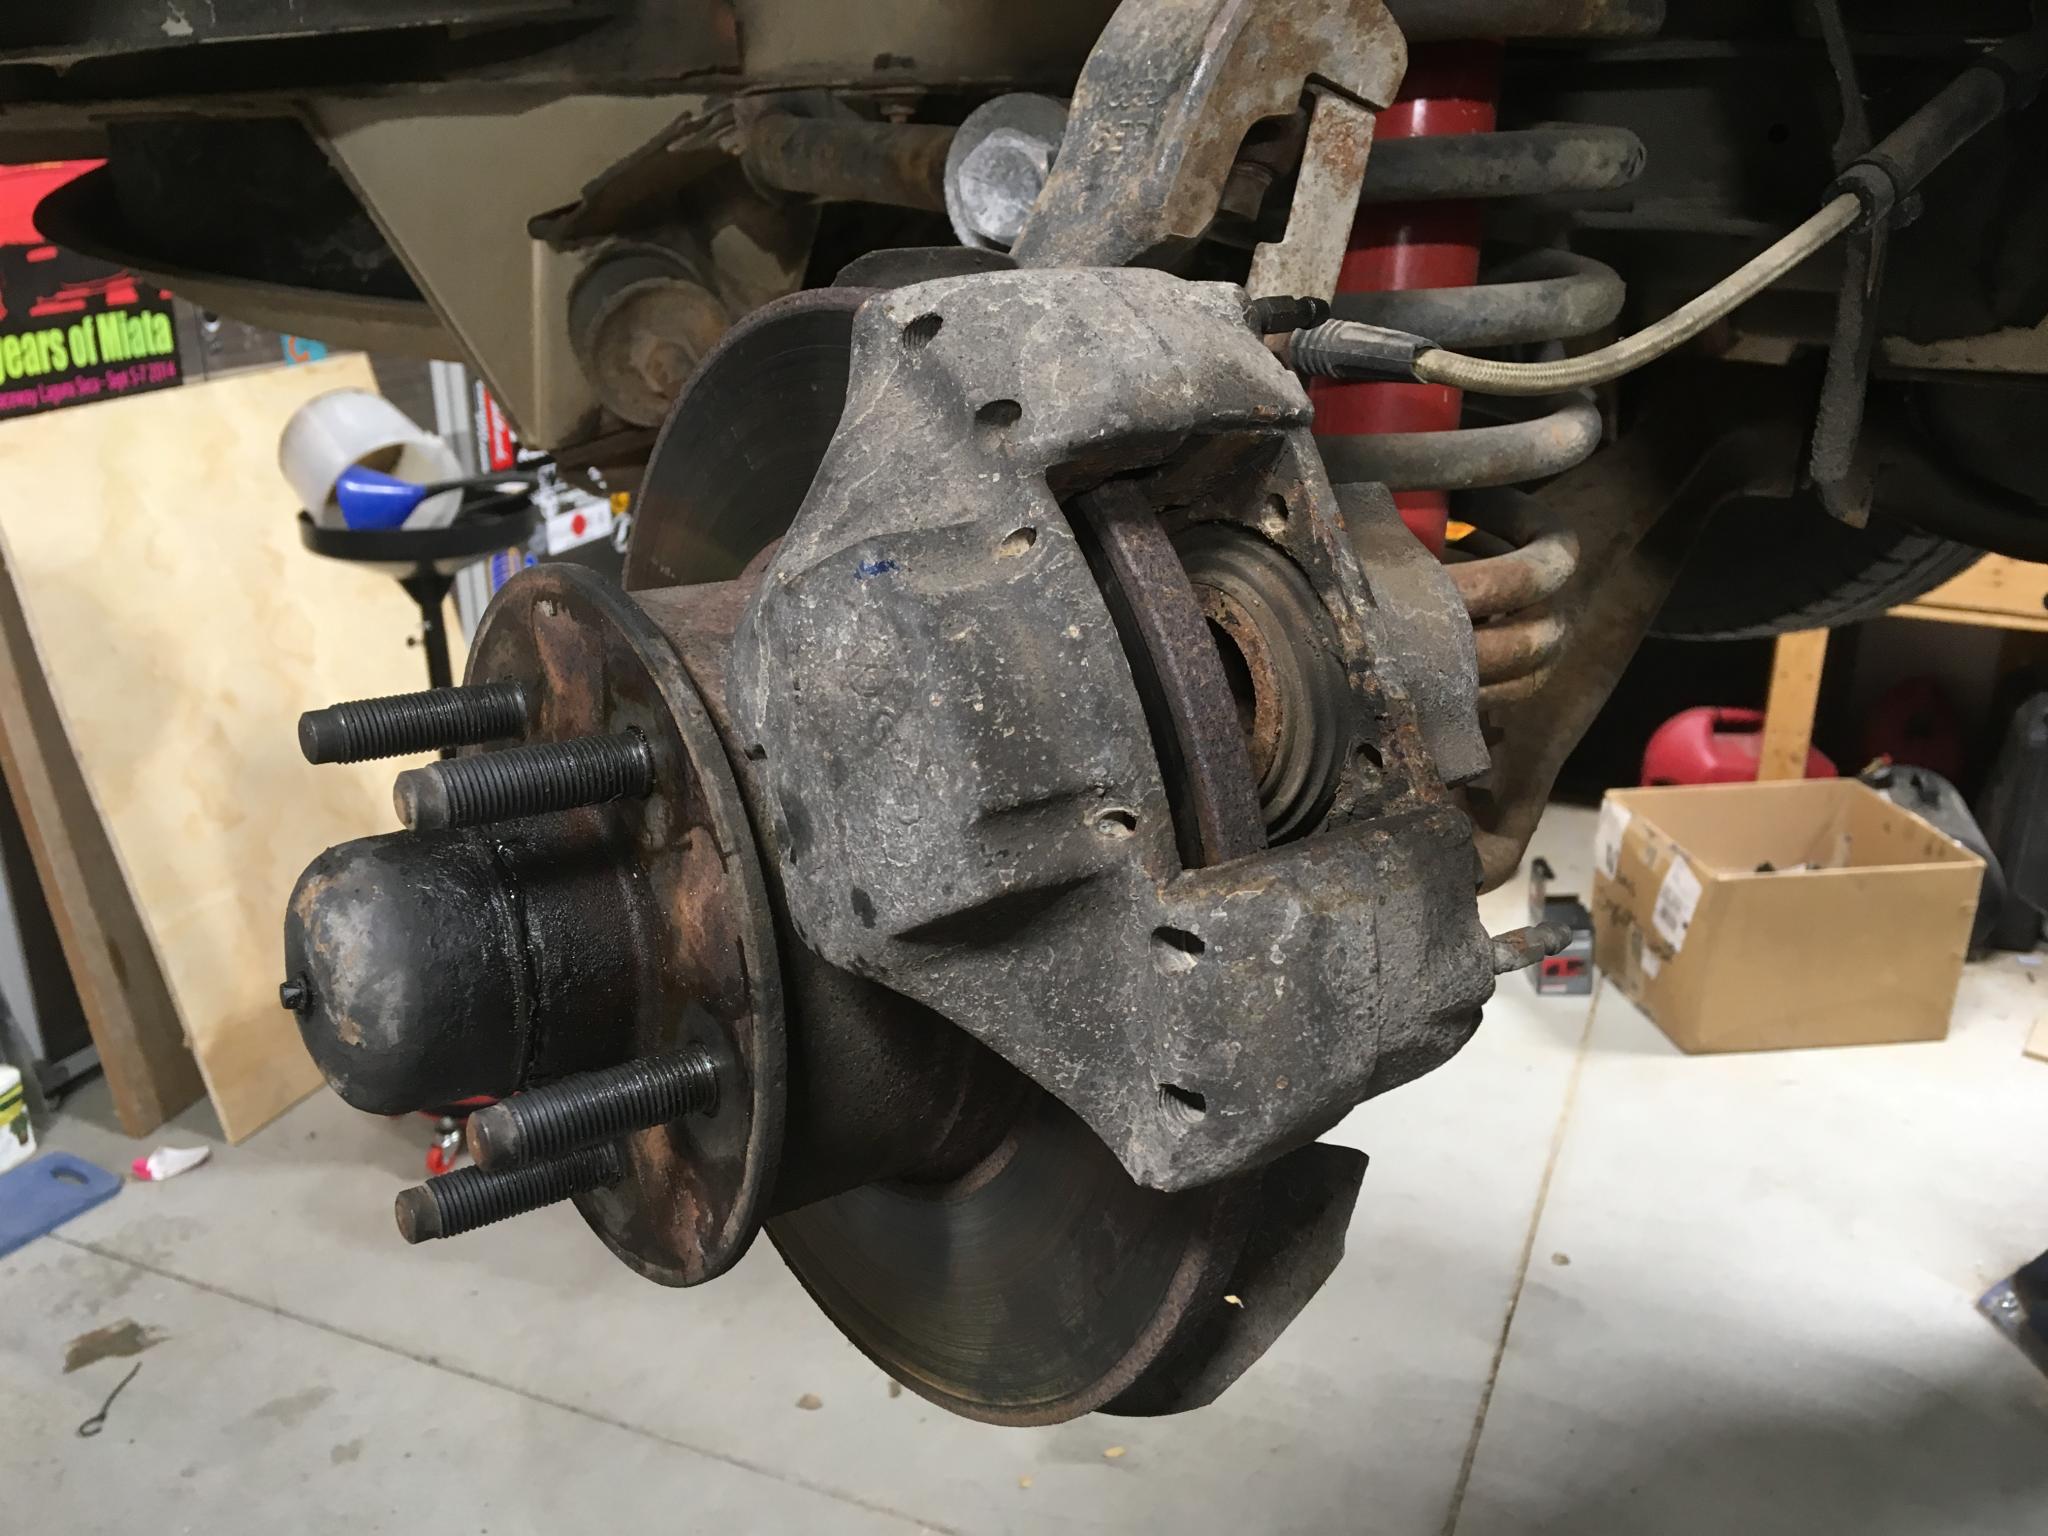
Time to take off the old hotness.
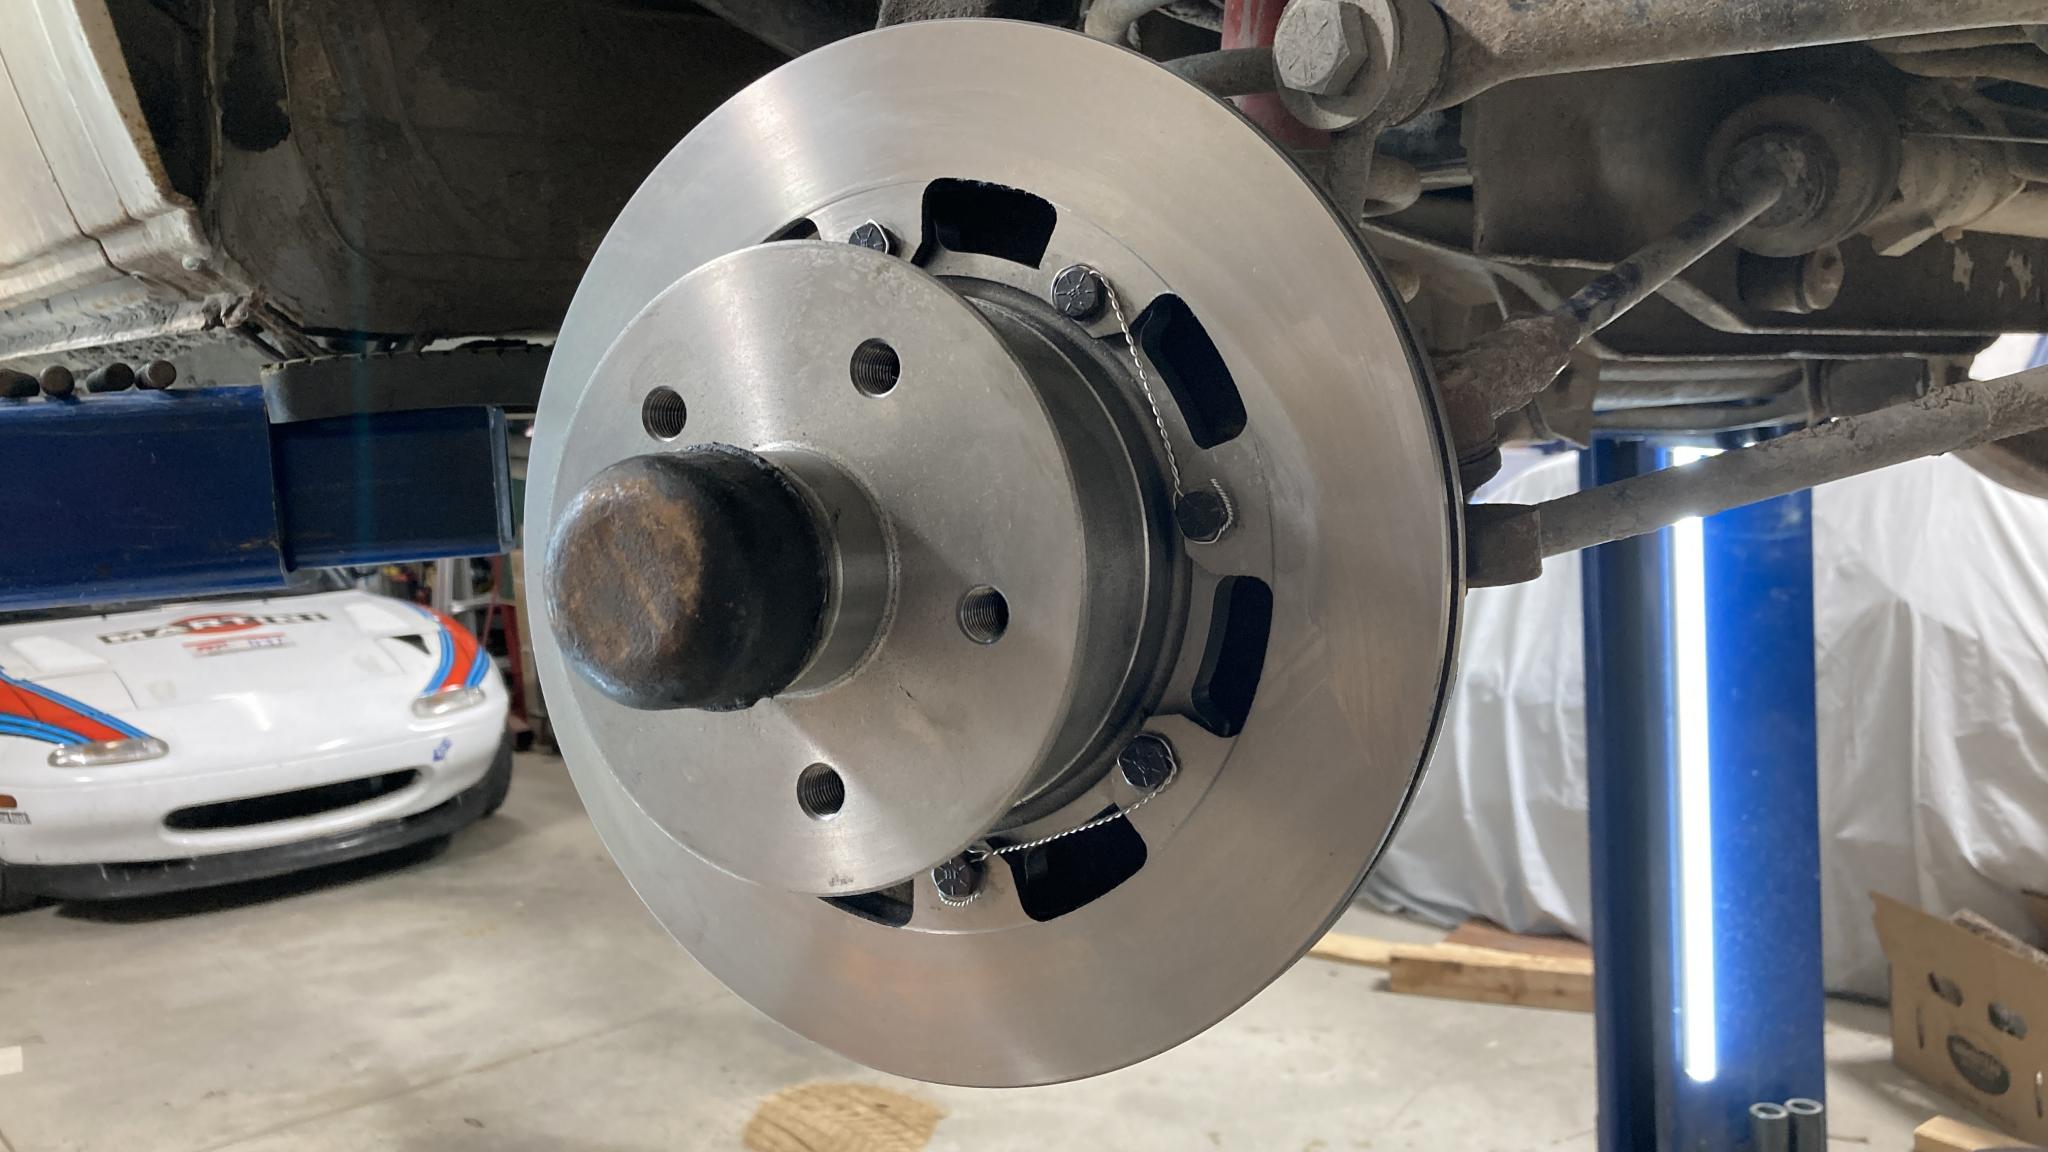
After much messy futzing around with wheel bearing grease, we have some of the new hotness in place. No pictures of the intermediate steps for very obvious reasons.
That safety wire cracks me up.
Then it's time to bolt up the calipers. As expected, I needed to trim off a small bit of the dust shield - a triangle about 3/4" tall.
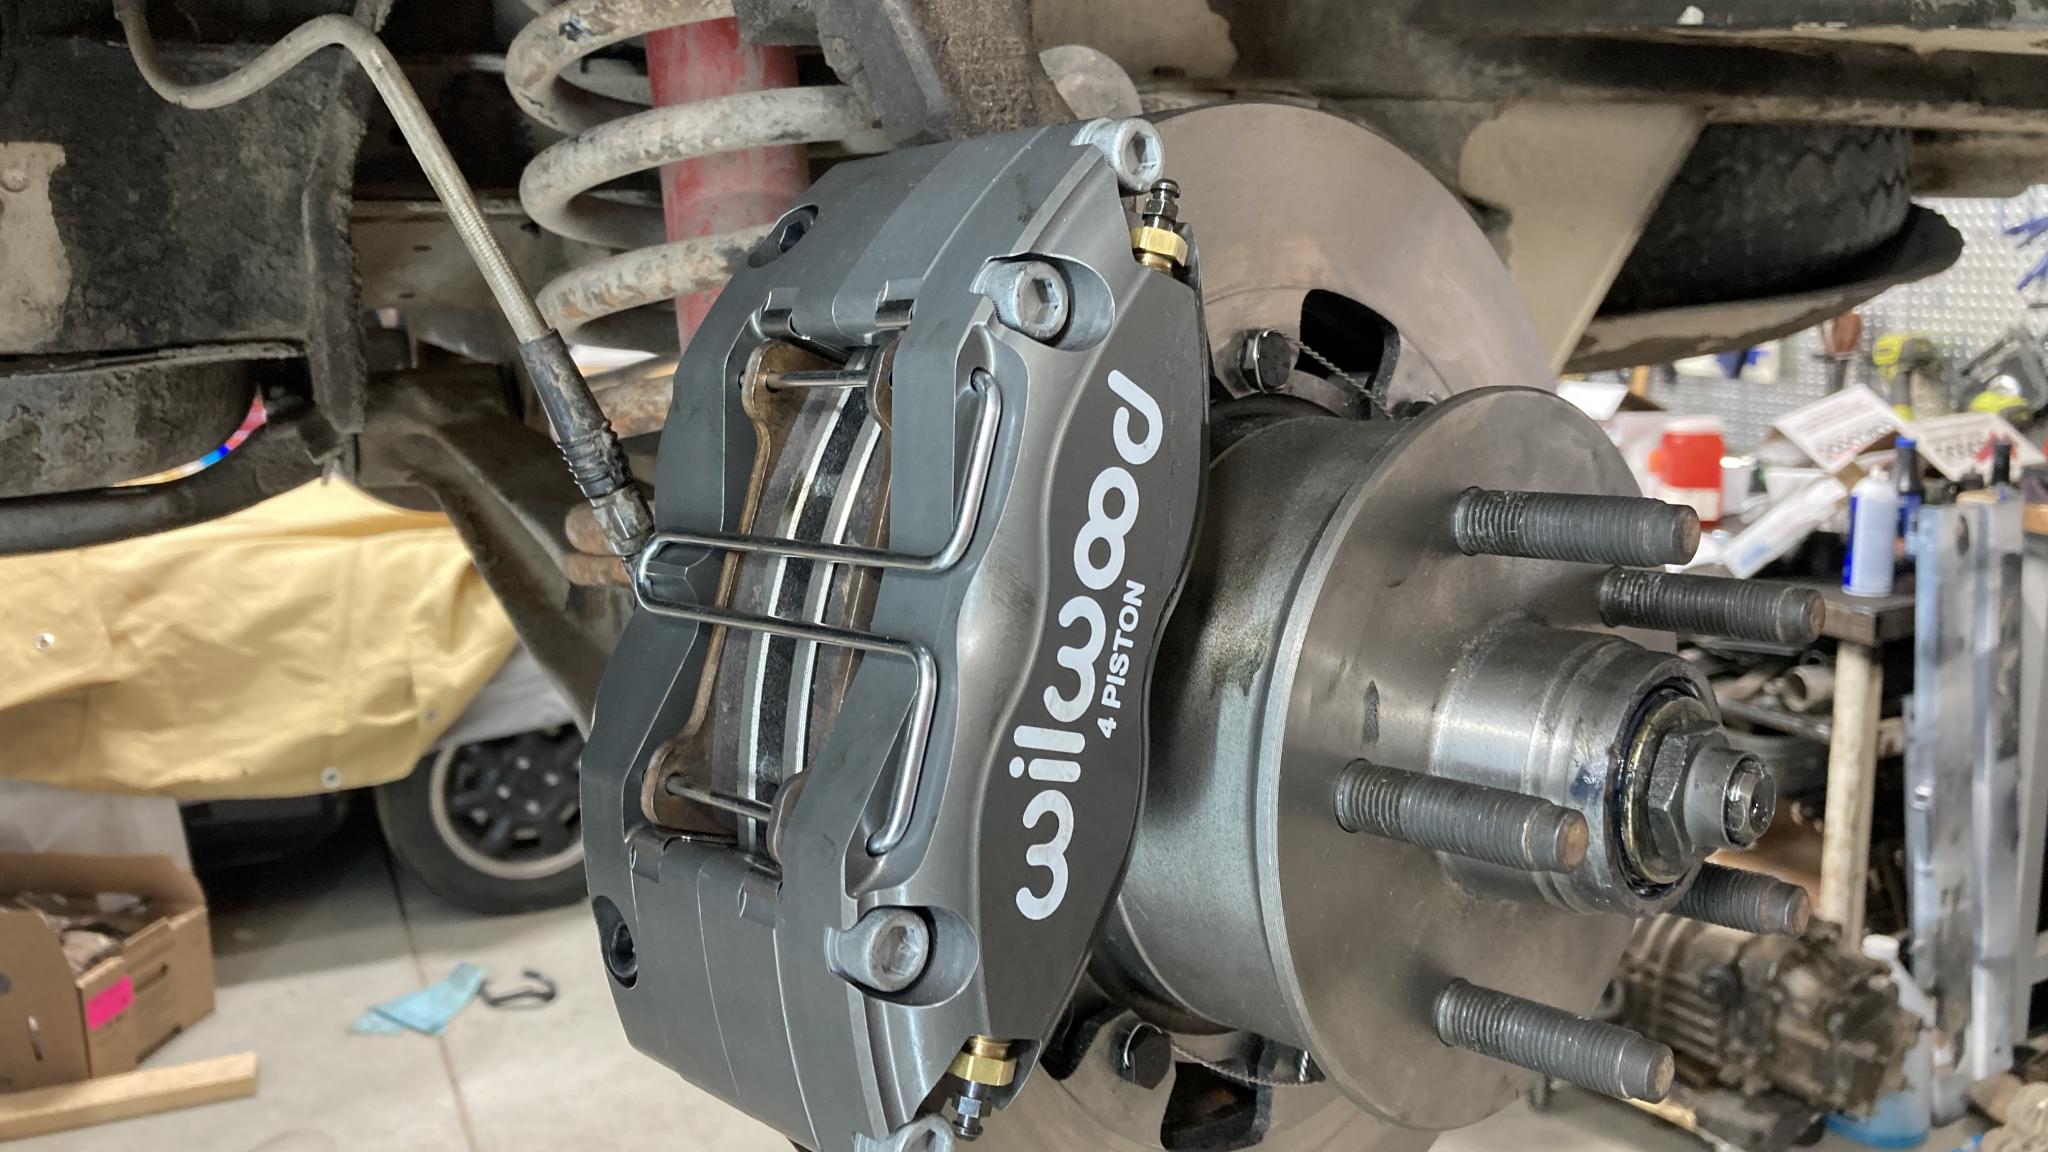
Gave the rotor a spin...and it bound up. Uhoh. Turns out it was hitting the caliper. A 1mm (0.040") shim and it cleared again. On the other side I used a slightly taller 0.060" shim set because that's what I had.
I pulled out the printed caliper brackets and started pulling dimensions from the model. And it looks like my printer is just a little bit off on the Z axis. Only about 1%, but that's enough. I suspect it's because I always calibrate with a 20mm cube and if the first layer is funky, I don't see it. I should print something bigger and check. Rookie mistake. So the print was a bit off, leading to the model being a bit off, and then Slippery made a perfect copy of the model.
The good news is that it's really easy to space out a radial mount caliper with shims, and Wilwood even does this on some of their big brake kits. So we move forward for the time being.
And voila.
Brake lines were an already solved problem in the previous generation. This swivel fitting allows the brake hose to move around more easily and prevents a possible spring/hose interaction that would have poor results.

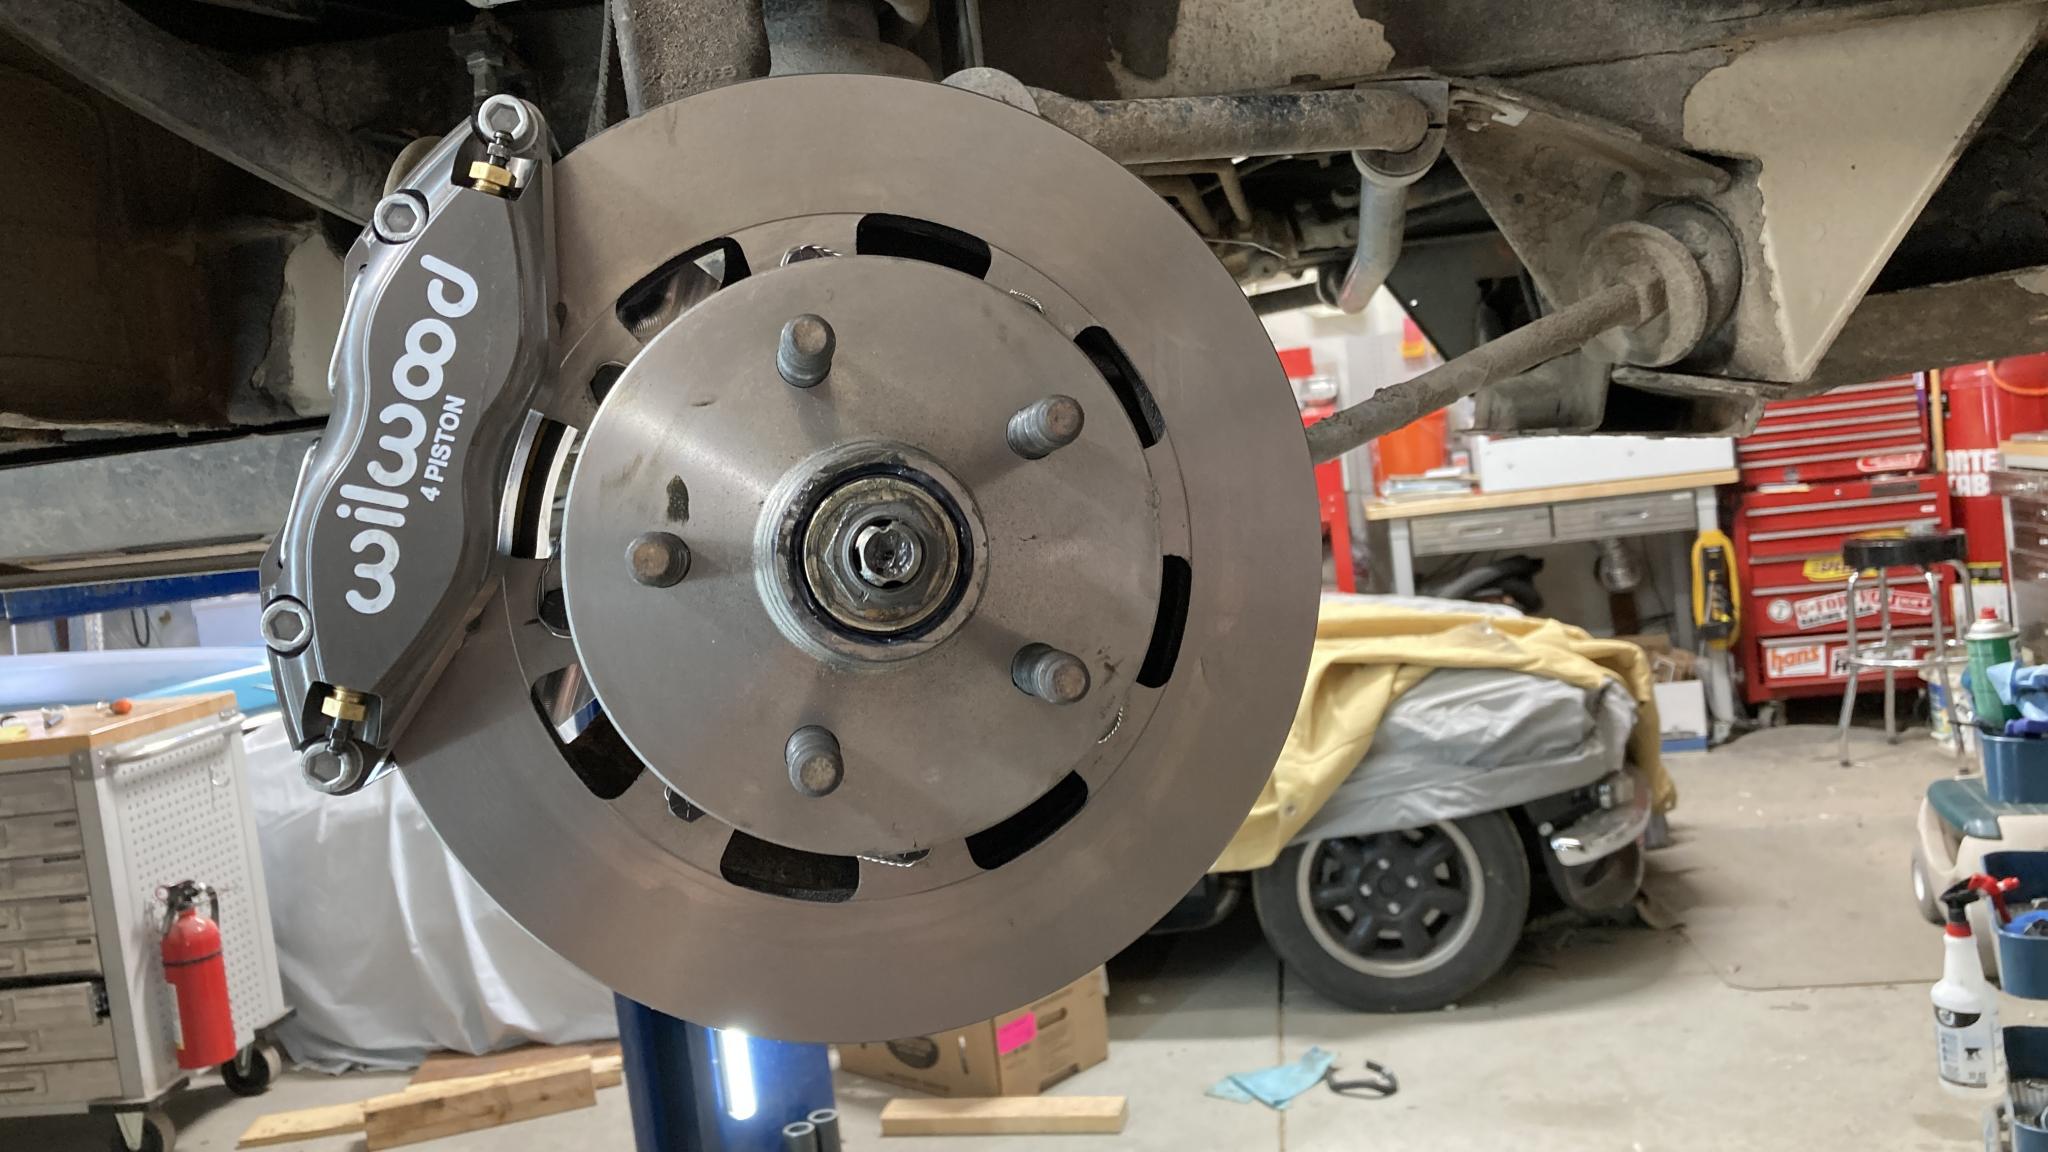
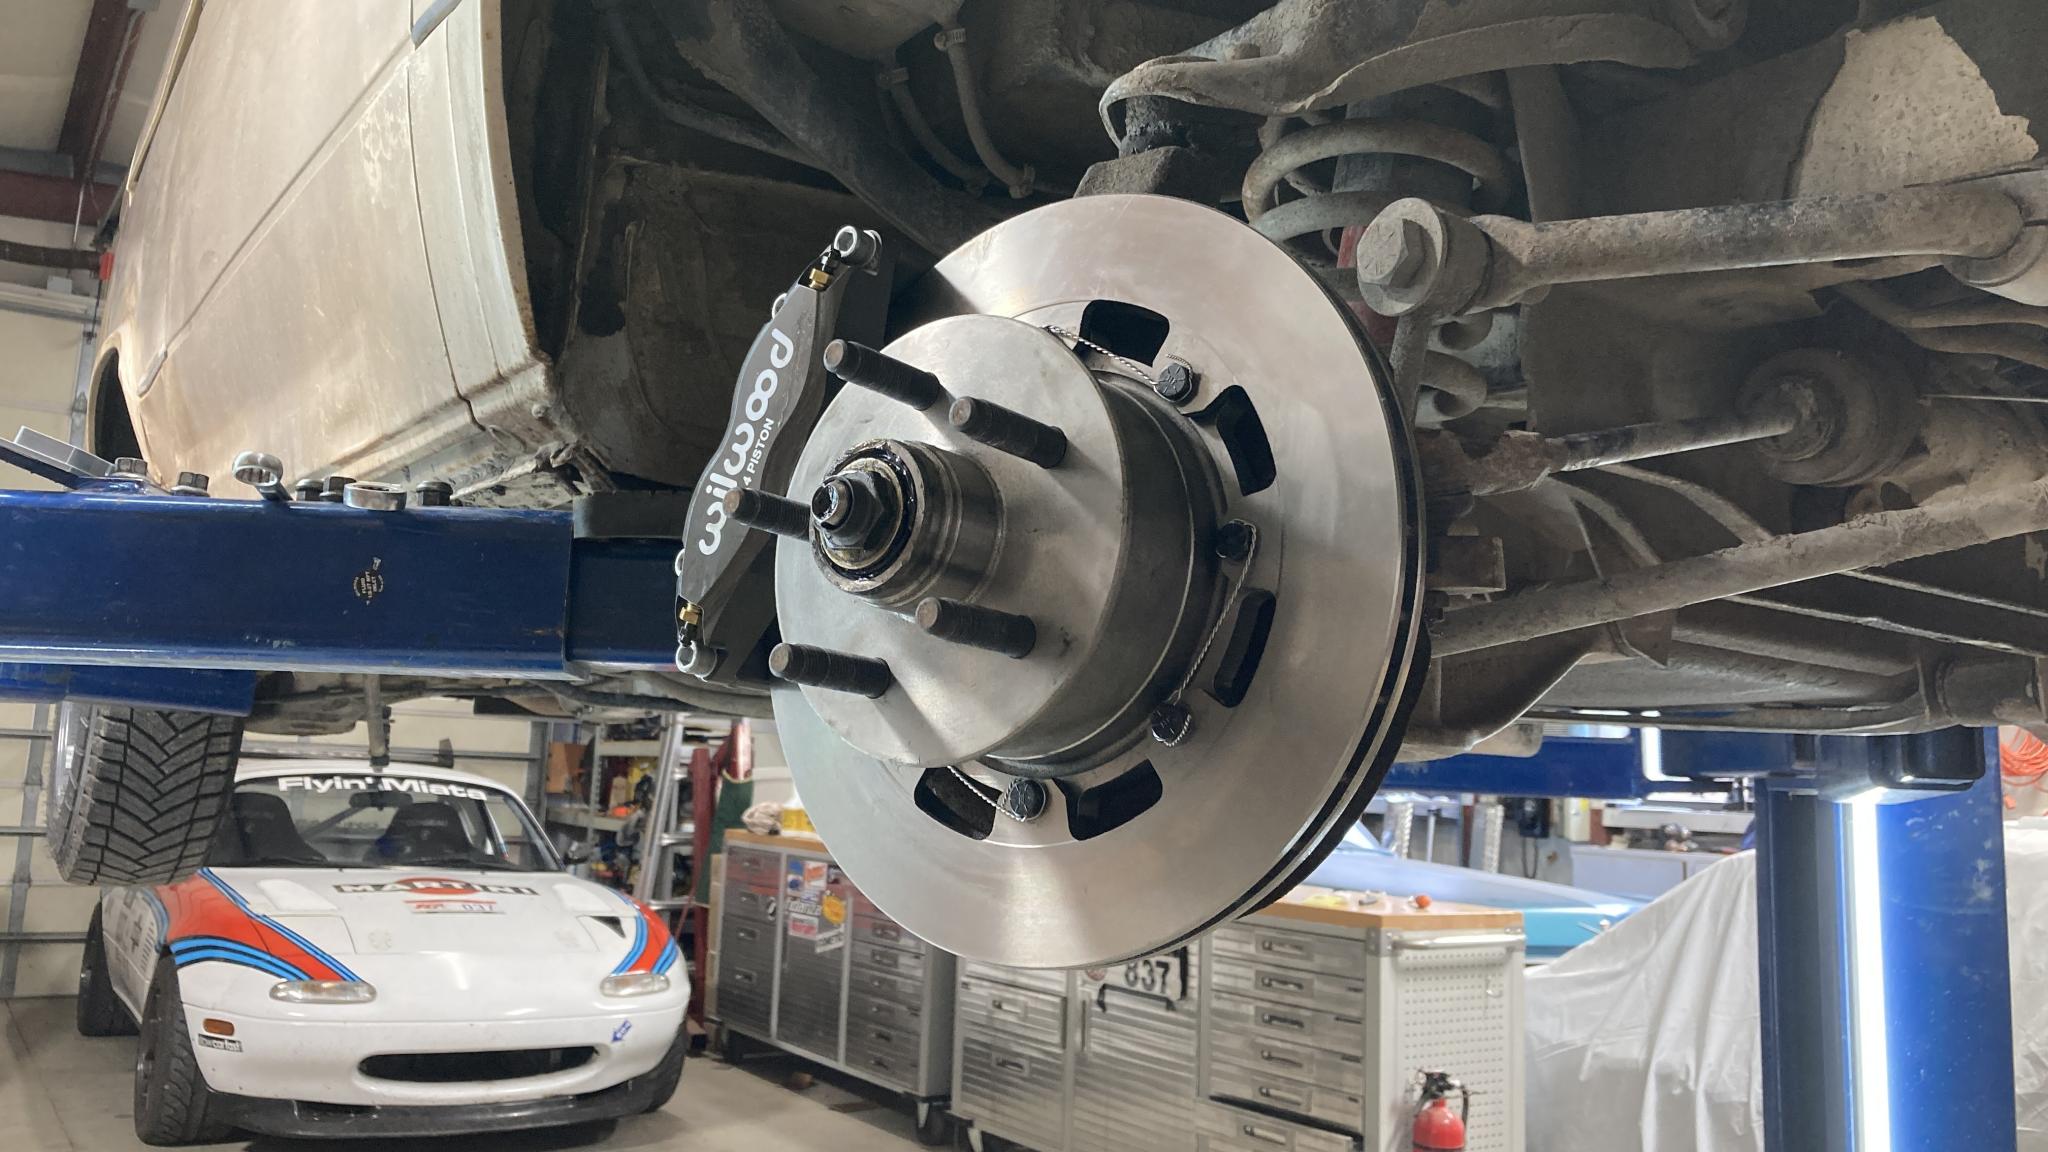
Glamour shots.
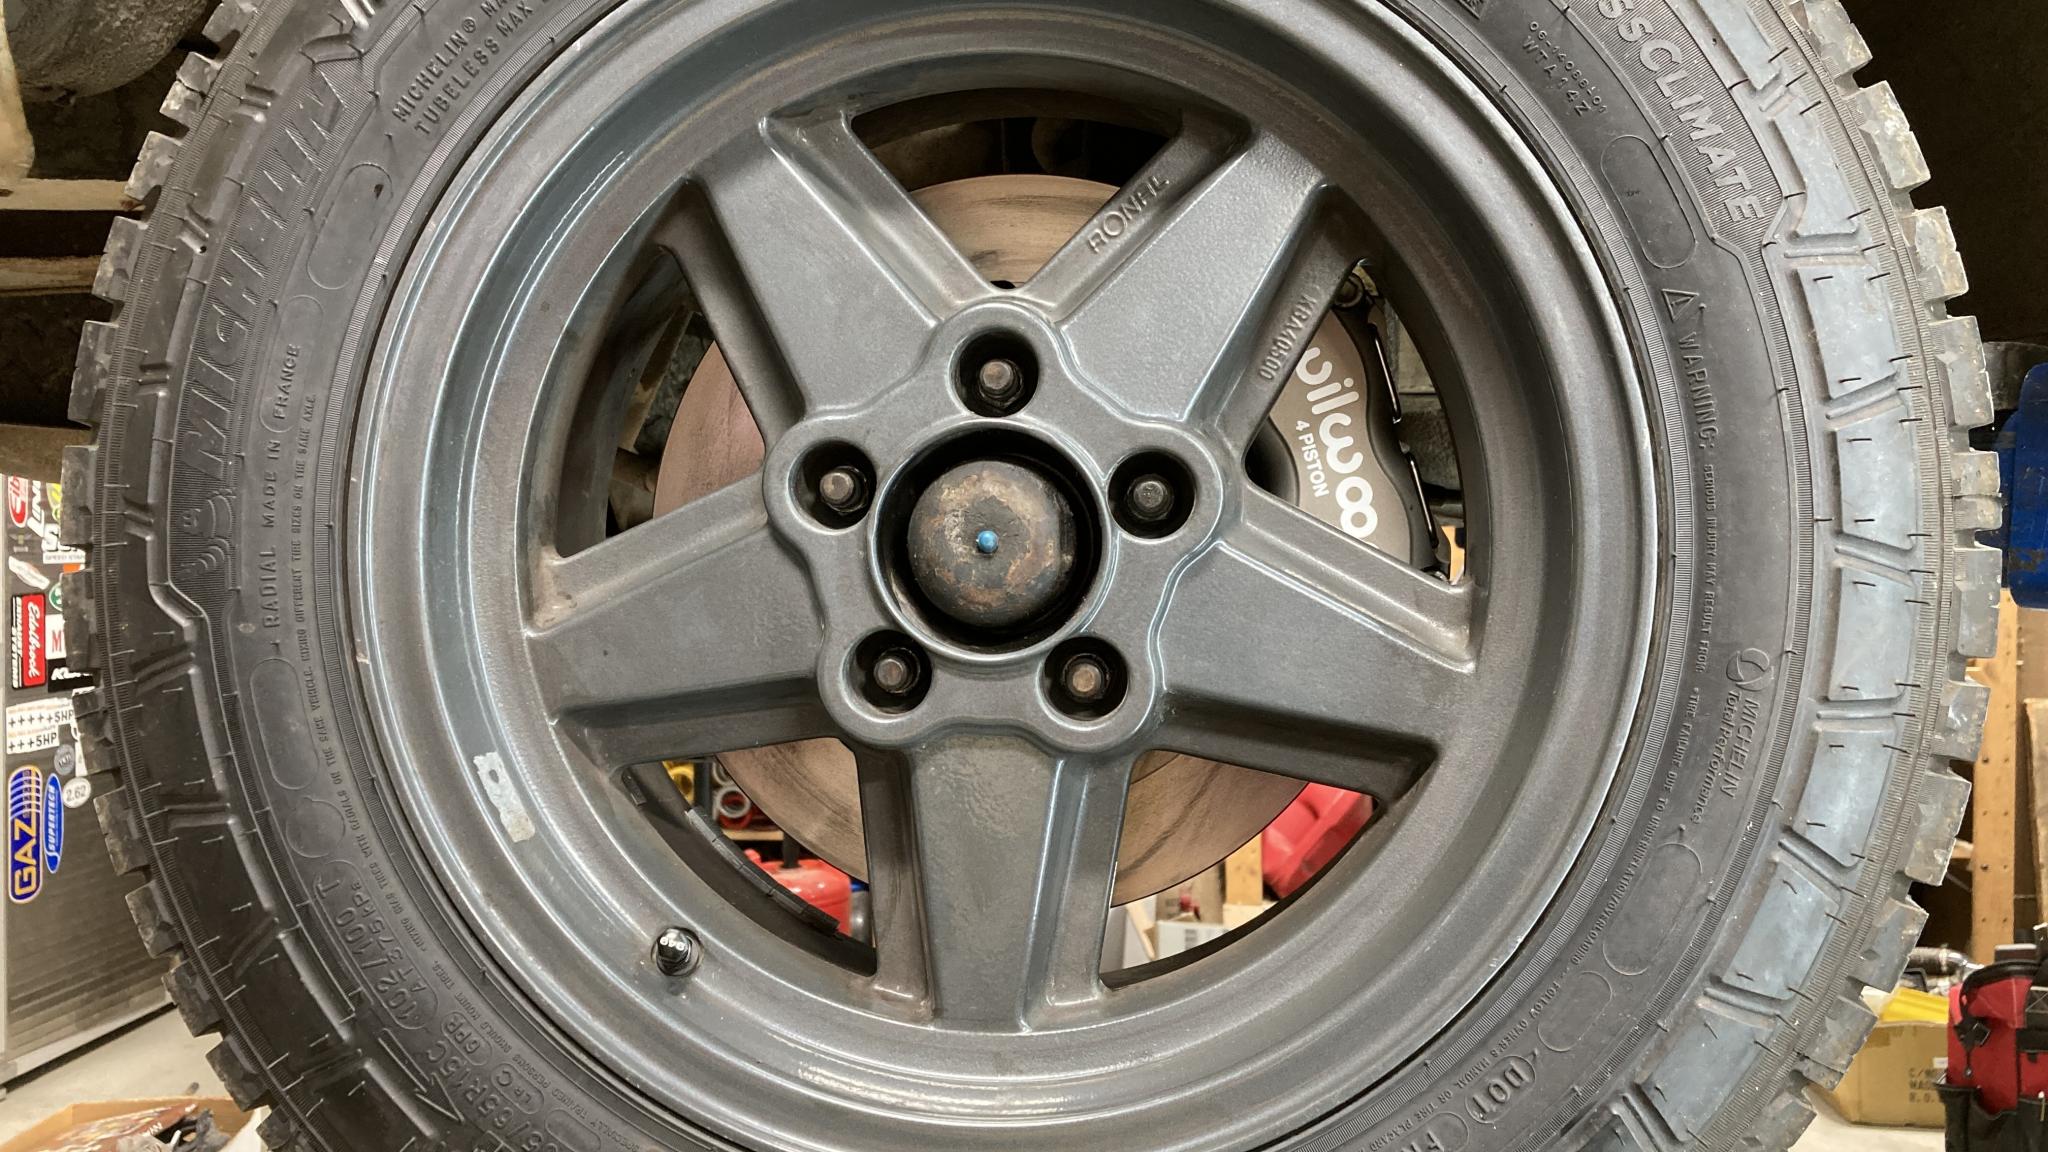

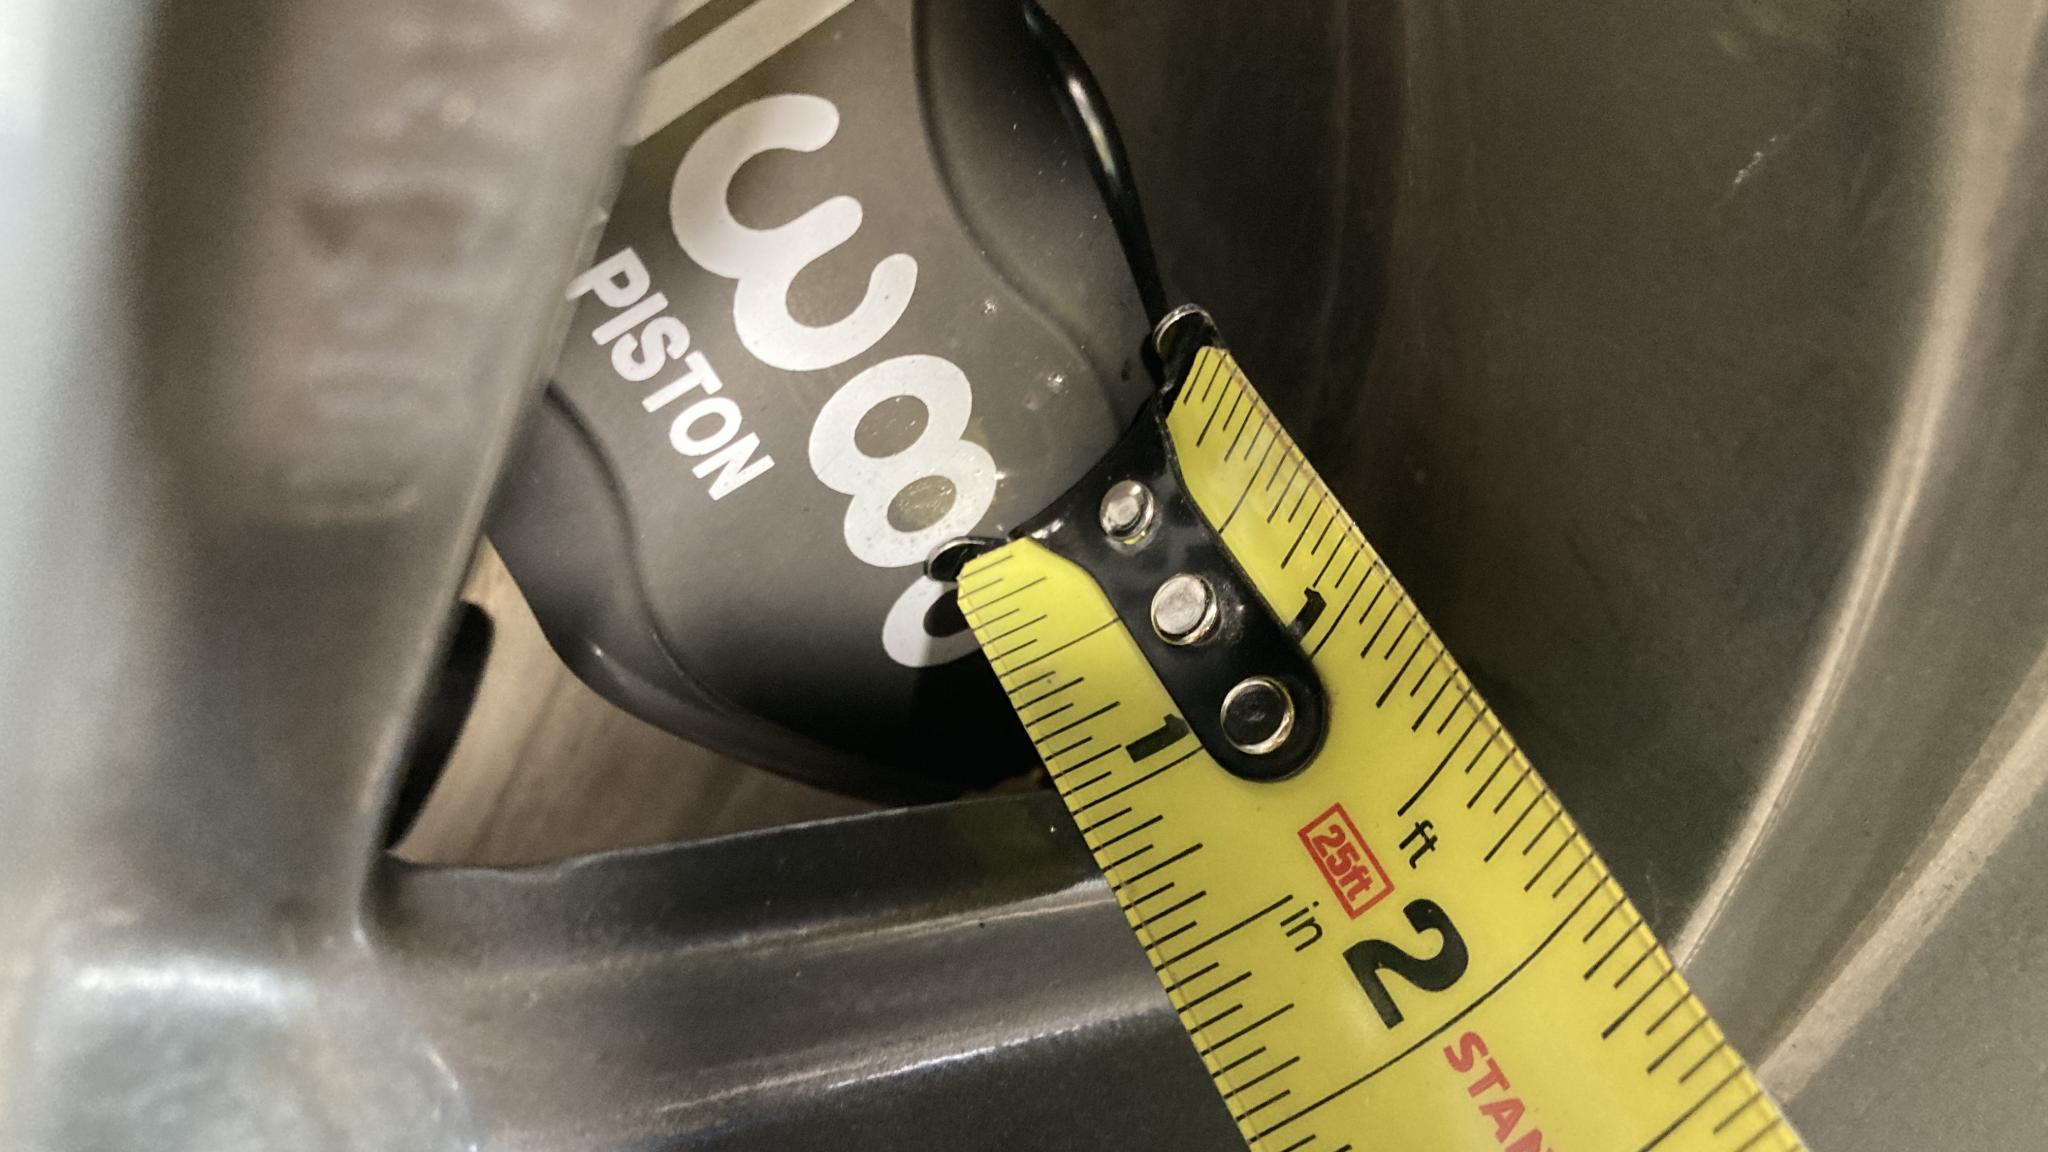
How's the wheel clearance? When you can check with a tape measure, pretty good :) 7/8" of an inch. In fact, I think I have 15mm more clearance than the stock caliper does.
Drive report: The rotors need breaking in :) And I'm not sure those pads are super-happy, I might grab another set to toss in. Everything's a little low friction at the moment. Pedal feels a lot like the previous one, which is not surprising as it's the exact same caliper specification other than the width. I'll get a dozen or so miles on it around the deserted local streets then pull everything apart for an inspection and pad change.
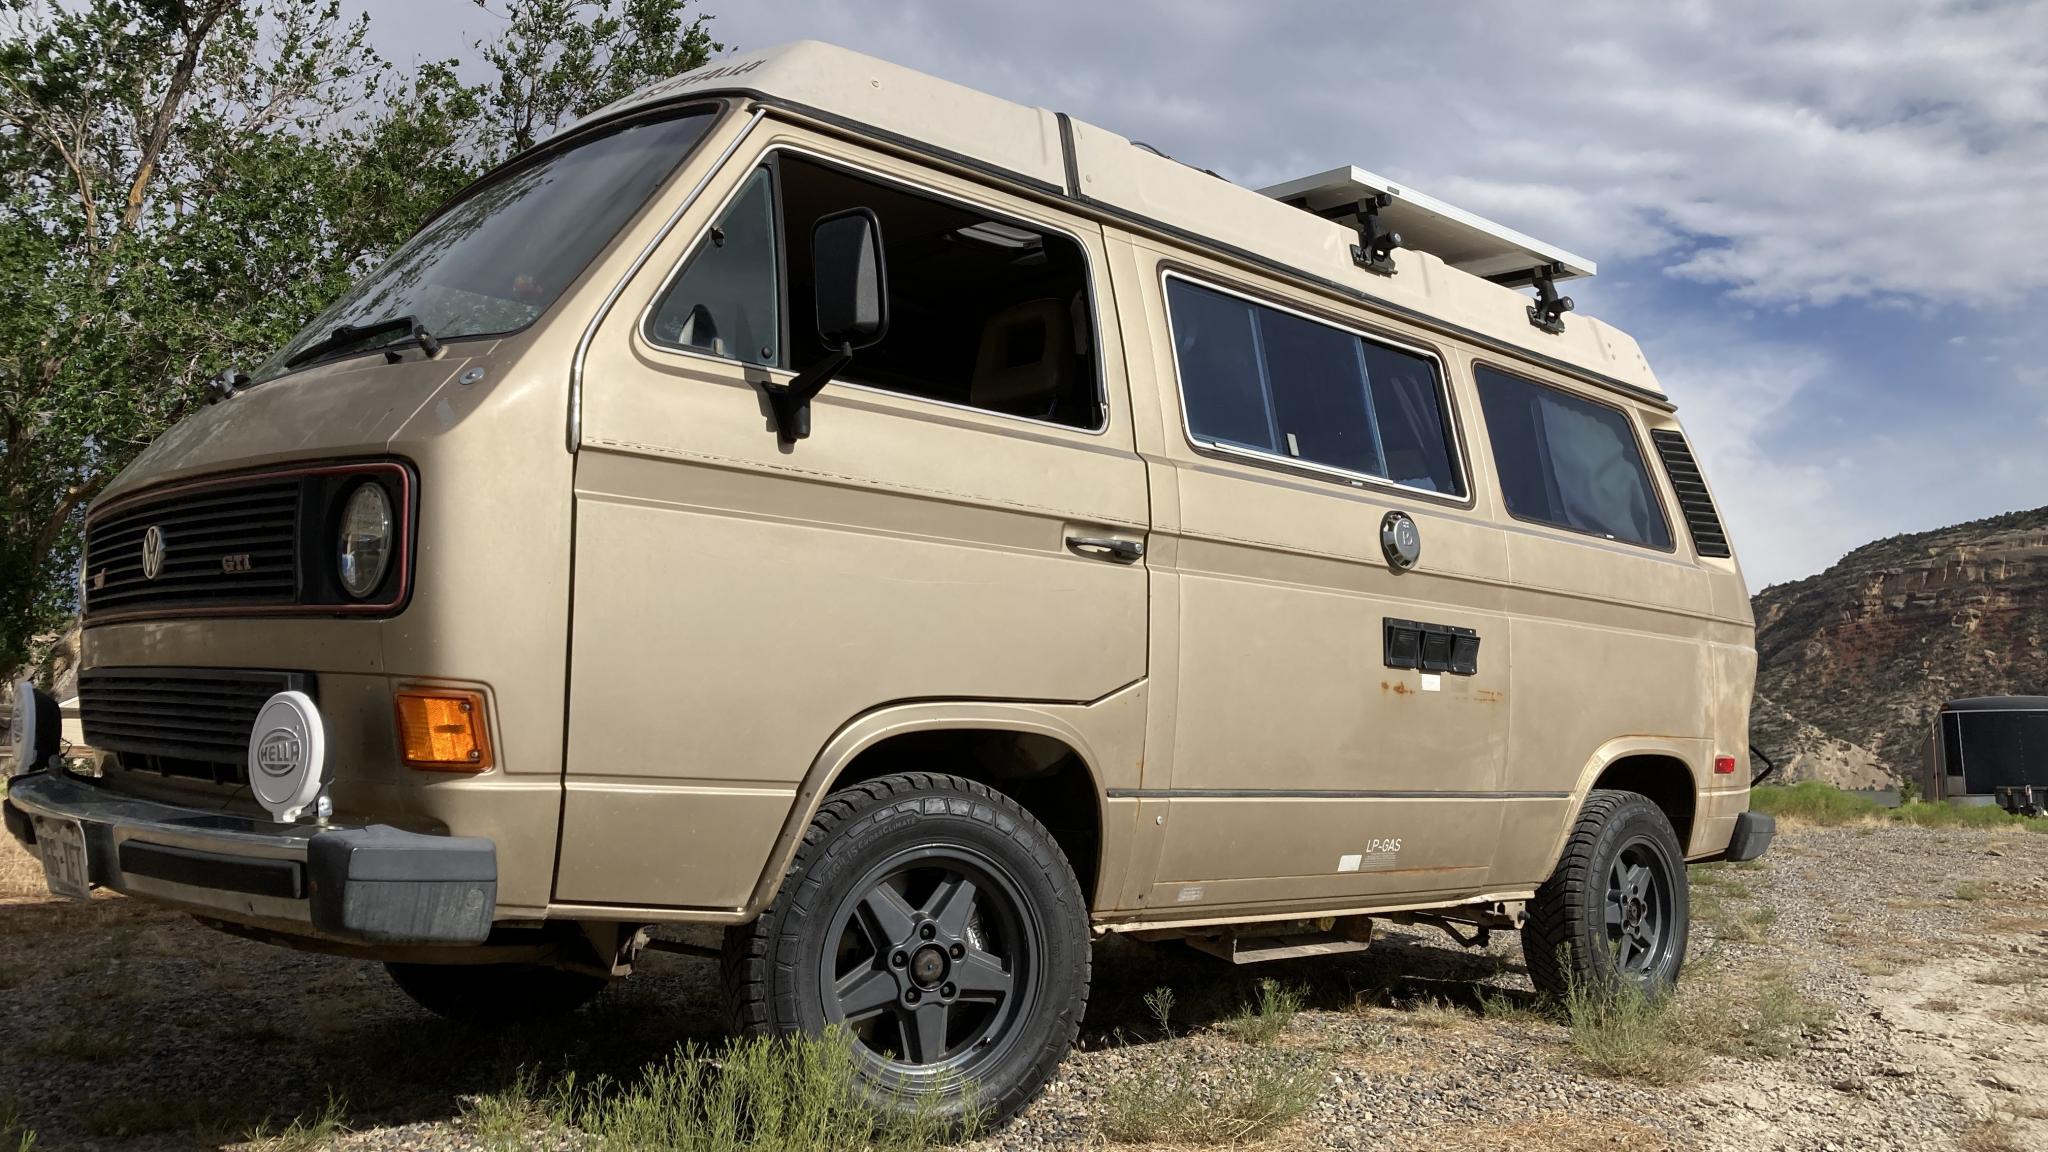
Gratuitous triumphant van shot.
Why didn't the clearance problem with the rotors show up when I tested it on the spare spindle? The same one I used for all my development? Hmm.

Ronals and wilwoods on a vanagon. I love this place.

Looking great!
The spare spindle was most likely from a different batch originally and maybe the machining tolerances are large enough to cause the problem. I doubt the holes that the factory caliper attaches to have a super tight location tolerance ...
You're probably right, it wouldn't take much. I suspect 0.5mm would have done it, and based on this picture of the original brakes it's pretty clear that the tolerances were probably measured with a tape measure. Look at how much of that friction surface extends beyond the pads. That makes me feel better :)
You'll need to log in to post.


