This is a collection of cheap and dirty bodywork tips in effort of having a daily beater Miata.  This is my winter beater, and it started cheap :)

The victim:

It's a 96 Mazda Miata with ~ 180k on it purchased for $1200 last January (2019). The PO was planning on doing a paint job, and started down that path apparently at the top, and when they got to the bottom they discovered the normal Miata rust!  Note that the nose is boogered up a bit, too.


The important part of any project is to state your goals.  Before we do that, let's inventory what I'm starting with:

Good:

  • Top w/plastic window is in good shape
  • Brakes are new
  • Tires are newish all seasons
  • Interior is okay
  • Stereo works!
  • AC and Heater work!
  • LSD!
  • No structurally concerning rust

Bad:

  • Engine burns oil (about 1 qt per 1000 miles, although it's getting better since I've been beating on it for a year)
  • Aforementioned rust on all 4 lower corners and underneath
  • Suspension is fairly shot, but it's a Miata so it rides okayish on only springs
  • Did I mention rust?
  • Exhaust leak due to rusty muffler


Now that inventory has been taken, let's state some goals:

  • All in cost of ownership is less than $2500 over 3 years.
  • Car looks at least "meh, okay.". A.k.a.: you don't immediately notice how bad it looks walking by it on the street, but it's not going to win pebble beach.


Alright, let's drive into rust repair.  I've previously detailed doing a proper butt-welded in patch panel repair on an NB on here before as has everyone who has done it properly, so how can I do it with a lot less time investment and effort?

Glue and screw, baby!   Okay, well, rivet anyway, but glue and rivet doesn't have the same ring, does it?

Here's where we're working with:

I started with patch panels from Raybuck, I think they were around a c-note apiece.

I cut away at the rusty bits, using as many straight lines as I could.  Then I slathered a generous helping of Eastwood rust converter and then chassis black.  I finished by spraying as much Eastwood frame sealant as I could inside the frame while I was in there:

That brings me to here:

Then I prepped the new panels.  My favorite method of getting the right shape is to tape up a piece of paper and do a crayon/pencil rub to get the shape of the part on the car and then transfer it to patch panel.  I don't have a picture on this car, but just remember grade school and you get the idea :)

To get nice spots to rivet the new panels in as flush as possible, I used a harbor freight flange & punch tool:

This thing is pretty cool, you can see in the picture above that there's a nice lip recessed in the part on the body. 

Here's a panel held up to fit (the back side is slathered in chassis black):

I then put a squirt of silaprene, body adhesive:

I've heard you can use construction adhesive, but I figured spend big for the good stuff, ya know?

Followed by rivets:

Then I the same to the front:

Thanks to a pair of banged up front fenders I got for free years ago!

Finally, I used some body putty to smooth that out a bit, and then put on some chassis black:

Total time so far: 5-6 hours for all 4 corners.


The next step was something I've wanted to try for a long time, doing a vinyl wrap!

I after watching a bunch of youtube videos, I decided to try Vvivid brand vinyl from Amazon. I went with Viper Lime Green.  It ended up costing about $300 all in.

I'm not going to bore you with in process pics, as there's video walk throughs a plenty.  I will say that I did damn near 0 prep to get ready. I gave it a 5 minute bath the day before I started applying it.  Here's the final result:

Shortly after wrapping the car, my lack of prep really came back to bite me. 

I didn't pay attention to exactly how bad the spray-painted primer was that the PO put on, and within short order the lack of adhesion to dust was really causing problems with the vinyl sticking.  By the end of this summer, I was losing pieces when I drove down the highway and I had to listen to the hum of edges vibrating in the wind.

So, before winter, I decided I needed to address it, and if I was going to "properly" fix it, the solution would involve sanding down the car, and at least painting it with primer..


I've always wanted to try doing a car quickly with a roller.


New plan:. Give tractor paint a go!

I haven't been able to find a good tutorial on doing a roller paint job, only a lot of references.  I'm hoping this serves a good guide for people.

My goal for this part of the project:

  • Less than $150 smackers
  • Less than 25 hours of work
  • "Meh, okay", doesn't stand out

Bonus objectives:

  • Shiny

So to start I had to hit all of the surface with a good sandpaper.  I'm not going to bore you all with pictures of sanding, but I will say if you look at the original picture in the thread or the front bumper picture above (wrapped) you can see how rough, thick, and flaky the paint was.

I hit the bumpers with up to 80 grit on a little palm sander to knock that all down.

Before I primed and finish sanded, I attacked the bumper issues using JB weld plastic epoxy. I ended up using 3 packs total.  I built little dams out of painters tape lined with foil to help build up the area (sorry, no pics).  Sanded it all down and then puttied it to blend it in.

Then I sanded everything with 180 to even the car up and finished with 220 for a primer coat.

This probably took about 10 hours.

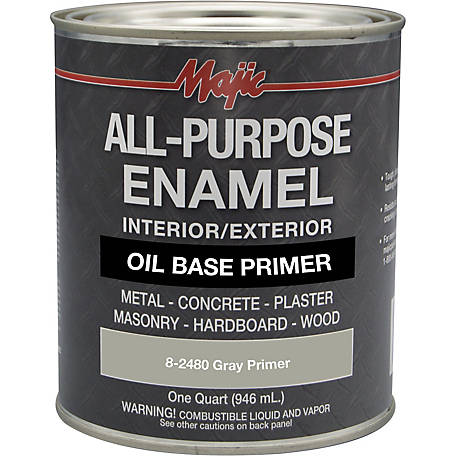
After a trip to my friendly Tractor Supply, here's what I ended up buying for primer:

I put it on with a fine nap roller.  But I made a fewmistakes!

  • I used paint thinner instead of mineral spirits, and the thinner flashed off by the time I got around to the back of the car.  Use mineral spirits!
  • I used a "smooth finish" tight nap roller.
  • I didn't thin it enough.

All combined, this left quite a texture:

So out came the sand paper again, and I hit it quite aggressively.  Starting with 150 and again finishing with 220.  I think I spent about 2 hours sanding.

That worked okay, still pretty textured, but onwards!


Overall, the primer seemed to take a long time to dry (I was only working on it after 10 pm, so maybe warmer and drier conditions would have been better?) And it had a decent texture left.  Next time I'll probably try a rust-oleum?

So, lessons in hand, I made sure to grab the "smoothest finish" small (4") roller they had at the hardware store, some paint tray covers, a handy 2 qt mixing cup, and some new stirring sticks.

My earlier trip to tractor supply yielded these gems for about $50:
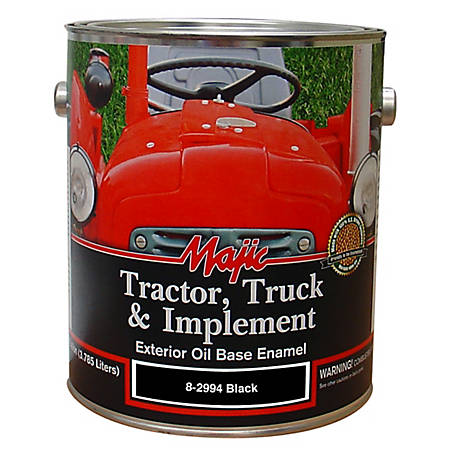
 

And so I began my wonderful adventure. 

First thing to know about this paint is that it is THICK.  Like, we're talkin "Dammmmmmmmn giiirl" thick.

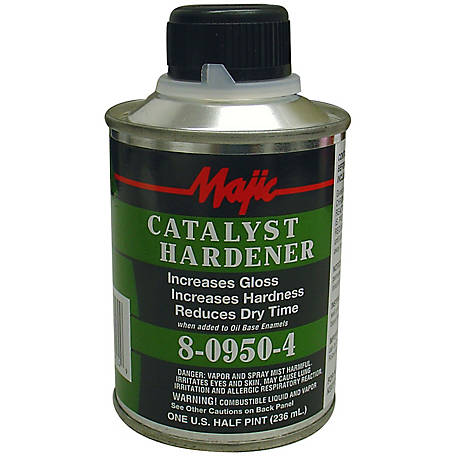
I couldn't find the golden ratio to mix anywhere, so I started to guess.  I first poured 1 qt of paint, and that .5 pt of catalyst is for a whole gallon, so I poured in a bit over 2 oz of that (60 ml).

Then I started mixing in some mineral spirits.  I started at about 4:1, so I was somewhere near 8 oz of it.  I tried that for the first coat.  

---disclaimer:. My expectations were so low that I did NO prep to the environment besides a basic sweep up the week before.  I mean, look at the sawdust in some of these pictures.  I just finished making three beds and a bookshelf in here!  ---

It turns out that this was just too thick, so it went on with more texture than I wanted.  Here's the the first coat:

Not bad, but more texture than I was hoping for.

I let that sit overnight.   The next day, it as dry enough to do my second coat. 

As I mentioned, it was thicker than I wanted it to be, so I mixed in another 4th (8 oz) of mineral spirits.


That's the ticket!  This stuff flowed a lot nicer and did a pretty darn good job of self levelling!


One tip I found is to use a foam brush to do the detail work and then blend that in with the roller.

And of course, enjoy the bugs!

If you get something like this, grab the foam brush and work it down a bit.  You can blend it in pretty acceptably.

For car prep, I removed anything that took less than 5 minutes to remove and made the job easier: marker lights, gas cap, windshield washer nozzles, headlight lids, tail lights and trim panel, top rubber seal along the a-piller/roof, and frankenstein bolts.  Anything that took more effort was left on and masked with tape such as the door handles, mirror bases, windshield gasket, trim along top/door glass. 

Here's the assembled car:

Here's what those repaired rocker areas look like:

I'd say that meets the goal!

Dusterbd13-michael (Forum Supporter)
Dusterbd13-michael (Forum Supporter) MegaDork
11/24/20 8:09 p.m.

50/50 to spray with a 9.99 harbor freight gun. Add a splash of hardener 

Dusterbd13-michael (Forum Supporter) said:

50/50 to spray with a 9.99 harbor freight gun. Add a splash of hardener 

Spray would have required me to clean the garage enough to not kick up sawdust everywhere and would have made it so I couldn't paint this year due to temperature. I'm guessing it would have taken at least 10-20 hours to clean the garage well enough to use an hvlp gun.  Plus I would have all the cleanup and such to go along afterwards.

I have a lot of young kids, so this was all done at 10-11 at night :)

Edit: oh, yeah, I'd have to spend a lot longer masking and prepping the car as well. 

I've done proper spray jobs before but they took me ~80 hours, and that would take me all summer at my current time allotment. I also intentionally wanted to try a roller job.

This weekend was supposed to be nice, so I decided to try a cut and buff to see what if I could get more shine just to see how far I can push it. 

I did a wet sand from the body line up (top half), 220 > 400 > 800 > 1000 over the course of a few weeknights.  I think I spent about two hours on it.  Then I set to it with the buffer and polish.

It was pretty apparent that I had two problems:. The rough primer created high spots that burned through to, and the inconsistent texture made it polish unevenly:

But that's okay, I figured this would give me a good basis for a recoat.   After a quick wash to get any wax/polish off, I set about to mask it off again.  It only takes about an hour to prep and mask a Miata for this kind of painting, it's A LOT faster than masking to shoot it.

Now I mixed up a pint, so I used about 1 oz of hardener and 8 oz-ish of mineral spirits.

I also switched to a foam roller, as they were back in stock at the hardware store.


One thing to note if you do this:. When you first paint, you're going to get bubbles:

Don't panic! 

2 minutes later:

And 45 minutes later (after painting the rest of the car), it's dusty but not bubbly:

That gave a pretty decent finish this time:


Absolutely good enough for my goals and amount of effort I'm willing to put towards this beater.


Total cost of this paint job was around $110 including sand paper, and right around 25 hours.  It would have only taken 20-22 if I properly thinned the primer & first base coat, and did a wet sand between the first and second coat.


Hope this helps someone!

cdowd (Forum Supporter)
cdowd (Forum Supporter) Dork
11/25/20 9:48 a.m.

That looks awesome for the money any time exerted!

TED_fiestaHP
TED_fiestaHP HalfDork
11/25/20 10:14 a.m.

   This really turned out great, interesting process.   Kind of brave using black paint, black is the least forgiving color, somehow it just shows flaws and defects more than any other color.

     I am currently using some paint from Summit it is fairly cheap, but yes your method would take a lot less time.

In reply to cdowd (Forum Supporter) :

Thanks!  That's what I was going for! 

In reply to TED_fiestHP :

Yeah, I was really tempted to go green or blue, but the car was originally black, so all of the door jambs, engine bay, etc. are already that color. 

I'm guessing at this point if I wanted to change the color now that there's a good base, I could probably do it under 5 hours though.

You'll need to log in to post.

Our Preferred Partners
midZ7Ufh1lcaSz0kJfEJr4o1Zix400yrMSe4E3BhRhOioFZQVaJsr6hemPBjwC1U