


Dusterbd13 said:Ive subscribed to the different grinder for every task. Love it.
Same.

Dusterbd13 said:Ive subscribed to the different grinder for every task. Love it.
Same.

I have around 10. I might have a problem.
I can use 4-5 doing rust repair, and probably 2-3 die grinders. Plus I just bought a finger sander. I'm also shopping for a variable speed 9" sander/polisher or 2.
Ok, definitely have a problem, but I am definitely one of those dudes that gets his jollies making/installing patch panels. And with a secondary shop space I'll need a few more so I don't have to move them back and forth so much.

I can order a new bearing for a couple dollars, so i'll probably get 1 HF grinder so i can keep working right now and then repair my old one and then have 1 for cutting 1 for grinding. I think 2 grinders is probably enough for my limited space right now lol
In reply to budget_bandit :
Check the case where the bearing sits. Most new grinders that bearing is just sitting in the plastic case and when they go bad they spin in the case, ruining it. If the new bearing doesn't fit in the case tightly they'll run for a little while but IME it's time to shop for a replacement.

Going to a decent (the cheapest dewalt) grinder has been huge for me. I warrantied the $20 grinder >8 times before switching, and the one dewalt has performed smoother, and lasted for a few years now.
In reply to Shavarsh :
i hear that. My beloved grinder is a Porter-Cable that's probably 12 years old and has been bulletproof. I just wish a new DeWalt wasn't $100...
In reply to budget_bandit :
Well done, in that case I support a bearing replacement as long as the case isn't too bad.
I sprung for the $35 8 amp grinder because the $15 4 amp grinder felt really wimpy in my hand.
The seats I have came with some brackets, but they were constructed somewhat poorly; the outer tubes came down below the mounting flange, so it wouldn't sit flat on the floor. So I cut up and welded some 1/8" thick pads (basically some permanent washers) and got it to sit flat on the outbd side.


Then I made up one of the pedestals for the inbd side. Gonna get it tacked in and make sure the height and angle is right, burn it in, and repeat.

I fully support the multiple angle grinder syndrome. I have to add the wire cup to the list along with the cutting disc, flap wheel, and grinding disc. Love the progress on the car!
Well, I am consistently surprised by how long it takes me to fabricate things, but the driver's seat is installed!

I built my little "pedestals" on the inbd side, got those welded in.
I accidentally welded the front one with the bolt in it upside-down, so I guess I have a captive bolt now. Thankfully it's still possible to get it installed lol

I also did some surgery on the left rear corner in order to pick up the factory captive nut in the floor.

With that done, I put in the clutch/brake pedal to see how it feels. It feels good!

Next item on the list is modifying and mounting the throttle pedal. Thankfully it's DBW, so I don't have to worry about routing a cable
If you'd like some perspective, go watch Episode 16 of Project Binky. They run a stopwatch while making a bracket for their power steering pump. These are guys with all the toys and tons of experience and it still takes a ton of time to get things done.
I have to remind myself often this is the price of not driving an F-150 like everyone else.

Great work. Seat mounting is time consuming and tedious even if you're not doing it from scratch.

It took me about 6-8 hours to mount an RX8 seat in the Earl Truck and that was with me bolting them to a Corbeau pre-fabbed seat rail. You're doing just fine.
In reply to budget_bandit :
In regards to the DBW throttle pedal have you heard about the diesel throttle pedal from the ?-1998 GM pickup? It requires a little bit of repinning but is a good option for some applications. By the way the metal plate that is bolted with it is the over travel stop so don't forget it too, don't ask how I know that lol. It definitely was on the 6.5 diesel OBS trucks.
Thanks for the encouragement, fellas. I feel like i'm starting to make actual progress on this thing now.
In reply to madmrak351 :
I'm not familiar with the OBS DBW pedal. I have an '04-'07 5.3 pedal that I think will work pretty well. It has 0% and 100% travel integrated stops. All I should have to do is straighten it and shorten it to fit my floor and i should be in business, with the added benefit of being plug and play with my OEM motor harness
In reply to budget_bandit : Ok understand completely if you already have a pedal on hand. Is you pcm gen3? We have used these on 3 different gen3 swaps with no problems other than me not installing the stop on one. Enjoying following your progress, keep up the good work!
In reply to madmrak351 :
Yes Gen3
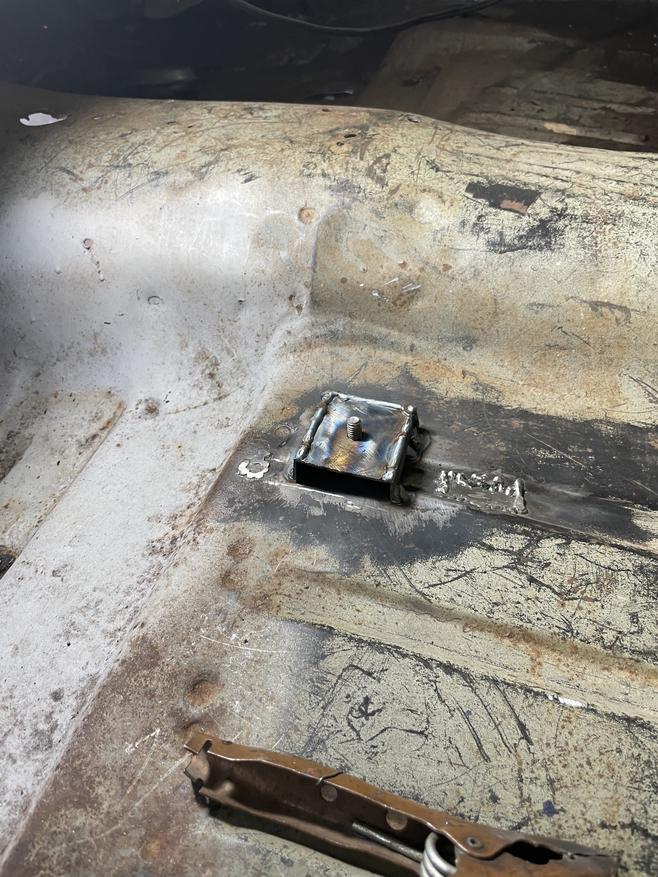
Tonight's agenda was to get the throttle pedal mounted. I could tell immediately that the stock shape of the pedal wasn't going to play nice with my steering column, so I started by cutting the arm off near the pivot.

I then started mounting the top half to the floor. I found a nice flat spot for the bottom bolt, popped a hole in the firewall and bolted it in.

I needed a spacer of some sort to make up the space behind the top bolt hole, so I whipped up a little half-boxed bracket and welded that to the firewall and got that bolt in.
Then it was just a matter of modifying the pedal arm to put the pedal where I wanted it. I'm also kinda shocked at how beefy the pedal arm is, 3/16" steel seems overkill?

I cut/flipped/hacked the stock arm until I got here:

It feels decent sitting in the seat, and I think i've left enough room for carpet on the floor and the tunnel to avoid interference. I decided this was good enough, pulled it out to finish welding my tacks, and we have a pedal!
I was also reminded why they call it a death wheel. Wear your PPE kids!
This thing is leaning to one side pretty bad. I measure 1.5" difference in fender heights. Probably a leaf spring gone soft, hopefully not any crash damage...

If it was crash damage, you'd have seen evidence by now with how deep you've been in.
The springs are most likely sagging.
I can't remember, did you disturb the front subframe and springs too?
In reply to Dusterbd13 :
That's what i'm hoping. Yeah, i pulled the subframe out and put in new solid bushings and new springs
Front springs nestled in the pockets correctly? I've missed one by 1/4 inch before....

Suspension bolts too tight and causing binding?
In reply to Dusterbd13 :
good word. I'll check that and see
In reply to wvumtnbkr :
haven't tightened any yet, so hopefully not that lol
You'll need to log in to post.


