Thanks for the offer, I talked to the guys at edelbrock and he gave me some dimensions. My intake is very similar to the performer RPM witch is much taller. I already have performer the blue intake on its way. The standard performer also has some room to be milled down as well.

Beagle
New Reader
3/3/15 10:48 a.m.
Good find! K&N and probably a few others have a drop base filter bottom plate that might work under the hood with a normal 3" element... the assembly is supposed to be 2.75" above the carb filter base.
http://www.knfilters.com/Racing/14inch.htm
I used to take paint off of plastic with EZ Off oven cleaner (Lye - caustic soda). I've never tried it on aluminum, wonder if it would work.
I may not be able to use a 14" air filter because of the slope of the hood but a 12" should work. That or a carb plenum to a cone filter.
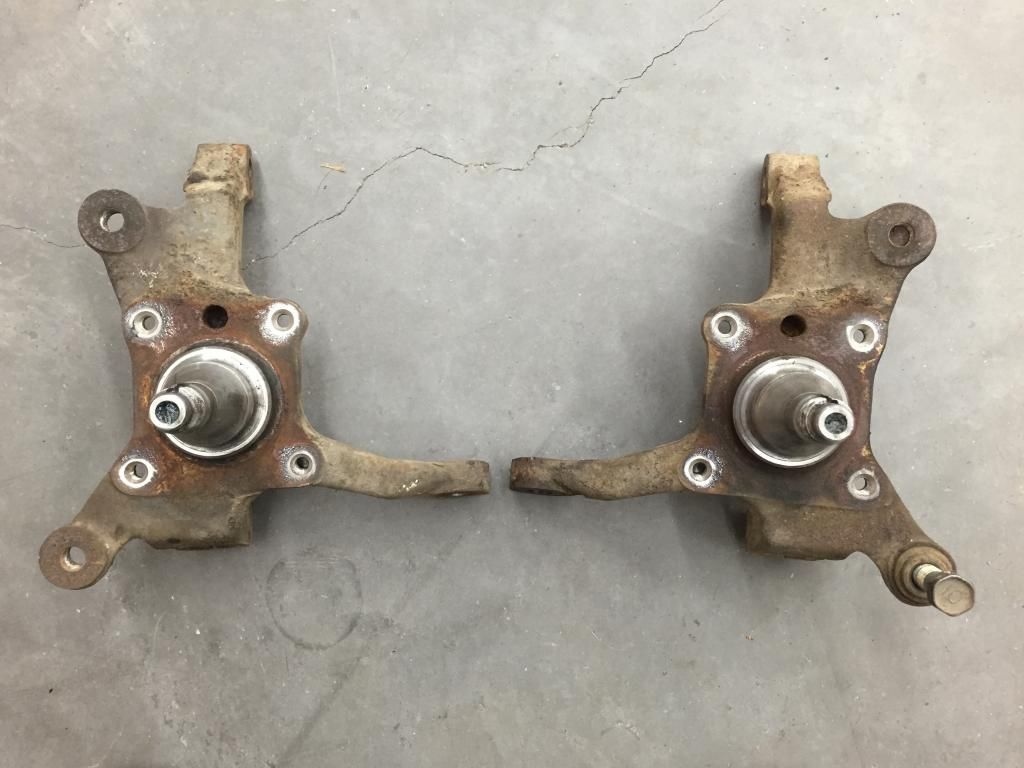
I also finely got to shorten the steering arms on my spare set of spindles. I tried to keep the ackermann close to stock but without installing them on the car then then taking 1 billion measurements I would say its fine.
Here is the start,
And the finish.
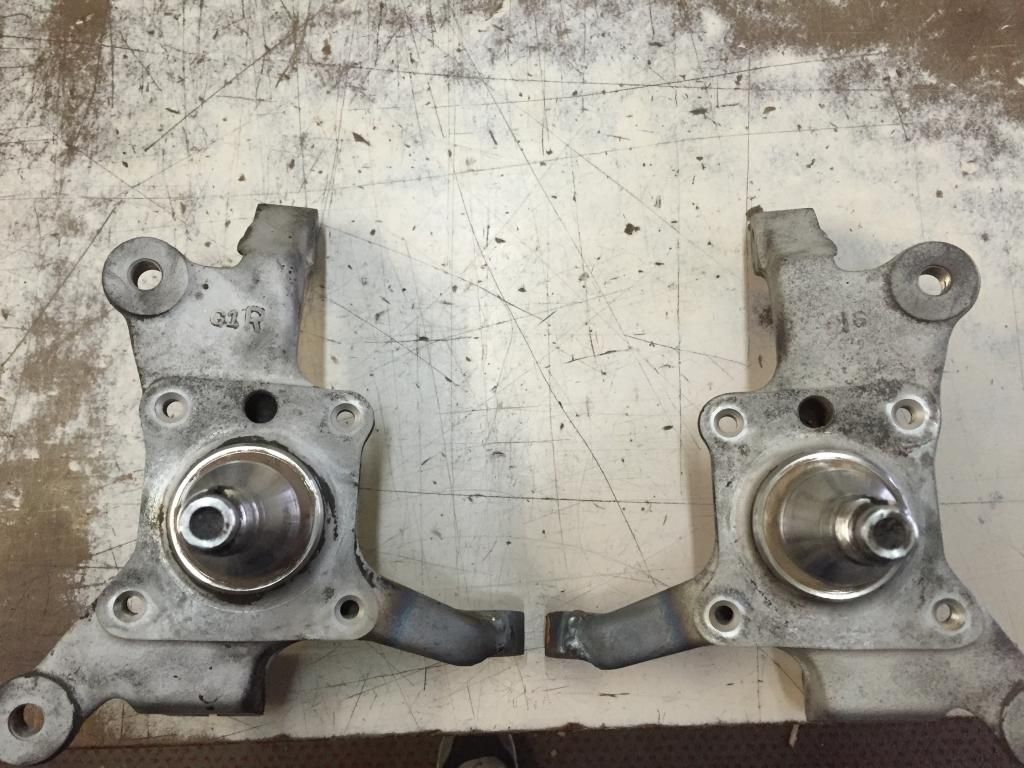
Don't recall off the top of my head how much shorter they are but its around 1". I hope to powder coat them and try them after iv driven with the stock spindles for a while so I can appreciate the difference.

Well here is the start to a new stage of the build.I have 90% of the parts needed and everything has been test fitted that needs to be and all modifications to the car to fit the motor have been done as well (I hope). So here is where the weekend started. Most of the parts still in mock up and the new intake fitted in top to check clearance.
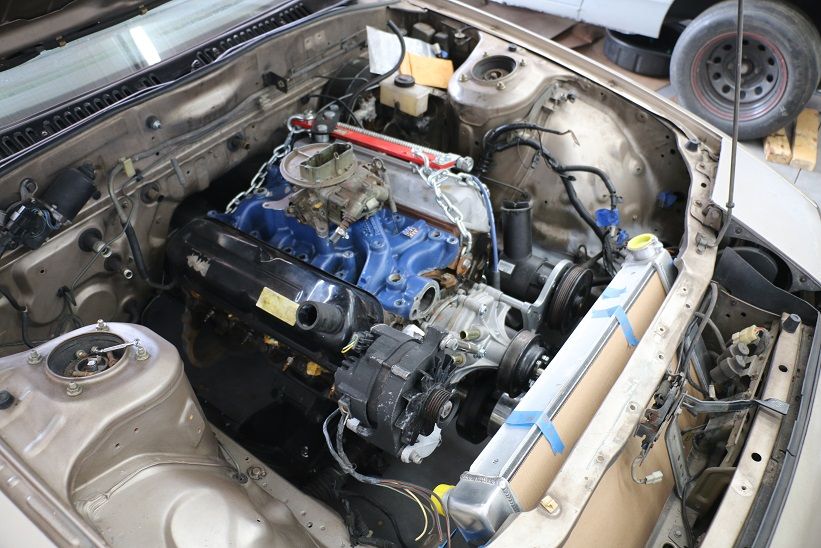
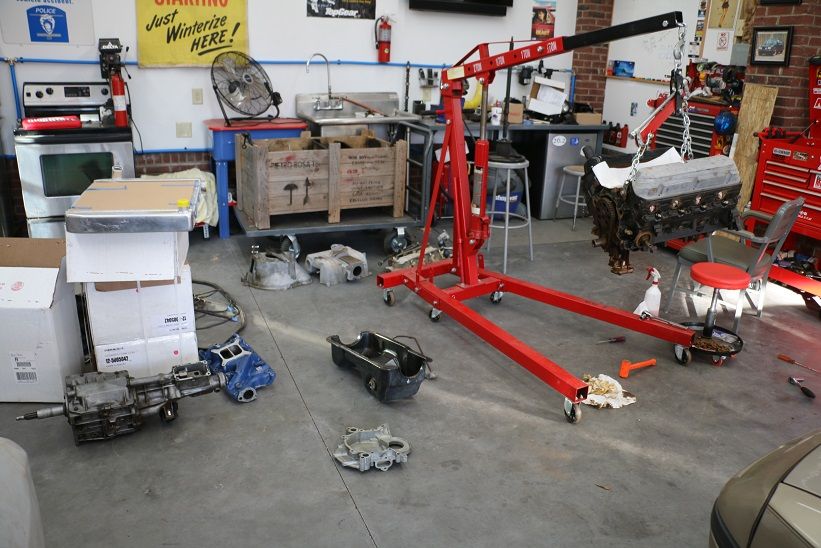
Then this happened. Only took maybe an hour to get the motor out and put all the bolts into little bags and mark them so when it comes time to put it back together it should be a bit easier.
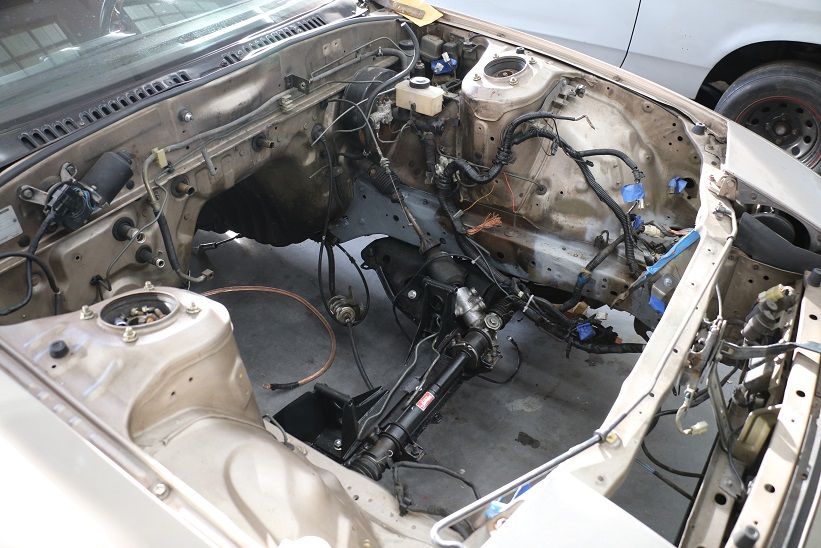
The mess that followed.
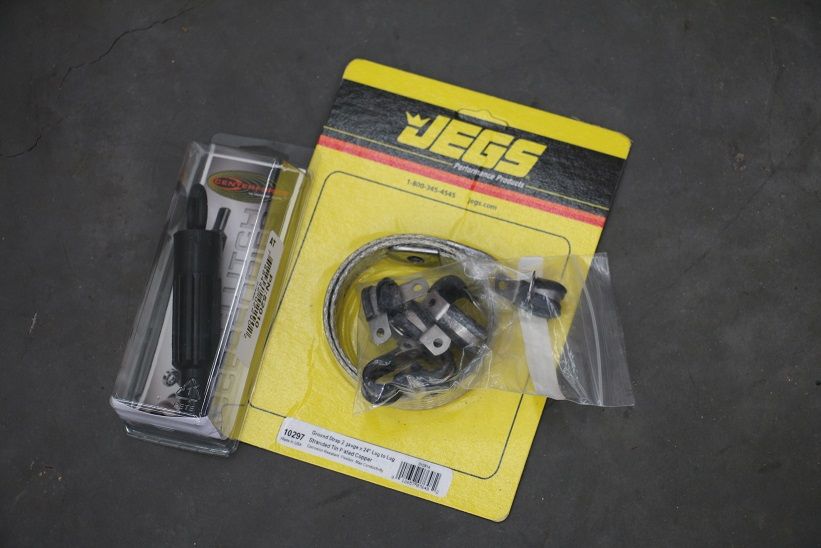
Some of the other new parts, cable clamps for the battery line, clutch tool, and a grounding wire for the block. I just went ahead and got the funky flat style in hopes it will look more stock.
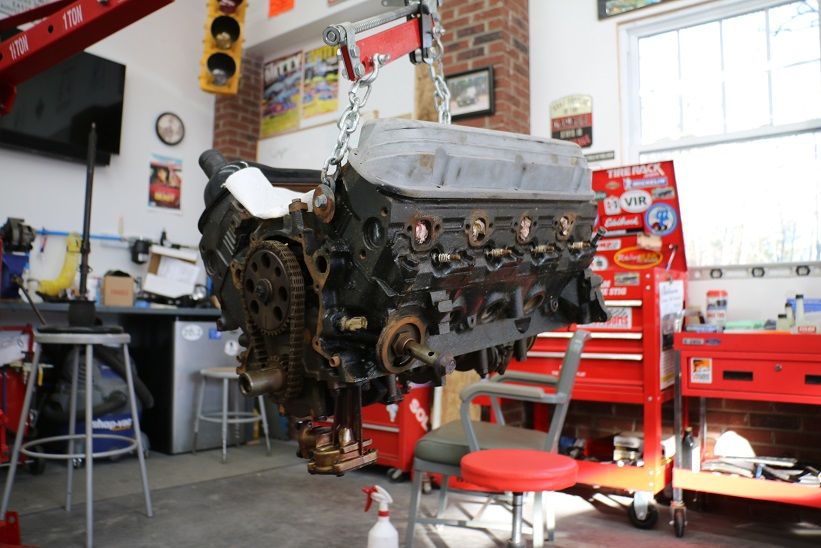
So now its time to pant and clean everything while I have access. Start with the block.
Her is the por-15 I plan on doing a few good coats on it. It looks good and covers well, I wish the motor was apart to do a really good job with the paint but this will do just fine.
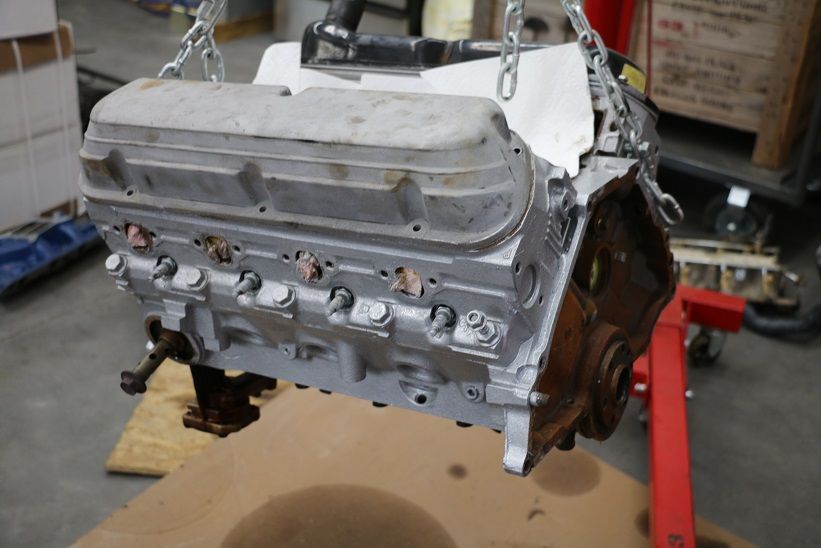
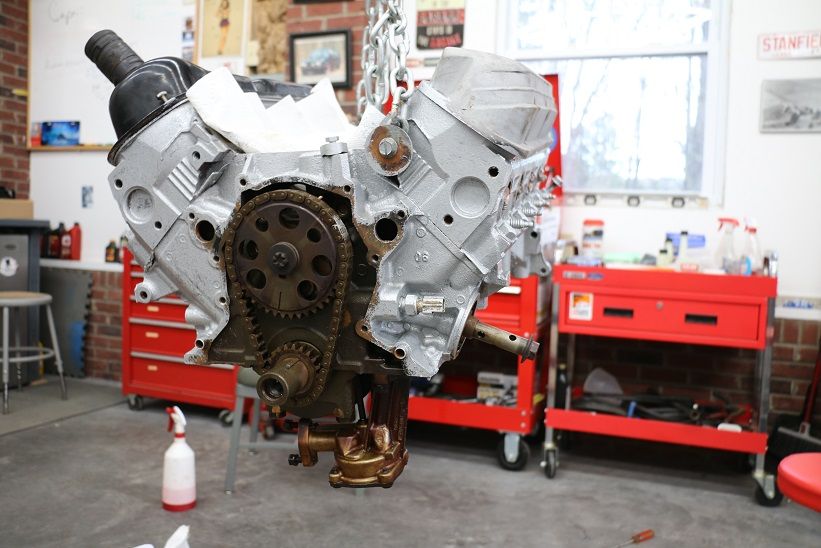
That's all I have right now, more parts in the mail and I need to get more paint for different parts. This stage is going to take a lot longer than I thought it was going to so be patient with me the post may be slow for a few weeks.

Fresh paint makes a world of difference! Still have a lot to go but thought I would give an update!
More parts came in, speedo cable, oil and water temp sensors so I can use the stock dash.
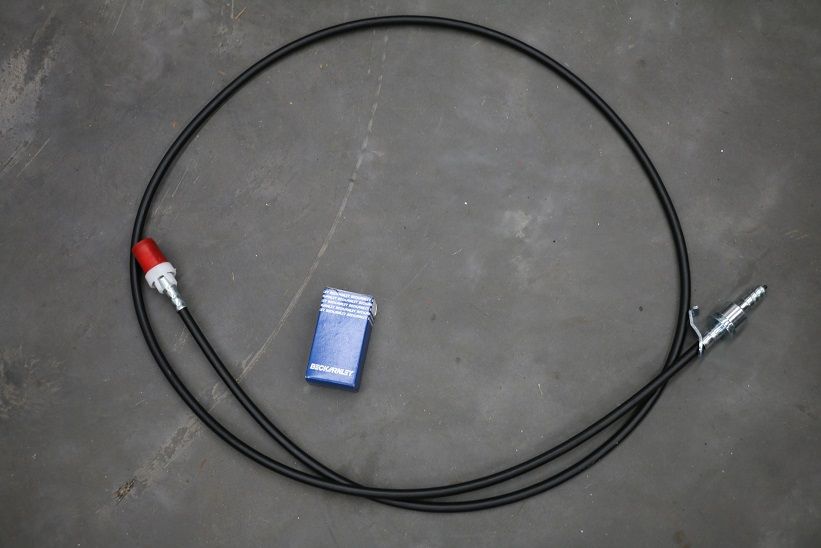
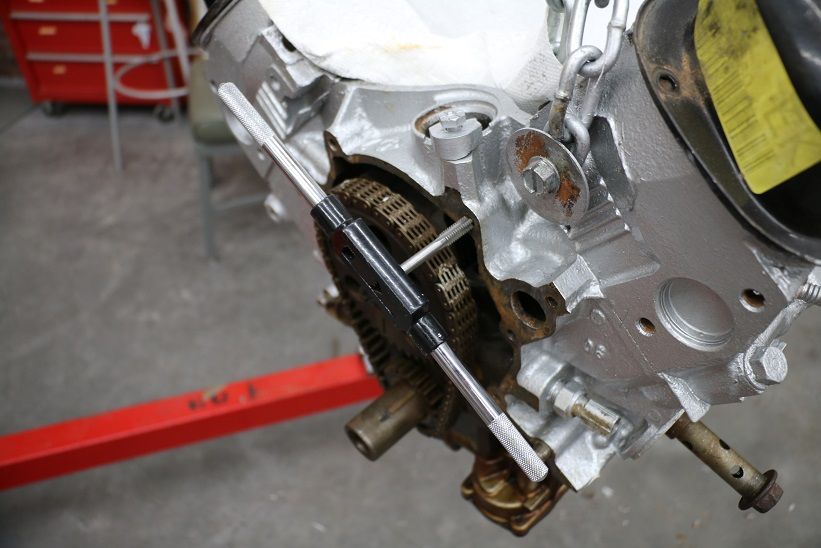
Other than that I have almost finished preping the motor to go back togeather making sure all the surfices are clean and ready to hold oil and water. I also chased the treads with a tap to clean them out. Its crazy how much nasty stuff is in there.
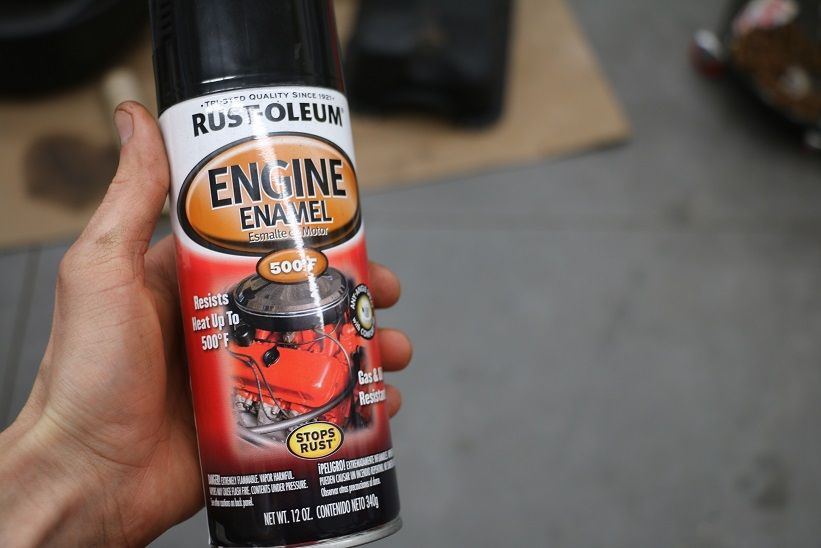
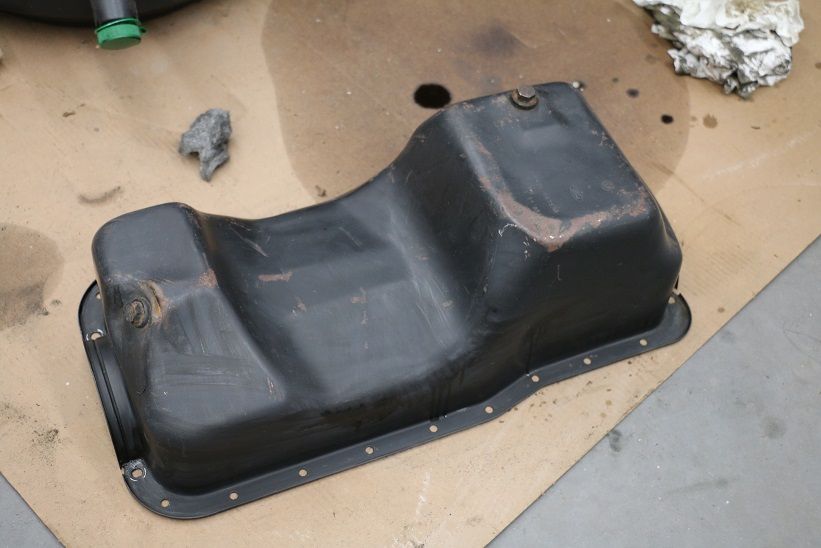
Then starts prep on all of the parts being bolted back to the motor. Lots of sanding and cleaning before paint. I used a simple engine enamel it looks good but you have to apply thick coats to get it to flow and look nice and smooth. Even so it still drys fast witch is nice.
Before,
Then after.
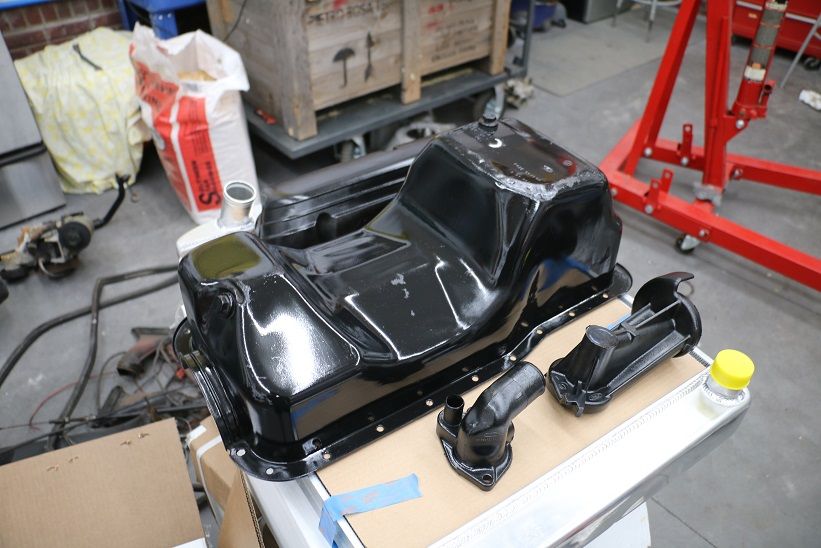
I almost skipped this step and thought about keeping the pan the way it was. But I have to keep talking myself into taking the time to do it right (I like to rush things for the sake of getting to the finish line sometimes). I know this car will not look that grate when its all done but I don't want it to look like some redneck dropped another V8 into a car in his driveway using his tractor to drop the motor in... Trying to make it look respectable that's all I ask for!
I hit a stopping point with the motor and jumped to the car. I don't want to pull everything off the car, it will be to much of a headache. So I am pulling the easy parts and painting with a brush around that hard parts. Lots of time spent with the steel wool and degreaser to get it prepped. This is going to take some time to get it ready but chipping away one little area at a time makes the work feel more productive.
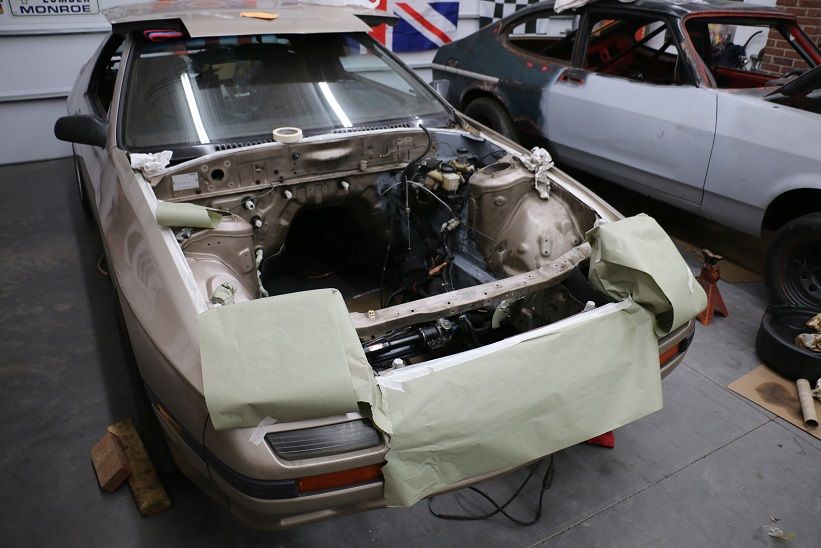
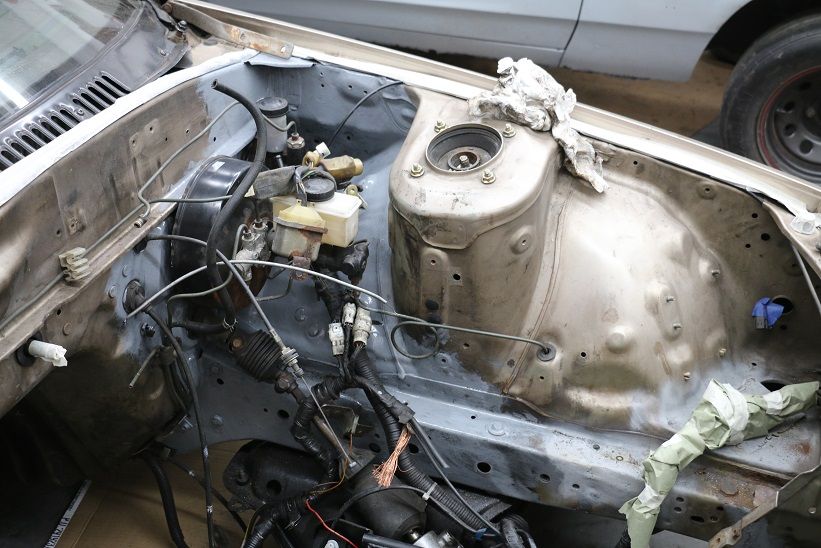
Still needs another coat but it should look good when its done. Don't know if some people will hate changing the color of the engine compartment but im changing the whole motor so it wont look stock under there anyway.

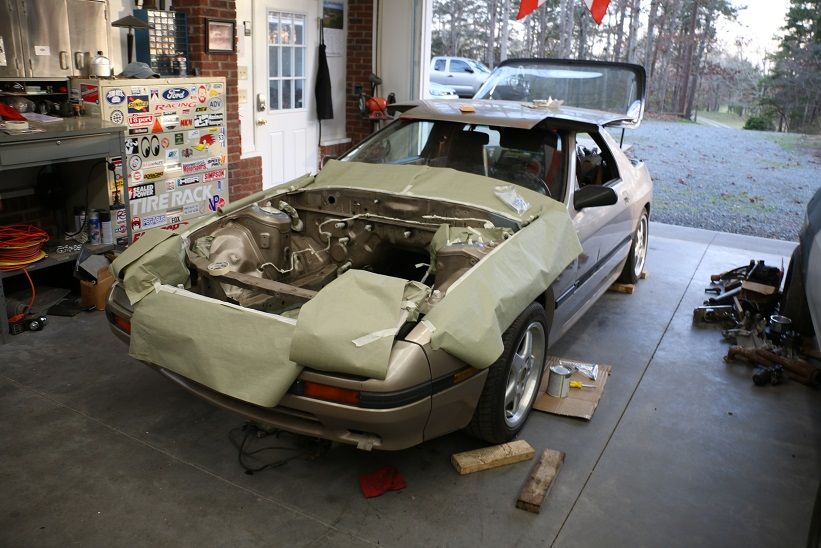
Lots of prep work the past few days! But I should be painting tomorrow. Everything has been sanded and cleaned and masked off. I could have painted today but decided to come back tomorrow and see if I missed anything, and I will have more time tomorrow to do the job the right way.

I am also looking into the gaskets I got for the oil pan, its a one piece silicone gasket with the washers as crush points for the bolts. I have heard that they can leak on older motors where the oil pan give more room for the crank and the cork gasket. My oil pan is out of a foxbody but unknown year... I really don't want to have to pull the motor back out to fix it... Don't know what to do yet so im waiting to put the motor back together.
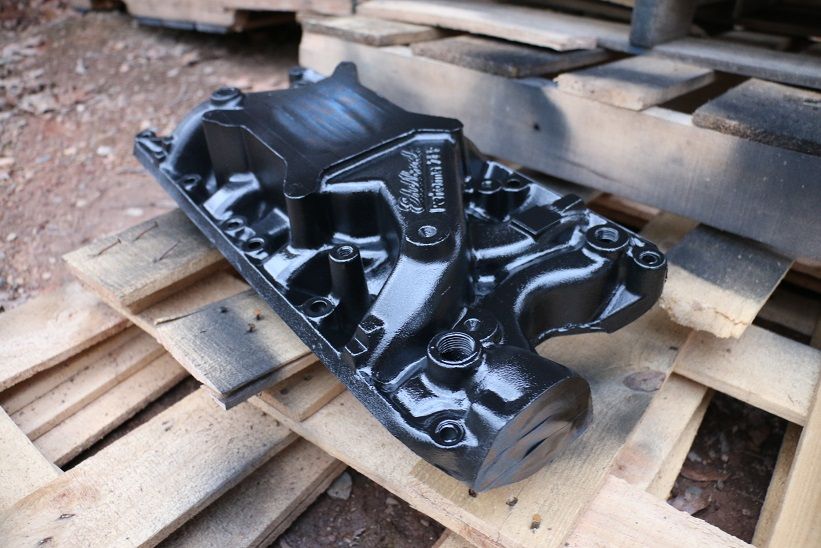
Also saw this with my intake.
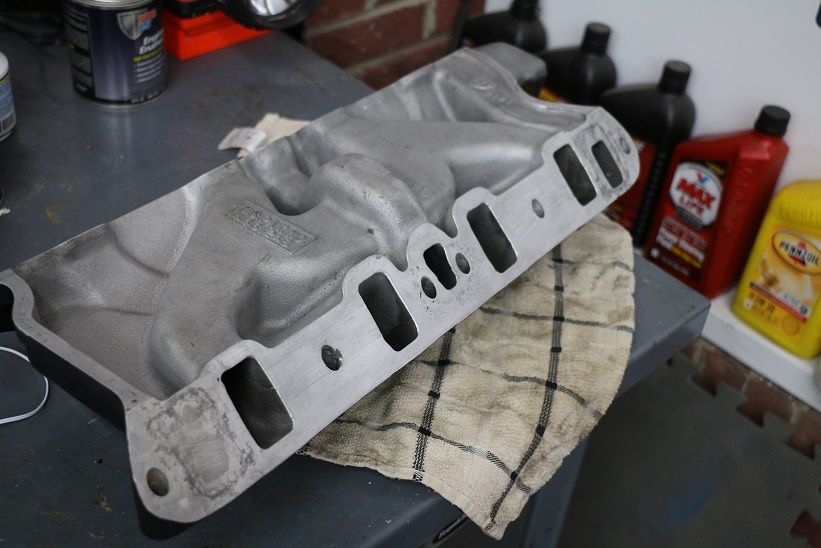
The port closest in the photo should have a water port next to it?!? Thanks to the internet it is correct! Some after market intake have one extra cross port so you could run more gauges. My stock GT40 intake doesn't have the rear cross so the proformer 289 intake should work fine.

Well First thing is first id like to thank everyone who has helped me with this build! I went from knowing nothing to knowing just enough to get the job done! No but really this site has been a tremendous resource for this build and no one has gotten all mad because I did things one way or another. So thanks again!!
Now back to business!
Didn't get to paint as soon as I planned because the beautiful girlfriend wanted to go out to eat, and well cars are fun but... She gives me hugs and the mazda is far from hugging corners yet. So a day behind and just before the rain came, so I pushed the mazda back out into the world so I wouldn't dye from toxic fumes. A quick once over to make sure everything was masked off and clean and then I went at it!
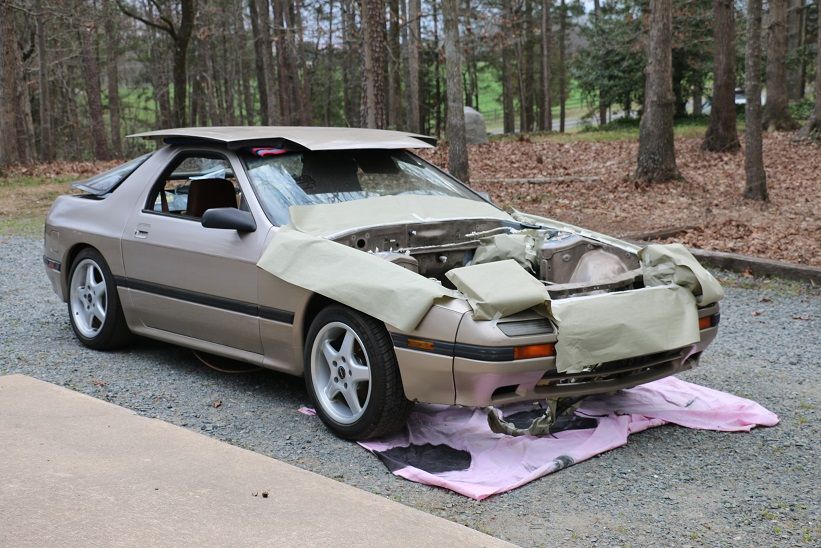
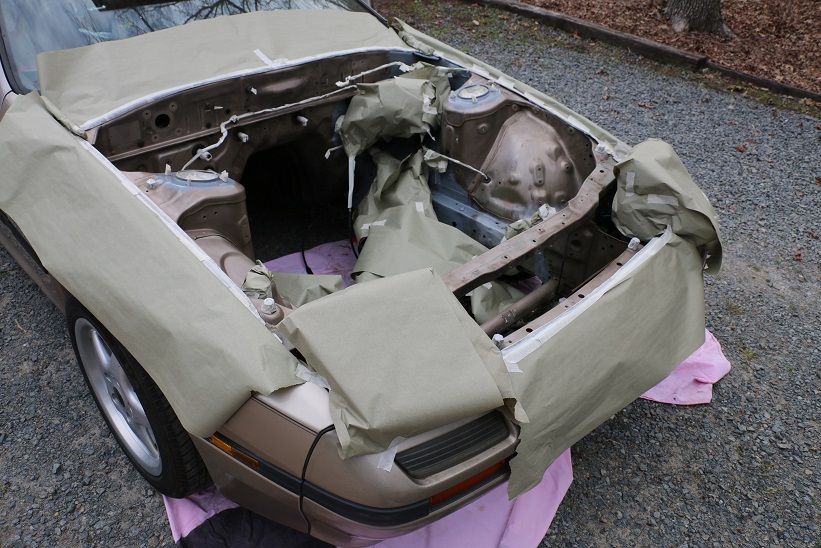
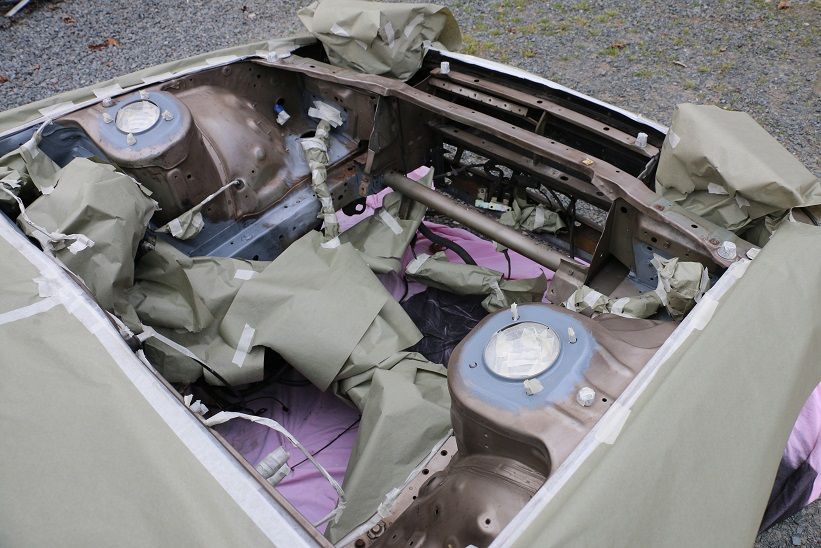
I used rustoleum gloss and im not to happy with it. The paint is fine but the can is crap... No fine line of spray like you used to get now its a circle pattern of spray witch would be grate for tagging a wall or your bosses car but not for much else. So keeping runs out was very hard, had some in a few spots but not to bad. This paint also needs to go on thick to flow other wise it has a mat finish witch I didn't want.
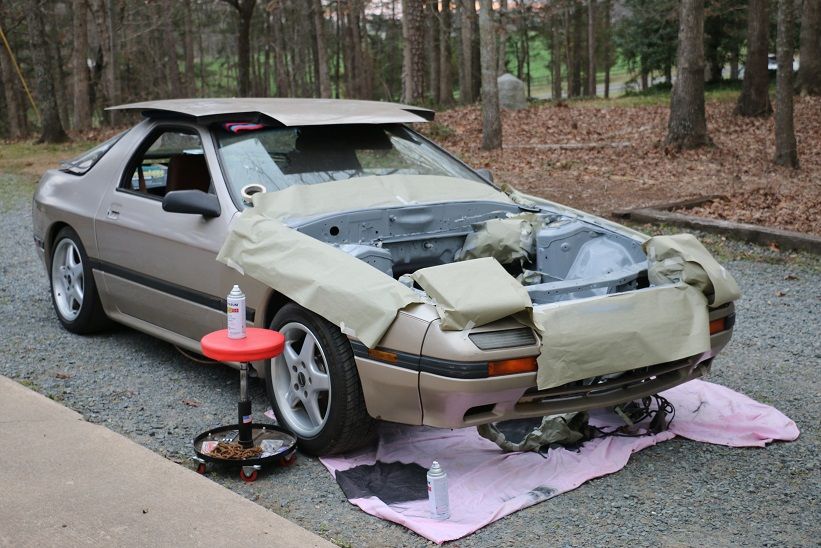
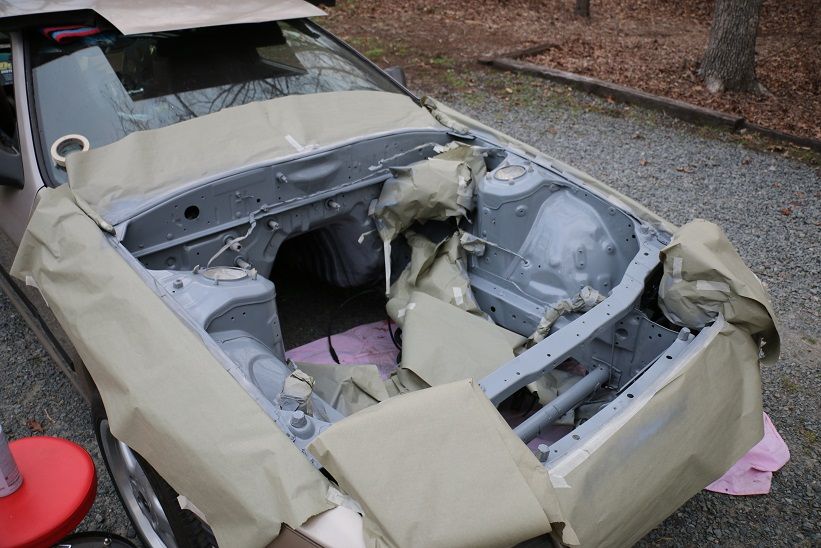
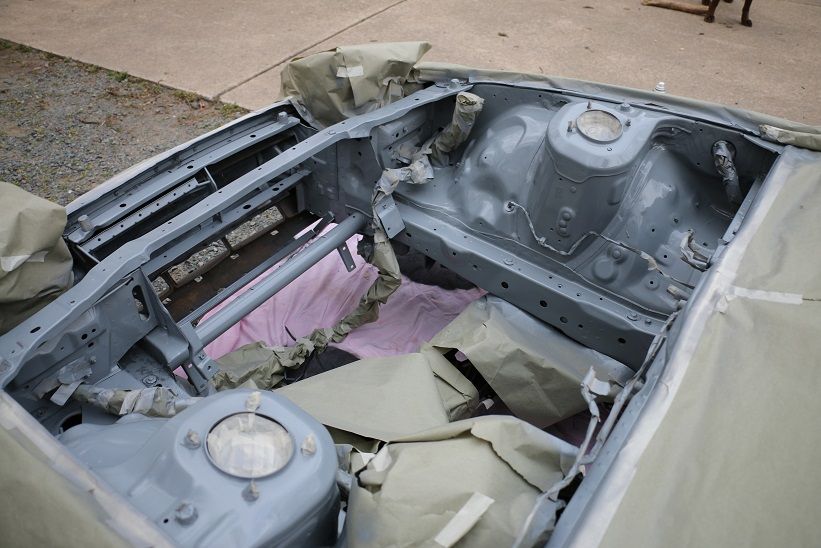
I was able to cover most of the cracks and hard to get at places so it should look very clean once its all back together. The light outside was really bad so I got a flashlight and checked for places I missed. Thankfully not much just some of the hidden spots that needed a bit more coverage. Now for the not so fun part waiting for it to dry...... This paint seems to dry slow but its not very warm out so that slows it down even more. I am going to leave it for 24hr and let it dry in the shop witch has AC and heat and should have nice dry air.
This feels like a very big step on my way to getting this thing put back together so I am really pumped to get the tape pulled off and keep on trucking and try my best to have this thing going by summer!
I use the good can tips off the johndeere or duplicolor cans whenever ppossible.
Id also strongly recommend doing a recoat tommorrow after work. Will help the gloss and durability immensley
Dusterbd13- I will try and get another coat on but I think this rain will keep me from doing it tonight. I might wait till tomorrow and since it will be a bit nicer.
Also Dusterbd13 I think I might get a full EFI system tomorrow from a SN95 mustang. Its a good trade/deal, I will still have most of my carb parts if I decide that EFI wont work for me. Do you know anything about the 302 EFI system? I have been looking on forums for simple stand alone wiring of the SN95 system and haven't found much.
I know a little bit. But it can't be that different from the gm stuff. And I know a lot about the gm stuff.
Sounds good iv seen people say online that it is only 5 wires to get it up and running everything else is plug and play. But I wont be using a good bit of it so I will just need to print out a copy of the diagram and go to town.

Got a little bit done to the car today. But first my new toys.
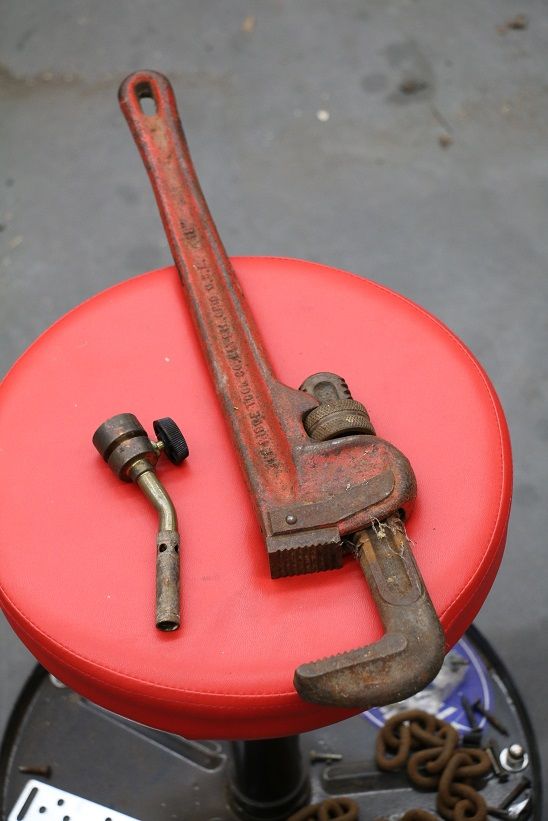
Got these for $3, tossed it into the blasting cabnit and put a new coat of paint on it and its good as new!
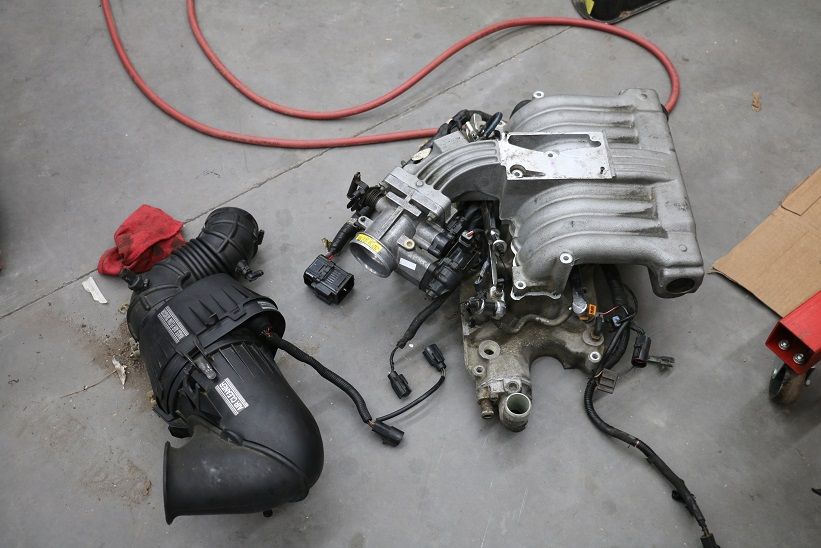
Then someone on CL had a trade for me, my polished intake and dizzy for his EFI system. But it didn't go as planned he had no idea what he needed to run a carb and so he didn't bring me 1/2 of the stuff that I need so I don't know what I will do with it. Might run to the junk yard and grab the whole EFI system off a car because people iv been talking to about efi systems don't know anything. The good part is I still have my carb intake that will fit under the hood and I know the part number for the dizzy and its cheap so I can grab another one if this EFI mess doesn't work out.
Then there is the car, I put another coat on like Dusterbd13 said I should and it really made the difference. It is much shinier and looks much better over all. Let it dry while I got the parts and started pulling of tape a few hours later. There was some over spray but nothing to bad. I also started fitting little parts back and seeing how these wires are going to lay out.
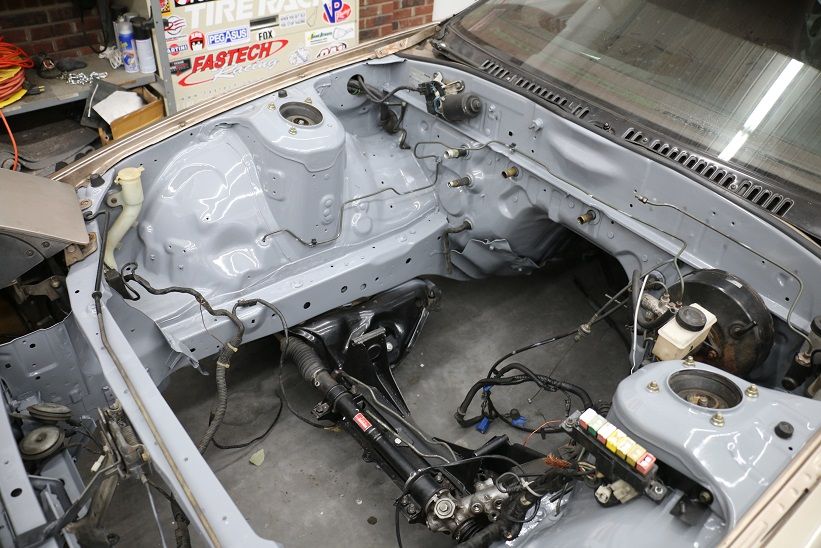
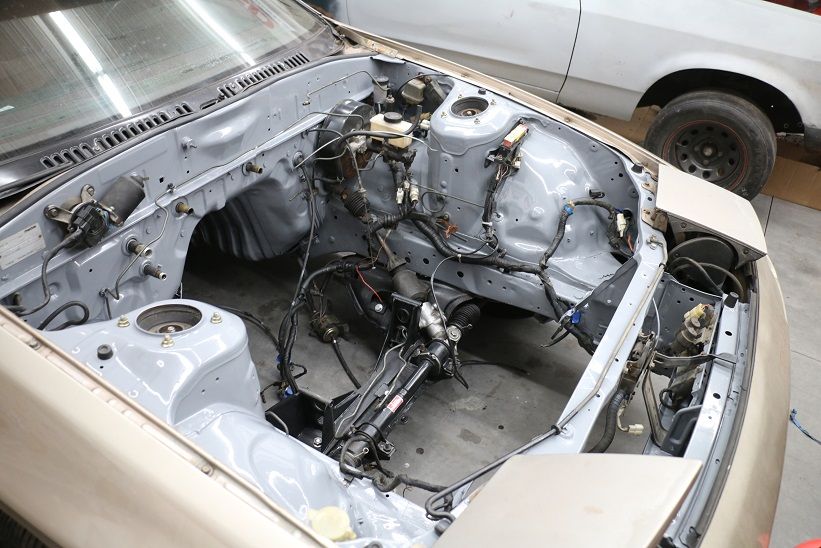

Its a good start and about as far as I can go before I drop the motor back in. I am free tomorrow so I might go hard at it and get the motor more or less back together then start with prepping the car to work with the new motor (speedo cable, tachometer, ect...)
Also took the alternator bracket to work and cut it down with the band saw at work then smoothed it out. Its getting painted now and should look stock for the most part.
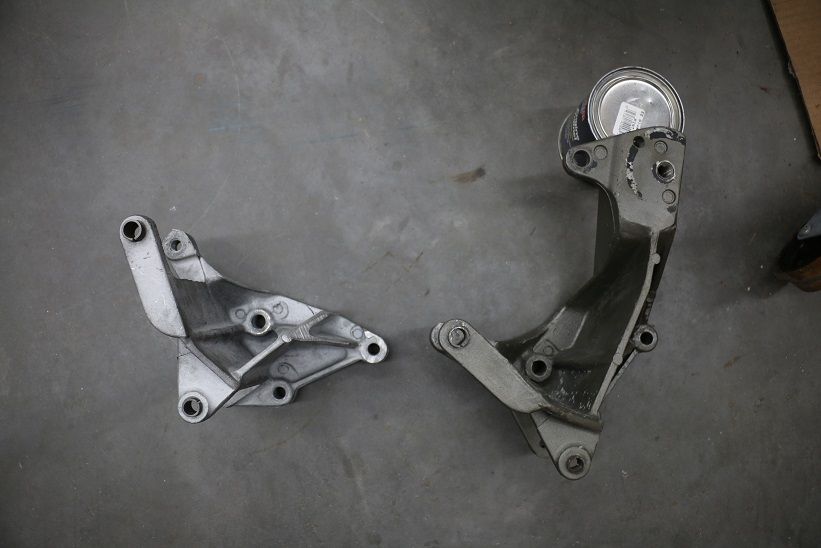

Beagle
New Reader
3/21/15 10:04 a.m.
this page is really helpful for EFI
http://www.veryuseful.com/mustang/tech/engine/#Diagrams
Beagle wrote:
this page is really helpful for EFI
http://www.veryuseful.com/mustang/tech/engine/#Diagrams
Thanks iv been all over that place and all over the place looking at stuff. The biggest issue is that the efi parts that i have are from a SN95 (1994-1995 mustang GT) I would love to have a efi from a 1991-1993 there is much more info on those years and the efi system is not a part of the car like it is in the SN95.

Beagle
New Reader
3/22/15 5:45 a.m.
What computer did you get with it? An A9L or A9P (automatic) was a swap item for early SN95's for a while because the computer for the earlier cars had a more aggressive tune and/or tolerated modifications better out of the box.
The basic function of the 5.0 SN95 computers didn't really change. The 4.6 versions (ODBii) changed a ton.
I have a T4M0 computer from a 5 speed SN95, nothing from the foxbody cars interchangeable with the SN95. The foxbody computers (A9L, A9P) are more liked for mods because they have less adaptive learning with means you can run more of a cam with the foxbody computer. The adaptive learning trys to over compensate for the lumpy cam.
The wiring for the foxbodys is made up with 3 harnesses (main, injector, O2 harness) the SN95 to me looks like it has a injectior harness and then a full harness that runs the whole engine bay. Id really like to find a foxbody harness and comouter they are better and easier to work with.

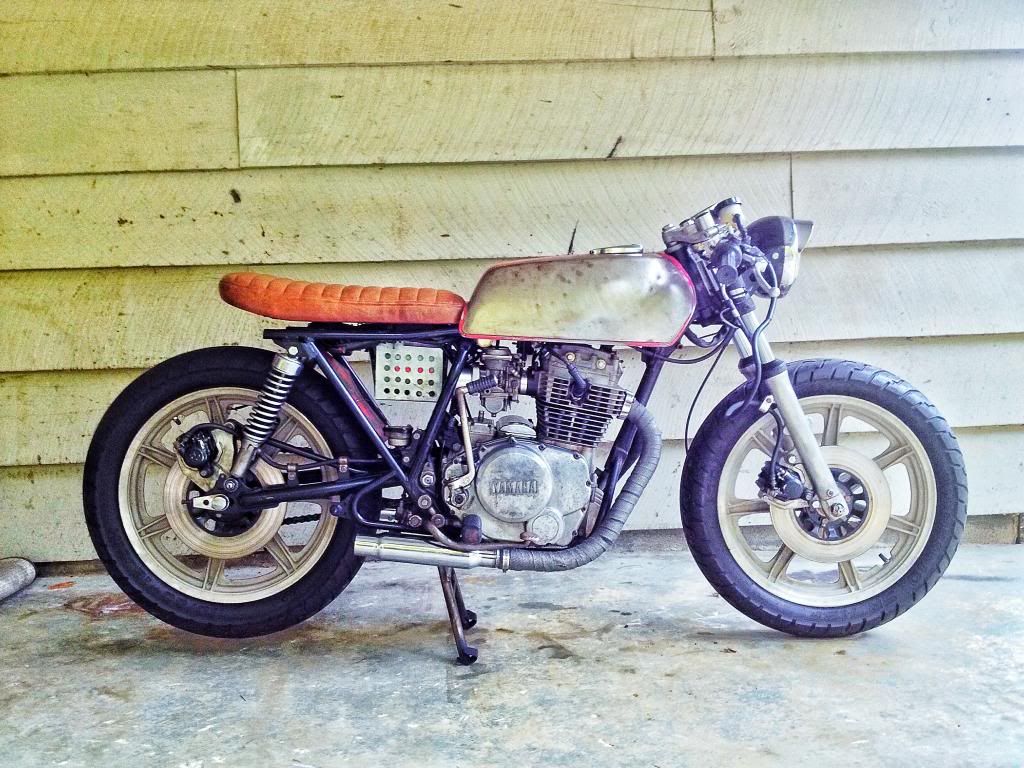
Some more updates! Didn't get as far as I wanted to this weekend but that's because I got my other project up and running for the summer. This is my XS400 iv been bringing back to life for a few years now. It has a long way to go but its a ride-able project that I can enjoy when it feels like running.
Here is what I got done on the Mazda, I decided to try and open up the dash and get the tachometer re-calibrated to read right with the V8 and hook up the foxbody speedo cable to the rx7 gauge.
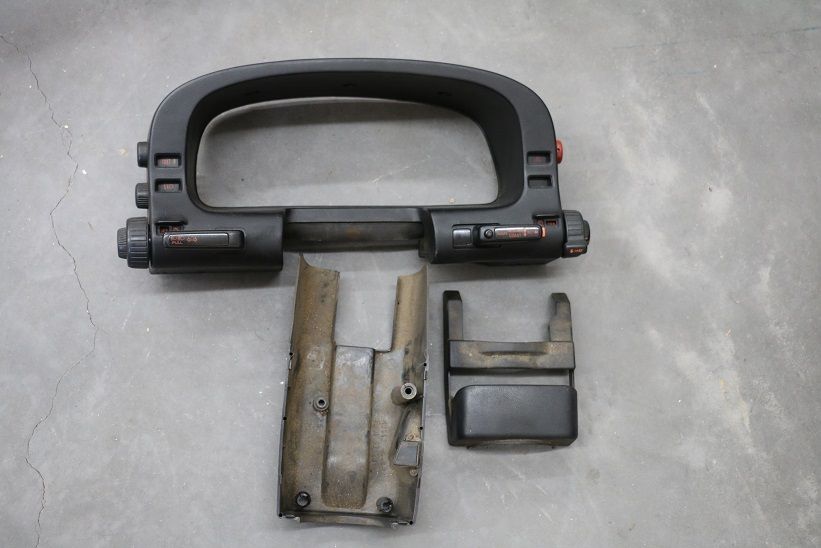
Came out with out much fuss once I figured out how the 2 plugs in the back came out. I did brake some of the plastic. It was very brittle from sitting in the sun for so many years.
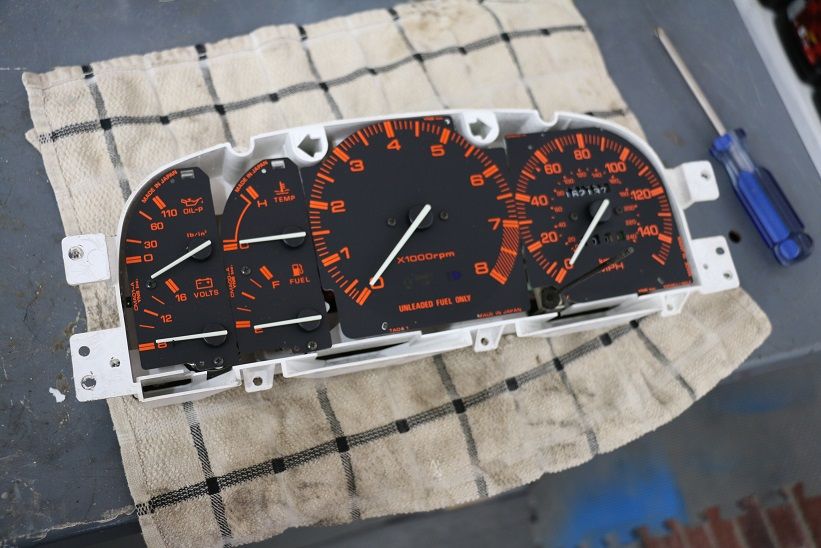
I then followed the granny speed web sight for how to re-calibrate it. But like normal it didn't work. I used my motorcycle battery for the 12V and 2 different trickle chargers for the signal. The gauge did nothing...
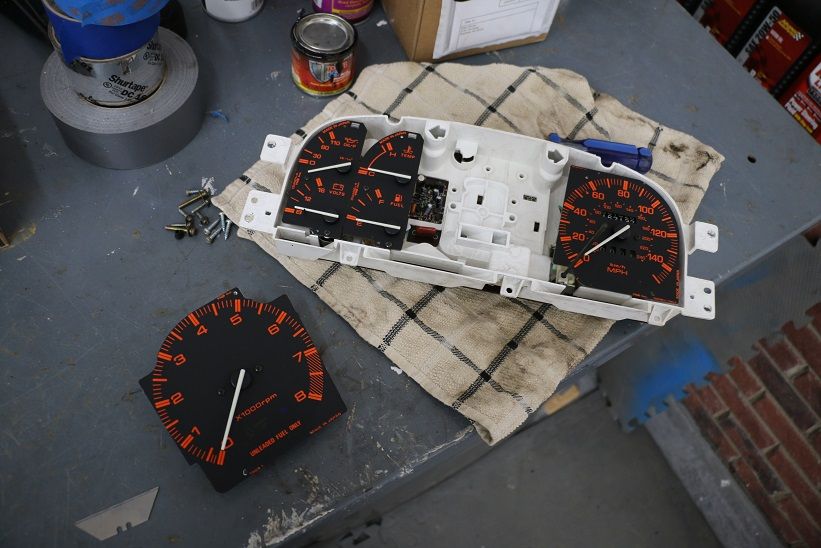
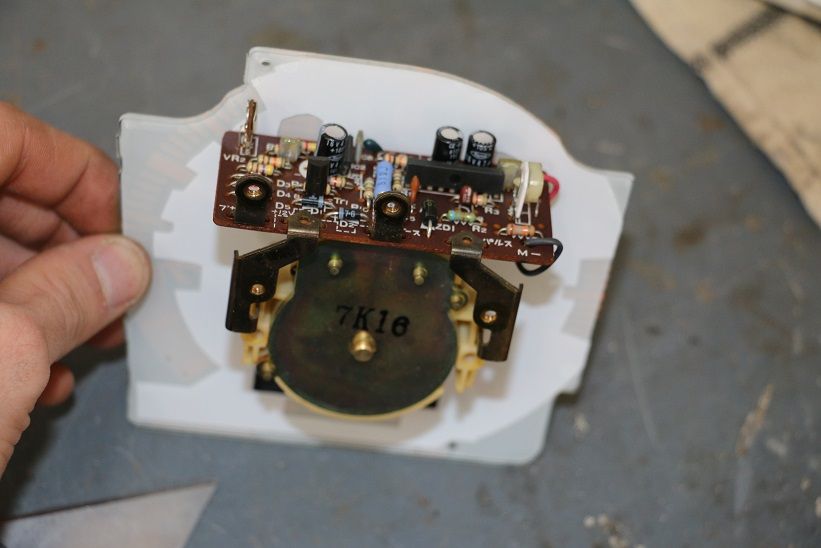
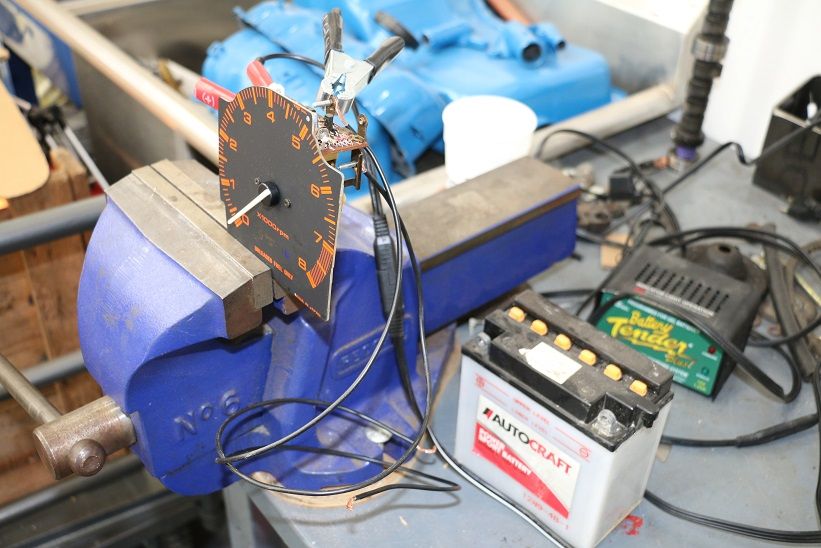
Might have to try it again with a old school charger and see if I get anything out of it. If not I might just leave it and then ill know when im at 8k rpm on the gauge im really at 4k rpm. That way it will make it seem like my motor really screams!! But id much rather have the stock one working, if that doesn't work out I might hide a small digital gauge somewhere that no one will see very easily so it looks stock.
I did however get the speedo cable to work. It was very simple the cable its self fits into the back of the gauge and the housing slips over that. To keep the new cable tight on the gauge I cut a grove into the metal then used a hose clamp to tighten it down on the gauge and tested it by using a drill to spin the cable on the other end. Now I just need to figure out what gear I need for my set up so it will tell me the right speed no the speedo.
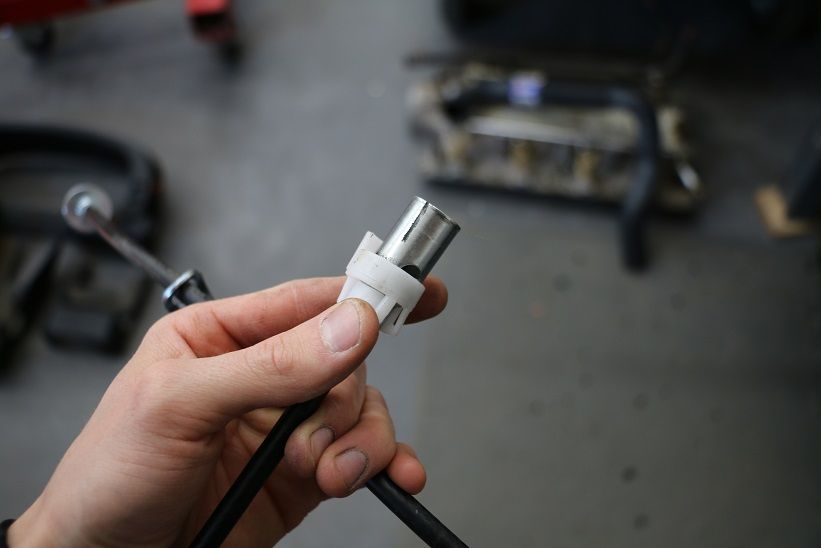
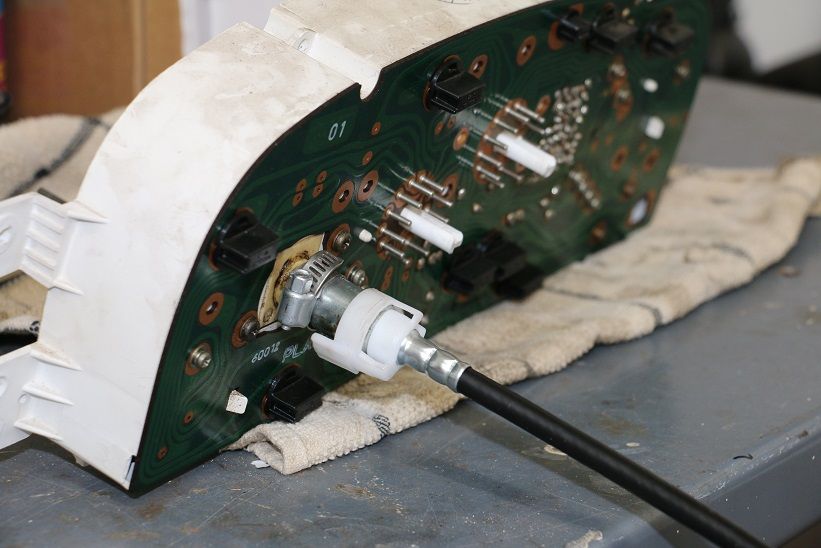
That's about it for this update. I have everything I need to put the motor back together but I need to take the timing cover to work so I can press the front main seal into it. Then I can assemble the front of the motor and put the oil pan on. I need to run and grab the clutch from one of the guys iv gotten a lot of parts from then bolt it all back together and get it into the car. That's where I will figure out if im going to go efi or carb and also what to do about a crank case breather. If I need to have one on the valve cover or on the intake or maybe the fuel pump plate on the timing cover? Still lots to do and think about!

More progress is always nice! It feels like iv hit my second wind and im getting things done. Still have so much to do that it hurts my head to think about but im just going to take it one step at a time.
Tonight I got the front of the motor together. Started by installing all of the parts and making sure I had all the bolts that I needed and of course I didn't. But thankfully I had grabbed extras at the store so I had everything I needed just had to hunt for it. The only thing im missing now is a spacer that I need to shorten for the power steering bracket and it will be done!
I got some Fel-Pro gaskets a long time ago from rock auto.
Also got some gasket maker from the auto parts store, I really don't want this thing to leak!
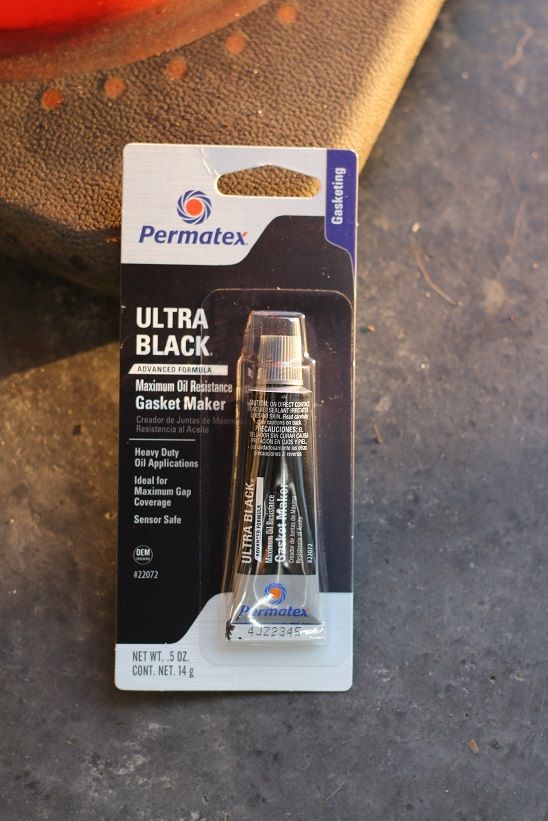
After that I started assembling everything making sure everything lined up before I bolted it down. The gasket maker seems to be working well and I got just enough on it because when I got all the bolts tight there was the smallest amount of it that had squeezed out of the gaps. Not enough to get inside the motor but enough to make a strong seal, so I would say its job done.
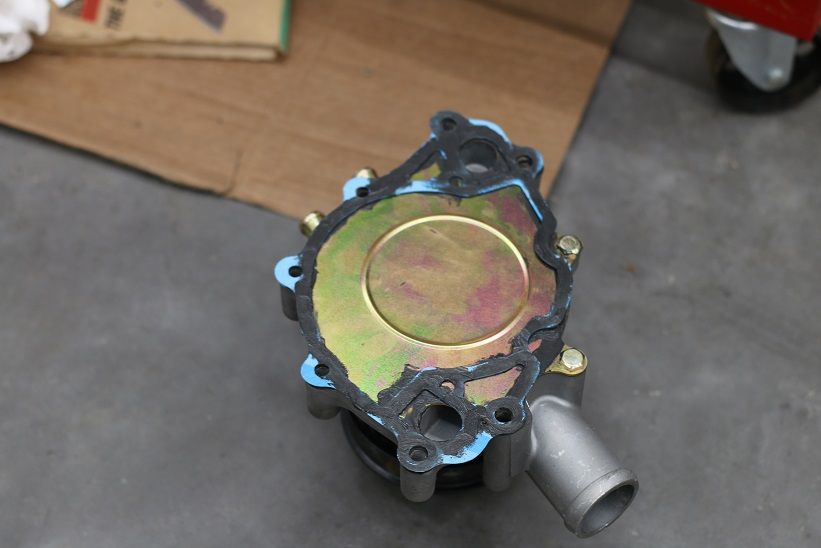
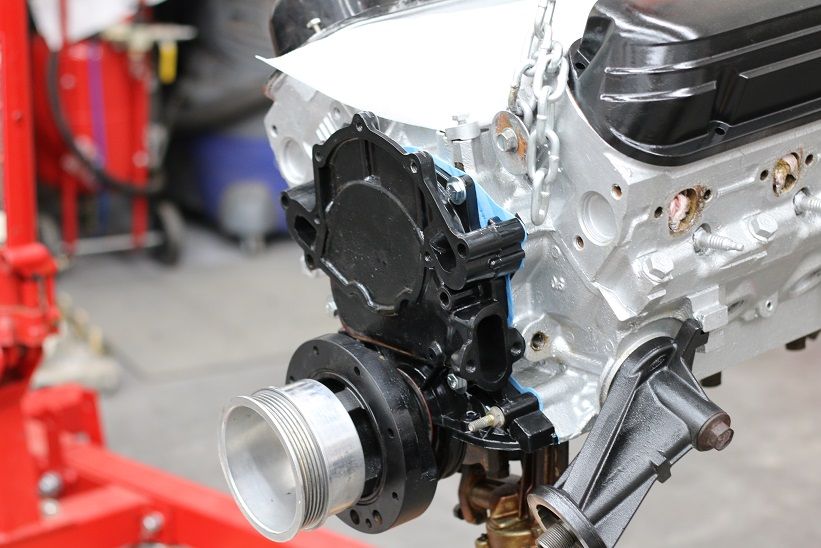
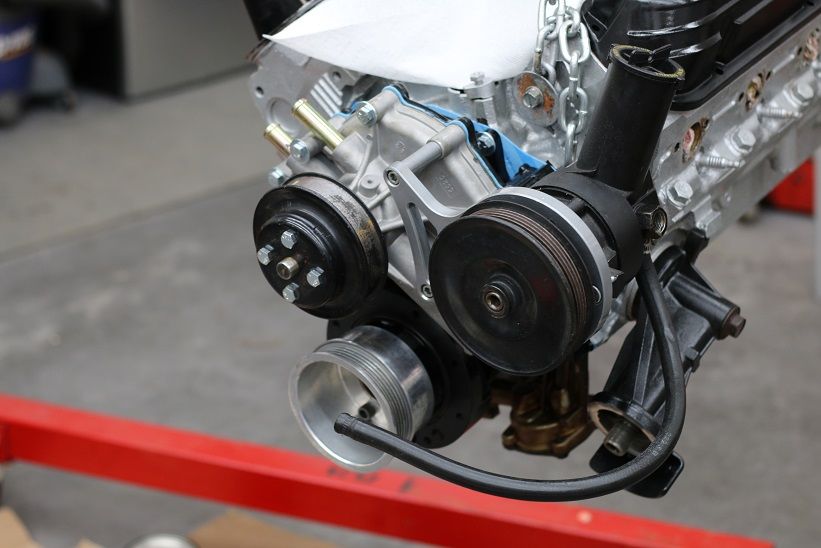
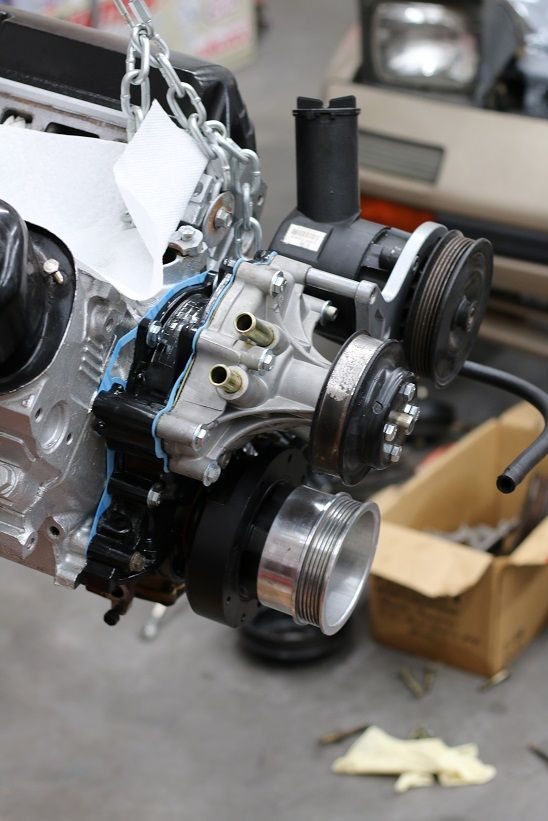
Glad to have that job done I was not looking forward to it. Now all I need is to get the oil pan on and the motor can go back in. (I think?!?) Still need to sit down and plan my next move so I don't have to back track.
I also broke down and picked this up over the weekend. Its a pull style clutch slave cylinder I got from the same guy that I got the front and rear end from. He used it on his 2.5 turbo car and he ran a T5 tranny so this will work for me. I went ahead and bought it because I started pricing out braided lines and this whole setup was cheaper then just a new line. I also think its a Wilwood slave cylinder so RACE CAR!

Still trying to figure out what to do with my crank case breather. Might have to sleep on it a bit longer. Im also getting close to running wires in the car here is a quick list of what I think I need to do.
-Battery cable to starter motor.
-Turn alternator into one wire, wire to starter motor.
-Wire starter into ignition.
-Wire main fuse to starter.
-Wire tachometer.
-Wire coolant and oil pressure senders.
-Wire coil.
-Wire trans so the car wont crank in gear.
-Wire buck up gear/lights.
Sounds like a lot in my head but it shouldn't take to long. Still a few more months out from having a running car but we are getting close. Knowing that I haven't updated the build on here motivates me to get something done with the car.

pres589
UltraDork
3/23/15 9:28 p.m.
Nice work. What have you figured out on the efi/ecu/etc front?
I haven't messed with it at all. The guy I got it from said he was going to pull all the parts he forgot and meet up with me again but I don't think I will hear from him again. Im going to keep my eye out online and try to find someone with a foxbody EFI setup and use the intake I picked up. Im just going to set that to the side for now and keep working on getting the motor in the car, I can install the intake and fuel delivery last so I can spend more time on it and figure out what im going to do in the first place. Keep an eye out for 302 EFI parts and let me know if you know where some are. I can have them shipped to me through work.

JTNWEvo
New Reader
3/24/15 10:52 p.m.
Thanks for the tip on the speedo cable attachment. I was just trying to figure out the same thing on my swap. A simple solution that somehow eluded me.
I just got my 5.0 RX-7 swapped started for the first time, not quite drivable but its great to hear it run. I have an 89 RX-7 with a Turbo II diff and what is basically a 93 Mustang 5.0 motor and T-5 tranny. I stuck with EFI and used Explorer GT40P heads and intake. Wiring was really pretty simple with the complete harness from a donor vehicle. Let me know if you have any specific questions.
You can find Fox EFI stuff on the for sale section of corral.net. That is where I bought most of my stuff.
I had planned to blog my build but I'm terrible at remembering to take pictures so not much got done with that. Glad to see some one out there is better at it than me!

Thanks JTNWEvo, if you have any pic of your car id love to see them! Ya the speedo cable was very easy mine came from a 91 mustang with no cruse control. I got the 70" one but you should be able to use the shorter one, mine is going to be way to long. Im still on the fence with EFI and carb. Im leaning to using a carb but the nice thing is I can always swap back. I might getting it running and driving and if the carb gives me issues with cold starts and vapor lock and all the other negative parts of using a carb I will go to EFI.
Also I found a motivation to get the car built! I am going to enter it into the -OPTIMA's Search for the Ultimate Street Car- This should give me time to build the car and start to get it sorted out so it will be more stable and the kinks worked out. They are coming to Charlotte NC on July 25-26th and running and at the nascar track, that gives me 121 days, 8 hours, 30 min, and 5 sec to get the car done! I don't plan on being any kind of competitive but it will be a good test for me and the car and it will give me more of a goal then to just finish the car. Its also a grate opportunity to run the car hard and off the streets.
I made a little progress this week but not enough to have a post yet. I wont be able to work on it this weekend but I hope to be putting the motor back into the car in the next two weeks. Need to get the clutch and bolts for the flywheel and clutch. Fingers crossed that we are getting close!

JTNWEvo
New Reader
3/26/15 1:26 p.m.
Hey, I put up a few photos and a video of it running on Flickr. https://flic.kr/s/aHsk67rQ6v

Your swap looks very clean and I can't wait to hear how it drives!
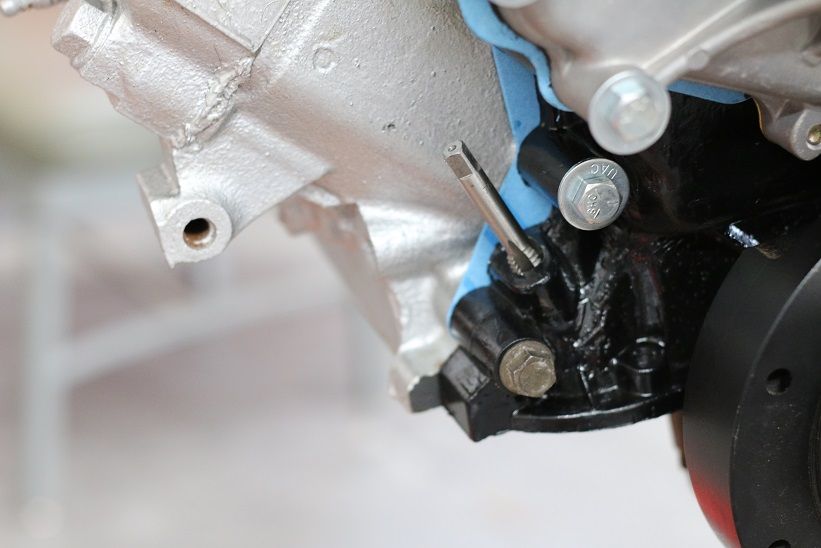
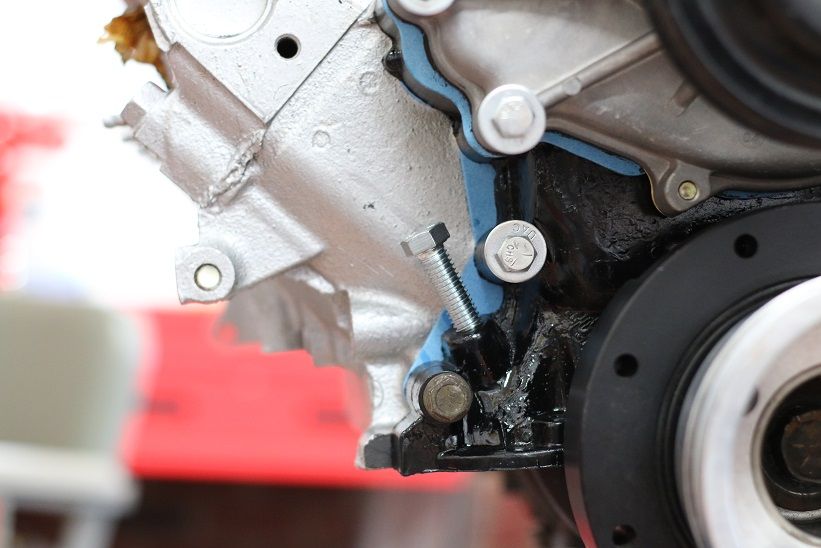
I have gotten a little bit done with the car. I started with plugin the hole for the dip stick on the timing cover. Since it is an older timing cover it has a hole for the dipstick in the front of the motor. I wanted to keep my dipstick on the side of the motor (stock location for my GT40P motor). So I simply tapped out the hole and used a bolt with some gasket maker to plug it up.
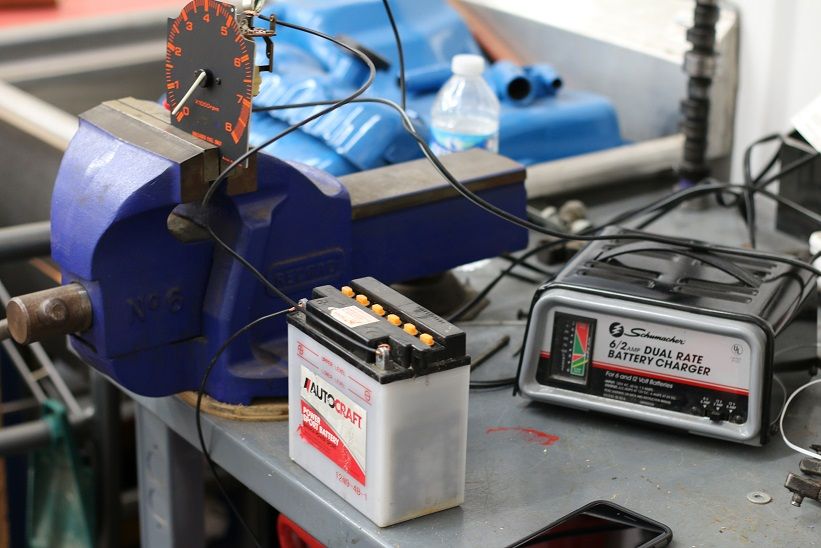
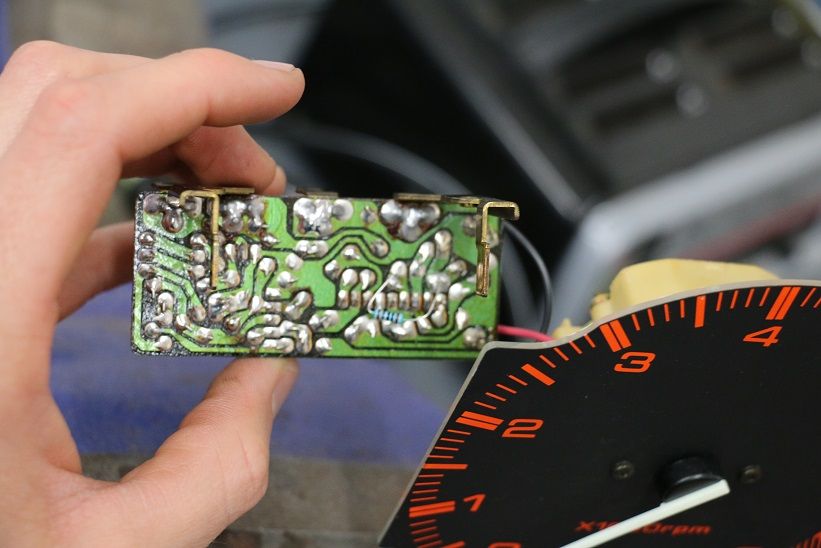
Then I talked to some people on instagram that were doing the swap as well and found out that I was using the wrong type of charger to calibrate my tachometer. So I grabbed my grandpas old school charger and hooked it up and this time it worked. On the way home I tried to stop by radio shack only to find out it was closed... So I had to dig around at home and find some random resistors. I soldered one in and it worked! Well not at first I had to adjust the tachometer back so it would read it was calibrated below 0 with the resistor now in place. Then I just fine tuned it to the correct amount for the v8 and yet another job done! This means I should be able to use the stock dash and all of its functions! I really wanted to keep the stock look so this works grate for me!
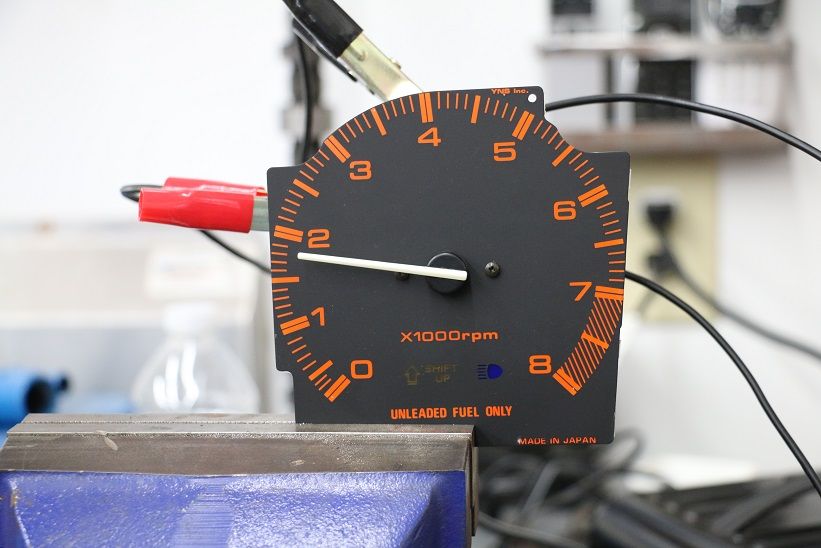
Hard to see but this was where I put my resistor.
I also have some parts coming in the mail. Flywheel bolts and a clutch release bearing so the motor and trans should go together soon then. Also figured up my speedo gear with the 4.11 gears and my tires, so I ordered one of them and a fuel pulp block off plate for the timing cover. Shouldn't be to far from putting the motor back in!

JTNWEvo
New Reader
3/31/15 11:43 a.m.
Thanks Skervey, I am dying to drive it but I can't get the darn clutch to work properly. I used the recommended 1" Wilwood Master and pull-type slave and I can't seem to get enough throw to disengage the clutch. I have spent several days bleeding and adjusting the thing but it just wont pull enough to disengage. I've ran 2 pints of fluid through the system and am pretty sure there is no air left in there. I have adjusted the clutch pedal so that I am bottoming out the master and the slave still wont pull all the way. Getting frustrated.


