
I've got 16mm of spacers on mine...

Well I've neglected this thread again, time for an update.
After this season I decided that the stock PASM suspension just wasn't cutting it. The active system is nice on the street but if anything gets in the way when approaching the limit of grip. A few months ago I bought a used DSC shock controller to give that a try. It was an improvement but still just not what I was looking for and required more tinkering than I wanted. I debated a few options and then found a used set of ohlins road & track coilovers for a price that I couldn't pass up. I wasn't sold on the super high front spring rate, but I rode in a friend's car with the same setup and it seemed to work well.

But first...I finally made it back out on track at the end of the season at nelson ledges. Other than being incredibly cold and the tires clearly starting to age out, the day was fun and uneventful. Swapping the track pads on went fine, but when I went to put the street pads back in I noticed that one of the caliper stud nuts wasn't quite as tight as the others when removing the caliper. Then when reinstalling that caliper, that stud/nut wouldn't take torque. Well, I know what that means...
There's your problem:

The threads were pulling out of the aluminum knuckle. In truth this is all my fault. When I originally installed these studs I didn't quite take the process of cleaning out the threads before installation seriously enough (the holes are open to the environment on the bottom end and the studs thread in further than the stock bolts) and that stud seized not quite fully installed. I made it work and it held up for two years and probably 10-12 torque cycles, but the reduced thread area finally gave out.
I contemplated trying to repair the threads with an insert, but ebay provided me with a whole replacement knuckle from an 11k mile 911 for not much more than the thread inset kit would have cost. That plus a new stud kit was an annoying but ultimately fairly cheap fix, with the added bonus of a basically brand new wheel bearing. All in all this was the best time for this to happen since I'm about to pull the suspension apart anyway.

New knuckle, with new studs installed. The slight irony was that, having learned my lesson about cleaning up the threads well, the threads on this knuckle were so nice that the thread chaser threaded through by hand with zero resistance.

With coilovers and a new knuckle sitting around, I had the opportunity to do some...unconventional wheel/tire fitment checks.

Ohlins did one of my least favorite things and came up with an aftermarket suspension setup with less clearance than OEM. To be fair the OEM clearance is very good and I guess ohlins wasn't intending these to be used with 18" wheels, but there's still an easy 10-15mm of dead space in the spring seat and the spring is longer than it needs to be. This is with 3mm more spacer than I run with these wheels on the stock suspension, and less clearance if anything.

Well, let's see if I can do something about that. I switched to shorter springs and also went down a step in rate which both made me a bit happier with the setup and meant more preload would be needed, moving the spring seat further up on the strut. Then I cut down the upper spring seat as much as I felt comfortable with, which also involved trimming the lip on the stock strut bearing to clear.
Before and after:


Between the shorter springs and modified upper seats, plus running slightly less lowering than the default setting (which was always the plan) the spring seat moved around 2" up the strut body and completely out of range of wheel contact. This is back to the normal amount of spacer, and the tires I'm planning on running in the future (RE71RS) run a bit narrower so there should be sufficient clearance. Not ideal but a big improvement.

So time to start installing, and do some wheel/tire fitment checking along the way. Since the left front was getting the knuckle replaced too I started there and did it the "hard way" of totally disassembling the suspension. That turned out to be an awful process. There was some magic in the control arm installation where everything went back together fairly easily that was missing here, I guess because of the significantly reduced droop travel of the coilovers. Eventually I ended up using a ratchet strap from the control arm to the chassis to load up the inner control arm bushing enough to make the holes align, and finally everything went back together.

The other front was much easier, when you don't need to remove the knuckle there's enough space to sneak the strut out of the fender opening by just loosening the inner control arm bolt to allow a bit of extra range of motion. And of coure the much shorter coilover goes in pretty easily.

Onto the rear, where the internet provided me with the "easy" method, the alternative being fully disassembling the whole corner including the axle and brakes...no thanks. There's not much preload to the stock springs which allows you to applly a spring compressor, slip the lower end of the spring out of the seat, and then thread it down the strut body allowing for enough clearance to slip the strut up onto the hole in the body and then out of the car.

Installation of the coilover is kind of the reverse process. Thread the adjuster way down to get the spring out of the way, insert the upper end through the hole in the body, then into the knuckle. Again the ratchet strap came in handy, this time to compress the strut while slipping the strut mount up into place. The first one was a bit rough including accidentally installing the upper spring seat parts in the wrong order at first, but with those lessons learned the second side went together quickly and easily.

Okay so how about those tire clearances? This was mostly out of curiosity as, having run them for two years, I knew that these tires cleared on the much softer stock suspension, just not by how much. Here's the front, it's hard to show but these are all taken with the tire just barely not touching the fender.
Wheels straight ahead is the worst, with the front of the tire peeking out of the fender:

But as soon as the wheels start turning, things get better:


It's a little hard to measure but these should all be pretty solidly beyond what the suspension travel will allow.
The rear is a bit harder because I'm planning to downsize from the current 19" wheels to 18s, so I don't have a great representation to check with. The real concern is wheel clearance to the toe arm and possibly to the lower control arm when the suspension compresses. The front wheel with no spacer is within a few mm of the backspacing of the correct wheel, so it's a decent reference:


Again that should be beyond the possible travel so the control arm clearance should be fine. The toe link clearance is a bit tough to judge because it depends on the exact shape and thickness of the inner wheel lip. My plan is to go a bit aggressive with wheel offset and be prepared to run a small spacer if needed.
And I tossed on the 19" wheel/tire, which is both taller and wider than the tire I plan to run, to check fender clearance. No problems there:

Okay, final setup time. One of the things I learned from this process is just how hard it is to find a relatively flat and level car sized piece of concrete. Knowing that my garage floor isn't flat, I took measurements of each fender height on the stock suspension as reference points. They were pretty uneven, especially the fronts, but I just went with it and aimed for reproducing those heights with the offset of the ~1/4" of lowering I was aiming for.

After that was all done, I took it to work where I have access to a set of scales. After spending quite a bit of time managing to set them up flat and level, I lowered the car onto the scales and found that my initial setup was basically dead on. This is with ~180lb (a bit light for me but it was all the ballast I could come up with easily) in the drivers seat:

I forgot to take the photo but if you do the math that works out to 49.6% cross weight. I worked it out that the correction to make it perfect was about half a millimeter height change on one of the rears....that's more than close enough for me. I did miss a bit on the rake, the rear was higher than I wanted and the front just a touch too low, but that's an easy change to make that doesn't require scaling the car so I just set the front swaybar endlinks and packed it up to make the rake change at home.
And for reference this is the weight with no driver, with basically a full tank of fuel:

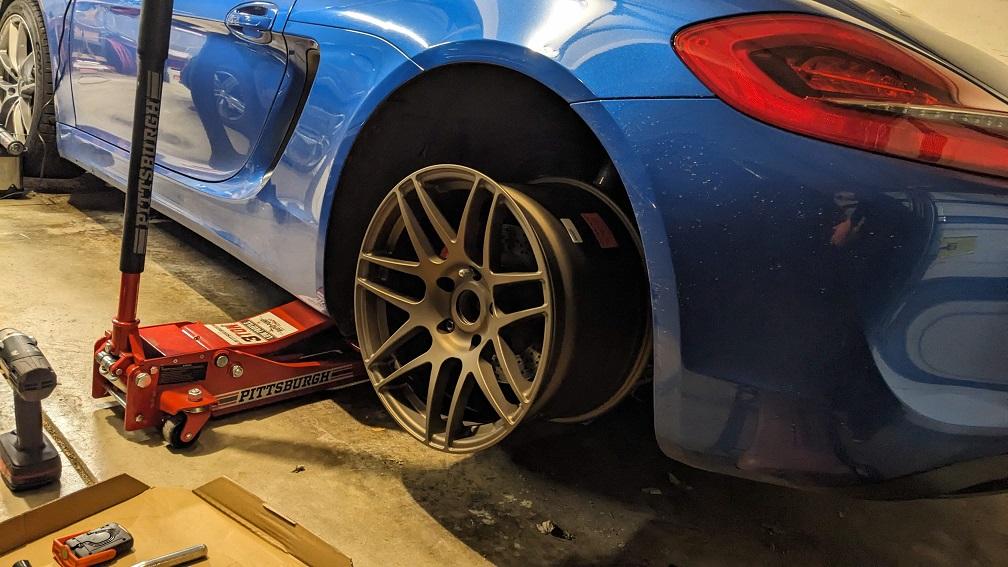
Made that final ride height change did a torque check of everything after diving it for a few miles, then went out and washed the car to take a nice photo of the new ride height.

My initial impression is that these things are pretty nice. The ride quality with essentially doubled spring rates is a bit worse, but at least as good as I was hoping for and definitely not unbearable. Handling is a bit hard to judge on all seasons in 40* weather but the car seems more predictable and planted than it used to.
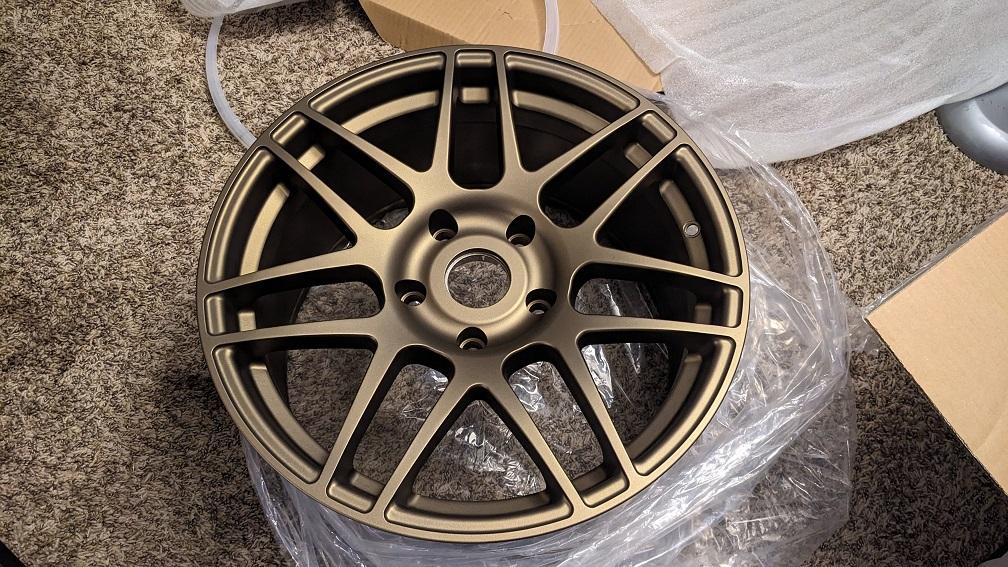
Ended up being busy this week and forgot to post, but some fun stuff has shown up in the last couple of weeks...and now I'm poor for a while.
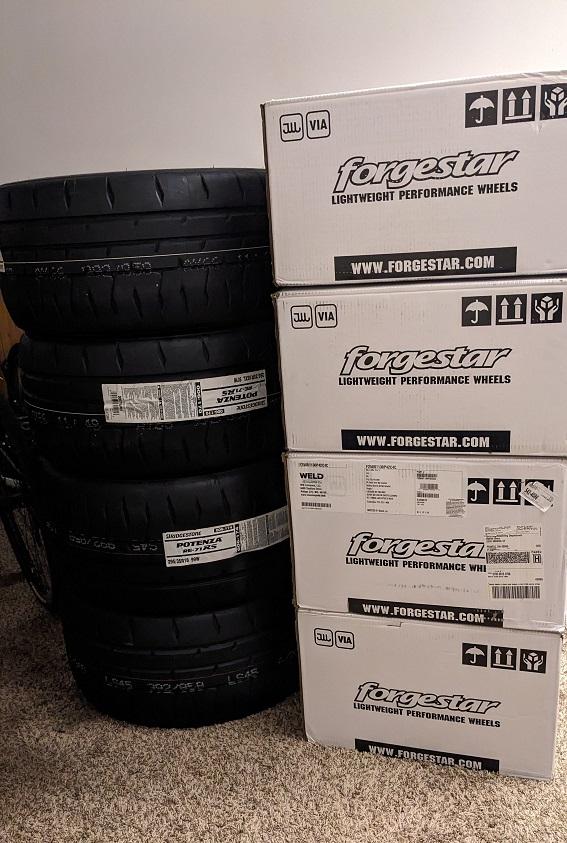
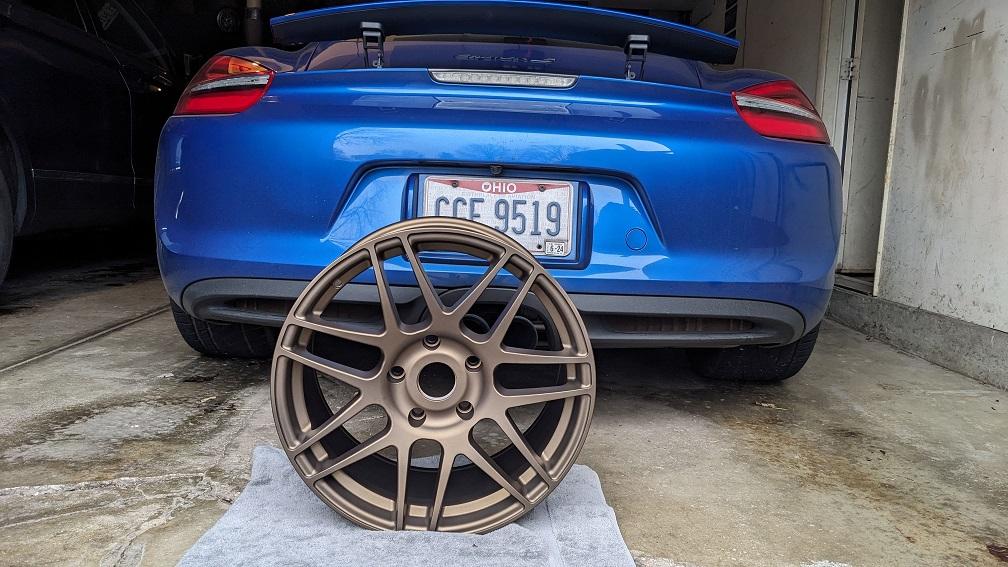
Wheels test installed on the car:
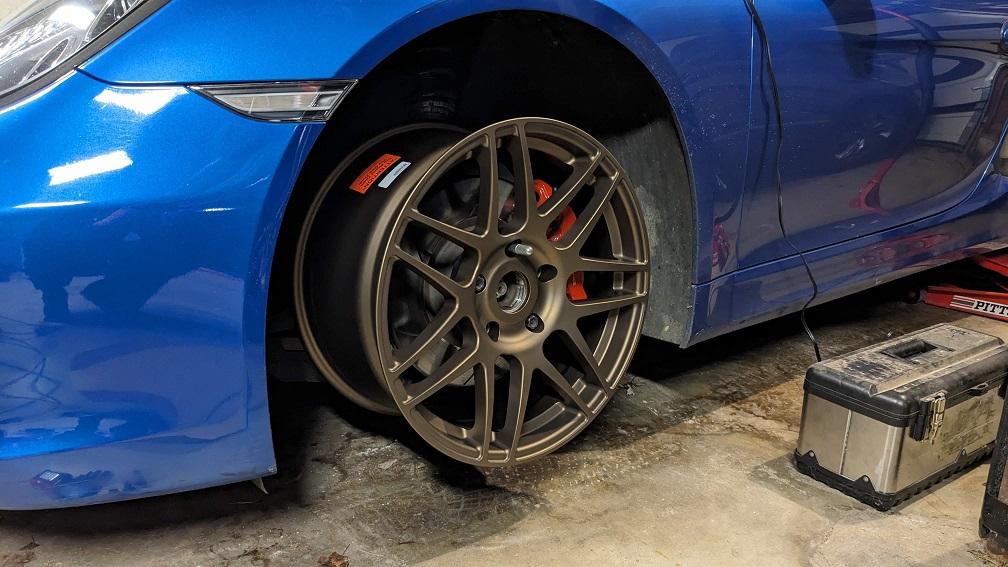
Back when I ordered these wheels I did some fitment checks and a lot of measuring and math with the wheels I had available, but every wheel is slightly different. Considering I'm trying to run a pretty aggressive setup I wanted to maximize the offset and went a bit aggressive, I'd rahter have to run a few mm of spacer than end up with extra inner clearance. So I figured out what offsets I was confident would work and then added 2mm to them. So how did that go? Up front there's no wheel clearance issues, only tire, so that'll have to wait until I get around to mounting the tires. But the rear limit is wheel clearance to the toe link, which I can check now.

Turns out, better than expected. This is with no spacer and it's right where I hoped it would be. It's hard to photograph well but the toe link is tucked within the step of the wheel lip slightly, with 3-4mm clearance axially and just under 3mm radially which hopefully should be plenty.
Oh and these also appeared about the same time...I had convinced myself to wait until next winter but these came up for sale for a price that was too good to pass up. Now I need to decide if I'm going to install them now or wait until I can afford the tune that should go with them.
I finally took care of a small project I've been wanting to do. I generally like these seats but the combination of their limited adjsutability and my slightly long legs mean that the seat base is too flat and it's a struggle to stay upright while driving hard, especially on track with heavy braking. The extra lap belt I added last year helped but still wasn't great. I tried but couldn't quite convince myself to replace the seats with something better, but I figured out that since the seat base pivots/raises mechanically (in a way that's not useful for what I want to do) it attaches to each slider at a single point front and rear. That means it should be pretty easy to raise the front pivot point to lift the front of the seat up to a better spot.
After a lot of measuring and some CAD work, these arrived in the mail. I got a few different heights so I could experiment if needed

Step one: extract the sliders from the seat. This was surprisingly easy, with the slight complication that the last idiot that removed the seat (hey...that's me) used a normal hex socket instead of the proper e-torx on the seat bolts so the heads were a bit chewed up.
Unmodified slider:

Drill an extra hole in the slider bracket for extra support of the add on tab, paint and install the tab, and the finished product:

And reinstall it all. The mount points are wider now, but there seems to be enough compliant in everything taht it went back together without binding anything up. The seat base angle before:

And after:

In photos both configurations look fairly steep, but the new setup feels much better. This is with the shortest brackets (~1" lift) which was definitely the right choice. I actually wouldn't mind a little less lift, but it can't go much lower without interfering with the original slider mount and I don't want to make any irreversible modifications to anything.
Intermittent nice weather means a semi-local test and tune event this weekend, which means it ws time to mount the tires and install on the car. The front needed 3mm of spacer for reasonable tire clearance which is about what I expected.


Still looks just as gorgeous. Actually even better now with those matte bronze wheels! :)
Well the first event of the season is over, which makes this the perfect time to tear the car apart for clutch replacement and header install...right?
Step 1: spend the winter slowly accumulating all the parts you need so that it doesn't seem quite so expensive.

This isn't the first 981 clutch job I've been involved with (and unfortunately won't be the last either) so I know more or less what to expect. The last one was on a texas car with <40k miles, this one is on a car that started life in new england and is approaching 90k miles so there might be some surprises along the way.
Getting everything unbolted and the transmission out was surprisingly uneventful other than having to relive the experience that the transmission doesn't really quite fit out through the provided opening between trunk floor and subframe cross brace nicely. But it's out.

Having access to a lift and transmission jack makes this infinitely easier than when I did this job on my 986 boxster on the floor with a floor jack.
As expected the clutch, flywheel, and pressure plate have seen some things. It's hard to photo but the PP surface looks like a brake rotor that's ready for replacement, complete with a few grooves. And of course quite a few hot spots.

And...uh...I'm pretty sure dual mass flywheels aren't supposed to move on this axis
As somewhat expected the project has scope creeped a bit with some "while I'm in there" stuff - rear main seal replacement, repainting the crossmember that's starting to get rusty while access to it is better, and some other hardware and seals that I didn't think about when first ordering parts.
As expected this has dragged on between add-on projects and things taking longer than expected. I tried to avoid replacing the rear main seal but gave in and decided it was the right thing to do. Removal went...well it went.

This week I 3D printed an installation tool since of course the new seal needs to be set at a specific depth rather than just bottomed out into the channel.

...and then promptly found out that I didn't leave enough clearance for the flywheel dowel pin and had to hack it up some. Ugly, but it worked and the seal seems to be seated well.

And got the shiny new flywheel installed and am finally on the path to actually putting things back together.

Some side projects...rear crossmember rust treatment and paint. I'm annoyed at how rusty this was but I guess overall I should be happy with porsche's rust prevention. For a car with almost 90k miles that spent the first few years of its life in new england being driven year round and has seen salt a few times during my ownership, only two bolts in this whole project were slightly troublesome and they were exhaust bolts which doesn't really count since that stuff always rusts.

This was a *very* interesting place to find rust though...inside the vacuum solenoid for the valve that controls coolant flow to the trans cooler.

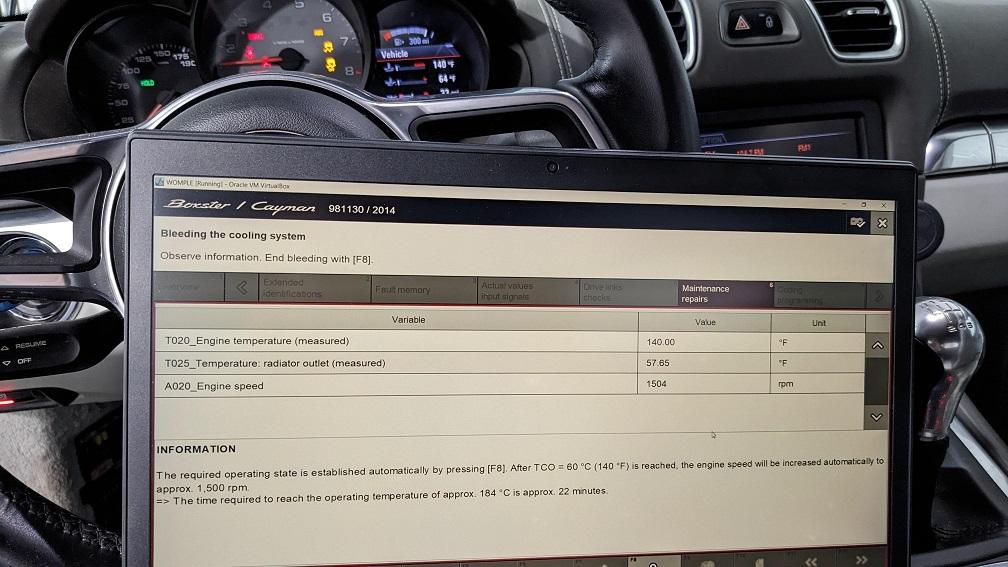
After a long weekend of work, it lives! Of course it's still not quite finished. The cooling system needs to be bled but it at least was able to run long enough to verify that the clutch works and the headers sound amazing.
Final step: run a coolant bleed cycle, hope the level is okay afterwards, then drive it home.
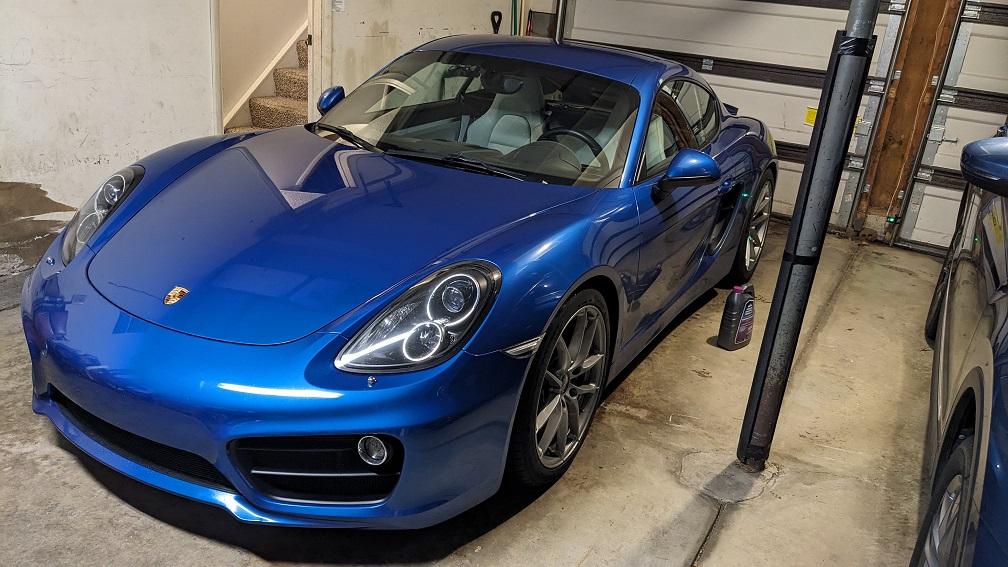
And home, looking shiny thanks to a 40 minute drive through intermittent heavy rain, and with a reminder to check the coolant before driving again
I've been driving it as much as I can to get the clutch broken in (and just enjoy the car) despite the terrible weather. I'm really happy with all of the changes. I'm not sure I ever listed the details so here they are:
-replacement flywheel, GT4 clutch kit: unsurprisingly the clutch pedal now feels exactly like a GT4 (which is a good thing). As best I can tell the clutch disk is the same as stock but the pressure plate definitely has a bit extra clamping force than the original. As a bonus the GT4 kit was actually cheaper than the stock replacement.
-Rennline trans mounts: assembly of these was awful but they seem to work well. A bit more low rpm NVH than I was hoping for but very tolerable and the drivetrain definitely feels more controlled. Some of the extra noise transmitted through the chassis is actually nice, it gives it a bit of the sound/feel of a classic porsche.
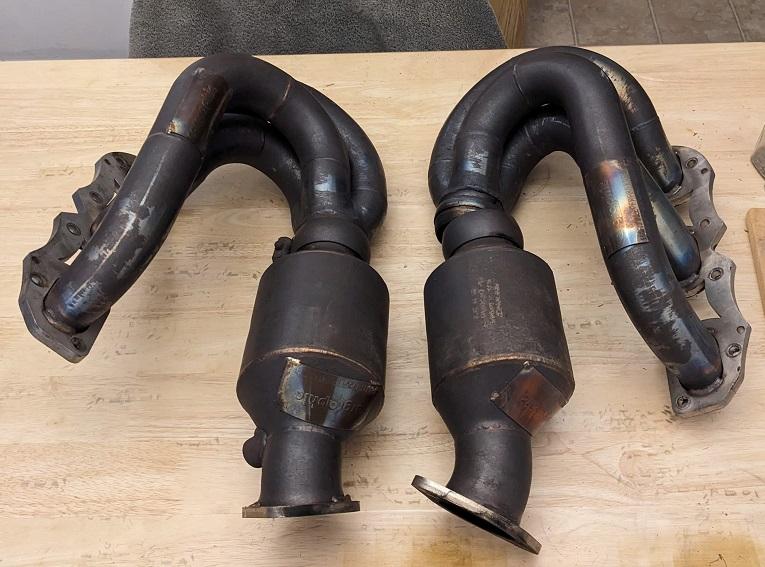
-Cargraphic headers with high flow cats: a huge pain to install but they sound good while not being incredibly loud, the cats work well enough to not make any bad smells or cause a CEL, and the low-mid range torque isn't life changing but is definitely an improvement. Eventually I'll get around to getting a tune which should really wake it up.
I also replaced the M1 delvac gear oil (it was also 3-4 years old and probably about ready for replacement anyway) for some redline 75w90NS. So far that's an improvement as well. The delvac was on the thick side for cold weather operation, this stuff seems a lot better and the high temp viscosity should be about the same.
At least on the 996's, the lore is Porsche or Delvac in the transmission ONLY. Under the threat of the 4 Horseman coming to knock on your door...

I found a ton of mixed reviews on what works and (mostly) what doesn't work in my 986. I ended up going OE for fluid and it's... fine. I've put redline in everything else I've worked on and been very happy. Curious to see how it works for you.
Yeah everyone has their own opinions and they all conflict, kind of like brake pads, brake fluid, oil.... It's worth noting that I believe this is a pretty substantially different transmission than the earlier cars. The delvac was *fine*. I chose it originally because everyone raved about the high temp performance. Which did seem good but the penalty was the driving below about 50* ambient felt like every shift was ripping the teeth off of the synchros until everything warmed up. The "on paper" specs of the delvac aren't overwhelming - the viscosity index is fairly low which is why it needs to be syrup at low temps to achieve good high temp performance. I did this research a while ago and don't remember the numbers but the redline has a higher VI so the high temp viscosity is very close to the delvac but the low temp viscosity is much better. So far it's been good, but like I said some of that is probably just from the oil being fresh. The only direct experience I've had with "bad" gear oil was in my friend's 997 GT3 and it was apparently very immediately obvious that it wasn't right. So given that it's done ~100 miles and is still fine I don't forsee any major issues.
Had an event with the new headers. As expected the power/torque difference is pretty minimal until I get around to getting a tune for it but man, does it sound good. No issues revealed other than a minor leak somewhere in the system as everything settles in. Should be as simple as cranking the clamps down a bit more.

Now that the car has a bit more runtime and has seen some higher speeds and warmer conditions, it's time to evaluate the wheel fitment.
Front: just the tiniest bit of tire rub on the spring seat and spring, not worth doing anything about

Rear: in some load condition that happened in this event but not the first one, the inner edge of the inside lip of the wheel just barely makes contact with the toe link. I'm probably going to toss 1-2mm of spacer on it just to be safe and since I was expecting to have to do that originally anyway.

All in all I'd say that's a pretty good precision fitment!
Also after probably almost 1000 street miles and around 20 autocross runs none of the spring seats have moved which was good to see.
I don't think I ever posted this so for my own reference if nothing else, this is the current alignment. Caster was originally somewhere around 10*, I recently switched to the lower caster setting which is ~8.7*. So far I haven't been able to conclude if that was a positive change or even a noticeable change at all.

I got 1mm and 2mm spacers for the rear wheels. 1mm still rubbed the toe link a bit, 2mm is on the car now but I haven't had the wheels off to check yet. Honestly I don't think it's a huge deal for that tiny amount of touching but I'd like to see what it takes to fix it, and be as nice to the wheels as possible.
Other than that everything has been working well and this setup is super fun and fairly easy to drive. The ohlins are exactly what I wanted/expected. There's definitely room for improvement if I really wanted to maximize performance, but they went on the car, took a day or two of street driving to find decent damping settings, and I haven't been inclined to mess with them since. Which is exactly what I wanted - 90% good, no fiddling, just driving.

In reply to dps214 :
^ That's really close to what I ran on my Cayman. I was running zero toe F/R though.
So I never really loved the GT3 front swaybar ever since I put it on, for a few different reasons. I lived with it mostly because it's a pain to swap and I didn't want to be constantly dropping the front subframe trying to find the right setup. It worked better with the ohlins but still seemed like it was a bit too much for slower speed stuff. Well, after a couple of particularly frustrating events, I decided it was worth the risk and effort to try something else. Conveniently I found an X73 (factory sport suspensionoption ) bar on ebay for pretty cheap, so I jumped on that. Looking at the calendar at the events I cared about and what other testing events were around, there wasn't a great time to install it and have a reasonable testing opportunity. But I decided I was done with the GT3 bar, so I tore the front of the car apart...a week before leaving for autocross week, with just a not super useful local event in between to make sure it didn't totally suck. So a couple of days of my fourth of july break looked like this:

Happily it all went back together without seeming to mess with any of the alignment, which is the other risk involved. With the GT3 bar off the car I did a quick rate check and it appears much stiffer than the internet believes, as a few others in the autocross community have suspected. So that made me feel better that I was on the right path and hadn't just spent six hours replacing the GT3 bar with one of the exact same stiffness.
Off to the not super representative local event and I did about as well as I could have hoped, including beating a friend with a STU base 981 with basically the same parts on it.
Okay so feeling somewhat confident, off to autocross week we go.
Long story short, things went about as well as I could have hoped. Considering the competition and the usually course styles, I knew anything more than third in class and about fourth overall was going to be basically impossible. Which is pretty much exactly where I ended up, a pretty solid third in class and just missing out on fourth overall by under a second total across eight competition sessions.


All in all it was a great week with lots of autocross, hanging out with old friends, and making some new ones. I had hoped to be a bit closer in time to the top of the field, but I'll take it considering I was in the fastest class, running against cars with substantially more power on generally pretty power friendly courses.
Fastest run of each day video for anyone interested:
Pitt 1: https://youtu.be/BHD__ReGR6Y
DW42: https://youtu.be/Os5tflgkdQM
UMI: https://youtu.be/j1EmPKkxuYE
Pitt 2: https://youtu.be/RZeQcQXMZdI
After that I was up to five autocrosses in seven days. As if that wasn't enough, I stuck around for a local scca event at pitt race the next day to make six events in eight days. I did some tent camping that night for the first time in a long time. I never got any good photos of it but the car was pretty much at capacity going to and from the event, with a week worth of autocross stuff including rain gear, plus camping equipment.

And the approximate trip totals for the extended week:

The whole experience was a ton of fun, though I'm happy to have nothing on the calendar for next weekend.
I've been a little haphazard in my testing and tuning lately. Recently week I remembered that I had reduced the front caster a bit. With more seat time and I bit more research, I'm pretty sure that was the wrong choice. So last week I undid that change. Somewhere along the line somehow one side of the rear alignment slipped a bit. I noticed it at the pre-autocross week alignment, but convinced myself it was some measurement anomaly because the car drove fine and the tires were wearing evenly. Then I looked back at the first time I changed the caster and the rear issue was there too, I just didn't notice it. So along with verifying the new caster setting, I knocked the rear end back in line. The slipped alignment still had net rear toe in, just less and very uneven side to side for a sizable thrust angle. I can't say the car really drives any differently now, but oddly enough the steering wheel isn't off center anymore ![]() . I'm not sure the caster makes much of a noticeable difference, but I took top index at a (admittedly less competitive than usual) local event by a healthy margin on sunday, so I guess the changes worked.
. I'm not sure the caster makes much of a noticeable difference, but I took top index at a (admittedly less competitive than usual) local event by a healthy margin on sunday, so I guess the changes worked.
Current (hopefully not to have to be messed with for a while) alignment for reference:

Well I finally convinced myself into getting on track this year - a track night event at pitt race last friday. That meant swapping to the track pads which brought with it a bit of maintenance I'd been putting off for a while: the rear rotors. They've honestly been ready for replacement for a while now and recently they finally started cracking a bit so it was time for them to go. It ended up not being terrible to do but did involve drilling out the rotor retainer screws as I was afraid of.

After drilling, a whack or two with a hammer and they popped right off. I managed to drill the screws out in a way that didn't ruin the threads in the hub and happened to have a spare set of screws sitting around, so it all went back together like nothing ever happened.

Now the front and rear rotors finally match again instead of the slotted front/driller rear setup it's had for a couple of years now. Put it all back together, soften the rear swaybar, do a quick brake bleed and it's ready to go. Oh there is one more bit if maintenance, for later: the front street pads are cooked. I knew they were getting low but I didn't realize just how close I was cutting it. I knew this was coming and have new ones to go in when the track pads come off.

On to the track! Having been almost a year since I've been non track anywhere and a couple of years since pitt, and with a pretty thoroughly new setup, I didn't really know what to expect and wasn't looking to do anything crazy. The other two times I was there I was stuck just over the 2 minute lap time mark, so I was hoping to at least do that because the car should realistically be pretty easily capable of it. I ended up doing three total 1:59s, the best a 1:59.2 according to racechrono. There was also a 2:00 lap that probably would have been a high 1:58 if I didn't sacrifice the last corner to let a much faster car by.
The lap wasn't really anything special, but I was mostly just looking to refamiliarize myself, feel the car out, and have some fun. There was also a bit of learning:
-It's been several years since I've been on track with tires that are only good for a few laps at a time and I struggled to figure out/remember how to manage that
-The car overall feels very good but is a touch on the loose side. I probably should have gone down another step on the rear bar. Initially it's pretty well balanced but as the tires get really hot the rear starts to go away a bit. You can see me heaving to wait on and chase it a few times in the above video.
-On that note, I stiffened the rear shocks to try to create more rotation at autocross speeds, which might not be helping at higher speeds
-Comparing to the data from the last time I was here, the car does seem to be making at least a little bit more power from the headers and tune. Temperature management seems about the same.
-There's definitely more time in the car but I need to build some confidence and get the car setup a bit better to do it.
After that I camped friday night and stuck around for an autocross the next day. I went back to the normal swaybar position but was lazy and left the track pads on which made absolutely no difference as far as I could tell. In competition I just didn't drive very well. In fun runs afterwards I moved the rear bar a step stiffer and drove better and the result was nearly a full second of improvement and an actually pretty decent time. The last time I tried the stiffer bar it drove sketchy on the street which is why I was hesitant to try it again, but it doesn't seem to have that issue now and helped a lot. Which makes me want to go stiffer. The problem with that is that I'm maxing out the current GT4 bar so I need to go to something aftermarket with more range. In the meantime I might try turning up the rear shocks a bit more.
Well I've been slacking on posting as usual but a few weeks ago I did an upgrade I've been contemplating for a while: front strut tower reinforcement plates. These cars have cast aluminum strut towers that have a bit of a history of failing from track abuse with stiff suspension. The plates are actually porsche OEM parts from the cup/clubsport racecars, slightly adapted to work on production cars. As seems to be the internet consensus, I don't think they're a huge strength increase but a) it can't really hurt and b) in the event of a failure they should help to contain things and level the extent of catastrophe at the very least. Overall, they're not incredibly expensive and help me sleep better at night, so it's worth it.
The install instructions that come with the kit are....not great so I'm going to go a bit more in depth with the install process in case it helps anyone else.
Passenger side first, the easy side. The plate has to pass through the cabin air filter box to the inboard support brace.

The instructions say to pull the box out completely but that seemed like a lot of unnecessary effort, so I just trimmed out the necessary area.

The plate installs over the strut mount holes obviously, and attaches to the inboard fender support and an unused hole in the strut tower using a long bolt and spacer on the outboard end, accessed from inside the wheel opening behind the fender liner.

For that outboard point, the kit uses some cap head bolts which aren't quite long enough to engage the lock nut fully. I swapped them out for 5mm longer hex head bolts, with a fender washer under the bolt head (below). Total height of the bolt head is the same, but with much more surface contact on the tower and full thread engagement in the nut (as seen above).

Once everything was installed I trimmed the removed piece of air box and glued it to the lid.

On to the driver's side. This side is more involved, first because the inboard support point on this side holds the wiper motor bracket. What's not super clear from the instructions is this plate doesn't come out, you just unbolt it, lift it up a tiny bit, and slip the plate in between. The bolt is oddly shaped because it's also the negative jump terminal.

The other, much bigger issue that's alluded to in the above photo is the windshield washer reservoir fill spout. The support for it occupies the outer plate support hole, so it needs to be relocated. The kit comes with a little bracket to mount it off of a tab on the reinforcement plate, but the position it ends up in is terrible. I modified the fill spout to clear the bolt/spacer so it could live in more or less the stock location.

Through some trial and error I made my own bracket that puts the filler not quite where it started out but in a place where it's actually accessible and looks more or less like it belongs.

Here's my bracket versus the one included with the kit. My version ended up a tiny bit on the short side still so the original was nowhere near working. Oh and also the holes in the included bracket aren't even large enough for the screws to fit. I had to drill them out to be able to test fit it, only to find out that it wouldn't work. All in all not my favorite part of the kit.

Okay, so the actual plate install is finished, at this point the instructions just say "reinstall the trim panels and you're done" ....except with the plates installed the trim pieces don't remotely fit well anymore. (the plates are designed for racecars that don't have any of those panels) On the passenger side all that can really be done is punch a hole in the side panel for the outboard nut to poke through. The rest of the panel gets tweaked a little but that can't really be fixed without basically cutting it in half.

The panels on the drivers side are configured a bit differently and require more cutting but end up fitting better once cut. It's hard to show but both the side panel and the center cover get trimmed a fair amount but end up fitting well, with the plate "ear" sticking out the rear a bit.


The wiper fluid cap is kind of wedged between the edge of the plate and the side of the center cover which I don't love, but it's fully functional and that's about as good of a spot as it can be in. All in all everything went together well and nothing looks too out of place, it just took a bit more effort than expected. With any luck I'll never have to find out if these things actually do anything.

Well, the only thing I've procrastinated on worse than my winter work on this car is posting about it. After the overhaul last winter this year was fairly light, mostly just catching up on some more maintenance and solving some minor issues. An interesting milestone is that I've now had this car for long enough that work I've done in the past is starting to need to be worked on again.
First up, over the course of the year I had noticed that the front bumper grill meshes that I installed way back at the beginning had started to detach themselves. So, let's rip the bumper off and try again.

I'd say it feels like I've done this before but there were definitely a couple of steps I didn't remember. After 5+ years this is all the stuff that had accumulated in the radiators, so the mesh inserts definitely did their jobs:

After some research I figured out that the JB plastic weld I used the first time around really isn't intended to work with this type of plastic. So realistically it did pretty well then - there were spots that were still very solidly stuck on, to the point that I had to scrape residue off of the bumper parts. After way too much research, I ended up trying some VHB double sided foam tape intended for low surface energy plastics. No photos of this because I was lazy and it ends up looking exactly the same as it did from the outside, but hopefully this installation is a bit more robust.
On a related note, somewhere mid-summer, a piece of cast off tire rubber found its way into the side air inlet and into one of the engine bay fans, jamming it. I managed to extract the piece, and somehow being jammed for almost two hours of driving doesn't seem to have killed the fan, so that's nice. But that means it's time to add mesh inserts to the also (like the radiator inlets) surprisingly unprotected side inlets. There's less access here so I went with the "direct fit" rennline inserts. They of course ended up being not quite as direct fit as advertised, but with some effort they ended up in a shape that works well enough and install was fairly easy as advertised.

Of course in the process a couple of the little tabs on the trim pieces broke off. I managed to rescue them and reattach. Super glue to attach them and some gorilla glue to hopefully provide some structure. They seemed to hold at least enough to install reasonably well.

You'll need to log in to post.


