3 4 5 6 7
Adrian_Thompson
Adrian_Thompson SuperDork
1/7/13 9:14 a.m.

I'm really glad you've backed off on going coil overs. I thing springs, shocks and bars will give you 90% of the performance of coil overs for 50% of the outlay, and if it's good enough for Spec E30, it's good enough for your intended purpose. It's great that you've got a real E36 M3 rack available with no questions about what it really came off as it came off your car.

You're progressing faster than me, but you have more to do Keep it up.

Tom_Spangler
Tom_Spangler Dork
1/14/13 1:24 p.m.

A little more disassembly progress yesterday. Removed all this stuff:

Exhaust had to come out because I'm going to pull the trans to replace the rear main seal. And because it has a large hole in it near the front. As you can see, I sawzalled off the back, one look at those bolts told me there was no way they were coming off. The plan is to use the catback I got from the parts car. Since it's from an 87 325is, it's dual pipe. Since I have to buy a new midpipe anyhow, I figured I'll just get the 325i dual-pipe midpipe and convert the whole thing. Hopefully my factory manifold will fit, if not I'll probably get a cheap eBay header.

So, I'm looking for the cheapest midpipe I can find. I'd like to have a cat, but it's not essential, especially if it can save me some coin. Any suggestions?

Here's the wheel well, the suspension is all removed at this point:

Tom_Spangler
Tom_Spangler Dork
1/17/13 9:18 a.m.

Yay, new (to me) parts!

Thanks to R3V user "e30rooster" for the solid deal on these Bavauto springs.

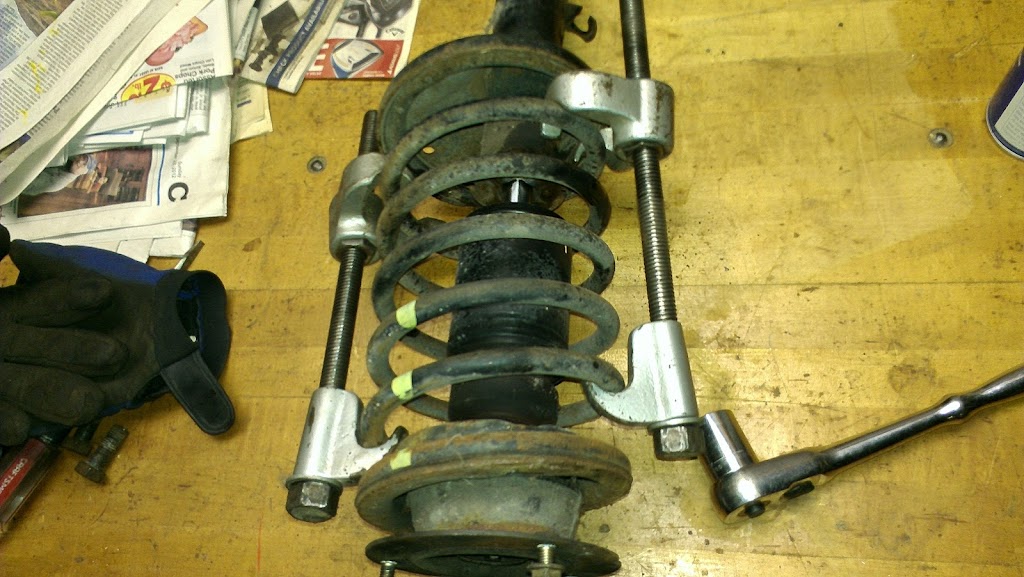
Time for strut disassembly. I've done this a bunch of times on many cars, and I have to say the E30 was one of the easier ones. I was able to use my trusty old spring compressors without any difficulty:

The spring compressed and removed. Pro tip: be super careful with a compressed spring, and uncompress it as soon as you can. In this state, it is more or less a bomb and can cause a lot of damage if the compressor were to fail or something:

On to the hub. Think it's been a while since the grease was packed? No matter, the whole thing is getting replaced:

Removing the hub nut wasn't too bad, as long as you have a 36mm socket and a long breaker bar. That thing is ON THERE! After that, a 3-jaw puller made quick work of the hub itself:

The last thing that needed to come out was the strut insert. The threaded collar was in no mood to move, so I had to persuade it with the old hot wrench:

Once it was off and I was able to pull the strut out of the housing, a ton of oil came with it:

So, now I really REALLY need to order my Bilsteins and hubs and such. First I want to clean up the spindles and housings and paint them, along with the brake dust shields.

Obligatory shot of the stock spring compared to the aftermarket one:

Adrian_Thompson
Adrian_Thompson SuperDork
1/17/13 9:27 a.m.

Damn, good progress, your getting ahead of me again

phenryiv1
phenryiv1 New Reader
1/22/13 10:08 a.m.

Looking good! I am about to tear into my 325 suspension as well, btu this will be the 4th or 5th time I have done so on an e30. It will, however, be the first time that I do so to just put in stock springs.

Tom_Spangler
Tom_Spangler Dork
2/12/13 8:48 a.m.

The parts fairy arrived!

Lemforder control arms, FAG hubs, Hawk HPS brake pads, Bendix rotors, Bimmerworld RSMs, rebuilt calipers from Autozone, and a few other miscellaneous things like SS brake lines and new front strut mounts.

Bilstein Sports:

Suspension Techniques anti-roll bar set:

Did a bit of repainting on the caliper slides:

I also painted my strut housing and spindles. Here they are assembled with the Bilsteins and new springs:

Next thing I need to do is replace the corroded brake and fuel lines, because they are a lot easier to get to with the driver's side suspension removed.

crankwalk
crankwalk Reader
2/12/13 11:18 a.m.

Nice work!

Adrian_Thompson
Adrian_Thompson UltraDork
2/13/13 11:01 a.m.
Tom_Spangler wrote: Did a bit of repainting on the caliper slides:

And here we can see why I havn't done much on the Saab, I've blocked my garage with Saab interior parts, plus quickcret and stone for the house, so when I needed to Service the Volvo I had to borrow Tom's garage, hence my car in the middle.

Thanks again Tom, you win one ride in my car at the 5/25 Rallycross as a result.

Tom_Spangler
Tom_Spangler Dork
4/30/13 12:49 p.m.

And then a few months passed.... Haven't touched Ugly much lately, hence the lack of updates. This is why:

We remodeled our kitchen. Took it right down to bare drywall and replaced everything except the appliances, which were fairly new.

So anyway, with that out of the way and warmer weather finally here, I was finally able to get back to Ugly. As of my last update, I needed to replace the corroded fuel and brake lines that run along the driver's side frame rail. As expected, the brake line came apart when I was trying to remove it, so I just cut it off:

Since that's a hell of a long line with lots of bends in it, I decided to just replace the bad part. I bought an 18" piece of hardline at Autozone and patched it in. Had to flare the ends of the old line first, of course:

A friend of mine's father was an engineer/mechanic at GM for 30 years, and one time he gave me a bunch of NPT and AN fittings. Like, a BUNCH:

All connected together:

Normally, I'm loath to adding new connections because they are just new opportunities for leaks, but in this case, it was by far the easier course. I'll check them regularly once the car is moving, of course.

The fuel lines didn't turn out to be as bad as I thought once I had them off:

I decided to go ahead and re-use them since the rust was all surface and they seemed structurally fine. However, I know that the rust probably weakened the steel, and the last thing anyone wants is a fuel leak, so I "reinforced" them in a way. I scraped off all the rust I could then hit them with Rust Bullet. Then I slipped a length of brake hose over them to completely cover the corroded areas. A dab of RTV at each end and a hose clamp, and I'm pretty confident that even if they do develop any leaks, the hose should keep them contained:

I also hit the rusty part of the frame rail with some Rust Bullet. It still needs topcoating:

Tom_Spangler
Tom_Spangler Dork
4/30/13 12:51 p.m.

On to the next thing. When I bought the car, the PO told me that it had a rear main seal leak. Sure enough, there was a pretty darn good drip from the area where the engine meets the trans:

So I removed this cover (don't know what it's called):

Correct me if I'm wrong (please!), but I think that looks like an oil pan leak:

Further evidence: it leaks a lot worse with the front end up in the air. It's been on jackstands for months. It had leaked for a while then pretty much stopped. But last week I jacked it up a bit more (needed the smaller jackstands for something else) and all of a sudden it was a gusher again. Now it's pretty much stopped again, but for a week or so it dripped like crazy. Also, the back of the flywheel looks bone dry, and I would think if the rear main was leaking it wouldn't be. What say you?

Adrian_Thompson
Adrian_Thompson UltraDork
5/1/13 1:41 p.m.

Therir is certainly oil coming from the oil pan, so I'm sure it is leaking. As for the RMS, the flywheel looks clean on the engine side so I'd say your 99% OK. Swap the pan gasket and cross your fingers

fidelity101
fidelity101 HalfDork
5/1/13 2:33 p.m.

rust free in michigan eh? seems rusty but not body cancer. great progress!

Tom_Spangler
Tom_Spangler Dork
5/15/13 9:44 a.m.

Oil pan removed. Yep, I'm pretty sure that was the source of the leak, judging by the condition of the rear part of the gasket:

The soft underbelly of the M20B27:

Doesn't look too bad considering it's 200k-plus miles. Bearing caps still feel nice and tight. I'm going to call the bottom end "good" until proven otherwise.

Of course, even after my ATF de-sludging, the oil pan still had a lot of crap in it:

I really want to put in a push to get this car on the road ASAP. I'm coming up on the one year anniversary of when I bought it!


Tom_Spangler
Tom_Spangler Dork
5/16/13 2:42 p.m.

So, the pan is back on, but now the front subframe is off. And now I'm doing more stuff (warning: project creep ahead!).

Originally, I assumed that the subframe had to come off to get the oil pan off because that's how it was on my E36. However, reading the Bentley manual, all you have to do is unbolt the steering rack, then you can remove all the oil pan bolts, lower the pan a bit, reach inside and remove the oil pump bolts (pan won't come off with the pump in place), then remove the pan and pump together. This is what I did, you can see in my previous post that the pump is sitting in the front sump of the pan. So, after giving the pan a good cleaning inside and out, and cleaning out the screen in the oil pickup, I dropped the pump back into the pan and put the whole works back into position. But I couldn't get a good enough grip on the pump to be able to put it in it's proper location to get the bolts started. After messing around with it for about half an hour, I decided to suspend the engine from above and remove the crossmember. Fortunately, I have one of these: http://www.harborfreight.com/automotive-motorcycle/lifts-stands/1000-lb-capacity-engine-support-bar-96524.html

Dropped the crossmember and I could easily get the pump back into place and then the pan. New gasket with some fresh black RTV and I've hopefully licked that little problem.

So the subframe is out:

One thing I'm definitely going to do is clean it up and install the reinforcement kit that you see there. I think there are also some reinforcement plates that came with my sway bar kit, need to look for sure. But since literally everything else is out of the way right now, I've decided to go ahead and do my E36 rack swap now, too. I just ordered a reman rack from Rackdoctor.com. As I mentioned previously, I have a 98 M3 rack left over from my old car that I will be using as a core. I also decided to go ahead and replace the worn, old engine mounts, too. I ordered some stiffer rubber ones from Bimmerworld.

Supposed to be a nice weekend around here, and we have no plans. I will be wrenching!

irish44j
irish44j UltraDork
5/17/13 12:41 a.m.

looking good Tom, keep it up!

Tom_Spangler
Tom_Spangler Dork
7/1/13 3:22 p.m.

Long time no update! I have been working on the car, but it's been bits and pieces, no major stuff. But here's where I stand right now. In my last post, I had removed the subframe and was preparing to do an E36 rack swap. This, of course, meant removing the steering shaft. I still have nightmares of doing this job on my E36, so I was prepared for the worst and had a full bag of tricks, including soaking in PB Blaster, using heat, forcing the two sides apart, etc. If you don't know what I'm talking about, there is an aluminum block that slides over the splined steel shaft that comes down from the steering column, and they are not fond of coming apart after 28 years and 220k miles. Long story short, after trying everything I knew, just just cut the bastard:

This meant a new steering shaft, of course. When swapping an E36 rack into an E30, the stock shaft is too long, so you must shorten it by grinding off a couple of rivets and replacing them with bolts with spacers in between. Here is the new shaft in the middle of surgery:

And here it is installed with some washers in there to space it out. Also note the red Loctite on the ends of the bolts, the nuts aren't on yet:

New E36 M3 rack from Rackdoctor:

Front subframe with reinforcement kit installed and minor surface rust cleaned up and treated with Rust Bullet:

New engine and tranny mounts from Bimmerworld came with German gummy bears, which my kids enjoyed:

I also changed the transmission lube to this:

I'm hoping that it helps with the shifting, the shifter felt like it was stuck in molasses before.

Tom_Spangler
Tom_Spangler SuperDork
11/2/13 2:39 p.m.

Been WAY too long since I've updated this. And, to be honest, progress has been slow. But there has been progress, so here goes:

After installing the E36 rack, I was ready to put the rest of the new suspension on. Here it is with the SS line and new tie rod end:

New Lemforder control arm. I bought E30 M3 offset bushings and pressed them into my old housings. Not sure I'd do that again, but fortunately my FIL has a press, so it wasn't too bad:

Rebuilt brake calipers all ready to go with new Hawk HPS pads:

Scored a new Magnaflow midpipe/cat system on Craigslist for $200:

Fast forward, driver's side all assembled with the new bits:

New ST front sway bar with Meyle HD end links:

I got rid of all the stock stuff a few months ago, and now I realize that I needed the end link brackets that attach to the control arms. Stupid. They are cheap enough, but it's just one more thing I need to order.

Adrian_Thompson
Adrian_Thompson PowerDork
11/4/13 8:20 a.m.

Crap, I"d forgotten just how much of a refresh you were doing on this. Good work

Tom_Spangler
Tom_Spangler Dork
11/4/13 8:30 a.m.
Adrian_Thompson wrote: Crap, I"d forgotten just how much of a refresh you were doing on this. Good work

Yeah, essentially the only front suspension or steering component I'm reusing is the uprights. The rest of it is all new.

Tom_Spangler
Tom_Spangler SuperDork
12/14/14 2:53 p.m.

Hey! Long time no see! I have no excuses, I simply lost motivation to work on this car for a long time. Fortunately, I've recently rediscovered it, so here we go!

With the front suspension done and dusted, I decided it was time to dive into the rear. Everything is coming out. I mean everything, right down to the subframe.

OK, I'll admit it. I didn't know this thing had drum parking brakes until I pulled the wheel and saw it:

My CV boots are cracking, but not cracked all the way through. So, the boots certainly need to be replaced, the question is do I replace the whole halfshafts? The CVs should be fine except for the fact that they have 200k-plus miles on them.....

Left side trailing arm and attached bits came out pretty easily. The right side, not so much. The fuel fill hose prevents one of the bolts from coming out all the way:

Old, non LSD, tall gearing, eta differential removed. It will be replaced with the shorter geared, LSD-having diff from my parts car:

Every bit of rubber on this car is, as they'd say on Wheeler Dealers "a bit perished". Every bit of it will be replaced:

The subframe is unbolted and hanging there. I need to get some lag bolts to drive into the aluminum bushings so I can then beat them out from above. You can also see the trailing-arm bolt I was talking about. I decided to leave it until the subframe is out:

So, once I get the subframe out, I'll do a few things. First, gotta get the old bushings out of it, the diff, and the trailing arms. I anticipate a combination of drilling, hammering, torching, and swearing will be necessary. I will be putting IE "street" poly bushings in their place. I also plan to clean them up and hit them with a little Rustoleum. I think I will also drop and drain the fuel tank. God only knows how old the fuel in it is, and since everything else is apart.... I already have springs, shocks, stainless brake lines, RSMs, rotors, etc. So, like the front, everything in the rear will be new.

I hope to be updating this thread more often this winter. I want this car on the road in the spring, period.

smokindav
smokindav New Reader
12/23/14 12:59 p.m.

Now I'm looking for E30 projects and there are some definite possibilities down here, and rust free too! Thanks, Tom.....

Tom_Spangler
Tom_Spangler SuperDork
12/23/14 10:04 p.m.

Dave! Good to see you here.

VWguyBruce
VWguyBruce Dork
12/24/14 10:02 a.m.

Wow, this is my project starting today! Thanks for all the good pics. I bought the long @$$ hardline for the rear brakes from Bavauto, came in a roll. Should be fun.

Tom_Spangler
Tom_Spangler SuperDork
1/2/15 4:58 p.m.

Been getting some work in on the car in between family obligations during the holidays. Biggest task was getting the rear subframe out. The bolts came out easily enough, but as is typical, the subframe itself was not so inclined to move. So, I drove some 5/8" lag bolts into the aluminum sleeves in the bushings:

Then I dropped a large bolt into the hole from the top:

And proceeded to beat on it with a BFH. Didn't take long and it was loose:

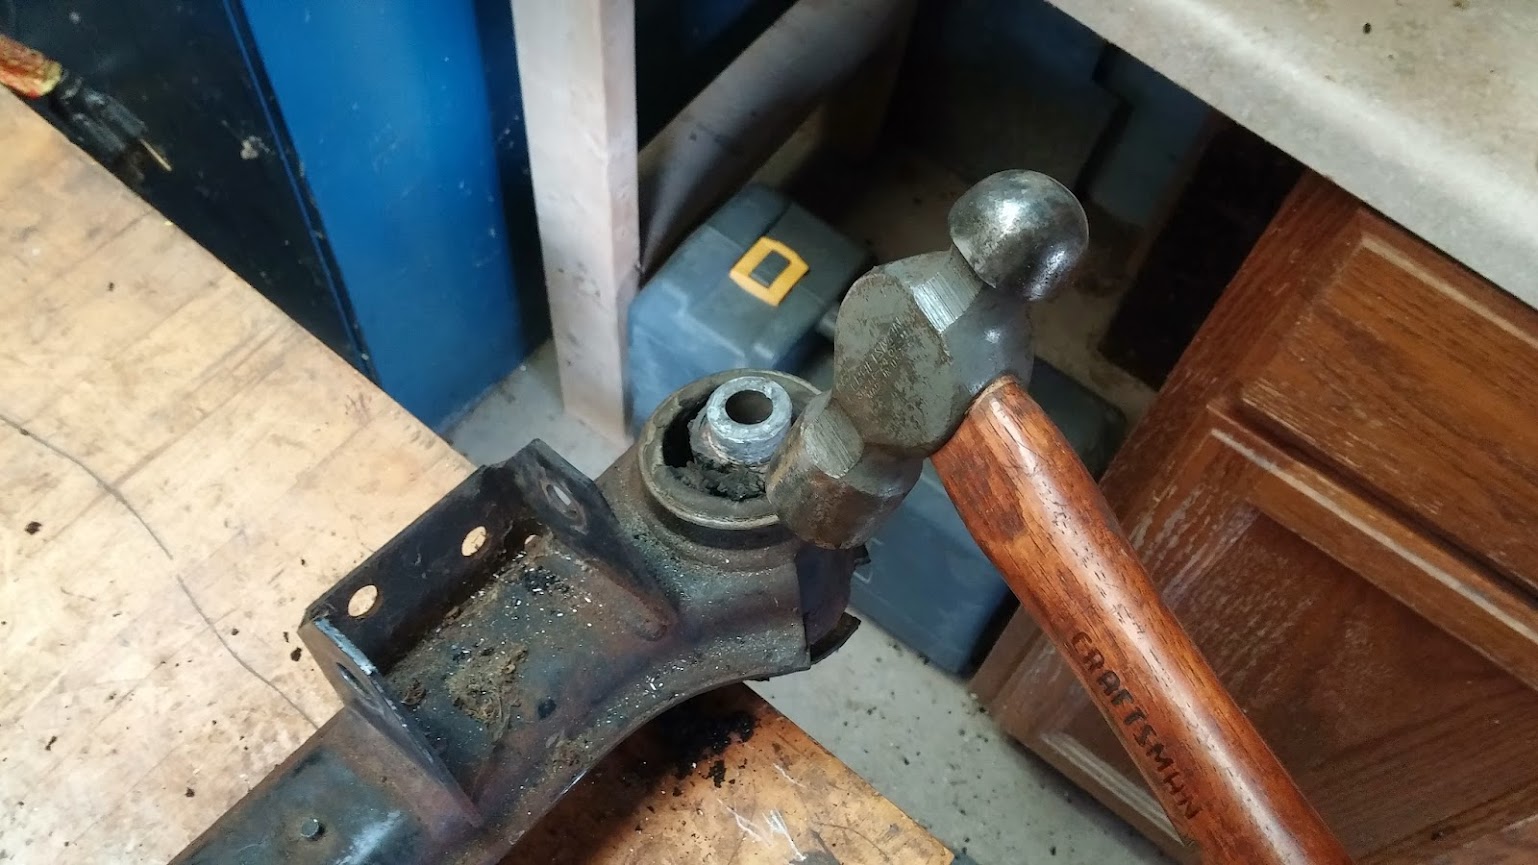
Repeat on the other side, and the subframe was out. Now comes the fun part, actually getting the old bushings out of the subframe. I started off by drilling out the rubber as much as I could to weaken it:

Once that was done, I knocked the center sleeve out with the trusty BFH:

Sleeve out:

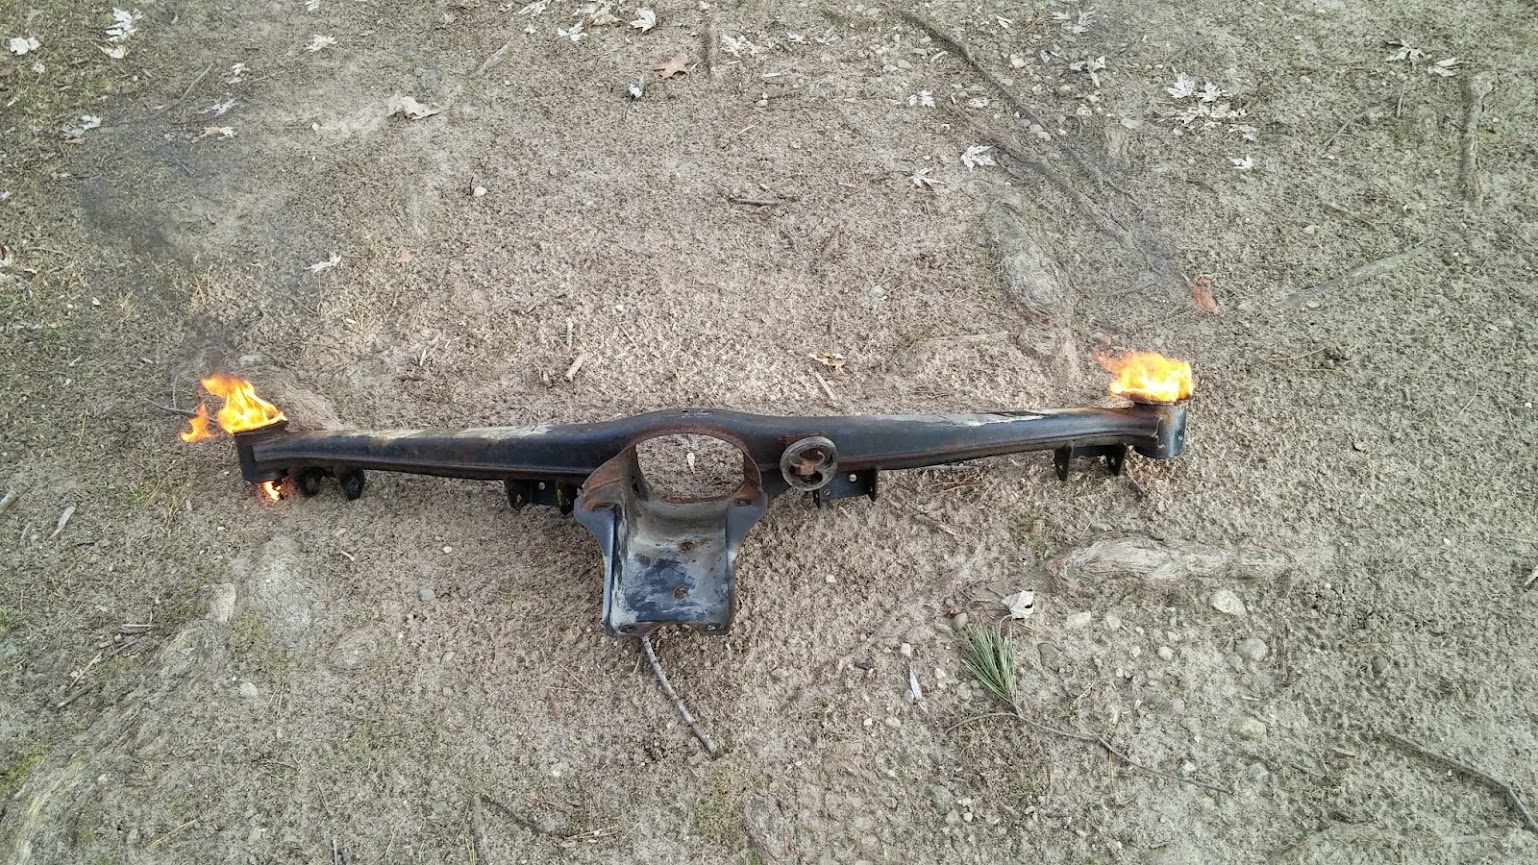
How to get the rest of the rubber out? Fire.

Next, the trailing arms.

Tom_Spangler
Tom_Spangler SuperDork
1/2/15 5:00 p.m.

Same approach as the subframe bushings, I started off by drilling them out. However, since the trailing arm bushings are smaller, I had to use smaller drill bits, and I broke a few:

In retrospect, I might not have even needed to drill them out, they came out pretty easily, and more importantly, cleanly. Used a socket and the BFH to knock them out:

No need for fire, thankfully:

With the subframe out, I wanted to drop the fuel tank. As previously mentioned, it's full of ancient fuel and God knows what else. It was a moderate hassle, but I got it out:

And it's a good thing. After draining some nasty, dark brown fuel out of it, I peeked inside. There's a lot of surface rust and other crap in there. It's hard to see it in this pic, but it's there:

So it's gotta be cleaned before it goes back on. I'm open to suggestions, and I'll be doing some research on the topic, as well.

3 4 5 6 7

You'll need to log in to post.

Our Preferred Partners
O4r0xLAclE7gKdmvl0BGuaJC7K6rkokGPztEV1a42w6hCKLslDYkPFdzWO8ucKb2