1 2 3
Rabbit Farmer
Rabbit Farmer New Reader
2/22/19 8:42 p.m.

Many of the forums that I am one have migrated to other modes of communication (Facebook, for example) or just kinda died.

I like sharing my progress and am always looking for other ideas and points of view to make my cars better.

So... let's get you caught up from 2003 forward with some content going back to 1995. (oh my!)

If you have seen my project posts on VWVortex (for example), this is all the same old content... nothing new yet.

Enjoy... and be patient.  A lot of content is coming your way.  :)

Steve

PS: Seems I will have to pay attention to links to videos to make sure those work properly.

------------------

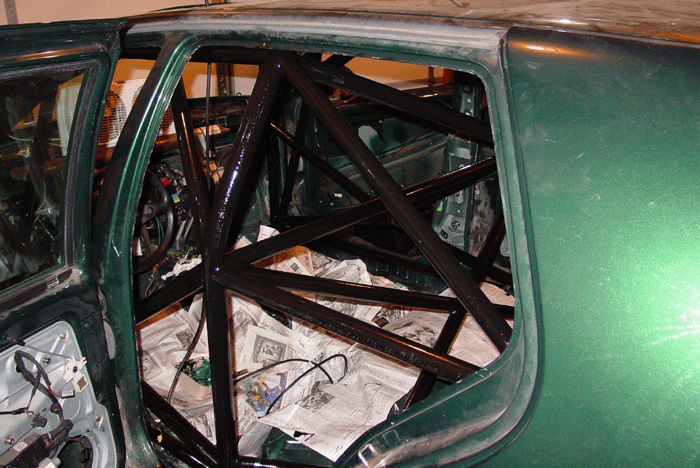
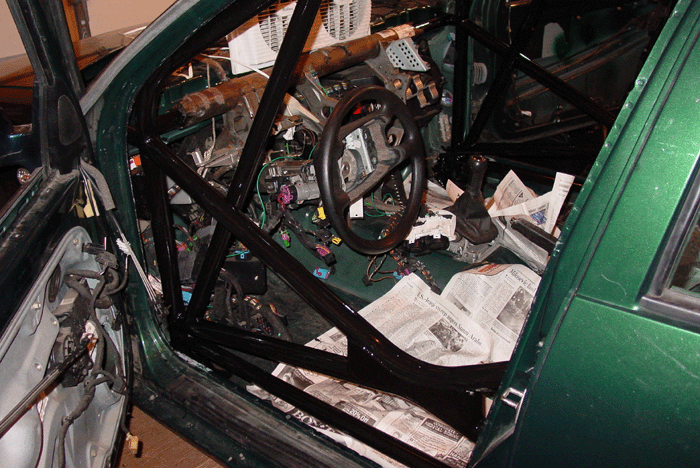
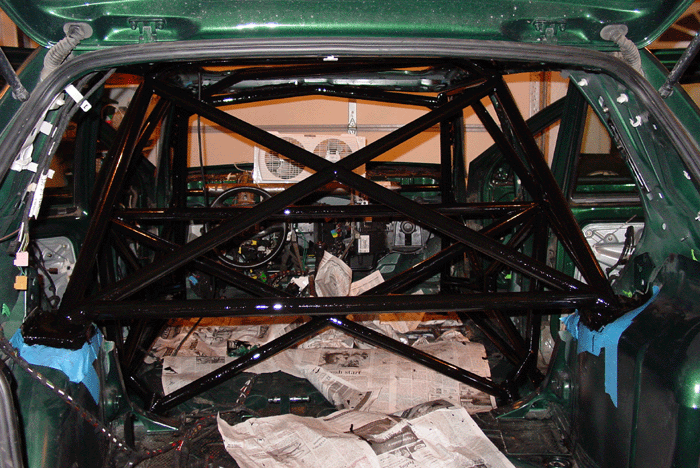
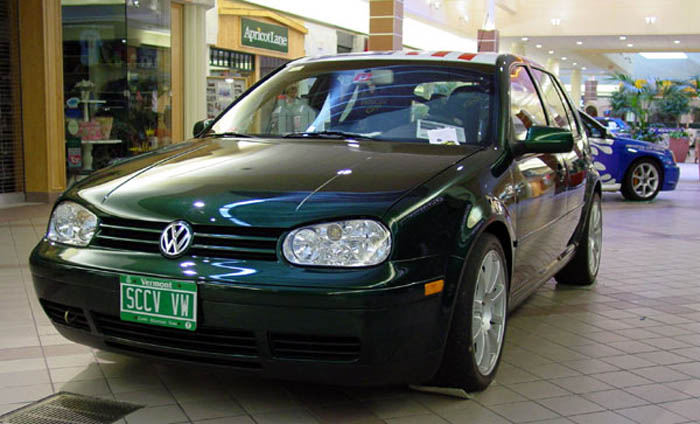
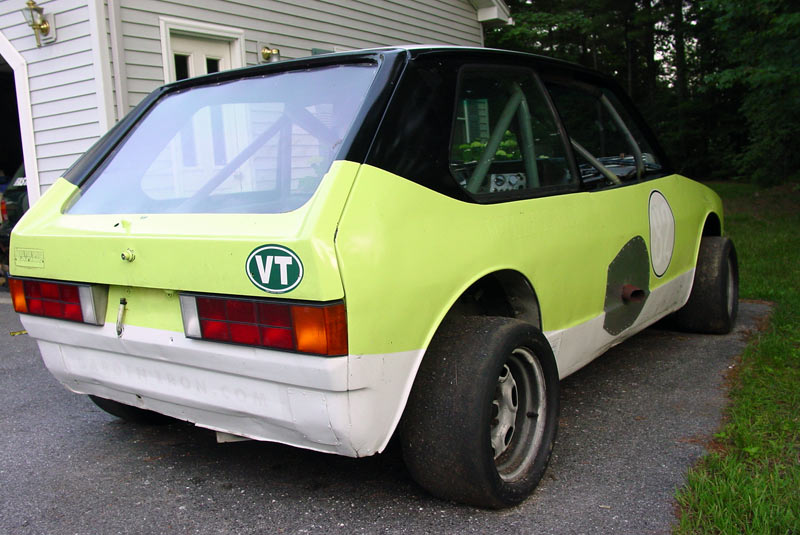
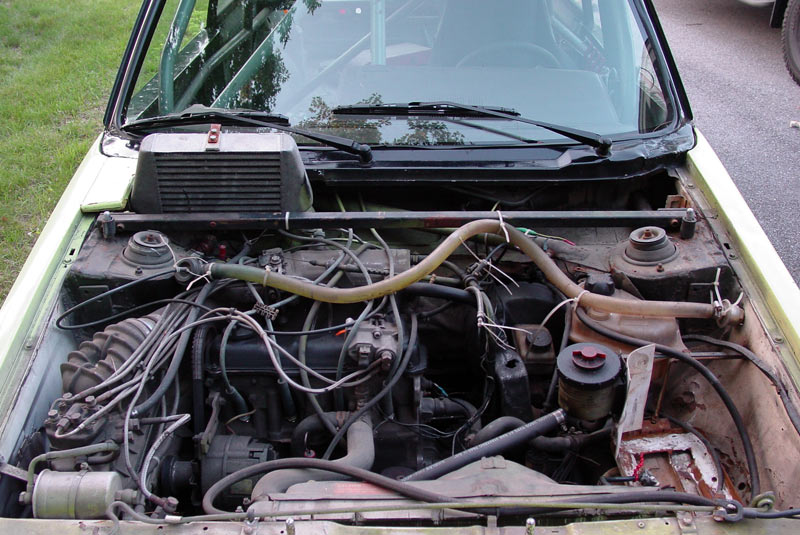
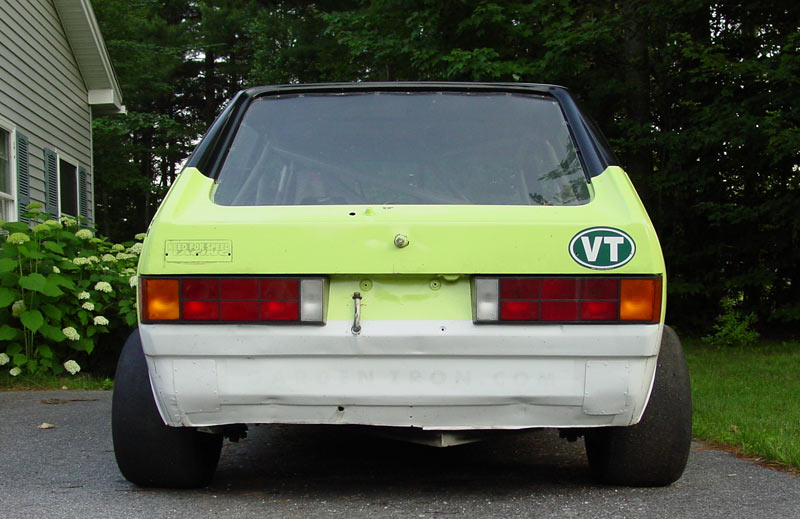
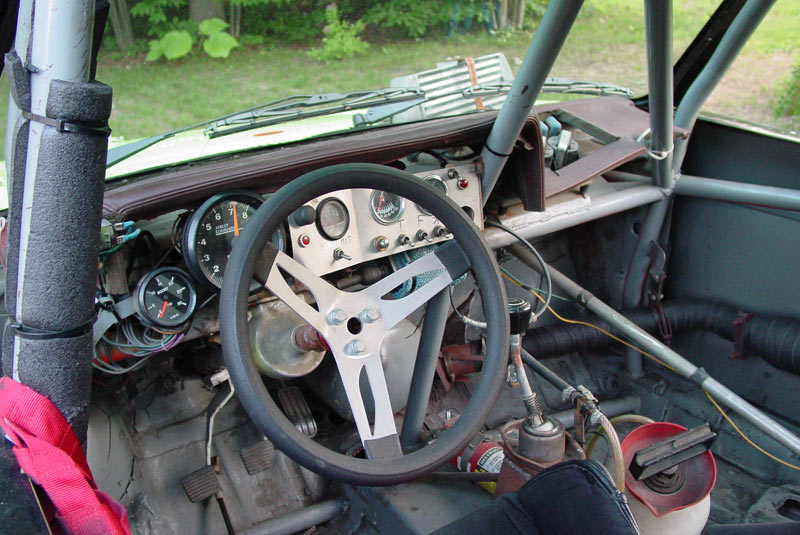
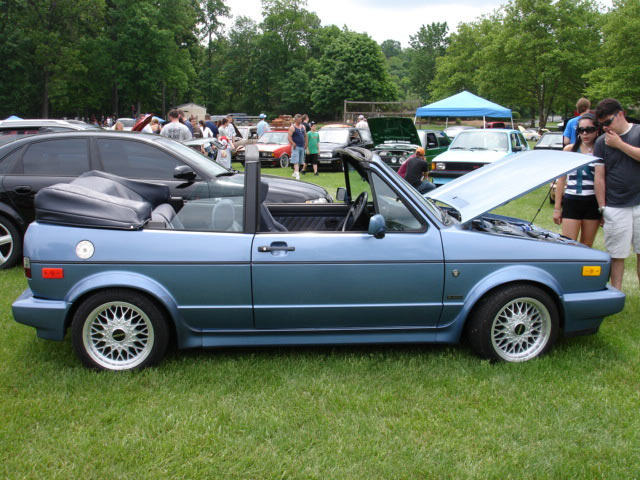
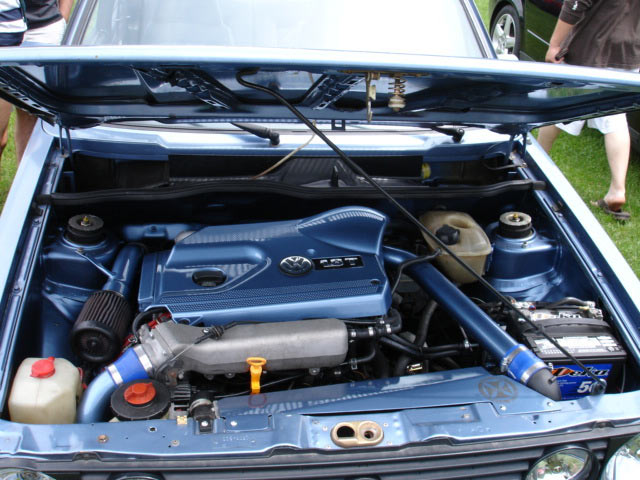
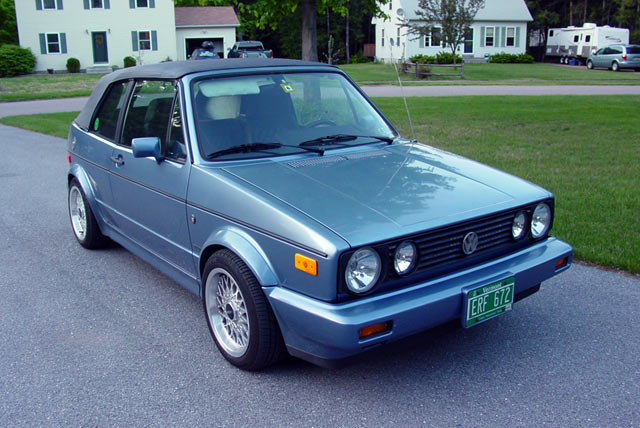
Here is where the car started:

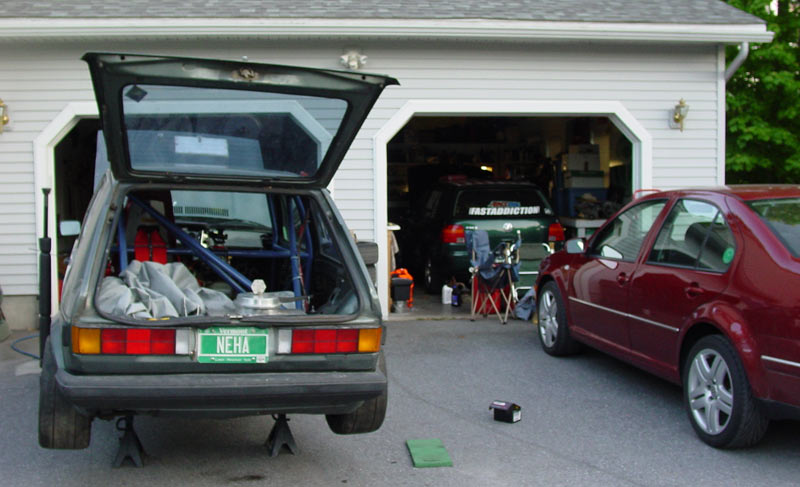
Photos from Day #1 when I was trying to decide if I wanted to purchase this project car....

Rabbit Farmer
Rabbit Farmer New Reader
2/22/19 8:43 p.m.


Summer 2006:

Safety
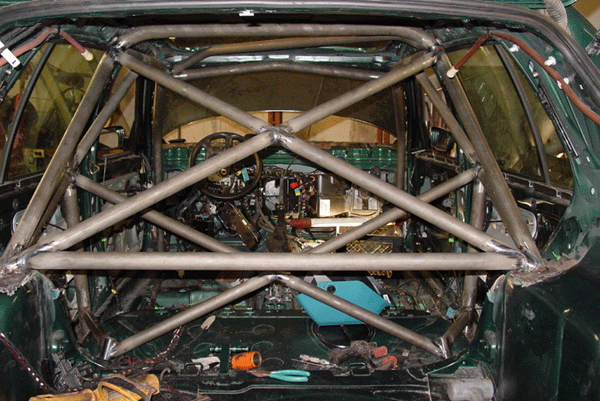
FIA Cage (Done)
FIA Seats (Done)
5-point harnesses (Done)
2.5 LB A-B-C fire Ext. (Done)

[b]Suspension[/b]
Bilstein Sport shocks/struts (Done)
Shine Racing coilovers and camber plates (Done)
Shine Racing anti-roll car (Done)

[b]Tires/Rims/Brakes[/b]
EBC Yellow brake pads all around & new rotors (Done, thanks to Fast Addiction)
Waiting for my Mintex pads to arrive.
17x8"" rims (Done)
Toyo RA1s (Done)

Plans over winter 2006-2007:

[b]Engine[/b]
Turbo GT2871
Performance intake manifold
3"" downpipe and side exit exhaust
034EFI Stand-Alone Engine Management
APR fuel pump
57 lb injectors at 3 bar
Adjustable Fuel Pressure Regulator (FPR)
Cooler spark plugs
Might change oil pan (add baffles and trapdoors)
Fuel injectors
Cam shafts
FMIC
Sprayer for coolant radiator since FMIC will block some of its air flow.
Oil pan (trapdoors/baffle)

[b]Transmission/Clutch[/b]
Lightened flywheel and performance clutch.
LSD

[b]Body[/b]
No plans other than some minor body work.

[b] ------------- Project Update ------------- [/b]

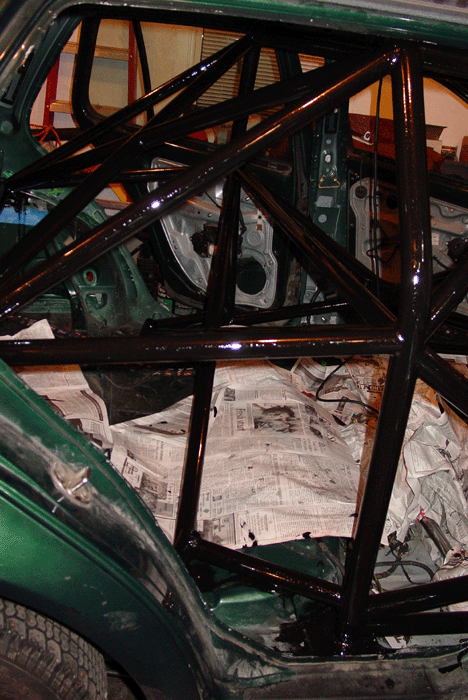
1st of two coats.  All painted with a brush.  (friend Nick helped tonight)
[b] ------------- Project Update ------------- [/b]

Burning the midnight oil....

A little progress this weekend.

(1) Determined solution for sunroof hole.  Going to Rathe's on Friday to cut some sheet metal from a Golf/Jetta III.  This is just a temp. solution to plug the hole until much later when the body will be the concern.  For now... getting it on the track/hill and going fast will be my priority.  Won't look pretty for a while.   :oops:

(2) Wiring: Just have to weld a tab in for the fuse box and then plug everything together that is on/around the steering wheel.  Everything else is hooked up.

(3) Plug the air vents in the dash where the dash was cut for the cage and then installed the vents a little further up-stream.   :D


(4) Did some cutting of the dash and glovebox to make it fit.  Still a work in progress.

(5) ""Fixed"" front bumper (essentially it looks like Frankenstein) and test fit  bumper and fenders.  Ordered part that was broken on fender (goes between fender and bumper).  After the part comes in the front end body work will be done.

[b] ------------- Project Update ------------- [/b]

Another busy night.... finished a bit earlier than I had been this week.. midnight.  :oops:

(1) Spoke with Pete down at VW to attempt to order little plastic tube that goes into the vacuum in the front right fender well... not really sure what it does, but it sucks air when the car is running so it must be really important.  Anyway, Pete said that the little tube I need does not come separately and that I would have to purchase the entire tube for $50.   :shock:

Here is the vacuum blue-ball thingy with the broken (half of broken tube is still in the flexible tubing) black connecting tube.

At lunch I decided to figure out what alternatives I had and came up with a brake line (the flared ends were a perfect fit)

Did a little cutting and sanding...

And done!

I did put tape between on the brake line so it could not slide inside of the blue-ball thingy (the lines are secure and shouldn't move around, but I still didn't want to take chances).

(2) Next, working with Eli at Shine Racing Services (http://www.srsvw.com) we are trying to determine the best suspension setup (done) and to see if camber plates will work on the strut towers with the cage there.  Eli faxed an outline of the camber plate to test fit it on the car.  Not looking good.

(3) Finished the dash with the exception of the trim at the driver's feet and steering wheel.  Waiting on those until my brother Andy welds on a tab for the fuse box that is normally located at the end of the dash.

I cut off the back of the center section to make it easier to change/inspect the e-brake lines in the future.  I don't want to have to remove interior trim.

(4) Trimmed the door panel (just one thus far) to fit around the cage.  Not perfect (need to slam door) so I will have to tweak a little more.  I might use alum. sheet at a later date, but this is what I have for now.

(5) Starting to look like a car.  Fenders mounted, bumper mounted, broken grill mounted.  All panels are a little bumpy, but body work comes later after the performance step has been completed. :twisted:

[b] ------------- Project Update ------------- [/b]

Andy (my brother) came over today so we could get to work on the roof and fuse box.  HE can fabricate.... I can't even come close.  If it doesn't involve cardboard, a couple of nails, pop rivets, zip ties or duct tape, then I'm lost.

Anyway, headed to Rathe's to cut off the roof of a MKIII Jetta.  Thanks to Chris (vtGTI) for the loan of the cordless sawsall.

Short and quick.

Put the new roof on top of the old roof, traced the sunroof hole....

Andy (love his shirt!) grinds off the paint to prepare the surface for welding.

Cut out and grind edges to match new roof to old hole.

Weld in new roof (including one brace from the original roof).  Didn't come our perfect (a bit of warping).

Grinding down the welds....

Later... filling the holes and painting the roof.

Welded in bracket for fuse box.

It is coming together.... slowly.

[b] ------------- Project Update ------------- [/b]

Spent all day on the car and didn't seem to accomplish everything I wanted.

Cut off the top of the glove box so that it could be accessed from above by going through the airbag opening on the passenger side.  The glovebox won't open because of the cage, so I figured out a way to access the box another way.  Of course, I suppose I could convert the airbag hole to the euro box and call it a day, but that purchase doesn't make the car go faster or handle better.

Anyway, Did another door today.  Reinstalled window and interior door trim... cut the heck out of it to fit around the cage.  I will take a picture of it with the door open so you can see all the cutting that was needed.  My goal was to make it look complete when the door was closed.

First coat on the roof.

Some misc. shots (new wheels are on)... needs to be washed very badly:

[b] ------------- Project Update ------------- [/b]

Since the first event for the Golf is coming up very quickly, I took today off to work on the car.

A present arrived today.....  

[b] ------------- Project Update ------------- [/b]

Well, I took enough pictures of the whole process and will make my own tutorial for the VermontRacing site.

Rear shocks/springs are in.  Ride height was reduced by only 1/2"", but I can lower it 1"" more.  We will see how the front comes out.  It is all about performance.

Here is the reason I couldn't figure out the rear... I had to remove the retaining clip and plastic washer, install the perch, and reinstall the washer/clip.  I had to purchase a new retaining clip spreading tool (whatever it is called) since the one I had spent more time going sideways instead of spreading the clip.  (junk!)

Installed....

Smoothed the roof out some more.... there are a lot of wrinkles.

Life on "the farm"... too many projects, not enough time!

[b] ------------- Project Update ------------- [/b]

Took Sunday off because I worked on car from 9am (Sat) until 2am (Sun).

Had a real fight with trying to get the camber plates aligned.  For now, they are held in with 4 grade 8 bolts per side until we can get it on an alignment rack to check the caster.  I'm not worried about camber since the plates are adjustable, but caster is not adjustable once welded in.  We will weld both the  top of the plate and underneath to make sure it stays together.

Did the finally smoothing of the roof and plan to try the paint method posted by Rob (Elmer Fudd) since it is just white and the roof.  Bret at Rally Grafix will take care of the graphics for the roof.   :wink:

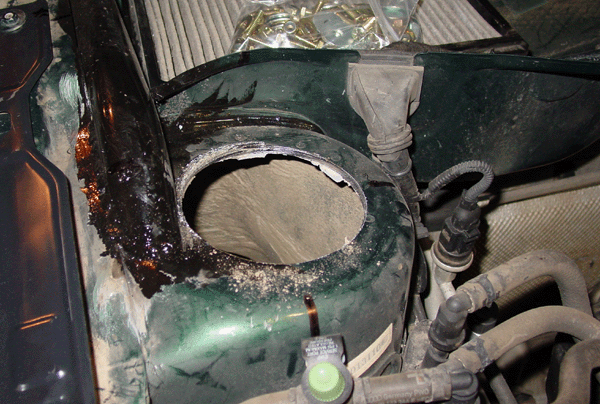
Anyway, Nick and Tim came over and helped with the drilling of the 4 1/4"" holes to remove the original strut towers.  The drill was so powerful that it took Nick for a ride a couple of times when it caught.  :shock:

Hole in the strut tower.
Camber plate installed....
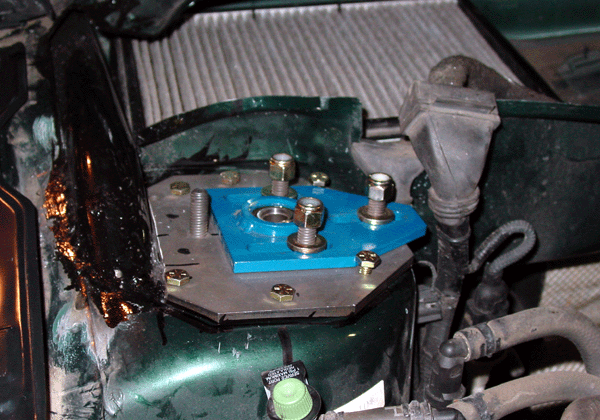
What it looks like underneath....

It is kinda of strange taking a cutting wheel to a new strut  

Installed.
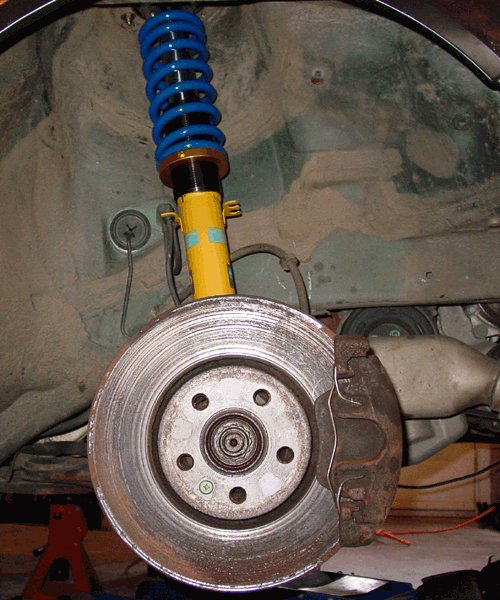
I am still working on sourcing the brake rotors, but put it together for now (the brakes are easy on this car!) so it is mobile.

Short and sweet.  I'm really looking forward to getting this on the road.

Dealer is coming over on Monday night to determine the actual value of the car for registration.  NADA lists this car at $9700.... yeah right.  Was that before or after it landed on its roof?

[b] ------------- Project Update ------------- [/b]

A big thanks to Casey for coming over tonight with a rear brake tool to reset the rear caliper, help put the car together, and get it down to the shop (and me back).  Plus, he didn't show up empty handed.  :)

Pictures as promised.

Chris scuffing roof to prep for paint.

Me painting the first coat... unlike Chris, I had to stand on a milk crate to reach the roof.

Roof when done.

Present arrive from Fast Addiction!

Rears before...

Rears after...

Fronts before...

Front after...

Seats are in.  Harnesses are partially in right now.

[b] ------------- Project Update ------------- [/b]

Camber plates installed...

[b] ------------- Project Update ------------- [/b]

Thanks to Bret at RallyGrafix.com
(covering over a really bent roof)

End of 2006.....

[b] ------------- Project Update ------------- [/b]

And now you are all caught up.  Welcome to 2007.....

Tranny is out. What a pain. The actual removal of the transmission was easy. Big bolts on the axles, easy motor mounts, lots of big bolts all around the tranny (instead of those 10mm head bolts from the Rabbit that hold the sheet metal cover to the transmission to keep water out... and that little piece in the back/behind the passenger side tranny flange), easy to remove parts underneath, and it just slides out soooo nice. The pain was the hours we had to spend on the top of the engine trying to figure out how to remove all the crap.

Transmission goes to Fast Addiction tonight (11pm) to start its journey towards enlightenment (e.g. LSD).

The issue I did have with the removal is the bolt that holds the back of the dog bone to the subframe snapped off (I just barely started to turn it with very little force). The bolt looked more like chalk instead of metal. And, in my efforts to remove the dog bone (the bolt broke off leaving a stud still in the hole) it looks like I broke the back of the dog bone. So, I will need to get a new one. Doh!

This week: front bumper off, exhaust off, DP off, exhaust mani off, clutch/flywheel off, SMIC off, power window control in. That should do it. Then start ordering parts.

Still looking for a hood and front bumper. I believe I have a lead in NH for the front bumper, but local would be better.

No pictures... figured you know what it looks like to remove a transmission. I have to say that I do not like the Bentley for the MKIV. Funny part of the removal, there was one like that stated (in a nut shell) to go to the electrical section for removal instructions for the starter. Okay, looked at the section on how to remove the starter... zipped to the step near the end since all the previous steps were completed until I realized the ONLY step that I needed to follow in the starter removal process was to remove the lower bolt on the starter. Um, they could have told me that in the transmission removal section.

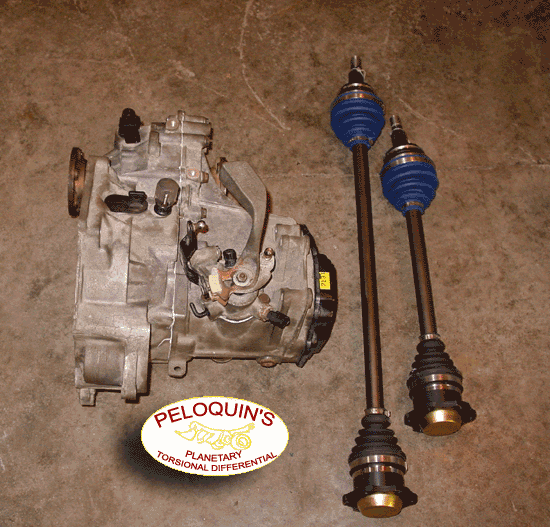
John at FastAddiction.com has the transmission and is installing the Peloquin LSD.  Want a go fast modification?  This is a great thing to get!

I recent purchased a MINT front bumper from a fellow Vortexer (I had to drive to the intersection of 89 and 93 to pick it up... and then on my way home stop by at FA to get some parts).

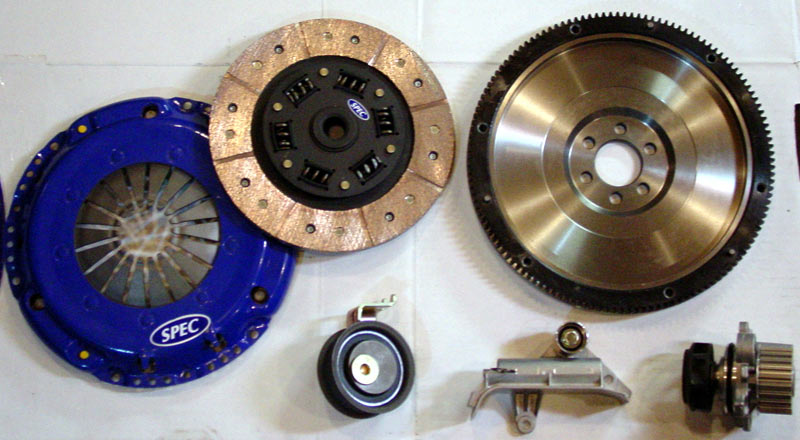
Here are the 'some parts'
I am still lost on what I should run for for electronics.  I have an e-mail out to Unichip.  APR is a no go.  Revo is a no go.  I can't find a product that will run a big turbo (short of engine management).

I finally got to dig into the engine today to swap out the plastic water pump with a metal one.  Doh.. it already had a metal impeller.  Such is life. I guess I needed the practice.  2.5 hours start to finish.  :)  It did make it easier with the fact that the transmission was out of the car so I could hang the engine more in the middle of the engine bay giving me more room to work.

[b] ------------- Project Update ------------- [/b]

Progress continues..... Car still isn't faster, but I now have all the body parts I need and the transmission is back in.  I wanted to drive it around a little tonight to make sure everything was good (plus I'm supposed to put 450 miles on the clutch before any hard launches... I don't drive that much in a year with that car... LOL).  But, since I didn't completely bolt the DP to the turbo it was loud as hell.  Don't worry, it is just hooked up for moving the car around (get on the trailer, etc.) and the ol' foot won't punch the throttle creating a lot more boost that it can handle.

Anyway.... a little progress.

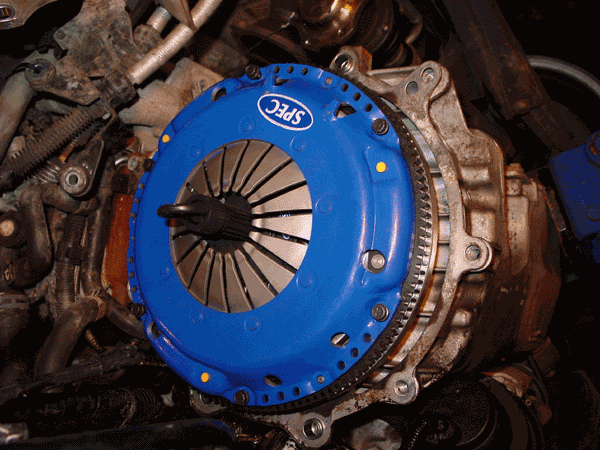
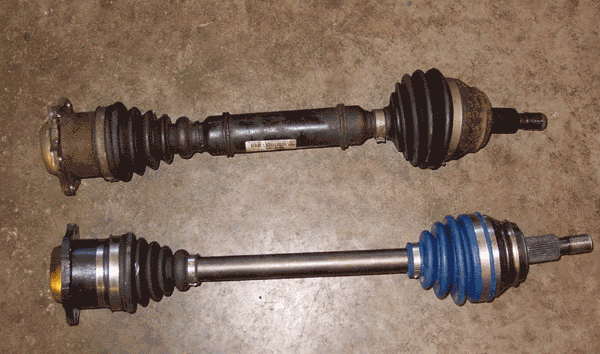
Thanks to John at FastAddiction.com, I now have my new flywheel, clutch, and pressure plate (I installed this on Saturday) and the transmission back with a nice toy installed inside.  I also purchased a set of Driveshaft axles (good for 400 HP).  The MK4 axles are soooo much easier than an MK1.
Clutch installed..... (bolts not tightened yet)
Something to keep me warm when the heater ran out of gas.... a little bit of apple infused vodka thanks to a friend.

The stock axle vs. the driveshaft axles.
Spent most of my time researching the internet for ways to make the car faster.  Thanks to John at FA, he was able to give me some direction since  I am new to the whole leaf blower mounted on an engine thing.

[b] ------------- Project Update ------------- [/b]

Spent the last few weeks making it look pretty.  Waiting for go-fast parts to arrive.


[b] ------------- Project Update ------------- [/b]

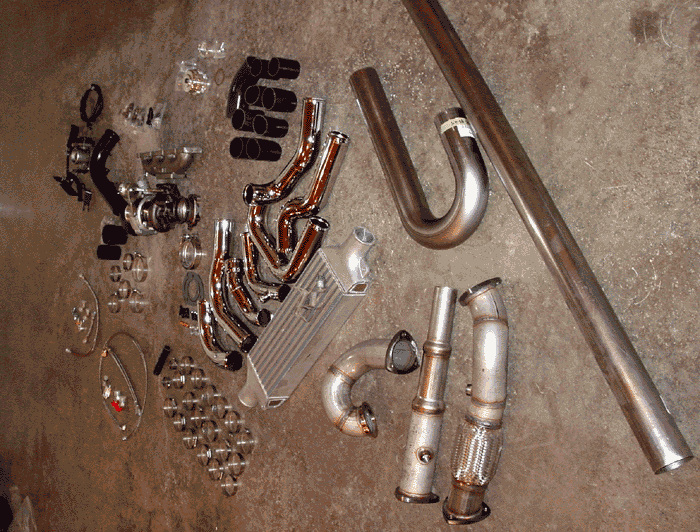
Some assembly required.....  
[b] ------------- Project Update ------------- [/b]

Some progress... all the big parts have been removed from the car so it is now time to put it all back together.  The oil feed line to the turbo was the biggest PITA as it was impossible to get to.

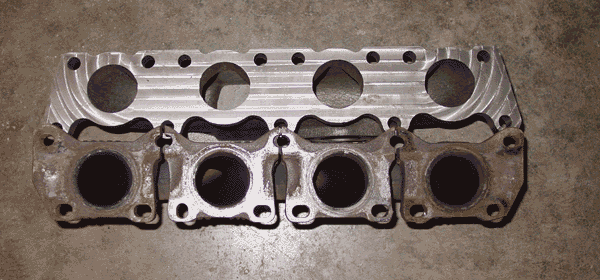
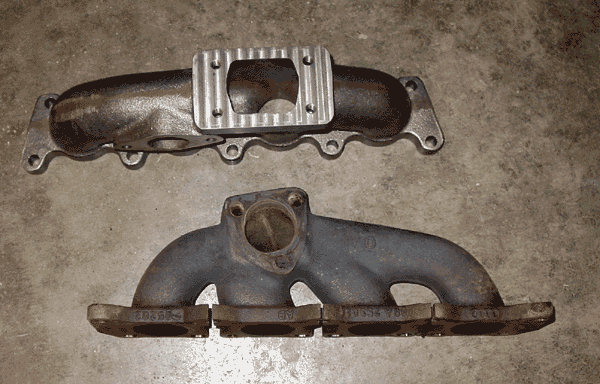
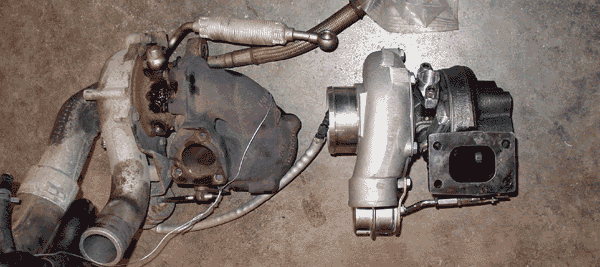
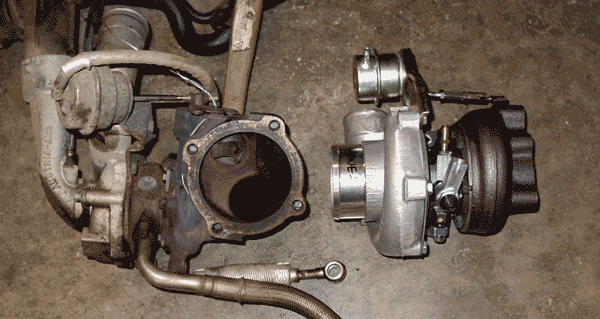
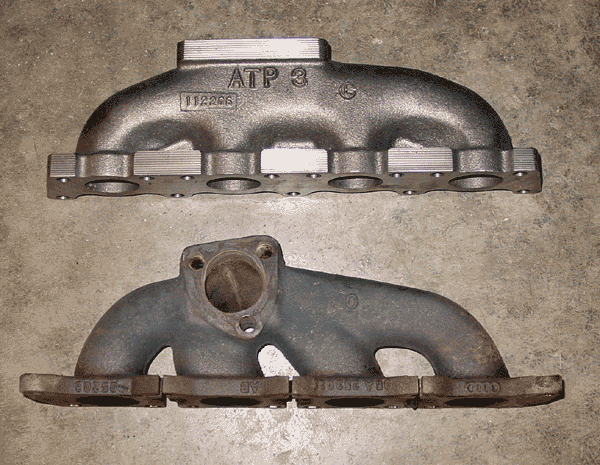
Anyway, some stock vs. go-fast parts side by side.

The pile of 1.8T parts I took out yesterday.... my green Rabbit suspension makes for a nice frame.
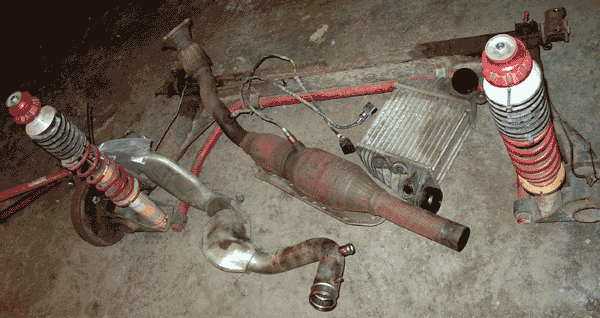
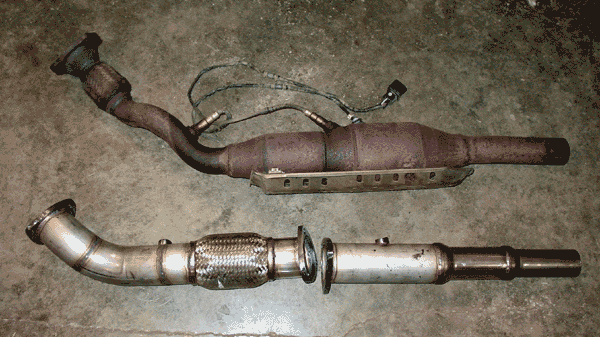
I think it is very impressive the HUGE difference between the stock exhaust manifold and the ATP setup.  Stock is tiny.
[b] ------------- Project Update ------------- [/b]

The past two days were productive.

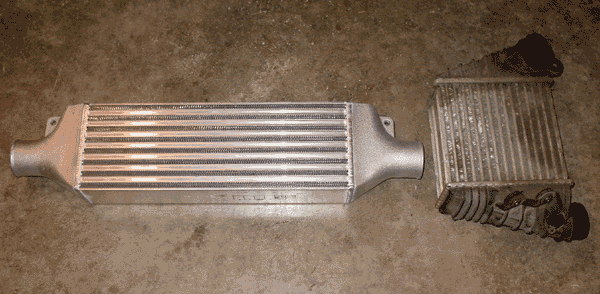
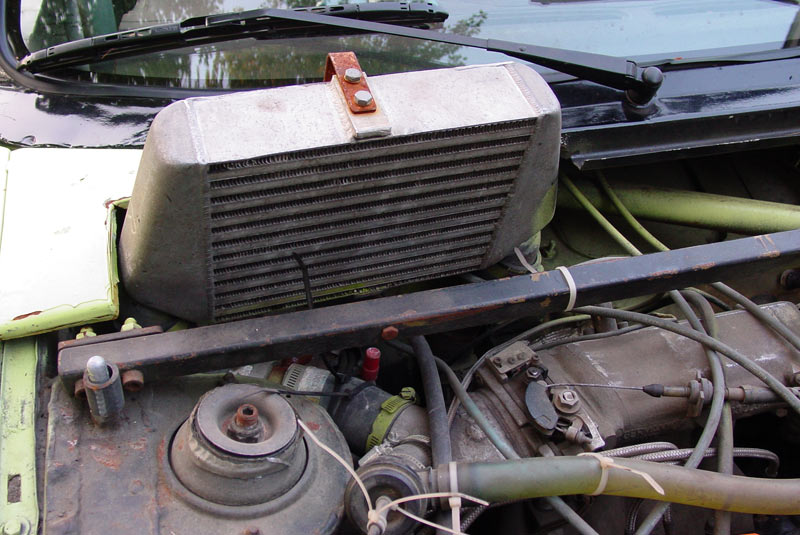
The FMIC has been installed and most of the plumbing is done.  I did not connect the tubing to the intake yet as I need to change the throttle body from DBW to DBC.  I have not installed the front bumper cover yet (will require some shaving).  The installation was a bit of a pain.... I had to cut the lip of the bumper bar so that IC would sit flush against the bottom of the bumper.  Per ATP's instructions, I had to cut the lower radiator support, but after I finished and reviewed the work, I have no idea why I had to cut it.  The IC doesn't hang anywhere near the radiator support.  Looking again at ATP's instructions, it looks like the IC in the directions is different than what I actually had to install.  There was some wasted time.  I cut part of the battery box base (I do not have the battery box anymore since it was a causality of the rollover) to make room for the pipes.  I also had a little problem clearing the headlight (throttle body side), so I cheated by removing the back cover of the headlight for clearance.

IC mounted to the bumper/rebar:

I had to drill a hole all the way through the second layer just so I could see.  Then I worked an open-end wrench with the nut duct taped to it over to the correct position.  The photo is at a sharp angle so you can see the nut.

Mount on the car with the tubing.  I had to put the tow hitch at an angle (I want to leave it mounted on the car)

The removal of the old turbo was very difficult with the oil/coolant lines and miscellaneous bolts/nuts.  Installation of the new oil/coolant lines looks like it will be much easier since I can see all the connections because the turbo doesn't hang below the exhaust manifold.

Installation of the ATP manifold was a royal PITA since it was impossible to see the nuts and even move impossible to (a) get an open-ended wrench on the nuts and (b) to be able to swing the wrench to tighten the nut.  Well, I don't think Sears will take back my 12mm combo wrench after I shaved it down to make it thinner both in depth of the wrench and the thickness of the round part.  I also bent the wrench to allow for the swing.  It actually worked quite well.  I wish I had thought of it before (as does my friend Nick) since Nick tighten (mostly) the hard to get nuts with the open-end wrench over the course of an hour.  I just had to tighten them with the modified wrench.

Hard to see/work with nuts:

The fabrication:

I hung the turbo last night.  Good thing I didn't start tighten the top nuts because one of the bottom nuts required the turbo to be at the end of the stud to be able to fit the nut between the turbo housing and the top of the stud.  I was able to tighten all but one of the nuts since I needed a 12mm combo wrench.  Hmmmm, somehow my 12mm got bent and didn't work here.

Turbo partially installed:

The nut that had to be installed first (lightened area) and the nut next to it (left side of image) that I couldn't tighten without a straight 12mm wrench):

The turbo from the bottom:

Hopefully tonight I will be able to install the oil and coolant lines and complete the intercooler pipes.  That leaves Wednesday night to install the FPR, injectors, and BOV.  If there is time, I get the exhaust completed.
EDIT: Didn't get a chance to work on the car tonight due to an SCCV meeting followed by the gym.

The engine management should be in the mail to me today.  Hopefully I will be able to get that on by Monday (busy this weekend drinking that 1/2 barrel of Switchback).

I need to get to Fast Addiction to pick up some last minute items.

[b] ------------- Project Update ------------- [/b]

The saga continues.

Big BOV... no idea where/how to install it.

The hairdryer installed...

Engine... not all hoses connected yet.

[b] ------------- Project Update ------------- [/b]

Now I'm above my head....

How the car has been sitting for 5 weeks....

Package arrived today with some wires in it...

Starting to sort out/layout the harness.  I plugged in what I could figure out so that I could determine the flow of the harness, and therefore, how/where to mount everything.  A bit of a brick wall here so I have some deep thinking to do.

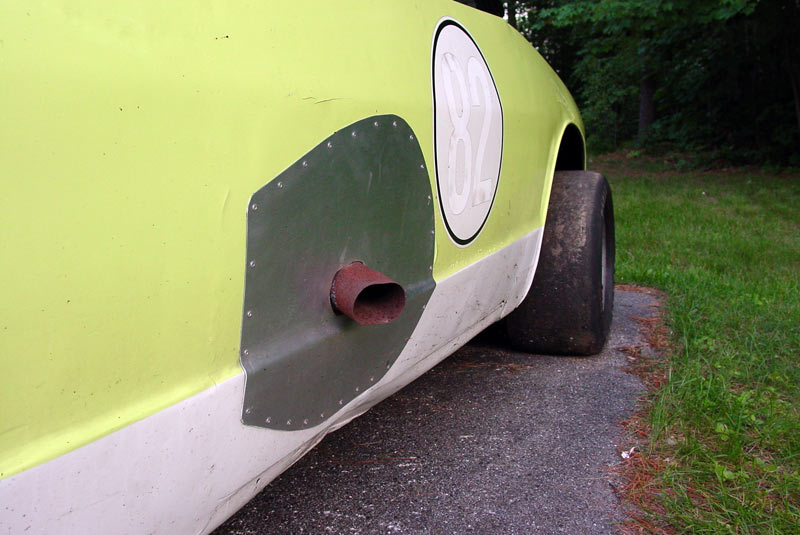
Letting the turbo breath with full 3"" exhaust.  Chris Achilles is doing the side exit for me.

Split race muffler... the muffler is 5"" round and only 6"" long.

Bigger is better... :)

[b] ------------- Project Update ------------- [/b]

Done.  Car is down at Quintin's Brothers in Williston to get dyno tuned.  They may or may not get to it today.  The exhaust system didn't do a very good job of making the car quieter.... I think it sounds nice.

Joe from axismotorsport.com was making sure the 034EFI wiring harness was functional.  It turns out that 034EFI did not include a mini-harness to allow the stock tach to work.  Because the stock tach didn't work, the fuel pump wouldn't stay on and the oil warning light kept flashing.

Cyrus, Chris Marotti, and Chris Achilles came over later with the Achilles custom exhaust.   

While Cyrus, Achilles and I worked trying to get the exhaust hung we got to listen to Marotti play us a ditty on the guitar.  Much enjoyed!

I still need to do a better job with the after-market tach (temp fix until I get the missing harness) and boost (hack!) gauge (hack!) install (hack!!), but I think I'm all set now.  Oh, and finish hanging the exhaust.

I think I got a total of 10 hours of sleep over the past three nights.  

Pictures....


[b] ------------- Project Update ------------- [/b]

We still need to mount the ECU inside the car (it is in the rain tray at the moment), but this means I need to remove the wires on the left side of the car (driver's side for me) and relocate them along the right side of the car.

We had some problems with the car at Lime Rock (track event) where the spark plugs would foul (oil from PCV) and turbo would become loose.  Issues that I will address this week as I have a hillclimb in two weeks.  I also need to make it quieter.....

Photos and videos from its first track event will be forthcoming.

Due to the stock internals of the engine (building it over the winter), we stopped at 18 psi and got 277 wheel HP from it.  The turbo can breath right up to 28-30 psi quite efficiently, but I want to keep the engine in one piece this summer.  This will turn out an easy 400 crank HP when done and a GREAT power band (good low end and top end).  Very pleased with the GT2871R!

Steve

[b] ------------- Project Update ------------- [/b]

Brady at Quintin's (dyno shop) e-mailed me today to tell me how to use the program to view the results.  I didn't realize that that graph x and y titles were clickable menus.  I'm unsure which program I ended up with (both displayed), but it is a very conservative number (18 psi) to where we are going (28 psi +/-).

Fun for now and the engine should hold together just fine.

[b] ------------- Project Update ------------- [/b]

Stock piston gave up the ghost at the first race (it made it through the first track event just fine).  I believe it was because the manual boost controller wasn't tight so it allowed for an over-boost condition."
"Time to rebuild......  

Not to worried about the block as I can bore it out if needed.  The head is my main concern.


[b] ------------- Project Update ------------- [/b]

Done.  I might procrastinate, but I get things done (now, about that turbo single round headlight Rabbit I have been talking about for years....)

Anyway, a number of late nights and one weekend I was able to pull out the old engine, put together a new one (never opened the new engine.... should have only 40k miles).  The whole process was not difficult, but it was time intensive.  Surprisingly, everything went together... kinda intuitive.  I did discover that almost all the parts on the NB engine (stuff bolted to head, valve cover, block) are different than the Golf.  Right down to the hard metal coolant tube that runs along the front of the block (found that out [i]after[/i] I install all the tubes, wires, etc.).

Anyway, some pictures for those of you bored with the text (I know I am).

Engine out (removed head and then lowered block/transmission out the bottom)

New engine with everything bolted on, Spec clutch, flywheel, transmission installed, etc.

How many 20-valves can you spot in 4 seconds?  ...go!

I removed the DP and both axles and was able to (quite easily) bring the completely assembled engine up through the bottom.  I had thought the turbo being bolted to the engine would prove to be too big for the engine bay opening.  Good news!

Every wonder why VW's have some electrical issues?  This is what the wire looks like that went to the secondary air pump and power steering pump.  The power steering pump wires were also broken off.  Of course, the damage could have occurred when I removed the engine, but honestly I have no idea how that could have happened.

I don't think that I need ANY of this.  I already removed the secondary air pump from in front of the oil pan.  Since I wasn't sure what I needed/didn't need and didn't have time to experiment, all the parts went back in.

Location of 034 ECU and relay board.  I took the time to remove all 034 EFI wires that ran along the driver's side (left side of car for those of you with the steering wheel on the incorrect side) and ran everything on the passenger side of the car.  I took the ECU out of the rain tray, cut a hole through the fire wall with an air nibbler (love that tool!) and put the ECU where the passenger airbag was.  In the future, I'll have to get it mounted better, but it will get me by for this season.  No pictures of the changes yet, as I need some sleep.

Heading to Moon Performance in NY at 2:00 on Thursday so that they can dyno tune the car to get it ready for Watkins Glen.  Fingers are crossed that everything works.

[b] ------------- Project Update ------------- [/b]

Son-of-a-Fahvergnugen-hatch-backing-knuckle-cracking-hub-capping-no-compression-valves-making-noise-pain-in-my-butt!

Engine makes noise when it runs. I will be getting new rings in the mail on Tuesday and changing them Tuesday night. If there is an issue with the head (which it sounds like this is the issue), then I have a real problem as I don't have any extra good heads to us. I have my $200 block/head setup, but that has bent valves and I have the old head that the pistons were throwing the rings against them at 6000+ rpms. I just might have to use that…

Picking up car from NY tonight. Bringing it back on Wednesday night assuming I have it together.

ACK! I am so sick of this crap!

[b] ------------- Project Update ------------- [/b]

22-Aug-2007

The rings on the stock pistons looked okay. There was a little peaning of the top edge of the piston that I had some concerns with, but it might have been okay. I just happened to get good pistons and rods in so I started on that last night since I couldn't go anywhere with the head.

[b] ------------- Project Update ------------- [/b]

23-Aug-2007

More progress... bottom end is done.  I just need a complete head and I should be done in about 3 hours.  (that's 3 hours on Thursday night)

Anyway... tired so here are a few pictures.

New pistons and rods finally arrived.  Since I didn't have them the other night when I knew that I had to rebuild, John at Fast Addiction was nice enough to next day up rings and a head gasket.

Compared... notice the location of the top ring on each piston.  The new piston is covered with assembly grease, hence the dirty look.

The old pistons.  For some reason that had dents (old dents!) in the pistons.

Three in so far... notice the new EGT sensor. :)

Bottom shot with hanging oil pump chain.

And finally the last one going in.  Pump back on, oil pan back on, etc.  Done with this step.  One more night and then it is a trip to NY.

[b] ------------- Project Update ------------- [/b]

25-Aug-2007

Turns out the head I finally ended using was crap also. It dropped a valve inside the engine. It started and ran great... never sounded so good. Put it on the trailer at 6am (when I finally finished working on the car after an all nighter), took a shower (needed it!), drove to Moon in NY, started it (sounded great), it stalled, couldn't start it again. Tried starting it a number of times with the laptop hooked up to it to figure out what was going on and about the 6th time we heard a clunk. Took the plug out and the end of the plug was flat.... huh!?! Looked down the plug hole and we could see the face of an exhaust valve looking back at us. Thankfully the head failed during a starting instead of running action. So, the Golf isn't going to Watkins Glen and won't be rebuilt for a while as I plan to get a new head.. perhaps ported and polished and ready to bolt on. Hmmmm, maybe some new Cat cams while I'm at it. Snow will be flying before that happens, but I do plan on taking it apart sooner than later just to see what happened. Hopefully there was not damage to the new pistons. "
"It is March 2008 which is the month I scheduled to start working on this car again for the next race reason (tax refund comes in the mail in March).

Plans:
Getting new head (naturally)
Kevlar cord timing belt
Perhaps getting rid of the coilpacks and going wired
Getting rid of OEM wires/tubes under the hood that aren't needed as I have stand-alone.
Electronic booster controller (controlled by 034EFI ECU)
Dyno tune with two maps (high HP and moderate for the rainy days)

That is it for March (I think).

Big brakes planned for later.

After running 100% with bigger brakes, I don't think I will be doing anything with the car for a while.  I want to change the suspension to lower it more without changing the suspension geometry (read as "lowering the car with shorter springs or coilovers is not the best way to make a car handle"... I need re-engineering).  For example, my other Rabbit (a 1980 Rabbit) is lowered in the front using heightened strut towers and modified mounting points for the front and rear spindles... the rear is independent suspension to boot!

Progress (and therefore photos) will start in a couple of weeks as I am busy right now shopping for parts and weighing options.

Steve

[b] ------------- Project Update ------------- [/b]

May, 27, 2008

Progress.... picked up a complete 1.8t engine with transmission.... unfortunately it is an automatic with front end damage.  (free auto tranny to anyone who wants it... it is just weight at the scrap yard to me... want to practice working on auto transmissions?  Here is your chance. But wait... order the FREE transmission now and get a free under the hood wiring harness.)

Picture of disassembling "new" engine... and taking stock wiring harness out of the car so just the 034EFI will be there plus the 6 or so stock wires needed for sensors, etc.  I will be working very fast on this in the next couple of weeks as I have a track event on July 14, 2008 that the Golf would be better than the Rabbit (5 hours of driving at the event).


[b] ------------- Project Update ------------- [/b]

June 20, 2008

Progress.

Turbo/exhaust manifold is bolted to the new head. The broken valve damaged one of the pistons. I had two options: 1. get one piston and have it balanced to the weights of the other three, or 2. get a new set of pistons for now (JE pistions) and do the "get one piston to complete the set" for later engine builds. Anyway, new pistons will be here on Monday.

Right now I have all the pistons/rods out of the car waiting for the new pistons. Everything should be together by Saturday.

Now, time to work on the new Rabbit and the water pump on the Cabriolet. I need a vacation.

Steve

[b] ------------- Project Update ------------- [/b]

June 27, 2008

Well, I have been away in MI for a week (Sun-Fri). New pistons were in this AM and I started installing them around 3:00 PM or so. I bolted the head on around 10PM and ran into a little snag (one with two solutions). The 5mm x 50mm stud that is needed to compress the timing belt tensioner is way too short when the tensioner is already fully extended (i.e. the belt is not longer on the car). I plan to head down to SAC in Williston on Saturday morning to get a 5mm x 70, 80, 90, 100 (hopefully they have it). I could get a bunch of 100mm and cut them down, but they should be cheap enough to just buy the different lengths.

Plans are to fire this up on Sunday..... Saturday is busy with a BBQ at our place so time is limited on Saturday.

Boring photos to follow on Saturday.

Steve


[b] ------------- Project Update ------------- [/b]

June 29, 2008

Some progress today.  It was a little slow since I took soooo much time just to get the timing belt on the engine.  :censor:  :censor:  :censor:

Big thanks to Jodi Doyle for some help with the intake today (added some nipples for vacuum lines)

Anyway, new JE pistons are installed (still using Scat rods).

And them purty?

The turbo setup on yet another head.  :censor:

Those hard to get to nuts on the exhaust manifold.

I bought a 10mm flex wrench years ago to be able to get those nuts in between the oil pan and transmission on my Rabbit.  Well, it is the same tool that is needed for the Golf, but thankfully, only two bolts need this tool on the Golf.

Close up of the end....

In between oil pan and transmission....

Close up of the bolt....

5mm x 50mm bolt with head cut off + standard thread connector + 5mm x 50mm bolt cut to 10mm + (nut+washer+washer)  + brad (nail) = "tool" to compress the timing belt tensioner.

I had a hard time getting my hands into the tight spot so Julie gave it a go....

Next project is to replace the bearing on Julie's Jetta (and do the brakes also... it still has my track compound pads on the front).

Then finish fixing the Cabbie....

Then.... get the turbo Rabbit read for the next hillclimb.

Of course, around 11PM tonight I started to notice water coming under the garage door while it was raining.... so, I was outside in the rain cleaning the gutters over the front and back of the garage.

Steve

Rabbit Farmer
Rabbit Farmer New Reader
2/22/19 8:53 p.m.

-------------- July 01, 2008 ------------------

Engine is all together.  I just have to hook up the wires (034EFI... pretty simple), boost hoses & vacuum lines, add oil & coolant along with a battery, and that should be it.  Joe from http://www.AxisMotorsport.com is helping with the electronic boost controller to ECU input along with other various wiring needs.

I'll be converting the car to studs for mounting wheels.  My Rabbit has them and I love 'em.

Getting close.....

Next, the Rabbit... or the Cabbie.... or the Jetta....

Steve

----------------- July 02, 2008 -------------

Nothing 4 wheel drive in my future.  Having fun with FWD.  Even my turbo race Rabbit is only FWD and it has serious HP and zero weight.  :)

I'm up in the Burlington area (northern VT).

The Boost controller will be the ECU (034EFI's IIc has the capability to do EBC) as opposed to the Voodoo manual boost controller that failed causing my engine to over-boost and go bye-bye.

I hooked up the harness tonight except for a couple of wires that are part of the car's stock wiring that interface with the 034 harness.  Joe (Axismotorsport.com) dropped of an assortment of T-bolt clamps for the inter-cooler tubing (love 'em), a stud kit for the wheels, and took inventory of what is needed for Thursday night when he comes over and wires in the N75 valve to the ECU for EBC.

Since I was limited what I could do on the Golf tonight as I need Joe to work his magic on the wiring, I started working on the turbo Rabbit to get it ready for the Okemo hillclimb (http://www.hillclimb.org) in July.  I also brought over the boost tubes to Jodi Doyle's house and he cut off all the extra nipples/connectors that the stock car would need (there were 5 extras) and welded  the holes shut.  I sanded down the tubes and painted them black using 500F engine paint.  Once it dries, I will be able to hook up the rest of the boost hoses and call the engine complete.

Thanks to both Joe and Jodi for helping out the VW community when in need. =)

Steve

------------------- July 02, 2008 --------------

Woke up early this morning to take care of a couple of small items before heading off to work and to take some pictures.  Text can only be so exciting.  :|

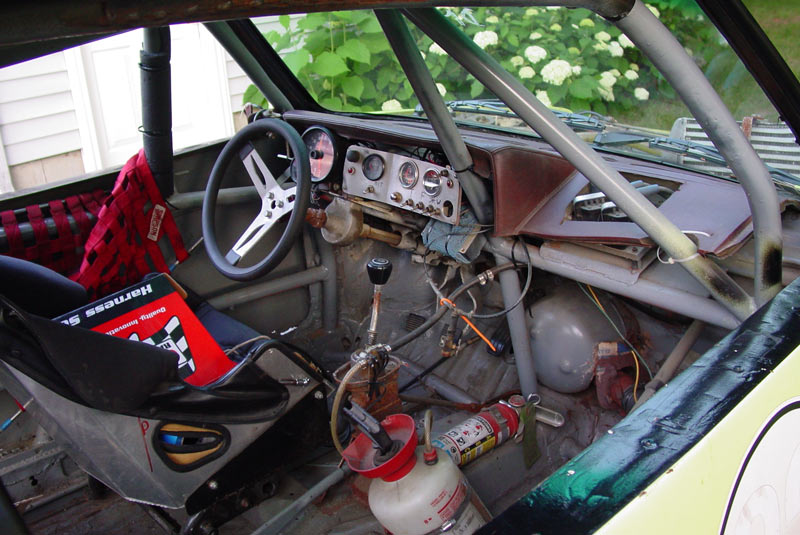
The two primary gauges in front of me are for EGT and the Air Fuel mixture (wideband).  The A/F has a narrowband output that Joe will hook up to the ECU for another input so the ECU knows what is going on.

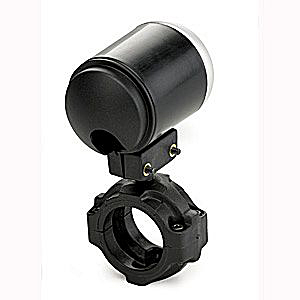
The next set of gauges that will be to my left (mounted on the roll cage with a mount that I found at Jegs) will be boost (naturally) and fuel pressure.  I figure these are all my gauges that need immediate attention as they change quickly.  Picture of the ECU where the airbag was located.  Nice place that I can button up.

The mount that I ordered (two of them) for the "A 1/2 pillar" (I have a roll cage bar that is located behind the A-pillar that goes to the floor and to the very top of the A-pillar as a straight shot to meet FIA specs).

Tubes are dry and ready for installation tonight.  They came out okay.

Cleaner engine bay with all the 034EFI wires running down the center.  The engine is a lot cleaner once all that emissions crap is removed.  Once I am happy with the location of the wiring, I might run it through a common wire loom to clean that up.

The wires that we need to remove (there will only be about 10 stock ECU wires under the hood... the rest have to go).  The stock wires that I will retain are for inputs into the stock gauge cluster for tach, temp, etc.

The toys that Joe (Axis) dropped off.  A plethora of t-bolt clamps (where were you all my life!!!), new studs, and the battery that I am borrowing to see how to mount it in the Rabbit which I would also use for the Golf.  If I can make it work, I will pick one of these up from Joe (or bite the bullet and just get two).

Time to head off to work so I can pay for all this.
Later
Steve

------------- July 03, 2008 ---------------

Another busy night.  All photos aren't working right now as our host just moved all data from one server to another and the DNS information will take 48 hours to start working again.  So, I'm stuck with an IP address until the DNS is resolved.  (should be working by tonight)

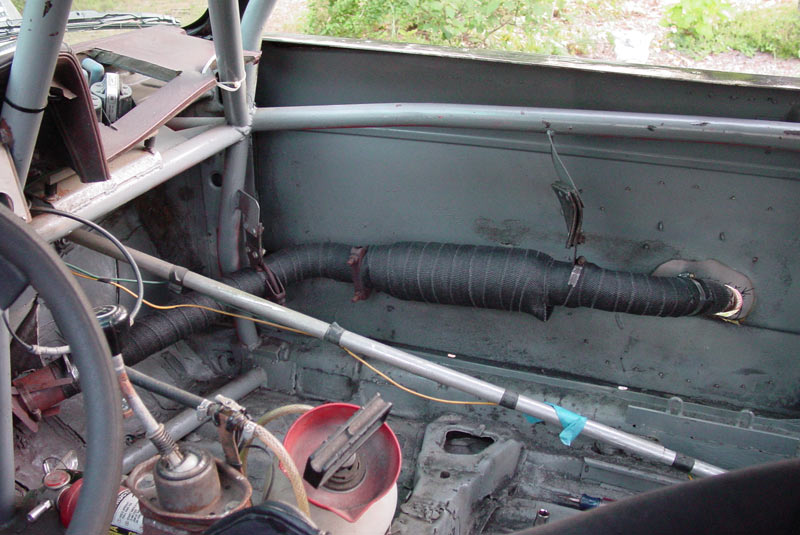
Anyway, while I had daylight I worked on the turbo Rabbit instead of the Golf.  I wrapped the exhaust to keep it cooler in the car as the exhaust pipe runs where the passenger seat would normally be located.  I'll get photos up once the site is back up.  I didn't realize that the exhaust wrap has a lot of metal flakes in it.... my arms felt like they were covered with broken glass and started to feel itchy.  Great.... didn't see a warning on the box (there isn't one) so I'll have to suffer. 

Since Joe (Axis) will be over tonight assisting (read: doing all the work) with hooking the N75 valve up to the ECU, hooking the A/F narrowband output to the ECU, programming the ECU to accept the inputs from the aforementioned, and finally terminating the stock wiring harness, I spent my time unwrapping the entire under-hood harness (de-mummifying) so that his time could be better spent focusing on the wires instead of the super sticking/PITA to remove wrap.  I'm sure every English teacher in the land just loved that long run-on sentence.  :P :p

Car should be running tonight and we might do some data-logging and programming to set the boost level to 18 psi (or slightly lower) as that is what the current tune is set at.  I'm still waiting to get into the dyno for the full tune (might still leave it at 18 psi for now to sort everything out and then turn it up as the summer progresses).  :emthup:

------------ July 04, 2008 ----------

Car runs just fine.  It turns out the original tune was wiped from the ECU so we had nothing to work from.  I'm assuming this occurred when it went to the dyno last and they were getting ready to tune it.  Such is life.  We downloaded a generic tune to get the car started and running to verify that all the gauges worked before starting to remove the rest of the stock harness (scheduled for next week).

Rabbit Farmer
Rabbit Farmer New Reader
2/22/19 8:54 p.m.

The pictorial update..... 

Wonder why MK4s have electrical issues?  I have been finding a lot of problem wires in the harness as we unwrap and remove it.

Looky.... car is rolling on its own....

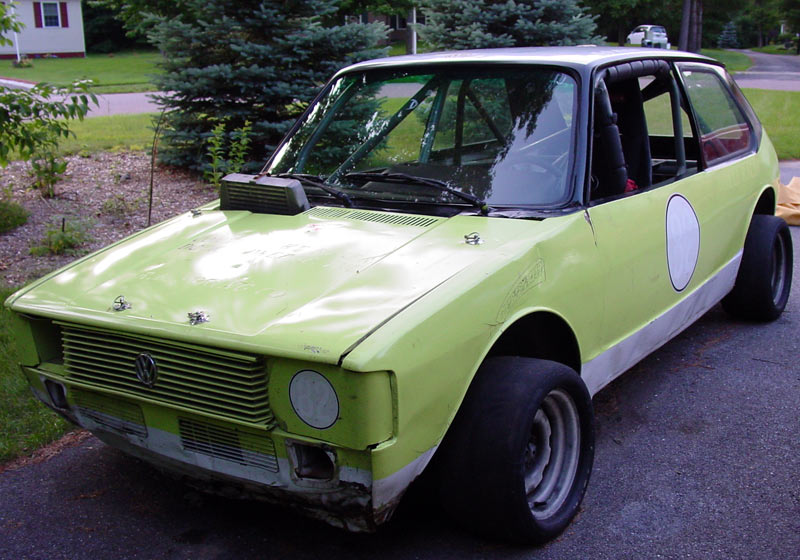
And the turbo Rabbit.  I plan on making it look a little more pretty, but in the nutshell, it is a fast and go-kart like handling car.   


Rabbit Farmer
Rabbit Farmer New Reader
2/22/19 8:55 p.m.

[b]06-Jul-2008[/b]

If you like Rabbits... here is the Rabbit I just sold (same builder as the turbo Rabbit above): http://forums.vwvortex.com/zerothread?id=3739880
I sold the linked Rabbit to purchase the turbo Rabbit (can't own them all).

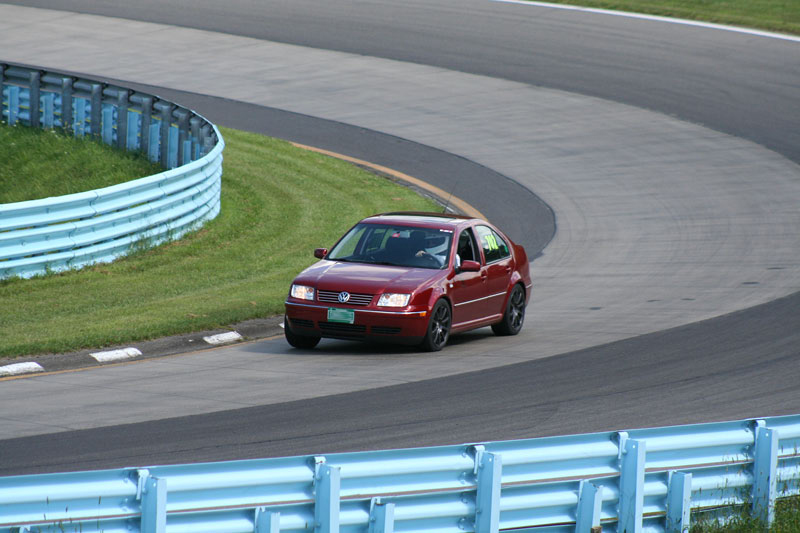
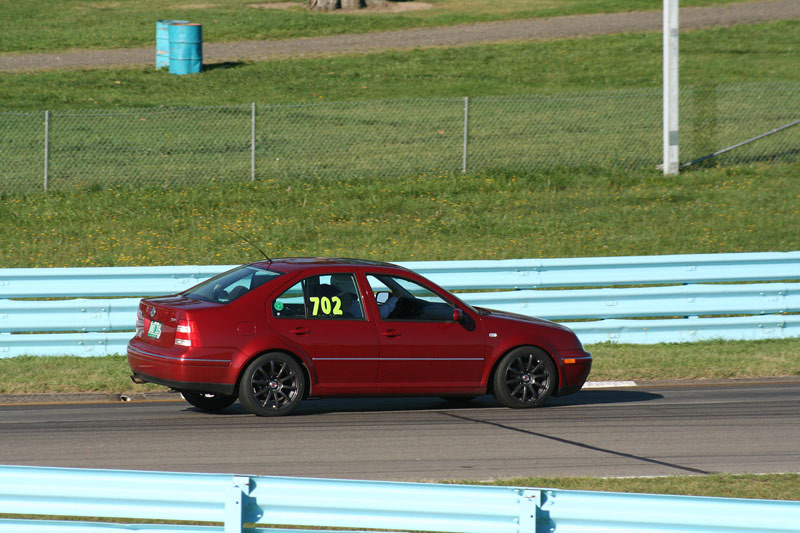
And below, my wife's 89 Cabriolet 1.8t (original paint) that I need to change the clutch from mechanical to hydro and change the wiring harness from MegaSquirt to stock wiring with chipped ECU (friend will help with the wiring).  I want it to drive like her 04 Jetta 1.8t (easy to drive).  Right now the Cabriolet is 177 wheel HP and 190 wheel TQ.  She goes like stink. You can see her 04 Jetta in there too. (100% stock except for Bilstein sport shocks/struts as the stock equipment completely failed within 3 years).  I have had the Golf 1.8t and the Jetta 1.8t at the local tracks (i.e. Watkins Glen).  Both are fun.


[b]09-Jul-2008[/b]

I'm having my driveway sealed so we had to work on the car outside for the last two nights.  It was hot, humid, a buggy as the sun went down.  The car is all together and running okay on a tune that was downloaded from 034 (for the 1.8t, but for unknown turbo, etc.... just enough so it runs).  I still have to properly mount some of the gauges (fuel pressure and boost) with the new mounts, but didn't have time before the dyno.

Dropped off the car at Quinitin's last night at 12:15AM for a dyno appointment on Wednesday....

[b]15-Jul-2008[/b]

Progress and results.....

I was running out of options so I reached out to some locals and Motorgeek and was pointed towards Marc Swanson in NH (3.5 hour drive, but next to the track) (www.efiexpress.com).

Gauges mounted on "A+" pillar (dark gauge is the boost; I haven't wired the lights in it yet).

Trying different rim color on the Golf. I have two sets of RA1's mounted on Flix wheels (they are a bit heavy, but in my price range at the time); one set is silver and other gun metal.

We left the house prior to 5 AM on Sunday (track day was on Monday).


Playing in Marc's garage....

Pyscho cat (Vern) playing "Tunsis" in the Rabbit

Car is all tuned and is running great at 23 PSI.  I did manage to break off a stud that mounts the turbo to the exhaust manifold so I am looking for a new manifold (I hate the ATP so this is a good time to change it).  I also need to look into better bracing for the turbo.

That is all for now.  Time to jump into getting the Rabbit ready for the hillclimb (Okemo II) this weekend.

Wife's Cabriolet is running again (it was just the t-stat that was stuck).

Video and photos should be up later this week.  Both Nick (STI) and I have in-car video so you can see both cars going back and forth.  I couldn't pass Nick (close in the straights) because I couldn't hook up like he can with the AWD.  Good times at NHMS (f.k.a. NHIS).

[b]17-Jul-2008[/b]

Kinda a non-update. I finally got the photos and will post video (in-car this Golf at a track and in-car the turbo Rabbit at a hillclimb).  Both videos looked a heck of a lot better before uploading to Youtube. Hopefully the sound works properly also; I had a problem playing on Windows Media Player 9 without the AC3 (or whatever) codec.


Rabbit Farmer
Rabbit Farmer New Reader
2/22/19 8:56 p.m.

28-Jul-2008


There was a little progress from when I purchased it.... 


30-Jul-2008


Time to inspect the exhaust manifold to determine if I can remove the stud from the ATP manifold without removing it from the engine or replacing it with a SPA manifold if I had to remove the ATP setup.  There was no way in heck I would reinstall the ATP manifold if I had to remove it.


I had to remove the coolant line to remove the turbo (it is hanging from the Shine Racing anti-roll bar that I removed at NHIS last week when it was raining to reduce oversteer).  Clean break of the stud.


I borrowed a 90-degree angle head from my father so that I could get into the tight space between the engine and firewall.


Drilled a hole in the center of the stud.  I used a flute bolt extractor.


Hmmmm, this looks like good news.


I was able to remove the broken stud from the exhaust manifold, therefore, thus and hence, I will not be changing from the ATP to SPA exhaust manifolds at this time.


When I was heading out the back door of the garage to make my way to my truck in the driveway (it still had a lot of my tools in it from the last event), I noticed that I accidentally left Daisy, my cat, outside instead of letting her inside before it got dark (this was around 11:30PM).  Then I noticed that Daisy's tail looked a little too big and I then recalled that I did let both cats in when I got home from work.  It seems the "cat" was actually very friendly and did not have the inclination to fire off a warning shot.  This allowed from some photos, but I opted to use another door to reach my destination.


I need to get some hi-temp loctite, new locking nuts and special heat washers (they help the nut stay tight) to get the car back together before the weekend.  There are some other plans over the next few weeks (including changing the transmission fluid to Motul 300) that will help make this a fun car to drive.


Sleepy time.

Rabbit Farmer
Rabbit Farmer New Reader
2/22/19 8:57 p.m.

30-Jul-2008

I had a problem with the video... something to do with MPEG2 output from my video camera wherein my video editing software can't see the sound.

If you want to watch the video with no sound....

NHIS with this Golf HERE

Okemo hillclimb with the turbo Rabbit (first time driving it) HERE

Watch the number of shifts in the Rabbit before the first turn (sound would make all the difference).  Got into 5th before corner three.

I am working on getting this corrected and uploaded, but getting the cars ready for the next two events is a higher priority for me.

Steve


23-Oct-2008

I was going to bring both the turbo Rabbit and the Golf to the hillclimb this weekend (www.hillclimb.org), but it will take too much time to get both cars to the hill and it doesn't seem worth it as Sunday looks wet.

Anyway, to drive both cars in the Prepared 2 class, the car must meet P2 rules (event though it is technically belongs in a lower class called Street Prepared).  P2 rules requires that the car has a kill switch.  I headed over to Joey Kale's place (www.kalescustom.com) and he welded on a plate so that I could mount the battery kill switch.

Last night I installed everything using 4G wire.  It seems that I should have used a thicker wire, so over the winter I will either add another 4G wire to the setup or use one larger wire for the whole setup.

My goal was to have the switch on the inside of the car so that it didn't rust should it rain. I came up with the idea of where it is mounted and it seems to work great.  I can roll down the window just enough to have access to the switch while my race number is still full visible.  Best of both worlds.


27-Oct-2008

Right click and save as.... VIDEO of the Golf at the starting line of the Mt. Philo Hillclimb.  Great event (www.hillclimb.org)


03-Nov-2008

Philo has come and gone.  Time to start planning for winter improvements for the track.  I already have an extensive list started.....  :)

I managed to "break" and axle during a practice run on Saturday.  The axle is a DriveShaftShop 425 HP axle so it wasn't power that did it in.  I recently ordered a set of 475 HP axles from them and noticed a HUGE difference in the design... looks like a set of old Rabbit inner CVs, but a heck of a lot larger.  Anyway, the 425 HP driver's side axle "broke" because a C clip that prevents the shaft from sliding towards the transmission, and therefore the tripod was allowed to slide inward to disengage itself from the cage... um, run on sentence... the C clip came off so the tripod wasn't contained.  Easy fix... replace the clip and get a new inner boot.

Finally, a great picture of me driving past one of the checkpoints (#5 on the hill) at Mt. Philo.  Big thanks to Dave_G of the Sports Car Club of Vermont (www.sccv.org) for taking and sharing the photo.


04-Nov-2008

The airbag will be gutted (it isn't connected, but I have the understanding that centrifugal force may still set it off).  Trying to make it LOOK street legal.... I drove it around town yesterday before putting it away.  I think I scared a Civic with a fart can.

I just uploaded this video...   It is one of the morning runs.  I don't have any of my fast runs as I lent the camera to someone else so they could get some in-car with their Subaru.

http://www.youtube.com/watch?v=uqdo4xuZFu8

Rabbit Farmer
Rabbit Farmer New Reader
2/22/19 8:59 p.m.

Pictures... the reason why people read forums and comic books... we don't need no stinking words!

Since I can't weld (at least I don't think I can) or fabricate (I know I can't... king of measure once and cut a million times), Joey at http://www.KalesCustom.com (Kellogg Road in Essex, Vermont) did a lot to the Golf.  Custom intercooler piping to and from the intercooler; relocated the BOV to just before the throttle plate; bracket to hold the downpipe (and support the turbo); custom exhaust utilizing the stock exhaust hanger to change the exhaust from side exit (done by Chris Achilles) to a rear exit as I realized that it was too loud (my fault for thinking I wanted a side exhaust); and relocated the battery to the rear; and adding another vent to the valve cover.

Very good job!! I highly recommend Joey's welding skills and fabrication abilities.  Of course, he is a Subaru expert, so the Subbie folks get a two for one expert in Vermont.  Kudos, my friend!

For those of you hooked on phonics challenged, I present some images for your enjoyment (with limited text interruptions).

The bumper was removed from in front of the IC to allow better airflow.  I picked up a  trim piece to go around the IC from Chris Havas at http://www.MetalMarks.com (place for rally folks to get carbon fiber parts; located in Vermont, but can ship).  I will install this soon when time allows.

Okay, we have some options at the end of the exhaust.   That is a V-Band clamp on there that allows for the straight pipe (there already is a muffler in the middle of the car) or a cat.

Joey wired the battery in the rear of the car (or his buddy James who seems to be an electrical guru of sorts... and works on Subbies).  I installed the battery box and made the bracket.  It actually works pretty well.

So, someone else made it onto the rear window of the car.  I reserve this place for people/companies that make racing this car possible through their expertise, help, and skills.  (with the exception of the SCDA1.com and vwvortex.com stickers... I'm sure they will get bumped soon)  Added... KalesCustom.com (the .com didn't fit).  Thanks Joey!

Well, there is always a second (and third, and fourth) project in the house.  This one I have been working on.  New brakes, new bigger radiator, air dam, removed some panels on the front of the car to allow more air flow to the oil cooler and radiator, etc.  Getting a new set of 22.5 x 9.5 x 13" mounted (yep, they are taller than my 20", but the price was right).  The new radiator should solve the coolant leak.  Enough for now... I plan to get the turbo Rabbit 100% ready for the first hillclimb of the season (Ascutney: check out http://www.hillclimb.org for hillclimbs in Vermont, USA); then I will focus on the Golf.  Time is running short so I need Plan B (Rabbit) in place before focusing on Plan A (Golf).

I have to make sure the Golf is track ready all season (i.e. no issues) so that I don't try Plan C again like I did in 2007... the wife's stock 2004 1.8T Jetta on my DOT R compounds (235's) running a HPDE at Watkins Glen.  Good times (I swapped the brakes over to EBC yellows and put on Bilstein Sports for the event), but it doesn't have the thrill of the Golf.

Rabbit Farmer
Rabbit Farmer New Reader
2/22/19 9:00 p.m.

Well, there is only one weekend between today and Ascutney weekend and I don't have a car ready.  Golf 1.8t can't be ready for the Ascutney hillclimb as I still need the parts, and after installation, time to dyno tune it.  Plan B is on the front burner.  I plan to have everything done on this on Saturday (assuming my outer CV boots are here).

Big new 22.5 tires... they look HUGE compared to the worn 20".  There goes my mechanical advantage for acceleration, but at least I will be able to get a lot more speed in the straights (I was limited by gearing at Okemo as I was top speed in 5th within the first 1/3 of the long straight).

Looks huge!!!!

They are actually shorter than the tires on Julie's Cabriolet.

... though a little bit wider.

Rabbit Farmer
Rabbit Farmer New Reader
2/22/19 9:00 p.m.

The Rabbit ran very well on the smaller tires at SLMP #1 (a small track in New York state/USA that is 3/4 long, 28' wide, with 13 turns.... good driving experience [time trials] and practice for the upcoming race season); I did find that I had to do a lot more shifting than expected.  I did notice that the hottest coolant temperature reading was only 160F; at the hillclimbs, I was hitting 200F by the top of the hill.  The difference can be contributed to either the new radiator (it is 2" wider) or the fact that the track event (SLMP) allowed for cooler temperatures with all the shifting (less foot to the floor) and almost no incline (as compared to a hillclimb where the engine is working harder to get up the hill).  Opinion will change to fact once the Rabbit does its first hillclimb this year (Burke)... unless I bring the Golf.

With the big tires... wow, what a difference.  The car didn't have the same acceleration and the gearing was way off for the track.  Oh well, the smaller tires were corded all the way around so I was out of options.  I think I still managed a 57.xx second time around the 3/4 mile track (sub-1 minute is everyone's goal at this track).

Back to the Golf... I haven't dyno tuned it yet as I have been waiting on some other toys to help with the reliability of the car.  I had two issues last summer... the intercooler piping would pop apart with 23 psi (corrected, thanks to http://www.KalesCustom.com) and the on-plug coilpacks would fail due to the heat.  Enter the following:
(a) High Output DIS Coil with Built-in Driver
(b) 16v Spark Plug Wires for DIS Coils - Black
(c) 1.8t Plug Wire Adapter (covers the sparkplug well to keep dirt out)

Now I will have individual coils that will be mounted inside the engine bay, but far from the turbo (heat), standard plug wires, and covers to keep the dirt out.  This means that I will not have coils failing all the time while on the track.

Rabbit Farmer
Rabbit Farmer New Reader
2/22/19 9:01 p.m.

Well, since I have this new (idiot proof, easy to use, functional, inexpensive) video editing software, I decided to redo the NHMS track event from July 14, 2008. Here it is... hopefully it is done uploading to Youtube. The previous version that I uploaded in 2008 did not have sound... a little boring without sound, don't you think?

http://www.youtube.com/watch?v=1sC5Q4kGO2E

In-car of turbo Rabbit at SCCV's SLMP #1 track event this past weekend.

http://www.youtube.com/watch?v=ClIJeFLh33E

Nick put together a side-by-side of our cars at Ascutney... pretty sweet. We both downshift at the same moment going into corner 13. I added some fluffy stuff (informational images) at the start of the video that Nick put together. I will be chasing his bumper at the next event.... no question.

http://www.youtube.com/watch?v=CToi3rEfAbs

05-Jun-2009
Ordered suspension bushings from Autotech... didn't hear anything from them for 2 days, called to find out they were on backorder.... ordered from somewhere else.

Installed trim piece around intercooler opening to clean up the edge.  I messed it up a little so I will have to install over the winter when I have more time (it isn't quite flush around the entire opening).

Still planning on installing (though not tying into the wiring as Burke hillclimb is next weekend) the individual coil setup.

Rabbit Farmer
Rabbit Farmer New Reader
2/22/19 9:01 p.m.

The 5:30 am trip started with rain and pretty much rained the entire time during the 165 mile trip to MA.

The normal site on the way home via Route 7....

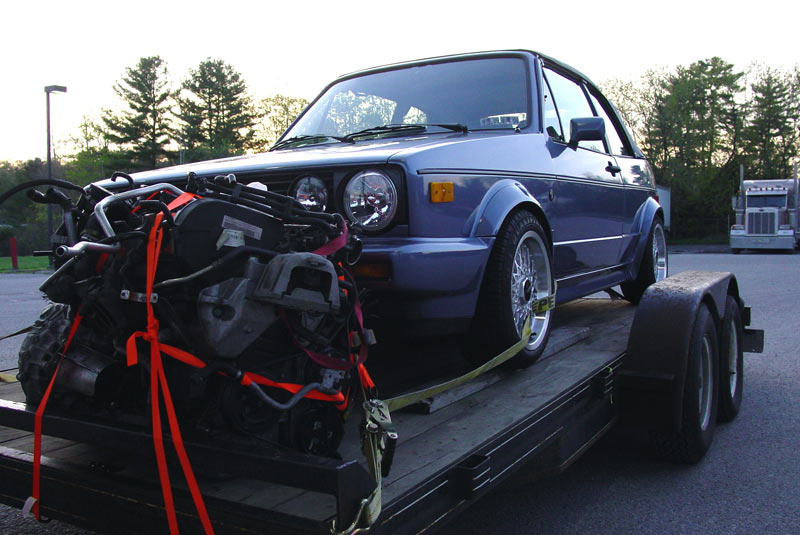
I think for $100 (plus $50 gas + $10 food + $5 diet coke) this was a good deal for a pedal cluster (has a throttle cable, not DBW), A/C pump, A/C condenser, radiator with fans, three good doors with glass, good roof (non-sunroof), plus some other misc. parts (I might grab the rear beam also).  Did I mention it is the same color as my Golf?!

Rabbit Farmer
Rabbit Farmer New Reader
2/22/19 9:02 p.m.

Another Episode of Nick vs. Steve / Subaru vs. Volkswagen (big turbo) / Burke #1 2009.... side by side work by Nick; pretty intro by Steve.  Enjoy.

http://www.youtube.com/watch?v=z2Xp-Ay6Qoc

One can of Red Bull tonight and I'm a video making (and remaking) machine.  

Remake of Okemo 2 (2008) with sound and added out of the back window shot:
http://www.youtube.com/watch?v=mIjjByh_H2c

First public viewing of Burke I (2008)... still learning the car... I can be so much faster once I drive this car more:
http://www.youtube.com/watch?v=ll31W-QeBug

Rabbit Farmer
Rabbit Farmer New Reader
2/22/19 9:02 p.m.

Shell is gone and parts are in storage for the winter project period.

Ralph's Foreign Auto installed new suspension bushings and James installed the hood pins (I figured I would walk the drill across the hood if I tried it.... plus I didn't realize that under the plastic was metal so I was thinking there would be a mounting issue on the body of the car... guess not).

Big thanks to the guys down at City Tire in Williston, Vermont (http://www.City-Tire.com) for their continued support of the local club racing!  They help make the sport possible!

I will post video of the last hillclimb with the Golf in the next few days (Okemo #1 / July 11-12, 2009)

Well, it was time to finally get the 1989 Cabriolet back on the road.  About 6 weeks ago (or so) I was driving it home when steam started to come out from under the hood.  I didn't have time to work on it so it stayed under cover in the driveway until about a week ago.  I was finally able to determine that the radiator was leaking.   Inspection of the radiator showed that the location/orientation of the diverter valve was against the front of the radiator; a new radiator was ordered.  I then had to source out new zip mounting hardware to reinstall the fans on the new radiator... enter Jegs (again!!).  Working on the car I heard a noise coming from in back of the car.  I looked around and found nothing.  Must have been outside and my tired mind/body was playing tricks on me.

[b]Intermission[/b]: Somehow Julie (I'll blame her since I have never used it) broke the lighted rocker switch that makes up the switch to turn on the reverse lights.  I tried to locate a switch of the same size without any luck.  When I was looking for the zip mounting hardware for the fans, I started with the make of the fans (good thinking, Sparky).  Guess what... that lighted fan switch actually came with the electric fans that are on the car.  I found an exact match and ordered it from Jegs.  Hmmm, there's that noise again in the back of the car.  Nothing in the trunk.  Nothing underneath it.  It seemed to stopped whenever I walked to the back of the car.  Strange.

[b]Back to the program already in progress[/b]: Fan installed and diverter location changed.

Source of noise identified.

While I was under the hood, I decided to identify the sparkplug wires that I hated.  The boots were standard cut (e.g. not made for deep well sparkplug access wells).  I ended up taking the wire set and covers that were intended for the 1.8T Golf and used them on the Cabriolet.

After installing the first two and thinking that they looked strange, I figured out that they should have been oriented parallel with the valve cover.  (no kidding, huh?)  I also identified a wire that went to the coil that was too short; sometimes when the engine rocks it would die.  The wire (big ol' red power wire going to the coil) was extended.

I still have a number of items to address on the Cabriolet to make it an easier and more fun car to drive.... looks like a late summer project at this time as work and the racing schedule is keeping me busy.

...and I still have to dyno tune the 1.8T Golf so that I can get some low-end power out of it to make the hillclimbs (and perhaps the autocrosses) a little more fun.  

Hmmmm, seems that I have a turbo Rabbit to get ready for Burke II.

I need a vacation.....

Steve

Rabbit Farmer
Rabbit Farmer New Reader
2/22/19 9:03 p.m.

I ordered another set of spark plug wires (must be an Audi wire set as they come as a set of five) and spark plug well covers for the Golf... got them through Joe at http://www.Axismotorsport.com

Another present arrived in the mail....

Spark plug wire set for the turbo Rabbit (need to custom make the wires as the coils are mounted on the dash with four holes going through the firewall... one hole per wire... the size of the wire [with grommet]) and heat barrier with adhesive backing.

The heat barrier is for the Cabriolet to keep the heat from getting into the driver's compartment.  

This would be a lot easier to do if the engine wasn't in the bay.  I had to measure out each firewall mounted clip location to map out where I had to cut the slots.  The bottom portion (bottom of rain train and down 10") took about an hour to complete.  The rain tray portion took about 10 minutes.  Very functional.

Sunday... jumping into doing the wires on the turbo Rabbit.  If that doesn't fix the problem, I might need a new tach (it has a built in rev limiter).  I also need to add some heat barrier protection to the Golf above the turbo and install the coils.

Another busy week, but I'm making progress.

Steve

Rabbit Farmer
Rabbit Farmer New Reader
2/22/19 9:03 p.m.

Turbo Rabbit is now back to 100%... it was old spark plug wires that did it in.  I replaced them with the kit from Jegs.  I also wrapped the wires (heat protection) where it is above the turbo.

Heat barrier installed on Golf.

Well, I'm almost ready for the dyno tune on Friday; right now it is just a street tune.

I tried my hand at fabrication.... as usual, it looks a lot better in my mind's eye than the final product, but it is functional.  This holds the individual coils so I can run spark plug wires instead of the coil on plug setup.

Tomorrow night (nothing exciting) I will install at new air/fuel (A/F) mixture sensor and new gauge wiring harness.


Rabbit Farmer
Rabbit Farmer New Reader
2/22/19 9:05 p.m.

A lot of information… for those of you with Internet ADD (too many words, man, let me just look at the pictures), I offer the below images, video, and the following summary:
Racing is fun, 270/23psi is the new 272/18psi, 80% throttle, more power, bang, let's go running, nice cars!

Mt. Okemo #1 / 2009 Video
I finally got around to putting together the video from the Mt. Okemo (#1 / 2009) event.  I was waiting to get some course-side video from Joey’s father (I will post up all the course-side video that he took later this week).  The video (2:27.85) is not of my best run (2:27.01) of the day, but the best run was a bit aggressive and I think sloppy in some spots, so I present the slightly slower (think “one-one-thou….” of “one-one thousand”) and cleaner run.

[youtube]http://www.youtube.com/watch?v=AfxbdhPFapA[/youtube]

It’s dyno time…..the saga begins

Let's start by throwing some numbers out there.... 245, 270, 272 and 300.

Friday was a trip down to http://www.ktrmotorsports.com in Ayer, Massachusetts for a dyno tune by Marc Swanson of EFI Express (a4kquattro on Motorgeek.com / phone 603.413.6833); Marc tuned the car using the dyno at KTR.  I got to KTR a little late because of a roll over on I-89 due to hydroplaning and driving around Ayer, MA trying to find KTR as they do not have a sign of any sort at the end of the "Truck Entrance" road that they are located.

First thing we did was get the next standalone coils hooked up and setup in the ECU.  Next was the baseline dyno to figure out where I was all this time.  At a dyno in my area, they determined that I had 272wHP (245, 270, [b]272[/b], 300) at 18psi.  Marc street tuned the car last summer to 23 psi of boost so I must have more than 300.... wouldn't you think?  First run was 245wHP ([b]245[/b], 270, 272, 300), but there was something wrong.  

Actually two things wrong.  

Next few runs left Marc a bit confused as the HP was not increasing with advances in timing (I'm running full race fuel; 109 octane unleaded).  Jim (KTR) noticed that the dyno only had readings up to 5000 RPM while we were bringing the car up to redline at 6700 RPM.  The car was spinning on the rollers.  Fixed.  Twice.

Next run didn't quite seem right either and that was when Marc noticed (per the computer hooked up to the ECU) that I was only running at 80% throttle.  It seems the cable was stretched a bit so I have been driving the car for quite some time at 80% (or so) throttle.  Man, all those hillclimbs that I wanted "just a little bit more" in the straights.... and it could have been there.  Darn!

Baseline wHP
Okay, we have a stuff together now and finally get the baseline power (remember, this is at 23 psi, so it has to be a lot more than the 272wHP/18psi power).... how about 270wHP?  Yep, different dyno yields different results.  Since last summer, the street tune gave me 270wHP.  Of course, I wasn't using all of that thanks to a stretched throttle cable.

More Power!
Time to get a little more power out of it, but more importantly, power where I need it for the hillclimbs (more low-end grunt).  Marc and Jim spent the next hour making adjustments to get the power where it should be.

Marc tuning from the co-pilot seat while Jim controlled the dyno from the driver's seat... while I stood around not knowing what to do with myself, but noticing an empty box of Harpoon and a running refrigerator in the corner.

So what did we end up with?  299.4, but let's round that up to 300 since it is OVER 299, a bit shy of 300, and I feel like rounding a .4 up this time. (245, 270, 272, [b]300[/b])  But, let's talk about that number.  It is not the limit of the turbo, engine, injectors, fueling, etc.  It is actually the limitation of the 034EFI MAP sensor inside the ECU; it is limited to 2.5 bar.  So, to get another 50wHP (per Marc), I would just need to send the box back to 034EFI to get the sensor upgraded.  I might as well get the 034EFI "hiccup" fixed while I'm at it (the engine is running just fine and stops for a second like I hit the rev limiter).  So, there is more that can be obtained, but I have to ask myself if it is worth it as 350wHP would be great on the track with FWD, but it might just communicate to wheel spin at the hillclimbs.

@#$%@#$%&@#$% !!
Time to hit the track... the running track.  When I got home with the car I decided to take it for a little spin.  I drove it very slowly/low RPMs until I was out of town; I turned right on a side road and gave it 50-75% throttle as the gas pedal felt a little funny going that extra 20%, and grind-grind-grind.  Great, there goes my Drive Shaft Shop 475wHP CV joint.  Or not.  It seems that those 3rd gear pulls on the dyno did the transmission in (or perhaps it is just the clutch).  I had to run/jog 3 miles home (good time to leave my phone at home, but who would I can anyway as Julie wasn't home.... my cat hasn't learned to drive the truck yet) to get the truck and trailer, come-a-long the car on the trailer in the rain, and then finally getting home by 9pm.  Ack!  Someone, somewhere, hates me (well, more than those ex-girlfriends).  Time to drop the transmission and figure out what happened.  If it is the transmission, I might look into the option of a 6-speed if it is something easy(ish) to convert and if the LSD can transfer from 5-speed to 6-speed.  We will see.  Maybe I'll get lucky and it will just be the clutch (wishful thinking).

Wow, look at all those nice cars!

KTR is a very large facility with A LOT of very nice cars (most of which I cannot identify, but you don't need to understand art to enjoy it).  This is just one of the small rooms of cars directly outside the dyno room.   There is soooo much more.  It is like a racing-orient version of RPM (http://www.RPMvt.com).

Lotus Europa(but that isn't a stock engine)

Rabbit Farmer
Rabbit Farmer New Reader
2/22/19 9:05 p.m.

The search for reason for the poorly running turbo Rabbit (aka Tub II) continues.

I started by mapping out the engine wiring harness.  Three hours later I have everything under the dash mapped except those wires that continue through the firewall to laa-laa land.  Wednesday night I will continue to locate the end of those wires.  The reason for the mapping is that I'm trying to identify all the grounds to ensure they are connected properly.

I learned a couple of things.  

First, there are three outlets on the fuel distributor... one is terminated.  The other two go to injectors... one mounted before the throttle body and one after.  The one before the throttle body has a electronic controller and a wire that goes somewhere.... 'somewhere' should be identified on Wednesday night.

Second... the 'brain' is Callaway Turbo Systems, Inc. model number 1084 / serial number 1787.  This will hence forth be the 'Magic Box'.  There is a vacuum tube connected to the Magic Box that goes to a tube off of the intake manifold (I assume this is a MAP sensor).

So, let's talk about how the car isn't running properly.  If I give it gas the engine doesn't rev up as fast as it should (sluggish) and the tachometer doesn't seem to quite mirror what the engine is actually doing.  This might just be my perception.  I looked at all the wires associated with the tach, the fuse box (all 6 fuses), and the direct ignition coils.  Here is what I have.

[b]COILS[/b]: There are two coils mounted to a plate.  Coming into the plate is Green (to Green tach), Gray (magnetic pickup on distributor), Red (Ignition relay [unsure of post number at the moment]), and Black (ground).  Another Green wire connects to a screw on Coil A (goes to 1 and 4 cylinders) that goes to the bottom post of the fan toggle switch on the dash.  The toggle switch is off when down; on the bottom of this toggle switch is another wire that goes to the bottom of the Fuel toggle switch then the Ignition toggle switch and then to the Ignition relay.  

The ignition relay goes to Ignition toggle switch, coils, other two posts go to post on the fuse box (unsure if + or -).

[b]TACH[/b]: The tach has a Black, Red, Green and White wire coming out of one part of the back of the tach that then go into this epoxy section on the back of the tach.  From this epoxy section, the White comes out and ends, the Black goes to ground, Red to bottom post of the Alt toggle switch, and Green splits with one going to the Magic box (pin number 7) and one to coils.

[b]The switches....[/b]
Alt (alternator)... car will run with this off, but with no power.
Fuel turns on the fuel pump
Fan turns on the fan (duh!)

From the [b]Magic Box[/b], we have a gray wrapped wire that goes to someone in the engine bay (Wednesday night), Red (bottom post of Alt toggle switch), Black (Green wire on Tach) and Orange (ground).

There is a lot more going on, of course, with all the toggle switches, gauges, etc.  I actually found two questionable wires (one that goes from Alt switch to ground and one to the oil pressure override switch).  I'm unsure if the bottom of the Alt toggle switch to the ground would cause the issue that I am experiencing, but you never know.  It was actually the ONLY wire that I could find that was not properly soldered and shrink wrapped... it had duct tape.  It is actually a very nice wiring job under the dash.

So, the saga continues on Wednesday.  I want to map everything out for the grounds (as I mentioned) plus when I swapped this all over to another shell, I want to know how to connect all the Legos.

Oh, one the Magic Box is a little cover that has "Advance Adjustments".... unsure what all of the knobs do, but they don't seem to have the rev limiter setting on there (could be wrong, I'll look at my pictures later).  If it doesn't... where is it?  Another mystery to solve.

The tach is a VDO Street Eliminator # 1-211-005-019A (97/04).  I'll do some research soon to see what I am dealing with.  How do I test a tachometer to ensure that it is working properly?

One last note (wow, long boring text post... gimme some pictures!!!).... regarding the tach Green wire that goes to the coils and to the Magic Box... on the coil, the green wire goes into what looks like a pile of white silicone.  The wire is bench, but I'm unsure if it is broken or faulty in anyway.  What is the white silicone stuff and can I remove it to check the green wire connection (and what do I replace the white silicone goop with when done)?

Yawn... enough for tonight.

Steve

Rabbit Farmer
Rabbit Farmer New Reader
2/22/19 9:06 p.m.

Walter... thanks for your input.  I'll check some things out over the weekend.

Back to the regularly scheduled program in progress....
(what I posted on another forum... so there is a bit of explaining needed to paint a better picture for them)

Thanks to John at FastAddiction.com I was able to drive my car for 4th overall at the Burke hillclimb (good times!!!)... just two Subarus and a Legends-type car beat me.  Thanks for all the fast cars that didn't show up (I think the exact same think Smokey said about his FTD at Bolton 2004... lol)...  I'm usually top 7 to 10, not top 5.  Oh, well... I'll take it.  Car ran great with the 300wHP, but I was praying the car would magically self-install AWD.  Didn't happen regardless of how much beer I drank.  Beer muscles didn't form either.

In-Car..... not my fastest run, but within 8/100ths of a second to it.
[youtube]http://www.youtube.com/watch?v=MvFz05_8tZc[/youtube]

Side by side with my car and Nick's STI is coming soon.

Then it happened.... we rent a small track in Morristown, NY about three times a year.  The track is 3/4 of a mile, 13 turns, and about 28 feet wide.  We run time trials with two cars at a time on the track as the layout of the track allows for this.  Car ran great on Friday (both my wife and me were driving it) and great for half of Saturday.  Then *pop* *zing* *ziiiiiiippppppppp* *grind* occurred.  Darn it, there goes my axle again.  Hmmm, seems my axle is functioning in all the gears but second.  So, I guess 2nd and 3rd (recently replaced) were in cahoots (always thought that word was spelled with a 'k') and 2nd gear joined 3rd in the big transmission in the sky.  Bye bye 2nd gear... write if you find work.

So, what to do?  Race gears for the 5 speed?  Get a 02M (6-speed) and change everything else?  Get a Quife dog box for the 5 speed that converts it to a 6 speed ($6k)?  Of course, this is further complicated as I really want an AWD for hillclimbing as I have max'ed out the FWD performance. Short term solution is to grab a second (might grab 1st while I'm at it) gear from another transmission I have and use it at the hillclimbs (two more this season) and be a little more gentle with it.  Then over the winter decide what to do with the transmission to make it bullet proof or sell the whole car now and start on my Subaru racer instead.

As the VW Turns will continue after these commerical messages.
Steve

Rabbit Farmer
Rabbit Farmer New Reader
2/22/19 9:07 p.m.

Tonight I finished mapping out the wires, vacuum lines, fuel lines, and air under the hood..... pretty much got everything to the firewall on both sides (under the hood and inside the car) now I just need to connect it all together.

Pictures of some of the parts to give you a clearer idea of what I am looking at...

Microfueler

The dash (switch panel flipped forward to access the harness)

Coils

Close up of adjustments at end of coils

What the...?????

Charlie, Steve, & Joey installing transmission after 3rd gear went (in time for Burke)

Rabbit Farmer
Rabbit Farmer New Reader
2/22/19 9:08 p.m.

Picked up 6-speed from Fast Addiction; everything looks great.

6-speed (now with LSD)
6-speed axles, hubs, starter, shift box/cables, power steering line, and hydraulic clutch line.

Add in the Spec 2+ clutch and lightened flywheel (interesting design)....

...means that the stock clutch, flywheel, and differiential for the 6-speed are for sale.
(I also have a stock 5-speed diff and 5th gear for sale)

Rabbit Farmer
Rabbit Farmer New Reader
2/22/19 9:09 p.m.

Panzer plate on the way. 

Day 1 of the 6-speed swap.  Sporting sexy steel rims with studded snows.  
I don't plan on taking pictures during this part as it is a lot of 'been there, done that'.... I will take pictures to compare old and new parts for reference.

Plan is to take this 5-speed with LSD, clutch, flywheel, and hydro clutch (will need help with that last one) and install it all in the Cabriolet.

Day 1

Day 2

5-speed transmission, flywheel, pressure plate, clutch, and axles have been removed.  Next stop for everything (minus the axles) is the Cabriolet.  (the plan anyway).

5-speed (Spec2) vs. 6-speed (Spec2+)

Big difference in the hardware between the Spec2 and Spec2+

5-speed and 6-speed side by side.  The 5-speed is a bit dirty thanks to a CV joint blowing apart at Philo.

Dieselgeek Panzer Skid Plate will be protecting my investment.

Stainless steel brake lines for front and year.

Rabbit Farmer
Rabbit Farmer New Reader
2/22/19 9:09 p.m.

Day 3

Busy night....

I removed the 5-speed shift box/cables; this required me to disconnect the exhaust and unbolt it from the floor so that I could hang it low enough to remove two aluminum heat shields.

Note the differences between the 5 and 6 speed cables and connections; I'm unsure if the actual box is different.

Side by side comparison of the 5-speed vs. 6-speed axles.  The 5-speed axles are from the DriveShaft Shop (475HP version) so they look very different from stock.  The stock 5-speed axles are hollow like the 6-speed while the 475HP axles are solid.  The big difference between the 5 and 6 speed axles are the method it attaches to the hub (nut vs. bolt) and the length.

The hydraulic clutch lines are very different.... I really like the design of the 6-speed as it doesn't have the large push rod setup on the transmission side.

And the frustration of the night was installing the 6-speed hydraulic line to the pedal assembly.  I removed the bracket under the brake fluid distributor so that I could get more room between that unit and the firewall to unhook the 5-speed line and install the 6-speed.  What a @#$%@$# pain!!!  I was finally able to get the 6-speed line connected (lost a lot of fluid so bleeding is in my future), but I am not sure where the line should run.  Does anyone have a picture of the clutch line navigating around the brakes lines properly?

View from the bottom....

Rabbit Farmer
Rabbit Farmer New Reader
2/22/19 9:11 p.m.

Day 4

Almost all together....  it would have been 100% together if I had known the shield that goes between the engine and transmission was different between the 5 and 6 speed.

I figured out the best way to run the clutch line (I assume this the factory route... made the most sense while on my back under the car), did the power steering line (real easy!), installed the shift box, put the exhaust shields and exhaust back in place, and finally installed the 6-speed hubs and axles.

The clutch hydraulic line....

Same image with notes to give you a frame of reference.  This is looking up from the ground to the underside.  Frame rail is the driver's side of the car.

Shiftbox installed... hmmmm, looks just like the 5-speed at this end.

Pictures of the 5-speed (02J) vs. the 6-speed (02M)

Together... easy project since I took the carrier off of the car as a single unit instead of taking it apart in pieces.  Every came apart so nicely as the car hasn't seen the roads in the winter since 2003 +/-.

Rabbit Farmer
Rabbit Farmer New Reader
2/22/19 9:12 p.m.

Day 5

Still taking my time; just a little bit each day.

I'm still doing research on what tires/rims I should use this year..... I currently have older Toyo RA1 in 235-40-17.  Looking for a wider and sticker tire, yet no taller than the current tires (short is even better).  Looking at Hoosier R6 245-50-15 or A6 245-45-16.

5-speed engine/transmission cover vs. 6-speed.  The black area on the right side is a piece of rubber.  It seems to have replaced the metal cover that is normally there on the 5-speeds.

5-speed cover on the 6-speed transmission

6-speed cover on the 6-speed transmission

Filling her up with 2.3 liters of Motul 300.  I need to get the special VW tool to tighten the filler cap.

Cover on engine....

A very different (and not flat) flywheel....

Shot of the clutch... notice that the thicker side of the clutch is actually the flywheel side; my experience is that is is normally on the pressure plate side.

The pressure plate (note the fingers) before I tightened everything.

...and afterwards.


Technical question.... what is the story with this hole in the bottom of the transmission?  It is supposed to be plugged?  Is it an inspection hole?

1 2 3

You'll need to log in to post.

Our Preferred Partners
QIcIA9S3Jvl4Sx3ST3Gr9p2vsQubDmyZpBYPK43UfMmJo9EaBUaO3UfFCYyTHs4g