Oct 20, 2015
So... the plans for winter 2015-2016.
Golf
I have really big plans for the Golf over the winter. I have determined that I should be able to complete all the upgrades, modifications, and other necessities early in the winter to ensure I am ready for (a) Ensuring the car is sold or (b) Ready for next season.
1. Clean the inside
2. Wash the outside
3. Install OEM bracket that holds plastic oil dipstick tube in place
4. Put car in the trailer
5. Have some soup
Truck
1. 50 gallon fuel tank... 27 gallon tank just doesn't make any sense, Mr. Ford
2. Additional driving lights (unsure if doing behind an aftermarket grill or mounted on simple light bar on front)
Behind grill: http://www.ford-trucks.com/forums/441186-installing-lights-behind-grille.html
Simple light bar (just an example): http://www.autoanything.com/lights/kc-hilites-front-light-bar
3. LED reverse lights
4. Airbags and/or stabilization and/or weight distribution system (I still need to research options)
Trailer
1. Battery charged from truck to provide constant power for interior lights. Right now the lights only work if the truck ignition is "on"
2. LED lights inside trailer
3. LED back up lights
.....and.....
Scirocco
1. Jump in and start working on it... plan the engine, send out the suspension to be rebuilt, VEMS, etc. etc. etc.
2. Get excited about #1 and then sit down and figure out a plan
Dec 11, 2015
And the planning begins.... tempted to start thread in MK1 Scirocco thread on VWvortex... but, I like all my cocaine and heroin habits in one place. Plus, hookers are half price this week. (huh? that doesn't make any sense).
Working on plans on the MK1 Scirocco.
Tube front end
1.8T (which it already has)
02M cable shift (current 020 5-speed with 4.25 final and shift rods)
FMIC (current what seems to be Corrado SMIC)
Beefy camber plates
Augmented cage for future Mt. Washington hillclimbs (looking forward to next CTTC... of course, I am part of the group planning the event!)
Of course, VEMS.us is in its future......
Golf is done, wash, tucked away for the winter (it is for sale!).... eyes are on the Scirocco.
Planning...... evil laugh.....
Mar 01, 2016
Planning, planning, planning....
Trying to figure out if I want the 02M (6-speed) or the 02J (5-speed) with cable shift for the Scirocco.
I came across this really, really, really cool site that I can put in all the gear ratios, tire size, etc. and watch it go through the gears using the auto-shift button.
http://www.blocklayer.com/rpm-geareng.aspx
I haven't tried the numbers for the 02J or 02M on the site yet. That will take some time as I need to determine what I have first.
I figure that if my Golf can get into 6th gear at Okemo (just holding speed, not accelerating), the Scirocco being lighter and much smaller diameter wheels will be hitting 6th as a usable gear.
Of course, what is it like at all the other speeds and gears..... what about Burke (tight hill) vs. Ascutney (fast)?
The 02M is much stronger, but since the car is so light, I do not think I need to worry about breaking the 02J. So, strength is not a reason to go with the 6-speed.
Then, there is the weight difference. I think it is 100# (02J) vs. 112# (02M); assuming the internet is correct. Will have to weigh both of them when I get a chance. Of course, the 02J doesn't have an LSD, but it will give me the general idea.
Of course... bringing in the cost factor. I have the 02M freshly rebuilt and ready to use. I have the cables for both. Might go with aftermarket upright shifter.... we will see.
Both transmission will either require some fabrication to be able to use the normal MK4 (like my Golf) engine mounts OR order pre-made 02M or 02J to MK1 (Scirocco) mounts. Since this will be always raced, I want something that will hold up. I like the fabrication angle as MK4 parts are easy to come by.
Planning, planning, planning.
May 22, 2016
Not too much of an update.
First hillclimb of the year (Ascutney #1 / 2016) has come and gone; weather was great, good to see old and new faces, etc.
I believe this is a personal best (2:56.10... so close to 2:55). Happy with 3rd overall.
https://www.youtube.com/watch?v=1B3uNDhQzlM
Next weekend... SLMP track event with the WRX.
May 30, 2016
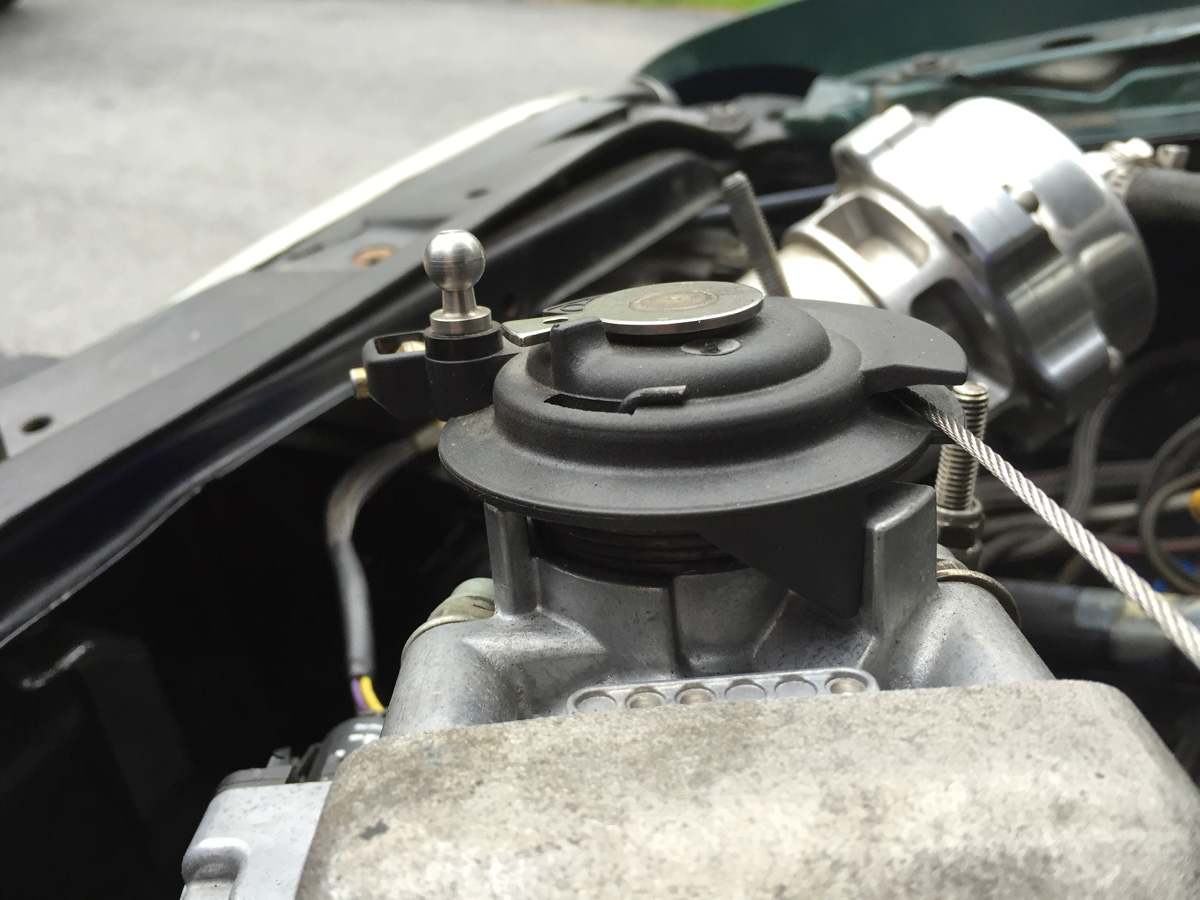
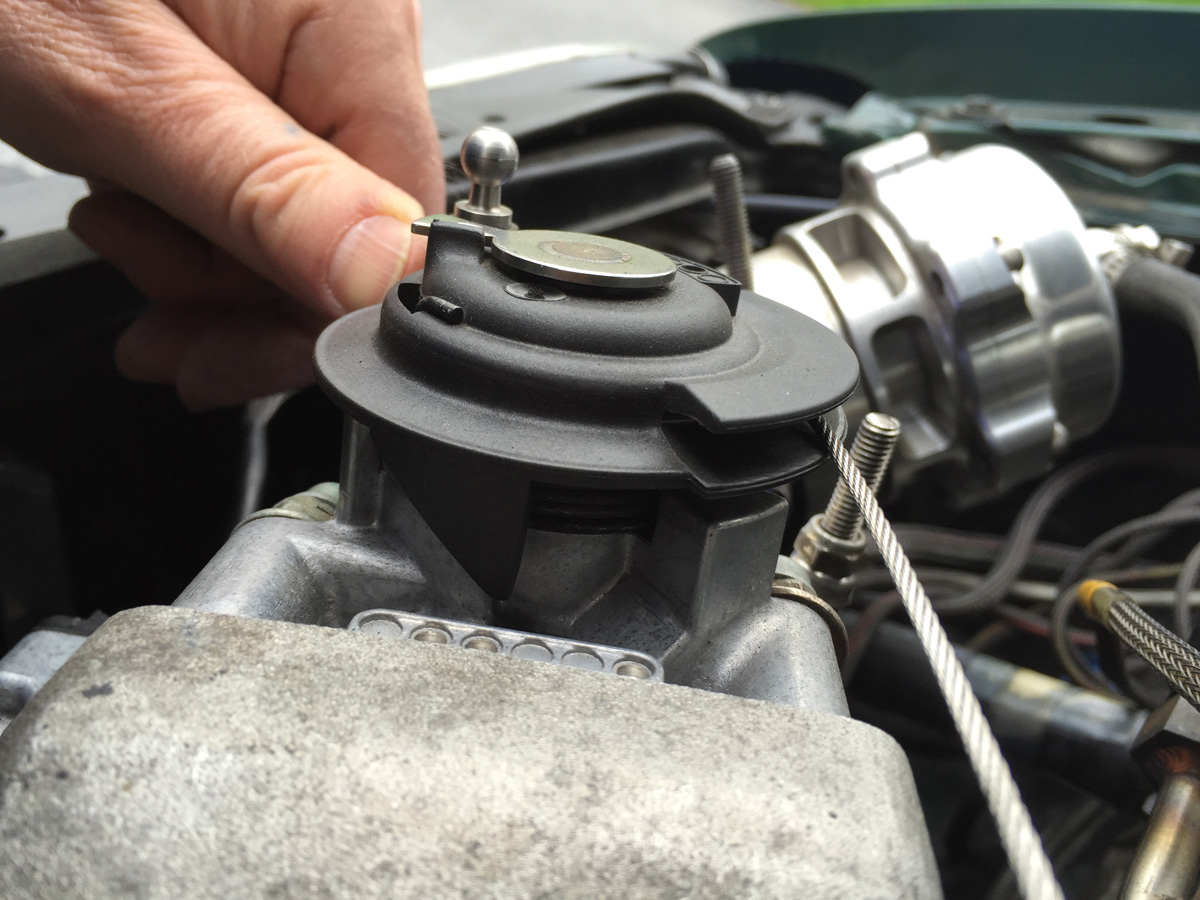
I did one improvement for the 2016 season.... installed set screw to control the idle.
Oh... and get a new set of Toyo R888 (235/40-17)... after the Ascutney hillclimb. (could have used them for Ascutney)
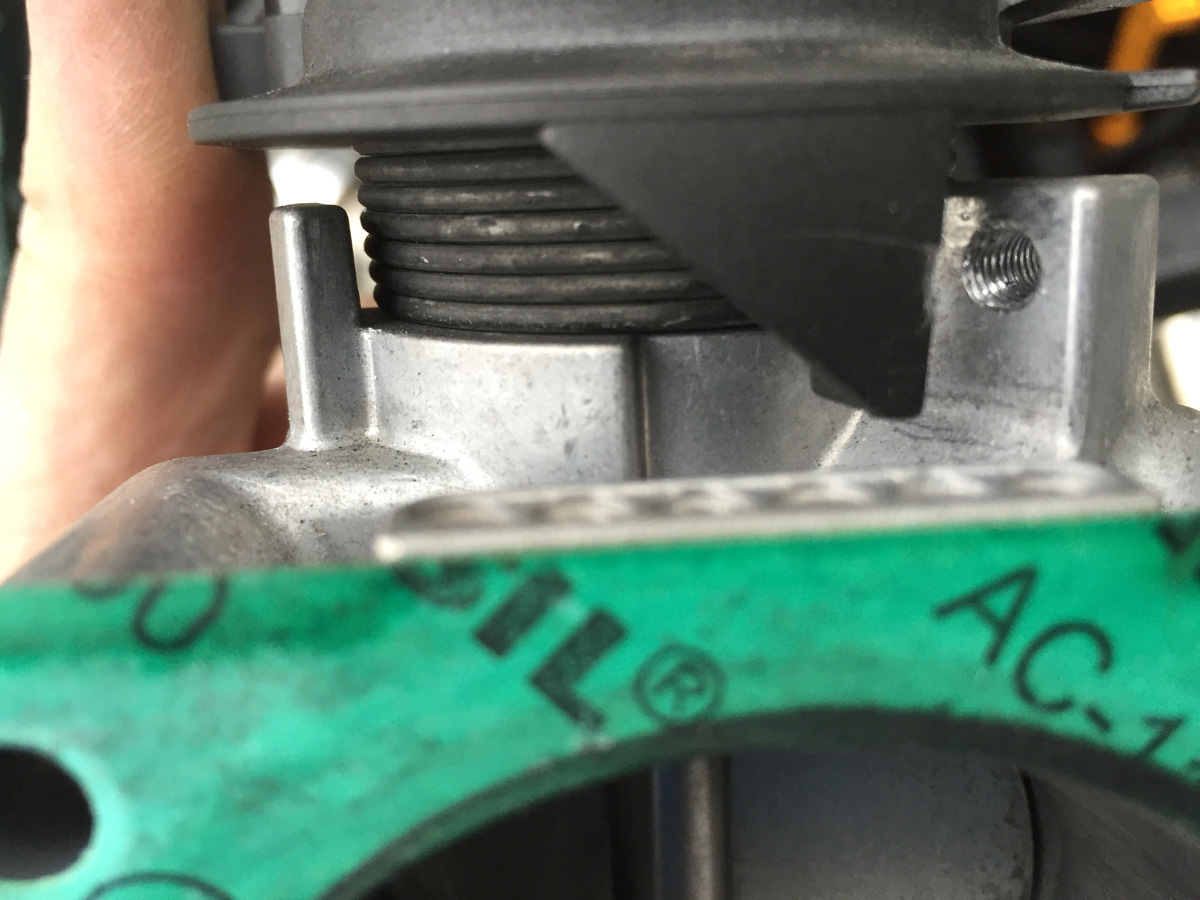
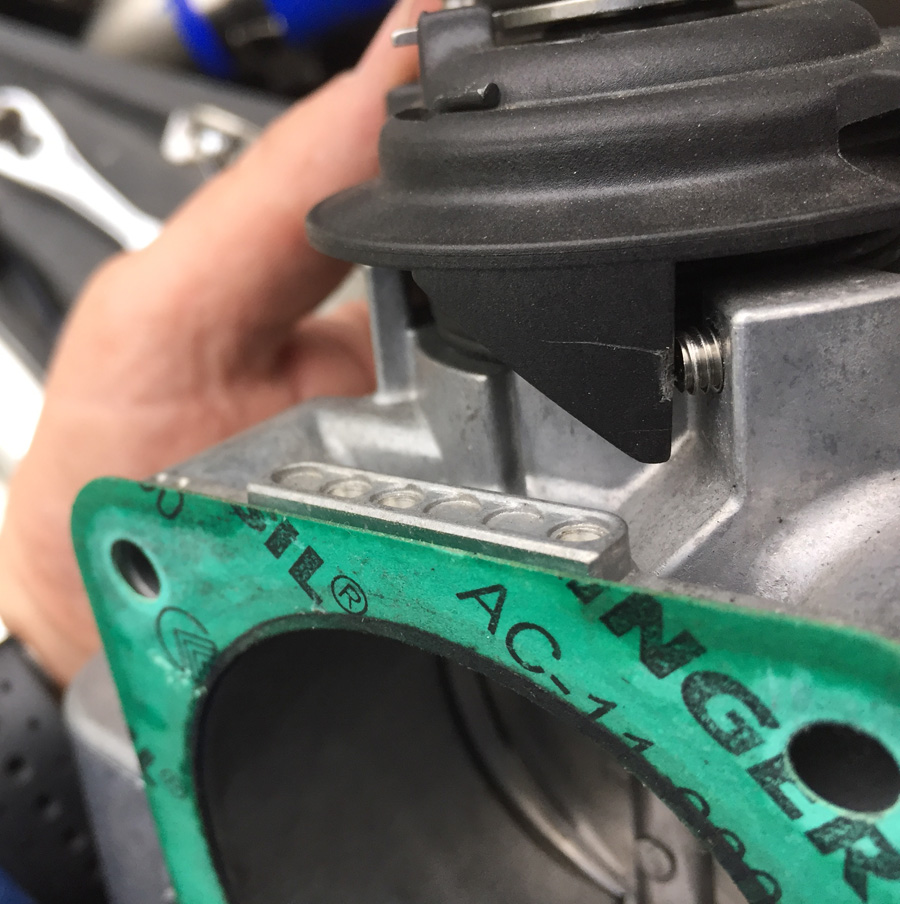
The car did not always idle when cold and I wanted the engine to run faster after a run (faster than 700 +/- RPMs) to pump coolant through the engine. Historically, I used a split washer to control the idle by putting it between the static throttle body stop and the rotating part of the throttle. I used the split washer because it offered different throttle positions based on its sloped shape.
Anyway... enough of dealing with the throttle, I installed a set screw to address the issue.
One thing I would have done differently if I did it again, I would have done it from the backside so that I could adjust the idle while the engine was running. As installed now, I have to turn off the engine and swing the throttle open to get to the set screw. Live an learn.
Photos of this simple adjustment.
Jun 14, 2016
Good times at the Okemo #1 hillclimb in Ludlow, VT. Strange weather (cold, wet, sometimes sunny.... unlike the usual 90 degrees and all sun).
The car did quite well at the event... 1st in class (Saturday, I was the only one in my class, so don't get too excited), 7th overall at 2:29.07 (nice!) and second fastest in the straight (111 mph... darn Super Chicken got me at 113 mph).
Doing some things to the car prior to Okemo #2 in a few weeks. Swapping out the hot side of the turbo for a small one and safety wiring all the hot side bolts as they backed out in prior years (seem okay this year, but it has been cooler). Naturally a retune is in order at VEMS.us.
Video from this past weekend posted on Vimeo as Youtube's quality hasn't been there for me. Make sure to watch in 1080HD. Enjoy.
http://vimeo.com/170451454 <-- video link
Steve
Sep 08, 2016
Half a summer worth of updates....
Golf is normally near 118 mph in the straight at Okemo, but I was running at 111 mph for some reason. It was slower. It was not smoking.
Anyway. After checking things out at Kales Custom, I was off a bit with the compression on two of the cylinders.
My first thought is "hole in the piston" but the car was not smoking at all.
Took the engine apart. While in it, inspected the clutch/flywheel.... looked great!
Pistons, engine block, and head looked good to me (untrained eye).
Hmmmmmm......
Disassembled.

Well, not related to the compression issue, I got to add something else to my carnage wall of shame... a broken main bearing cap. AND... there was nothing wrong with the bearing. Good thing I had the engine apart.
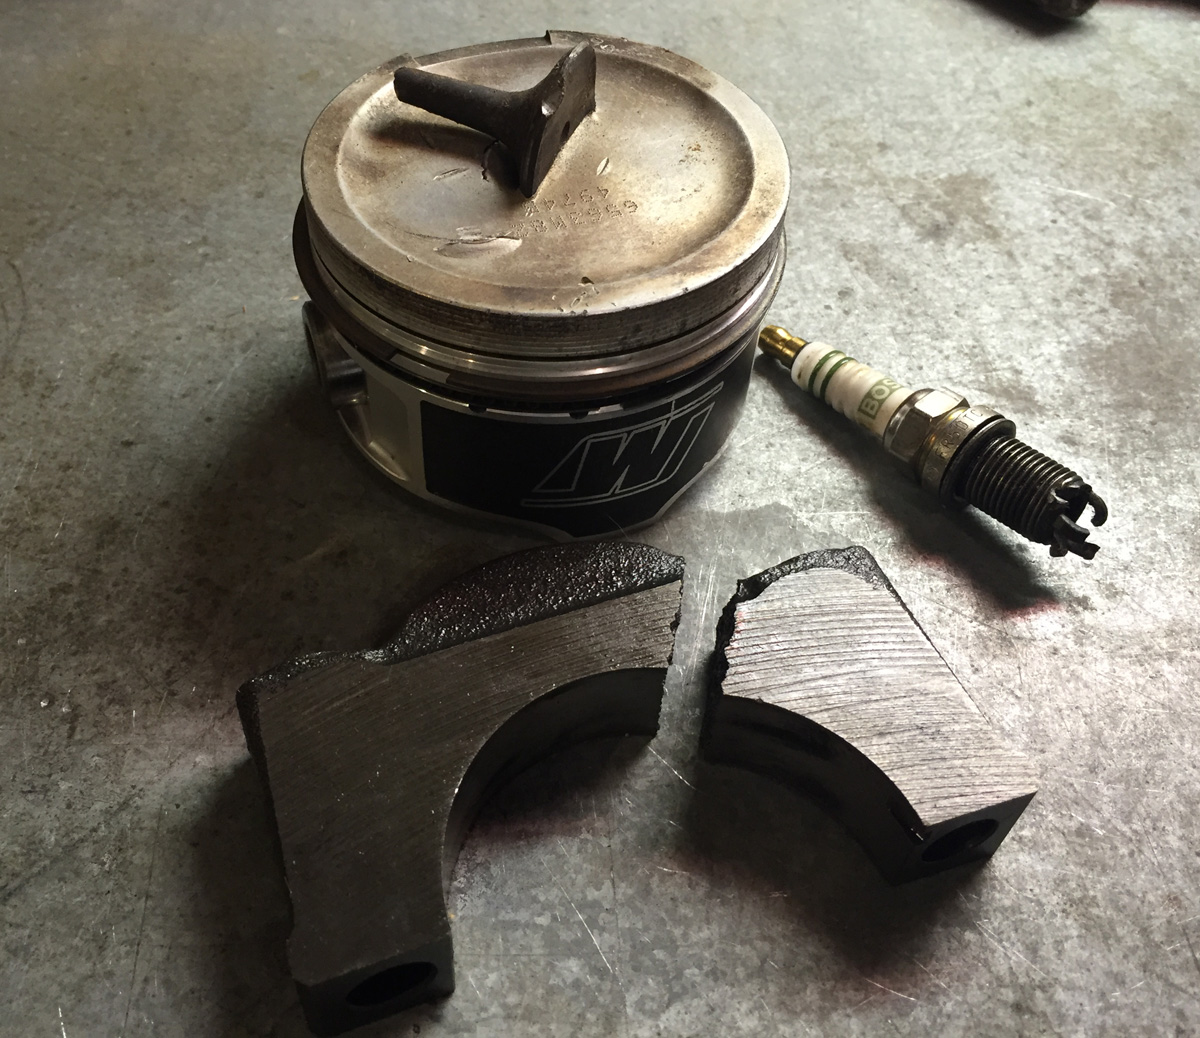
Being new to the whole "broken main bearing cap" club, I thought bringing a bearing cap from another engine the machine shop could make it work. Well, YES and NO. They would have to line bore the caps so they worked with the crank; they send out for line boring; and the "big V-8" guy didn't have one that small.
So.... I brought him a new block. Problem solved!
Not.
I get a call from the machine shop (RPM in Georgia, VT) and they tell me they can't put the pistons in the cylinders. They don't fit. They are too big? I didn't recall boring anything.
I also did not recall what I had for breakfast.
Turns out I did .5mm oversize on the pistons at one point as the block was dorked up from one of the previous engines going the way of the Doo-Doo Bird.
Bored and cleaned block with new piston rings (all gapped).

So... the source of the compression issue was actually the seats for the valves. I guess running a bit of boost for 3 years isn't good for longevity of those internal engine parts.
Cleaned up valve seats and new valve seals (all 20)..... figured we were in there anyway.
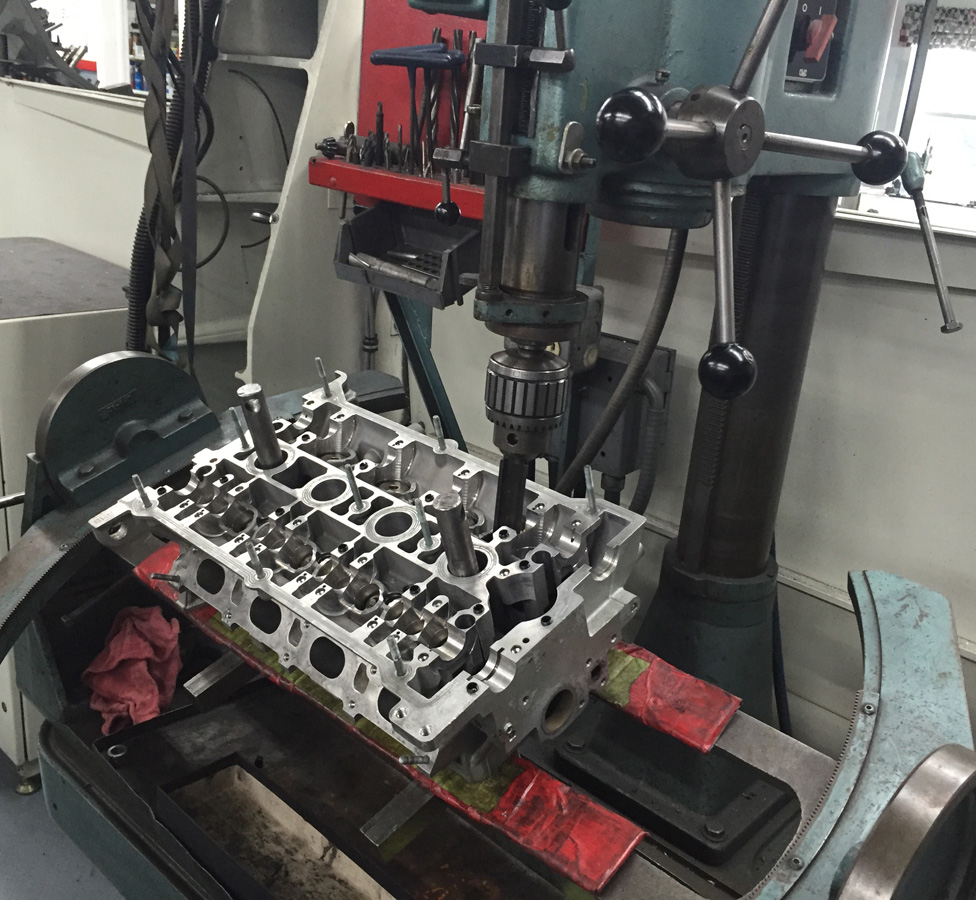
Everything is back in my garage.... a project for tomorrow as I have the day off.
Meanwhile, while summer is slowly drawing closer to winter, the New England Hillclimb Association (NEHA) hillclimb events continue. Well, I just have to drive, ya know.
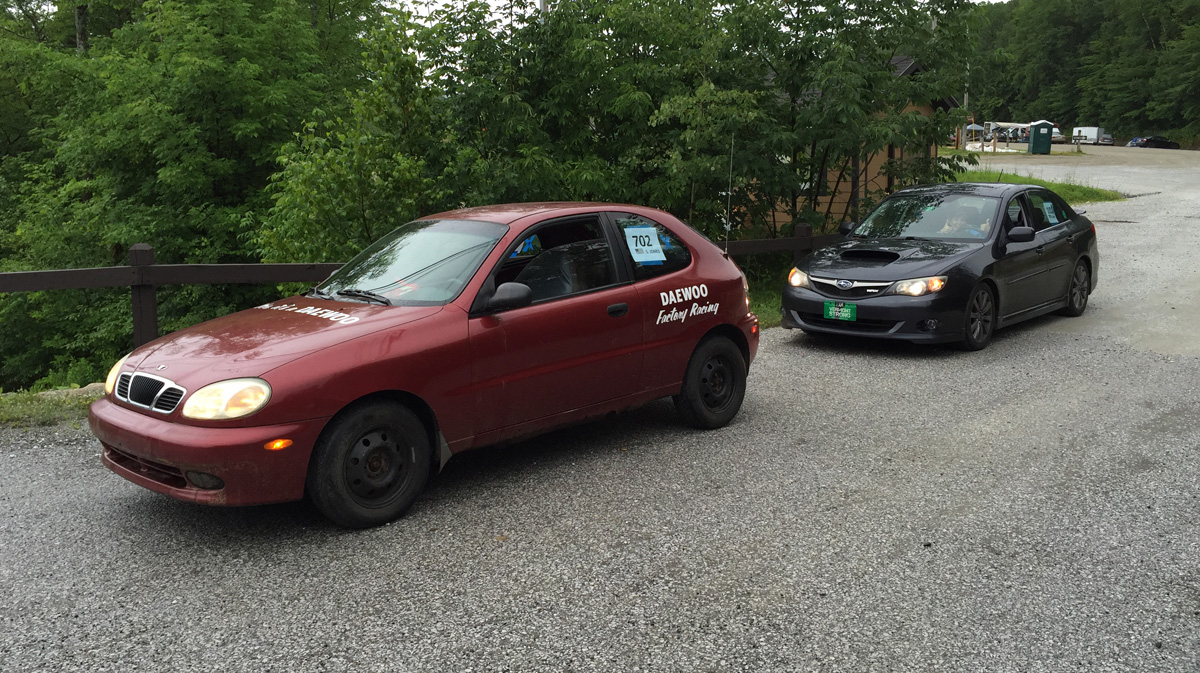
Enter the world's fastest red, automatic, Daewoo Lanos with white stickers. It needs all those qualifiers to remove the other 7 Daewoos from the population. I drove it at Okemo #2 and Burke #1. Photo of the World Famous Non-Factory Sponsored Superduper Intergalactic Racing Team Daewoo Lanos (at Okemo) with Julie (little woman) in the 2009 Subaru WRX (my car!!!!) in back of me.
I had lots of time to think in the straights.
In other news... went to wedding with a bunch of local VW club people (Dubsnorth). Had a great time. No one told me about the open bar.

Ascutney #2 is next weekend (favorite hill). I don't think the Golf will be ready with putting everything together, breaking it in, and dyno tuning it. Back to driving the Daewoo.
Then.... October brings about the Mt. Philo hillclimb. Another great event, though, sadly, the last event of the year.
Nothing too exciting.... but I'm still alive.
Steve
Oct 03, 2016
And the other half of summer.....
Spending time rebuilding an engine with no corners cut... well, one, but that was by accident. I did pay for it.
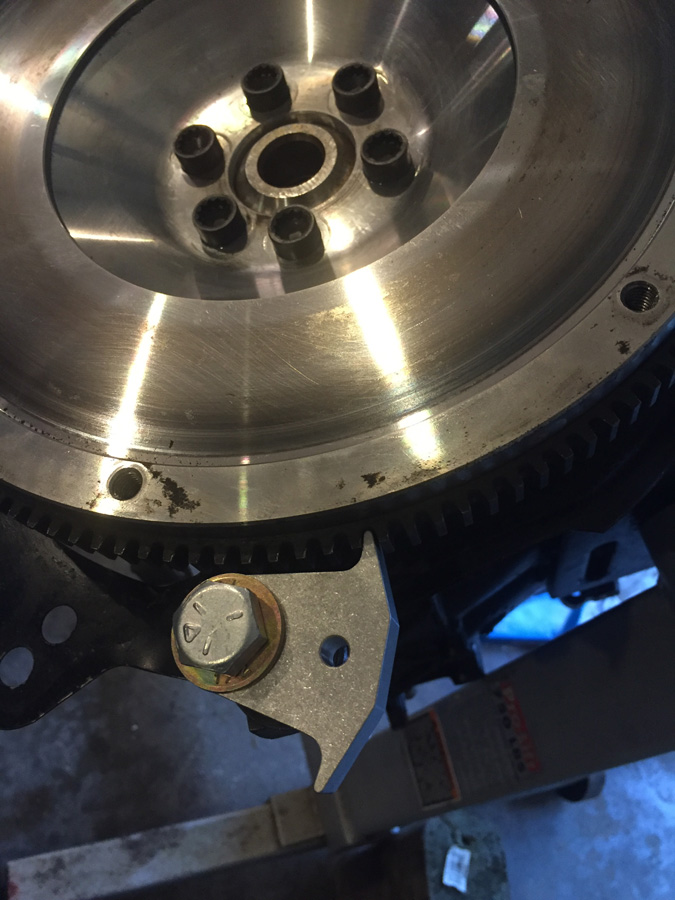
I had one of these for my Rabbit, but never for the 02J (5-speed) or 02M (6-speed).... that usually involved vice grips and screwdrivers. Enter the proper flywheel holder (not recommended for the crankshaft bolt). Easy to use and very effective.
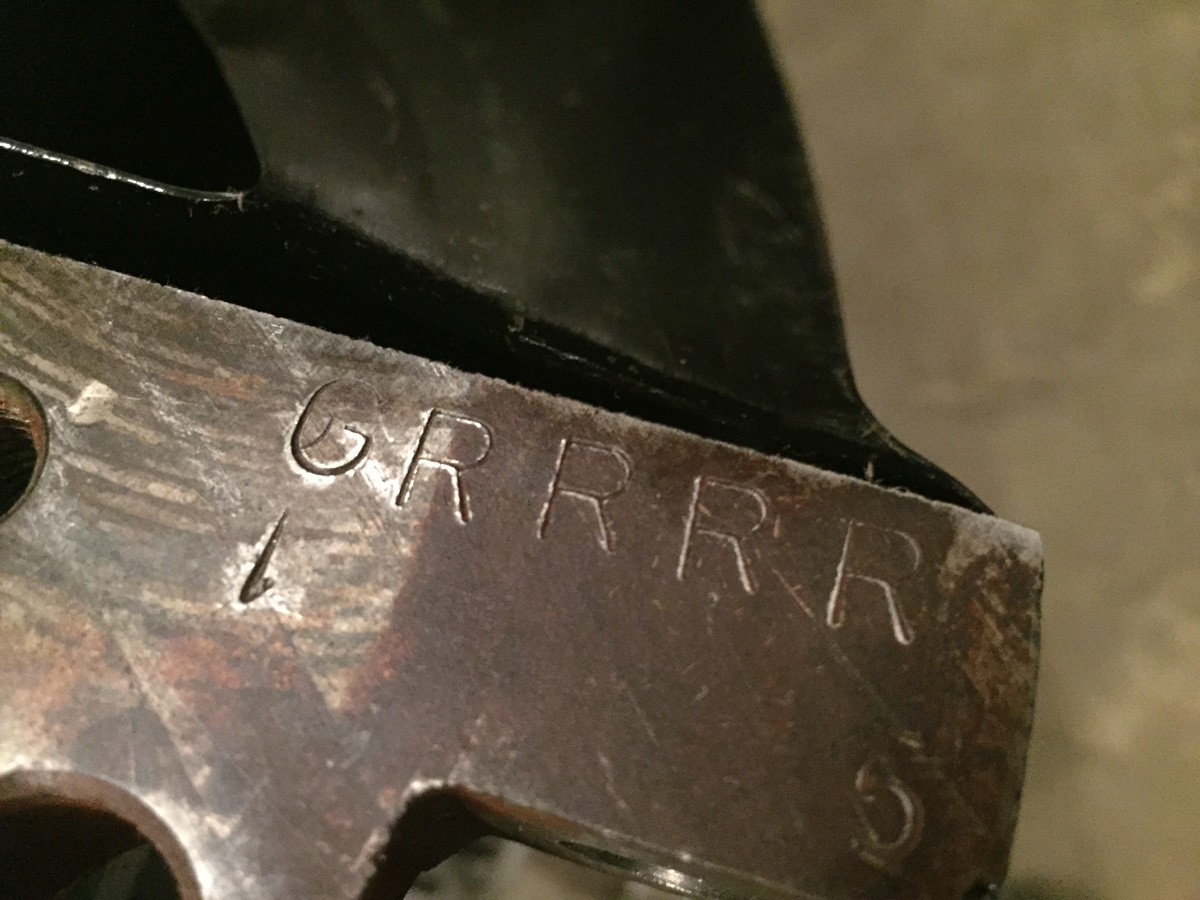
The new block code is "Grrrr".... no idea what it means, but it seems fitting.
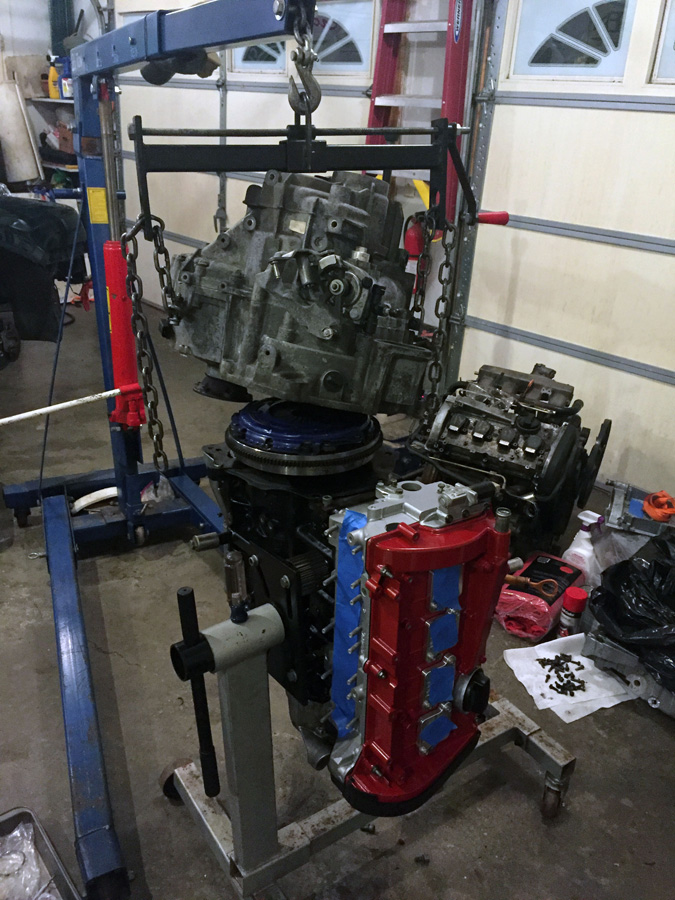
Nothing too exciting from the engine build point of view. Bored the block to accept the .5mm oversized piston (82.5mm vs the standard 82mm), new valve seals, new rings (naturally), and everything was cleaned and machined by [url]http://www.rpmenginesvt.com[/url] (Georgia, VT)
Add on the transmission... my new favorite (and easy) way to install the transmission.... unless you have to bolt on the oil pan afterwards (where rotating the engine/trans as a single unit is a royal PITA).
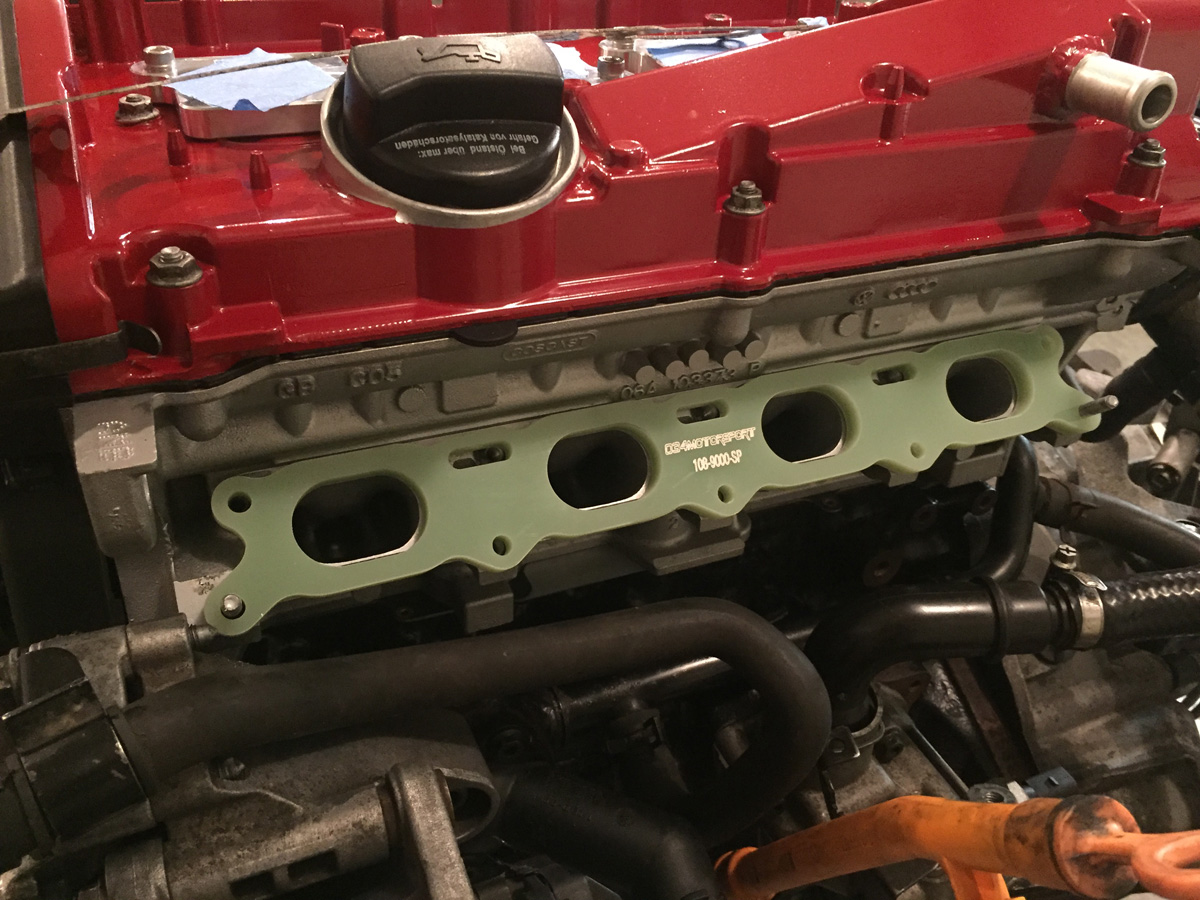
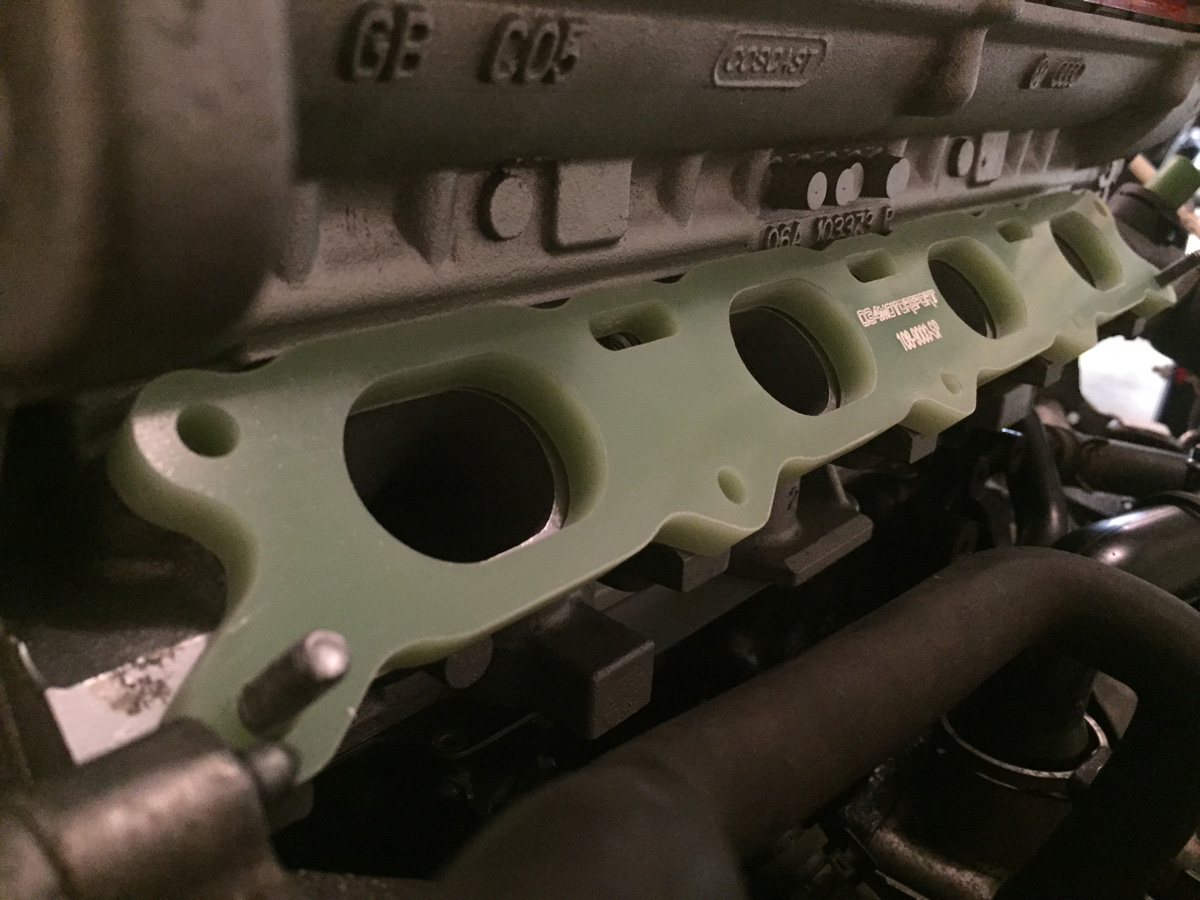
Something new that I am trying... and it led to another series of challenges... is the intake manifold Phenolic spacer. Now, what does Phenolic mean? It is a thermal do-hickey that prevents heat from the engine block from transmitting to the intake manifold. Reduce heat in the intake manifold means more power (there is a reason that we have FMICs!)..... or, it is really good marketing.
One thing I noticed when taking apart the engine is that the fuel injectors were very loose in the injector cups. It was like throwing a hot dog down a hallway.
So, new injector cups were in order along with new rubber o-rings on the injectors.
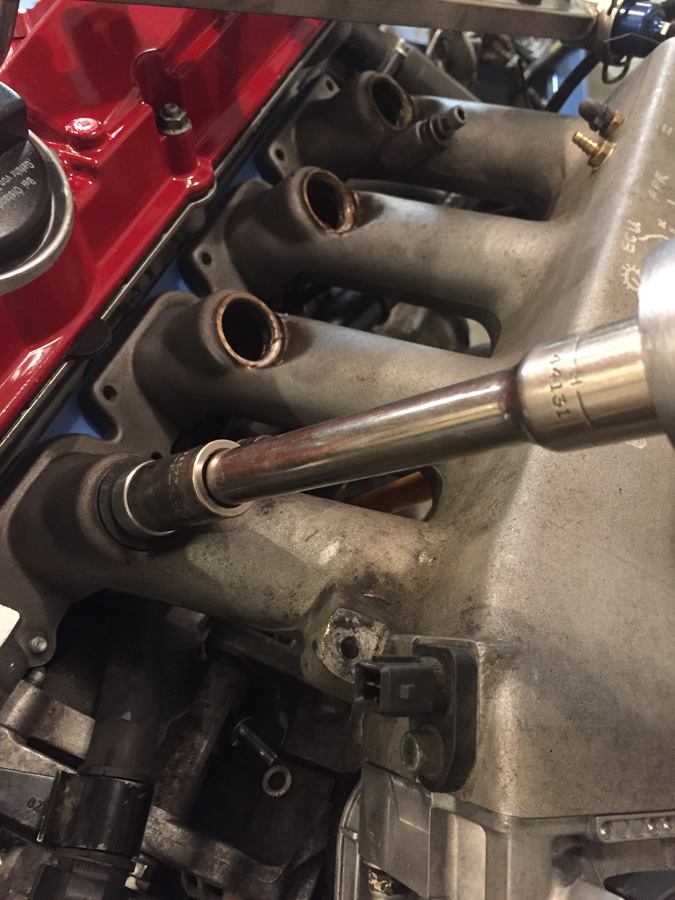
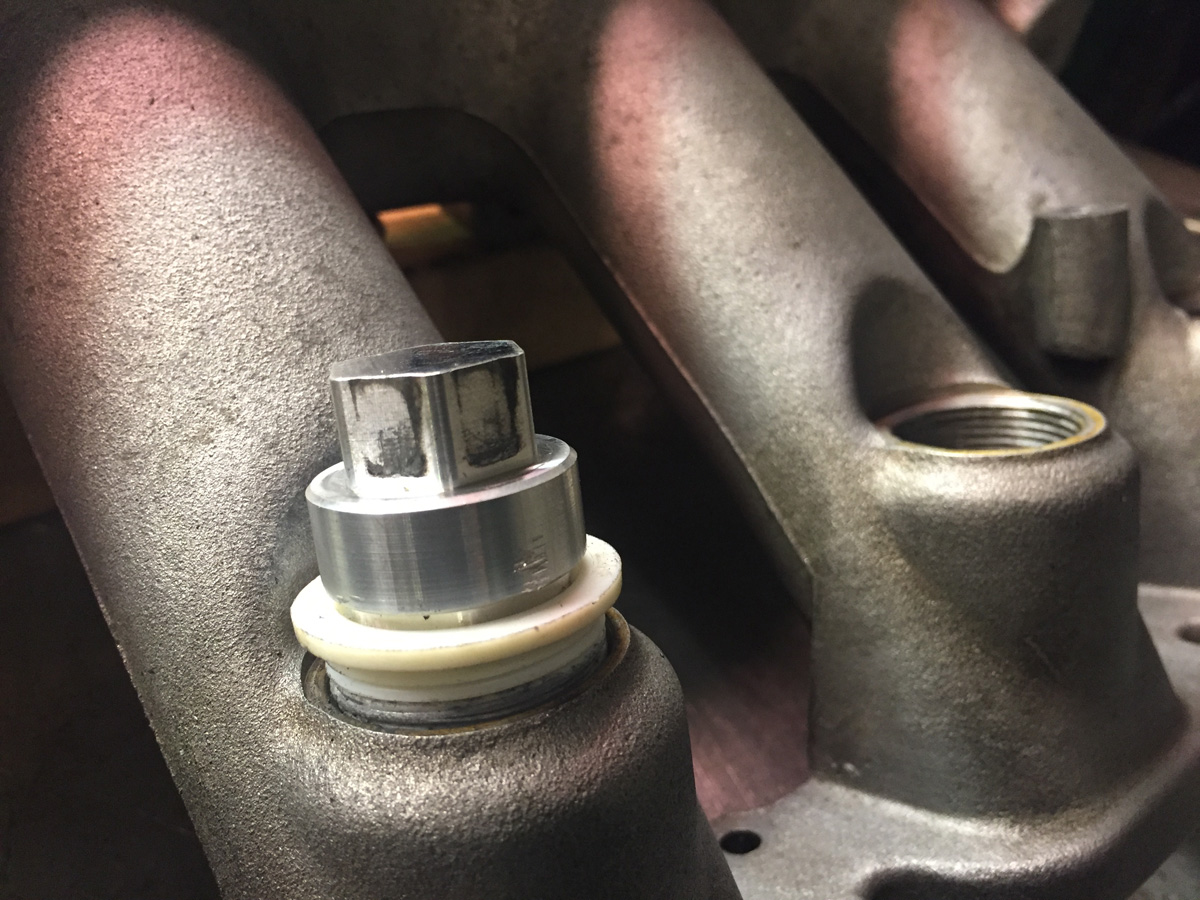
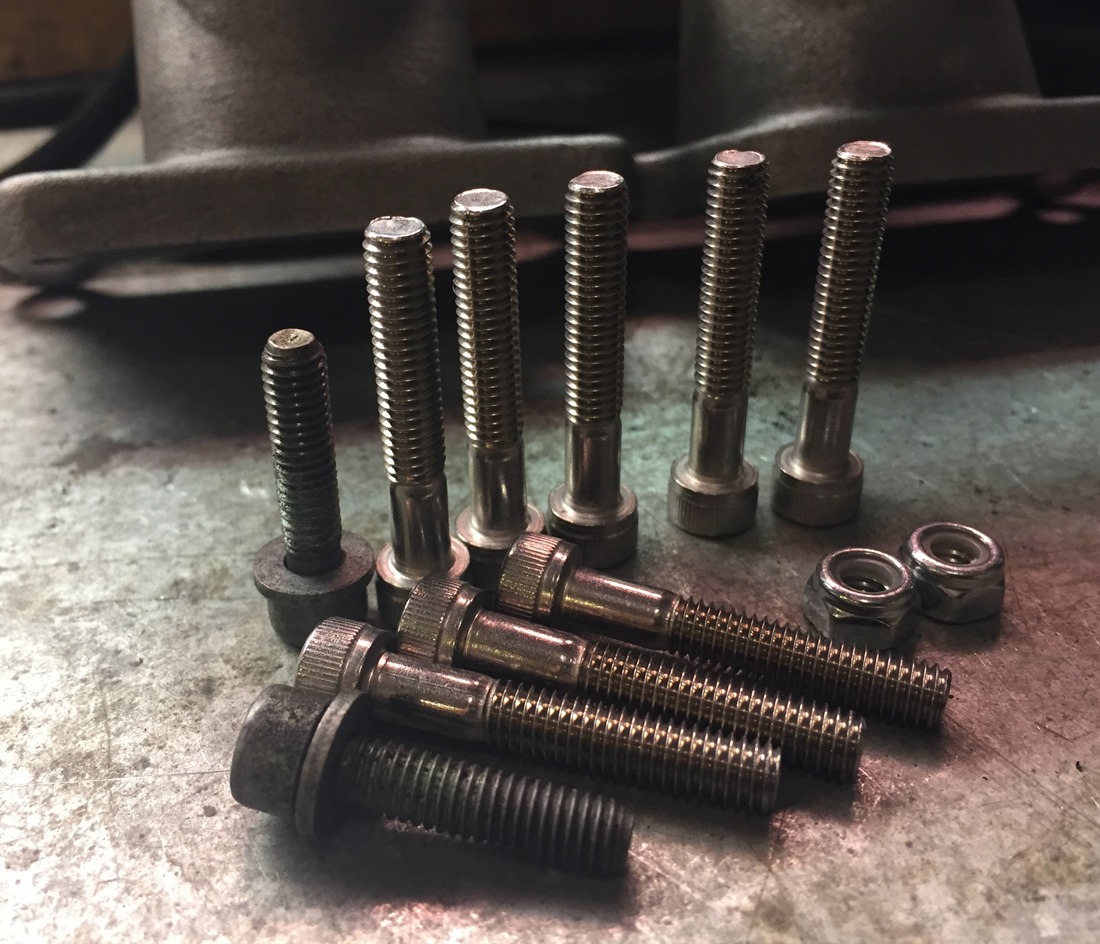
The kit from 034Motorsports also included longer intake manifold bolts and locking nuts. Shorter stock bolts vs. longer 034 bolts pictured.
All assembled and pretty. While I was there, I had to oversize and tap the holes that held the fuel rail and throttle cable holder (another do-hickey) as the 7mm holes in the aluminum intake were less than threaded.
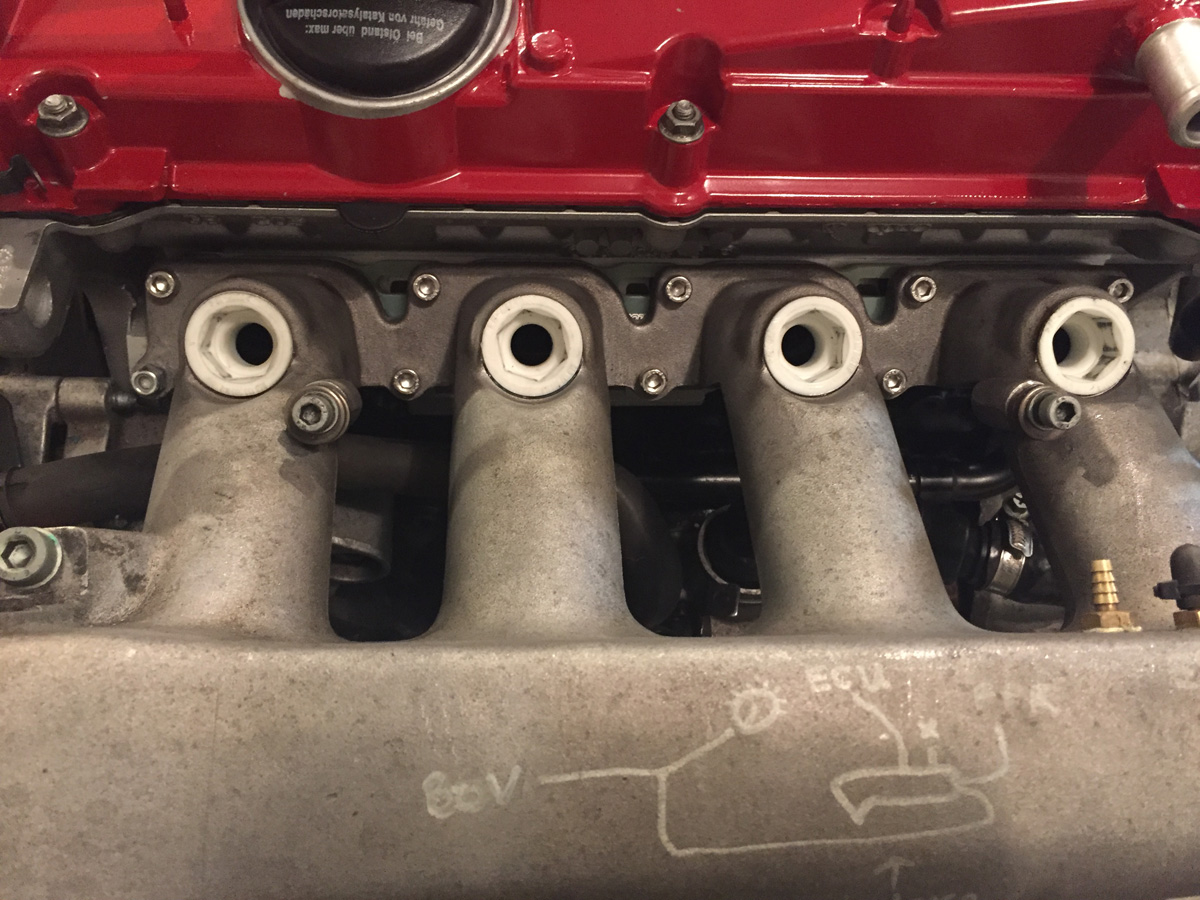
Showing the thickness of the spacer. At least 300 more wHP, I figure. Throw in some stickers and that is 305 wHP more! Mother of God! (Super trooper reference)
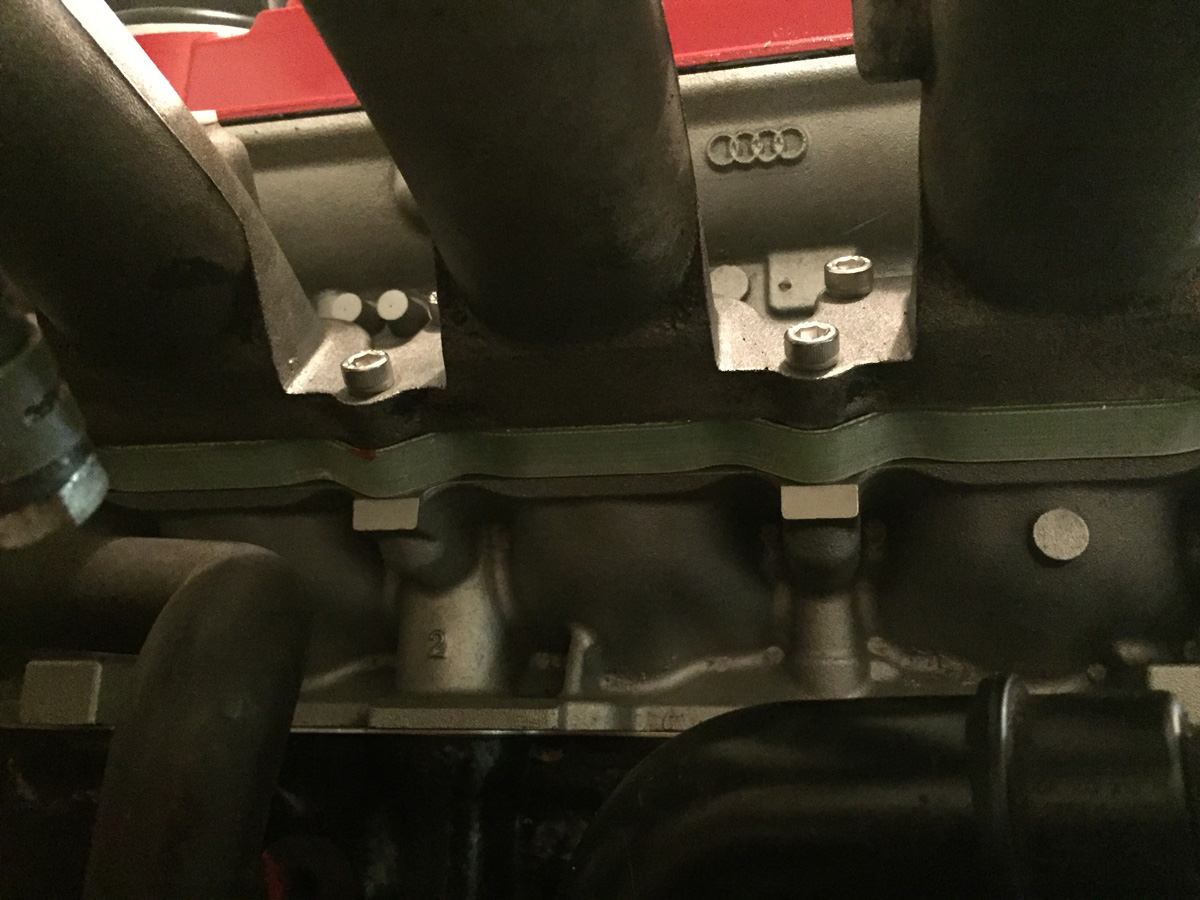
Sad part, the internet must have an end.... search for "Mother of God" and it just starts repeating on Google.

Anyway, back at the ranch....
New challenge with the spacer is that the bracket that holds the intake manifold in place, something that I have not used for years, but figured the additional leverage from the extended mounting point with the spacer would warrant it, does not line up anymore. English teacher would have shot me for that terribly assembled sentence. Oh well.
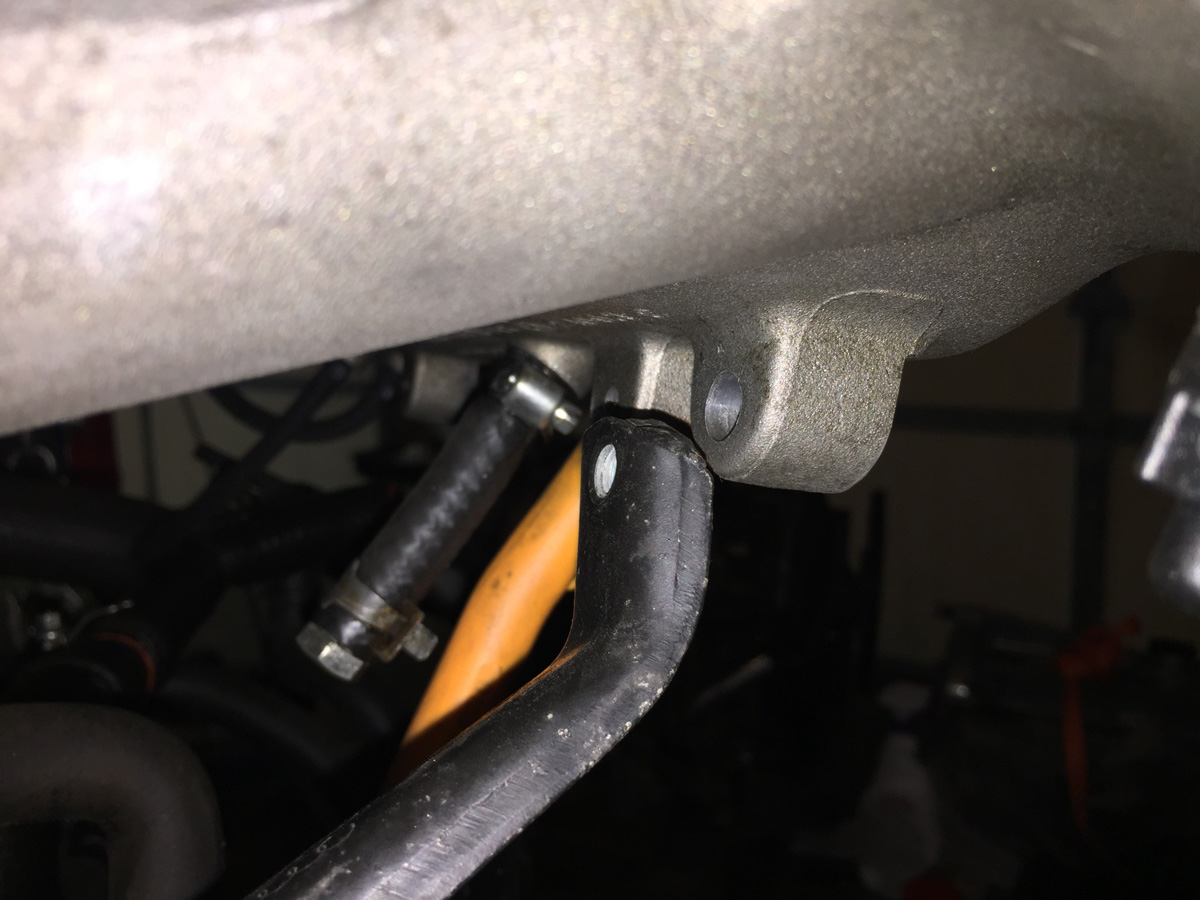
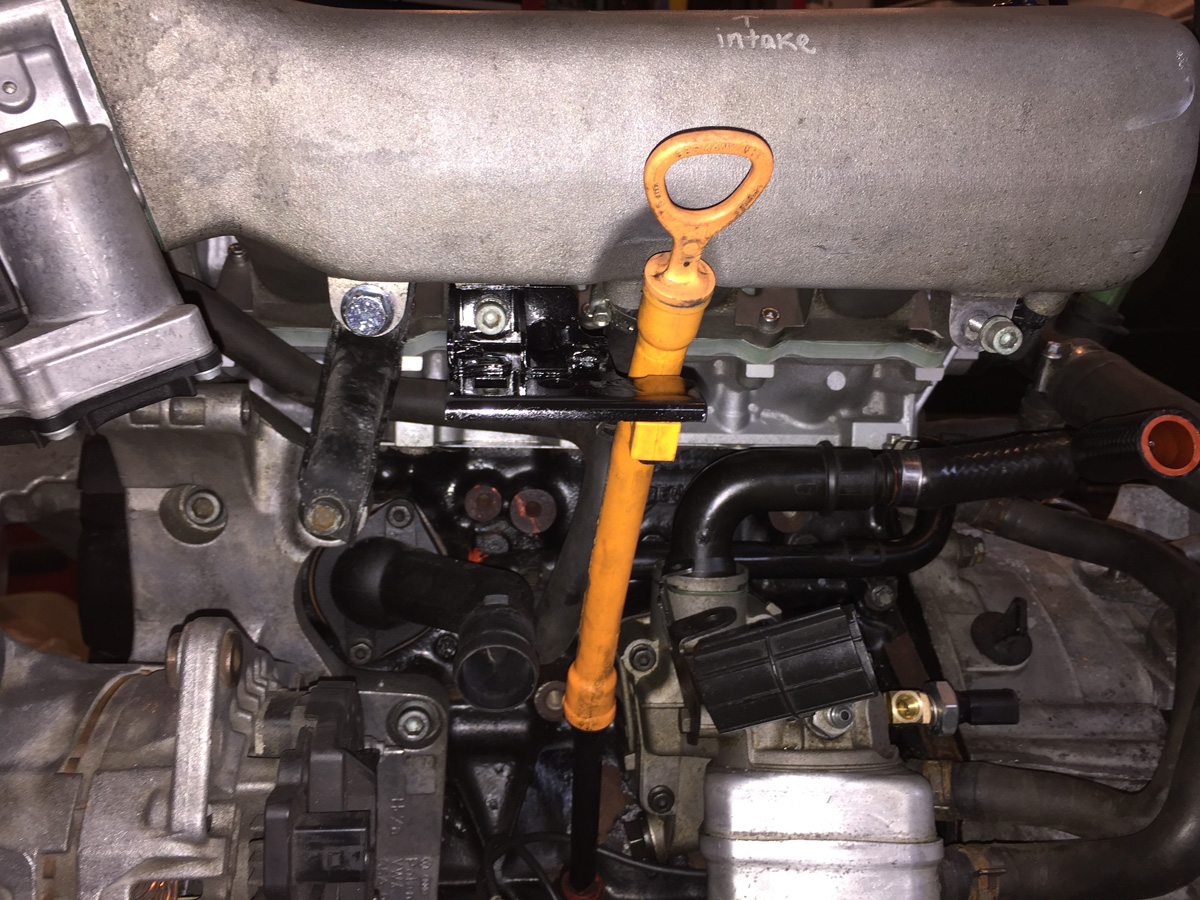
Also, at Ascutney #1 (2016), I dumped a bit of oil on my skid plate because the plastic oil dipstick was dislodged (or was never correct pushing into place). I haven't used the stock dipstick holder down do-hickey thing-ah-mabob for years. Something else I was going to solve while putting the engine back together.
Image of the stock holder-downer thingy. It is quite long as it holds various electronic bits, emissions VTAMs, blacks tubes, and other various things that I do not need. VTAM is an old IBM term for those of you playing the home game. I mounted the stock brace (that I had to grab from a junk car recently as I discarded mine years ago) to give me some ideas of what I could do. The right most bolt is currently in service holding the Kales Custom oil separator. I could use the stock bracket and the oil separator with the stock bolt, but all I needed was something simple to hold down a flimsy plastic tube. Enter Mr. Hacksaw and Mrs. Dremel.
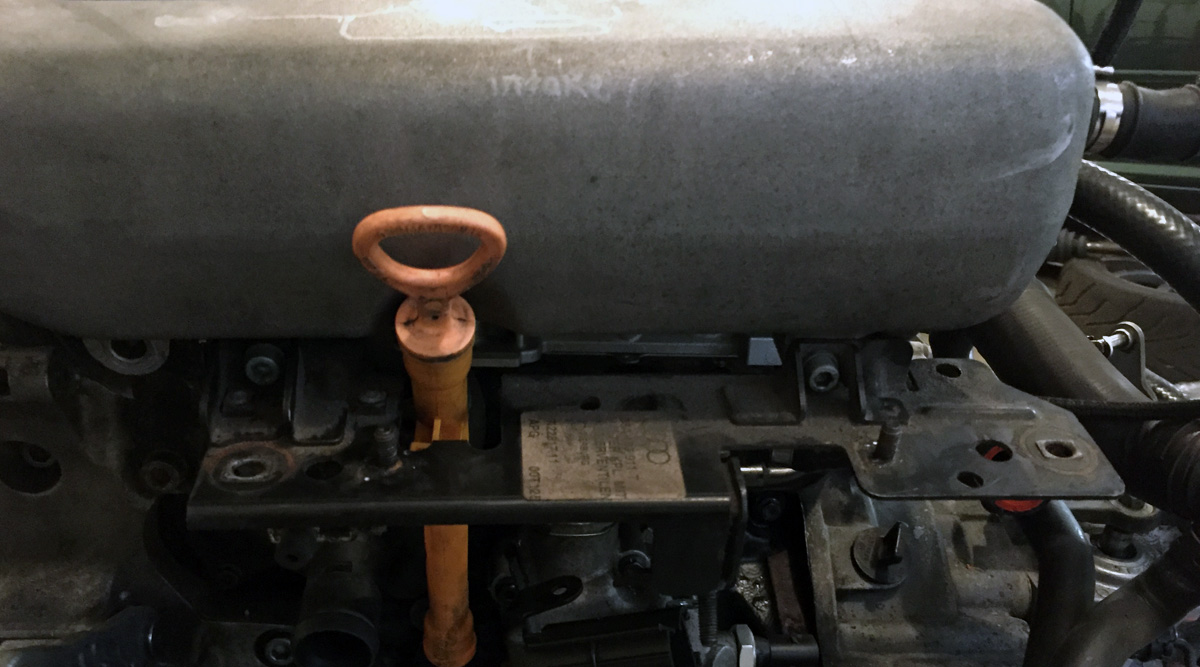
Longer bolt installed with aluminum spacer. I had to flatten out the brace a bit to extended it and then bend the end so that the bolt hole would align with the hole on the intake.
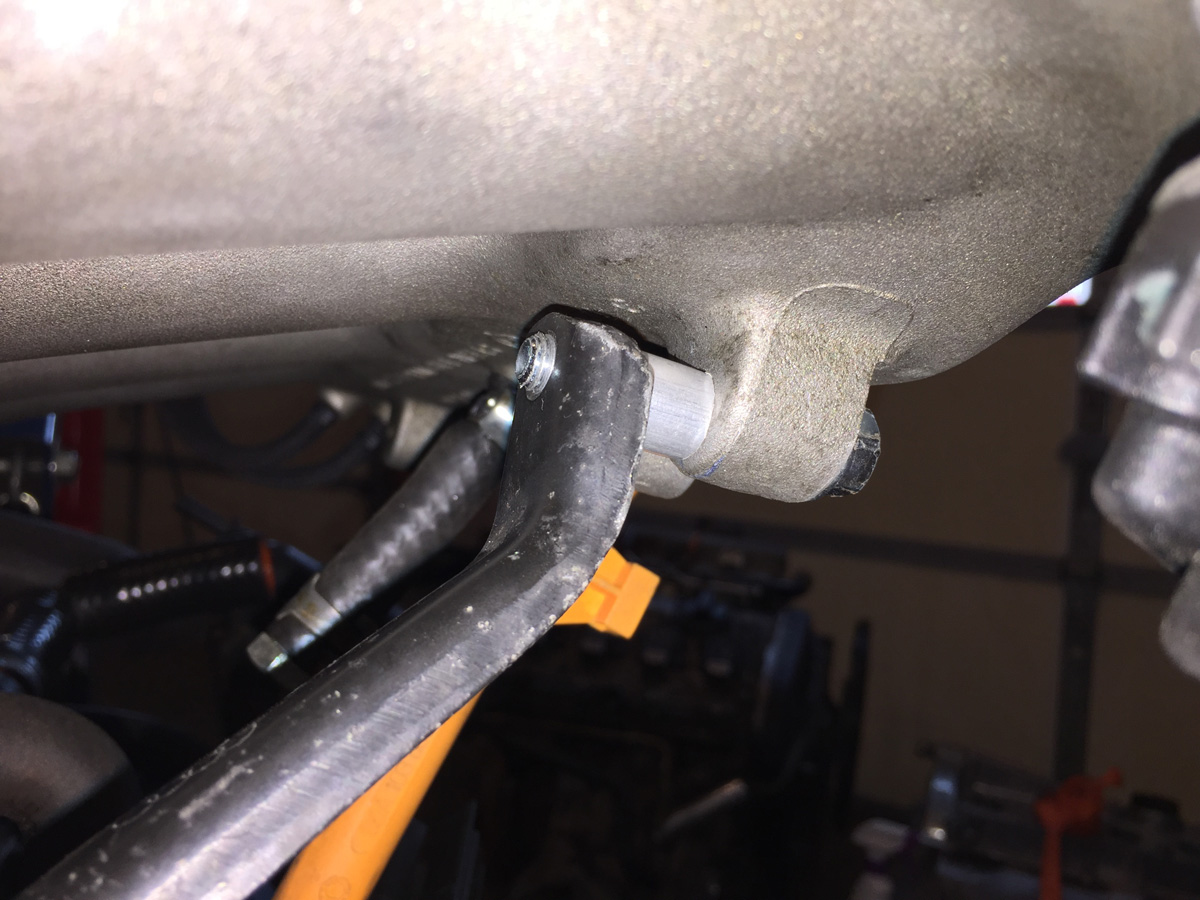
Cut down the bracket for the dip stick....
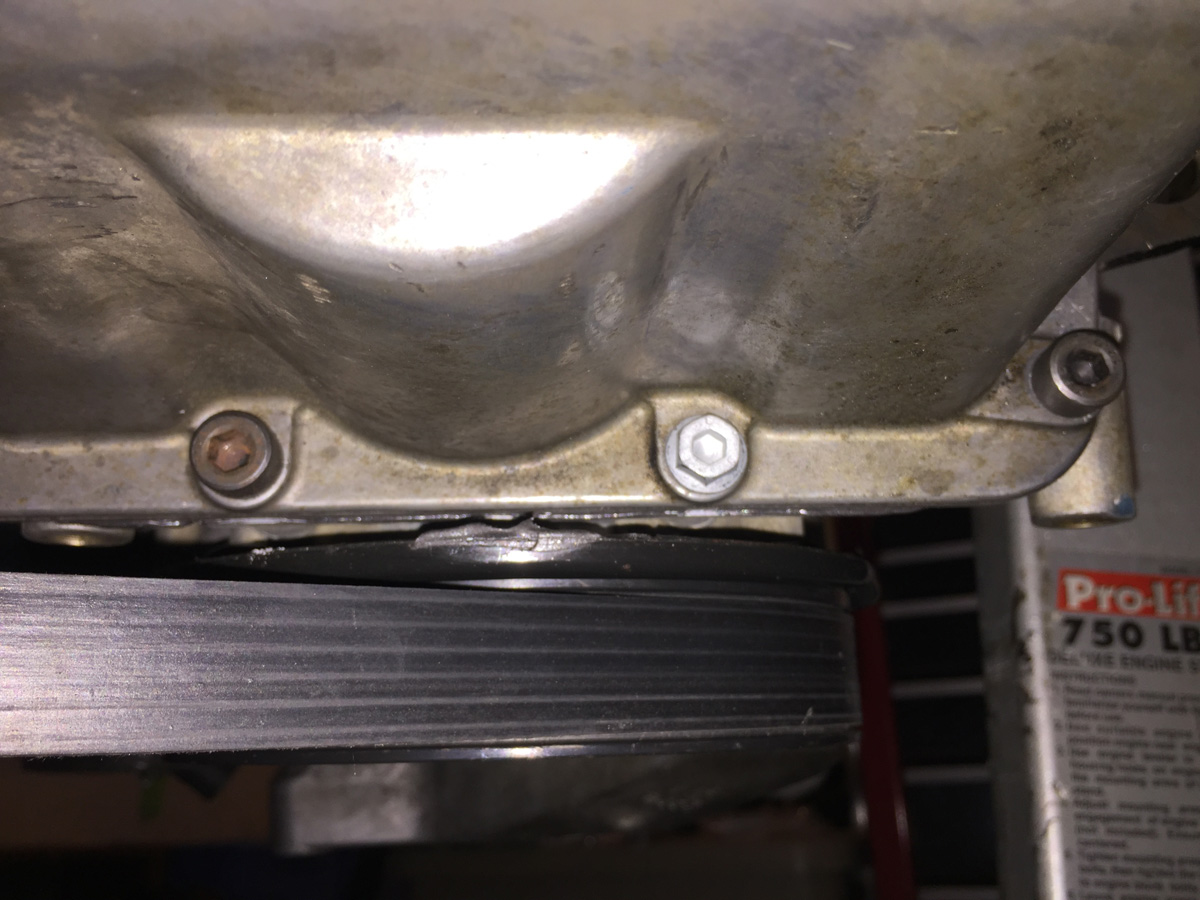
Now the trials and tribulations of cutting one corner (by accident). When rebuilding this engine, I used all new bolts (paying close attention to the TTY bolts). But.... I did not replace the front main seal aluminum plate. I did replace the seal, naturally, but generally, there is no reason to replace the plate.
Unless the bolt holes were stripped by whomever owned the engine previously.
No problem... one size up (7mm to 8mm) on the bolts.
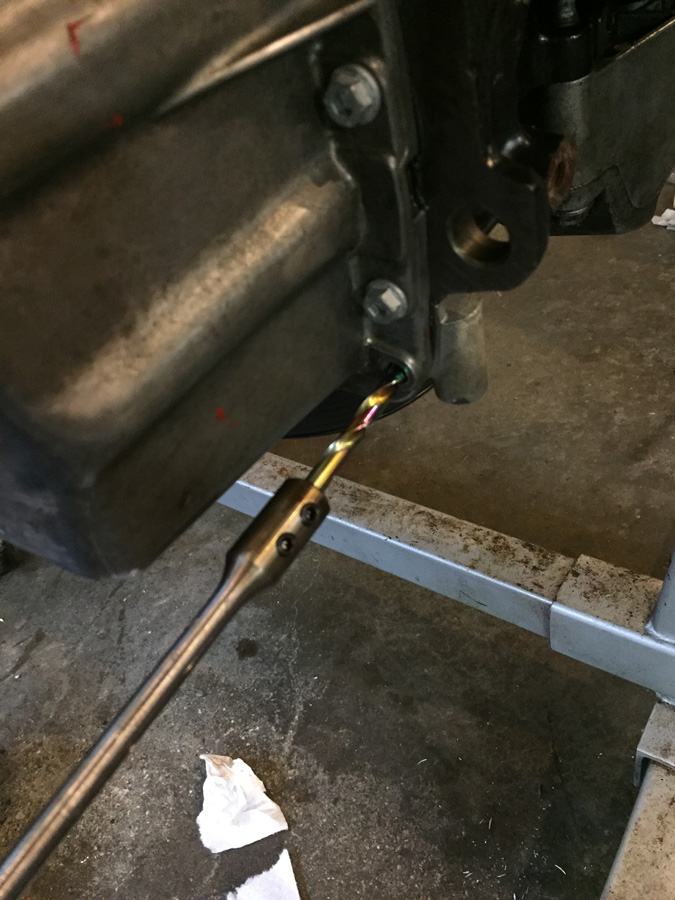
Except, there just had to be a problem. The chuck on the drill would not clear the oil pan. I already applied the sealant to the block and pan and installed the other 18 pan bolts and torqued the three transmission to oil pan bolts. Didn't want to take it apart for the two holes that were stripped on the front main seal plate.
So, I needed to get a longer 17/64" drill bit (what is needed for a 8mm tap) or an extension for the drill. That's what she said!
I could not find a longer drill bit (it is Vermont, ya know), but I found a 12" extension that used two hex set screws to hold in the 1/4 drill bit.
Except mine is 17/64". Doh!
The short version, and three drill bits later, I had to brill a hole in the base of my drill press so that the 12" rod would be low enough to be able to drill into it, drill for a long time with cheap drill bits in hardened steel, and finally get the bit to work with the extension.

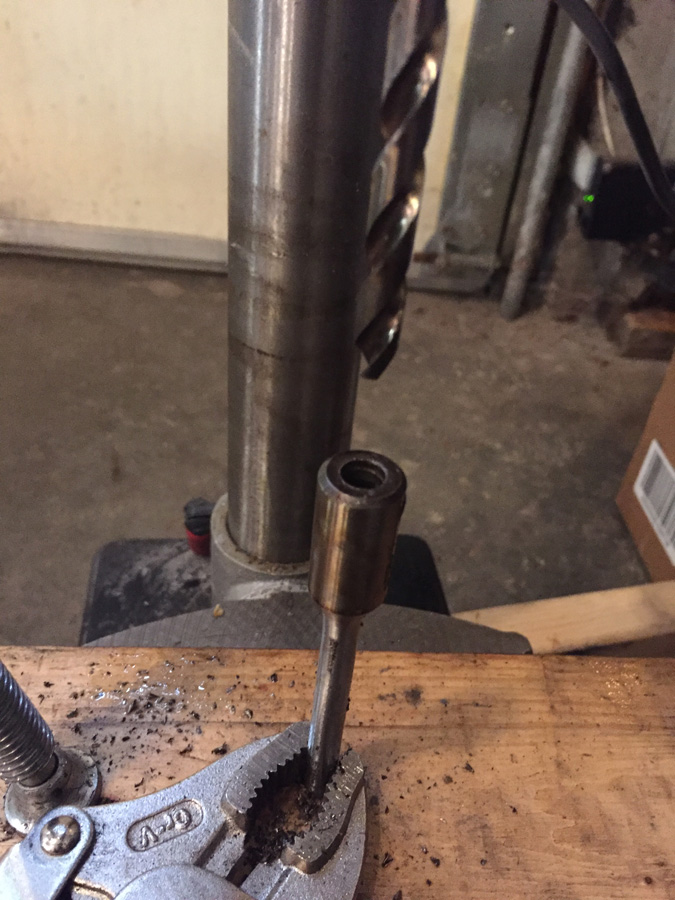
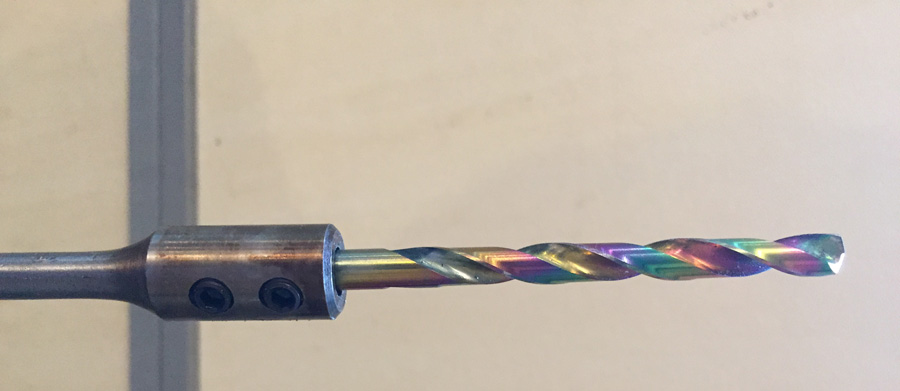
Drilling one of the two holes....
Worked out nicely with the tap as the tap handle that came with the kit did not hold onto the tap very well.
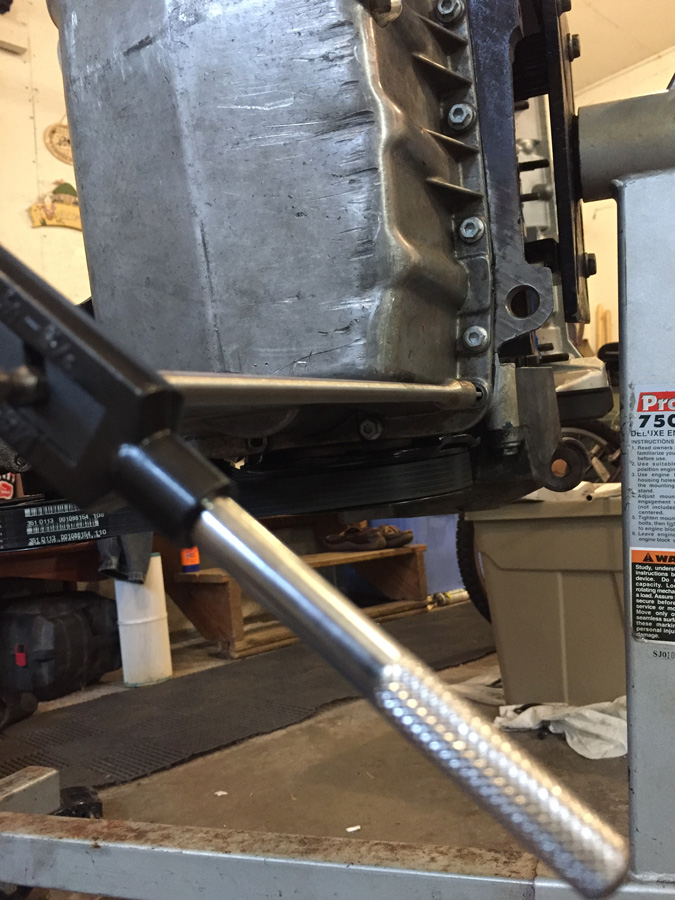
Two 8mm non-TTY bolts holding the oil pan in place much better than the 7mm TTY bolts with threadless holes.
Pretty exhaust side of the engine with new locking nuts. I really like the oblong nuts better than the split locking nuts.
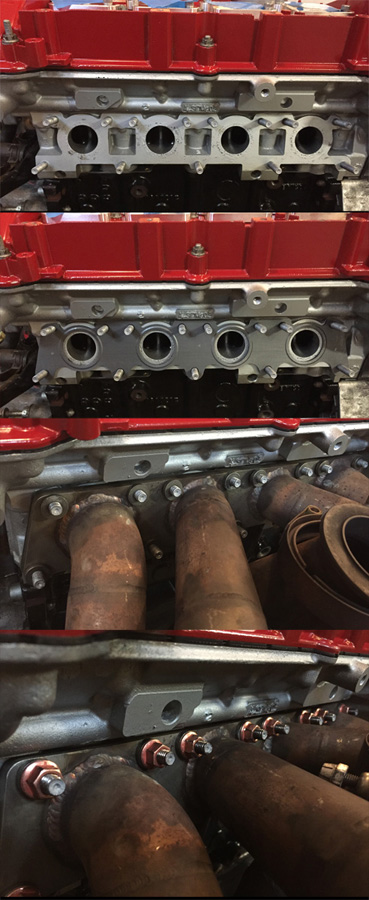
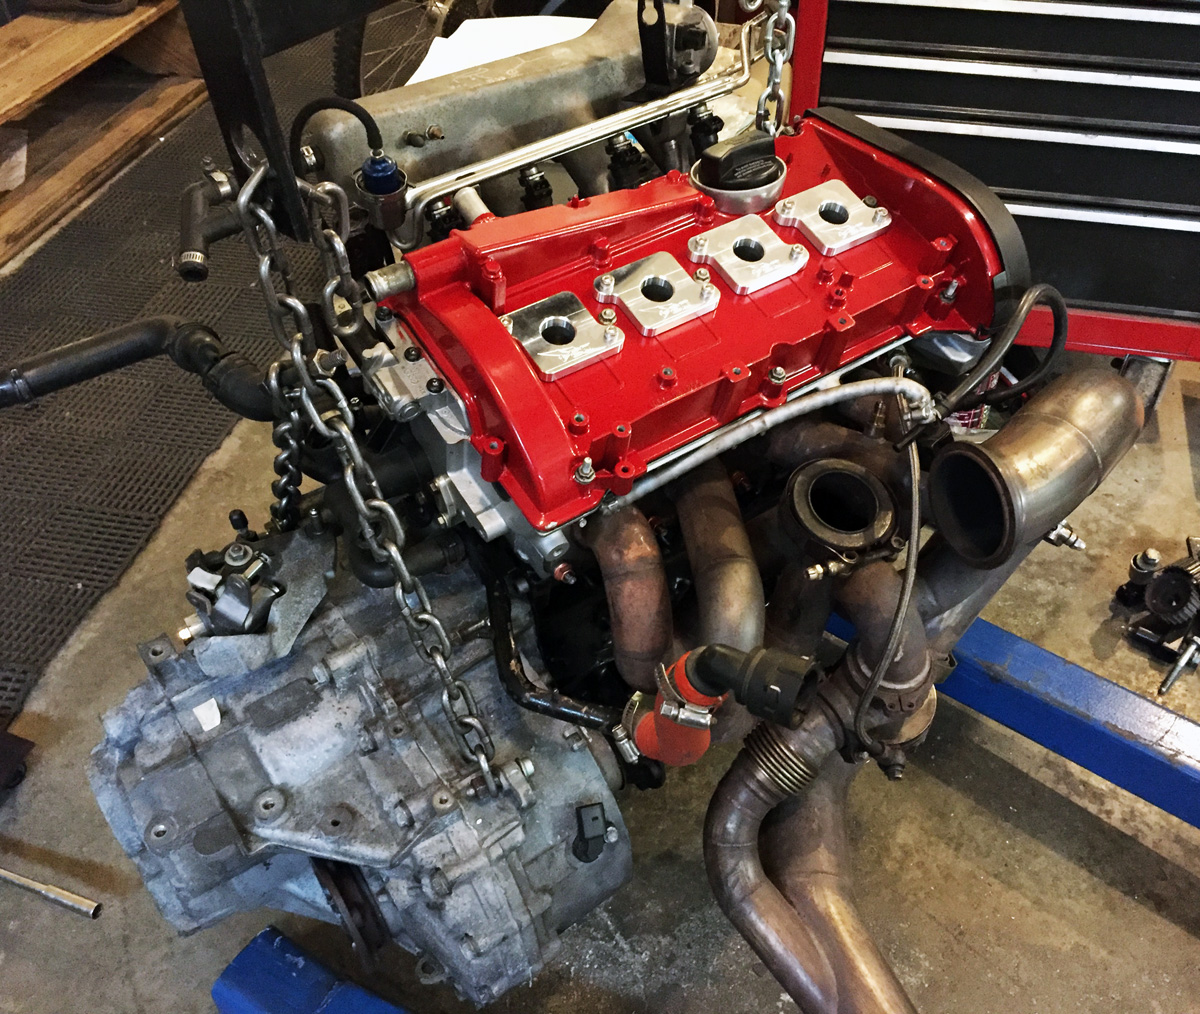
100% together (minus turbo).
Oct 09, 2016
A little progress.... on the Scirocco!
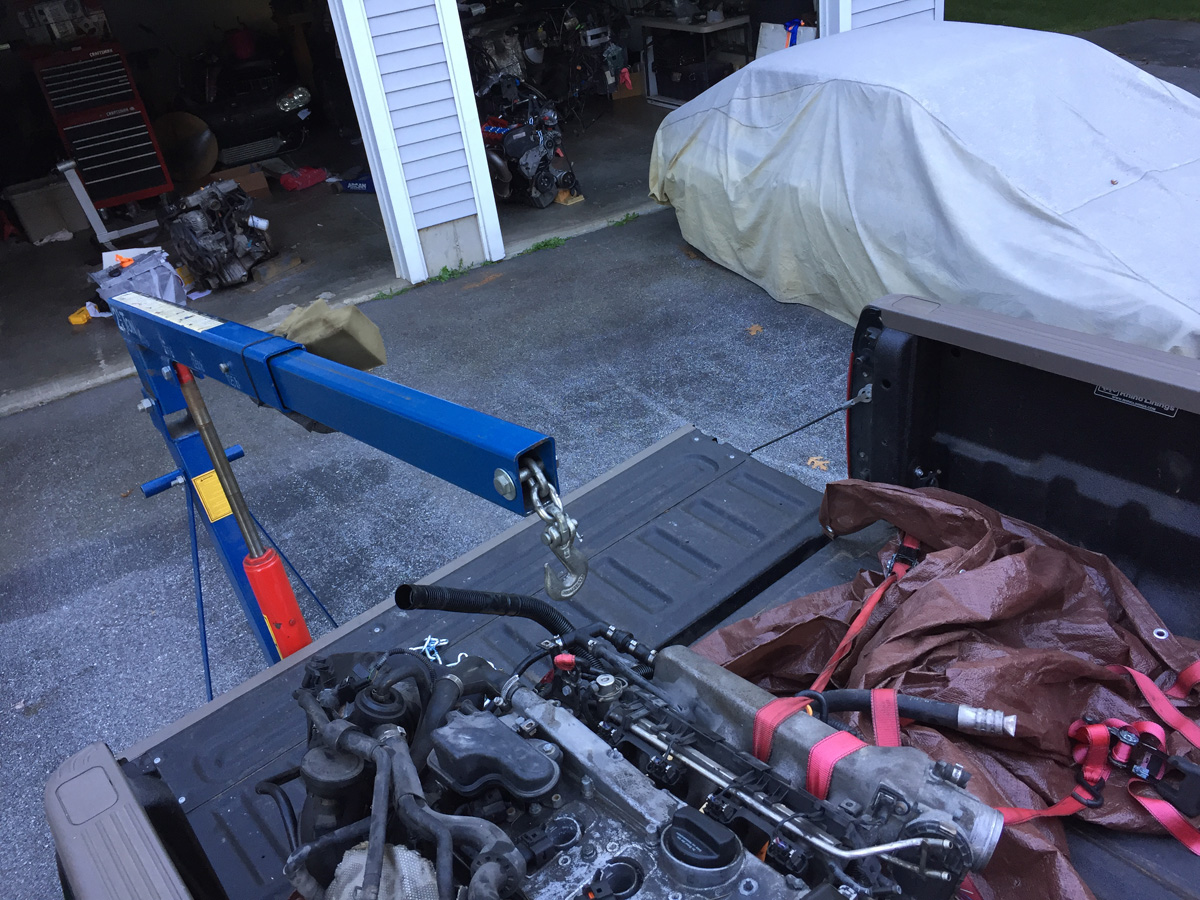
I picked up a 1.8T AEB engine (block is 058.... intermediate shaft for external water pump), mainly because the Scirocco has an AEB and I figured it would be easier to work on the Scirocco if I had another engine that was exactly the same.
Then I got to looking at the new engine and realized it was quite different from the 06A that I run in the Golf. No biggy. I was not sure if the intermediate shaft was going to affect my plans for the engine build.
So.... just in case... since the junkyard had a 1.8T 06A block style engine for cheap (the 1.8Ts are getting old, so things are cheap, though, hard to come by), I grabbed it. There is still on more 1.8T in the yard.... in a Passat, though it was not an AEB.
Still planning to use the AEB head on the 06A block.
Jumping into the Scirocco shortly after the Mt. Philo hillclimb.
Now on the Golf.... two issues that I have had with the Golf. She is a little slow (not too slow) building up the boost for short distances (corner to corner), but was great once it was full boost. AND.... the bolts on the hot side of the turbo would back out.
Enter the Tial 3652 and exit the Tial 6852 turbine housing.
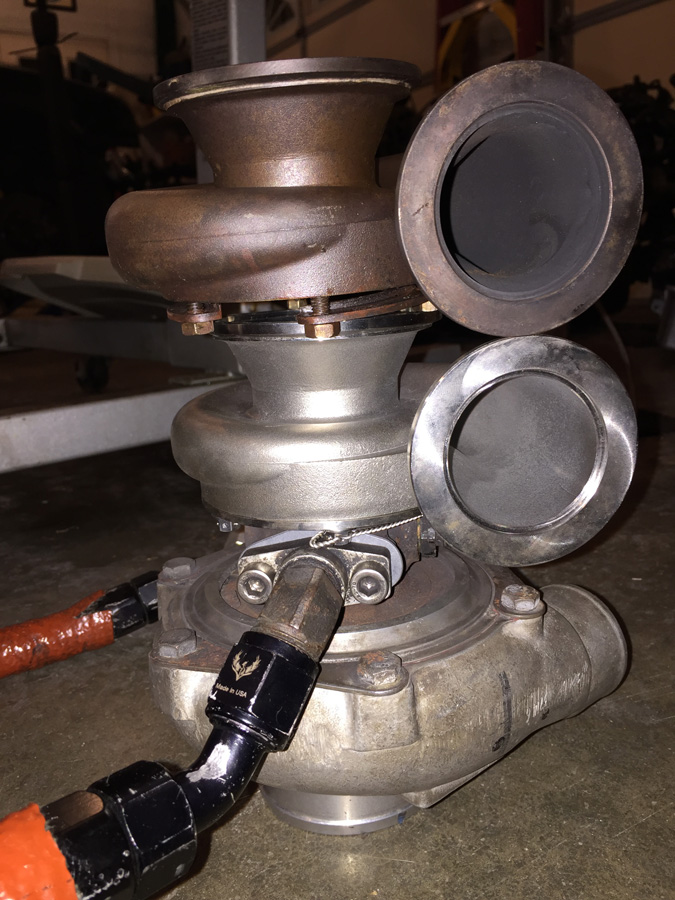
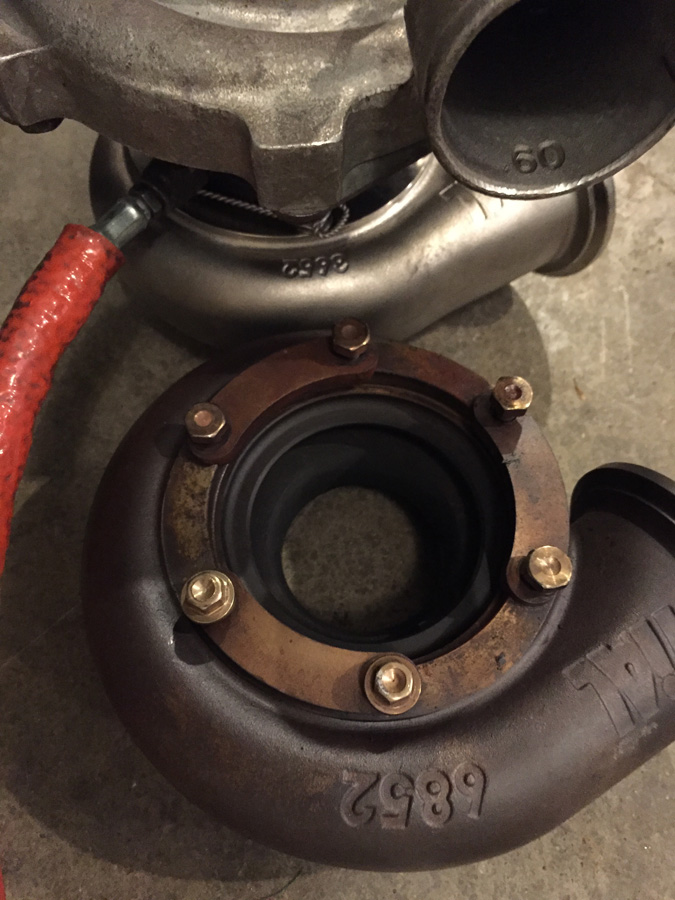
To address the potential for loose bolts, Joey at KalesCustom.com installed in SS bolts (pre-drilled holes for safety wire) and installed safety wire. So there!
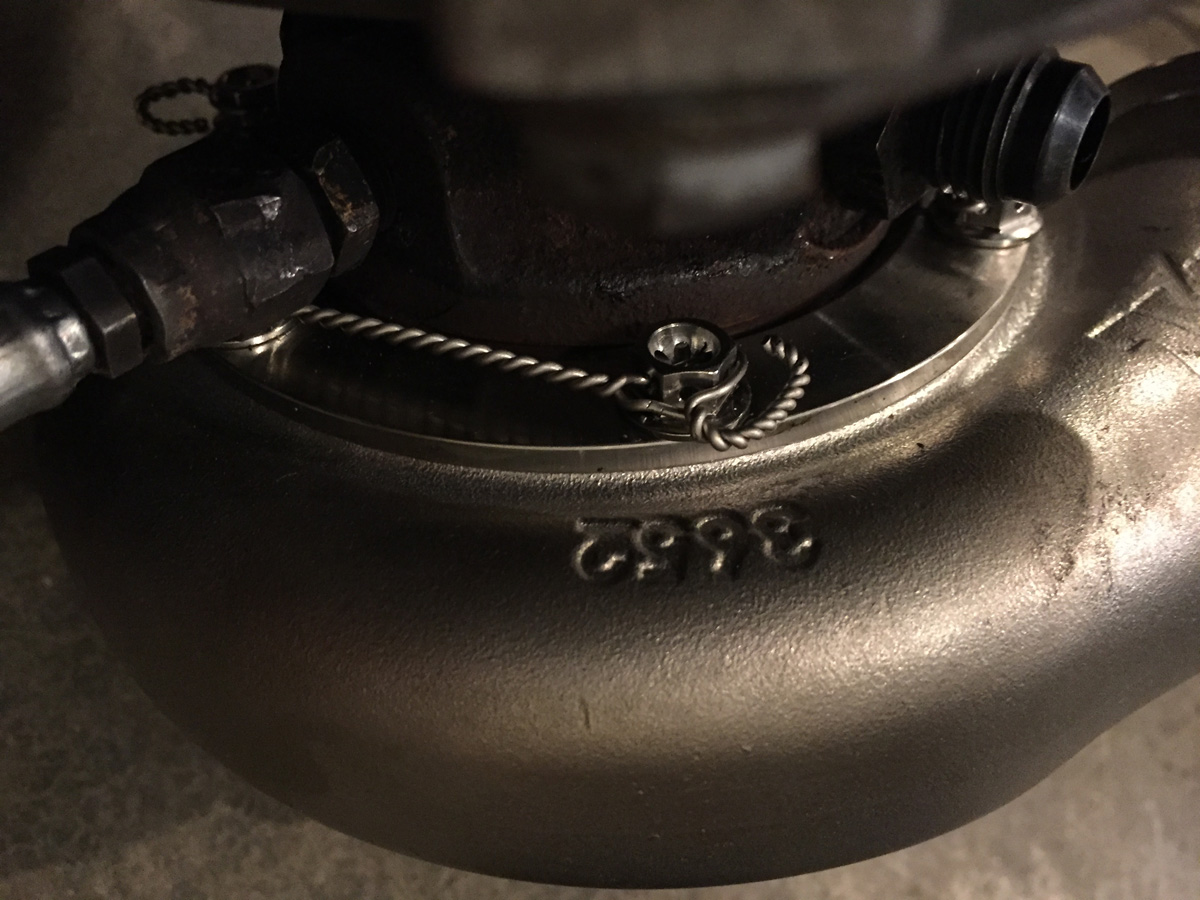
Putting the engine back in the Golf this week (maybe.... have to get ready for the Mt. Philo hillclimb.... sans the Golf) or next.
Then time to play with ideas for the Scirocco and start working on the engine.
May 16, 2017
Lots of updates... I had to organize the photos in folders/sub-folders just to apply some organization to the chaos.
Since I had a long winter to stare at the car to try to figure out some improvements, I jumped into it in November and ended up making a lot of changes, including one major project that I wish I never started.
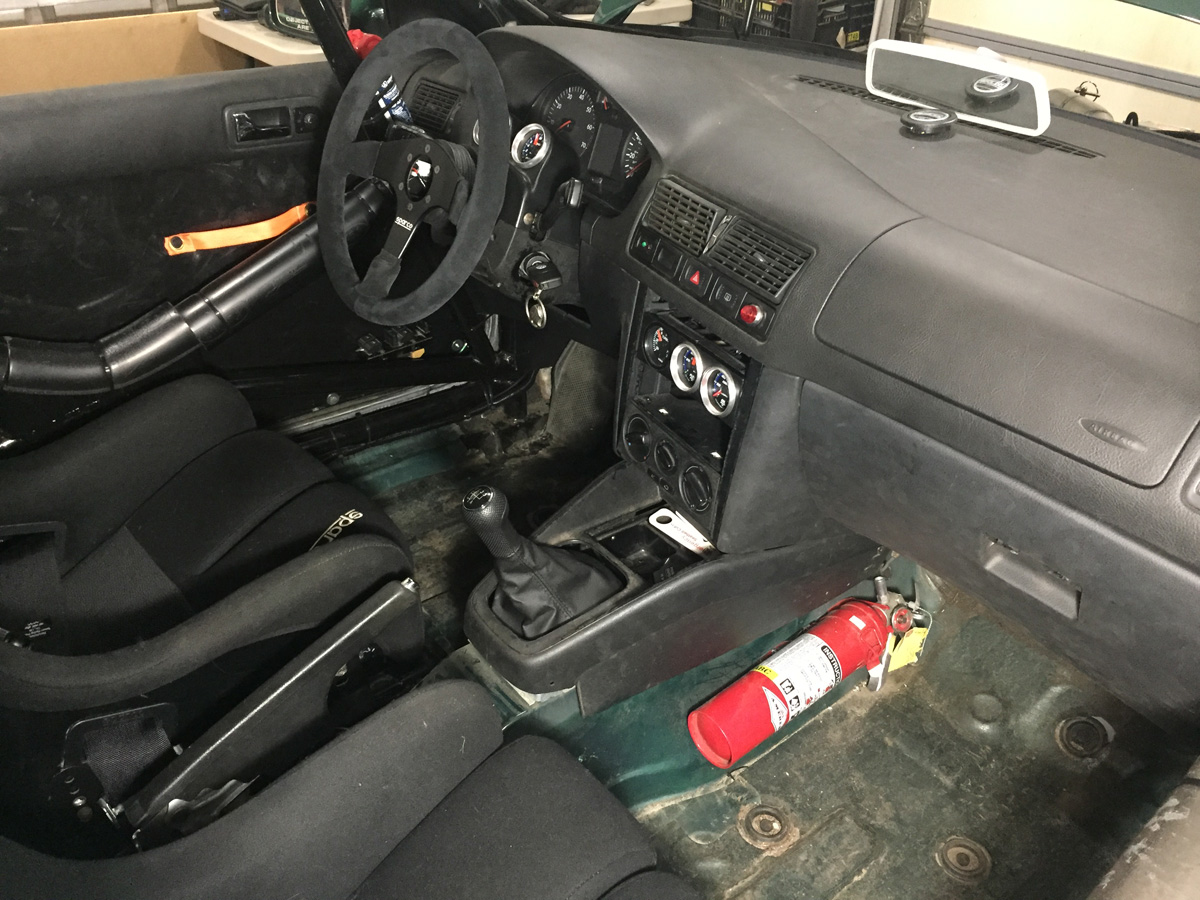
Many months yielded only a weight savings of 16.2 pounds with the first phase of the project… removing the stock wiring harness for stuff I didn’t need... wasn’t worth it and wish I never started. More to come on that later after I work through the pictures to determine what is worth sharing.
So... I guess I will start somewhere in the middle as the beginning phase of the winter is long and very confusing.
Something simple. The Doors.
When I was putting the car together for the first time, I took what was currently there and modified (cut) it so that the stock door panel would work with the cage.
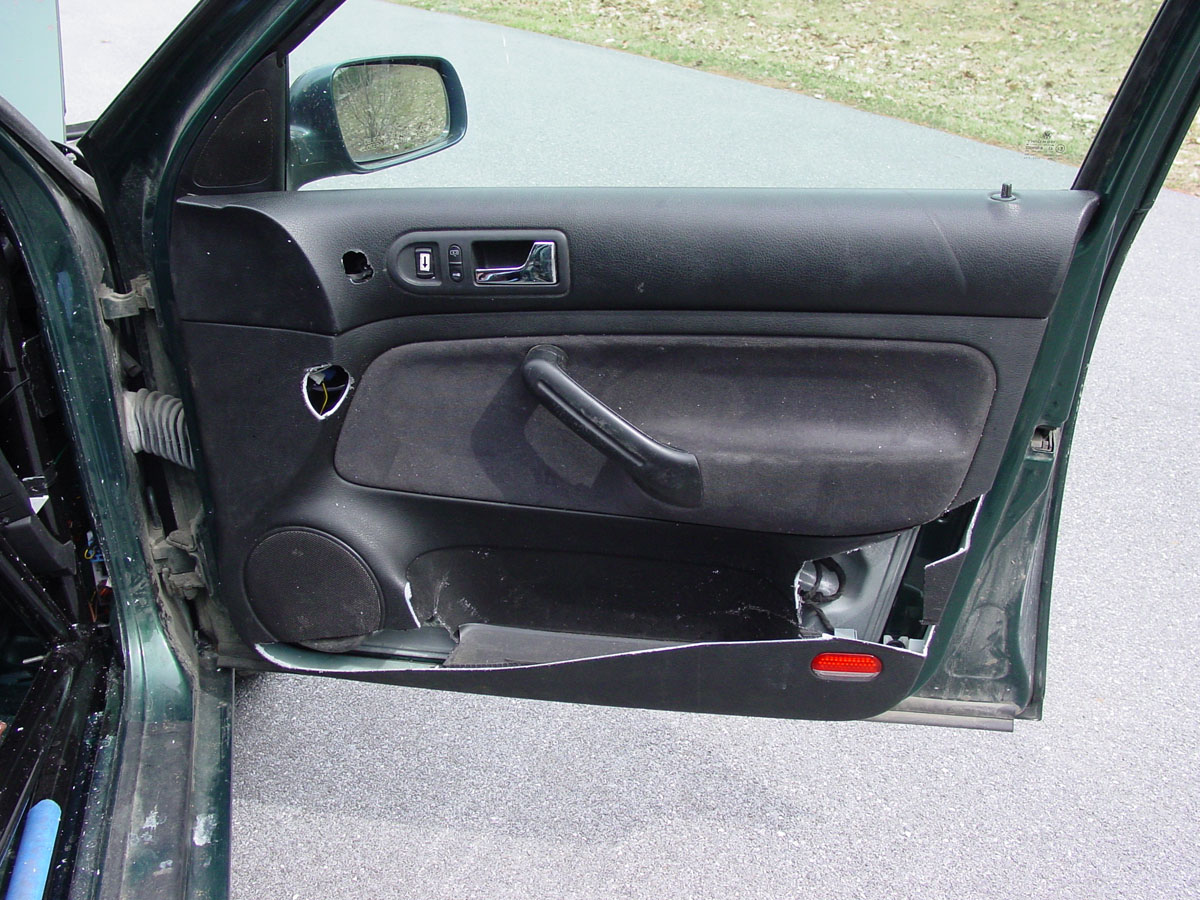
I cut out the sections that interfered with the cage so that, when the door was closed, it looked good.
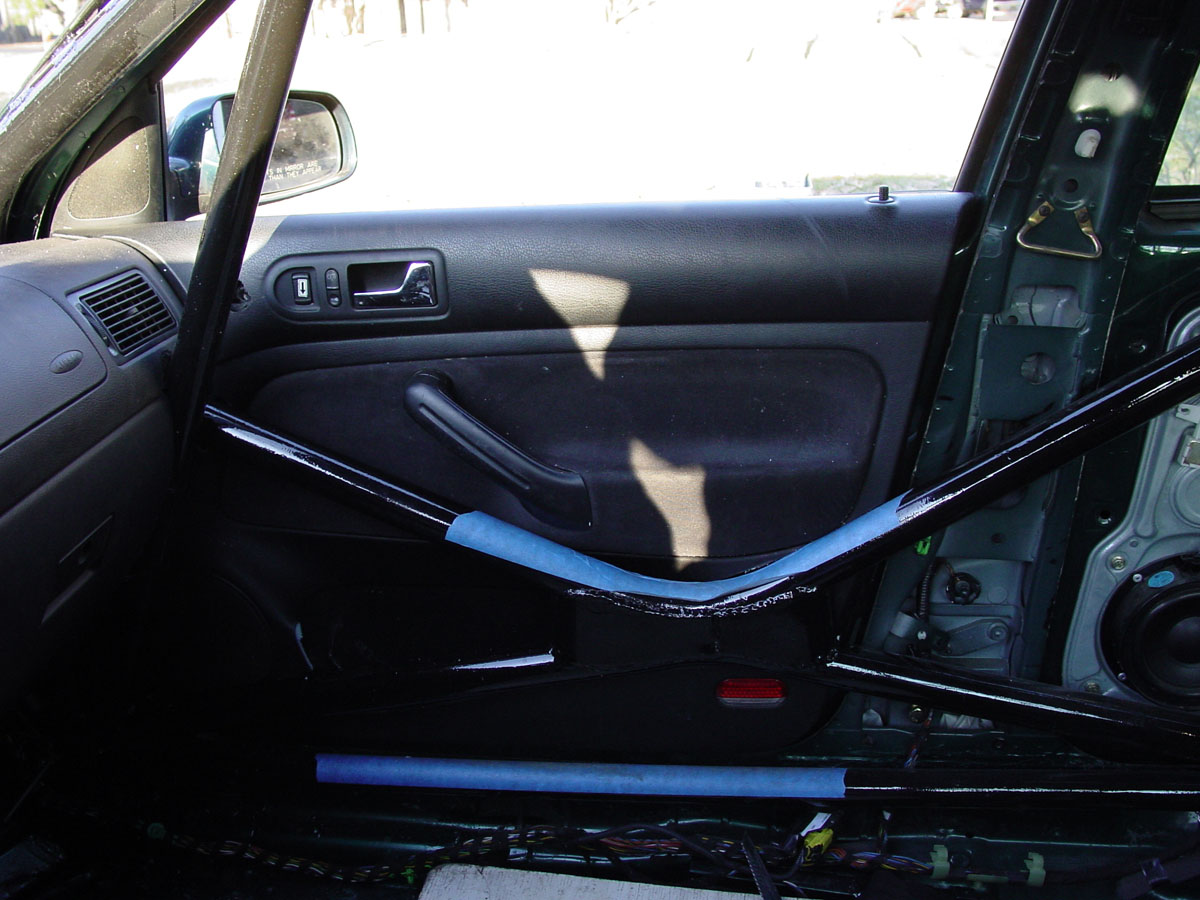
Not that I expected a huge weight savings, I think the new modified door panels I did over the winter look better than the hacked up stock panels.
I started with the passenger door as it was easier to work with as it did not have window switches and the gas door/hatch switches. Yep… I still have power windows. The driver’s door is the mirror image of the passenger side so once I had a template, it was easy to duplicate for the other door.
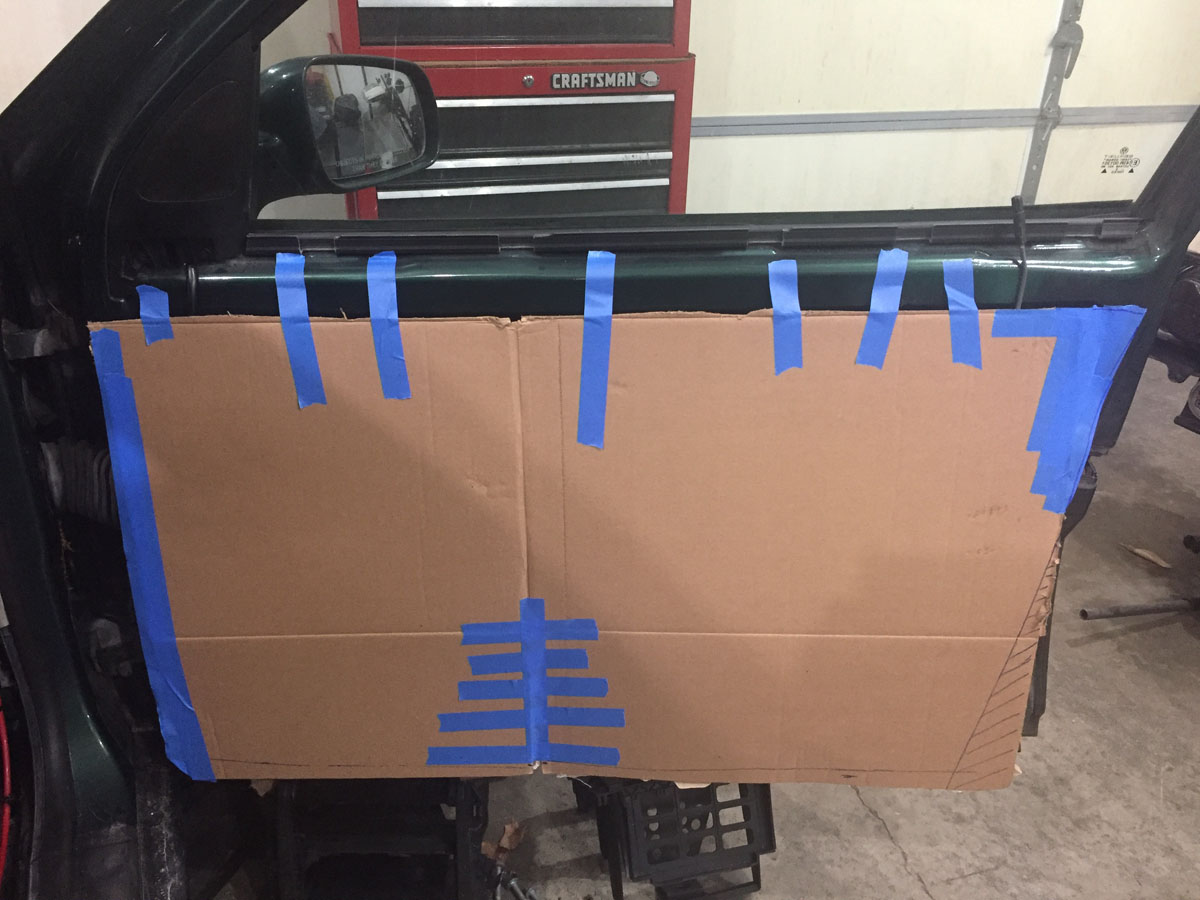
I picked up a roll of 22” wide by 10’ long 1/8” thick high density polyethylene plastic from [url]http://www.SpeedwayMotors.com[/url] for $20 . Lots of other color options (black, light blue, dark blue, red, white, and yellow). I like the understated “black” though was tempted with red.
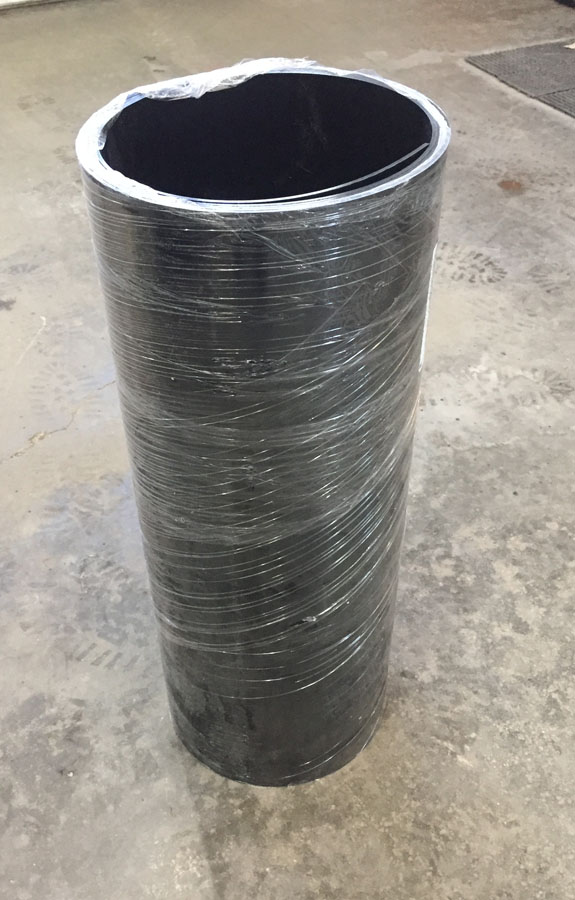

I made some measurements on my high-tech concrete work surface (the floor)…
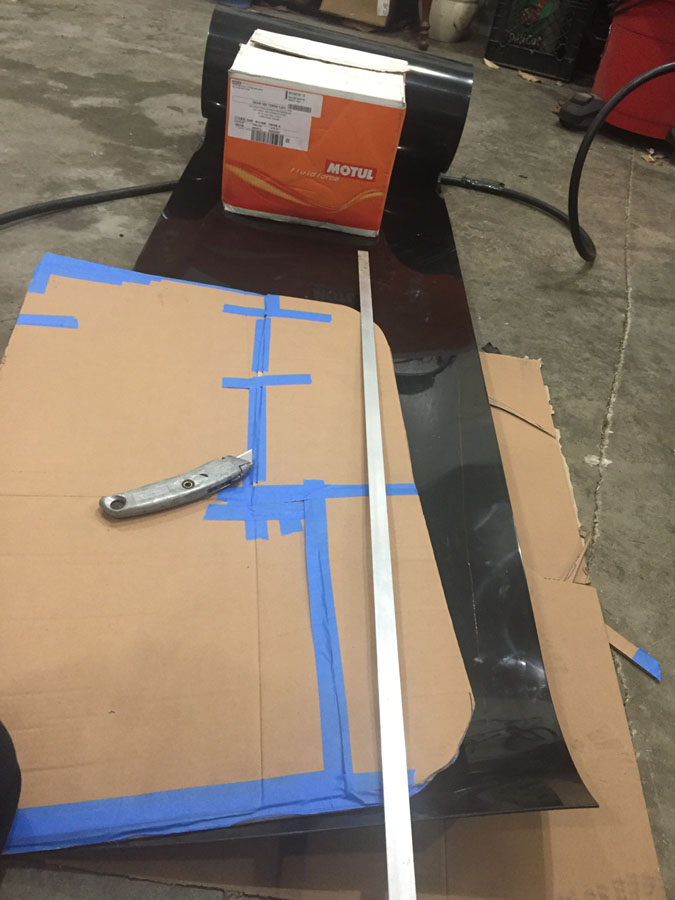
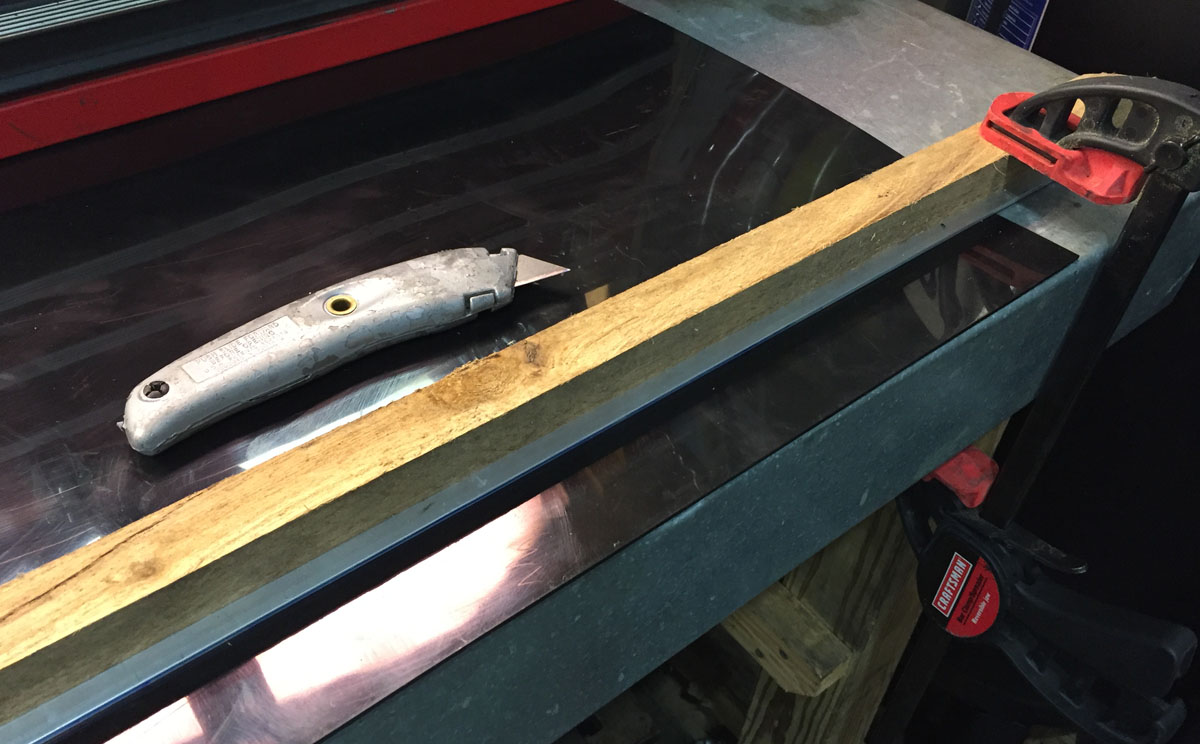
Used a thick piece of aluminum flat stock as a cutting edge held in place by the typically bent tomato stake and bar clamps. A brand new blade in the utility knife was my friend.
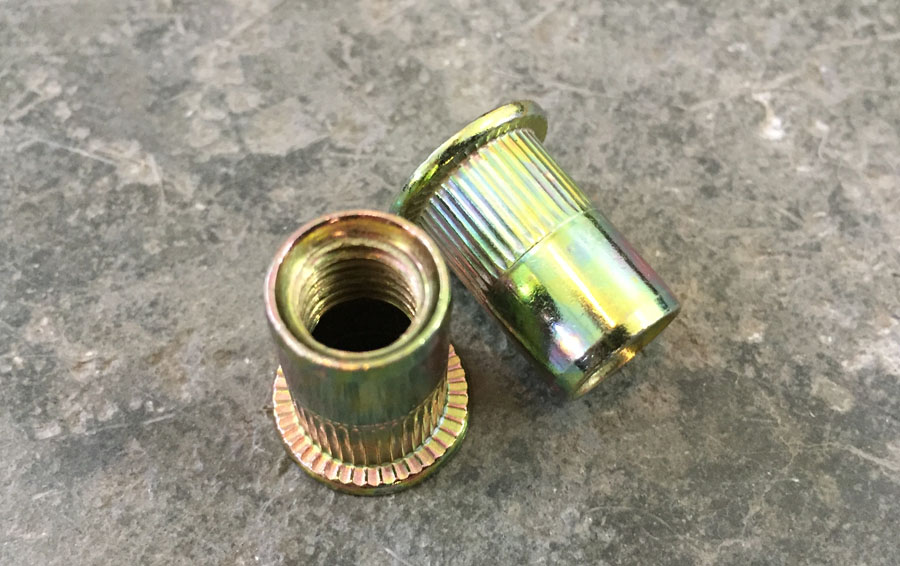
I purchased the world’s worst thread rivet nut insert tool available on the internet. It did not last the entire project and had to be disassembled at the end of each task just to get the threaded piece of the tool out of the pressed in threaded nut. I threw it away when done.

The threaded rivet nuts that I used... 5mm I think.
Installing one of many of the rivet nuts on the door.
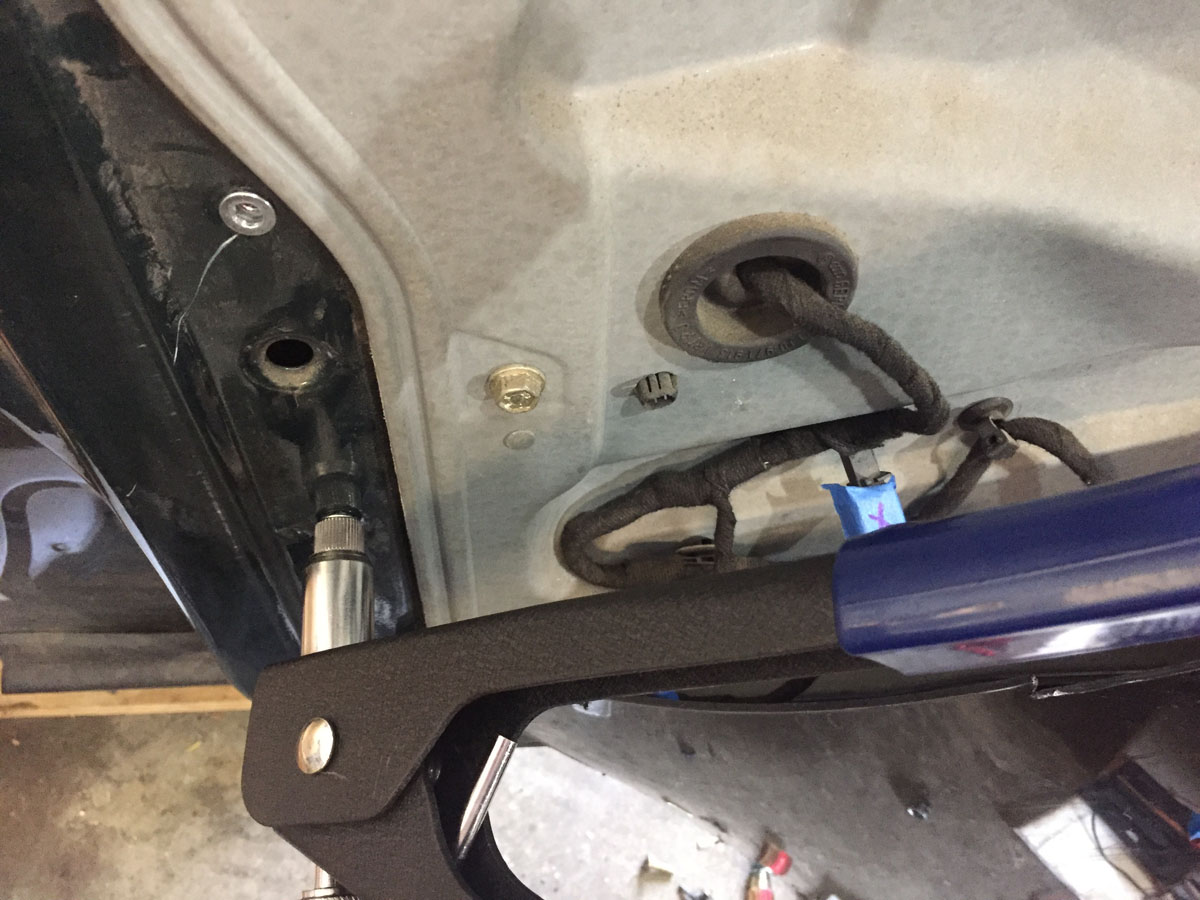
I used the top of the stock door panel as it had the door latch and provided some protection for the driver in regards to the top edge of the door.
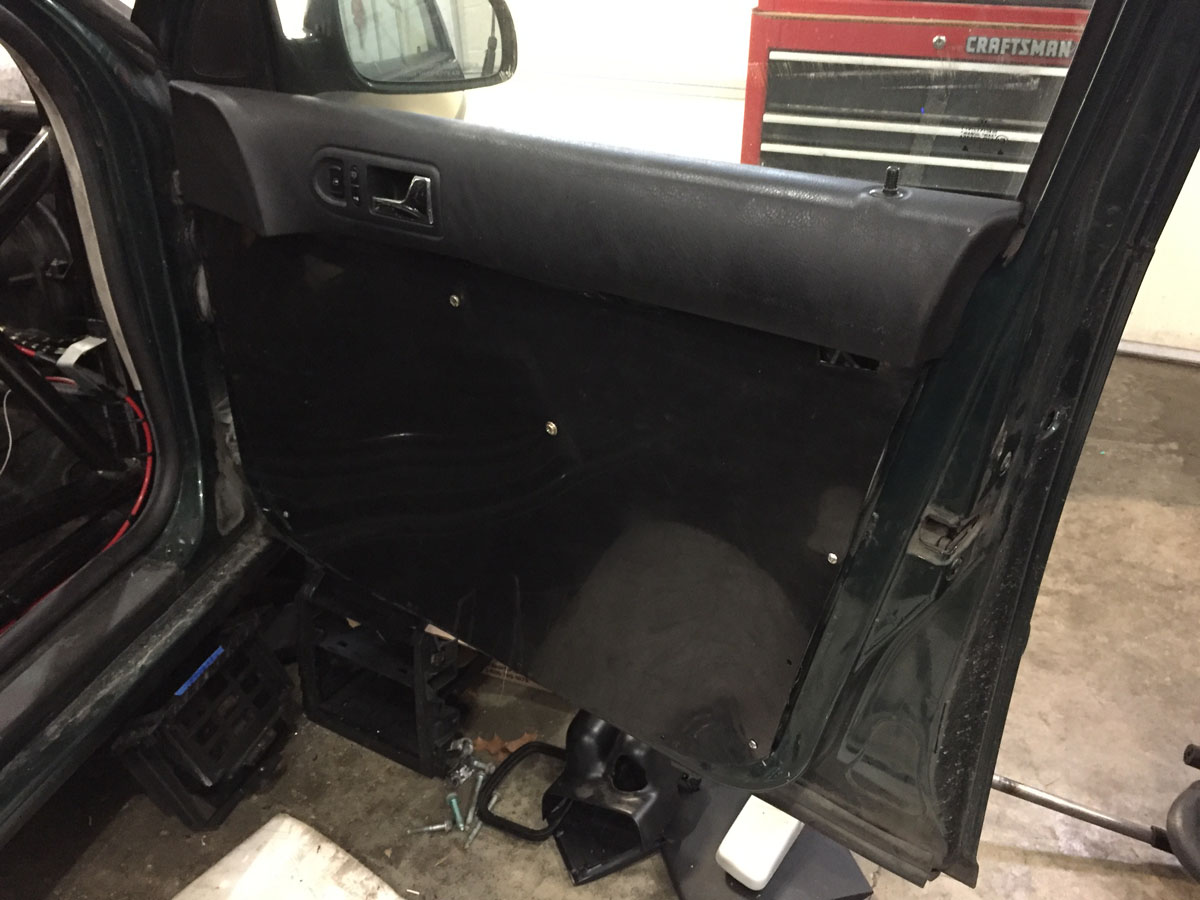
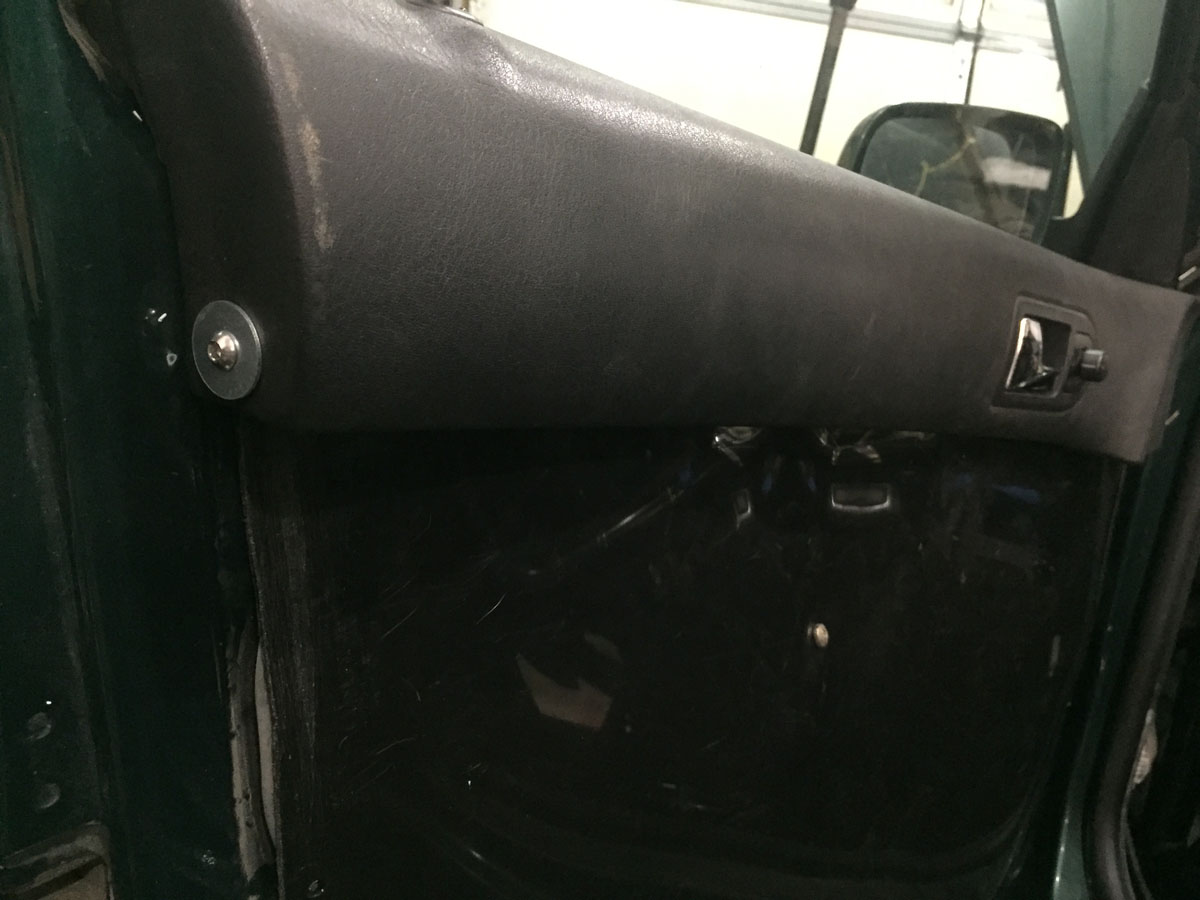
To hold the stock piece to the door, I made a simple bracket with a threaded rivet nut.

I think it came out pretty good.
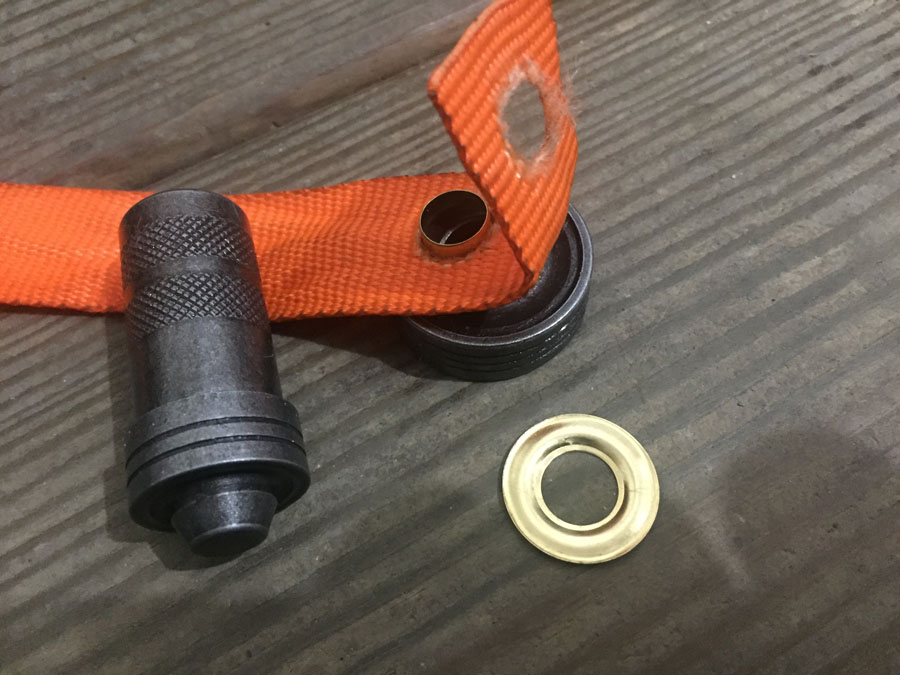
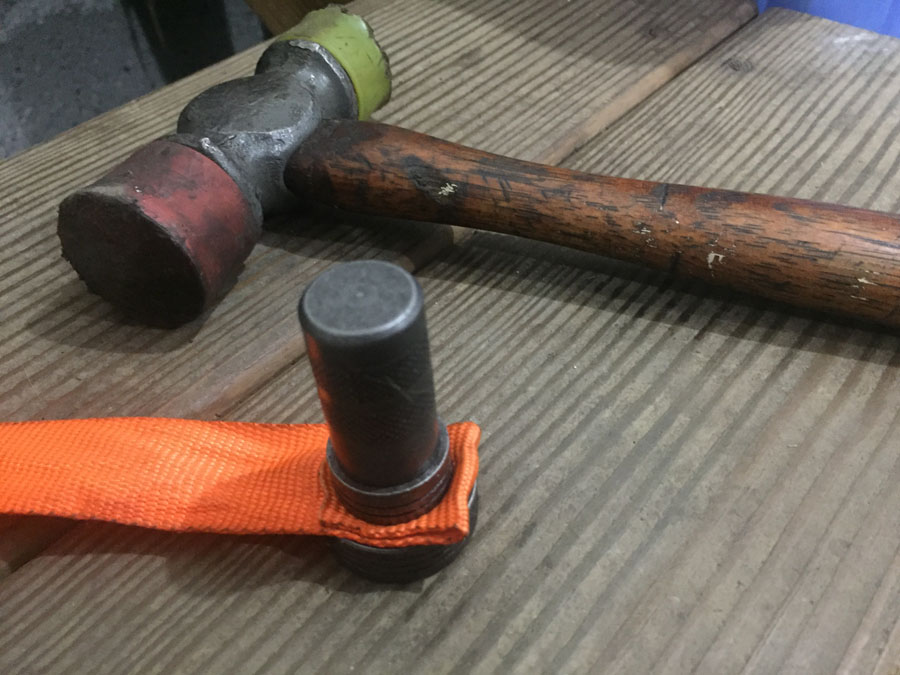
Next… time for a door handle to close the door. Time to learn how my use the grommet tool that had very limited instructions (like which side of the grommet half goes towards the fabric).
Cutting hole (first attempt at strap)
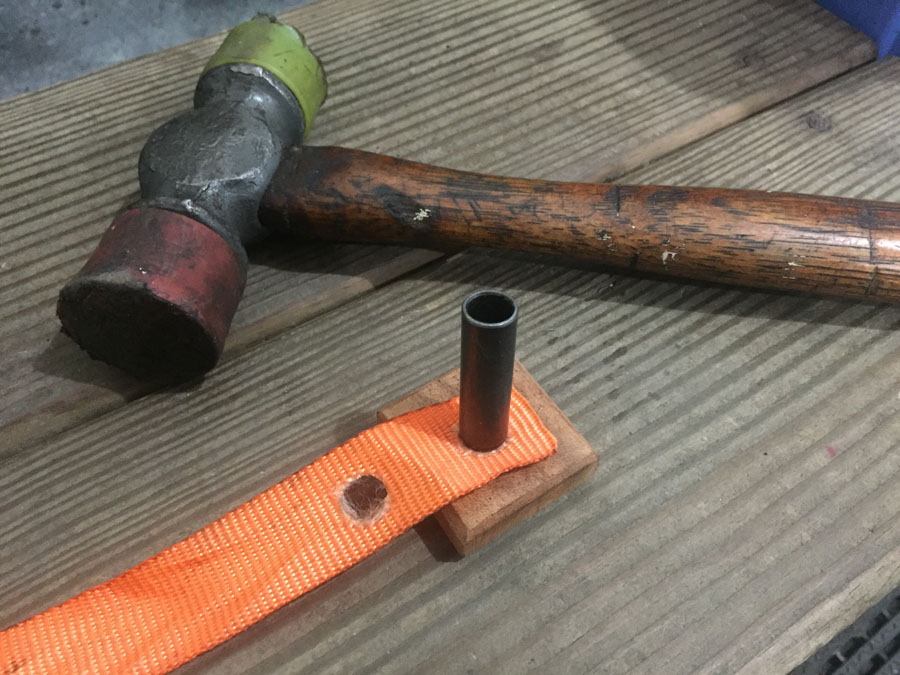
Lower part of die with half of the grommet
Lightly tap it together
Finished product (round 1)
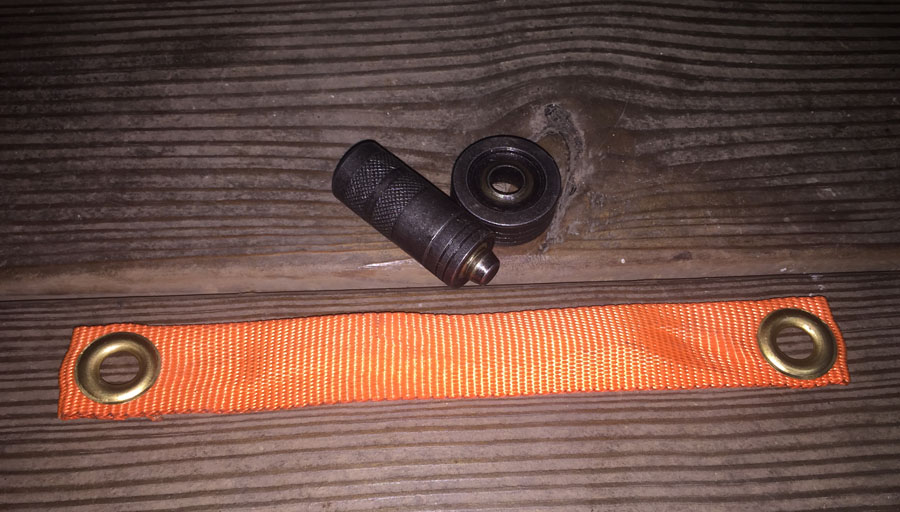
What I did discover is that the grommet would cut into the fabric when used as a door handle.
So I changed the design slightly for the driver’s side where I used three layers at the end and put the folded strap on top instead of the bottom. Seemed to work better.
Finished product…
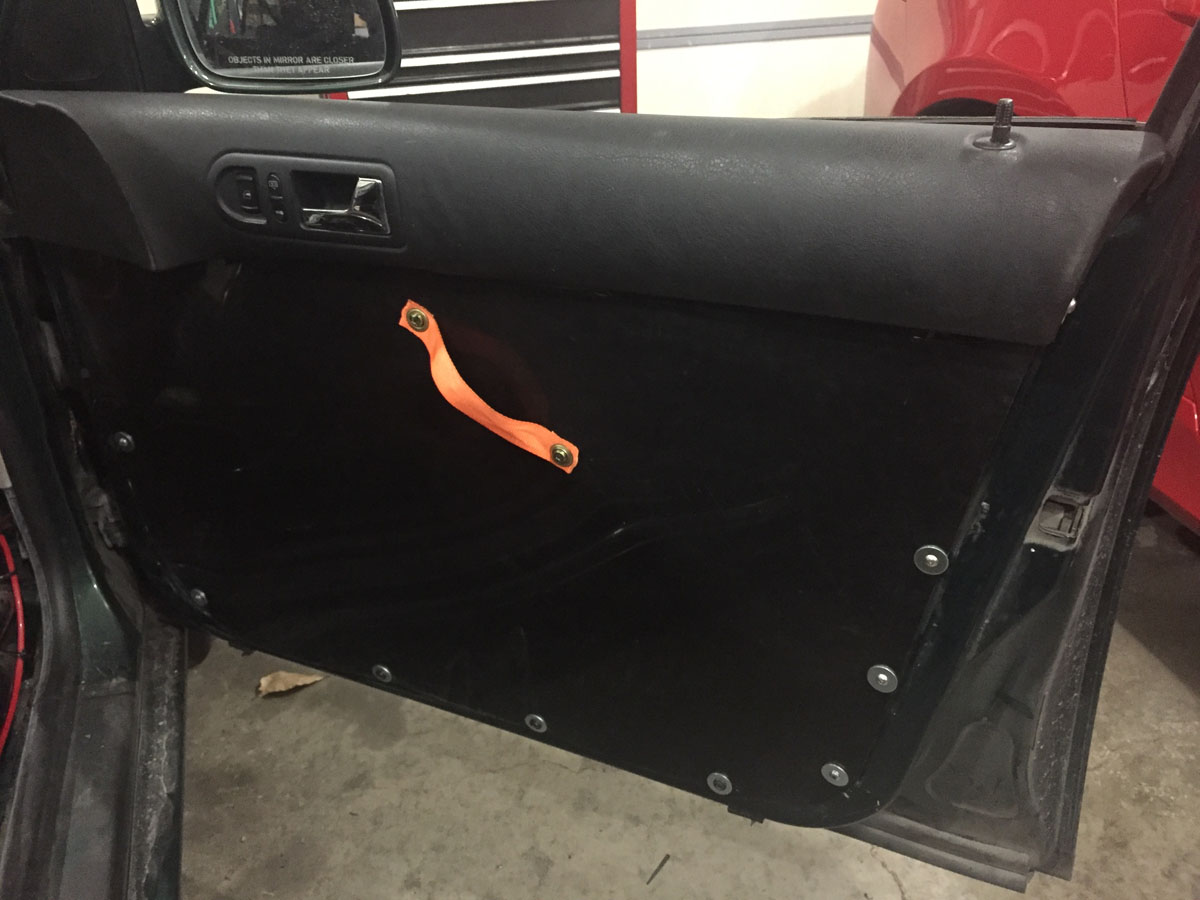

Now on to the driver’s side which proved to be a bit more difficult because of the lack of the correct tools (a vise only works as a metal brake with simple bends) and it seems my lack of visualizing an object in 3-D space. Damn monkey with a football.
The driver’s side door panel is not as flat as the passenger side so I had to made a support that went between the door panel and the plastic piece.
Anyway… it ain’t pretty so there is nothing to show. (sigh)
Driver’s door done and switches installed… more threaded rivet nuts to the rescue.

Using the same 1/8” plastic, I made a piece in the footwell to protect the wires. The plastic was the perfect size to slide into the groove in the dead pedal.
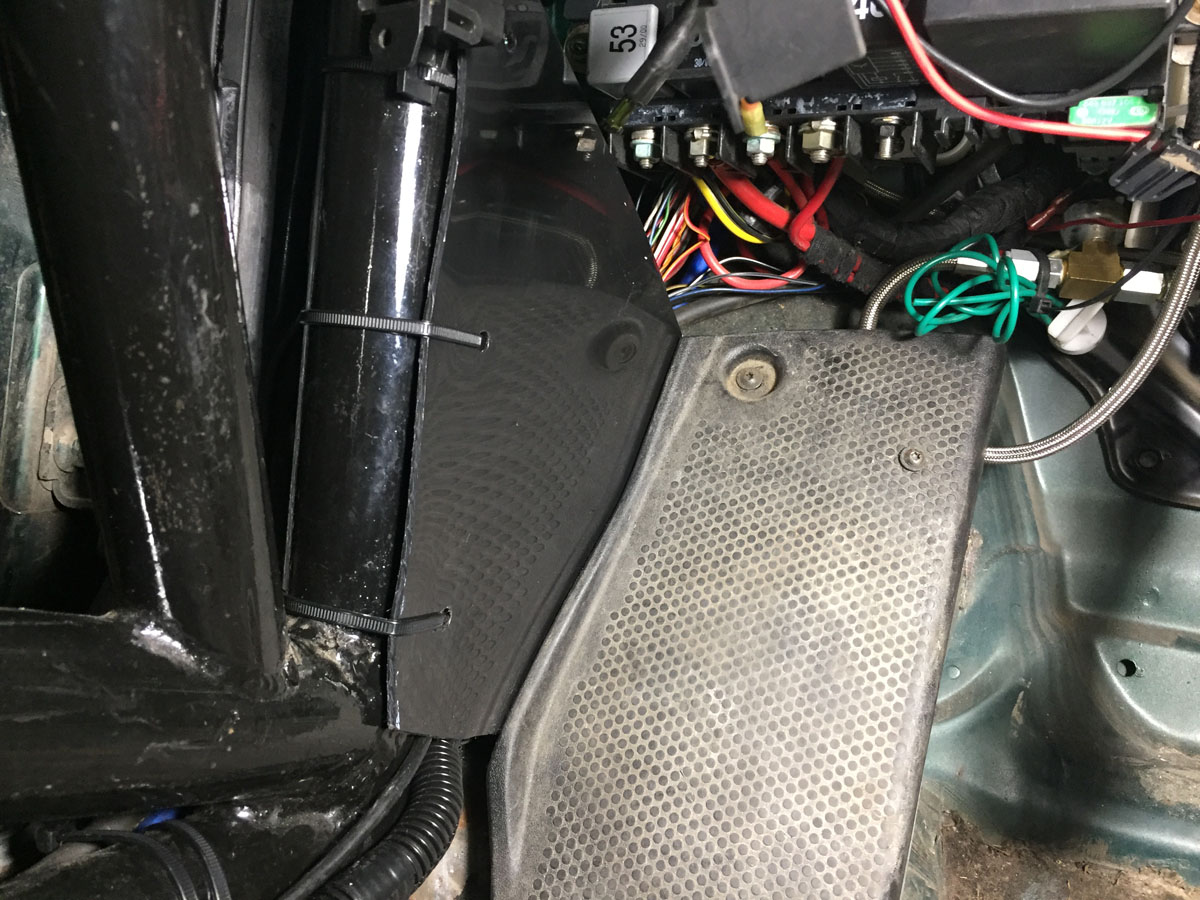
Probably too much information for what was a simple (albeit time consuming) project. It would have been sooooooo much easier in the summer as working with a roll of plastic in the winter is a pain. Hard to flatten it.
Enough for one update.
By the way… the car is currently at http://www.VEMS.us (Colchester, Vermont) awaiting its tune. Fingers crossed that everything works out.
Edit… while I was at it, I had to use the Command Prompt to change the file extensions from upper to lower case (used “Rename *.JPG *.jpg”) as the server is case-sensitive. Never a dull moment.
May 29, 2017
Next minor update... still avoiding the big "wiring removal" post.
Two things I wanted to accomplish with this change....
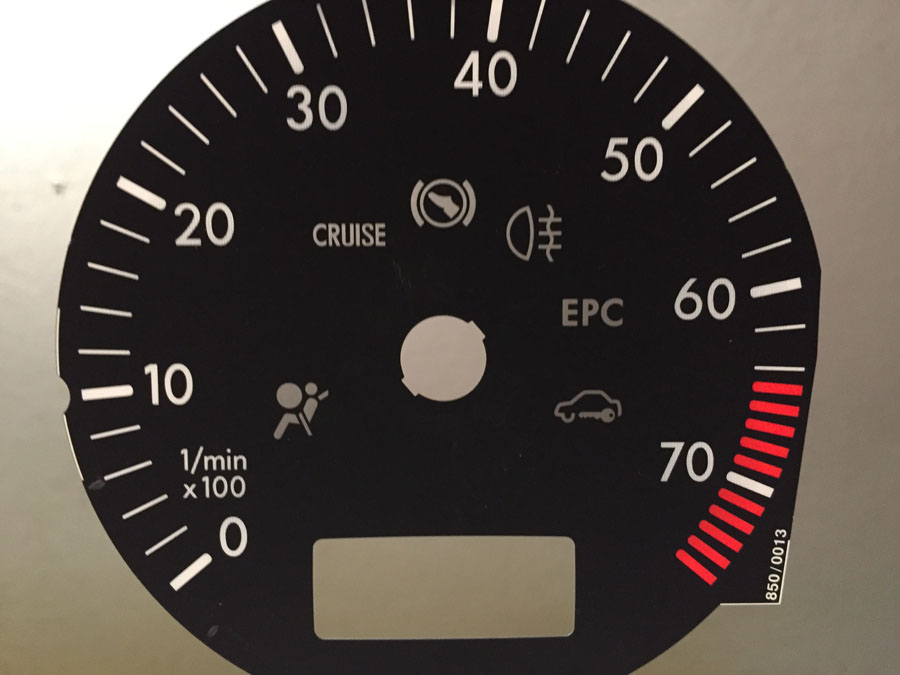
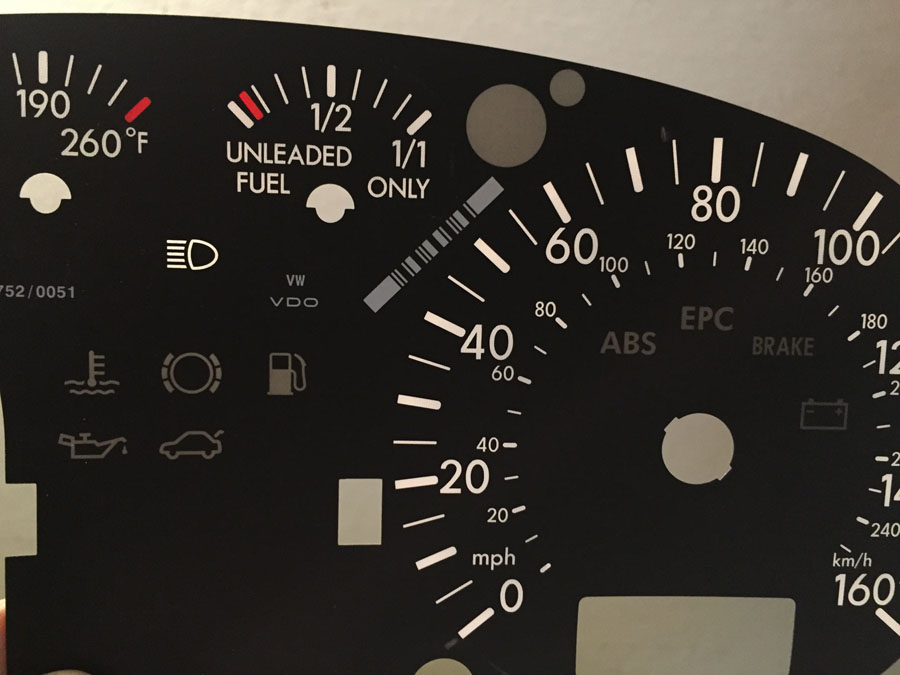
1. Clearer lens cover on the cluster
2. Fewer idiot lights since my ECU doesn't even know my car is running.
Cluster removed from dash and plastic cover removed
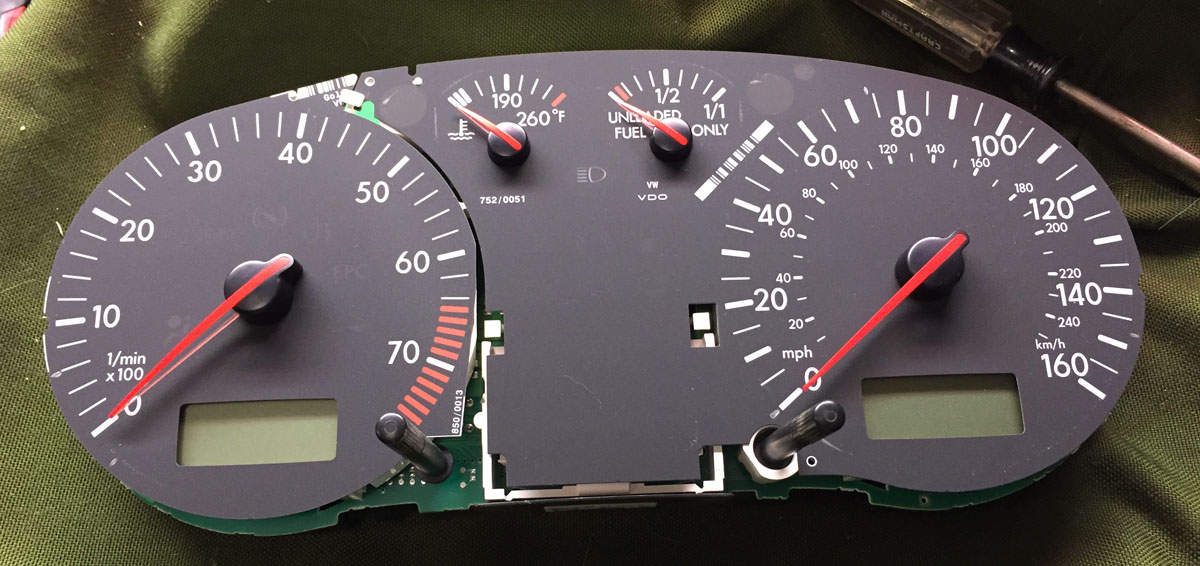
Off with the needles
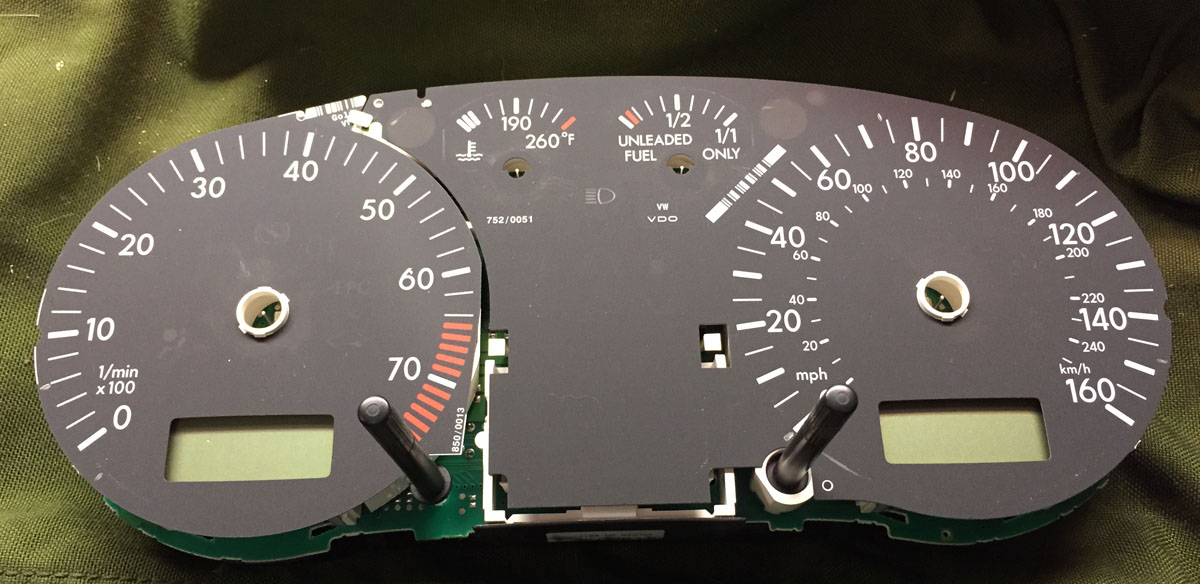
The inside of the MK4 cluster. Thinking of my old Rabbit days, I thought this was going to be an exercise in removing some tiny light bulbs. Nope... tiny LEDs that are soldered into the electronic board.
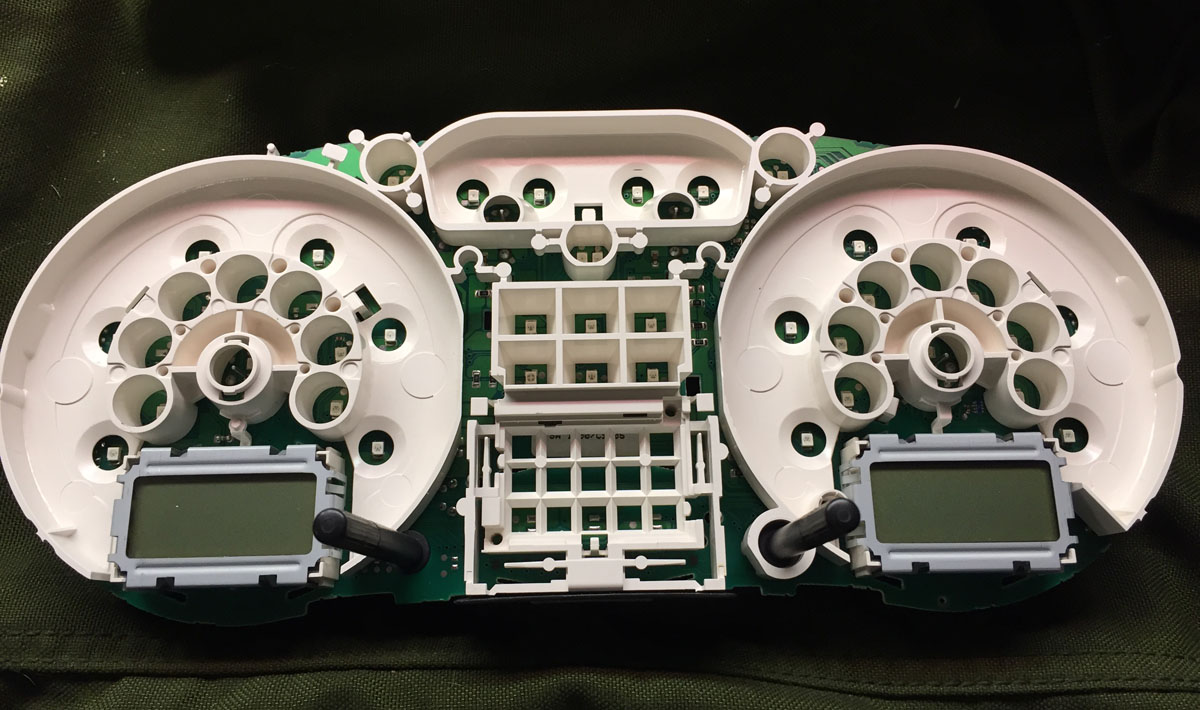
Tach held up to the light so that you can see the idiot light images.
Plan B... electrical tape.
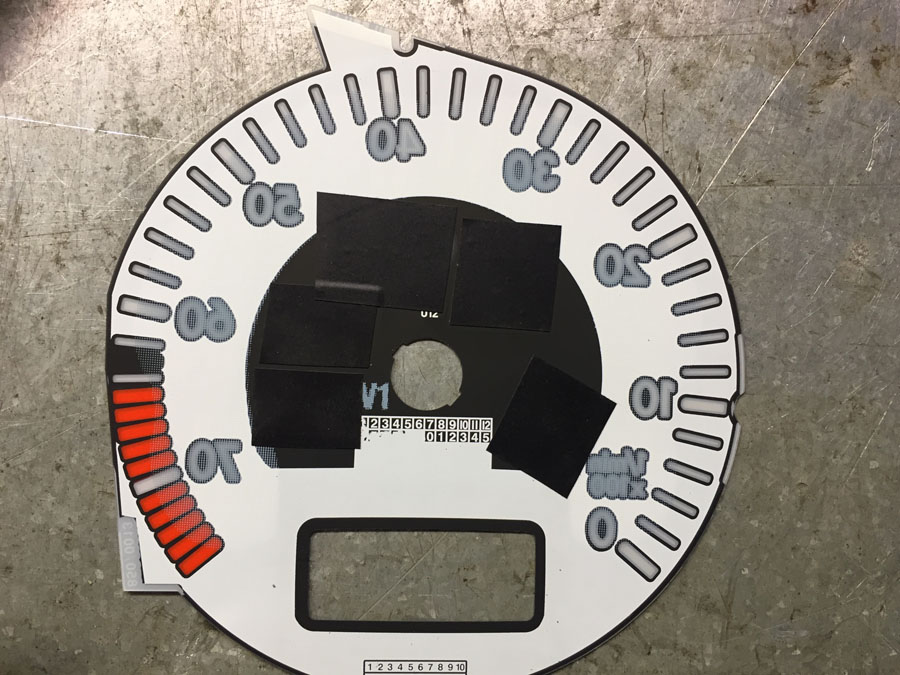
Results...
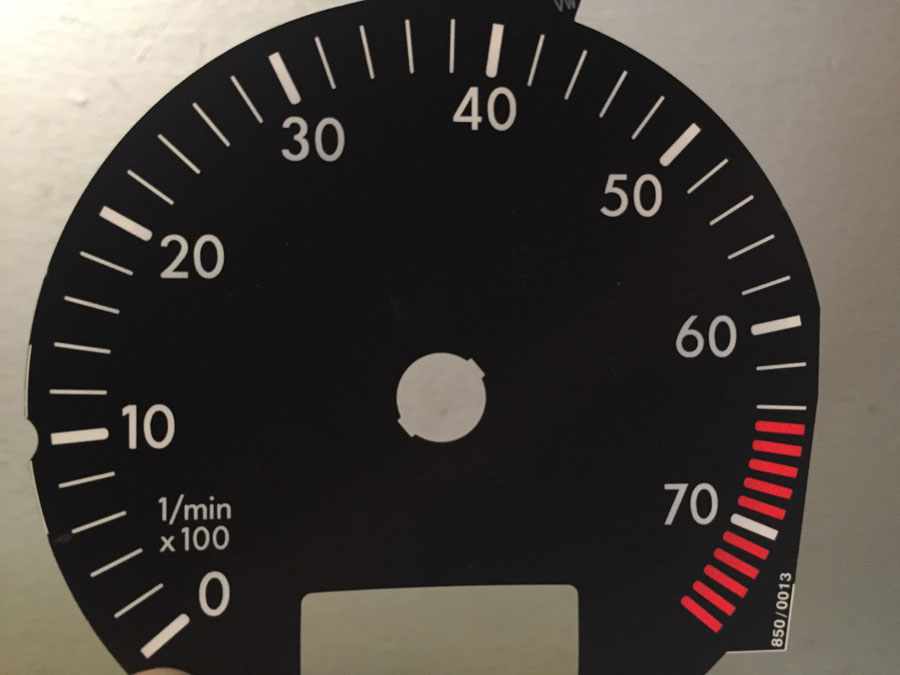
Speedometer before...
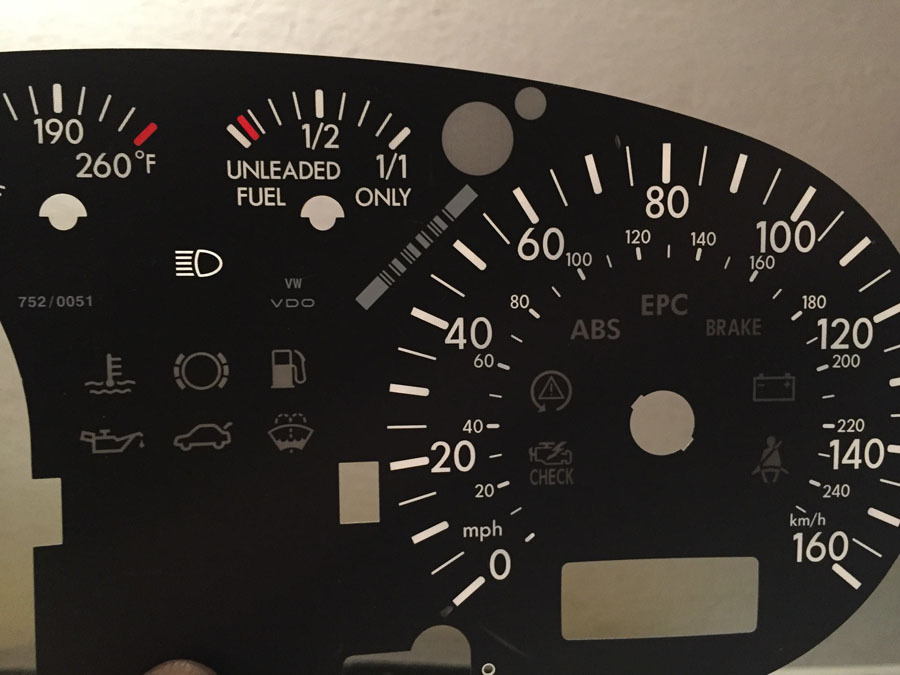
And after...
Scratched cover...
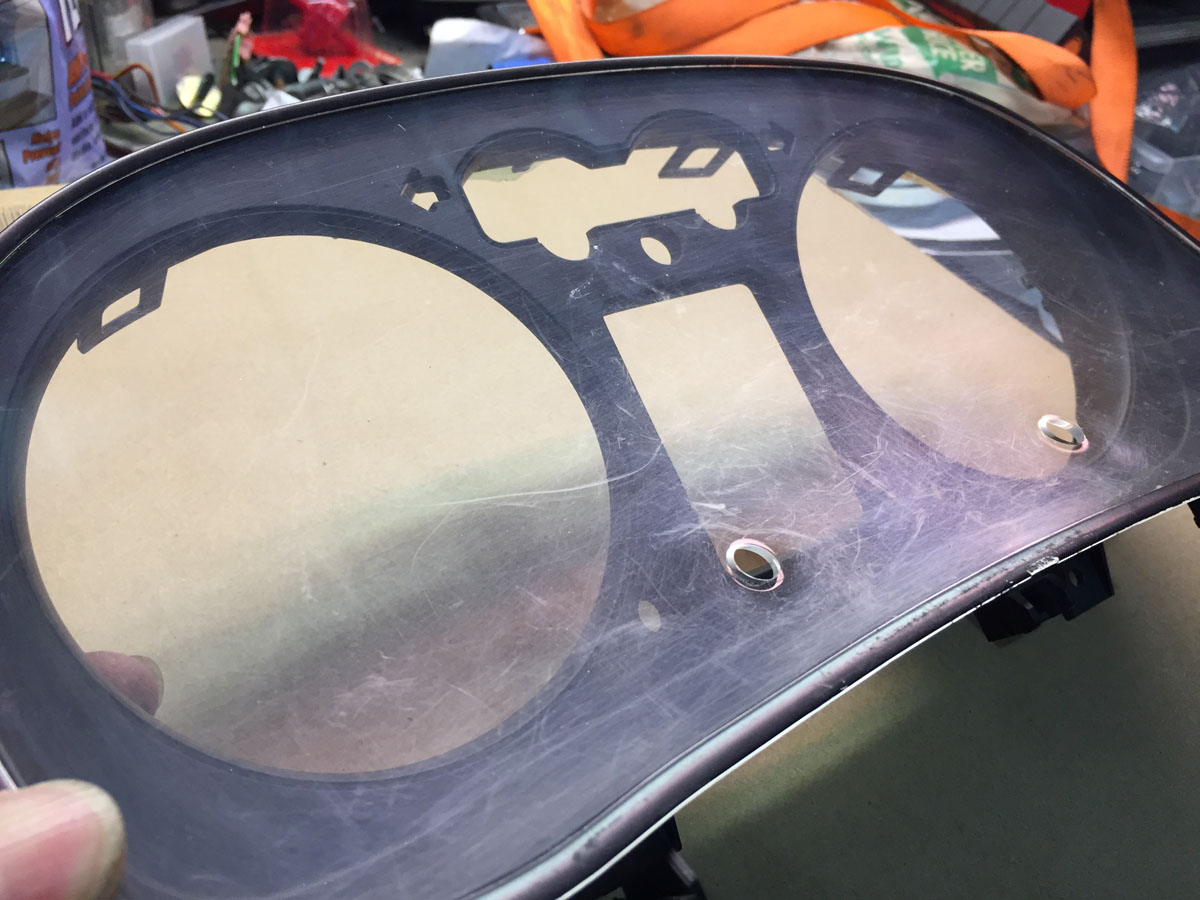
Pretty!
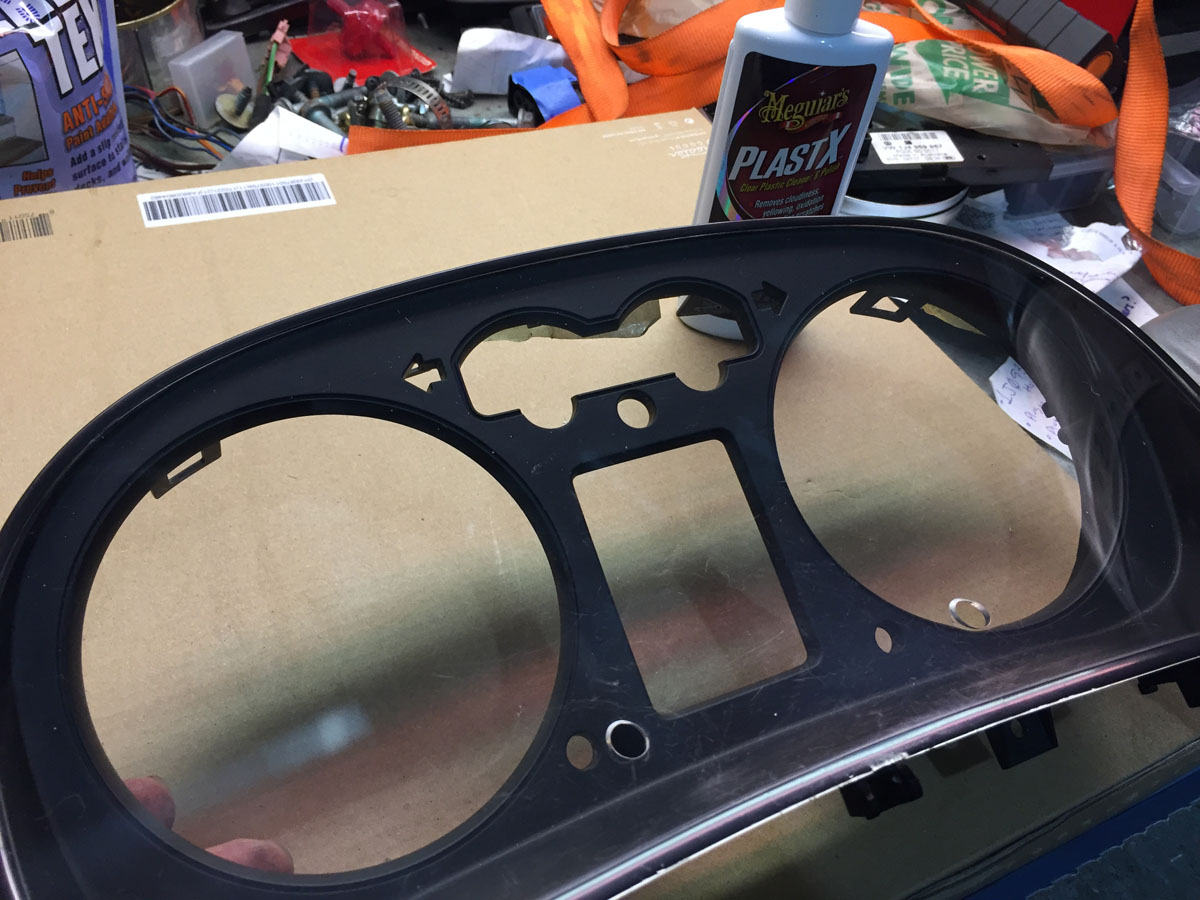
I just used headlight polish. Works quite well.
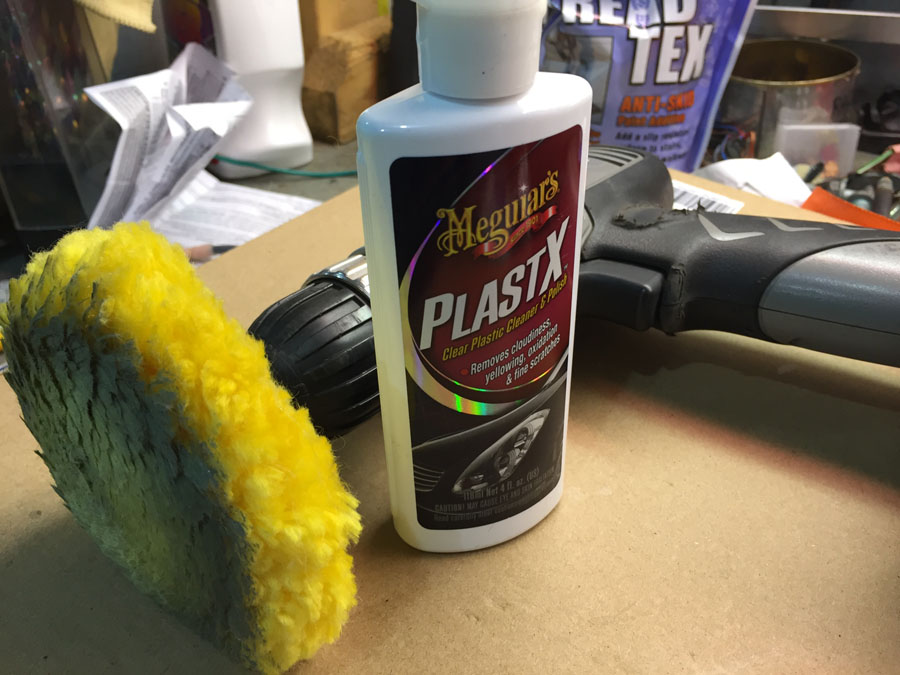
May 29, 2017... but much later in the day.
When trying to start the car after the "big wiring project" (that I wish I never started), the fuel pump would not turn on and the engine would not turn over.
Engine turn over was the clutch switch not installed yet. I was planning on circumventing this control and wasn't planning on installing it. Of course, I should have either followed through with that plan or installed it prior to trying to start the car.
Then there was the fuel pump that was not... well, pumping.
I followed the yellow wire from the fuse box on the driver's side, through the dash board, and out the hole in the fire wall to the rain tray. There sat the 034 relay board.
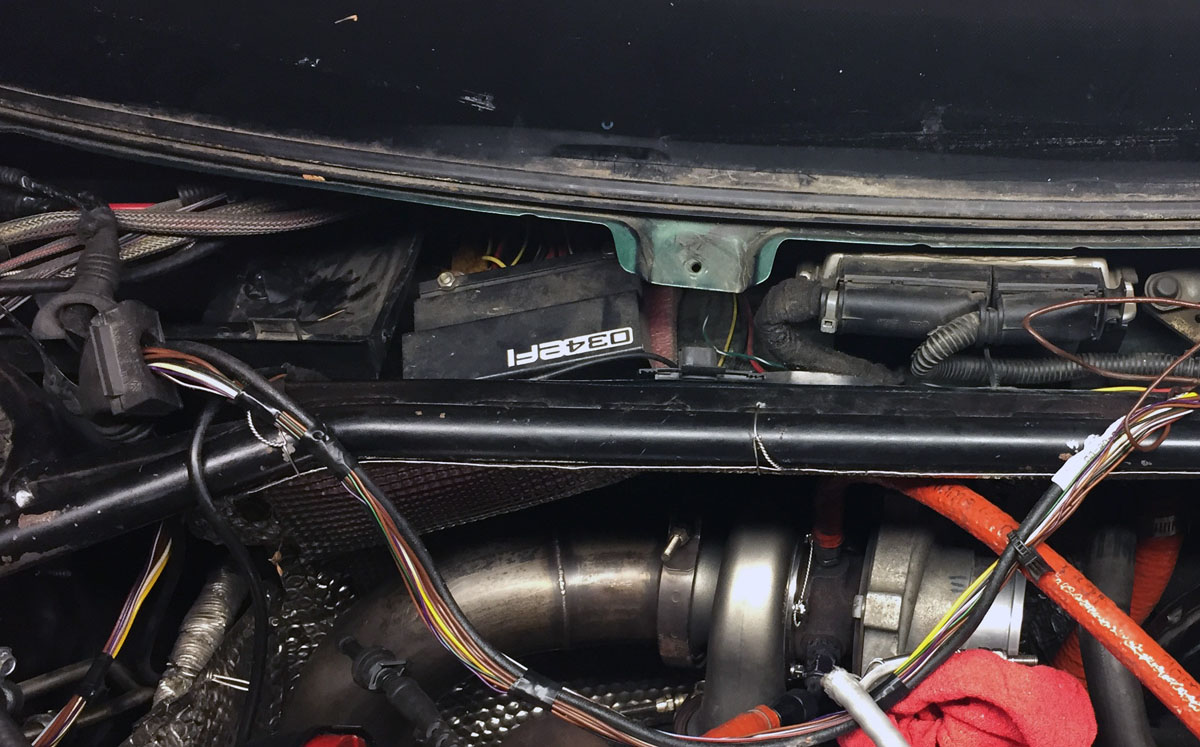
It has fuses in it. I can seem them. But access was not possible without pulling back the heat shield, removing the nuts that held the relay board, and then taking the little screws out of the relay board to access the fuse.
I couldn't see me wanting to do that at an event should I blow a fuse.
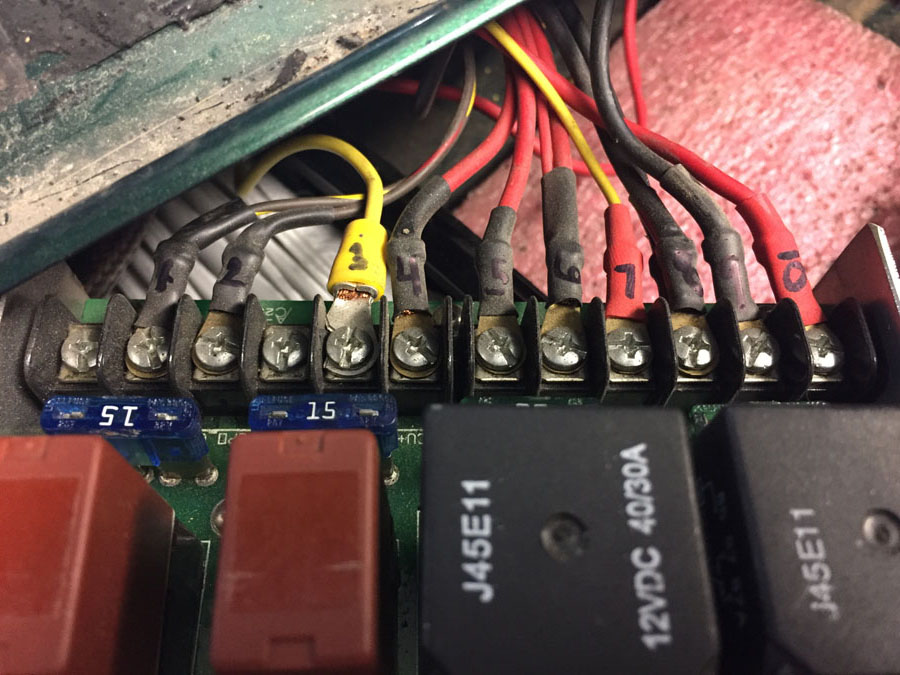
I marked the wires (should have use a paint pen) and removed all the screws so that I could run the wires through the firewall.
There is my yellow wire (marked #3)... and the fuse that was blown.
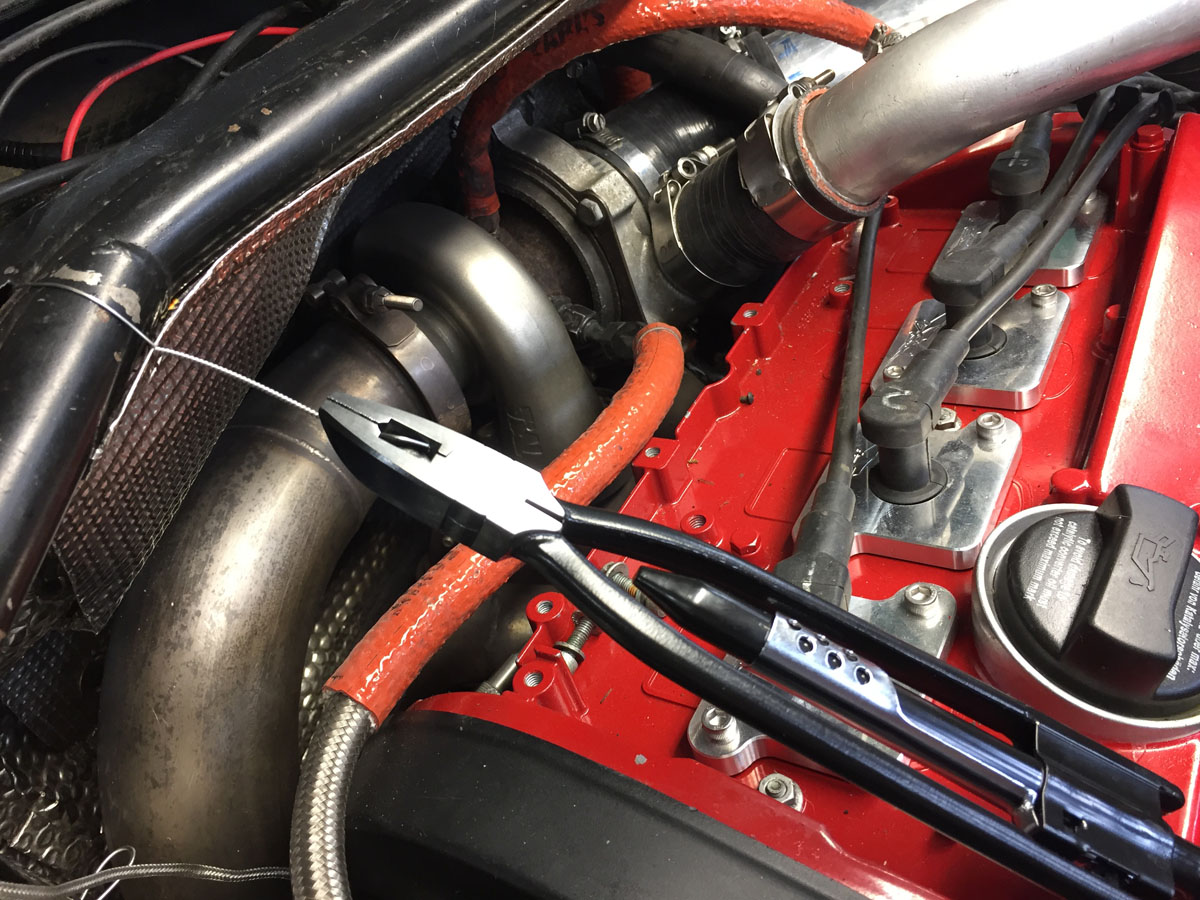
To reattach the heat shield, I picked up a safety wire twist pliers.... mixing "a" with a plural sounds funny. Can't have a pant or a plier. Easy to use and quite functional.
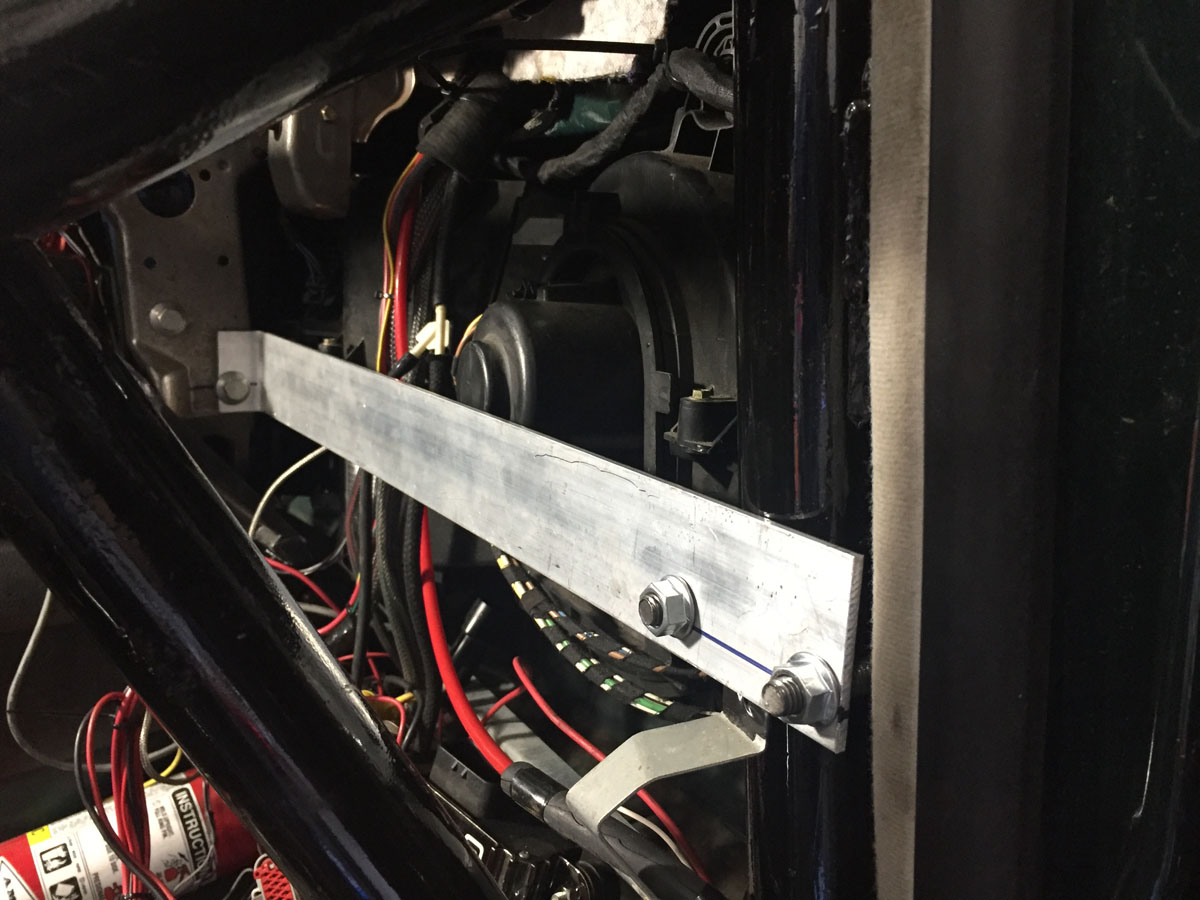
I started with a piece of aluminum stock that mounted to one of the bolts that supports the dash and then used an exhaust clamp for the outside mounting point.
Next, Bob at Vermont Custom Sheet Metal cut of a sheet of 090 aluminum plate for me. Seems the machine was a bit of an overkill for what I wanted. He didn't blink an eye when I asked him for the small sheet... I guess he has seen all sorts of requests over the years. The machine out back would cut a half-inch piece of steel. Don't get your fingers in that one.
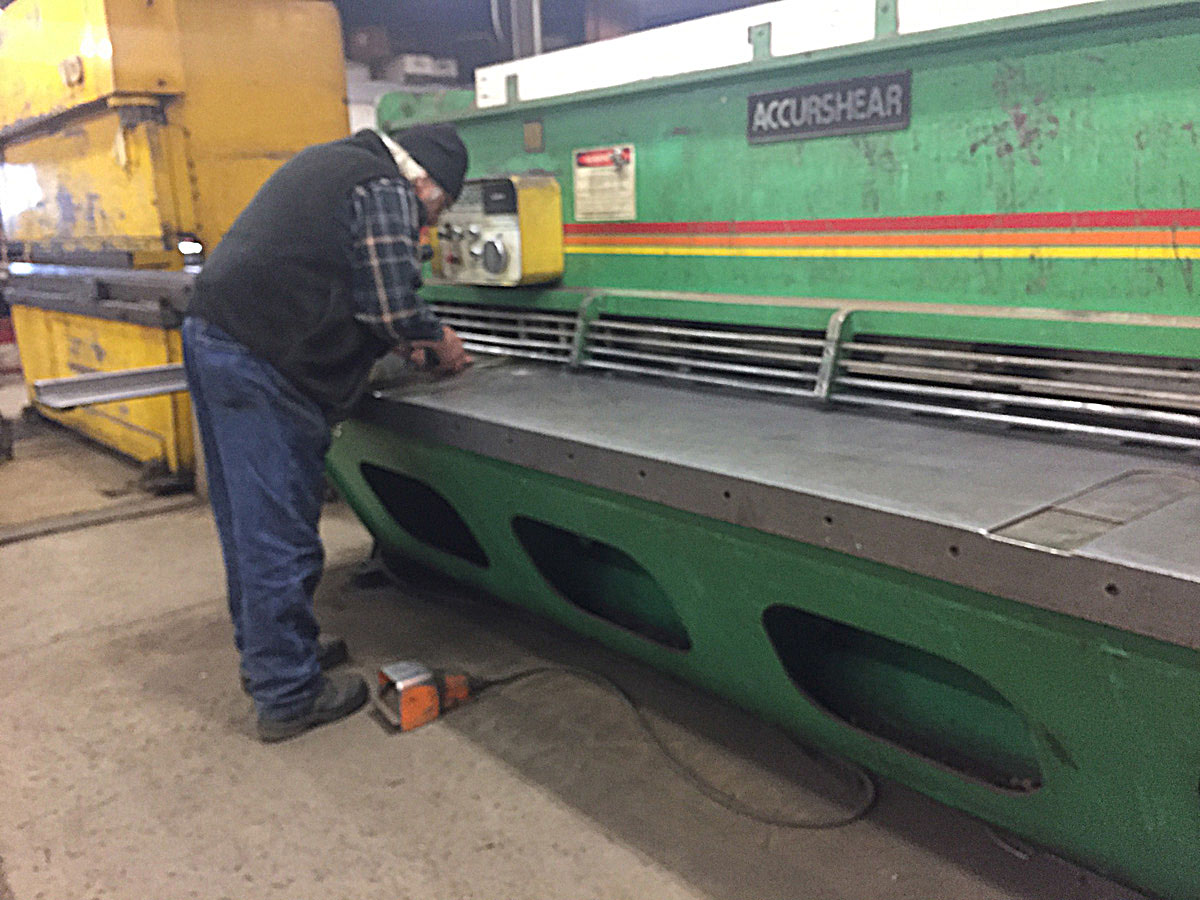
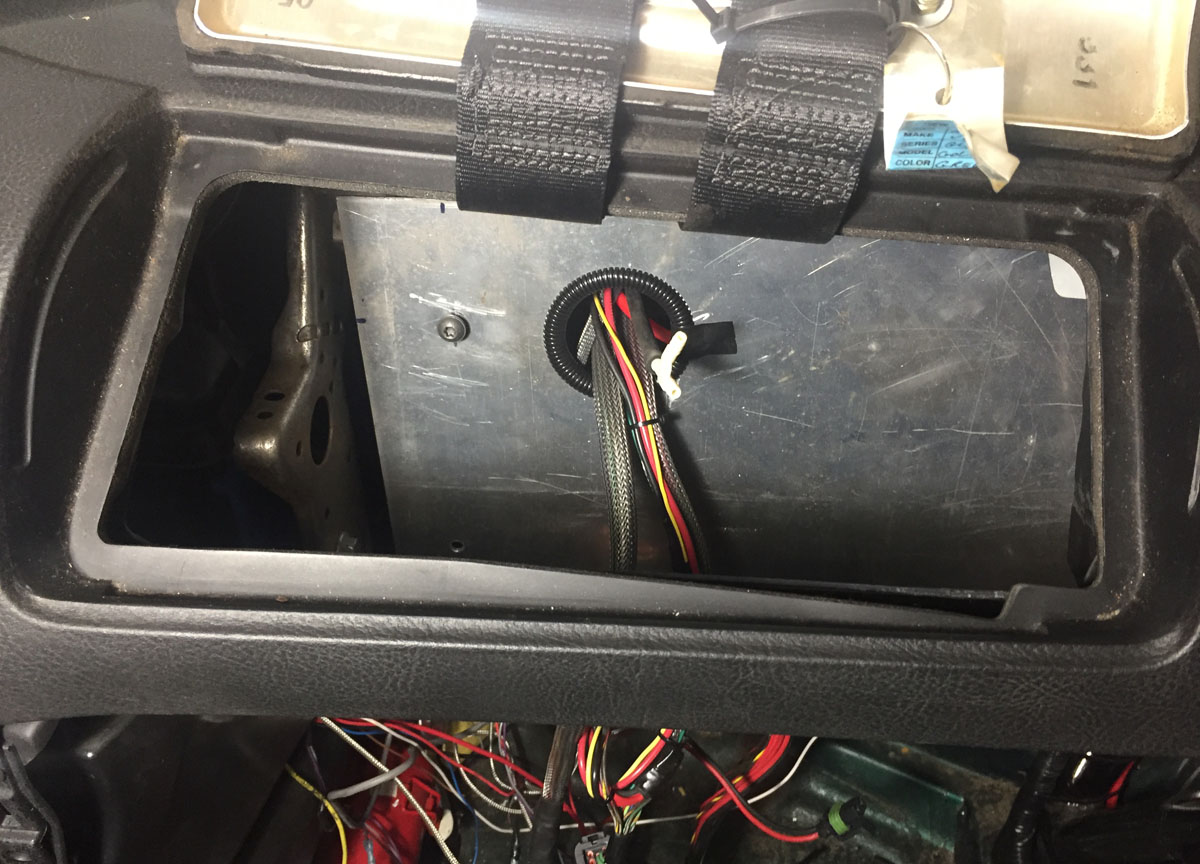
Plate in place... ran the wires through the 2.25" hole to determine placement of the 034EFC IIC ECU, 034 relay board, and the water injection system that I use to spray the radiator.
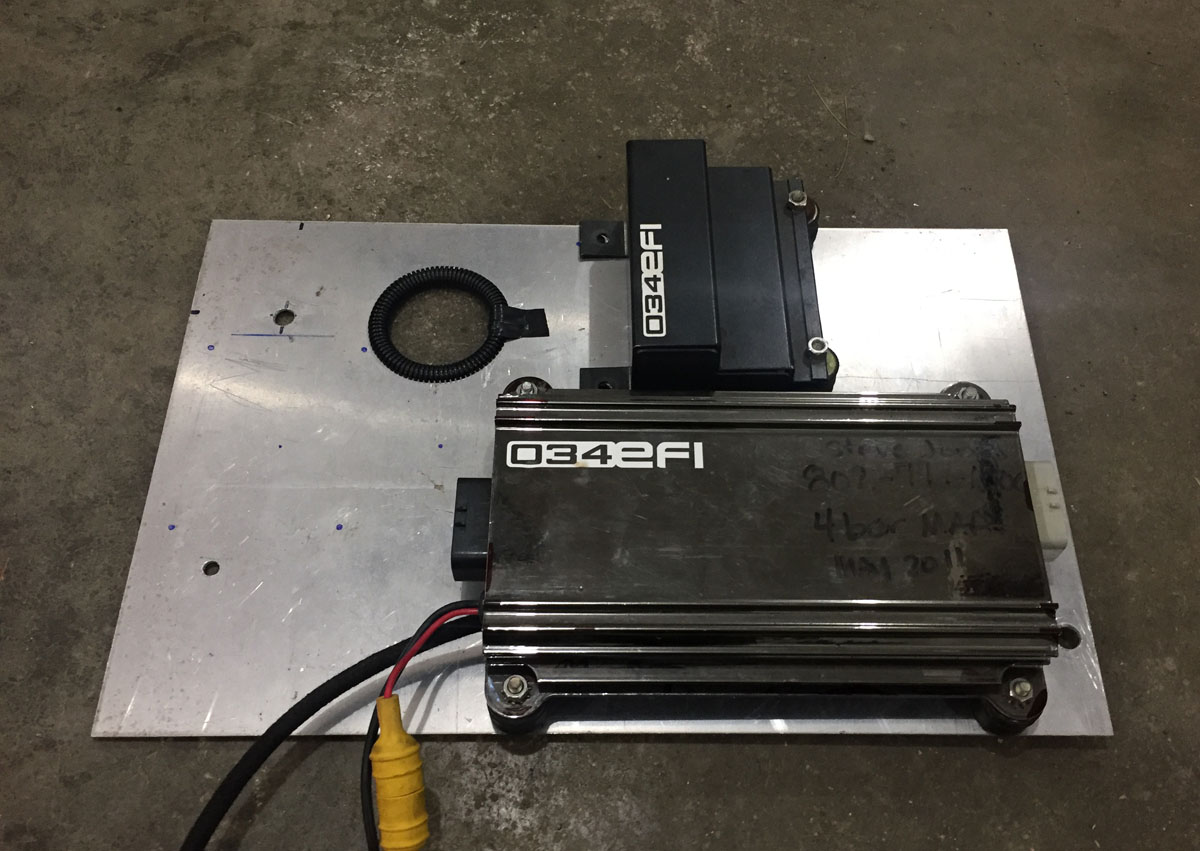
Determined location and drilled mounting holes.
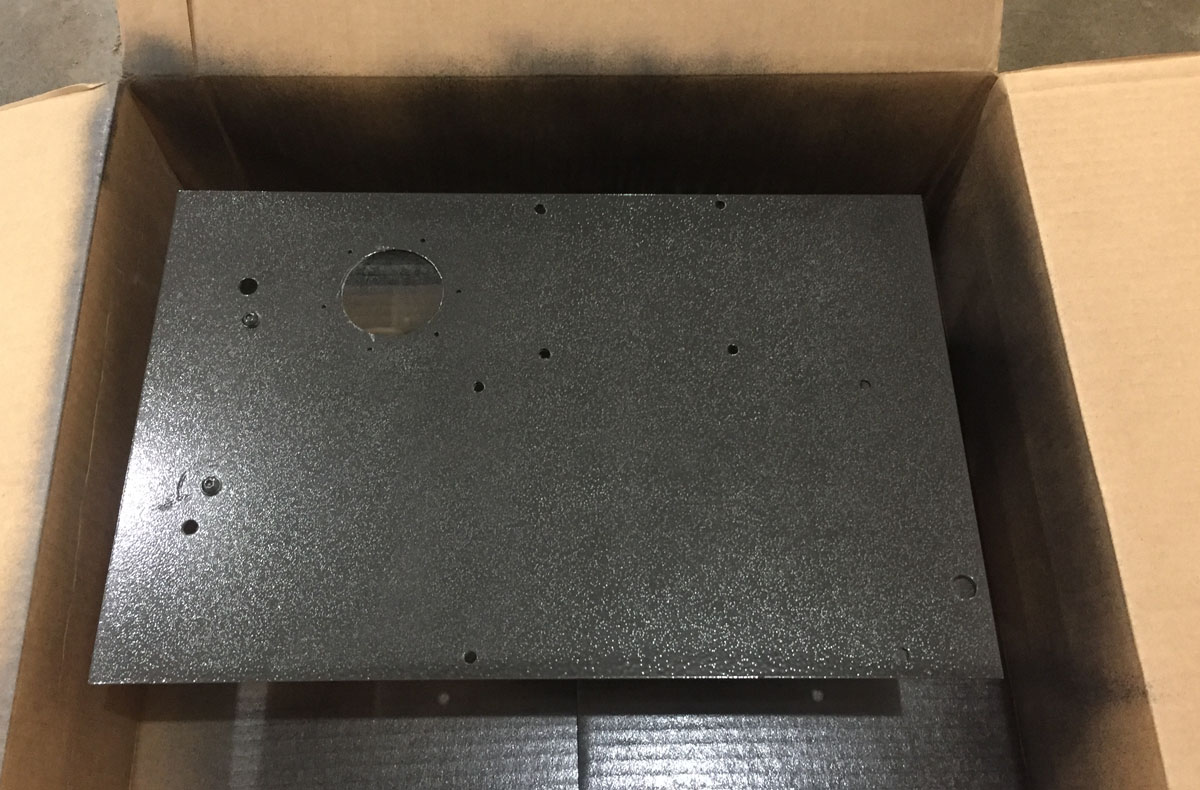
Some Hammermill paint.
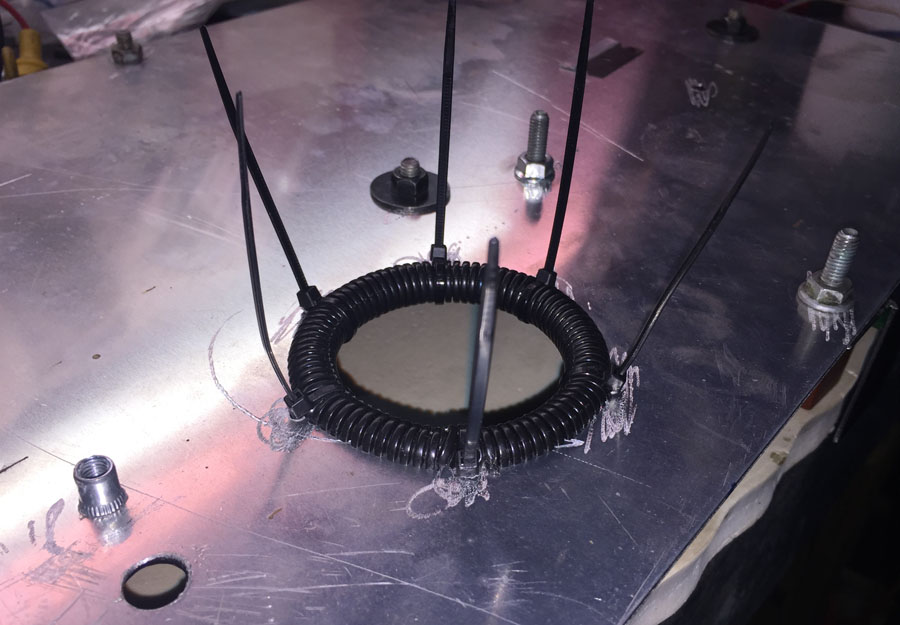
Custom grommet made from wire loom and zipties... it works.

Everything in place. If I was doing this from the start, I would have made all the wires the correct length. Large lip tires are holding the wires, not the ECU.
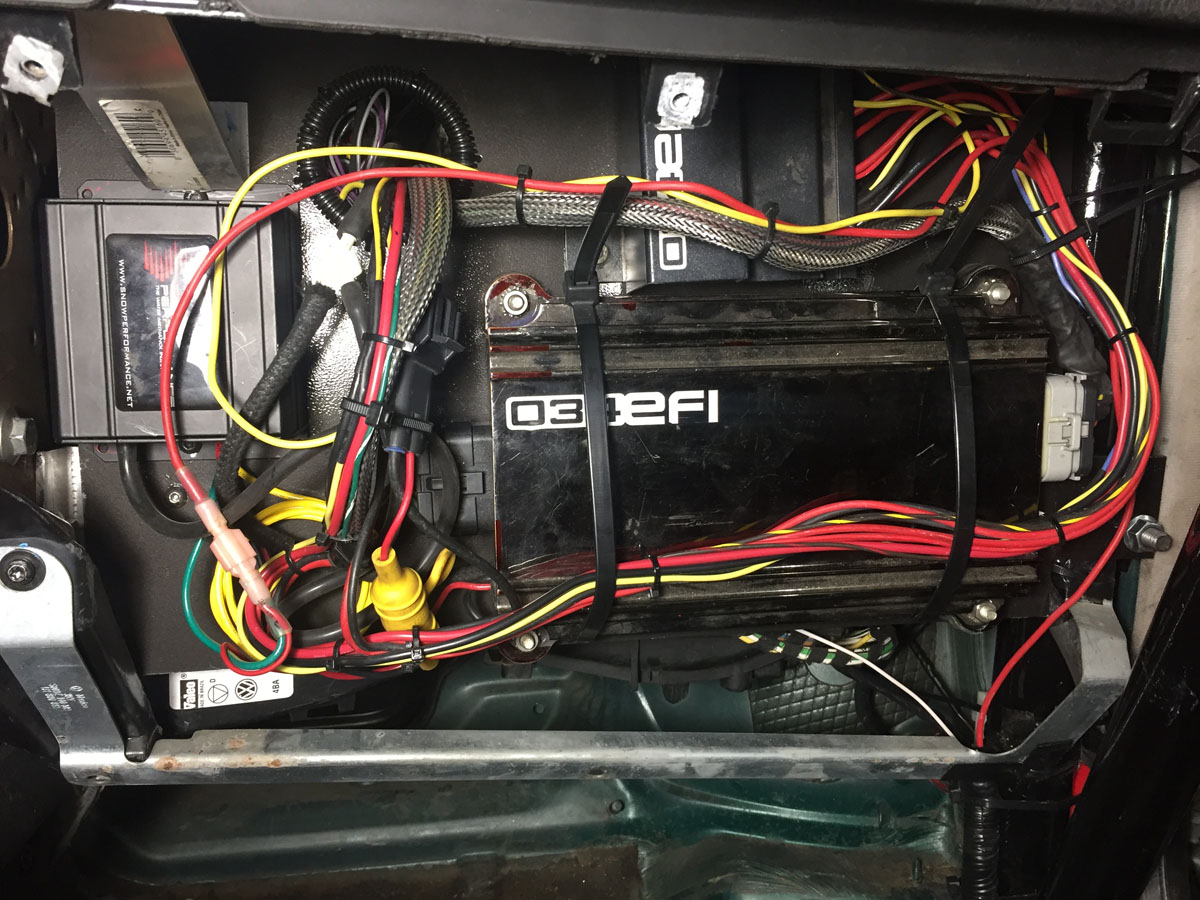
Dash coming together.
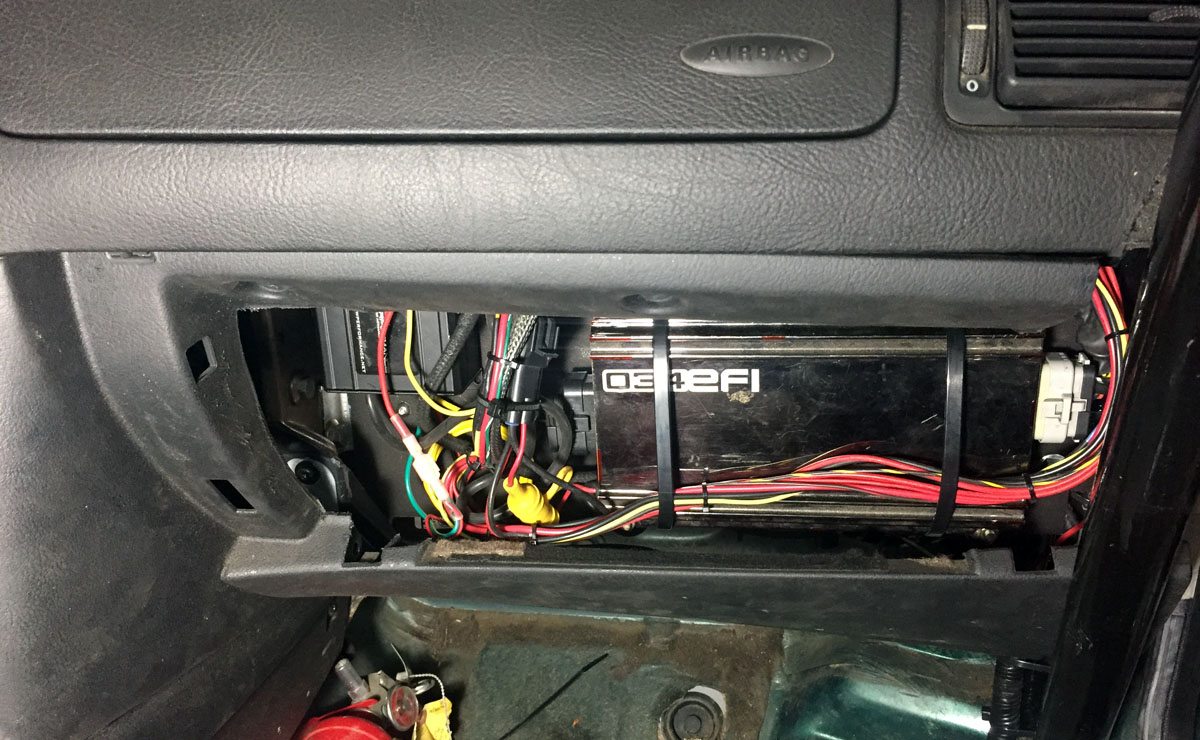
Glovebox door in place... I used an aluminum rod that goes through the gutted glovebox door and is held in place my the stock indentation where the factor latch goes. The rod is attached (VW part # Hose clamp) to the cage on the outside.
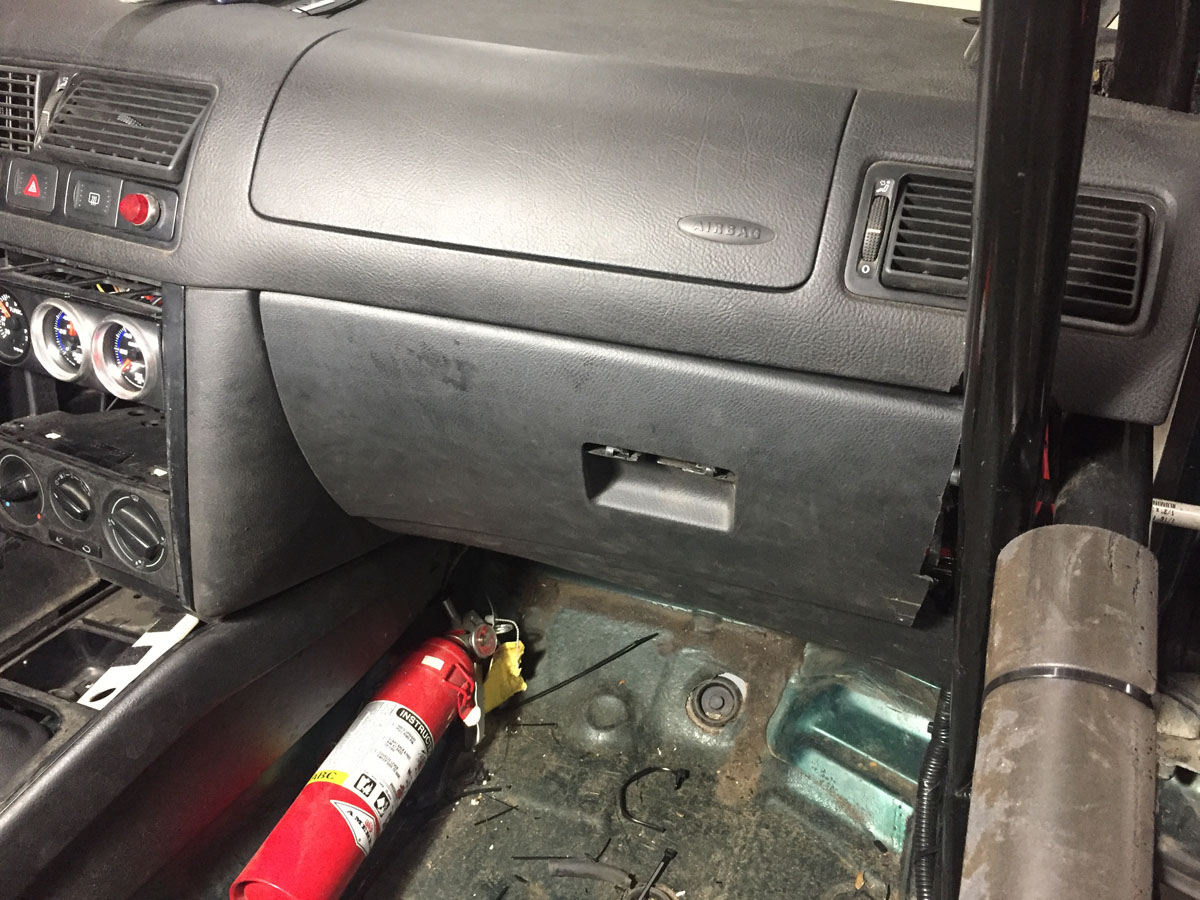
And done...
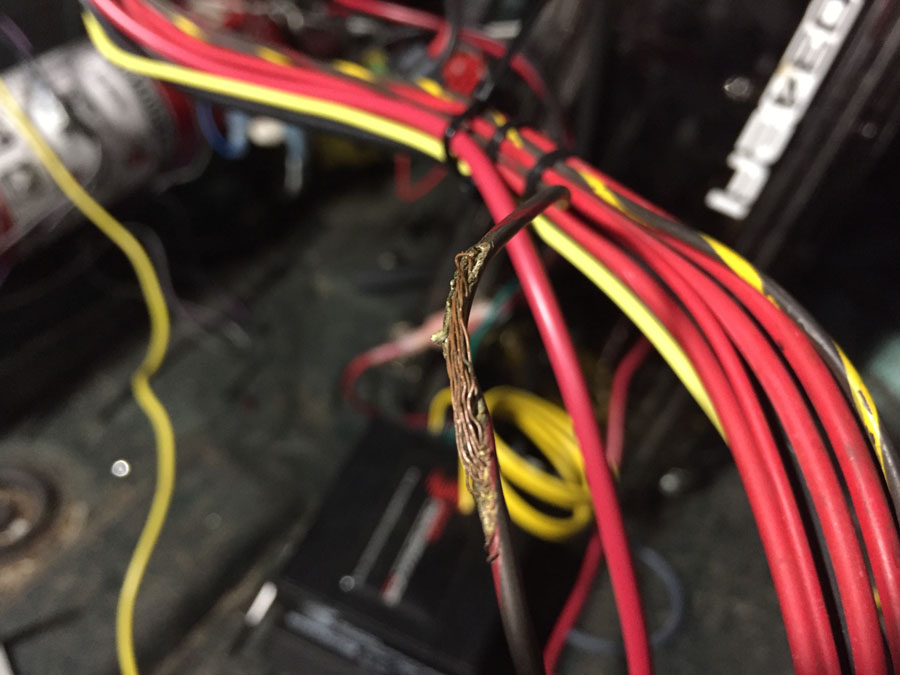
And... one good thing did come out of the fuse being blown on the relay board for the fuse pump. When pulling the relay board wires through the fire wall, I found a wire (went to GPO 0) that was less than healthy. Glad I found it now.
May 29, 2017... but very very late at night
And to check something off my "to do" list for the day, some more photos.
Some of these are more for me to recall when I did something (who cares that I painted something or put fluid in something else?)
So... I painted the ceiling. I was going to replace the entire roof as I have a color-correct non-sunroof roof ready to install. Did not seem worth the effort. Instead, I painted over the mulit-color ceiling.

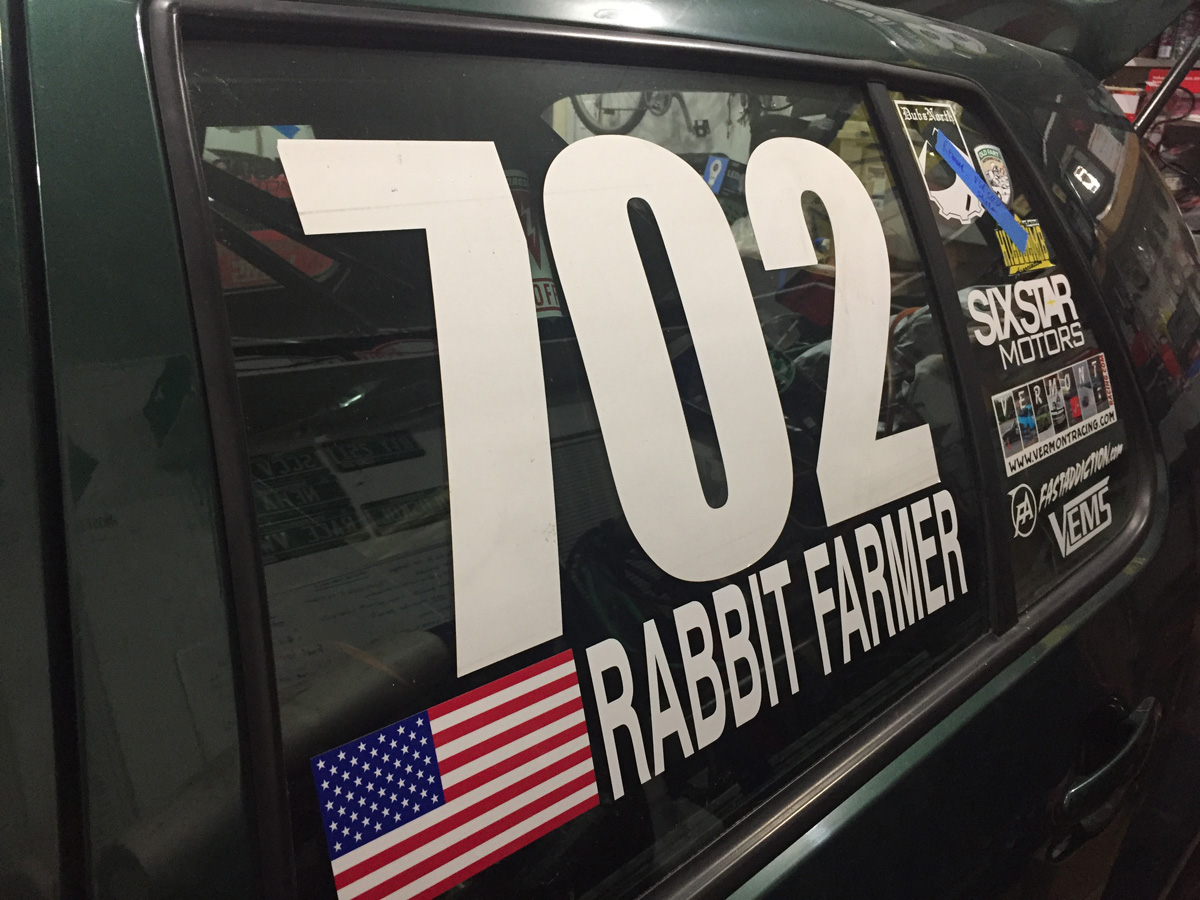
Who the heck is "S. JONES" anyway? Don't know... figure I would have better luck with "Rabbit Farmer". Why not?
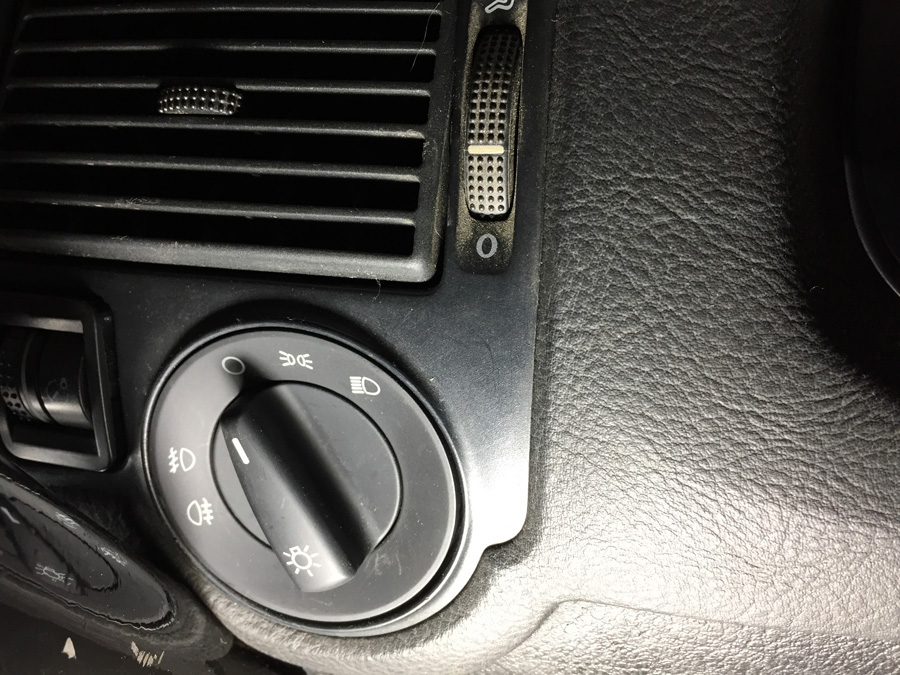
Seems minor, but a "Euro Switch" has its benefits. I was not able to change it in the past because one of the tubes for the rollcage was in the way; when the dash was out I changed the switch. This switch allows me to turn off the headlights, which is nice when you have a dead battery and the headlights keep coming on when trying to start the car. The e-brake switch is supposed to do the same, but for some reason they still came on.
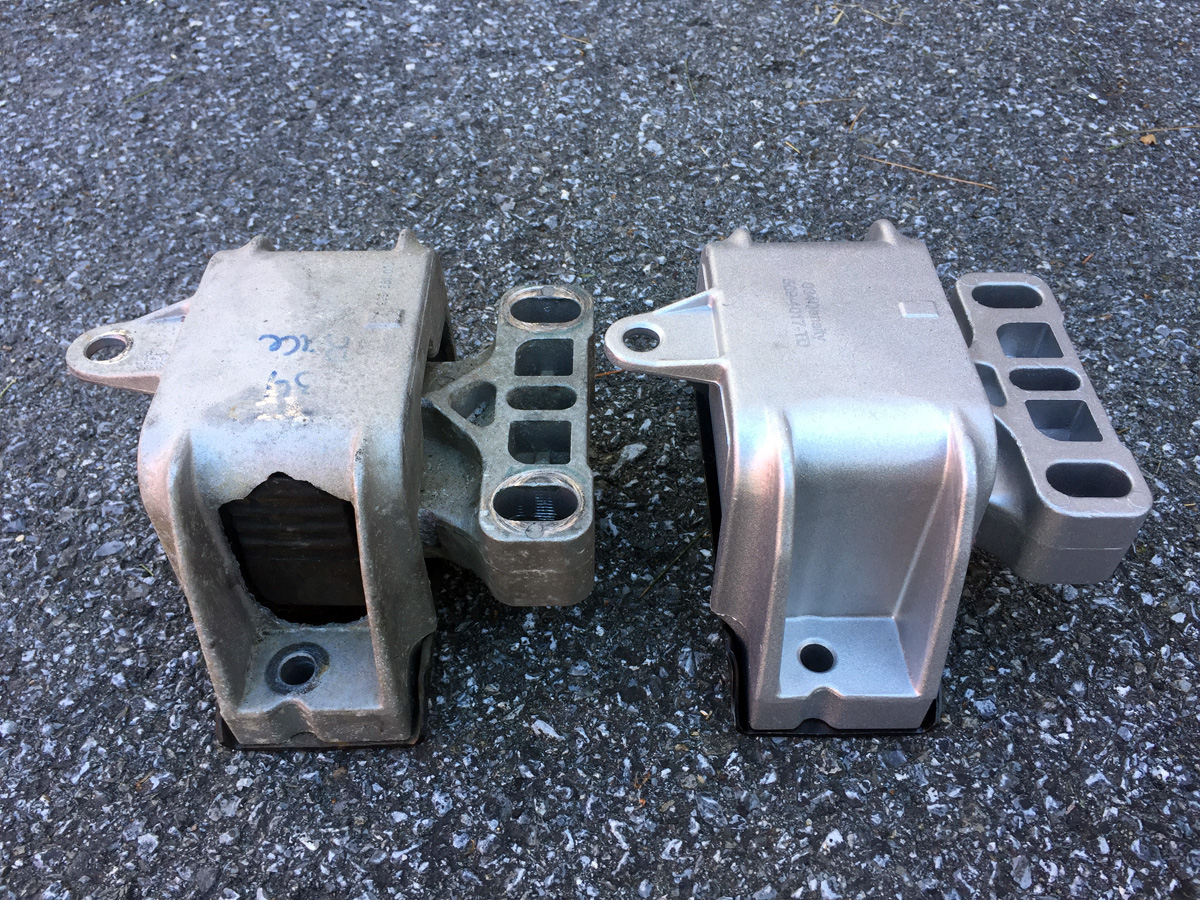
I noticed that the transmission mount had a crack in it. I assume this was from when the dogbone broke at Okemo (2015?) allowing the engine to swing freely (and cause the throttle to get stuck).
I was going to take it apart and salvage the high density rubber for another mount, but I could not find one. Plenty of engine mounts, nothing for the transmission.
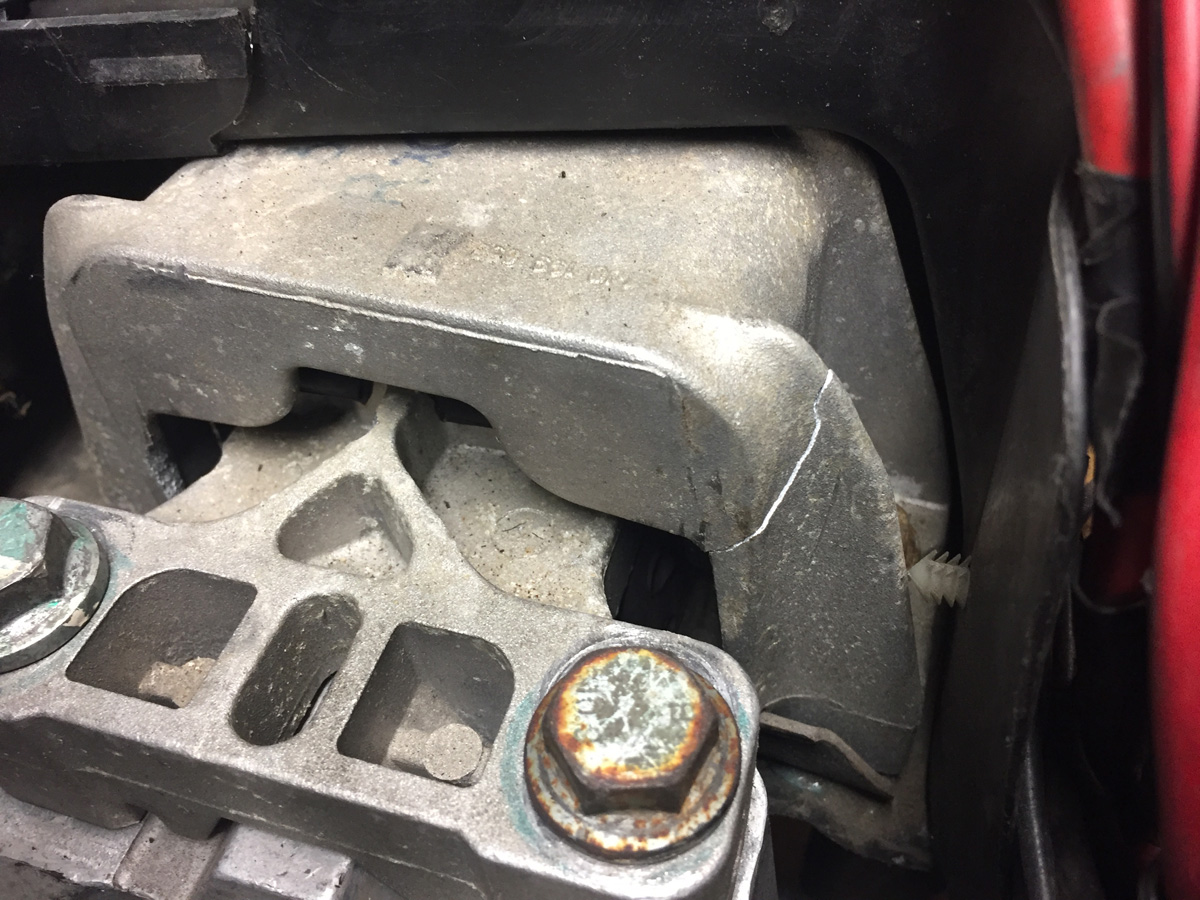
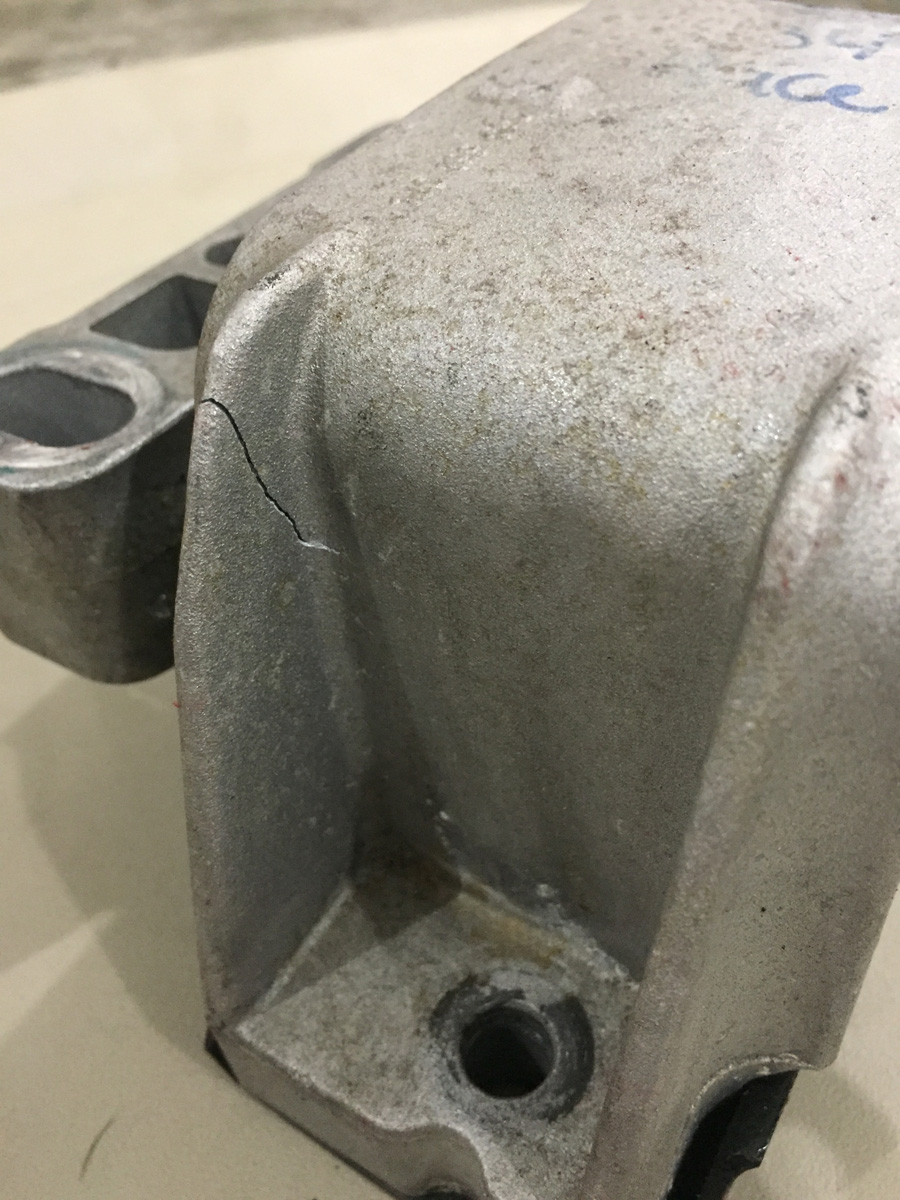
Glad I decided to replace it because the entire backside was blown out.
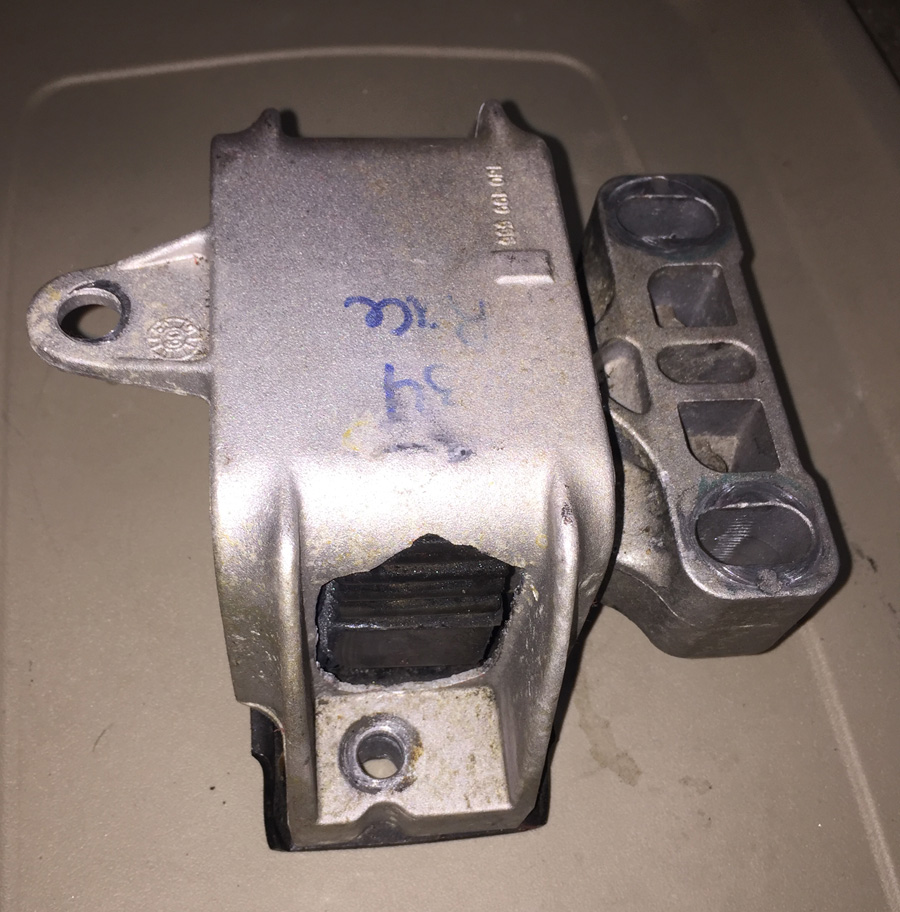
Enter a new set of "track density" 034EFI mounts. Now I have a spare engine mount.
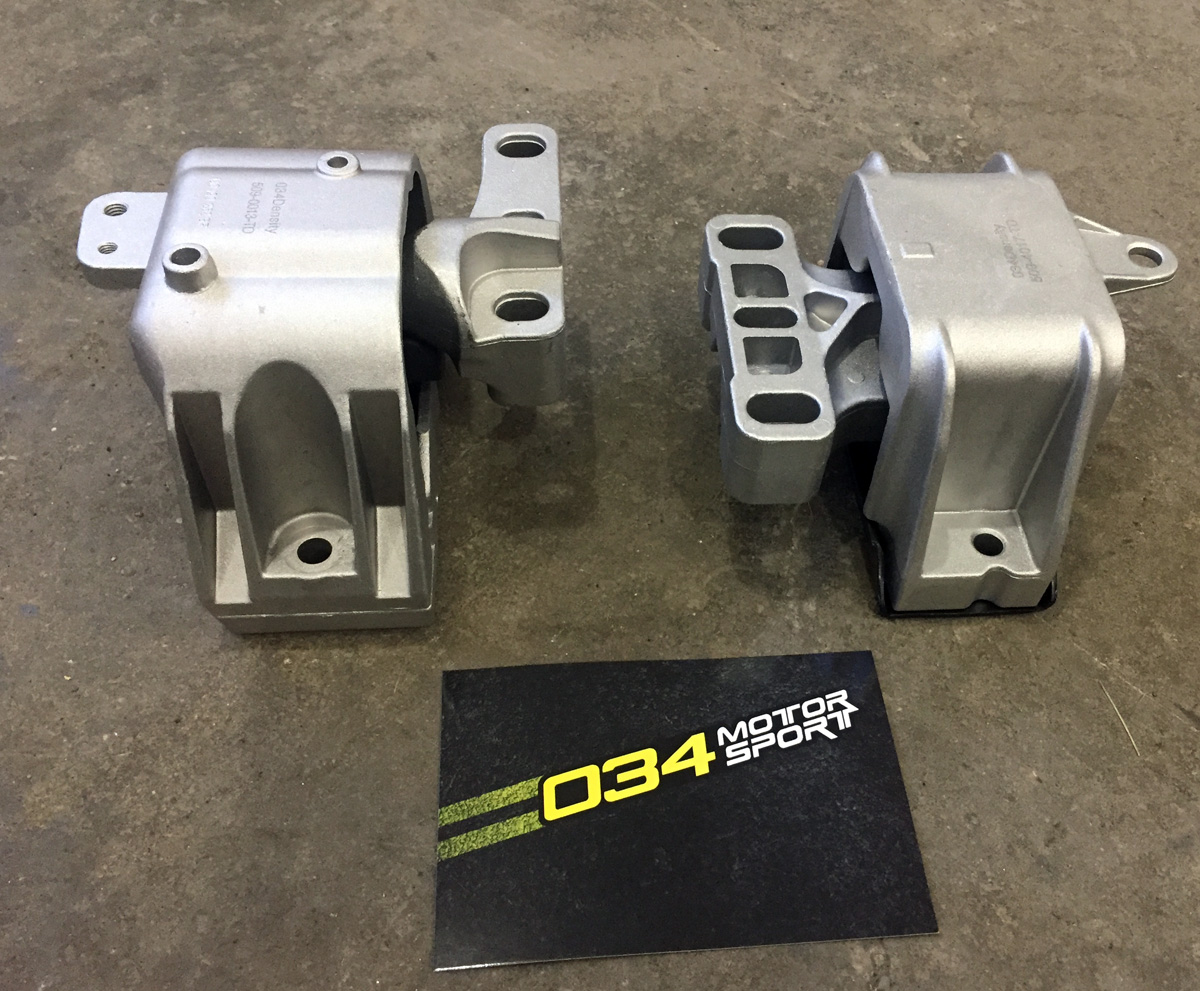
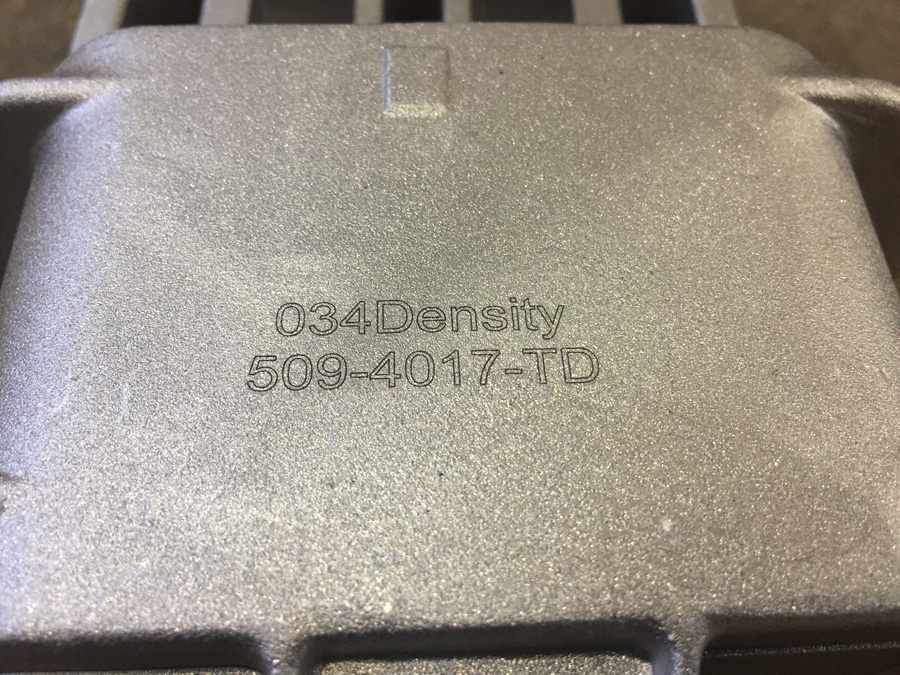
Broken mount and replacement.
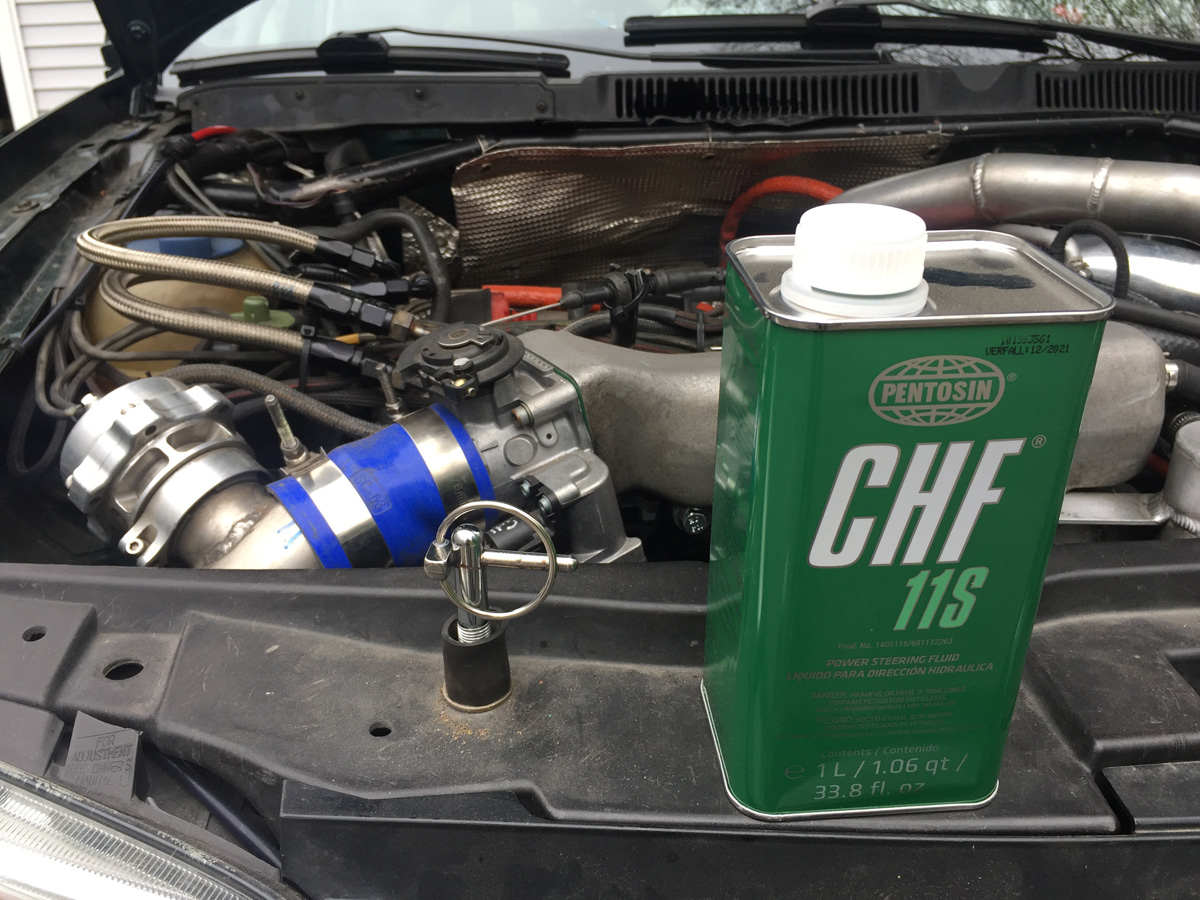
I put some fluid in something. Pentosin CHF 11S power steering fluid
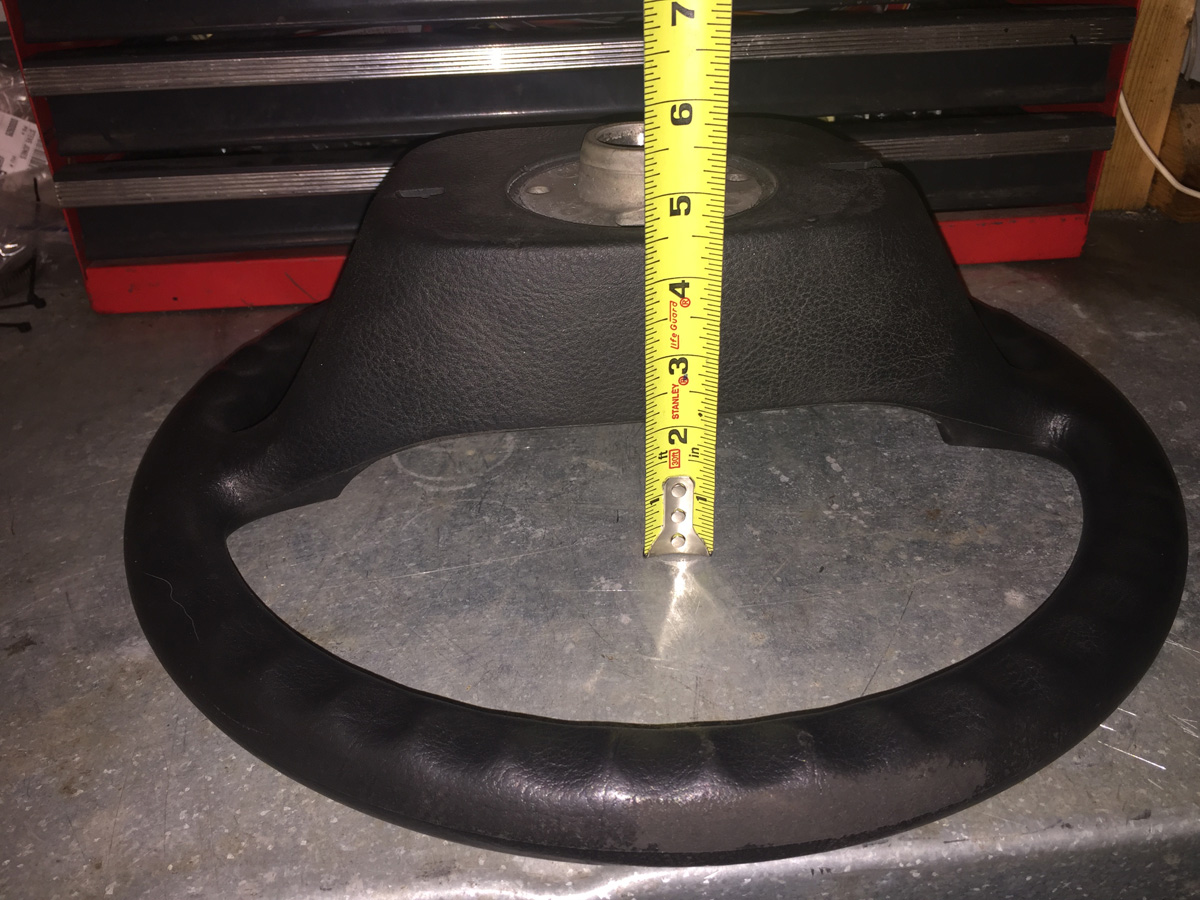
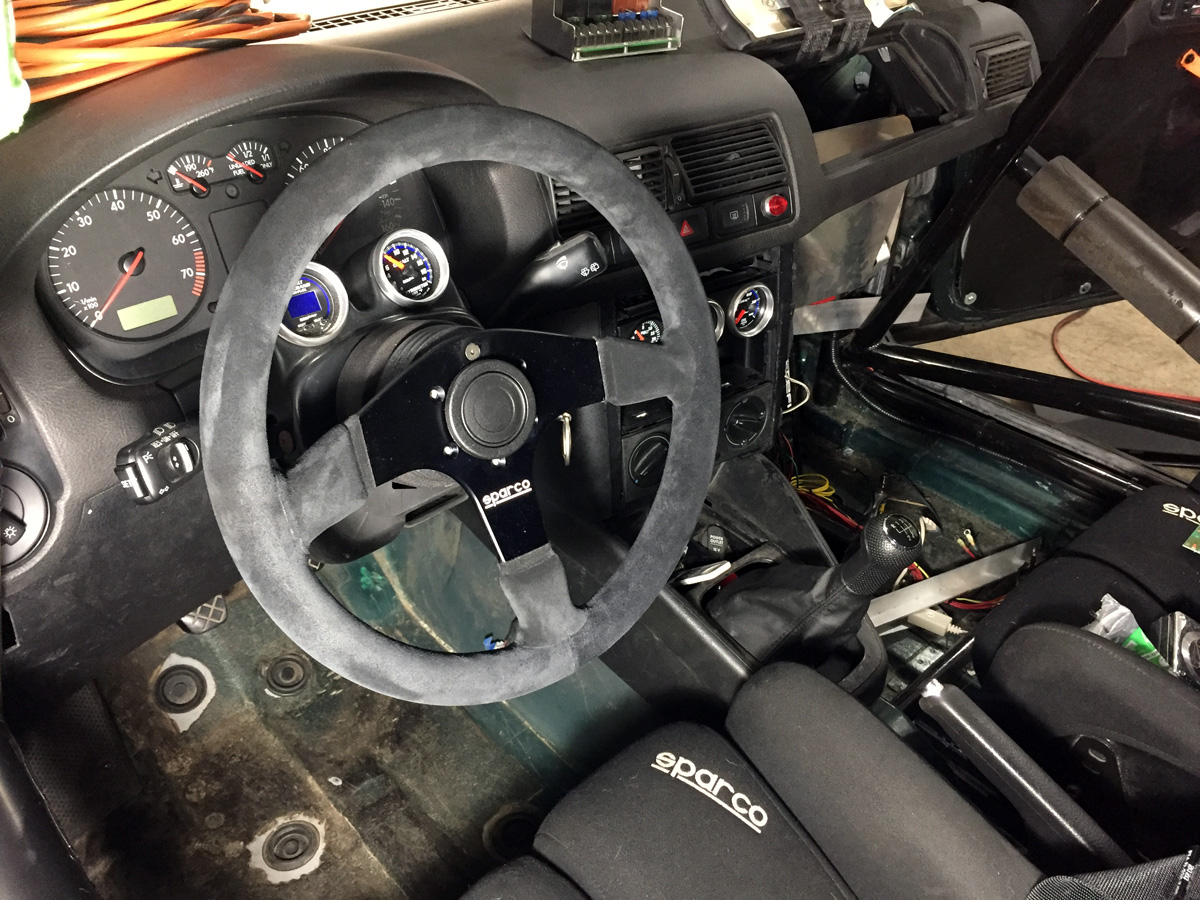
Time to address the steering wheel. Really, there was nothing wrong with the stock wheel as long as I was wearing my gloves. Without my gloves, it was a bit too smooth to ensure positive grip. Also, while it does not have any airbags, dealing with the airbag shell when I want to remove the steering wheel has always been a pain.
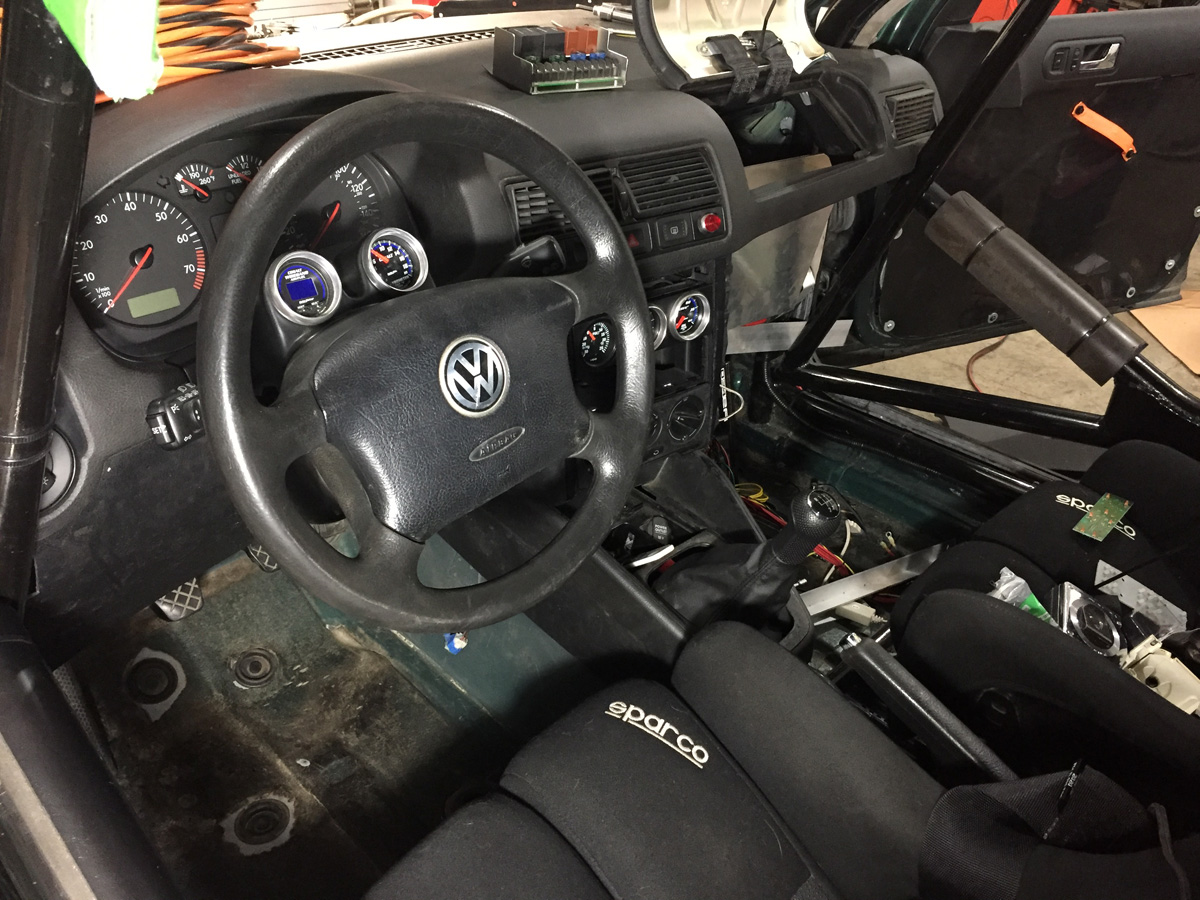
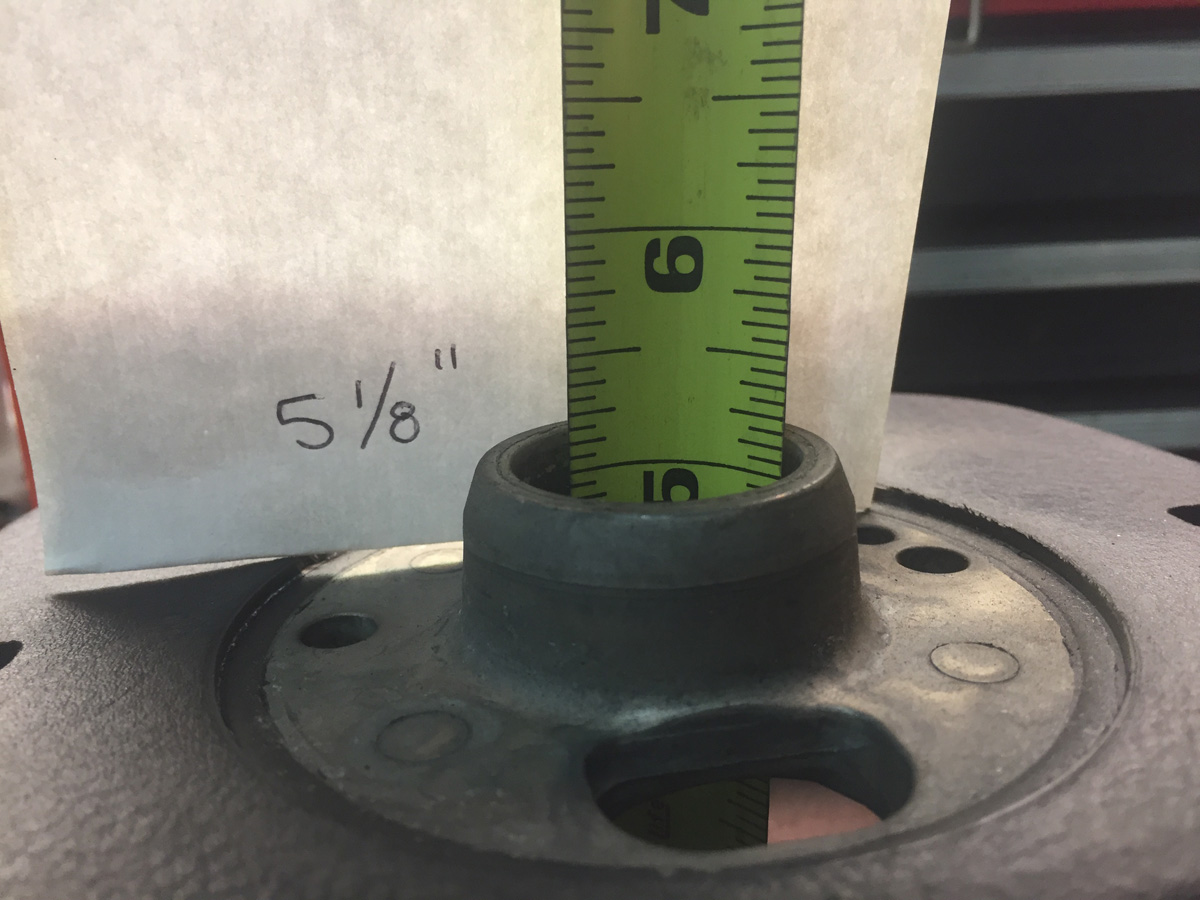
Measured the dish.... 5 1/8"
Sparco R-375 (360 mm diameter, 36mm dish, black suede, anodized black spokes, and 6 bolt mounting). Purchased from [url]http://www.OGRacing.com[/url]
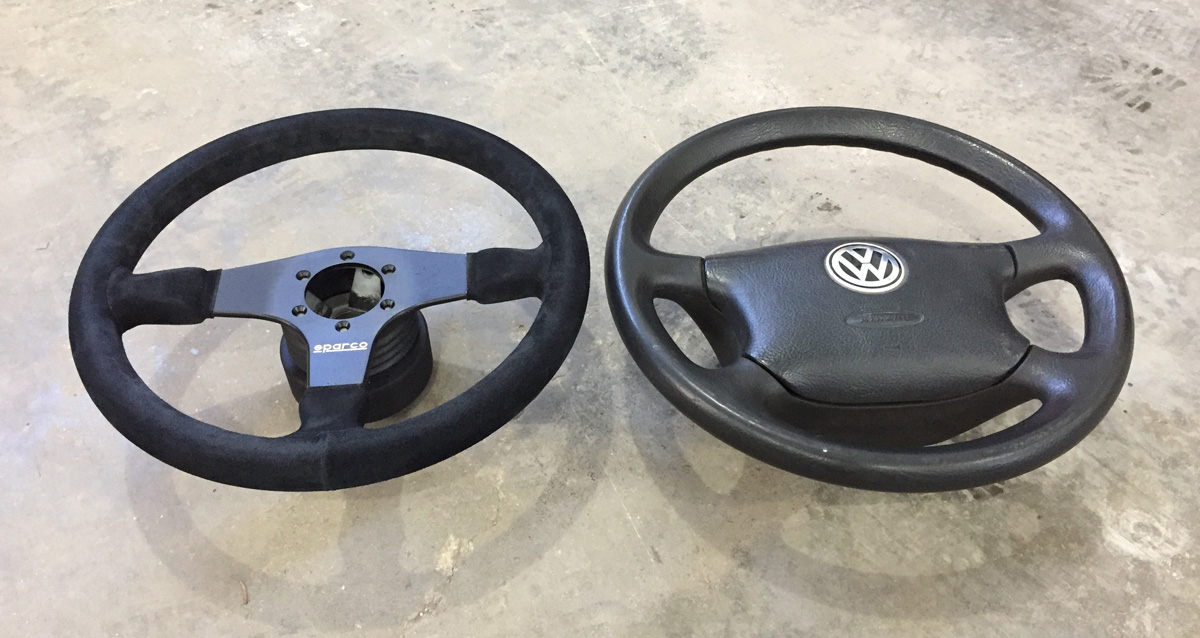
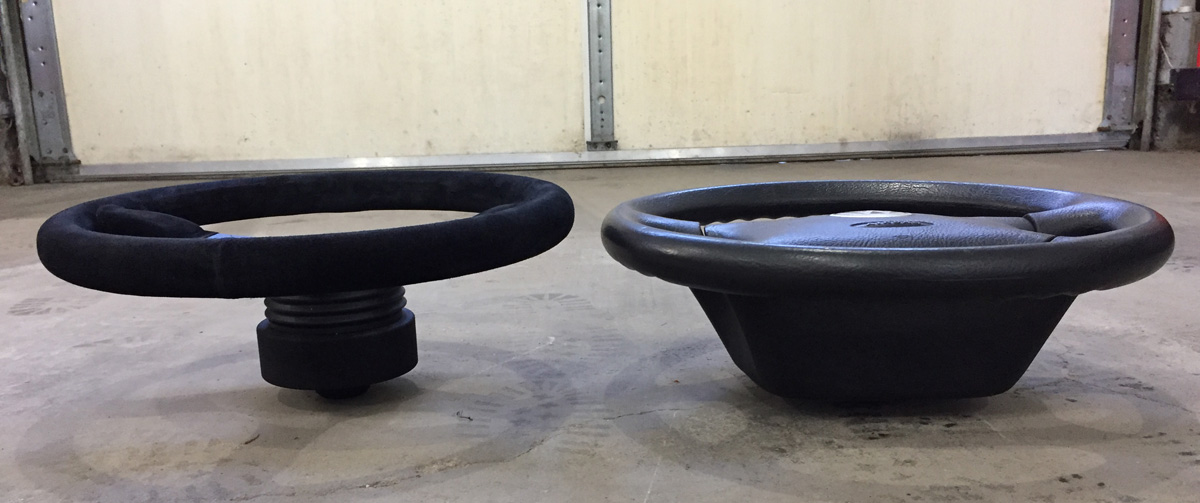
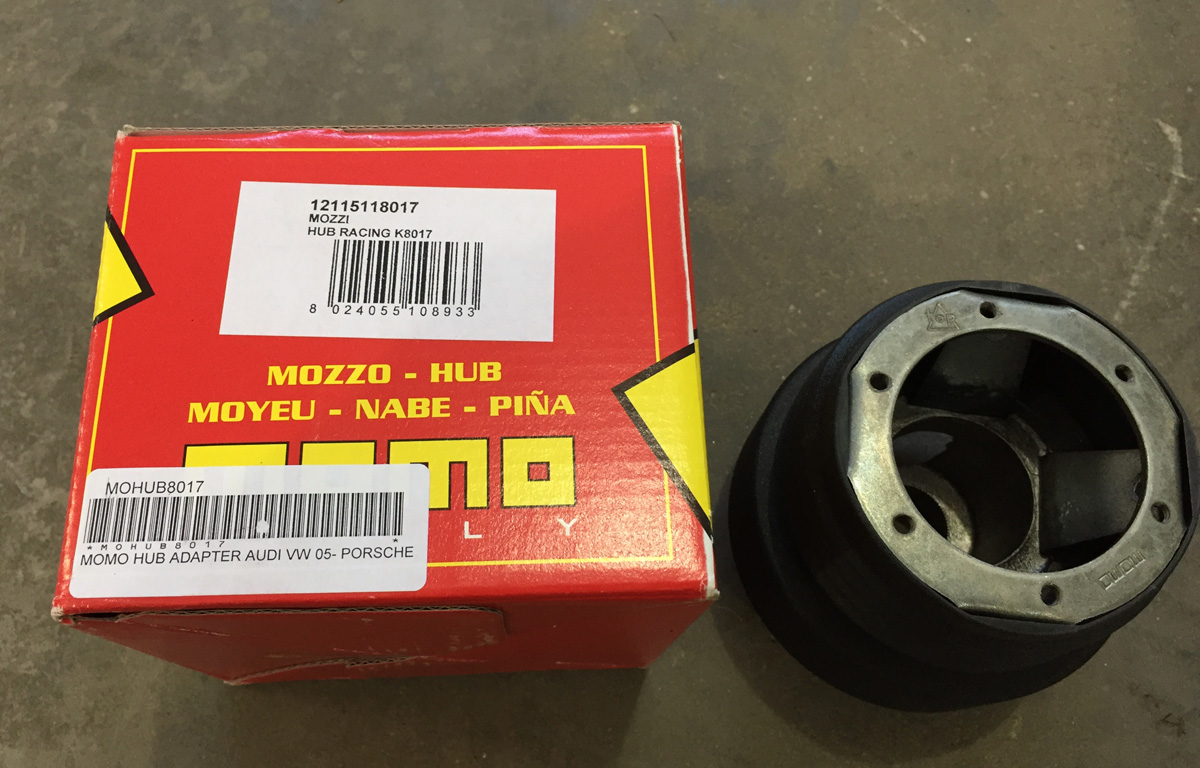
And the Momo (part 8017) 6-bolt mounting hub (adapter for Volkswagen, Audi, and Porsche)
Done... I did not get the quick release as my seats are on sliders.
Now for a lesson in Cause and Effect and the realization that I haven't closed the hood on the car since July 2016 +/-.
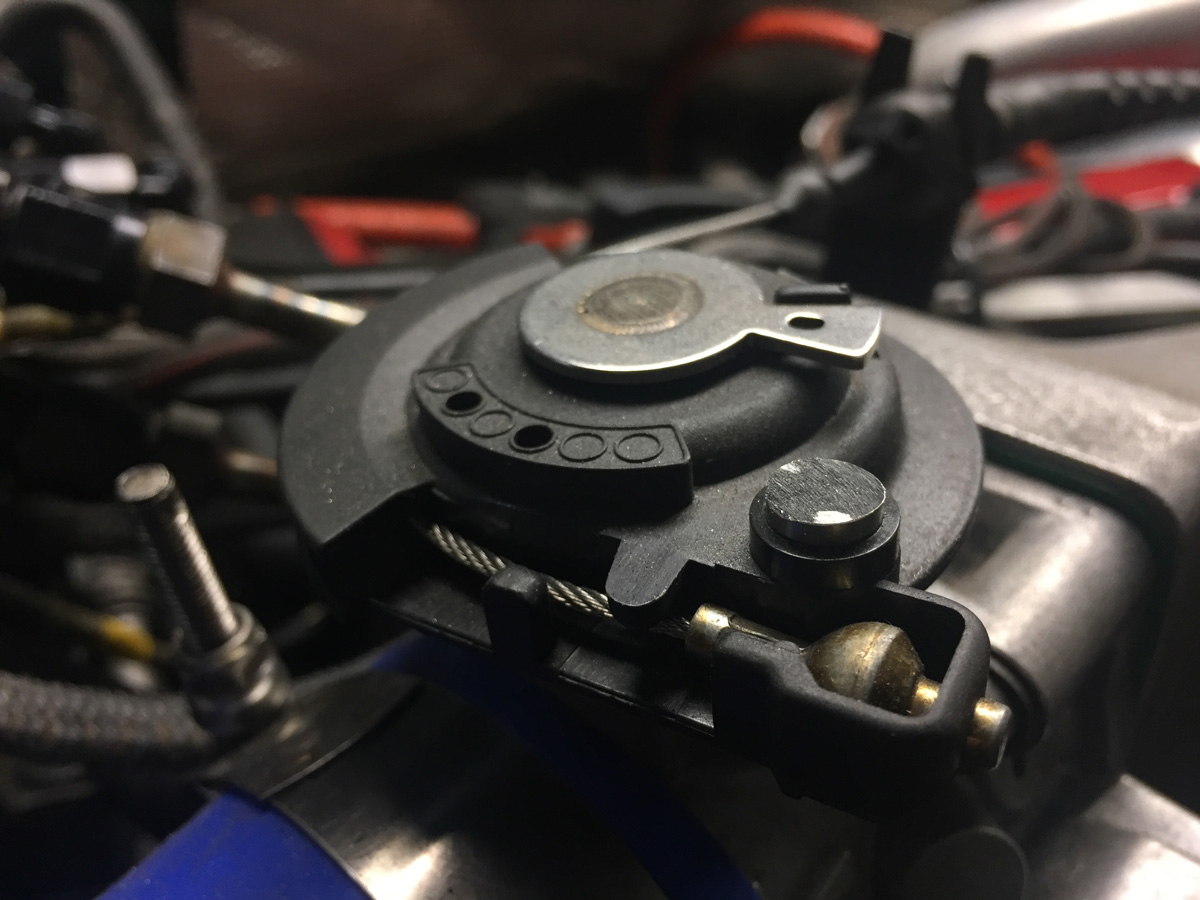
I added the Phenolic spacer to the intake manifold (cause) and now I can't close the hood because the part of the throttle body is hitting the hood. I am guessing the ball mount on the top is related to cruise control... just a guess.
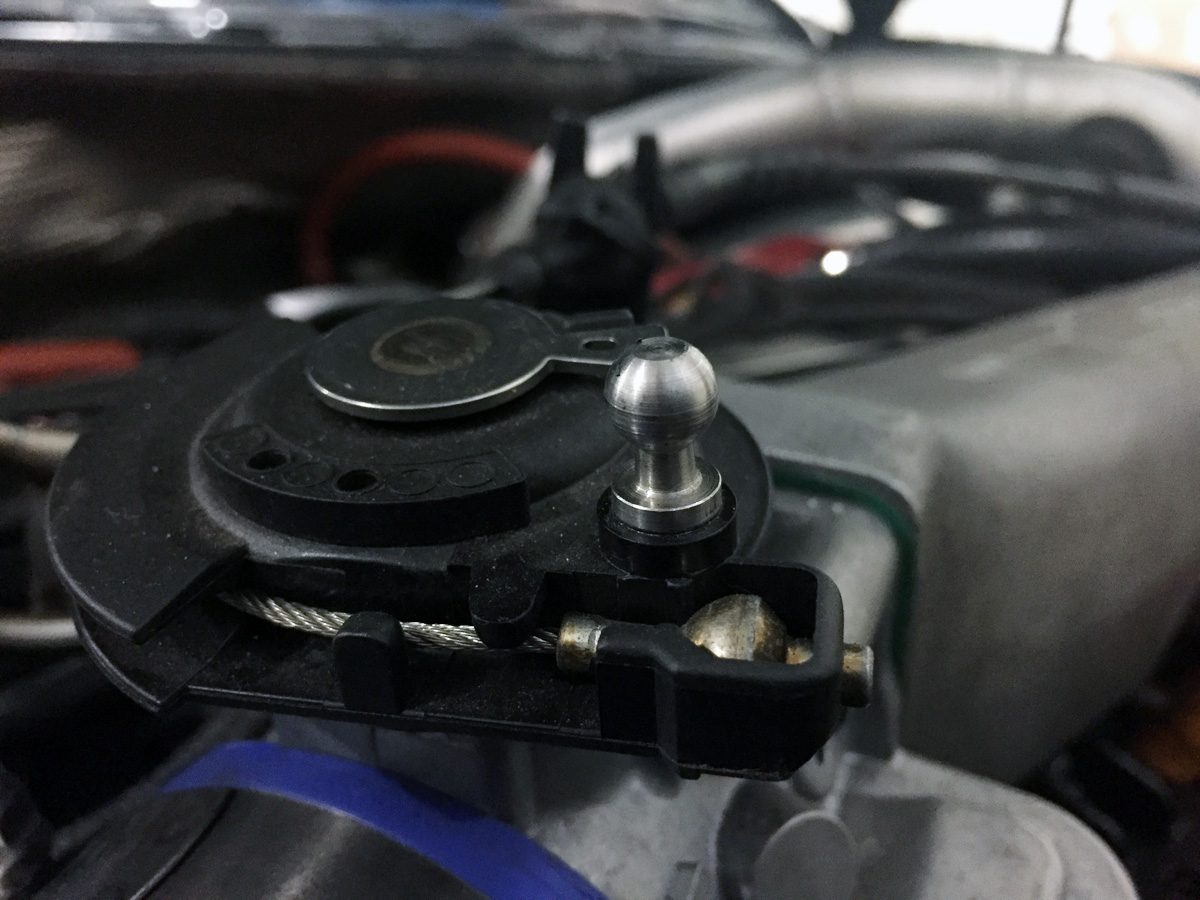
First contact... with the hood
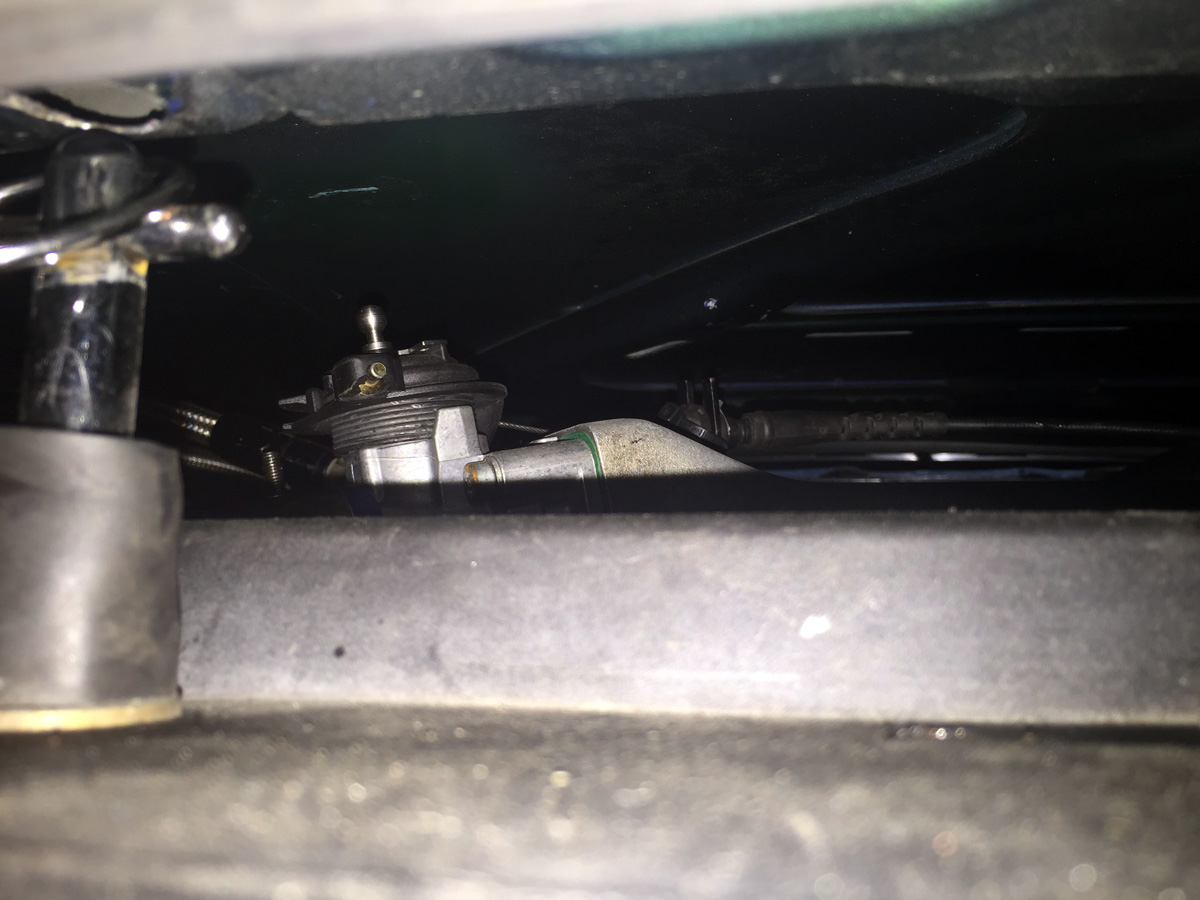
Opps... won't close enough to install the hoodpins.
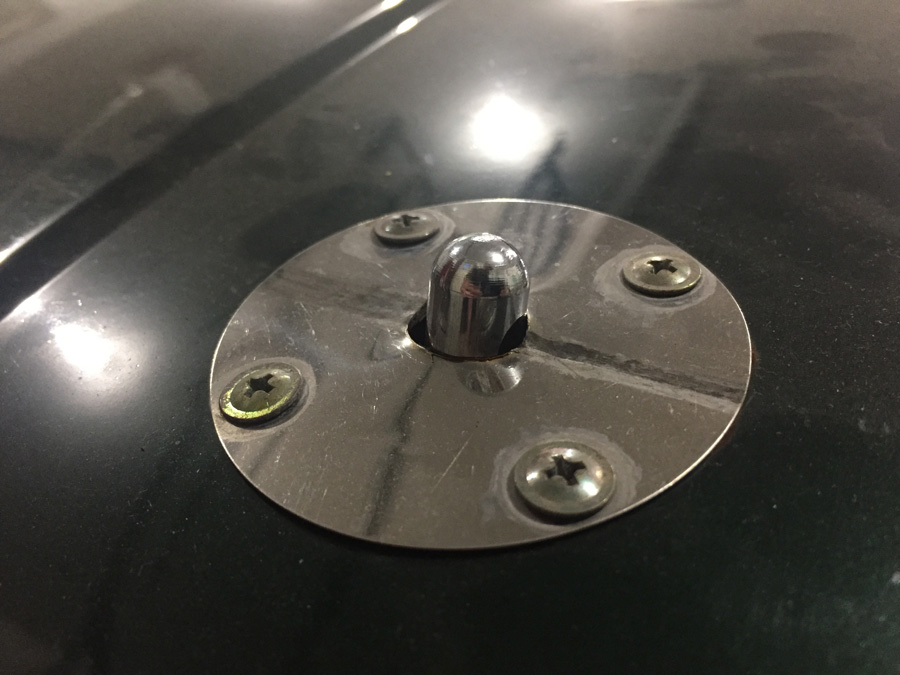
Enter Mr. Dremel. I also adjusted the hoodpins at the same time to ensure the hood was at the same level as the fenders.
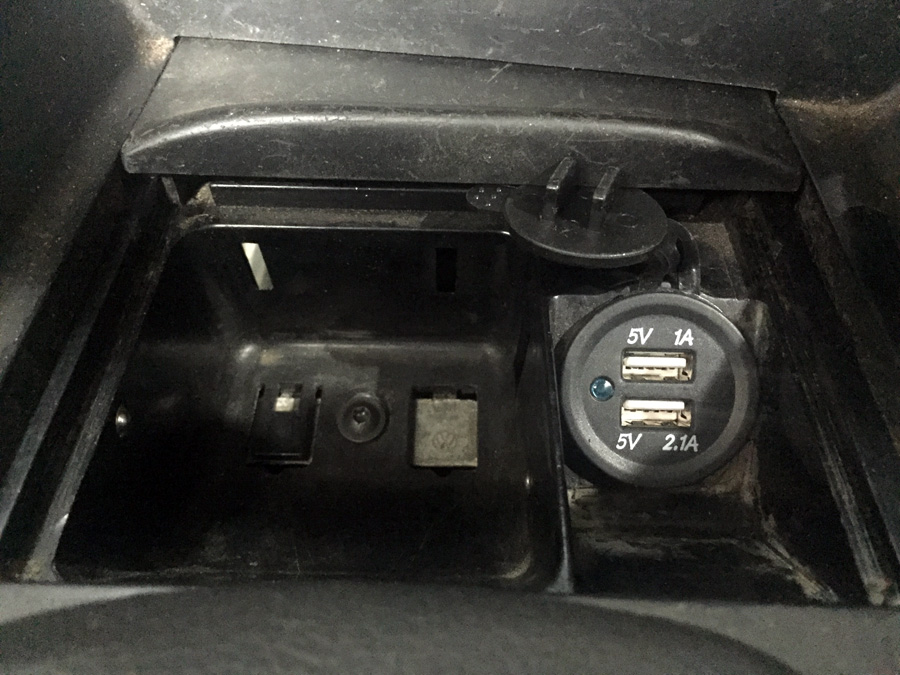
I used the cigarette lighter to charge my phone and camera. Then I came across a USB version that just made sense. I removed the stock lighter (thread body with nut on back), opened up the hole a little bit with the Dremel, and installed the USB ports. Nice.
Now I just need to find the little red coin tray that goes next to it. Somewhere in my garage, I hope.
This was actually the last thing I did to my car (yep, I know there is that whole unexciting "big wiring project" update that is still to come) before it was off to the dyno.
Started and ran great.
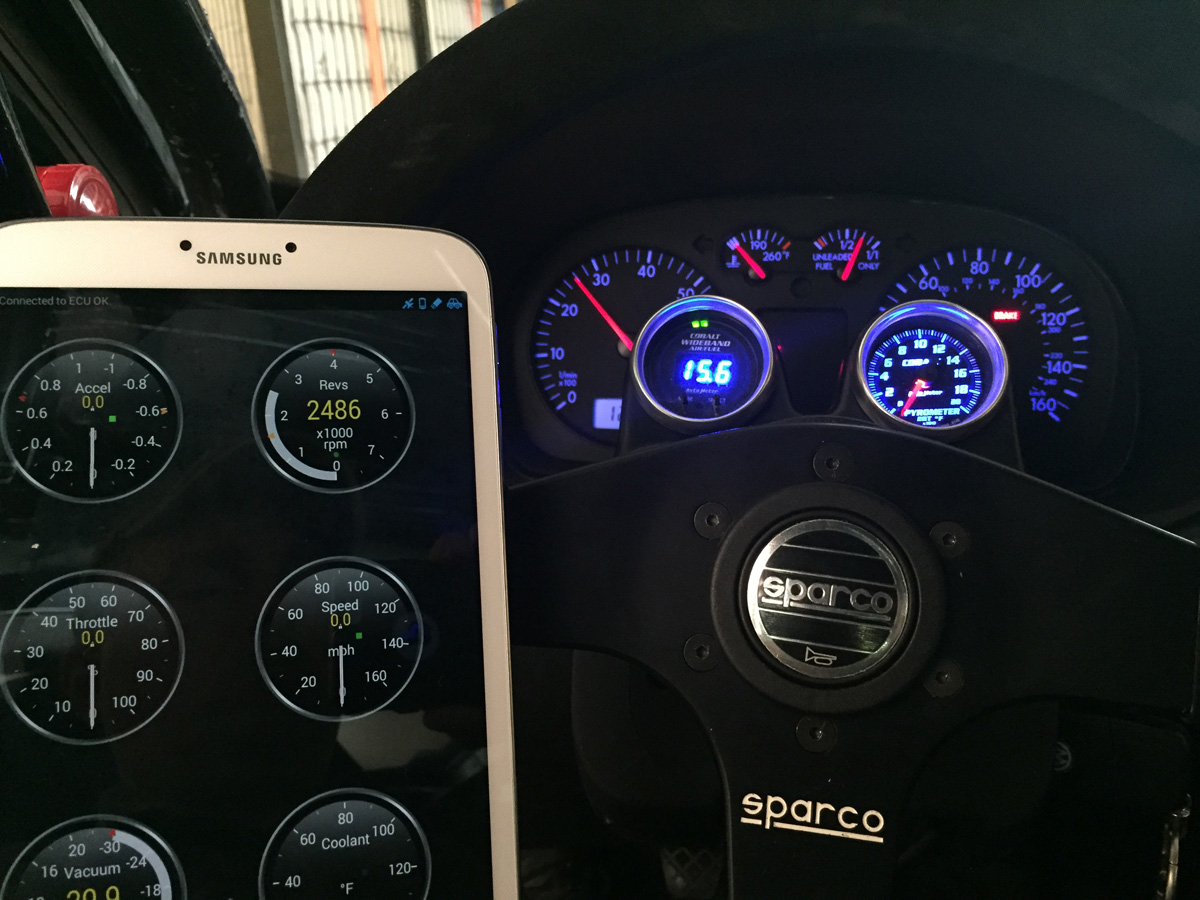
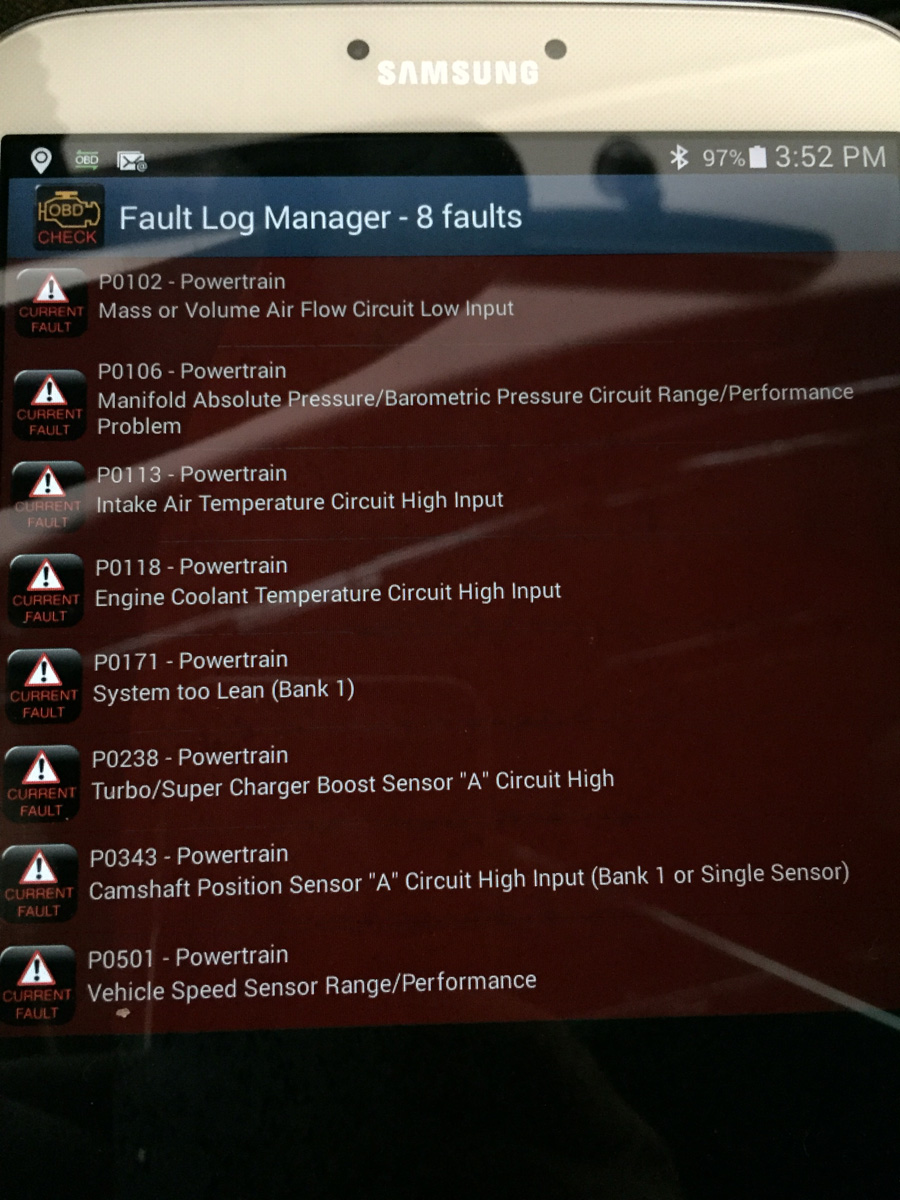
The Brake warning light is blinking and an occasional audible warning. Fluid level is fine. Borrowed a buddy's (Chris / vtgti) OBD2 scanner (Vgate Scan) and tablet to determine what codes the stock ECU could provide... nothing brake related.
Oh well, everything seems to work fine.
Jun 01, 2017
Posting up more recent info in advance to the dreaded "big wiring project" update.
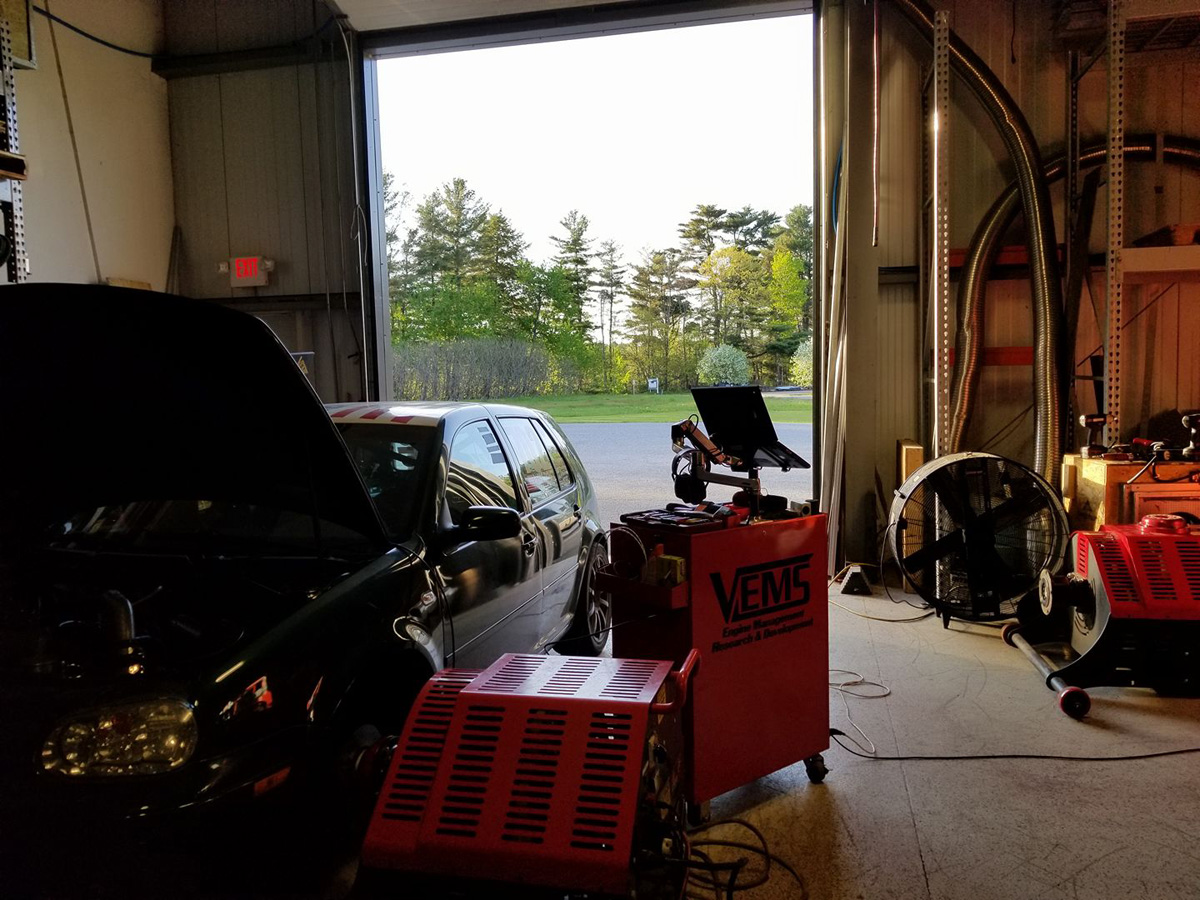
Tuning at http://www.VEMS.us in Colchester, VT... they also just hired someone (Nick) who tunes Subarus!
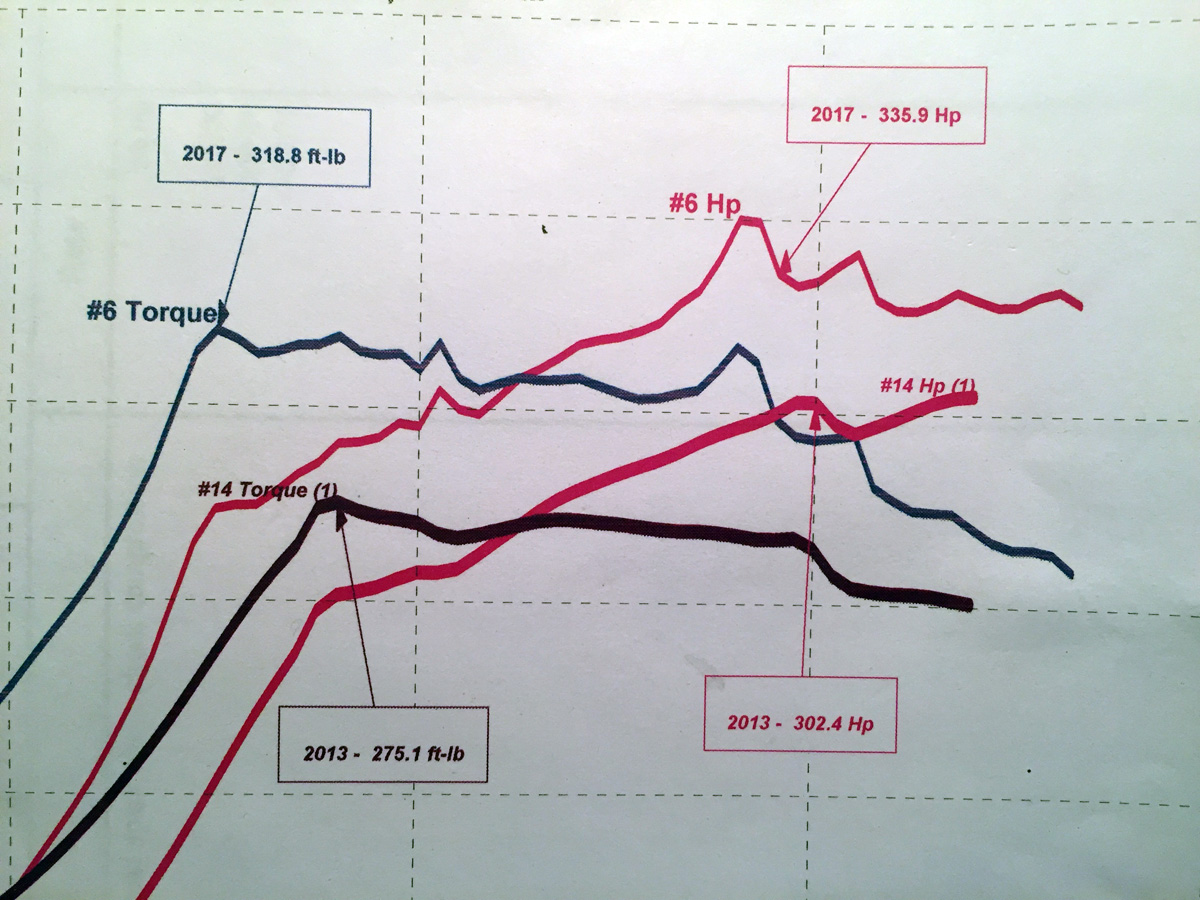
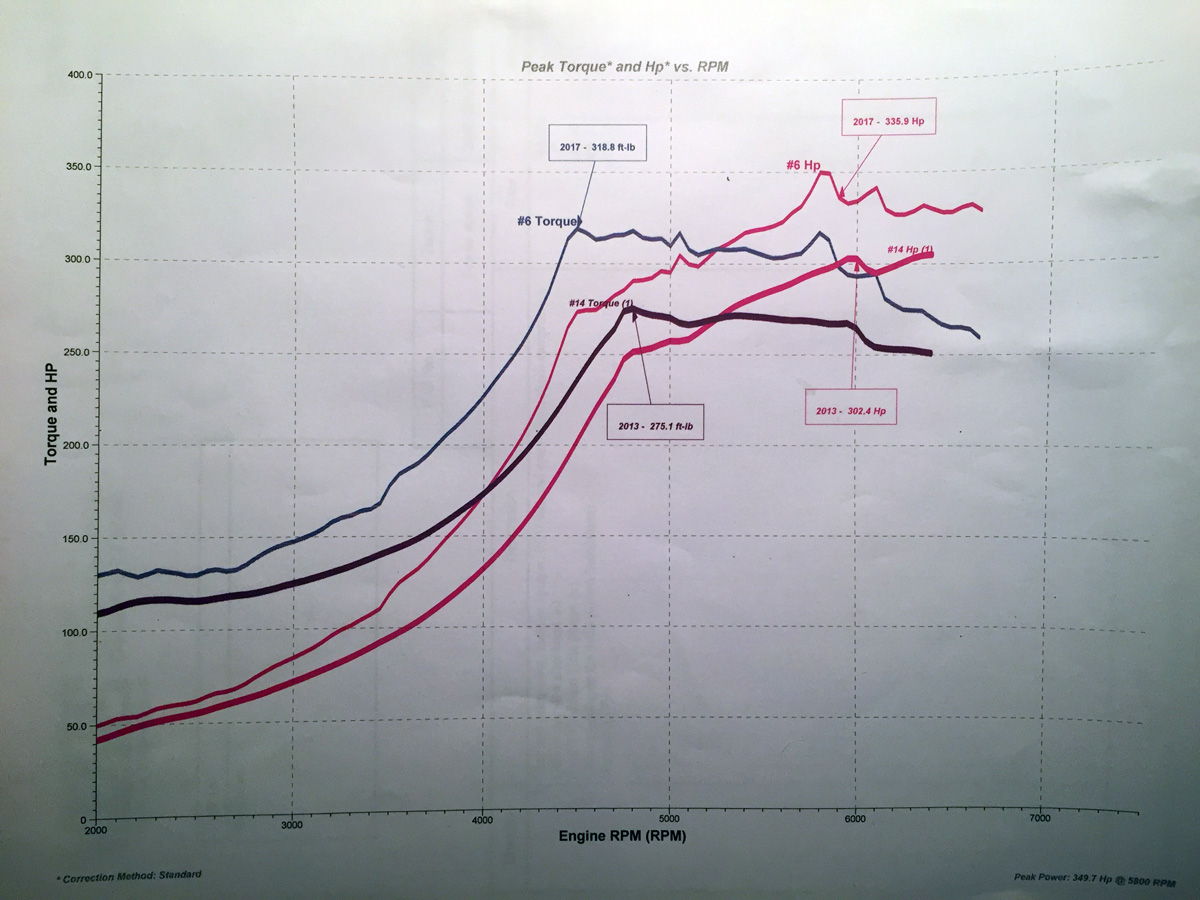
Results: 335.9 wHP and 318.8 wTQ.
My goal was to move the power band down in the RPMs to give me more low end TQ. Surprisingly, it gave me a lot more TQ and HP, lower TQ RPM, and less boost!
From Jason (VEMS):
"The peak torque from before is matched 500 RPM sooner, but still climbs. At 4500 RPM (peak torque) it's almost 100 ft-lb ore than last time.
Now at 16 PSI boost instead of 20 PSI and I did take a bit of timing out of the top end because it didn't affect torque, so power timing is better"
What does this say? More power at the low end, more TQ overall, and a great tuner that is paying attention to things to ensure a good and safe tune. And he is local!
(the little spike to 350 wHP is due to the RPM pickup on the dyno)
First event of the year is at the SLMP track in New York; had a great time in the Subaru WRX, but it rained all weekend.
First hillclimb of the year is the New England Hillclimb Association (NEHA) Mt. Ascutney hillclimb sponsored by the Sports Car Club of New Hampshire.
Had a great time and the weather was great.
Make sure you select 1080 HD for video quality.
http://www.youtube.com/watch?v=nvHdF7Mf8fs
Here is a side by side from Ascutney #1 in 2016 (top) and 2017 (bottom)
(Top) 2016 2:56.10 | 302.4 wHP and 275.1 wTQ
(Bottom) 2017 2:57.79 | 335.9 wHP and 318.8 wTQ
Runs seem pretty much the same. A little slower in 2017, but many factors can play into the time difference, so I would call them pretty much the same. I think Okemo (more of a power hill) will show the difference in TQ in HP much better than the bumpy Ascutney.
Jun 03, 2017
Trying something new.
I sent the broken axle (broke half way up the Ascutney hillclimb.... kinda in the straight) back to DriveShaft Shop (DSS). The outer CV join on the passenger axle broke.... it always seems to be this axle and this CV.
I am waiting to hear back from DSS.
In the meantime, since I have heard a lot of success stories with Raxle, I contacted them via e-mail.
Immediate response via e-mail that prompted a little back and forth conversation with Marty... the person from the e-mail... asking me to give him a call so that we could discuss options.
First, I have to say I really enjoyed talking with Marty. Down to earth.
After discussing my challenges with axles, the hills, the bumps, the power.... I ordered a set of race Raxles from Marty.
What does Raxles have to offer:
I haven't tested them yet, but based on our conversation, a superior axle
Great customer service based on my experience
Race axles (as opposed to their street axles) guaranteed for life (I pay shipping both ways) even with racing! (big selling point.... Marty said he hopes he never hears from me)
Based on personality and customer service, I highly recommend Raxle.
Now, the major decision point will be how they hold up with racing on the rough roads where lifting a tire, under power, in a corner is very common.
We will see.
And... I spoke with him late this afternoon and already have a UPS tracking number, which means they are on their way. Sweet!
Jun 05, 2017
And another "Plan B"
I was having issues with the Tirerack.com website (would not process the order, regardless of the browser or computer I was on) both yesterday and today.
Did a search for Toyo R888R tires and Phil's Tire Service in New York came up: http://www.philstireservice.com
Prices were pretty close if not better (I was unsure what the shipping price was on TireRack due to issues).
Ordered a set of 235-40-17 Toyo R888R tires. Note, there is an extra "R" at the end as these are different from the normal R888 tires that I run. Better dry traction... unsure what that means for wet traction.
We will see.
Steve
Jun 08, 2017
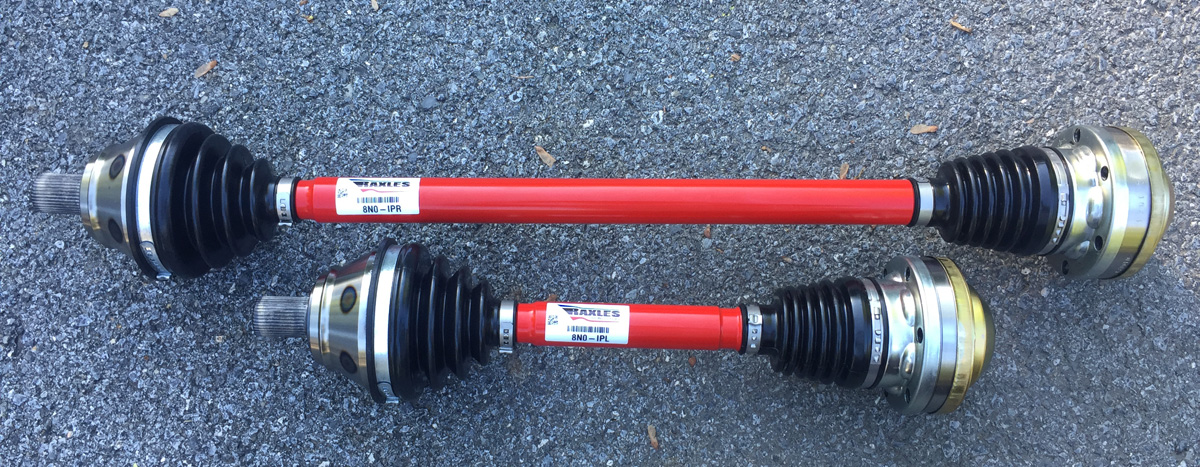
I keep breaking the passenger side axles.... I believe this is because it is longer and there is more leverage applied to the outer joint (the part that keeps breaking).
Why don't I fix the problem to remove the longer axle from the equation. Good idea.
Epiphany!
My plan was to get into the Scirocco right after the Mount Washington Hillclimb in July.
But, it might be time to jump into it now as the Scirocco has an intermediate shaft setup so that the axles on the car are equal length.
I figure this is something that I could copy for the Golf.
Hmmmm......
But, in the meantime, while the DriveShaft Shop (DSS) axle is back with DSS for repair, I looked at other axle options.
Naturally, I ended up on Raxles website (http://www.raxles.com/) and had a conversation with Marty to hammer out what I needed.
The axles arrived yesterday.
I was very impressed with the boxes and overall packaging. Yep, seems immaterial as the quality of the axles is all that truly matters, but it was definitely bonus points.
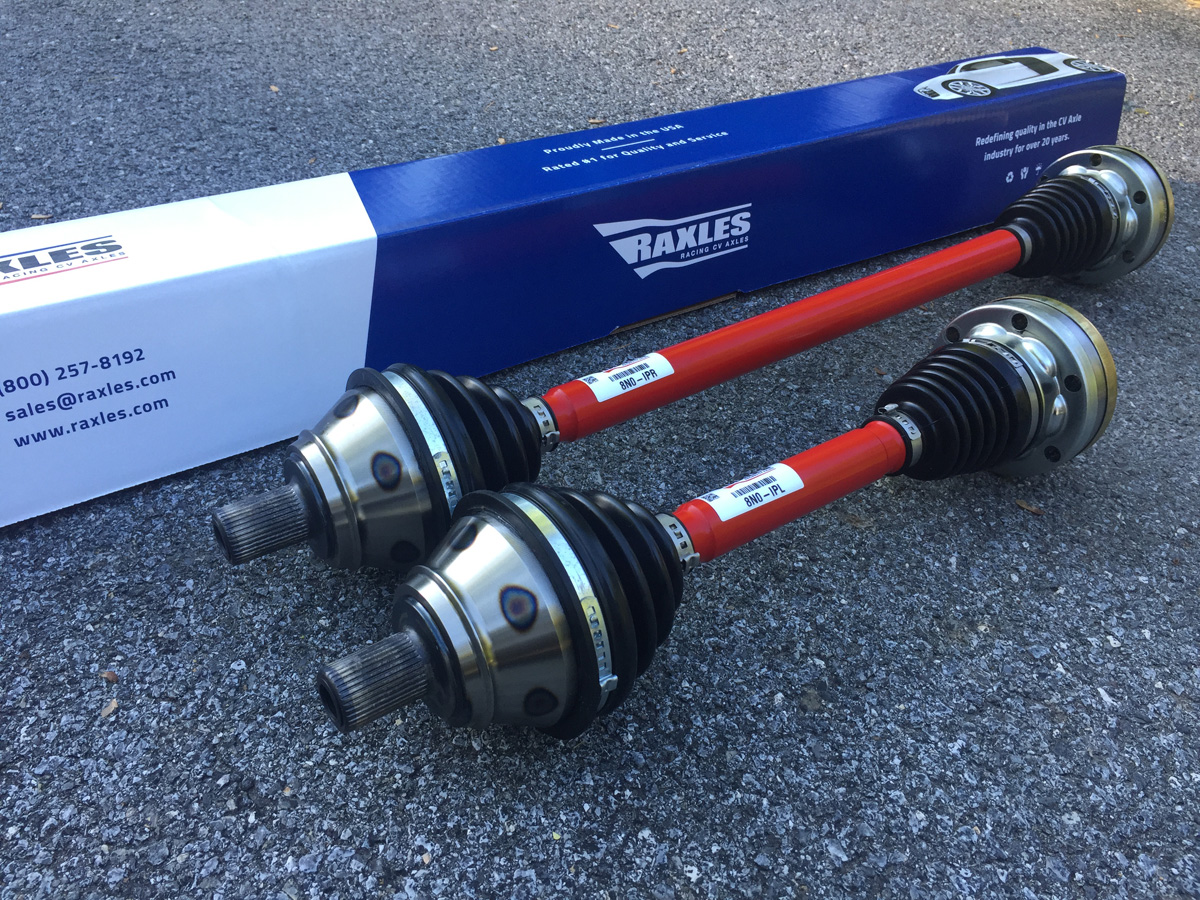
The axles seem very solid and well constructed.
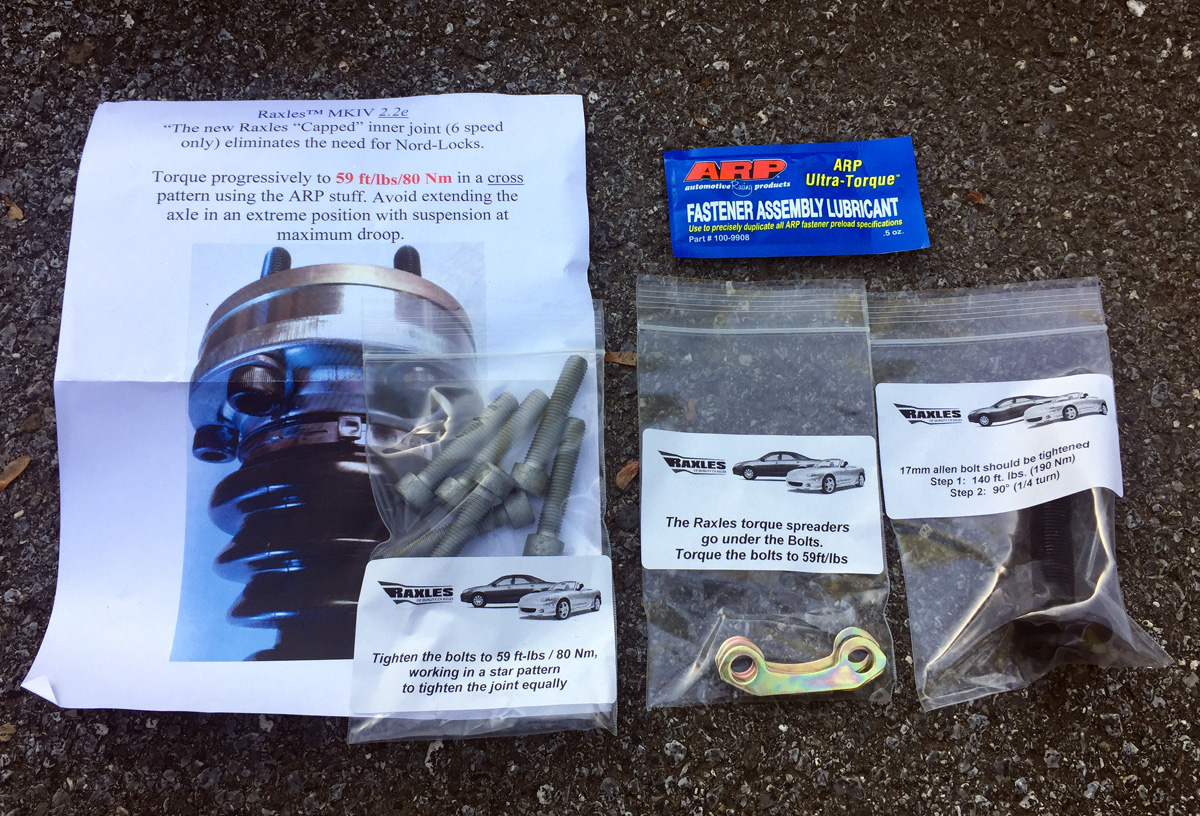
All new hardware with idiot proof instructions. Bonus!
Jun 26, 2017
Okemo hillclimb was a lot of fun.
We had some technical issues on Saturday morning (a perfect storm) where everyone came together to find a solution. Great event!
Because Okemo (very fast hill) is the event prior to the Subaru Mt. Washington Hillclimb on July 7-9, 2017 (aka "Climb to the Clouds"), I decided to put the car in the trailer after two runs on Sunday to make sure I did not do anything stupid.
There is a bit more time in the car... apparent because I noticed many places where I could have driven soooo much better. Wished there was an Undo button on the dash to redo the previous corner. Oh, well, next year.
My top speed in the straight was 113 mph on Sunday. I think my speed was 118 mph in the past (if memory serves), but I am sure it is slower because of the smaller hot side turbo. It was not from lack of trying.
Video from Okemo... New GoPro5. Used the GPS to map the track, get speed (wasn't close after check 7, but dead on in straight per the radar gun), and used the GoPro "Quik" editor. Simple, but clunky, and I am unsure if I can add any photos, etc. for intro screen. Still learning how to use it.
Recorded at 1080 dpi and 120 fps. Doesn't "wow" me on the quality on my computer, but it might be excellent on the TV. I might have to reduce the fps to get some of the detail for the fast sections.
Frustrated with the phone interface so far... was able to connect at home, but after I powered it off using the app, I could not connect again. Menu is a bit clunky for using WIFI. Could be simpler.
I'm sure my lack of experience with the new camera played into it also. I will find an expert (my lovely wife Julie) to figure it all out for me.
Video will be available soon... it is taking a while to upload and process. Youtube tells me it will be available here:
http://www.youtube.com/watch?v=s0I_I-Ml_1E
A friend of mine in Canada (Ralph) drew the Rabbit Farmer Racing image for me. I added the text to the wheel to personalize it a bit. A Youtube video crash course on how to use Adobe Illustrator was in order. I got through it... looking forward to the other toys in AI. I am very familiar with the basics of Photoshop, so this is a very different world.
I have ordered a bunch of these shirts (long and short) in pink (for the wife), dark green (color of the car) and black (just because).

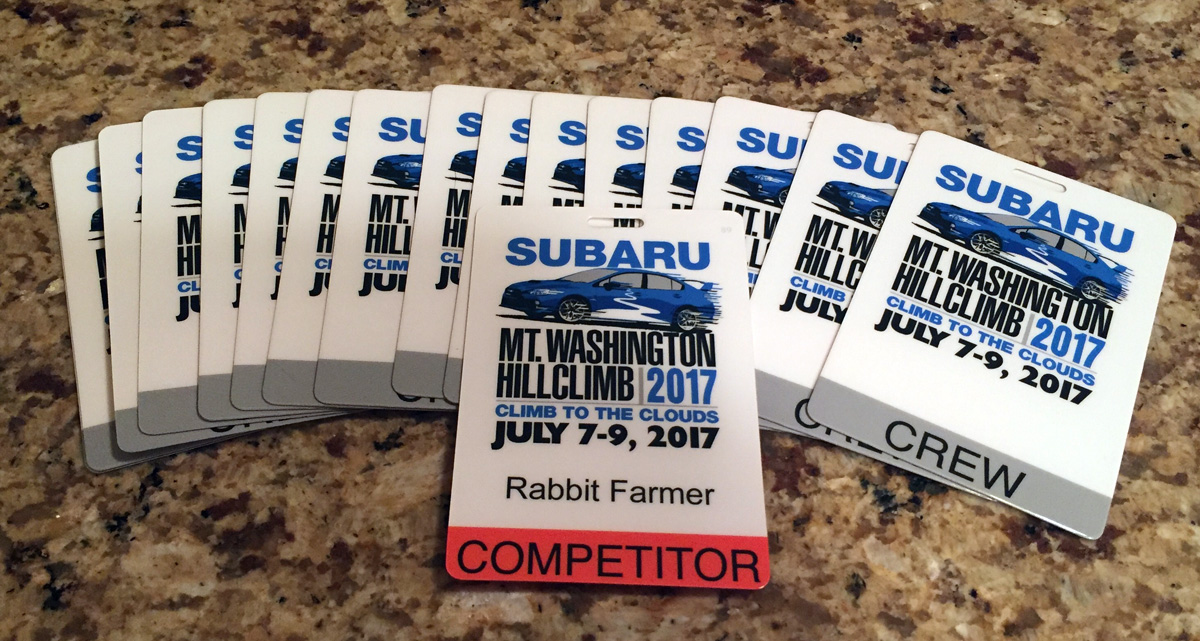
Coming soon... actually, next week, Climb to the Clouds. The official credentials arrived. Good thing they spelled my name correctly. ;)
Jul 13, 2017
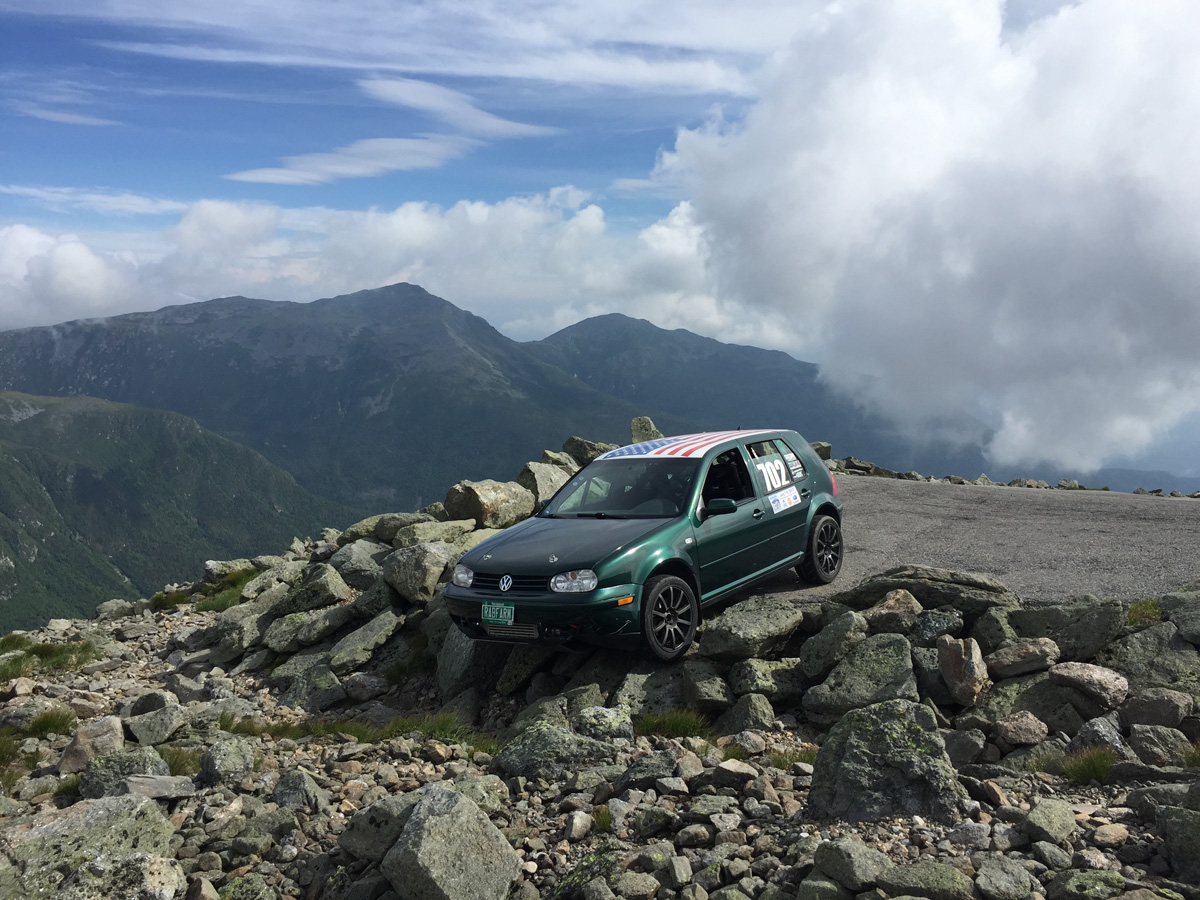
So.... this was Friday at Mt Washington.
Saturday and Sunday went a lot better.
Photos and videos coming soon.
Feb 23, 2018
Well... it has been a crazy summer.
After Mt. Washington there wasn't much to post. There was nothing to fix on the car as it ran great all year.
With the mishap at Mt. Washington, and the issues of connecting to it with my phone since day one (grrrrrr!), I did not use the new GoPro5 much the rest of the season. I need to send it back for replacement (has a 2 year "return even if you intentionally mess it up" plan). Some pictures, some video, but nothing you haven't seen before.
Backing up a little to the preparation for the season, one thing we did notice was a loose ball joint or tie rod end.... ended up being the tie rod. Chris Cheeseman of Cheese Factory had the time to fix the car with my compressed/rushed schedule trying to get the car ready. I trust this man with my cars!
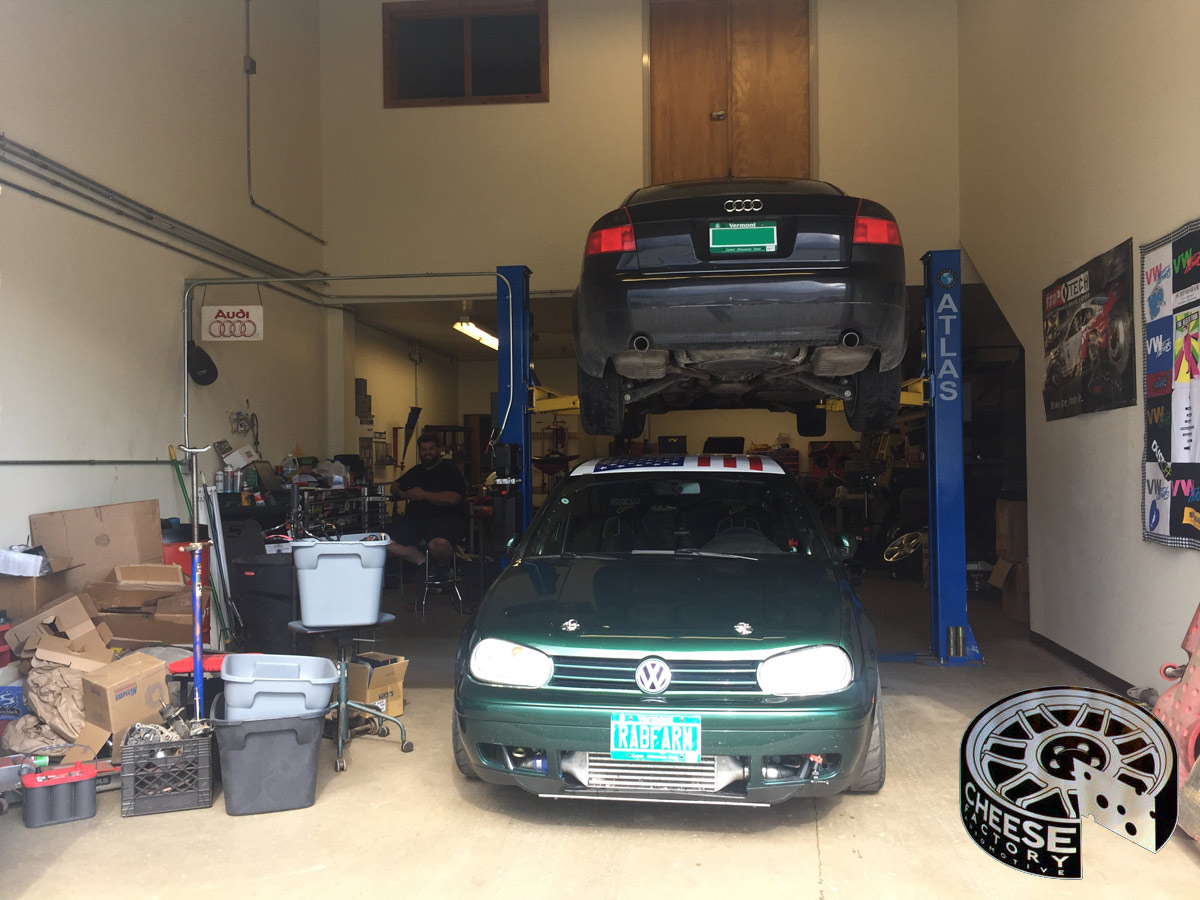
Car was aligned the next day with a shop down the road.
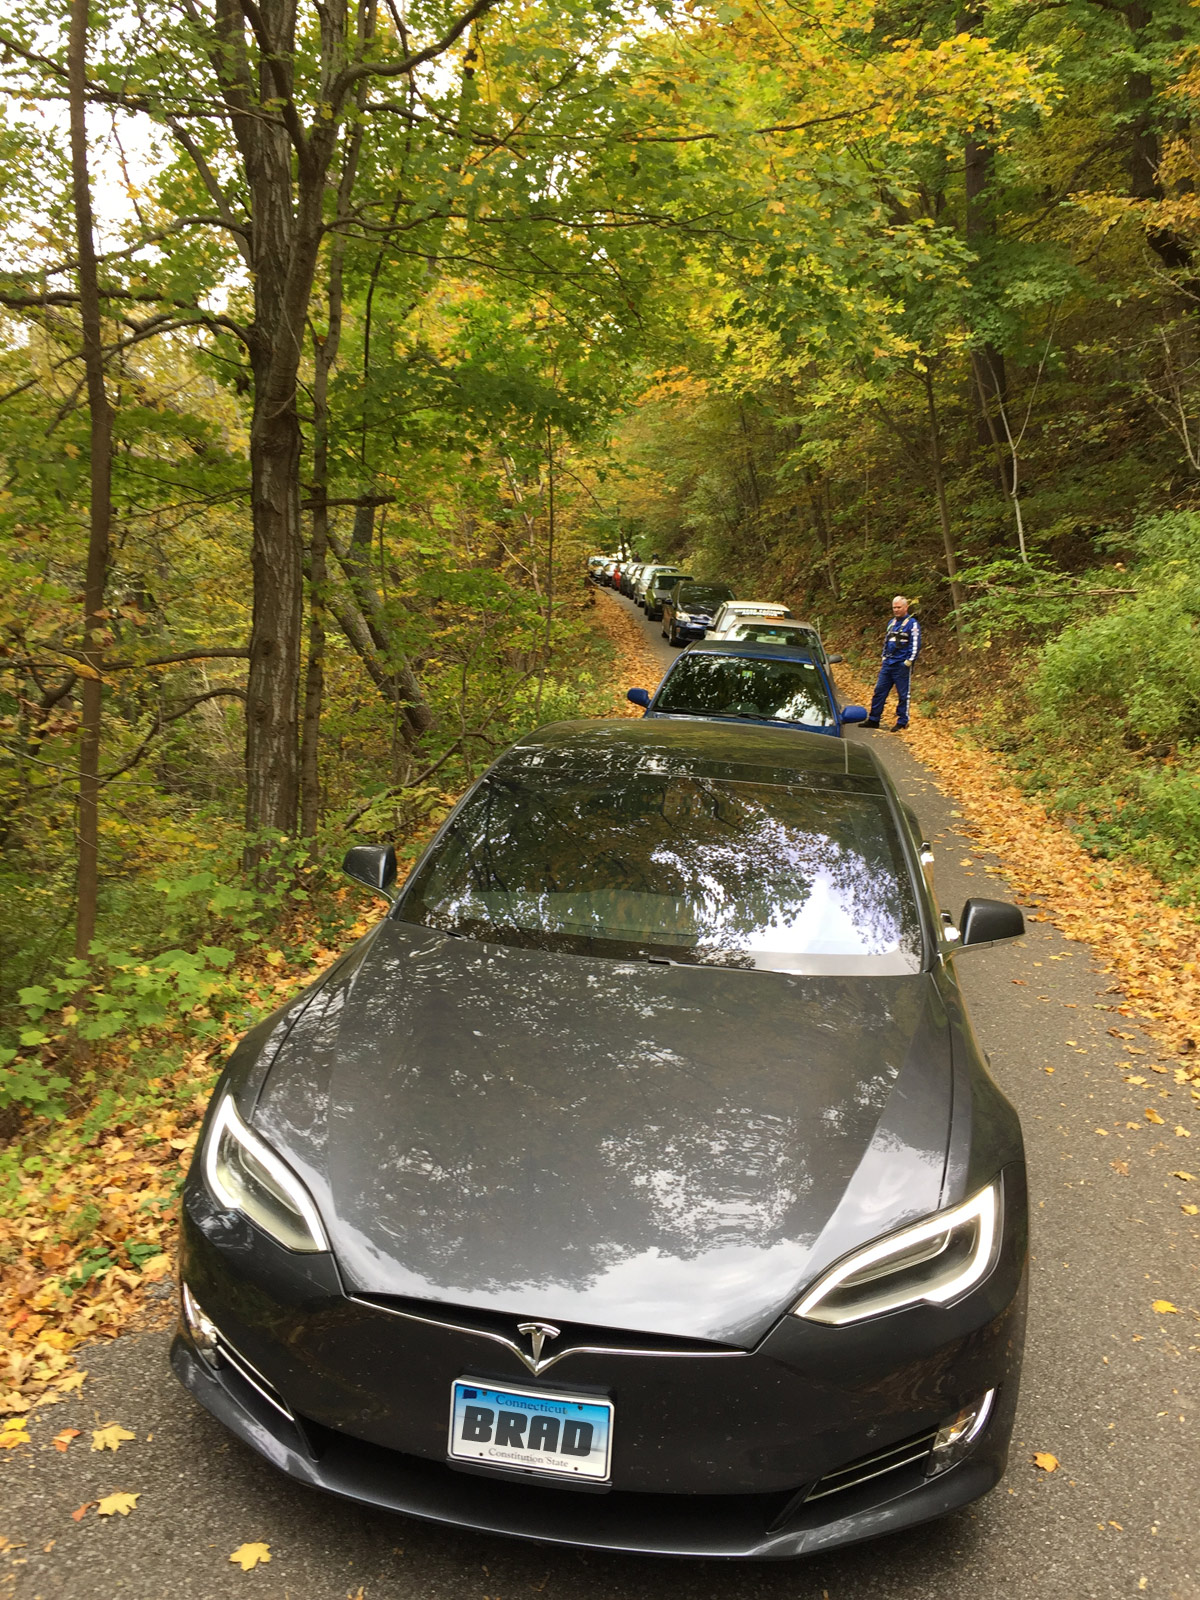
Highlight for me was at the historic Mt. Philo Hillclimb… passenger in a brand new Tesla Model “S” P100D driven at (almost) speed. Holy #$%@#$^ acceleration Batman! It was a rocket! First full electric car (I believe) at a New England Hillclimb Association event. Sweet!
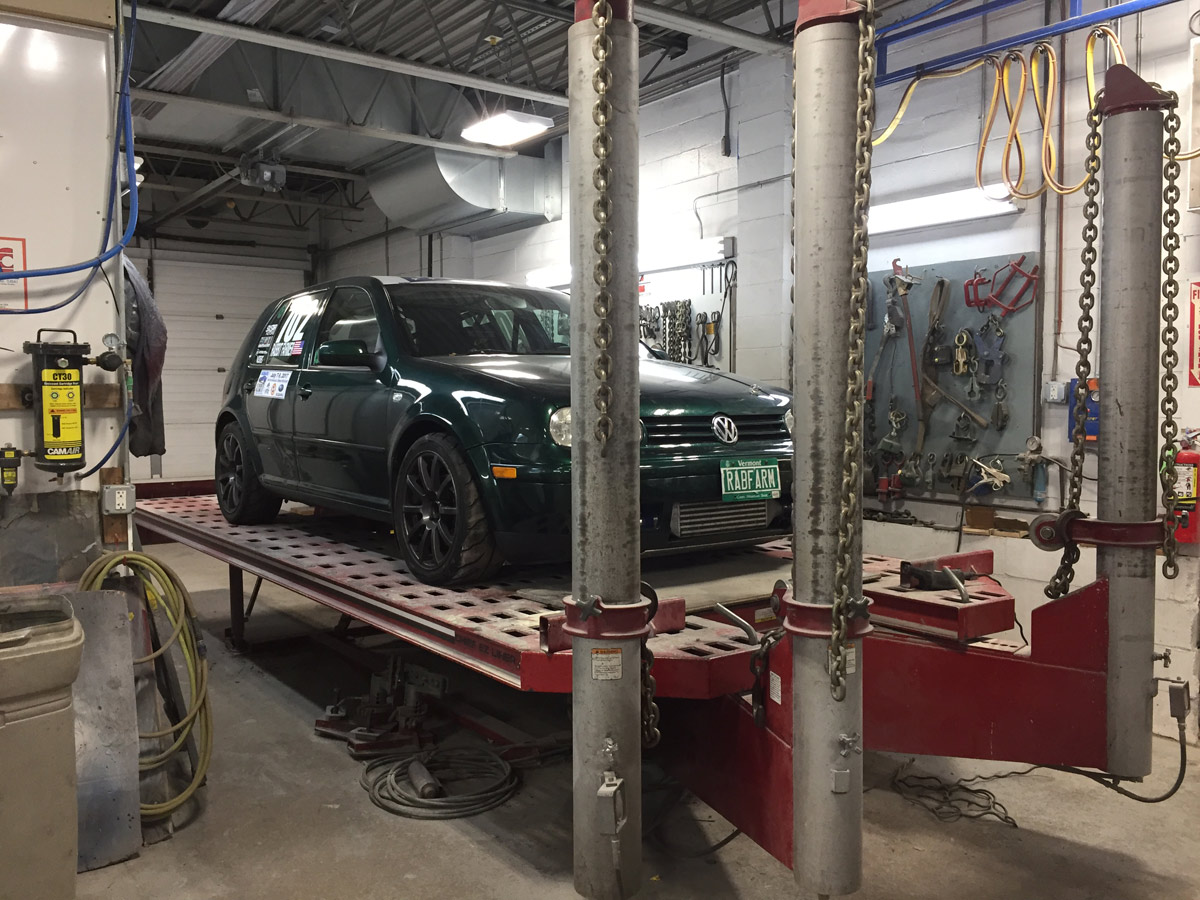
Winding down after a fun and successful season. Decided that a good friend of mine (Kyle) could take a look at the Golf to see if there were any major issues caused from the little excursion at Mt Washington. All fixed (need an alignment). There were still some issues with the car from the 2010 Ascutney incident that were not addressed (because we did not have a good frame machine).
Then the summer got really busy as we packed up and moved across town. No time for cars or play. Winter rolled around.
The Volvo looking good with some snow fog over Lake Champlain.

Now that it is almost March, it is time to retrieve the Scirocco (don’t get excited) from the storage facility where we stored during the transition to the new house.
I’m going to just start building the engine for the little MK1…. At least I can get that done so that the car is mobile.
Looking forward to the 2018 season.
Oh… Here is the video from the 2017 Mt. Washington hillclimb. At the end I included the “incident” and some pictures of it stuck on the rocks. Enjoy.
(it will be a while until it is posted as we are on really really really really really sloooooooowwwwwww DSL instead of our very very very fast Cable we had at the old house)
Youtube tells me the link will be here:
Is there a way to make the embedded videos a lot smaller? About 12" across on my screen.... 5" would be better.
Apr 18, 2018
I had a coupon or gift card... something that effectively made this (nearly) free.
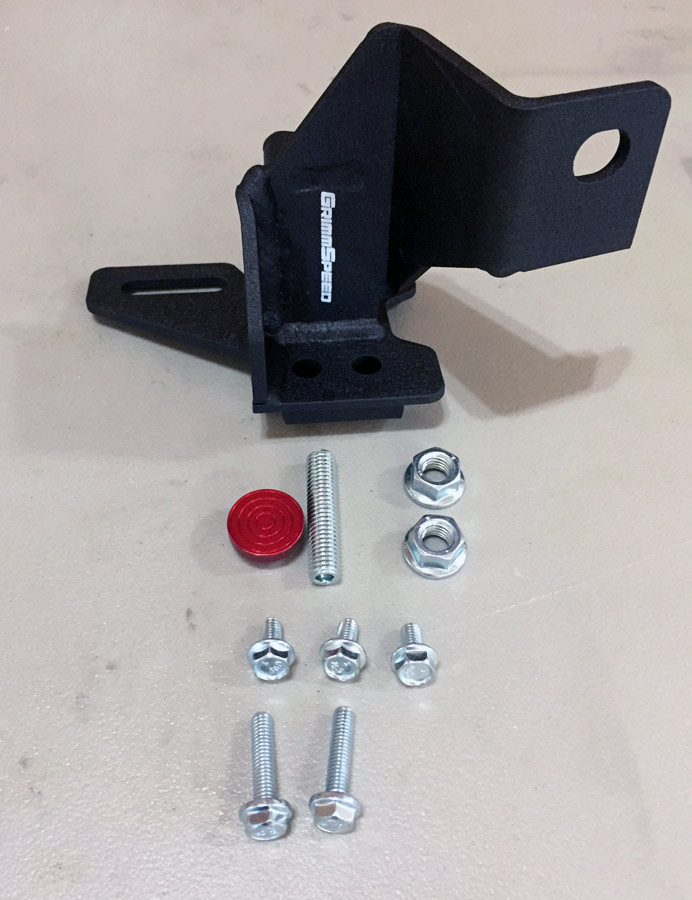
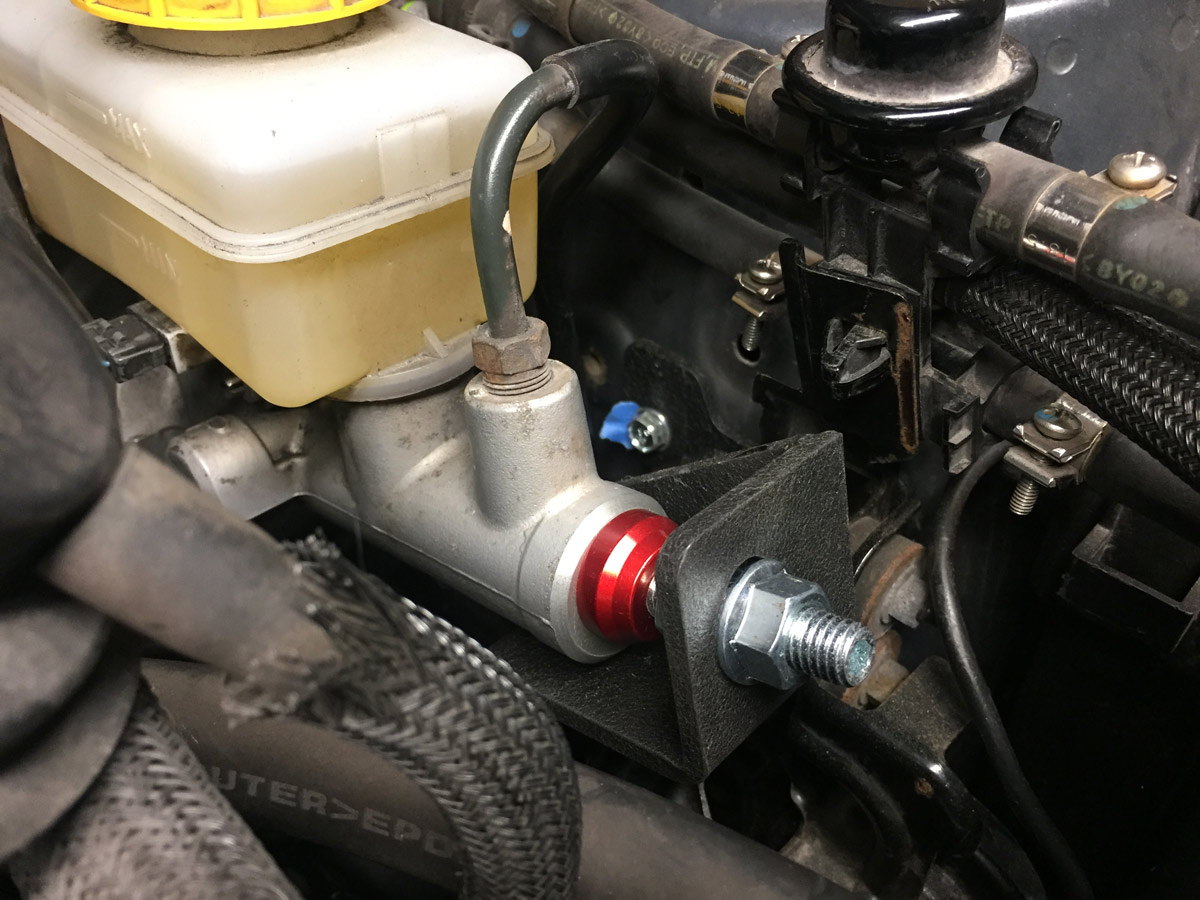
This is the GrimmSpeed "Master Cylinder Brace" that is supposed to firm up the brake pedal as this brace prevents the master cylinder from moving (firewall flex).
The website states that this will make the pedal feel firmer just like SS brake lines would do... but I already have SS brake lines, so I wasn't sure if there would be a huge difference.
It wasn't too difficult to install, but I was having some challenges because I could not quite visualize the end game... how it should look when installed. I am told this should be a 15 minute job (seems it should take longer since I had to chase some holes, remove some stuff, switch some things around, and have a beer). Just saying...
The Kit...
Installed...
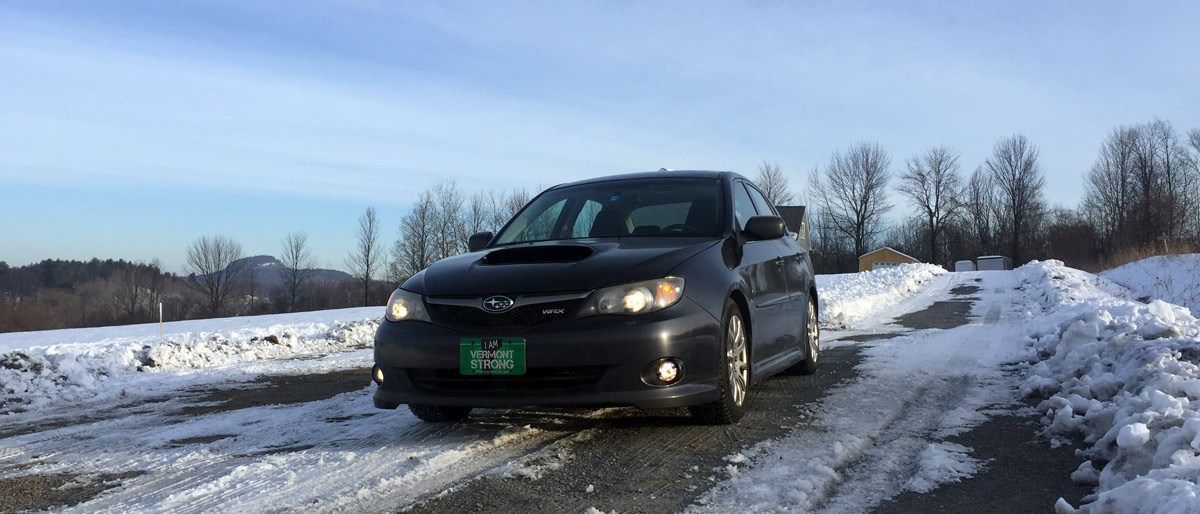
The car... just begging for its gun metal stock rims with summer (not all season) tires.
Now, let’s get to the good stuff.
Steel bottom oil pan, Raxles axles, and removing the steering lock on the Golf
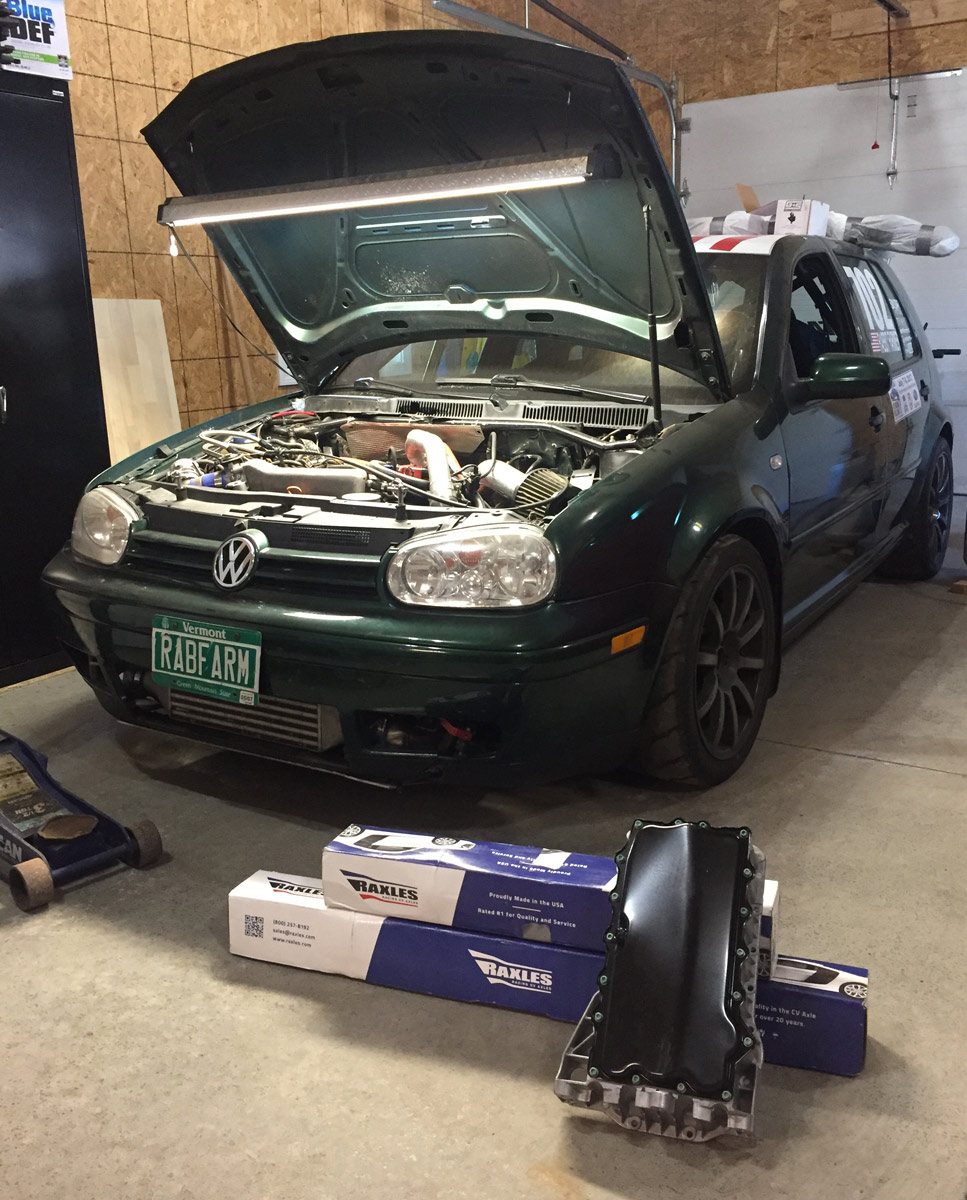
The steel bottom pan is called a hybrid pan. Whatever…. It isn’t all aluminum and it is shorter. It seems to make up for oil volume in the width (front to back) of the bottom of the pan.
Naturally, with the shorter pan, it came with a slightly shorter oil pick up tube.
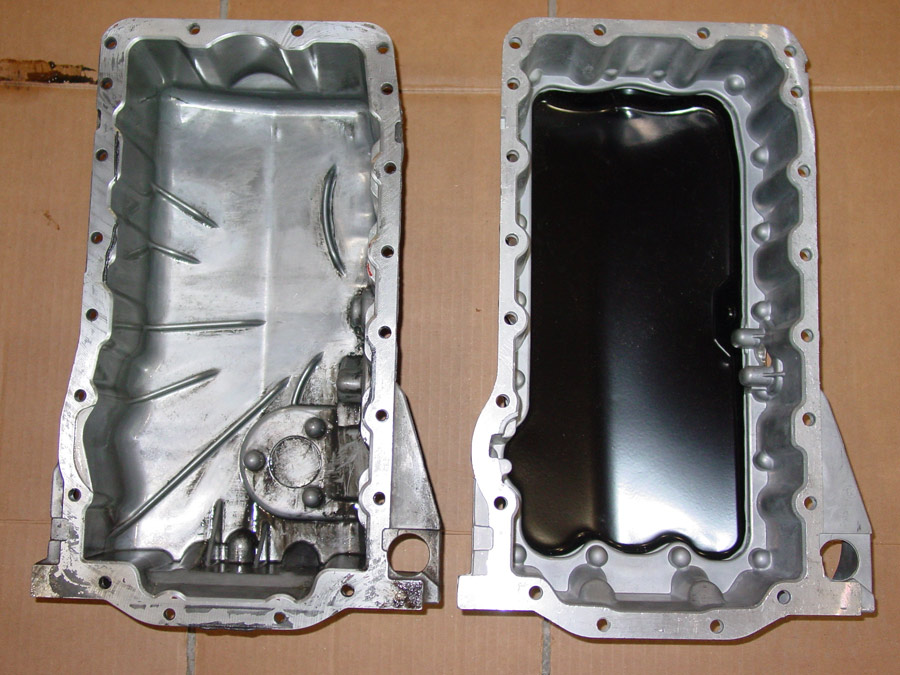
The gray stuff on the old pan is JB Weld that I used to seal a hairline crack for the last hillclimb (Philo) of the 2017 hillclimb season. This is the reason I was replacing the pan.
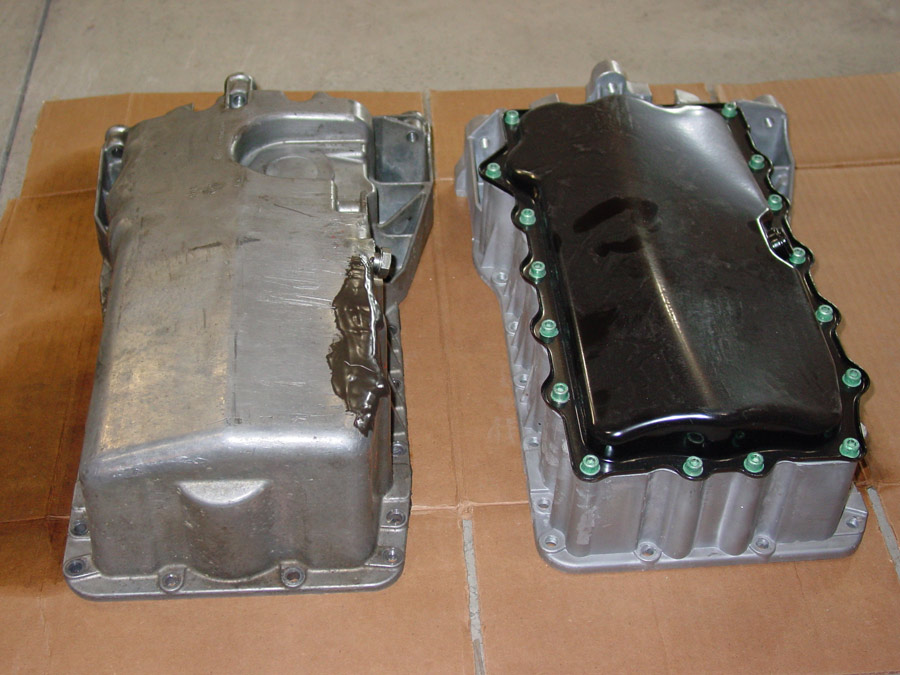
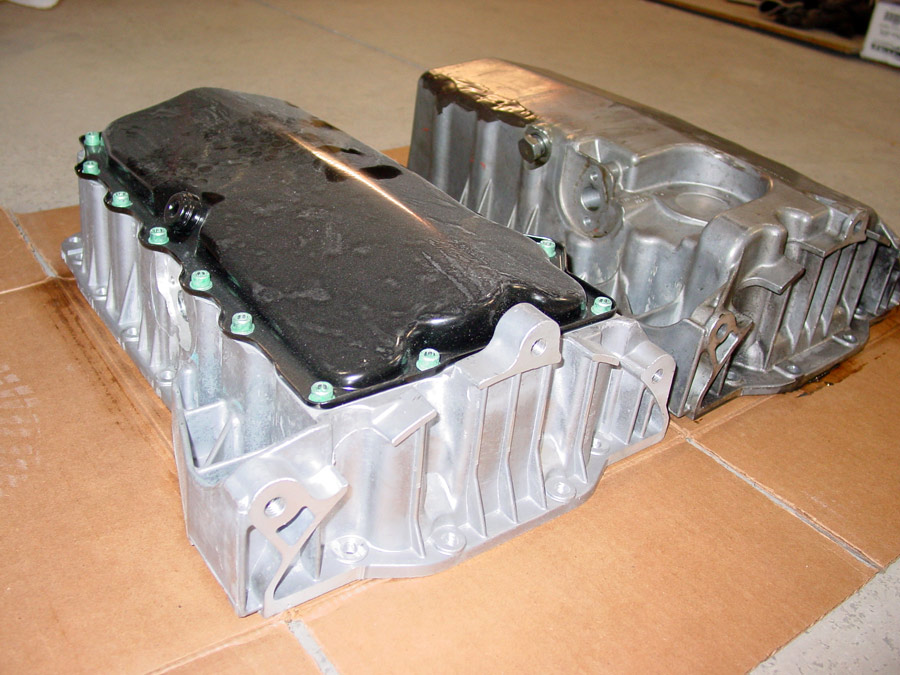
Next…. Some Raxles axles. I spoke about them earlier. Very pleased with everything so far. The 2018 hillclimb season with be the ultimate test.
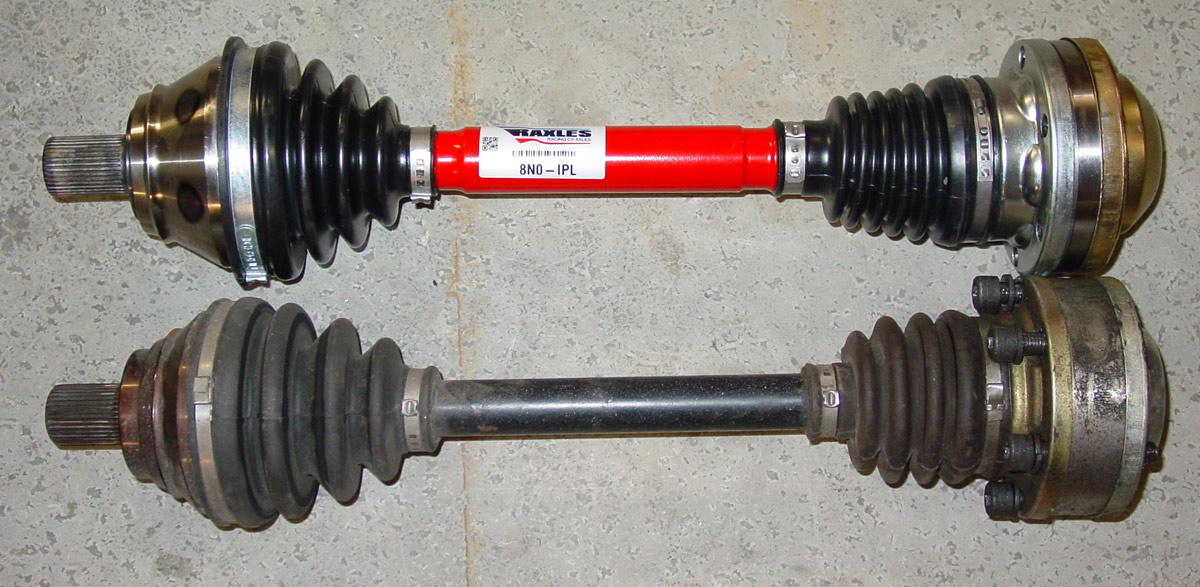
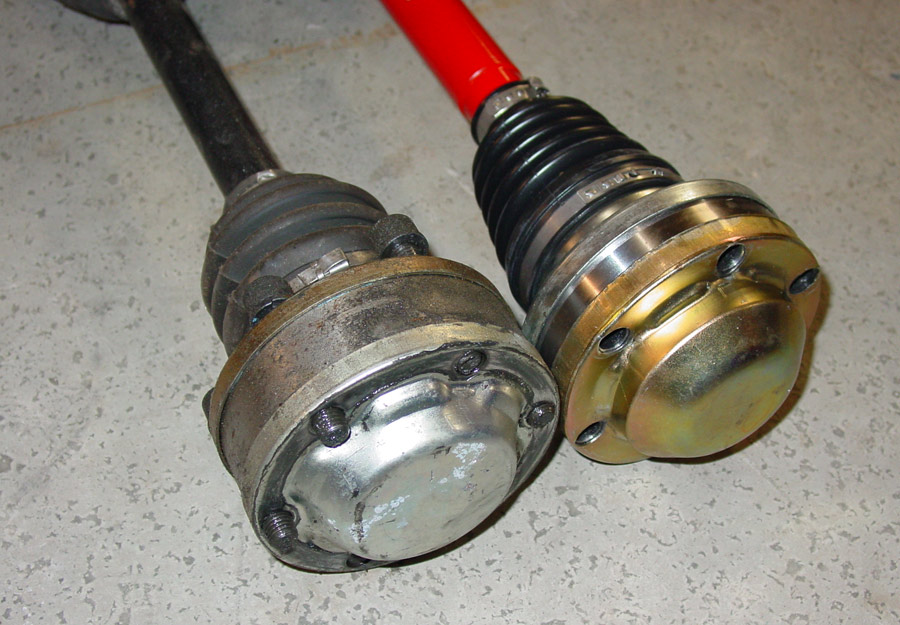
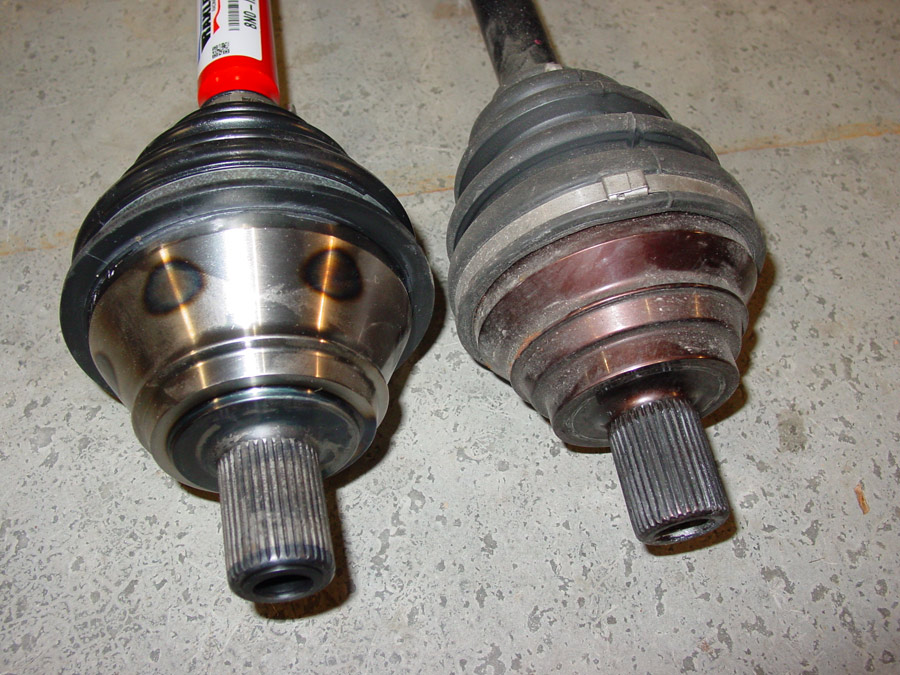
Pan and both axles are installed!

Okay… this is where the “way too much information, man!” section starts. If you have no interest in seeing how to remove the steering wheel lock on a MK4 Volkswagen, stop here and spend your time doing more useful things like getting lost on Youtube.
The disclaimer: I had no idea what I needed to do and was not able to find information on the internet. I even searched the dark web (my order of hookers should be here in 5-7 business days) with no luck.
First… You do NOT need to cut the snap bolts on the ignition as you do NOT need to remove it.
If you are removing the entire switch and do not need any part of it (electrical ignition switch or the chipped key), then you CAN cut off the bolts and consider this project done.
Read on….
Taking the Dremel to each of the snap bolts. I sliced the bolt head into little sections that then introduced blunt force trauma (well, it wasn’t blunt) via a chisel to shear off the heads.
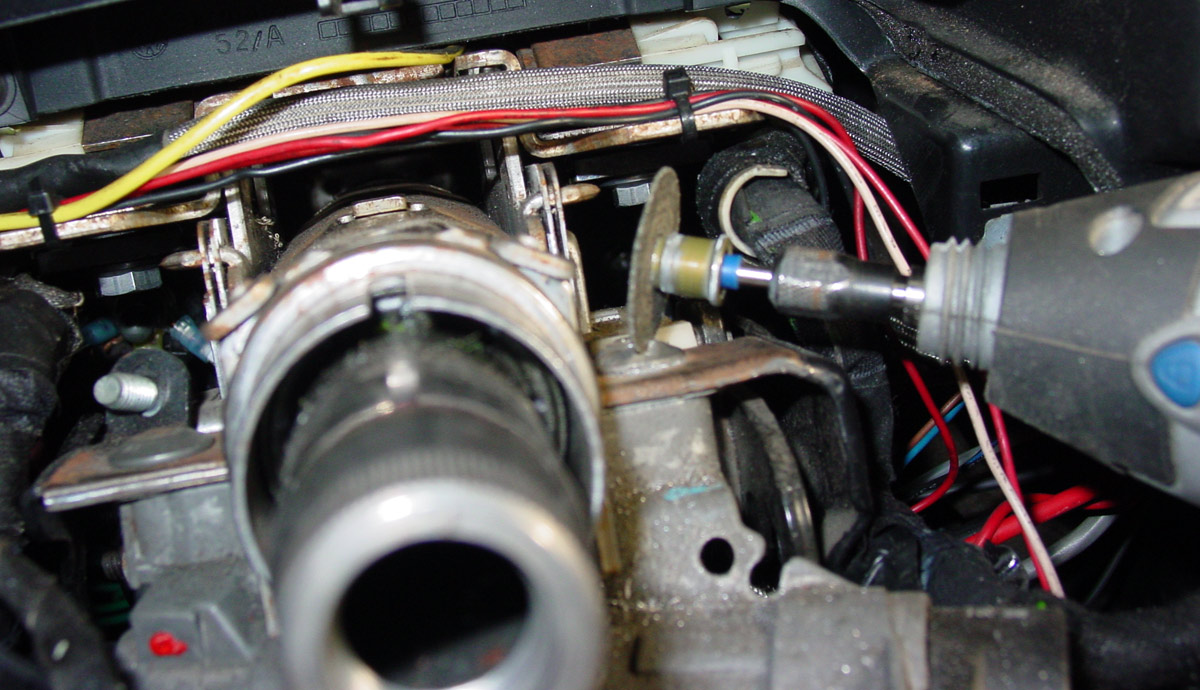
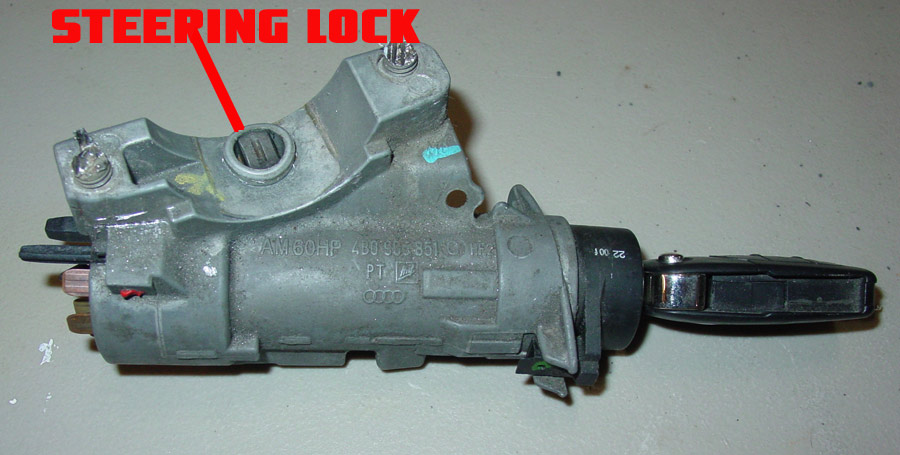
Both snap bolts removed, unplugged the chip key, unscrewed the single ground, and would normally remove the ignition switch plug on the back, but that was already removed as I have a separate flip-switch ignition switch.
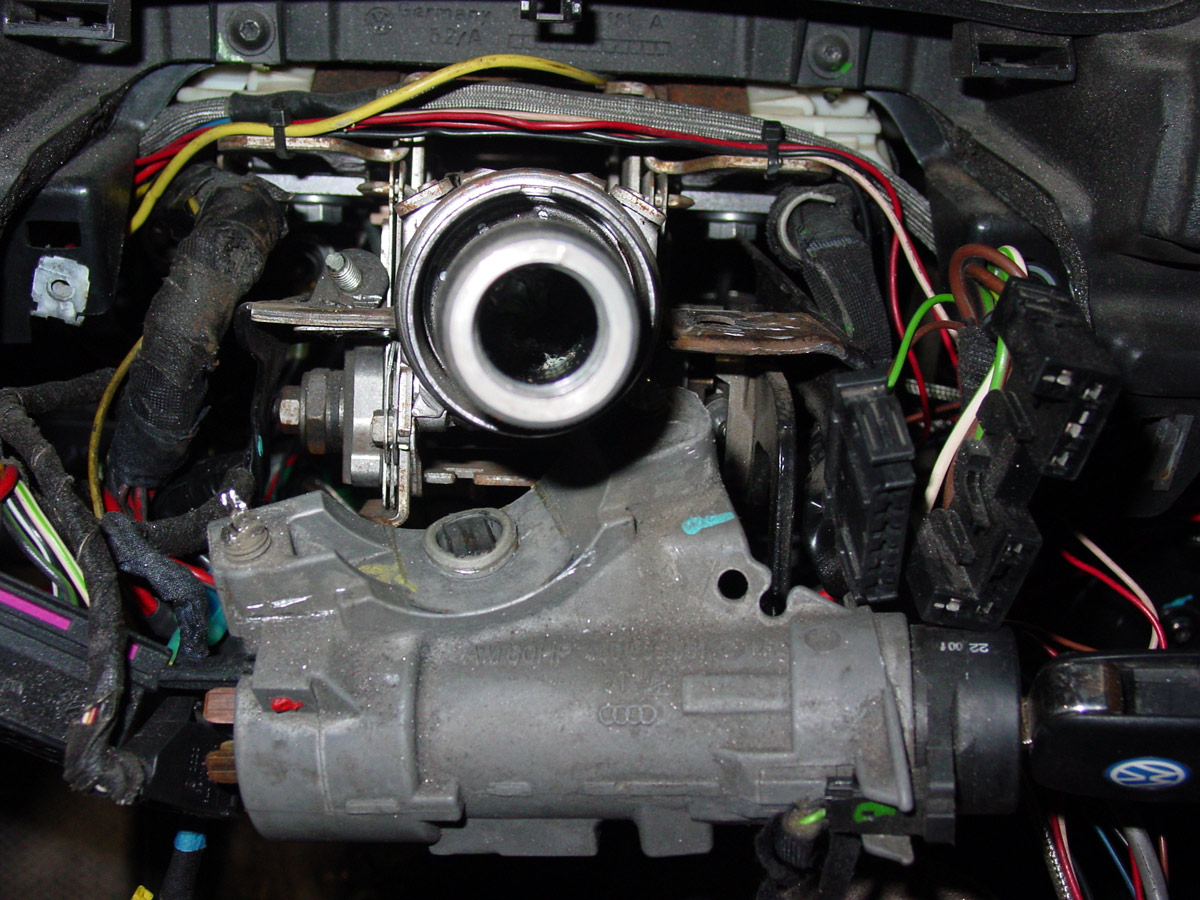
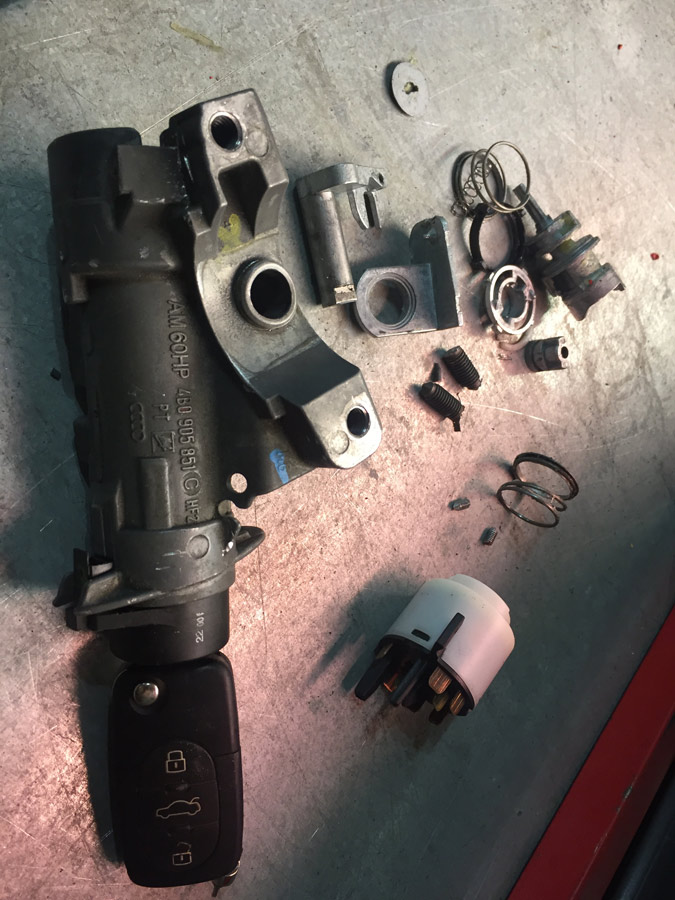
This is the steering lock pin.
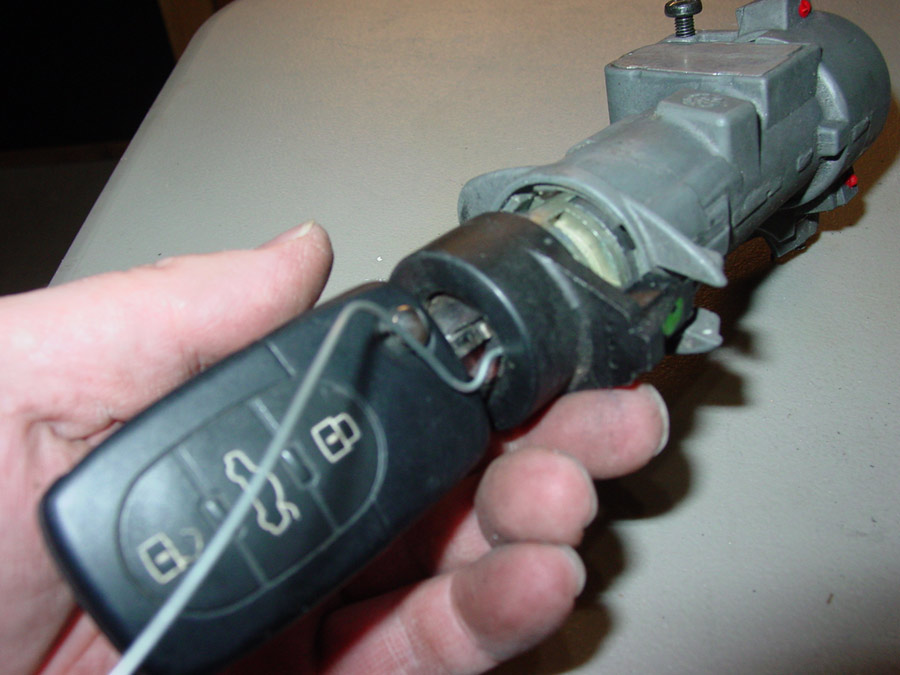
There are a lot of video tutorials online on how to remove the chipped key ring (black ring). Short version: Turn the key to on, insert paperclip/mechanics wire/etc. into the little hole next to the key. This will release the lock on the black ring.
If you are planning to reassemble the key section of the ignition switch, pay attention to the orientation of the insides and be careful with the two plastic clips. I knew that I did not need any of this so I just focused on removal.
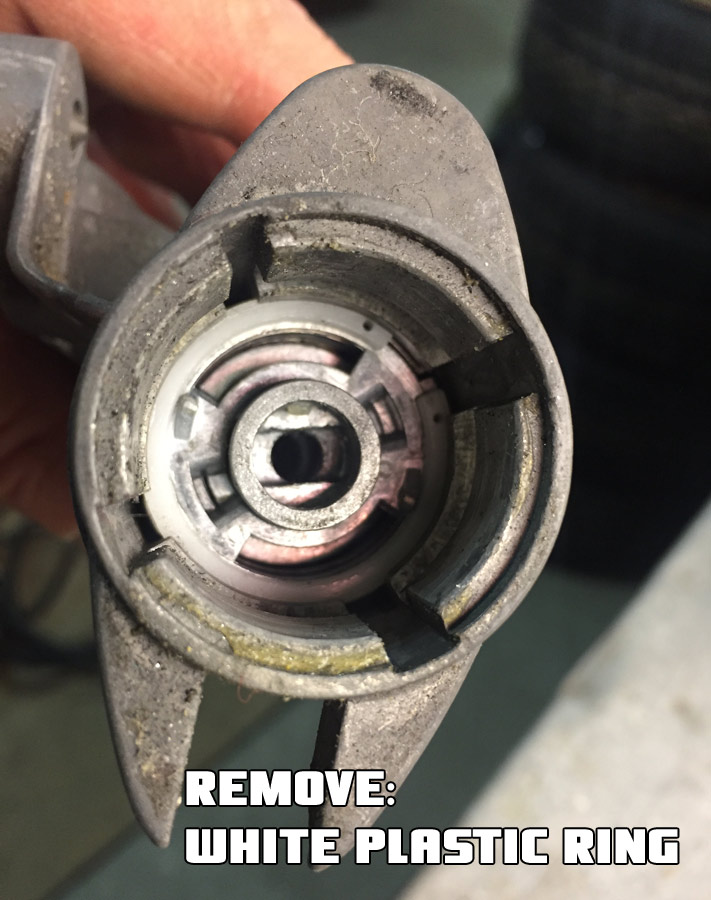
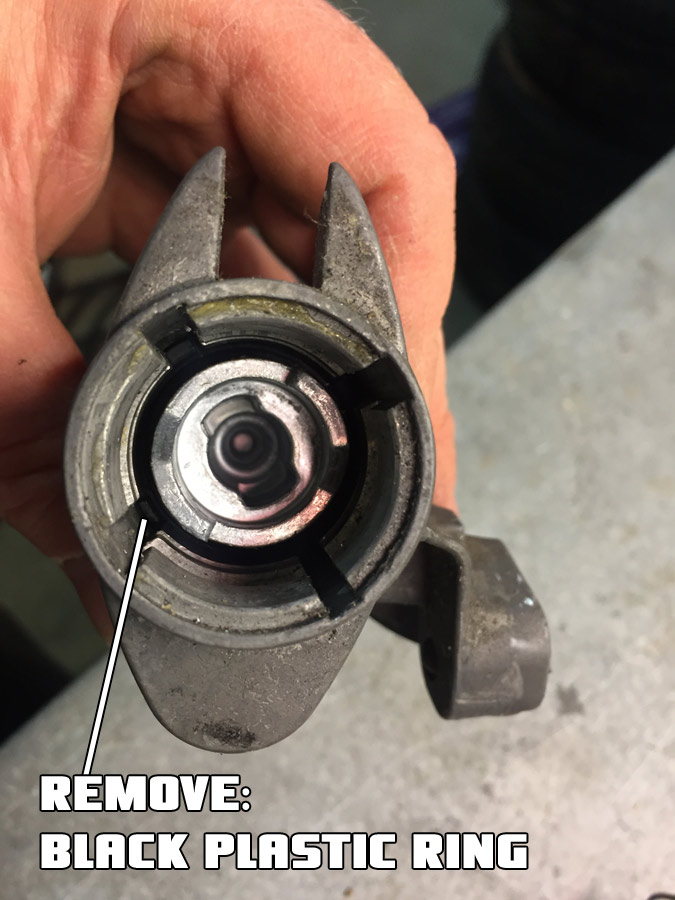
Remove the plastic ring. It is brittle.
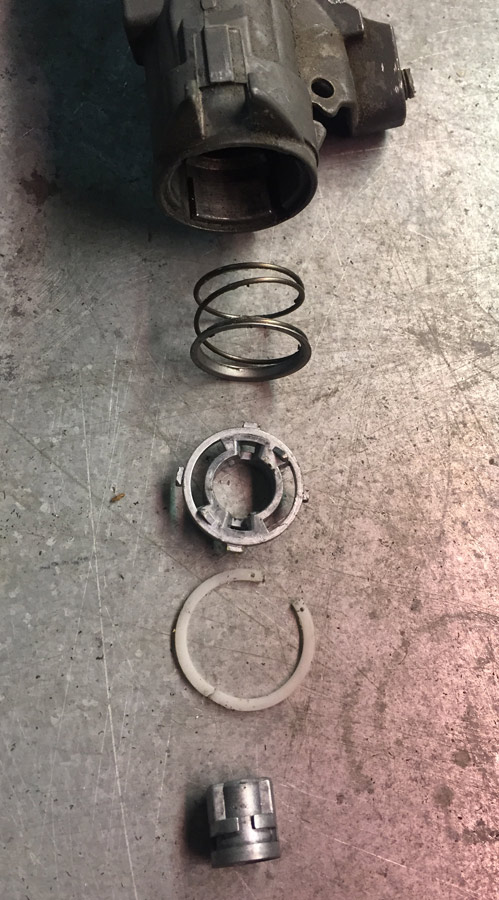
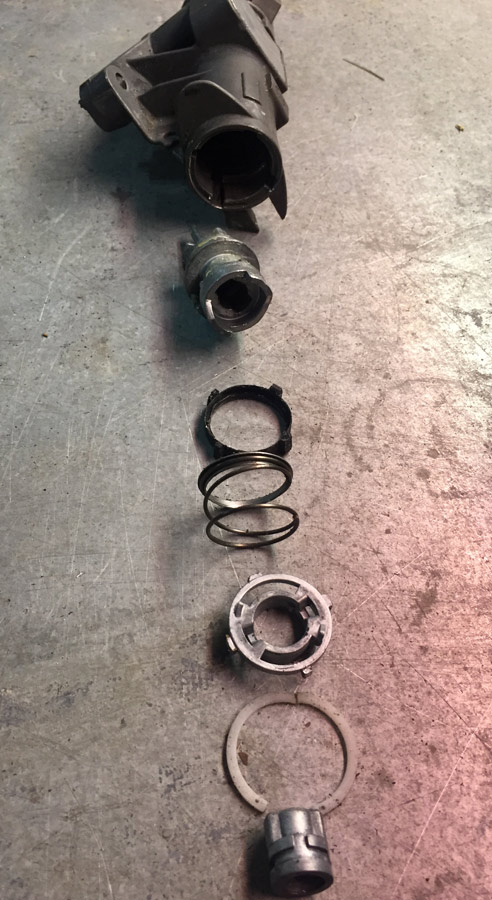
The bits and pieces… yep, that is the technical name. Look it up.
Next is a hard to see black plastic ring. This needs to be removed so that the largest part of this assembly can be removed. This is the piece that is preventing you from removing the metal plate on the bottom of the switch where the actual steering lock pin lives.
More bits and pieces… this is everything that comes out of this end.
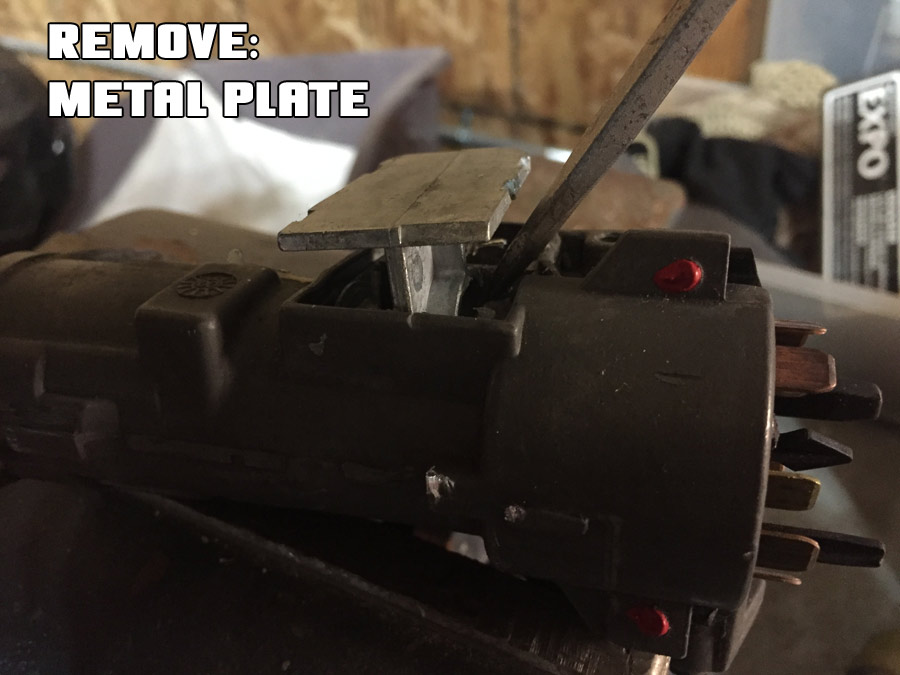
Pry off the metal plate. You will see that the plate has a ring that the previously removed part went through that prevents you from removing the plate. Note the two red dots in the image… this is red paint (or something along those lines) that cover set screws for the electrical part of the switch. More on this later.
Remove the spring and the steering wheel lock pin.
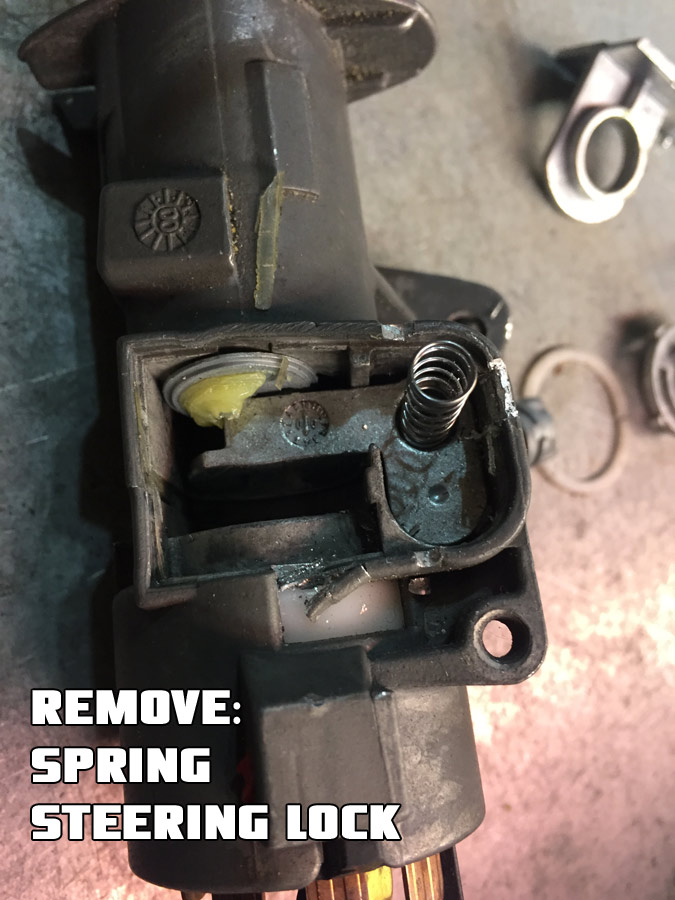
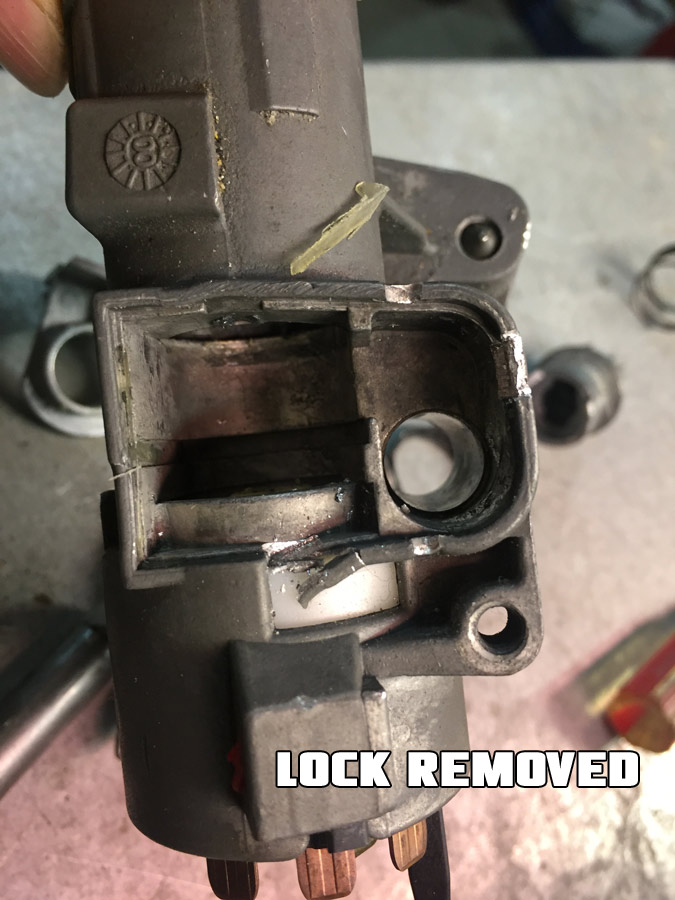
Removed!
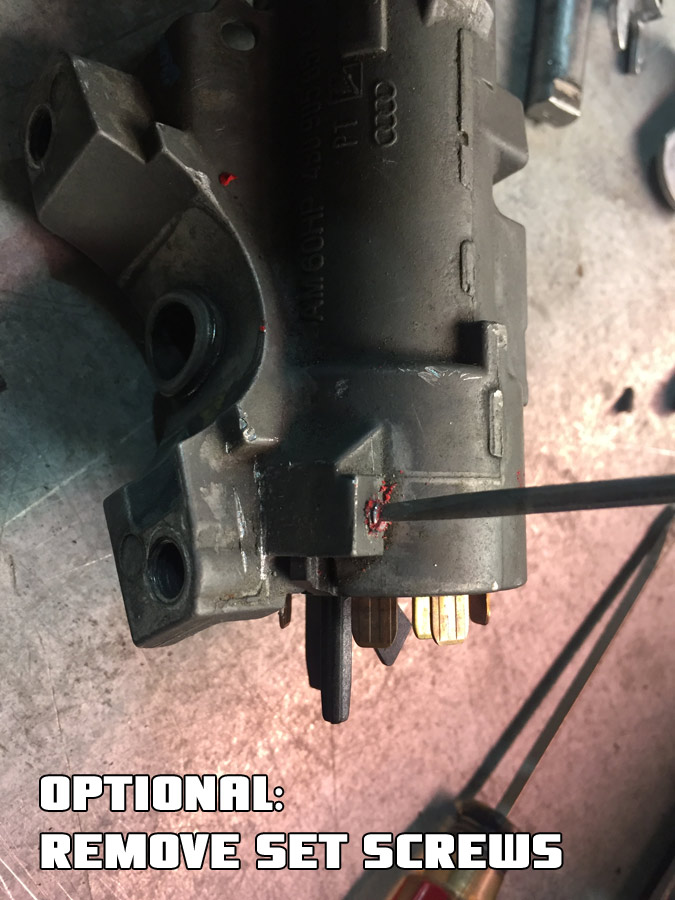
If you do not need the electrical plug, tap off the red paint and remove the two set screws.
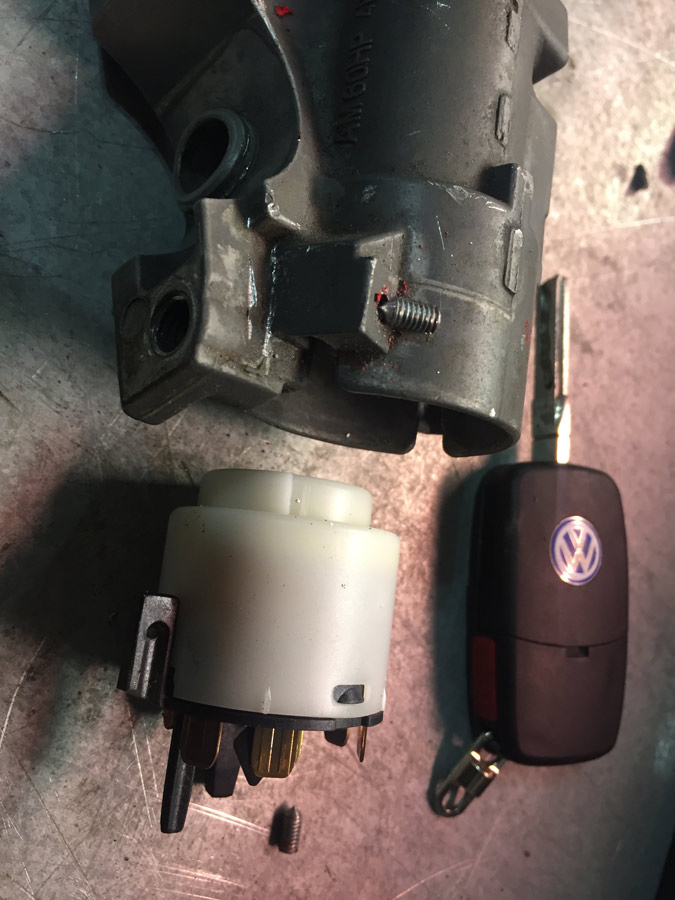
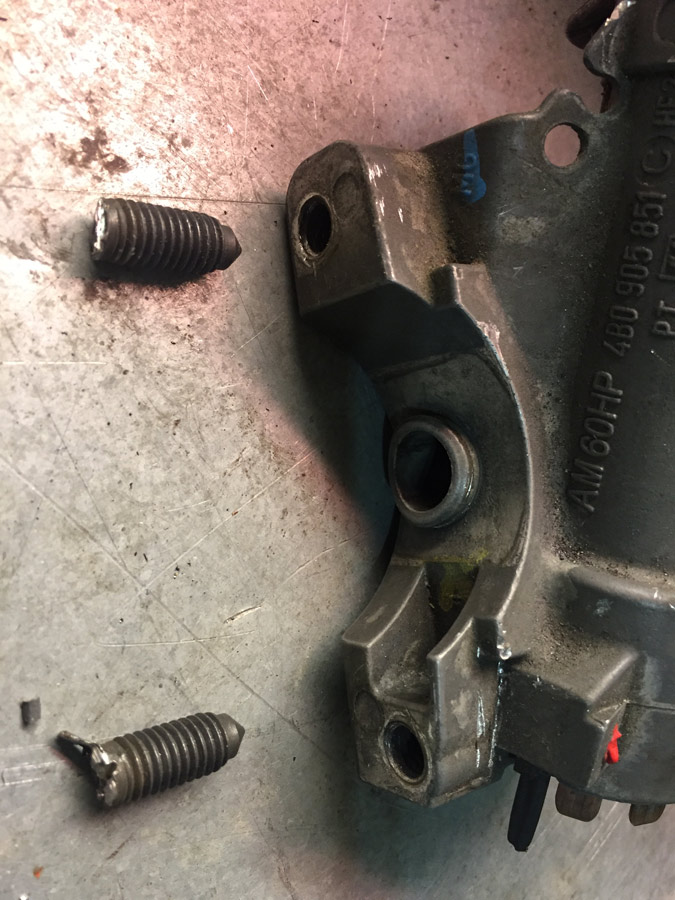
Remove what remains of the two snap bolts. These were easy to remove… I think you could grab onto them with vise grips. I used the vise. They were not tight at all.
Chipped key ring reinstalled… nothing else was installed. The metal housing is completely void of all bits and pieces.
Wait… why am I putting this switch back together after removing all the bits and pieces!?!?
Three reasons:
1. I am unsure if the chipped key is needed to run something on this car, so I reinstalled it.
2. The snap bolts also held the braces for the wiring harness on either side of the steering column.
3. There was a single ground wire that I didn’t feel like trying to find a new home.
It just seemed easier to remount the empty shell of the ignition switch instead of trying to solve all these new, albeit relatively simple, problems.
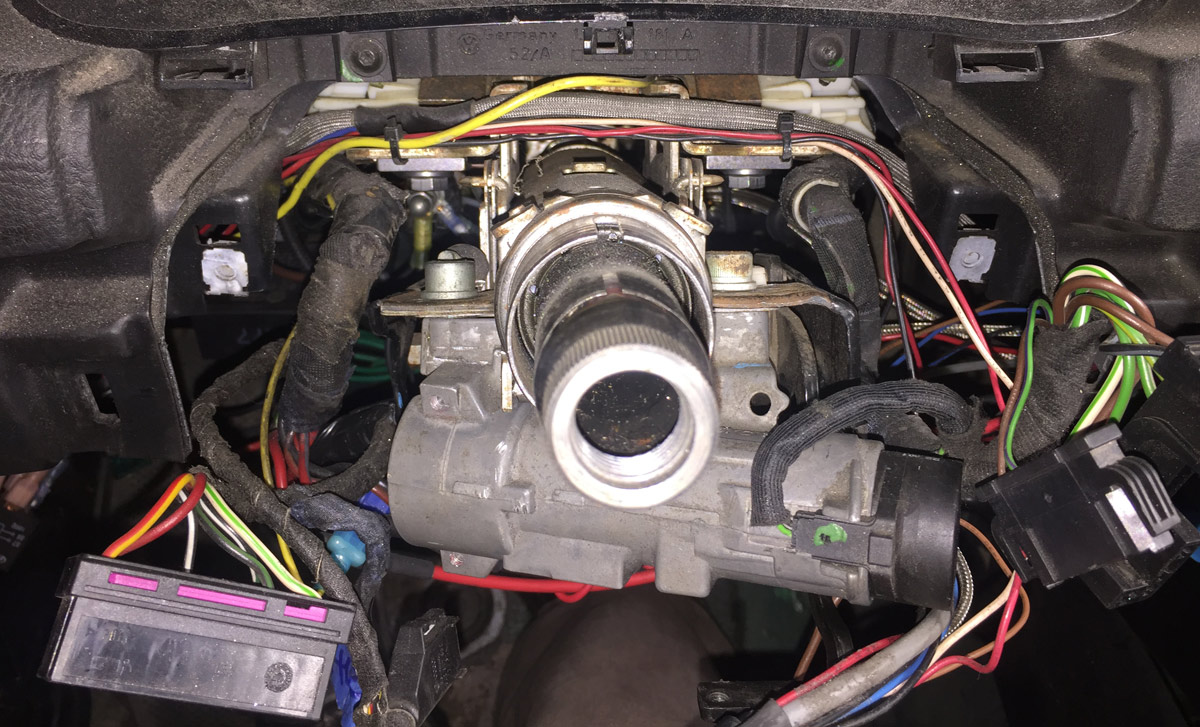
What’s left…
1. Reinstall steering wheel
2. Install front tires
3. Install skid plate (left it off to check for leaks with the new oil pan)
4. Alignment
5. Wash the car
All easy stuff. I hope that it is for the list. I have some minor work to do to the Subaru WRX (new headlights and fix some plastic bits on the front end that did not like the snowbank in the middle of the road) and then have THE project (the Scirocco) to jump into. Damn it… I am going to work on it this year?
And speaking of the Scirocco.
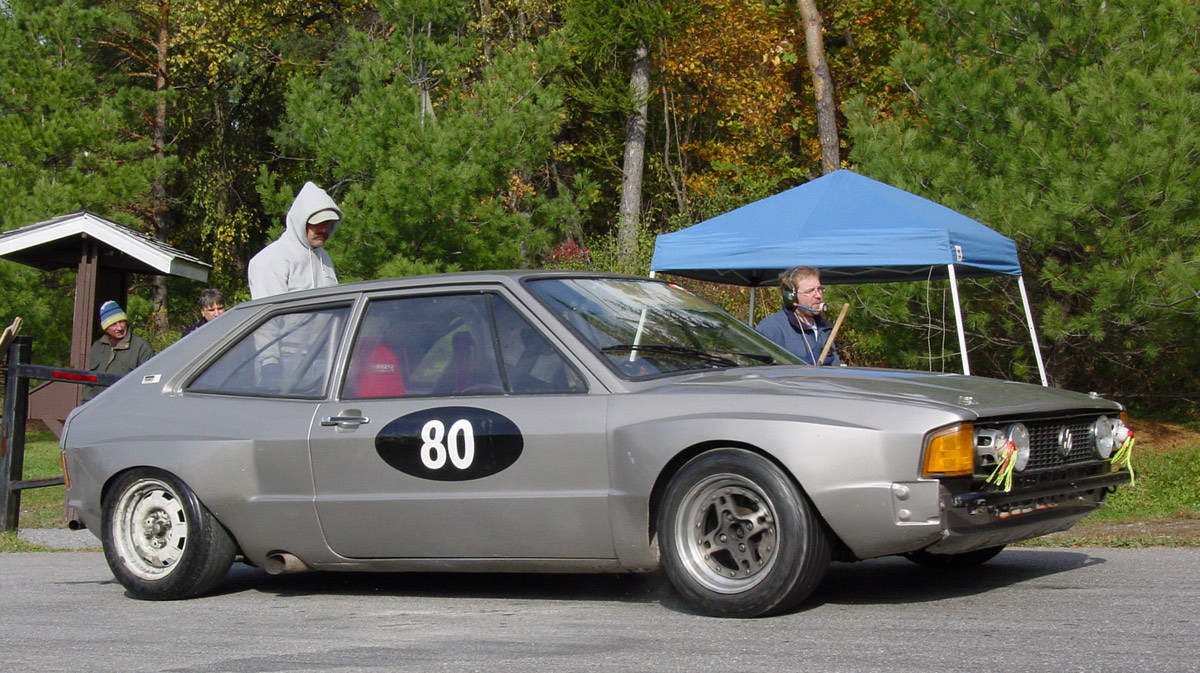
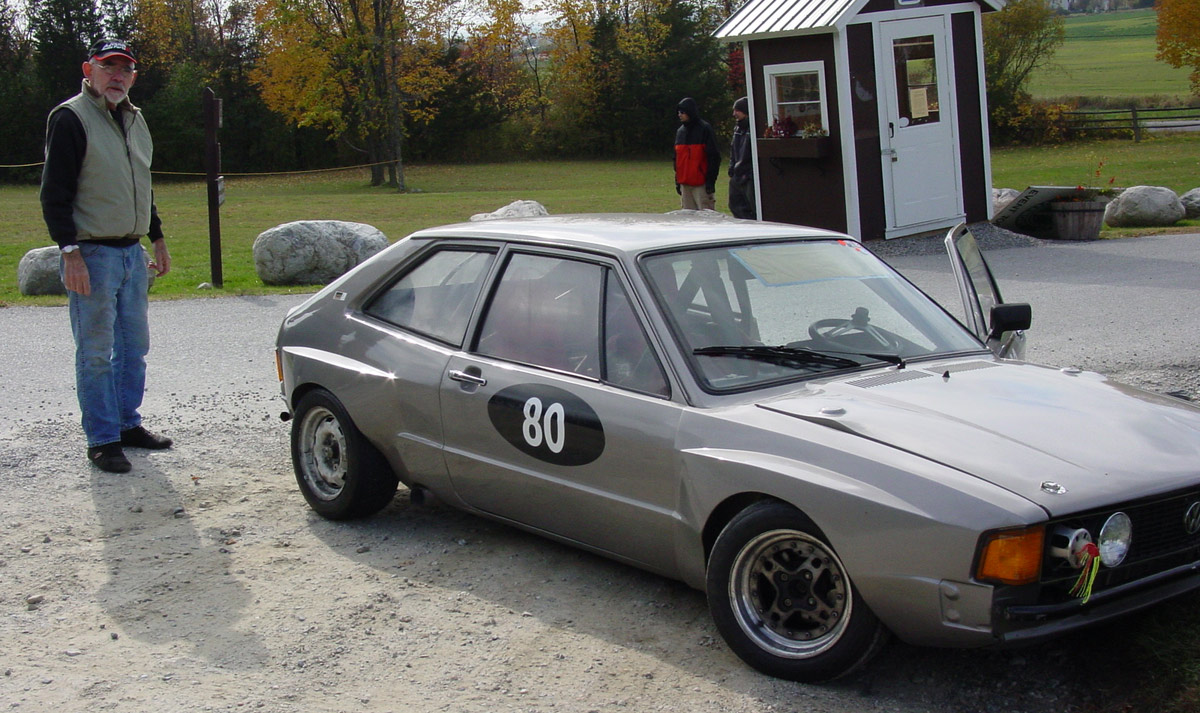
Bill Rutan, the builder and racer of the Scirocco, passed away early this month. He had a very, very, very successful racing career and built some very successful cars. I paid very close attention to his advice on how to make my Volkswagens go faster and how to drive faster.
Race on Bill, race on!
Jun 01, 2018
Short update just to get caught up. Unsure if I will do videos for the Ascutney or Okemo hillclimbs.... we will see.
Before Ascutney....
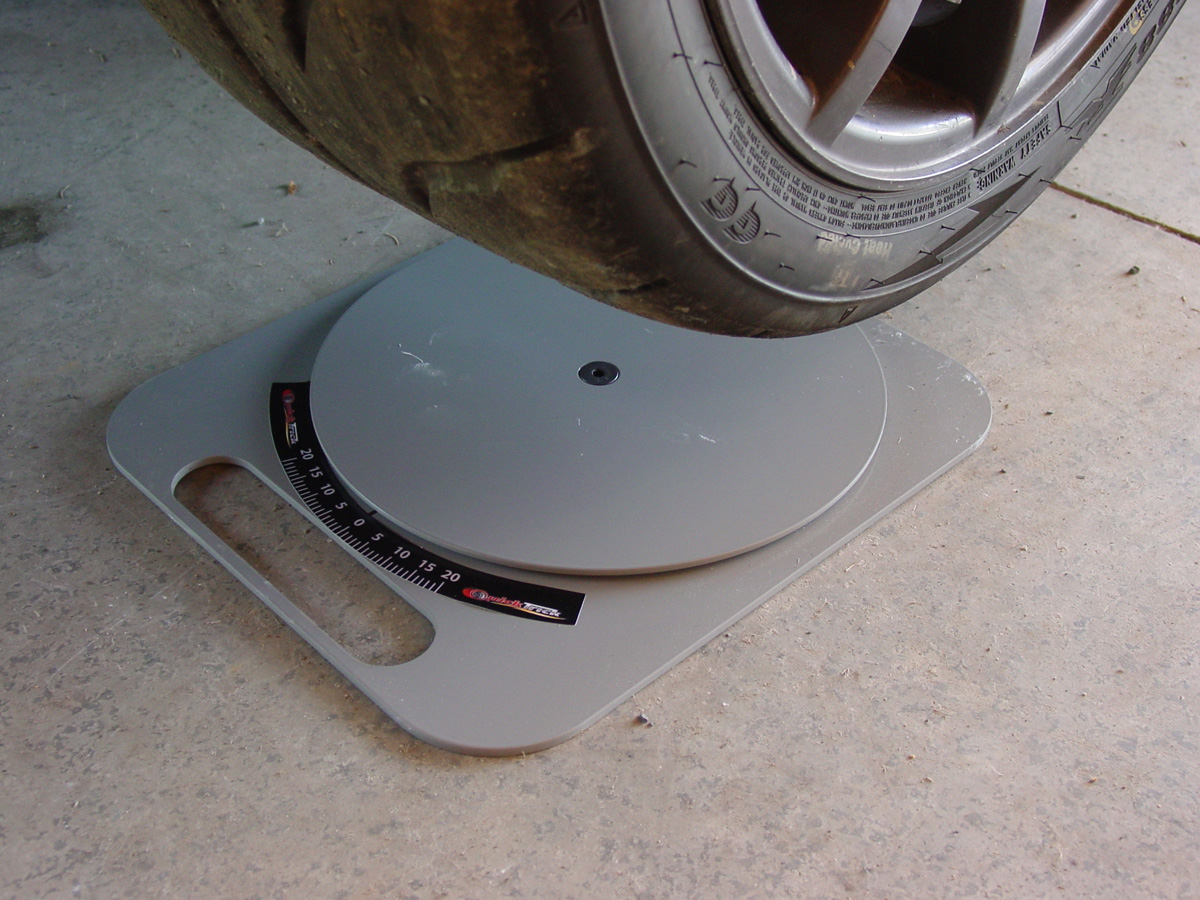
I purchased the "QuickTrick Pro Series Alignment System for 13" to 18" Wheels" and the "QuickTrick Ball Bearing Turn Plates" to help me do my own alignment. Use it five times and it pays for itself.
First time doing alignment (caster, camber, and toe) on any car so there was a bit of a learning curve. It turns out it is quite easy.
Good enough to drive 30,000 miles on the road during the year? Unsure about that, but it is fine for racing.
Alignment tool is pretty simple (yep, you could get away with a much cheaper alternative like strings, spider webs, and other mumbo jumbo, but I needed something more idiot proof).
Metal arms mount to rim and tape measures determine toe.
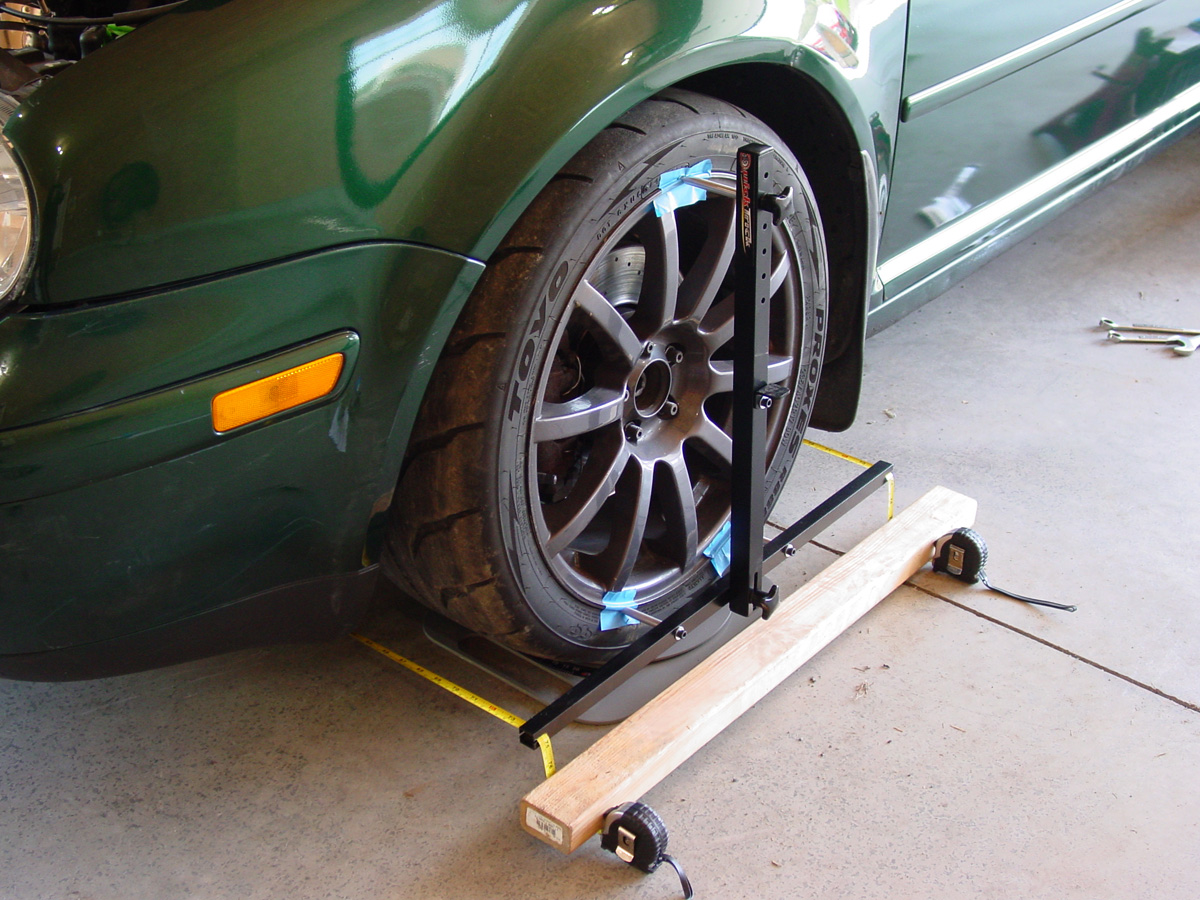
The turn plate makes it easy to rotate the wheel when adjusting toe. You could also use two pieces of metal with sand or oil in between them).
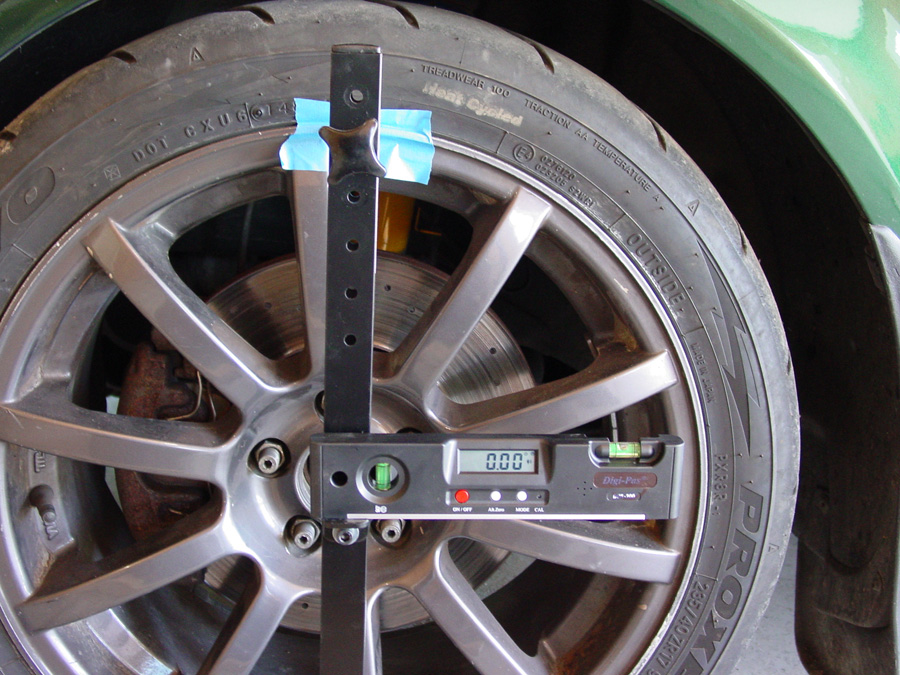
Digital gauge that you first zero-out on the floor to take into account any angle on the work surface and then you can use it for caster (no adjustment on my car) and camber.
Worked great... car handled as expected at Ascutney.
I did have an electrical issue with the wire going to the fuel pump. Lots of helpful people at the event who were more electrical savvy than I helped to get the car going again.
Then Sunday rolled around and I managed to twist the end of the axle off.

If I saw this, my first guess would be that the installer over torqued the axle bolt. Not the case as I carefully followed the Raxles instructions as they call for very specific torques for the hub bolt and inner bolts.
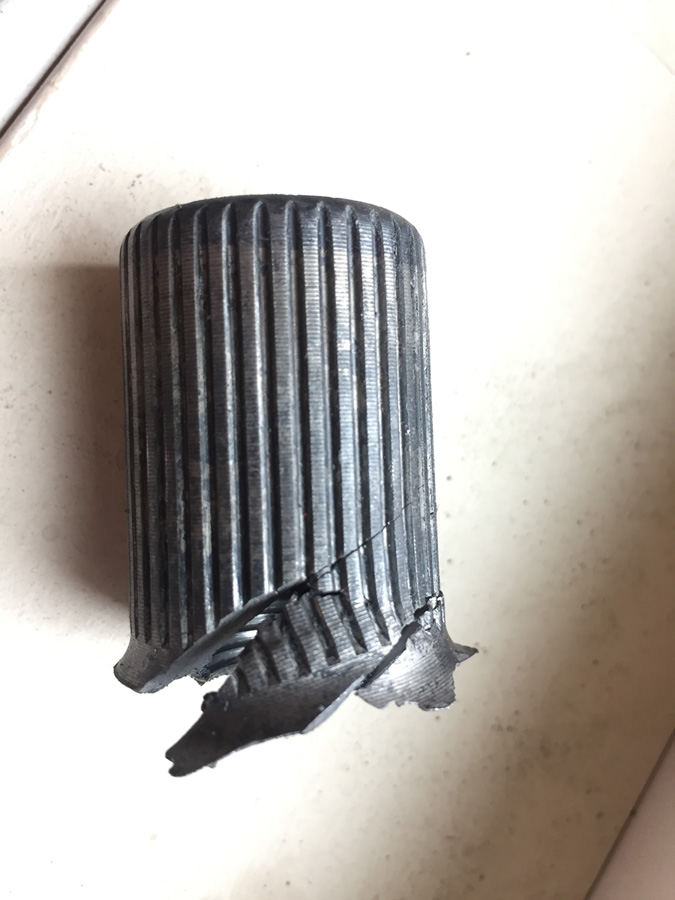
Since Ascutney, and prior to Okemo, I had the replacement axles back in hand. Now that is quick service! Thanks Marty!
The Ascutney hillclimb memorialize our racing, and mad scientist to everything Volkswagen, friend Bill Rutan.
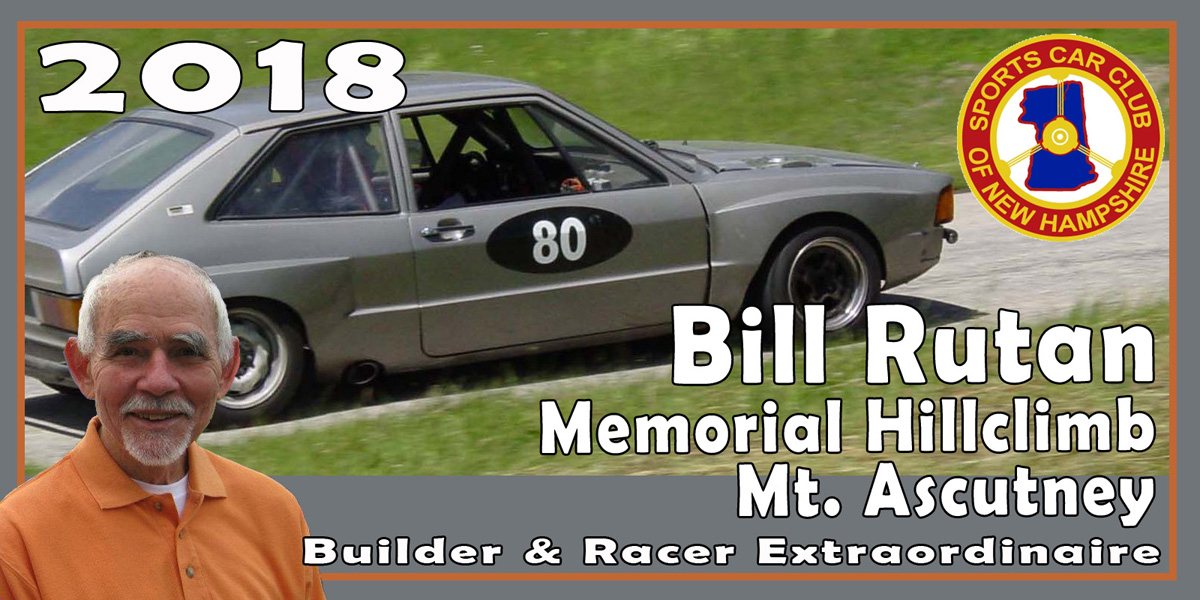
So... that slightly motivated me to get working on the Scirocco.
Already built engine:
AEB 1.8T engine
Bored to 1.9 liter
Manley rods
Supertech stainless steel exhaust valves
Cat Cams valve springs
Titanium retainers
New valve guides and Viton valve seals (e85 ready if I ever when that route)
Integrated Engineering's IECVA1 camshaft:
*CNC ground on new chill hardened cores
*Dialed in via extensive engine dyno testing
*For OE style hydraulic lifter buckets
*Strong power from 5500 to 8500 rpm
*270 / 274 degrees advertised (Intake & Exhaust)
*.370" / .378" Lift (Intake & Exhaust)
ARP connectors for everything including crank bolt with friction washers
Cometic head gasket
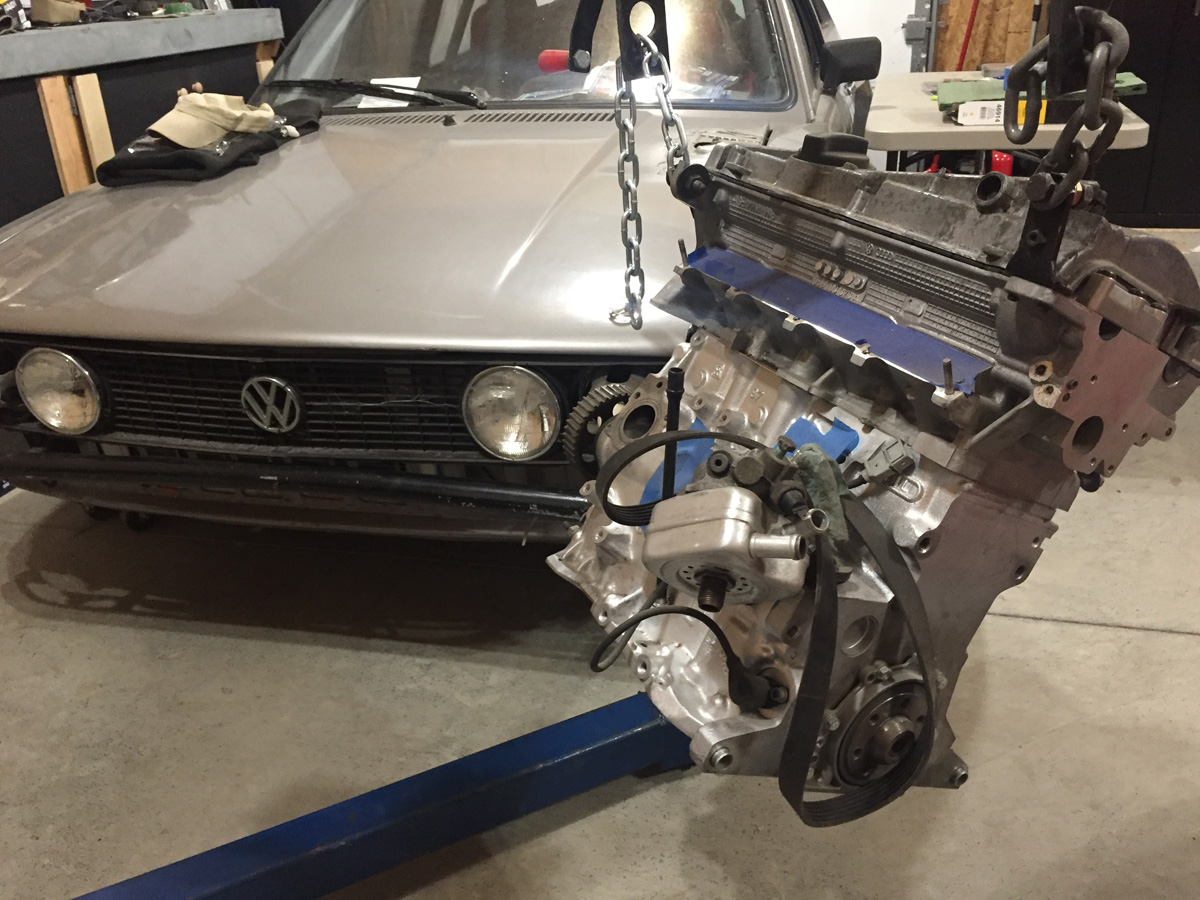
And then I took a week off in Rhode Island for a wedding.
Enjoyed three breweries:
Revival Brewing Company
Shaidzon Beer Company
Whaler's Brewing Company (my favorite venue and 1/4 mile away from where we got married)
.....and then some Del's.

Jul 09, 2018
And so it begins....
DAY ONE
The Scirocco has been on the back burner (heck, not even on the stove) for quite some time. There is always something else that needs to be done just at the moment I wanted to start on it.
I've been planning and conceptualizing what I think is the perfect car (regardless of what you drive) for racing... reliable, easy to work on, easy to source parts (it is an old car!), and fun to drive.
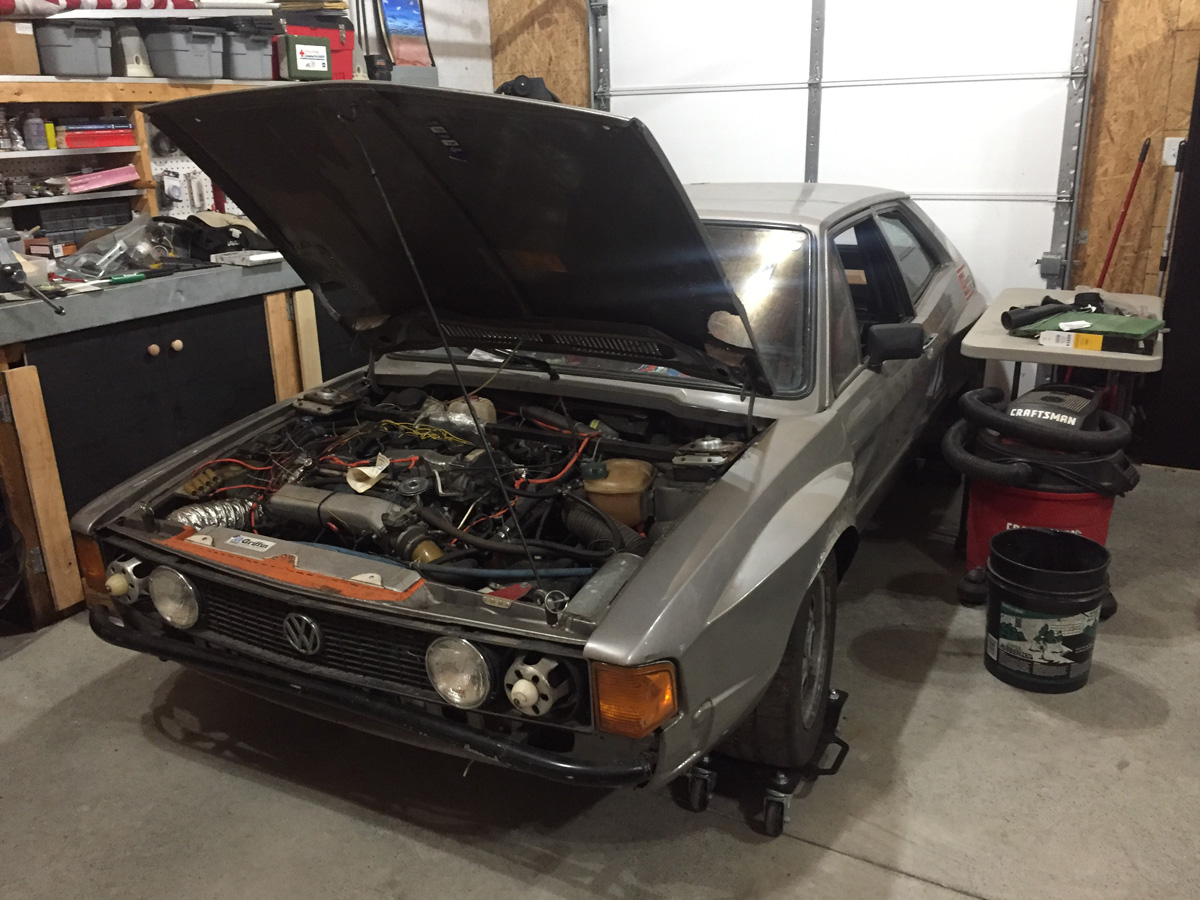
The car has some crazy stuff going on... DAY TWO will include the documentation (photos and notes) of every corner of the car to determine what Bill did when building/modifying the car over the years (and why!); plus it will help me put it all back together.
Day one is strictly cleaning the car to get ready for day two. Day one is done.
But how did we get here? A fellow racer "threatened" to purchase the car. Put me in the spot of poop or get off the pot. I'm pooping. (thanks Brad!)
As mentioned early, the engine is ready. I will go through it to make sure everything is good. Need to research the cam to see if it will work for me.
The plan for the car:
Removable front end like the MK4 (I guess the MK2 and beyond were that way..... I kinda skipped from MK1 to MK4).
6-speed (02M) cable shift gearbox.
MK4 mounts on the car (as opposed to MK4 engine/trans to MK1 body mounts)
Air dam
Air ducts for front brakes (track events!)
Glass! Yep, I am going to make this street legal-ish.
VEMS standalone engine management
Bodywork and new paint (need to determine color)... blue? orange?
The car is going someplace very special down the road (more to come on this new development) within a few weeks to start the fabrication and bodywork.
You'll need to log in to post.