
Like stories like this? You’ll see every article as soon as it's published by reading the print edition of Grassroots Motorsports. Subscribe now.
We loved our new SPC Performance front upper control
arms for our past project Nissan 350Z, but the
bushings were SCCA-illegal as delivered.
Read the rest of the story

SVreX
MegaDork
6/6/18 3:21 p.m.
Or, you could machine them out of used cast-off bathroom partitions, like the Mumpkin!
Good article, JG!
Step one: Buy a lathe.
Great.
Does the control arm motion occur between the bolt and sleeve, the sleeve and bushing, or busing and arm?
Delrin is good E36 M3. McMaster-Carr sells it in smaller quantities.

te72
Reader
6/6/18 9:56 p.m.
Question, where did you order your dad from? He looks like a quality dad, so I'm guessing off one of those fancy tool trucks. The dad I found can be sourced from your local "knows way too much to be working behind a parts counter" guy. =P
Also, darn you Toyota, for making so many parts NLA for the cars that, you know, made your reputation among enthusiasts... I know the aftermarket serves most of these cars, and they were built fairly well back then, but hey, everything ages, things break. I'd love to be able to keep the old Yotas alive...
In reply to OnTheChip :
I would imagine that the rotating portion occurs mostly betweem bolt/sleeve and depending on design (like aftermarket kits) some will happen between sleeve and bushing.
the bushing is there for more than just the rotation such as bumps that jerk the arm around or load that the bolt/sleeve/etc cannot compensate for
thats my WAG

kb58
SuperDork
6/7/18 11:25 a.m.
DaveEstey said:
Step one: Buy a lathe.
Beat me to it. It's like that woodworking show that is/was on PBS, called something like "Yankee Workshop". Anyway, he'd produce fabulous furniture... using his $50,000 worth of equipment.

Driven5
SuperDork
6/7/18 11:51 a.m.
OnTheChip said:
Does the control arm motion occur between the bolt and sleeve, the sleeve and bushing, or busing and arm?
Typically the sleeve rotates in the bushing and the bolt is just there to clamp it all together, but that's just the beginning. In order for everything to locate, support, and move properly, you'll also need to figure out the fit between the bushing OD and the control arm housing ID, the amount of resulting shrinkage of the installed bushing ID, the fit between the sleeve and installed bushing ID, the fit between the bushing flanges and the mounting bracket, and the fit between the sleeve and the mounting bracket to ensure the fit between the bushing flanges and the mounting bracket when the bolt locks the bracket down tight against the sleeve. And that's all assuming that the suspension you're working with has already been confirmed as operating only pure single axis rotational motion for each bushing being replaced.
For all of the 'technical' articles/blogs/posts I have seen out there proclaiming how 'easy' it is to make (or have made) DIY bushings, I don't think I've ever seen one that includes any of the 'minor details' that are actually critical to doing so correctly. It always seems to be some variation on...
Phase 1: Collect Delrin
Phase 2: ?
Phase 3: Bushings
In most applications the sleave is clamped between the ears of the mount so that it can't rotate. That's why factory bushings should be tightened with the suspension loaded. If you don' then the rubber bushing is twisted at rest. I've fixed some wonky handling issues just by taking miss matched pre-load out of control arm bushings.
When I make Delrin bushings I like to do a press fit on the inner sleave and a light sliding fit on the outside of the bushing. This makes for more bearing surface and allows for a grease fitting if you want one. Sometimes the outer portion isn't a complete sleave (like in a leaf spring eye) in which case I make bushing a press fit to the outer portion and let the sleave rotate.
In reply to APEowner :
This is my understanding as well. Stock rubber bushings allow arm motion by deflection of the rubber, which isn't possible with Delrin (or other 'hard' materials). If the length of the inner sleave doesn't allow a tight, clamping fit with the bracket, motion will occur between the bolt and sleave, which could also allow slop: ie. I'll handling.
To Driven5's point, details matter and tolerances/fit should be specified in these, otherwise useful, articles.
DaveEstey said:
Step one: Buy a lathe.
Great.
There are deals to be had. I paid $600 for mine and it has more than paid for itself (my wife's wedding ring alone). The person that I bought it from had just purchased a high end cad etc lathe and was making space in his shop. I took a look at it and told him I would take it. His response....well, you would be a $#%&$ing idiot if you didn't. It took an engine hoist to get it out of the back of my scion xb.

Fun projects! I made a couple of forays into bushing making__machined and molded__some years back with good results.
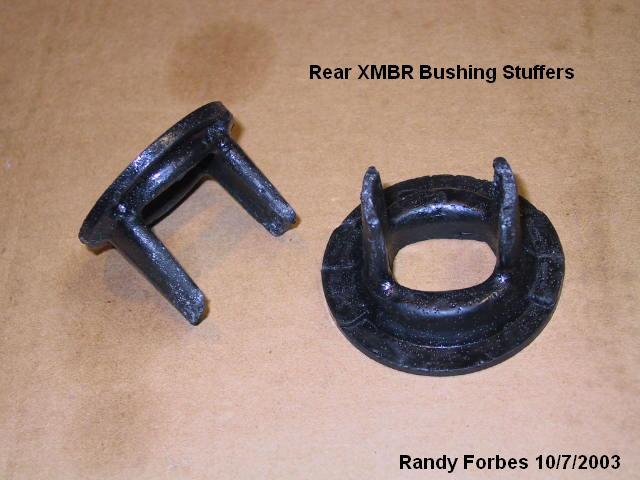
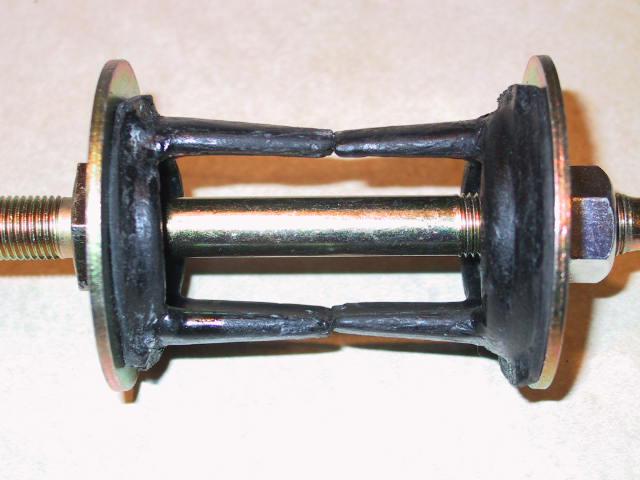
Before Jeff Ireland/Ireland Engineering started marketing his urethane subframe mounting bushings for the E-30 esque Z3 and M Rdstr applications, I was molding some "bushing stuffers" from a pourable Devcon 2-part urethane (Shore hardness unknown, as I've slept since then...). These filled the longitudinal voids in the OE bushings and also packed the space at the tops and bottoms to eliminate a substantial amount of the excessive compliance. By all accounts, they were a success. The professionally manufactured and store-bought polyurethane bushes from IE were a substantial improvement on what I was making, so I abandoned them and have probably purchased and installed Jeff's bushes in 150-175 cars since then. I wish I could remember what album has the pictures of my molds (made in 2-pieces from a pourable aluminum/resin product from Loctite). I'll edit this post if I come across them, but I too used a plastic food-container dish to make the molds!
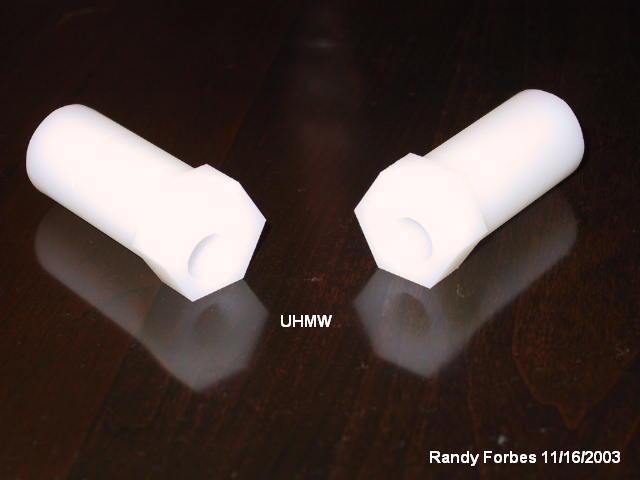
The machined bushes were turned in both UHMW (Ultra High Molecular Weight bushing material) and a bronze alloy. I never finished the bronze ones to size, opting to install the UHMW ones for a test first. They are still in the upper/outer pivot position, allowing a decrease from +1* (positive) camber to approximately -2* negative camber on my '57 Healey. I made them eccentric, so that they were adjustable to enable matching both sides. Given that the UHMW bushes have been in for nearly 15 years already (recently inspected during a front shock upgrade) and found that there's still no perceptible wear at the ends or bolt-holes and that the bronze bushes only need (both of) the ends trimmed to size, I doubt I'll need to make any more for this application in my lifetime!

UHMW bushes before ends were trimmed to size

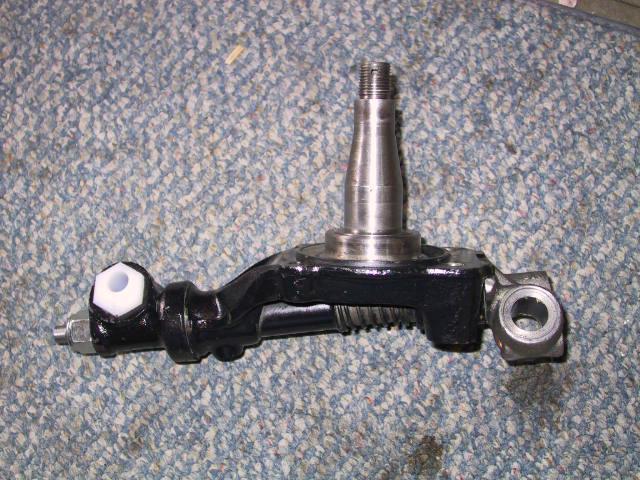
Fitted to the Healey's upper trunion (previously machined for straight bore; original 1/2-bushes were tapered)

So yes, Doable AND Fun project that anyone can do at home**
** NO Dads were used or otherwise harmed during the above exercises.
DaveEstey said:
Step one: Buy a lathe.
Great.
Heh, that was my exact response as well.
Now, having a lathe is awesome, if you have the space.

clshore
New Reader
6/9/18 10:37 a.m.
In reply to Dr. Hess :
Delrin can also be had impregnated with Graphite or Moly, to provide self lubricating properties.
Could you 3D print them easier?
I bought a 9x20 lathe a few years ago for the express purpose of making delrin bushings.
The new offset bushings in the front upper A-arm now allow -3.0 degrees of camber, which was not previously possible.
Messing with the design a bit allowed forcing the A-arm back a bit further in the mounting brackets, providing more caster as well.
Since then that lathe has come in handy for many other projects.
alfabeach said:
Could you 3D print them easier?
3D printing is getting better and better all the time but I think the tolerances that a good bushing needs to be held to are a bit tight for at least the home machines to hold.

jkstill
New Reader
6/12/18 3:55 p.m.
In reply to APEowner :
I know someone that has used this same attribute of stock bushings to affect corner weighting in SCCA classes that do not allow these parts to be substituted.
I poured my own front LCA bushings with Devcon Flexane 94 in order to offset the inner sleeve and increase the LCA effective length. It was the least expensive way to get 3 degrees negative camber on my '85 Fiero 3800 track car. Longer tie rods were way more costly than the bushing material! Made a huge difference.
I have a mini-lathe I bought for $200 years ago, they are $500 now, they will turn plastic easily, also aluminum, but not steel,
used it to make bushing for my MG to be on topic.
I also recently made some polyurethane motor mounts for my mx3 racecar using two part mold making stuff available at Tap Plastics,
https://www.tapplastics.com/product/mold_making_materials/casting_products/tap_quik_cast/74
I suspect this stuff could also be used to make suspension bushing where you just pour it in, no lathe required.
You do need to have it all setup just right, otherwise, this stuff leaks like water through any holes until it hardens.
In reply to DaveEstey :
Did you even read the article?
Step One is: Buy Some Delrin
Sheesh. ;P
Seriously though, certainly not everyone is going to have a lathe, or know someone who does. This doesn't preclude you from creating a shop drawing, collecting material and stopping by a local shop, contacting a local trade school, visiting a forum that caters to hobbyists with lathes and finding a person that may well do a small production run for you to help subsidize there hobby. (I've done this with great success)

BA5
Reader
6/18/20 7:15 a.m.
But..... what do I do if I'm the dad?
DaveEstey said:
Step one: Buy a lathe.
Great.
Cumon now. You can very easily fashion a 350 hp lathe by putting the rear of the car (if rwd) on jack stands, bolting the delrin to the vehicles hub, mounting a common bench vise holding a wood chisel to some wood with an articulating base, ratchet strapping the wood to the vehicles exhaust for positive pressure against the delrin, cranking on the vehicle and adjusting throttle position to the appropriate speed depending on chisel sharpness, and adjusting ratchet straps and articulating wood base accordingly.
Some people just can't be patient enough to wait for the upcoming part 2 and have to make wisecracks.


