All right, time to devulge the CL score...
While scouring online for a set of pistons, I stumbled across an ad for a set of D0VE heads and "some other stuff". $400 later, I was loading the following into my 300TD:
Two freshly machined D0VE heads with dual valve springs and pushrod guides
A set of flat top pistons
A 1969 460 block, bare, with main caps and hardware
A set of used rods
So...yeah. I got a deal. ![]()
Now, I could have taken the D0VE heads and used them, installed the pistons, gotten ~11:1 squeeze, thus necessitating a more aggressive cam...but then we'd be into real money. So, in the spirit of the game, the D0VE heads are going into my stash, and we'll stick with the D3VE heads ($0), ported, and the flat top pistons which are essentially nearly free considering what the heads and block are worth.
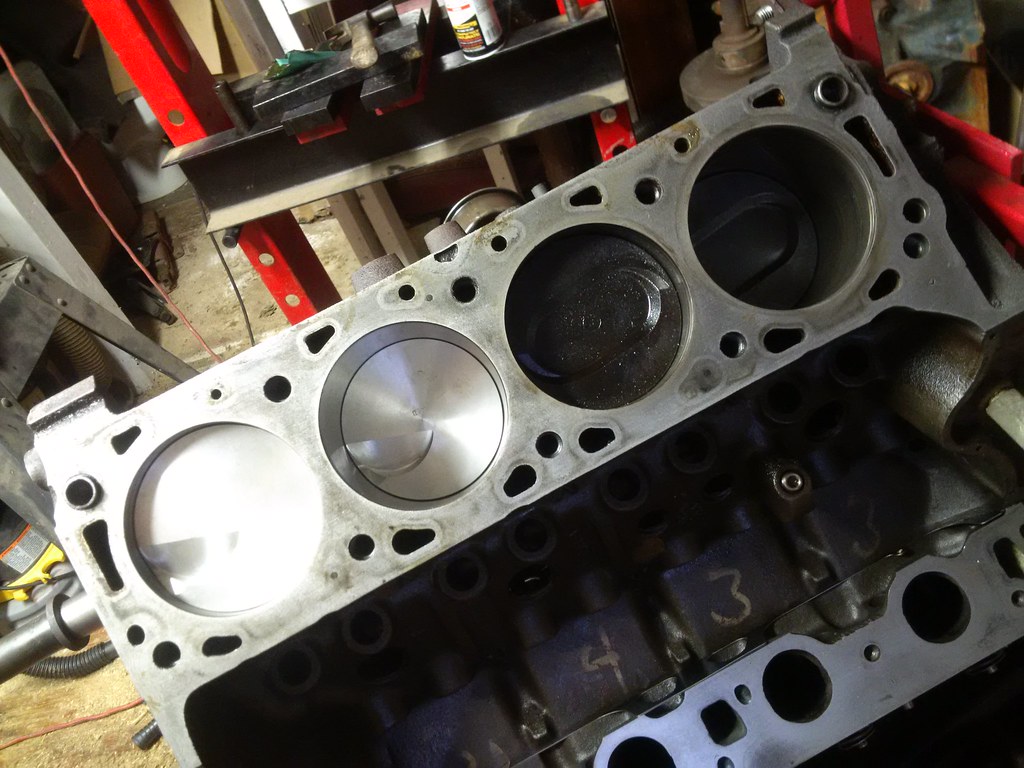
Started putting in the new pistons this week. Checking the ring end gap:
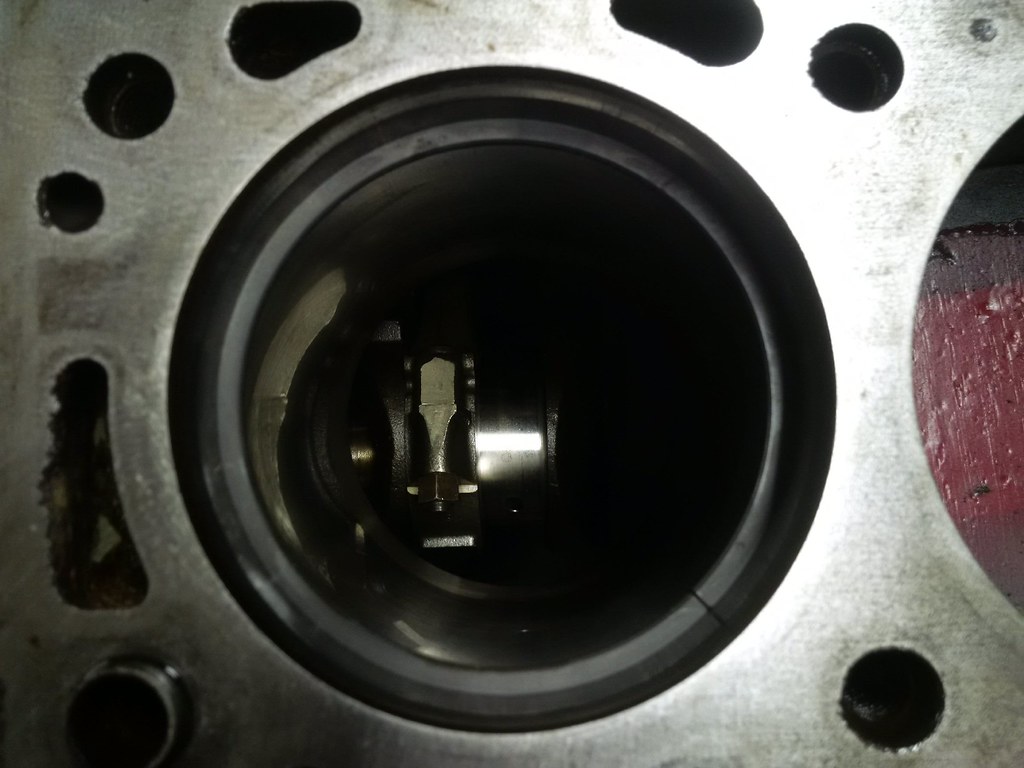
I set them "loose" for racing- 0.035" for the top ring, and 0.18 for the second.
And the new slugs go in:
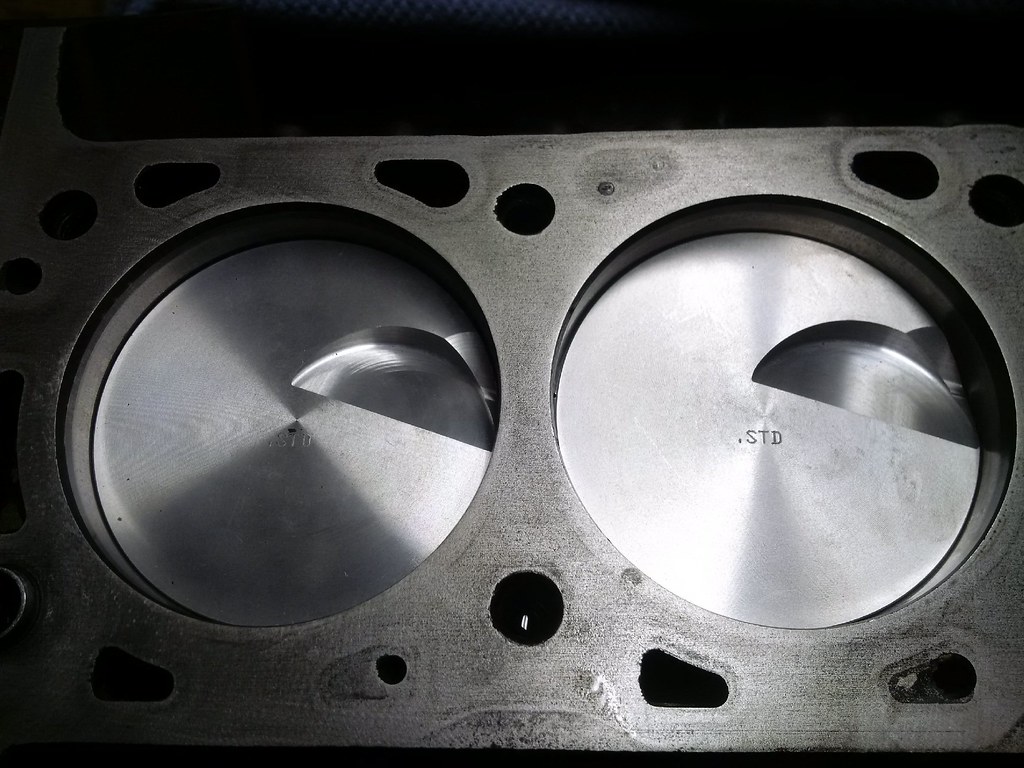
Last night, in one hour, I removed one of the old pistons, pressed out the wrist pin, installed a new piston on the rod, pressed the new pin in, installed the spiralock pin keepers, gapped the two compression rings, installed and oriented the rings, and installed the new piston with rod end cap. I've got two more to go on this bank, and then we'll be ready to put on the head and move to the right bank.
![]()

I am late in the game here, but did you check the valve to piston clearance using a solid lifter? If not, how did you have the hydro lifter pumped up? Or did you use a really light checking spring so the spring pressure would not collapse the lifter...? Just asking... And on your porting. Looks great to me. But don't forget the short side radius.
In reply to noddaz:
I did not have a solid lifter, but I did install the head without a gasket, and tightened the rocker down so there was zero valve lash. In actual installation, there will be a 0.030" head gasket and some valve lash to take up the hydraulic pump-up of the lifter.
Thanks for the input on porting, but it's done, head's back together. ![]()
Got two more pistons in last night in 1 bit over an hour. Now it's ready for the head! Guess I'd better order those head gaskets... ![]()
Link for reference:
https://grassrootsmotorsports.com/forum/grm/from-the-grm-vault-diy-head-p/121424/page1/#post2144858
![]()
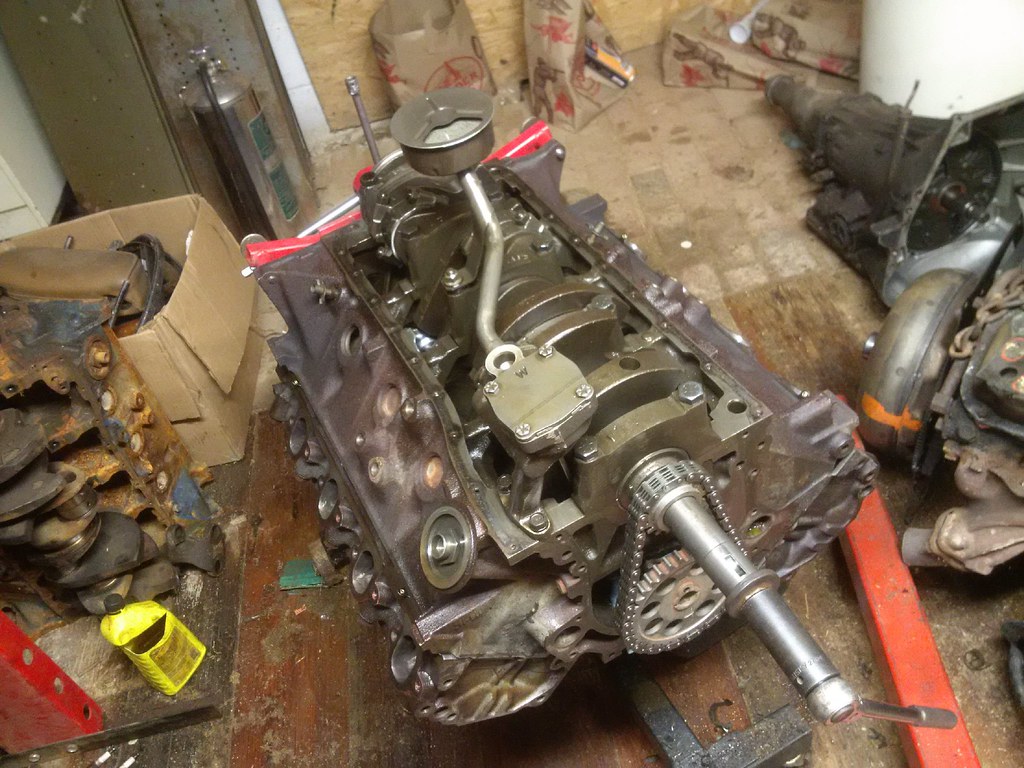
Made some more progress this weekend. In disassembling this engine, recall the valve covers and timing cover were practically epoxied on. I had to use big prying and banging tools to get them off, rendering them pretty well berkeleyed. Luckily, the parts engine had a nice straight set of valve covers, and a good timing cover, too. The timing cover needed replacing anyway, as the truck and car covers are different.
The parts 460 yielded a good car oil pan (again, different from the truck one) and oil pump and pickup (again, different). The pile of parts from noddoz included a new pump, but the pickup is still needed.
The dizzy (fo shizzy) on the engine being built was stuck and the bore it sits in rusted, so I cleaned that all out and oiled it up.
Lots of cleaning, gasket scraping, degreasing, etc. Zero dollar work, all time consuming and necessary. ![]()
Got the first head back on the engine, and moved over to head #2, which had two very frozen exhaust manifold studs. After attempting various methods of (unsuccessfully) removing these studs, I finally did this:
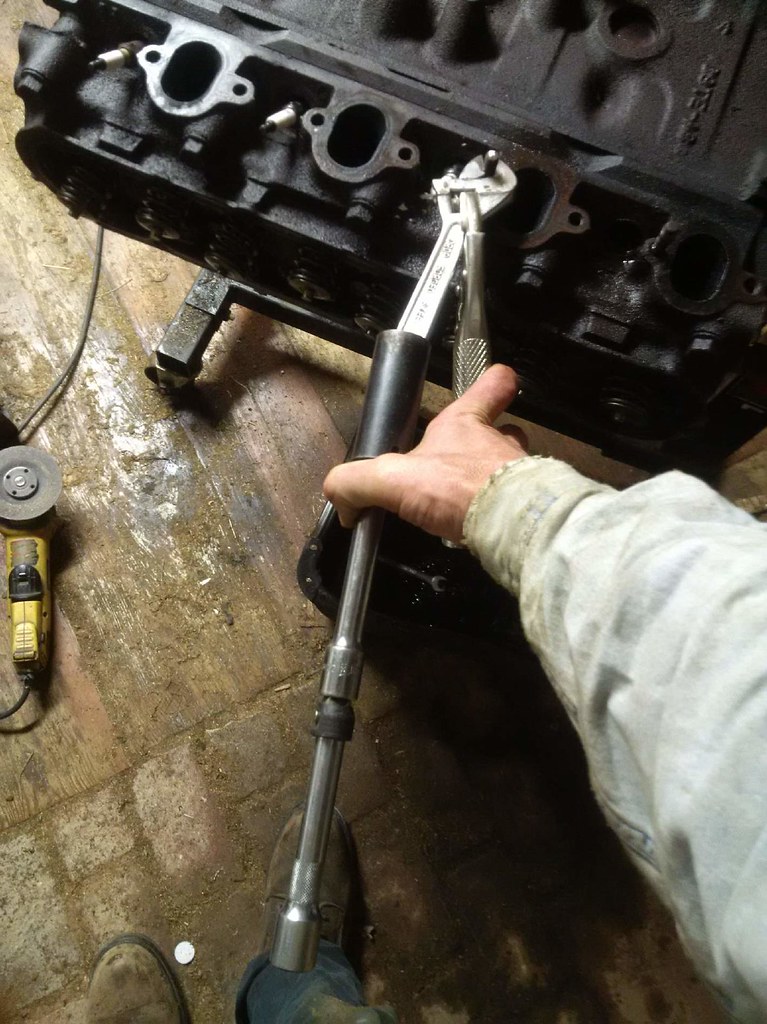
Ground two flats on the stud, parallel to each other, put an adjustable wrench on them, made a "breaker bar" for the adustable with a large socket and extensions, and then clamped a vice-grips onto the adjustable wrench thumbwheel to keep pressure on it while turning the wrench.
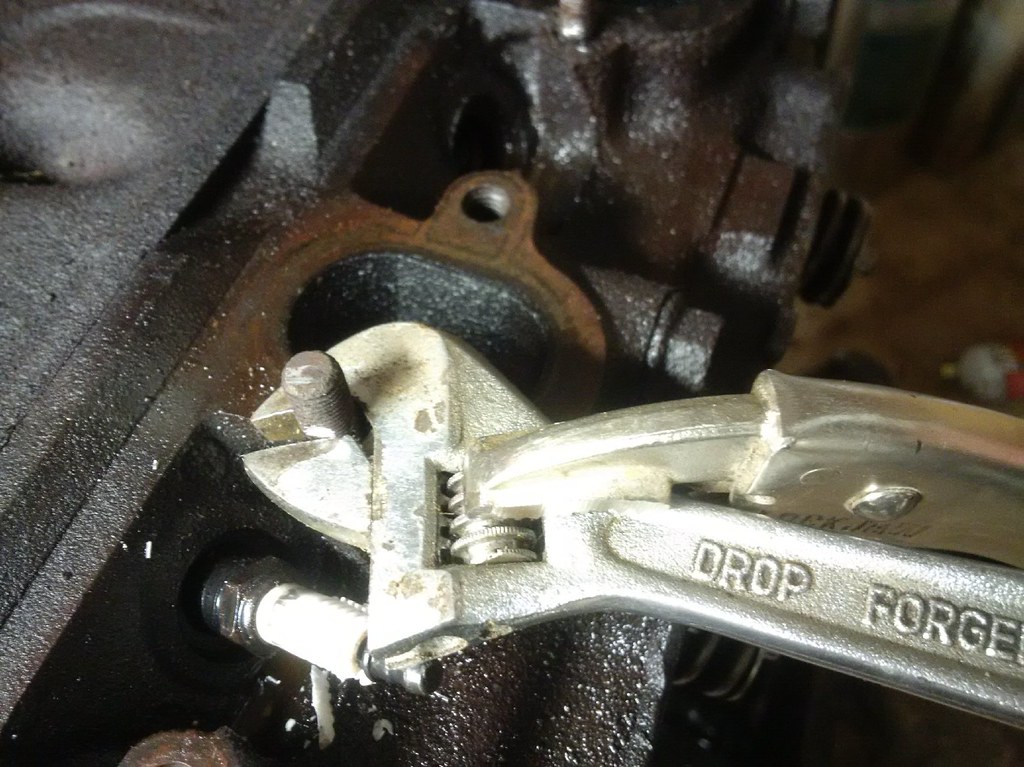
Success!
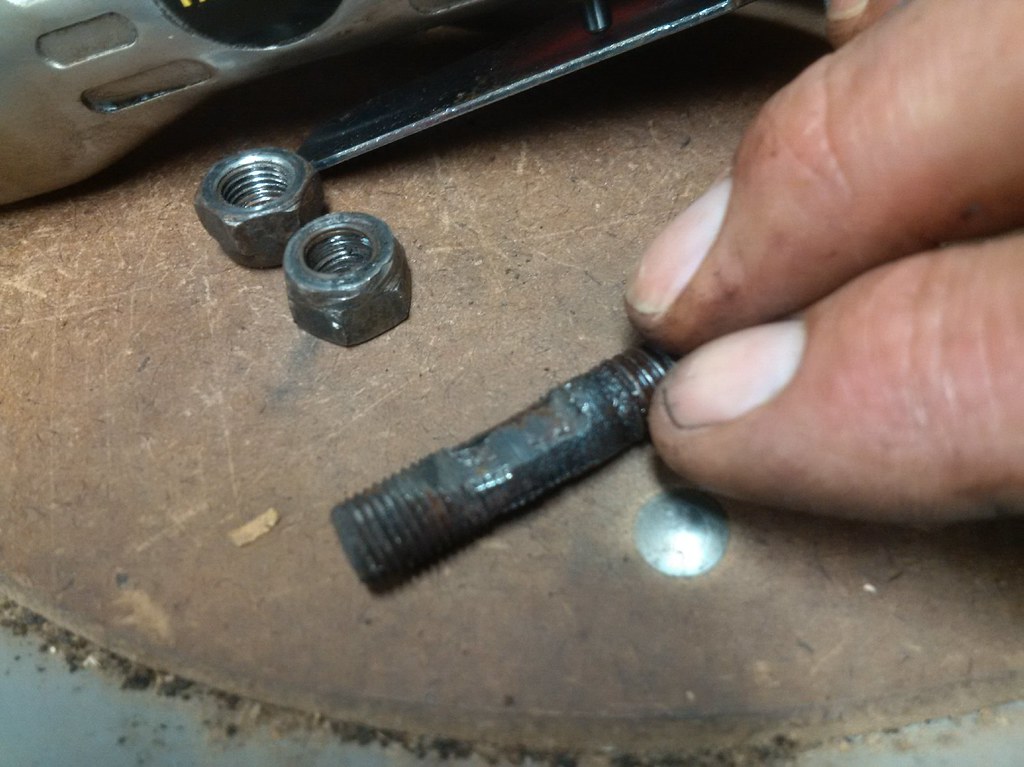
It worked so well on the first stud I repeated it on the other stuck stud and it, too, came out perfectly. Ran a tap down all the holes and all is well. Time to pluck the head!
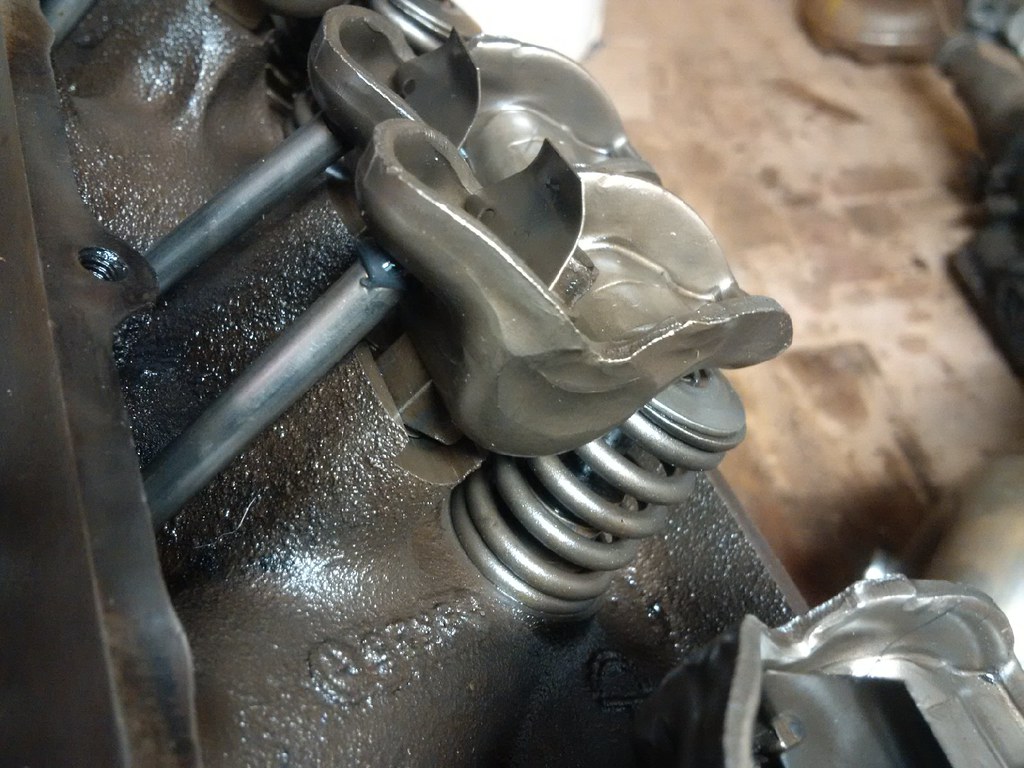
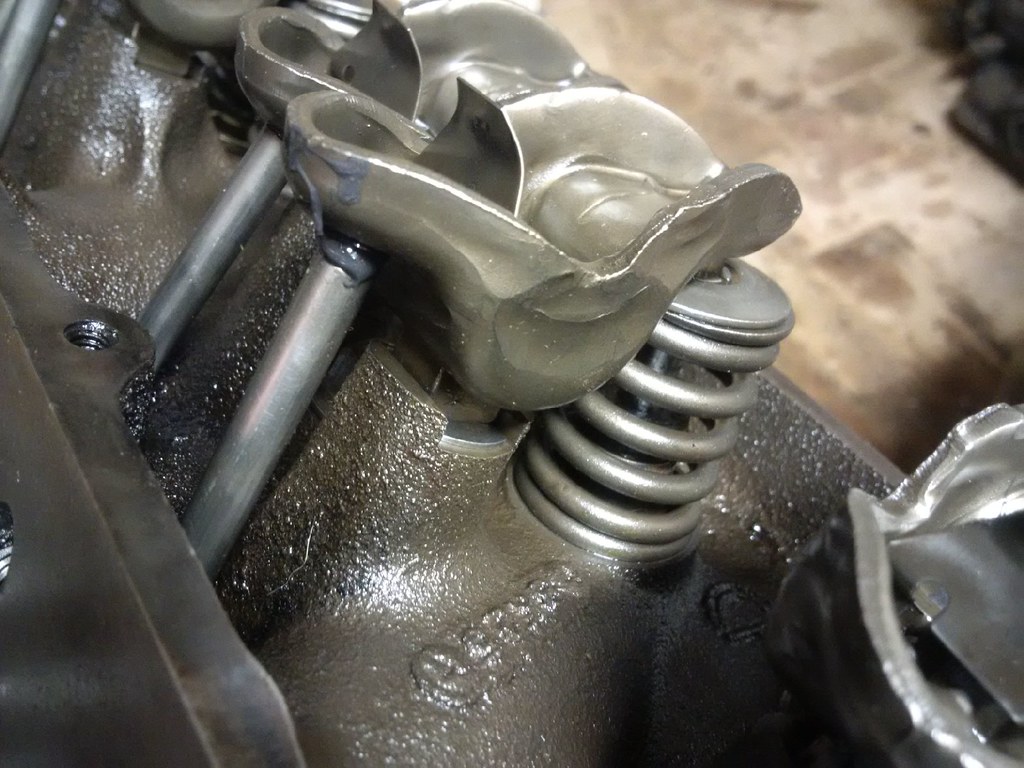
6.5 out of 8 exhaust ports have had the smog bumps removed and the ports matched to an exhaust gasket.
All this exhaust work is exhausting! ![]()
More portin'...

Vague attempts at organization.
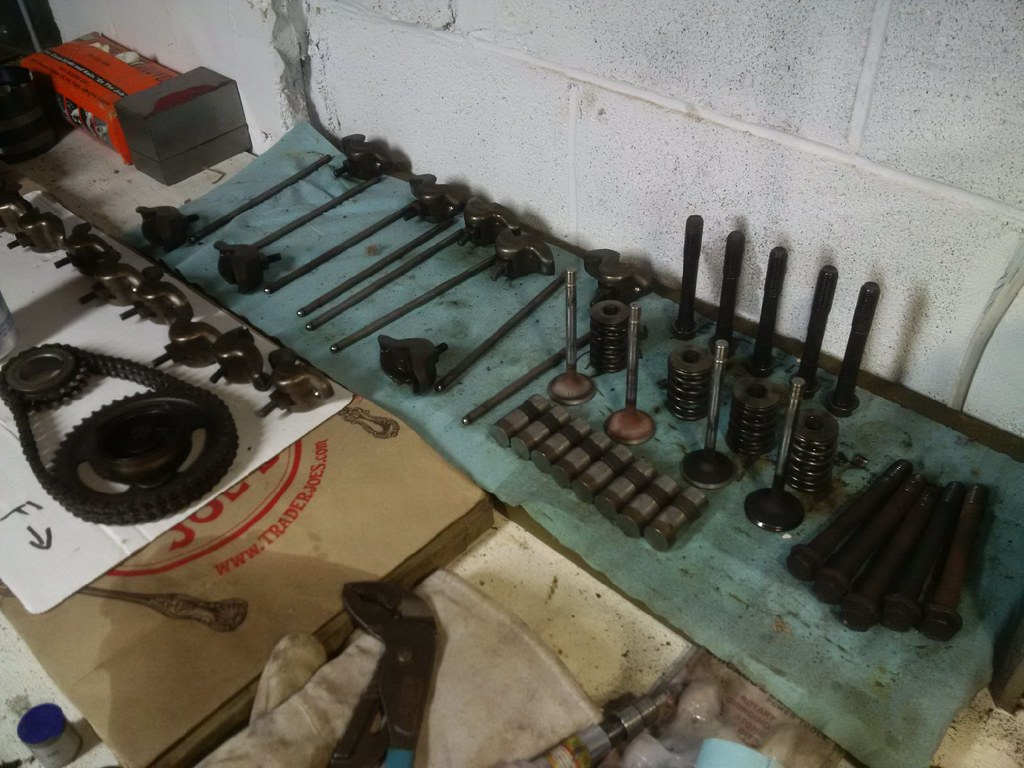
Time passes...work continues! 6 of 8 new pistons are now living in their happy homes.
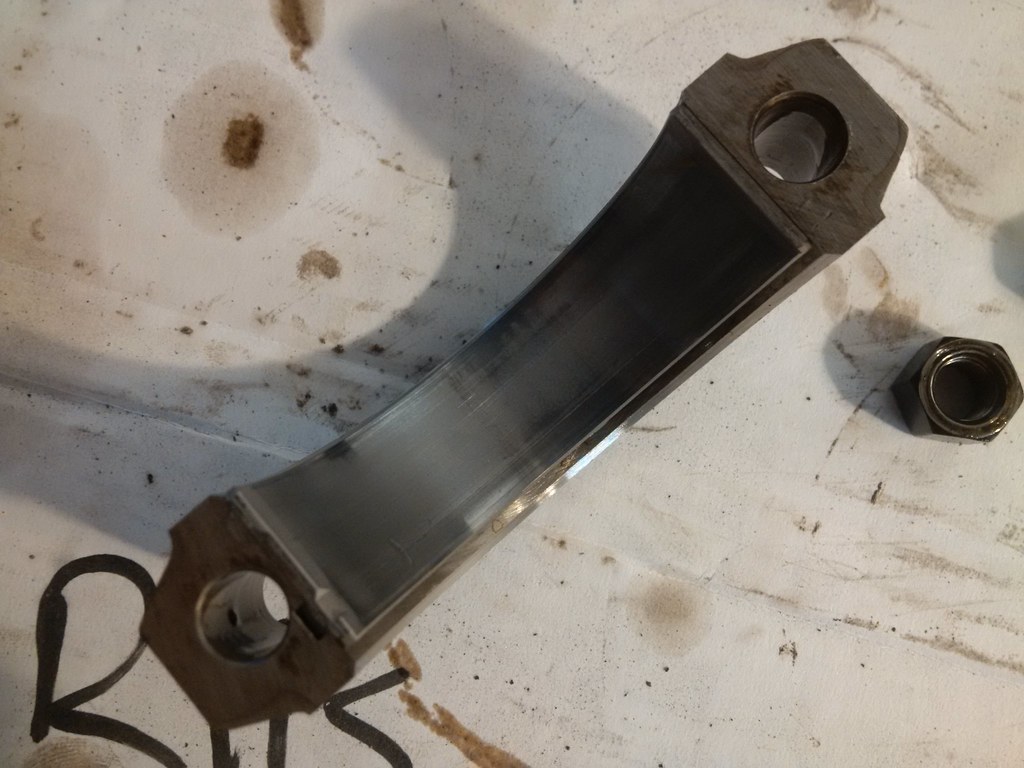
These big end bearings are in great shape. This engine reputedly came out of a motorhome with about 30,000 miles on it. I believe it.
More of the mundane. All that stuff they don't tell you about in Hot Rod or Car Craft. Cleaning off the threads of head bolts to be re-used. Replacing the rear main seal. Torquing big end bearing caps. Et Cetera. No glory here, no fancy cam installs or trick intakes. The portin' and polishin's done. This is the nitty gritty, buttoning it all together. And it's being done 20 to 30 minutes at a time.
Eyes on the prize.
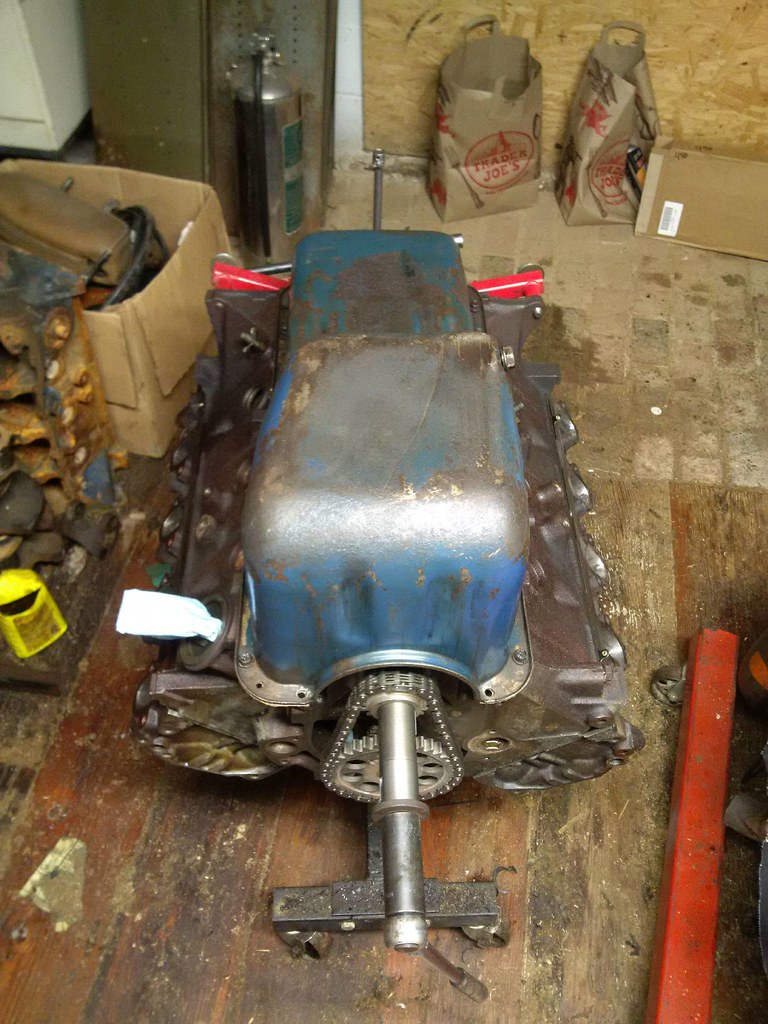
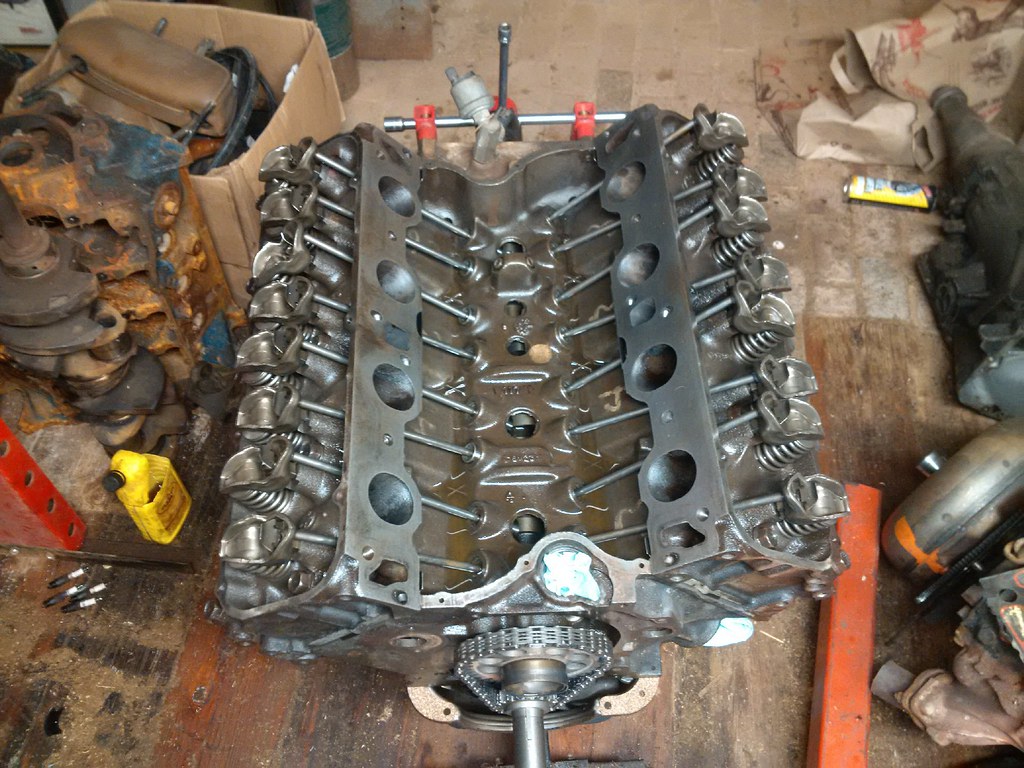
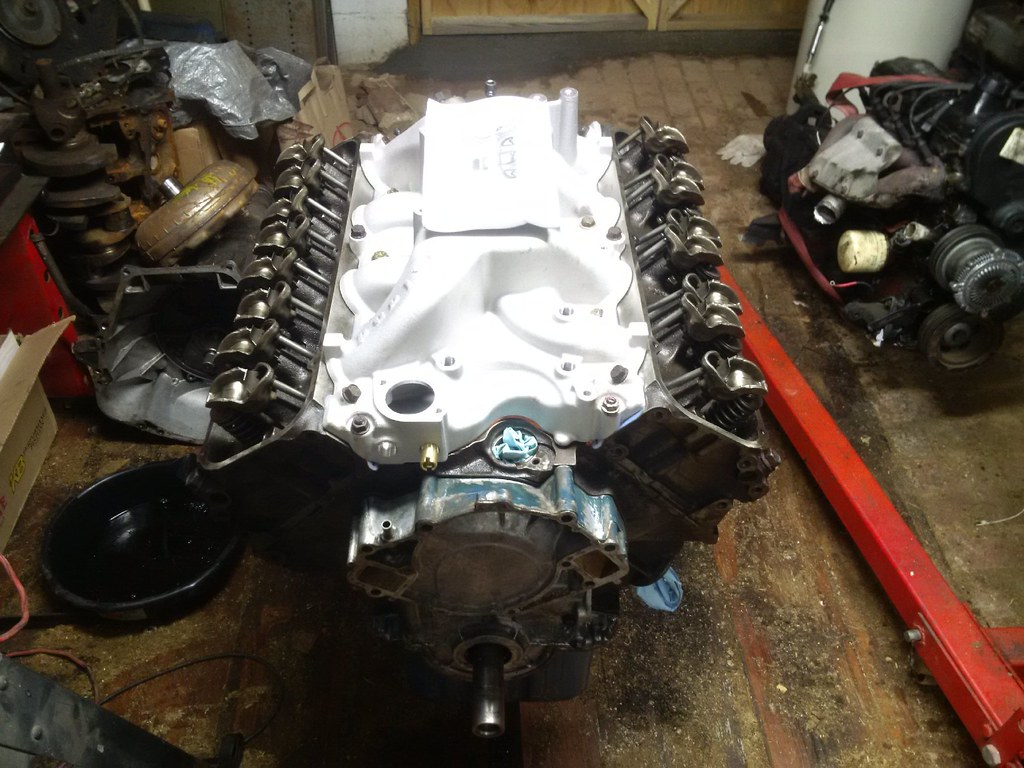
Heads on, torqued to 140 lb-ft. Big end connecting rod caps to 45 lb-ft. Main caps to 105. Flipped upside-down to do the windage install.
In order to fit this formerly-truck 460 into a 1975 LTD Landau, one thing that needs to change is the oil pan. The truck 460's used a mid-sump pan, whereas the car 460's had a front sump. Changing pans necessitates changing the oil pump pickup location, which, of course, also necessitates a different pump. Fortunately, included in the beer-for-460 Ford parts trade with Noddaz was a new Melling oil pump. ![]()
The screen on the car-type pump is a press-fit into the pump, and due to some complicated geometry with the pickup screen tube, a special tool exists for installing the pickup screen:
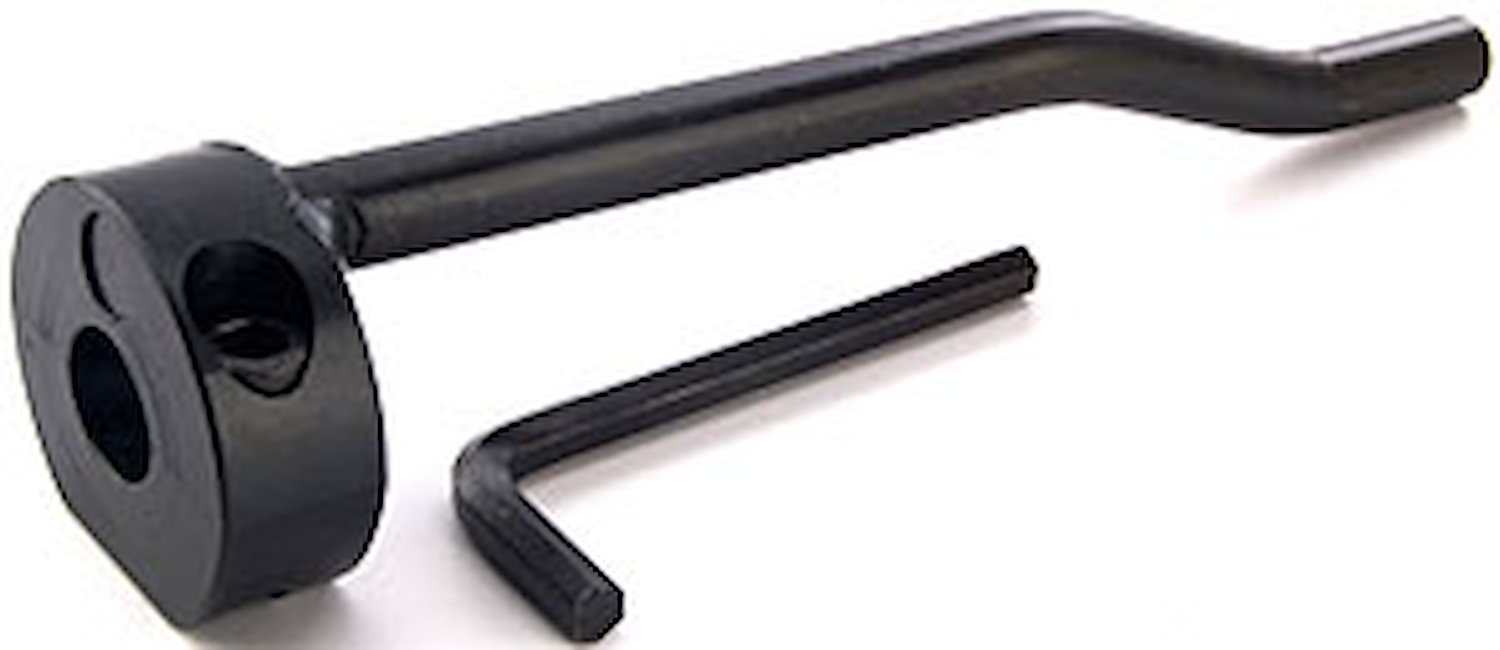
Basically, it clamps around the tube of the screen and allows one to use a mallet to tap the tube into the pump. Not wanting to shell out $57 for a one-time-use tool, however, I decided to make my own.
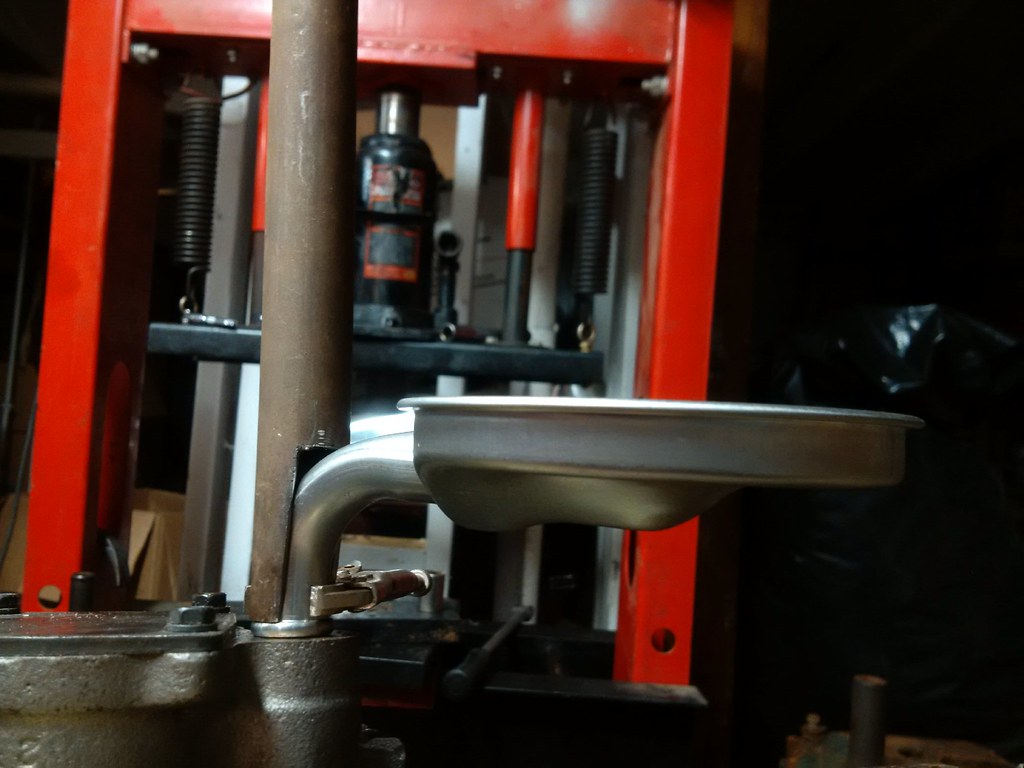
I scavenged in the scrap metal pile until I found a piece of metal pipe with an ID slightly larger than the oil pump pickup screen tube's OD, about 8 inches long. Then I sliced an angled section out of the pipe so that it would fit over the bend in the tube. I clamped the pipe to the tube with a set of vice grips just tightly enough so that the pipe wouldn't slip off, and would bear against the rib on the tube. Then I used a 10 pound maul to tap the tube into the new oil pump (which was already installed on the engine).
Success! With the new oil pump, pickup screen, windage tray, etc all installed, the front sump oil pan fits perfectly.
So, here's the Tunachucker Speed Shop:
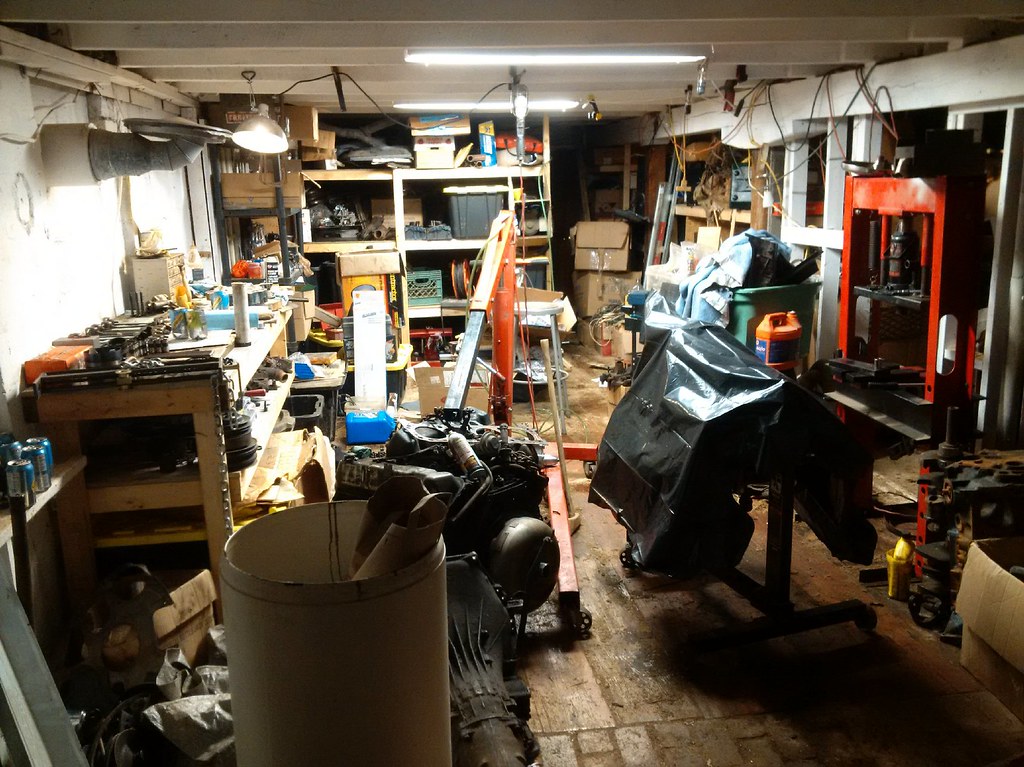
The black trash bag there is hiding the current build.
More of the mundane last night. Pulling freeze plugs. The coolant passages were clear, and new brass plugs were installed.
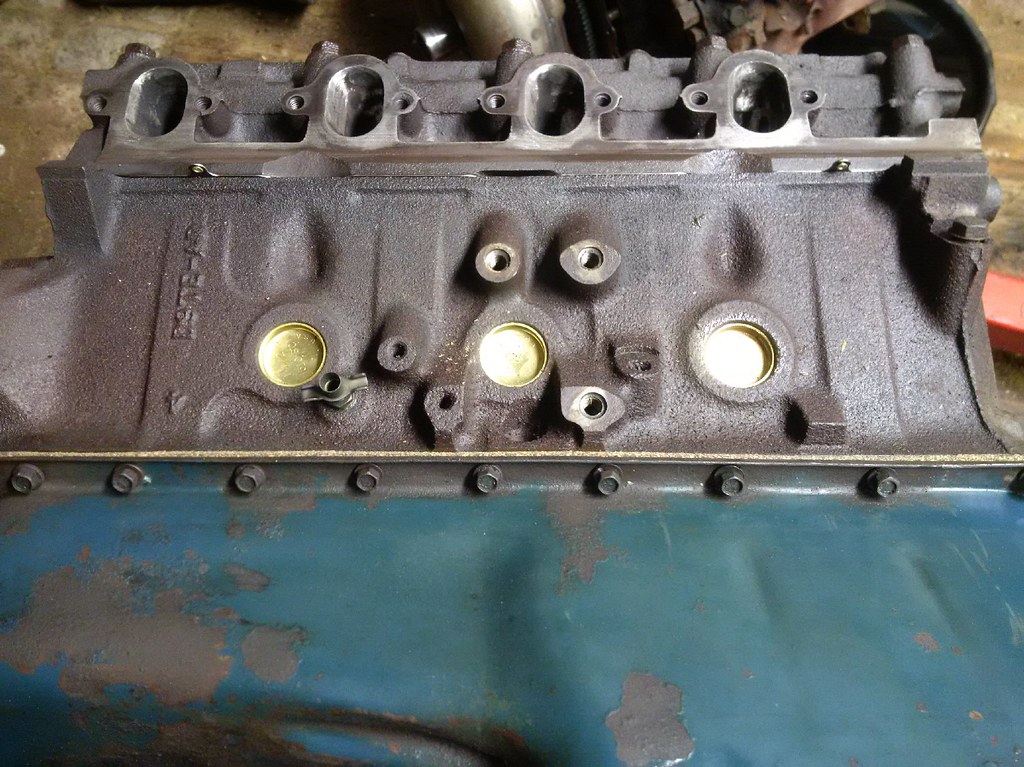
The heads also got the funky 43/64" (Dorman P/N 555-120) freeze plugs installed into the smog ports to block them off. And the timing cover got a new seal pressed in.
The engine hasn't looked like this in a long time.
Now to set the valve lash. BBF with the stud-and-bolt mounted rockers require either shims on the rocker pedestals or different-length pushrods to adjust the lash. At full valve closed (lifter on the backside of the cam lobe) the lifter should be pushed down about 0.030". I managed to get 5 or 6 valves checked last night and they were all over that, meaning either shims or shorter pushrods are needed. The pushrods are cleaned and re-used so basically $0. New pushrods would be over $100....and shims are about $10.
Shims it is. ![]()

Following along and hoping to emulate this build at some point. ![]()
In reply to The_Jed:
Let me know if you want any help when you do.
Got the valves all lashed up this weekend. 1/2 to 3/4 turn each, about right. Each one took a 0.060" shim. Now to slap on the aluminum stuff around the periphery of the block and get it ready for the transplant in January.

would like to learn more about the valve shims for the BBF...
Dees be Dey.
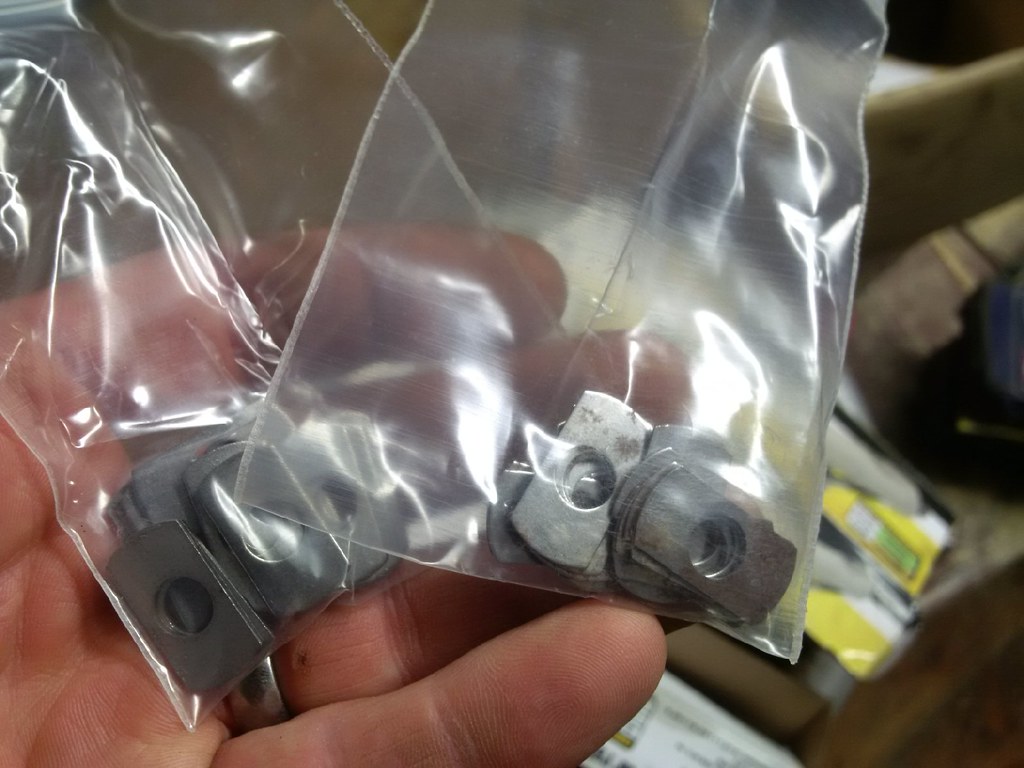
Rocker Arm Shim Kit M-6529-A302
From what I can tell, the 302 Ford V8 uses these as well. There are 0.060 shims and 0.030 shims.
Read this for more information.
The rocker arms are bolt-mounted. With the rest of the valetrain in place, while tightening down the rocker bolt, find the spot when tightening it that the pushrod just begins to depress the collapsible portion of the lifter (the inside part). Then count the turns of wrench needed to fully seat the rocker arm mount. Since the rocker bolt has 18 threads per inch, each turn equals about 0.056".
The goal is to have somewhere around 1/4 to 3/4 turn of wrench. If it's more, then there is too little lash. If less, then too much lash.
Because of the thinner-than-stock head gaskets on this engine, and the different cam lobe profile, we ended up with around 1-1/2 turns on each rocker bolt. Too little lash- and the potential for burning valves and losing compression.
Here's a rocker bolted down just until the lifter is beginning to compress. Note the gap between the rocker mount and the pedestal.
Remove the bolt, and install a shim. Here's a 0.060":
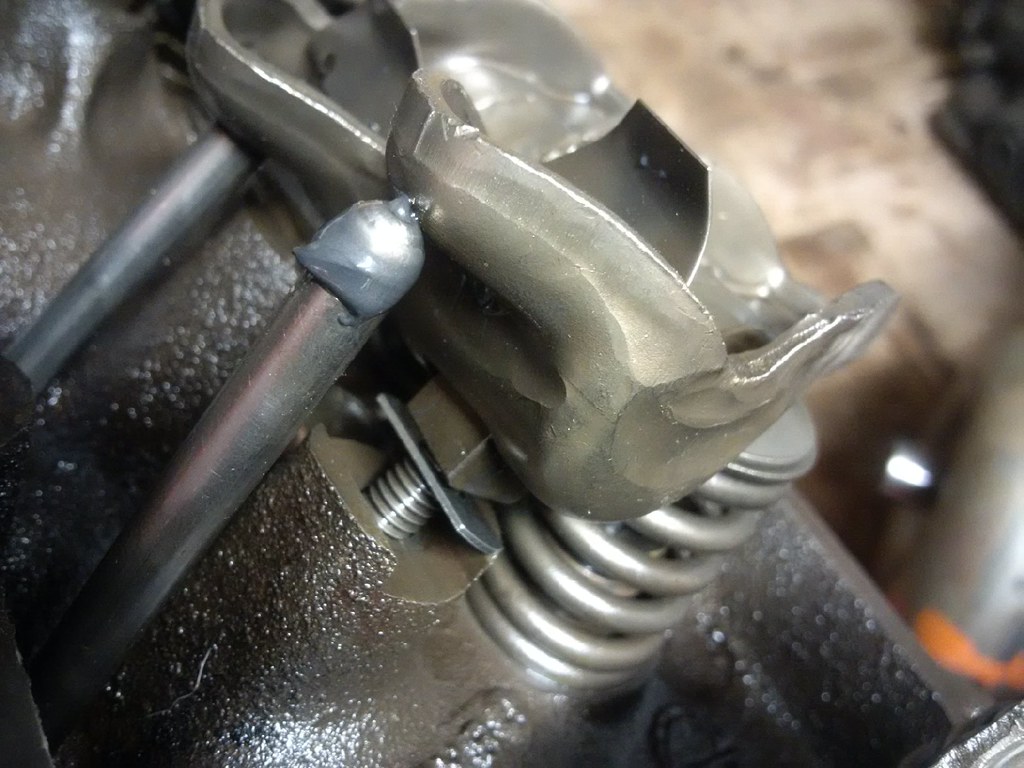
Tighten it down. Now the lash has been reduced to approximately 1/2 of a wrench turn from when the lifter just starts to compress to when the rocker mount is fully seated to the shim and pedestal.
For this engine, one 0.060" shim on each pedestal worked perfectly, and brought the lash down to between 3/8 and 1/2 turn per valve. It is recommended to not use any more than 0.090" worth of shims, or the rocker-pushrod-valvestem geometry can get messed up. In the case that more than 0.090" is needed, use shorter pushrods. And if there's less than 1/4 turn of wrench with no shims, then longer pushrods will be needed, or the pedestal top rocker mounting face can be machined.

You get the added benefit of having the rocker pedestal sitting on a hardened piece of steel instead of cast iron.
Despite the cold, a week spent out of town for Thanksgiving, and all of the countless things that seem to suck every available minute out of the day, progress is being made.
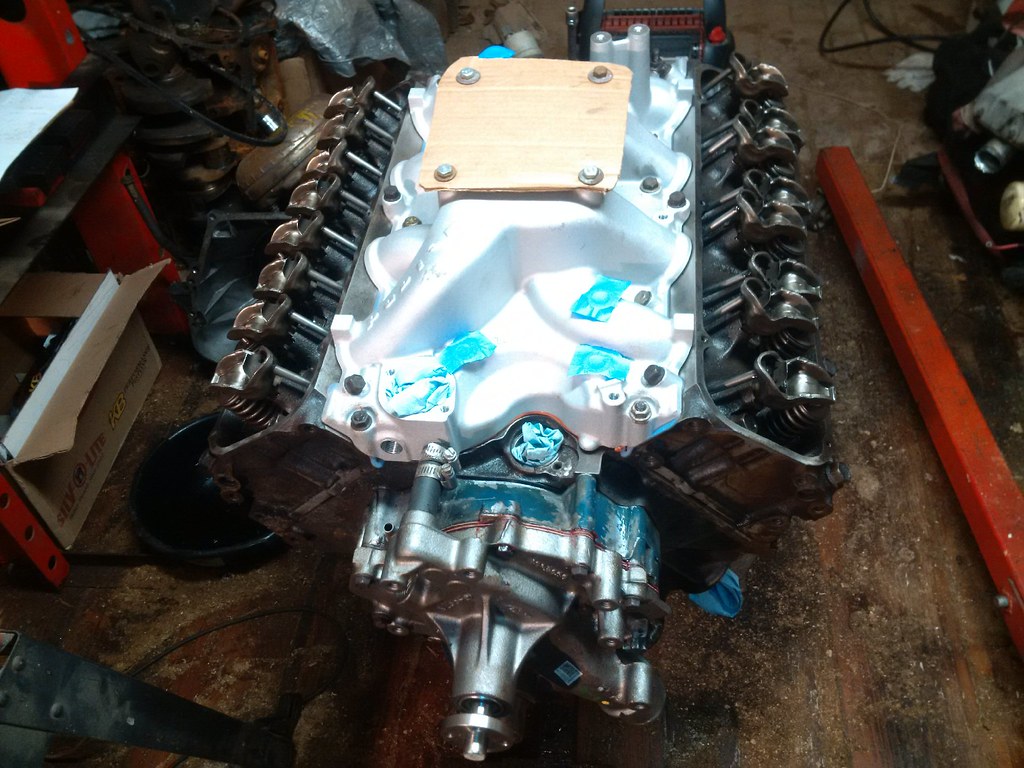
In a rare fit of common sense, I did some reading on installation of intake manifolds on the 460. The current recommendation is to eschew the stock-type intake manifold gasket with the valley pan and use Fel-Pro's 1230 gasket set. Also, the rubber end seals are recommended to be replaced with a thick bead of RTV. And so...

It took me more time to hunt around, find, and chase threads on all the bolts and studs needed to install the manifold, than to actually install and torque down the manifold. But it's on there, finally.
The list of "to-do's" is growing much shorter now. Install the water pump, install the flex plate, tighten the oil pan bolts, install the valve covers, and... ???
Last night I went out, fabricated, and installed a carb-block-off plate, to prevent errant materiel from finding its way into the engine. I also taped off the open vacuum ports. I'm...learning from past mistakes. ![]()
looking quite nice........
Looking good....
Thanks guys! I hope this big block build has been entertaining and informative. I've met a few GRM'rs as a result, and learned knowledge that I've already passed on to others. Heck, I just mailed out a pair of freeze plugs for the smog heads to a GRM'r in Missouri (I had to buy a box of 10 just to get the 2 I needed).
More progress last night, got the water pump installed. I think we'll do the valve covers next, to get that all buttoned up.
It's really close now. Work party January 14th to do the install in the car. I'll post pics here. ![]()
noddaz wrote: Looking good....
I haven't forgotten you, either. if you have a sticker or something you want me to paint on the car, let me know. Otherwise I'll just replicate the plywood sign to the best of my (very limited) artistic abilities.
Water pump is on:
Yes, I'm learning from past mistakes. Covering all the openings on the engine. It does need valve covers, though. I cleaned them up last night. Should bolt on easily, once I find the bolts...
You'll need to log in to post.