Finally got the dismantled front suspension out to the powder coater.
fingers crossed they don't put powder where it doesn't belong. Last photo showing the stripped upper control arms prior to coating

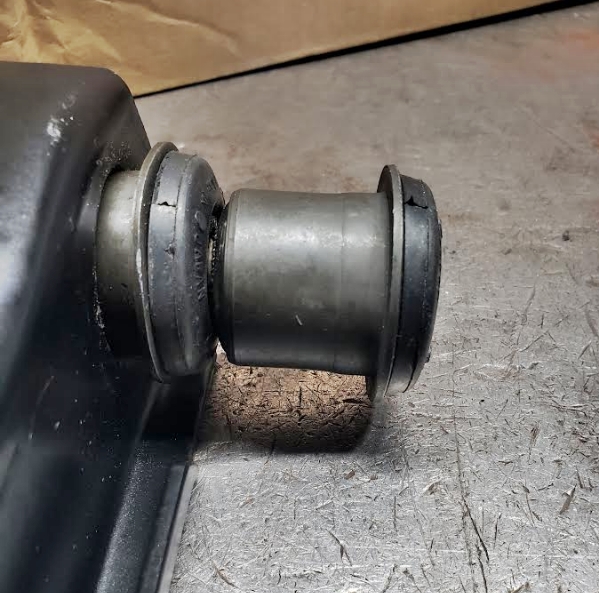
Also found/purchased Celica rack bushing[s]. As they were designed for power rack, I'll only be using the shaped end. Yes, the shaped end is the same for both manual rack and power rack.... I checked toyodiy.com first.

more to come.... 
A bit further today... removed the original temporary rack mounting rod, and narrowed the mounts a bit as well
before....

after....

came out looking nice if I do say so myself

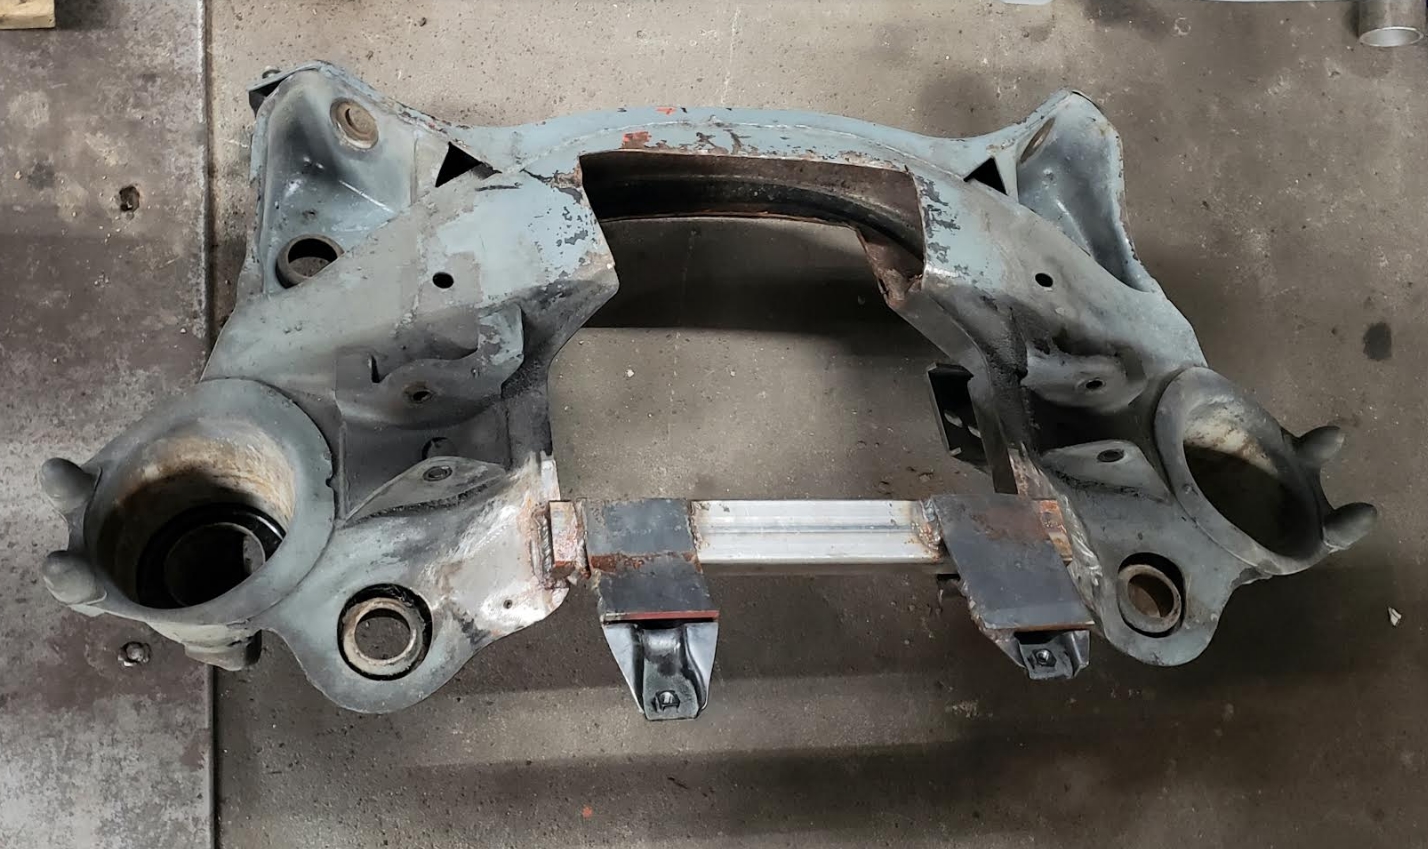
Subframe needs some welding - boxing in the cut section, and then it too can go to powder coat - but before that....
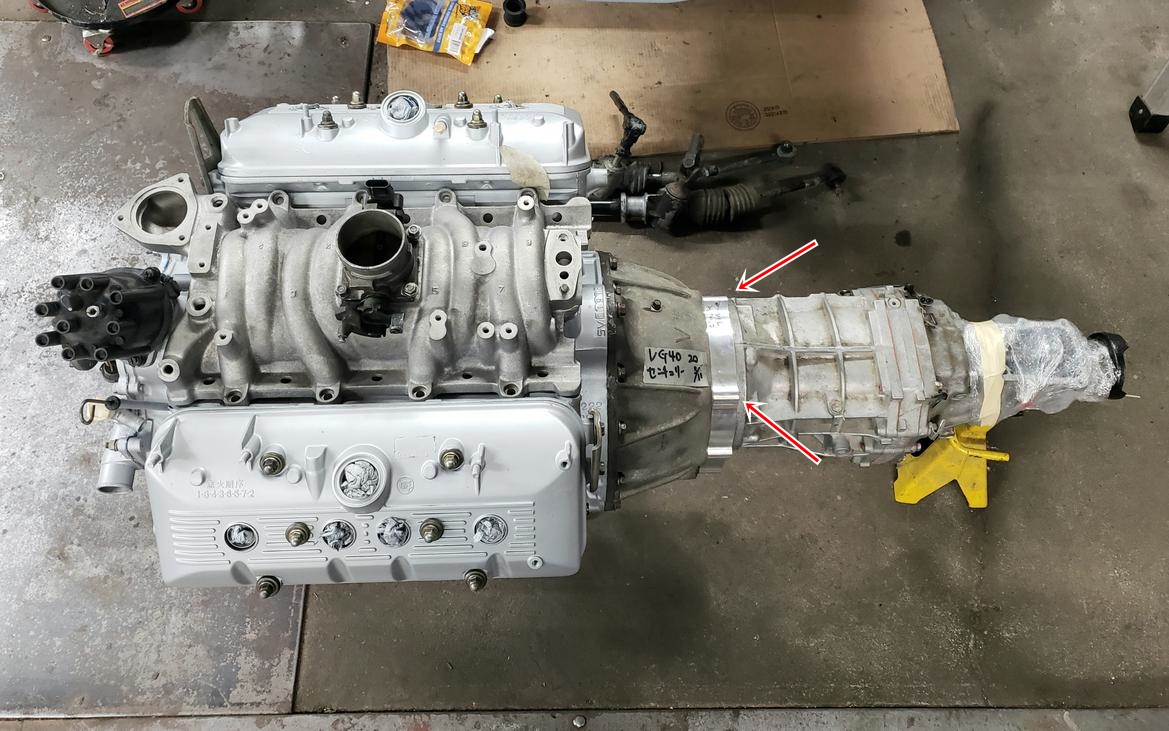
now to get the engine and trans together to see if the both fit... and if not... to see what needs to happen for it to fit.
more to come...
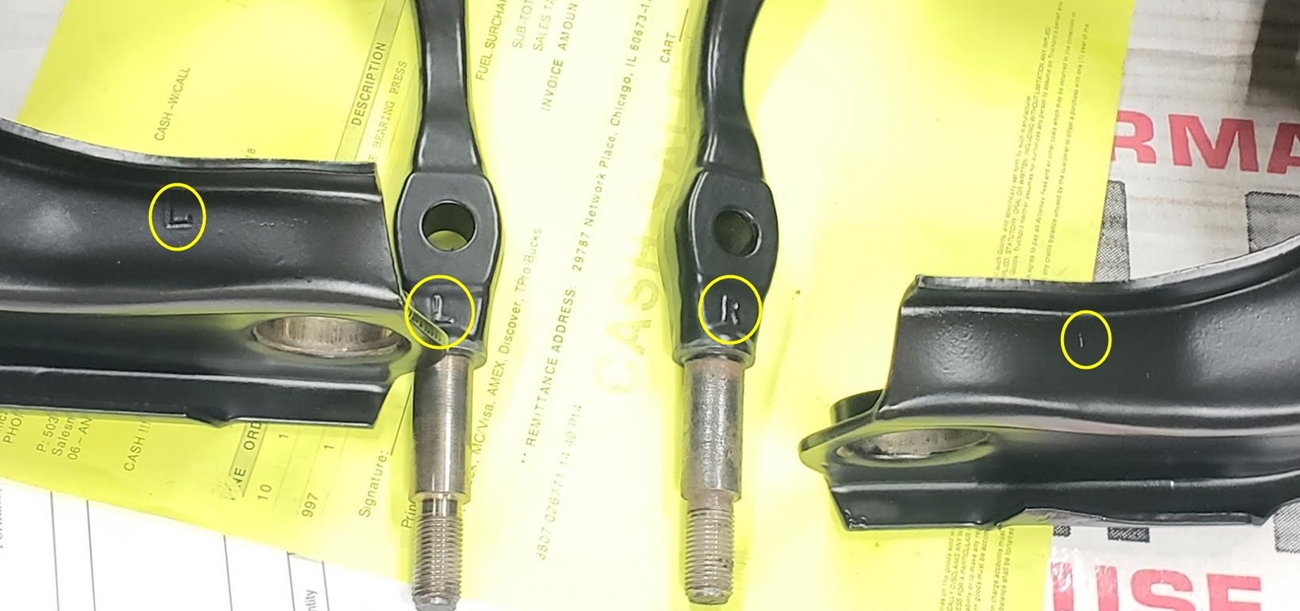
So... if you looked closely at the photo of the powder coated suspension you may have noted that the lower arms still had their bushings in - I left them that way so the new bushing would be pressed in from the right direction....
Speaking about the rright direction.... while I took a bunch of photos of the upper contral arms, and their pivots, it looks as though I was worried for no reason.... Toyota marked them for me (yes that is an "R", just poor angle to see it)
more to come.....
So the plan for Saturday is to get this fitted.

more to come.....
So, Saturday was postponed until today (Sunday), and we got it 95% in....
but there is a problem.... One of the previous places forgot to install #35 on the front two subframe mounts...

I've seen both front bolts a bit taller then the rear bolts, and I had wondered......

So for now the 1st fitment of engine trans will have to wait - but the feeling is it will all fit with some massaging....
more to come.......
3 steps forward, 4 steps back..........
along with the short delay on the engine/trans fitment, the shop installing the bushings into the control arms has run across an odd problem. It seems as though something doesn't fit quite right....... The bushings if you remember are Toyota bushings for this car - part number is on the bushings..... 48632-22020

But we seem to be about 10mm short........


The current plan - fit the bushing into a lathe and "move" the step roughly 5mm per bushing.......
more to come......... 
oldeskewltoy said:
The current plan - fit the bushing into a lathe and "move" the step roughly 5mm per bushing.......
more to come.........
Comparing my upper arm with bushings to my Aussie friends arm... my bushings are still short....

more to come....
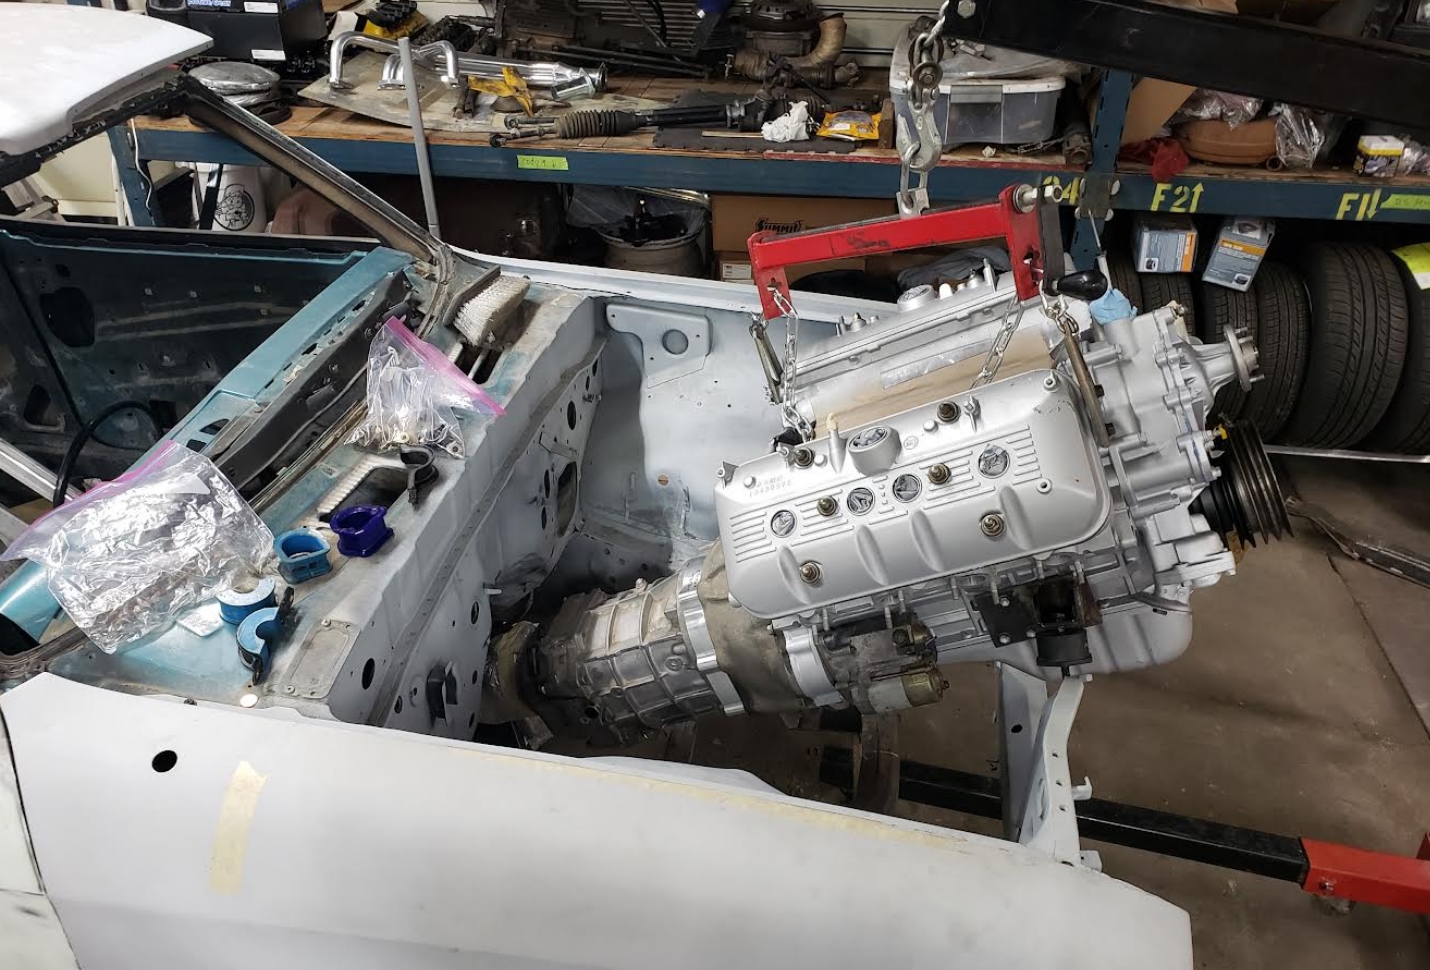
So while the suspension solution has yet to be determined.... back to driveline fitment.
First things first the lower mounts to the front of the sub-frame were removed from the parts car and installed. At least now the engine can be fitted without it coming out the bottom.
The two photos from the first attempt will have to do for "action" shots....
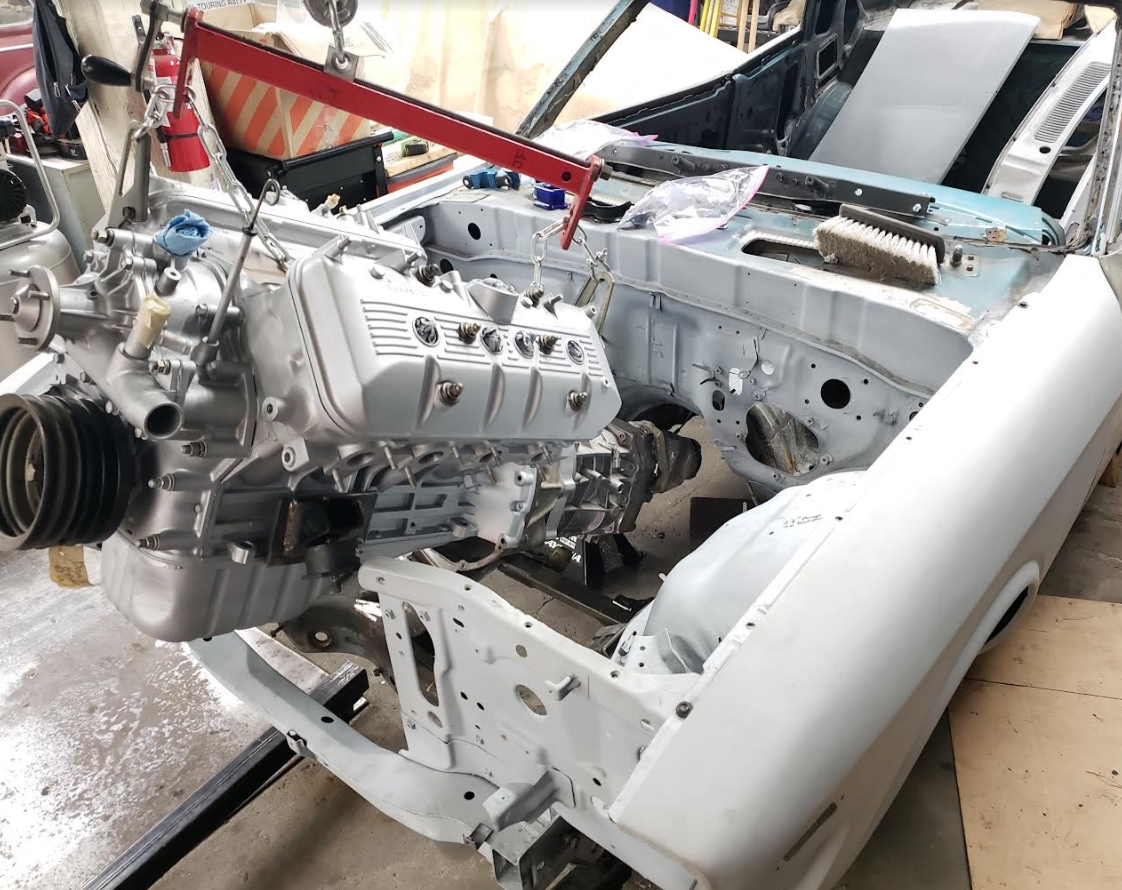
.... and the engine/trans is in!

and it looks as though running the hydraulics shouldn't be too difficult.

There is a bit of interference... For now the best I can get the engine angle to is 4 degrees....

The point of interference right now are the two top mounting ears for the adapter
unsure yet, but it looks as though I may be able to taper the 2 mounting points, and I could add a few more "strategically" placed hammer hits on the tunnel. As far as lining up the shifter hole, it is very close, but the shifter opening in the tunnel looks like it may need to be extended back about 1"
I ran into the same issue with short bushings. I solved it by turning up some steel spacers to take up the slack.

Shavarsh said:
I ran into the same issue with short bushings. I solved it by turning up some steel spacers to take up the slack.
Cant speak to your control arms (bushings), but mine are suppose to engage the "teeth" of the bushing into the pivot once the nuts are tightened.
Tightening them is to occur once weight is on the suspension. Once tightened the "teeth" hold and the bushing flex around it
oldeskewltoy said:
There is a bit of interference... For now the best I can get the engine angle to is 4 degrees....
The point of interference right now are the two top mounting ears for the adapter
A slightly different POV.....

Different bushings, different results

So with the engine out again, the front cross member will get proper welds, and the center section boxed-in, and then powder coated

oldeskewltoy said:
oldeskewltoy said:
There is a bit of interference... For now the best I can get the engine angle to is 4 degrees....
The point of interference right now are the two top mounting ears for the adapter
A slightly different POV.....
While waiting for the front cross member......

oldeskewltoy said:
So with the engine out again, the front cross member will get proper welds, and the center section boxed-in, and then powder coated


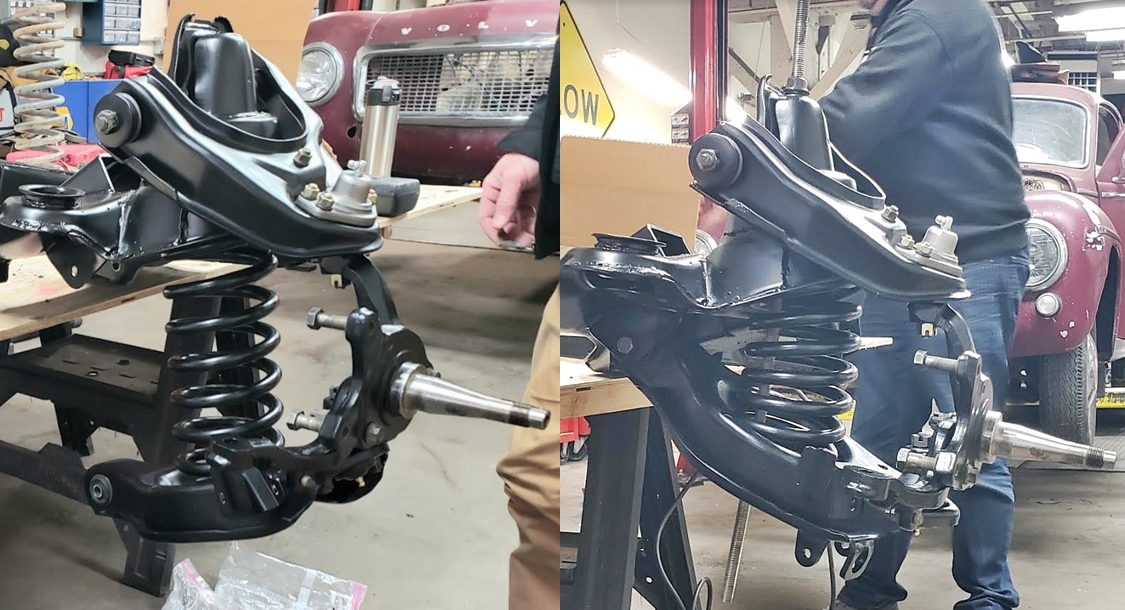
The BIG Challenge... getting that spring in.......
We tried the lift and HD zipties (nearly...) and we tried both kinds of spring compressors - Tried in these cases were attempts to fit, and or safely compress the spring - no one was injured during these attempts. Finally our shopmate Bryce recommended a long threaded rod to install - BRILLIANT!
I'll get it fitted to the car next weekend.
The only way I've ever installed springs in an arrangement like that is with the crossmember in the car. Even then, without engine weight, it's difficult.
Same. That looks similar to GM suspension of the era. The "big ol' pry bar" method has worked well for me, where you stick a pry bar between the coils with the LCA hanging down and wedge it in there as you jack up the LCA. The threaded rod method is quite elegant though, especially on freshly powdercoated parts!
Did the threaded rod method on the chevelle and it was still terrifying
So some good news........ and a E36M3's worth of bad news
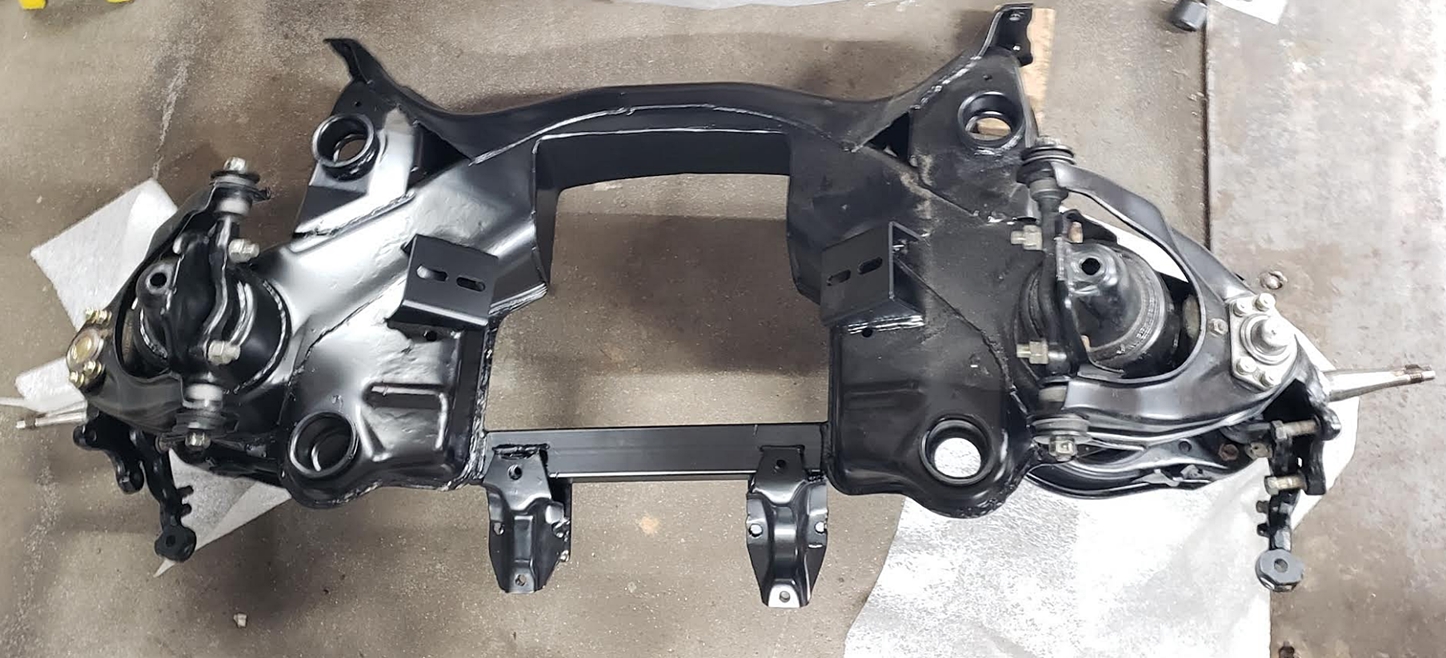
first the good news... subframe and suspension is reinstalled.

and the steering rack is now perfectly placed, just tucked behind the subframe


... and now for the bad news.... our landlord has asked us to leave, we need to be out by April 1st  Making a long story short (speculation) the patriarch of the family died last year, and the rest of the family are looking to get out of this building.... we are one of at least 2 parties who have been asked to leave on April 1st.
So with that deadline... I'm seriously looking at having the car professionally finished.
More to come.....???
so the rack is now firmly mounted. the rack mounts are from an AE86, with the d/s mount moved 1/2" further left. The rack is from an RA64 Celica, so the d/s mount is fitted using a 30mm wide neoprene rubber wrapped around the rack, and on the other side is a urethane AE86 manual rack mount with an enlarged ID to fit the large RA rack.
And yes the cross piece holding the rack mounts is askew, but the rack is square to the car. The large passenger mount size is what necessitated the cross piece being askew.


As a longtime friend and shopmate of Oldeskewltoy, it has been really exciting to see this project coming together! We're close to having it on the ground and rolling, which is going to a big milestone. Engine/trans in the car, suspension/wheels on, and rolling. A long time coming, and a ways to go still, but it feels and looks like car, which is great to see.
So, as far as clearances are concerned.....
We now have "more" at the steering rack........
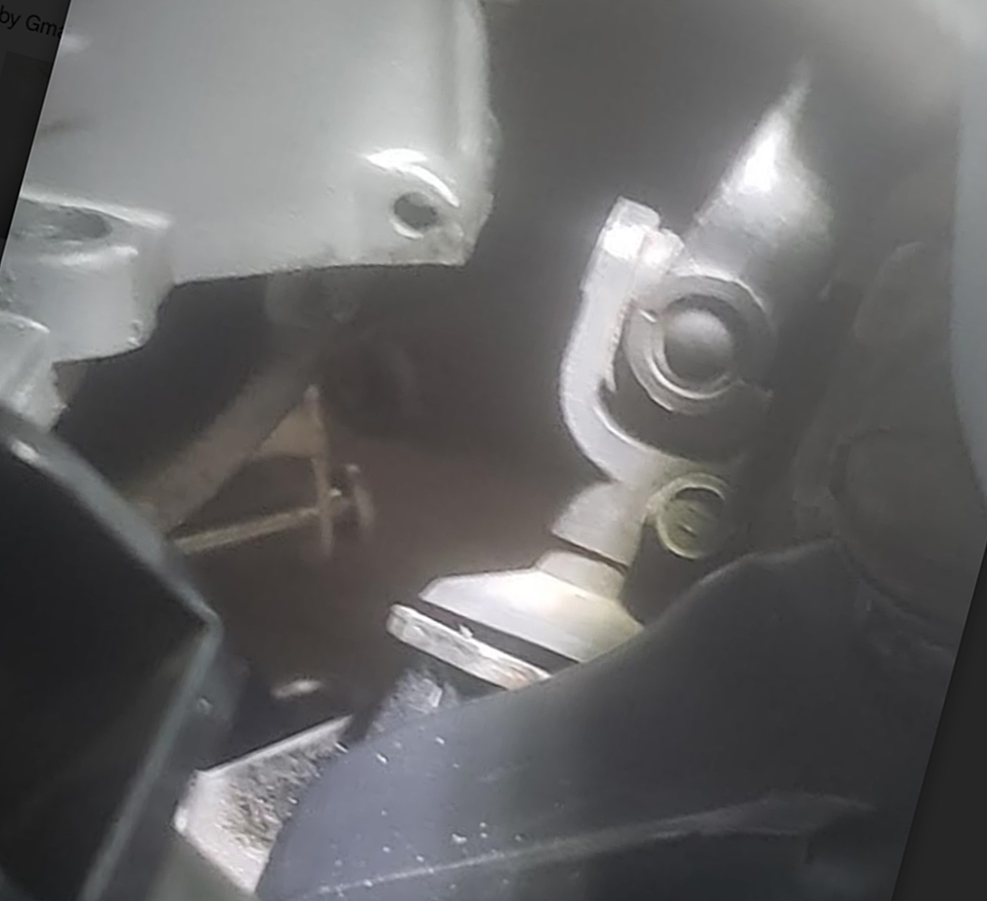
...and as far as starter clearance, the engine will have to come out to service the starter.....
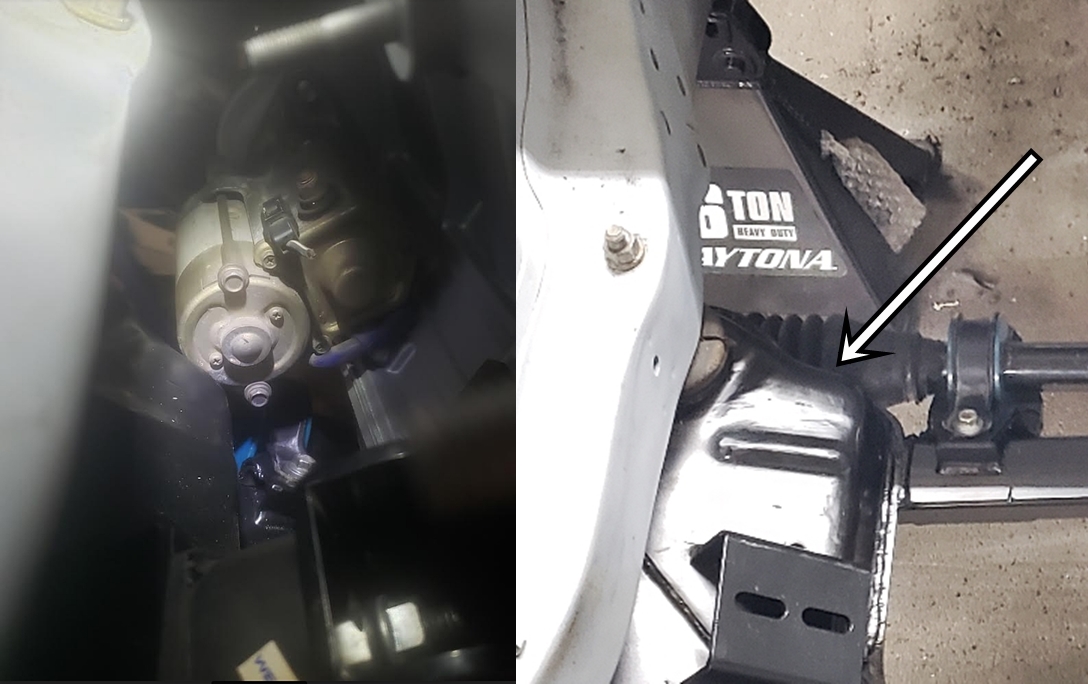
In the left panel bottom you can see the engine mount, and a bit above that you can see the large passenger side rack mount, and at the top of the panel is an exhaust stud.
Oh, OST, coffee, and the rig used to get the engine in.

more to come......