Been around for ages:
https://www.speedwaymotors.com/Steer-Clear-Steering-Box-Drop-Brushed-Finish,6254.html
Been around for ages:
https://www.speedwaymotors.com/Steer-Clear-Steering-Box-Drop-Brushed-Finish,6254.html
ShawnG said:Been around for ages:
https://www.speedwaymotors.com/Steer-Clear-Steering-Box-Drop-Brushed-Finish,6254.html
very interesting......might work.... isn't cheap.... but it may be a solution. Run that down from the column, rotate the rack so the universal in not as up right and it might just work.........
Stefan (Forum Supporter) said:That's essentially how steering quickeners work that are used by dirt track cars. There's still slop in them, so that's not great. A belt system would have less slop, but obviously one wouldn't want to break a belt.
What about swapping to a front steer solution? Would that provide the necessary room to route things properly?
Many OEMs use servo-assist power steering racks that have belts in them. It sounds kludgy, but I guarantee your wrists would give out well before you break a cogged belt in a steering application. The ones below are for a BMW F82, and about 1.5-2cm wide.

It would require some rethink, but how about an angle gear like a lot of newer Japanese trucks have?
Example from a QX4. Could have sworn I'd seen one in a Toyota at some point.
i would not want a belt in the steering linkage. That would feel woozy! Sure the OEMs do use belts, but they go between the assist motor and the rack, not in the steering column.
Pete. (l33t FS) said:It would require some rethink, but how about an angle gear like a lot of newer Japanese trucks have?
Example from a QX4. Could have sworn I'd seen one in a Toyota at some point.
i would not want a belt in the steering linkage. That would feel woozy! Sure the OEMs do use belts, but they go between the assist motor and the rack, not in the steering column.
got a photo, or link??
Tried to post a reply earlier but it appears not to have stuck. Apologies if this is redundant.
You shouldn't have to throw more bulky, clumsy, extra parts into the steering system in order to make it less intrusive. It's not in keeping with the OEM-style theme of the build, and it's just dopey besides. The car and the steering system are entirely conventional in layout. There has to be a more elegant solution.
As I said earlier, you can probably make a little extra room by finding some smaller components and optimizing their locations. Maybe an extra u-joint is called for. But certainly you don't need the bus adapter.
Please let us know when you are able to determine how large a tube you can comfortably fit between the powertrain and the steering shaft. Also, how large a tube can you fit two of? Four?
I finally ran across this, and am loving it. Great looking body, and a great engine! I saw a hot rod done with one of these Hemi's, and thought it looked just right sitting there. The only "hemi's" I have owned or worked on were Shovelheads, and a 426 has always been out of my budget, but would love to do something with one of these little beasties one day.
What are the odds....???? Performance sway bars for a moderately obscure 50 year old Toyota...... ![]()
Price is $790 Aussie, or about $575 US, now... will they ship to the USA???
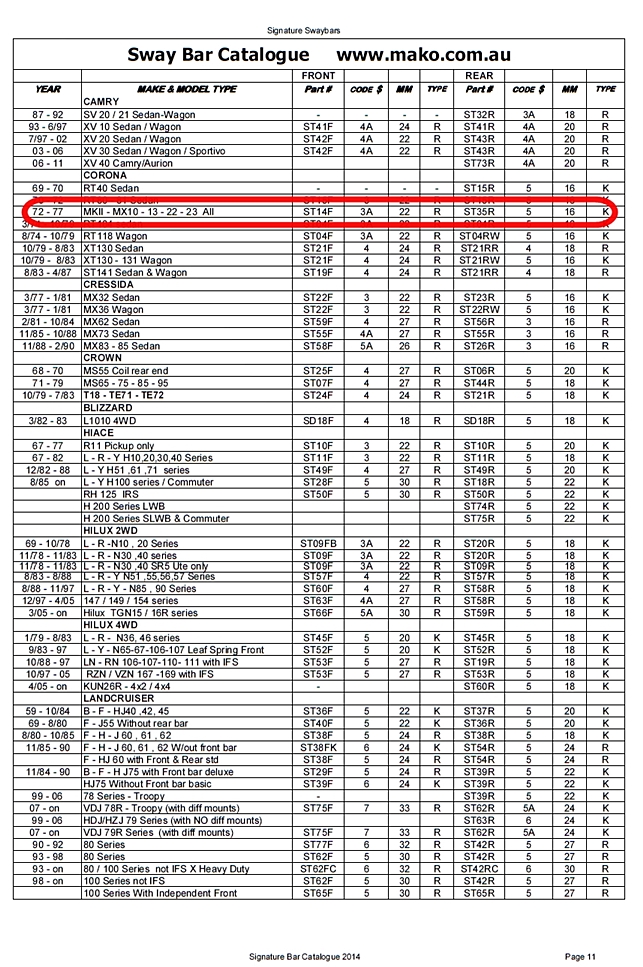
more to come...... ![]()
oldeskewltoy said:What are the odds....???? Performance sway bars for a moderately obscure 50 year old Toyota......
Price is $790 Aussie, or about $575 US, now... will they ship to the USA???
For that price you can bend your own and then some.
Well.... Mako Swaybar doesn't ship outside Aussie... ![]() , I spoke to a few of my Aussie contacts, but there seems to be a dimensional limit (1050mm) on shipping, and the price is a bit steep... without the fiasco of getting them here.
, I spoke to a few of my Aussie contacts, but there seems to be a dimensional limit (1050mm) on shipping, and the price is a bit steep... without the fiasco of getting them here.
Mako isn't going anywhere(hopefully?), but in the mean time I remembered an old suspension/swaybar company from my "youth"... Quickor Suspension, now Quickor Garage.
And they are right here in Portland!!! So getting custom made bars should not be an issue.... even the rear (no rear bar originally) shouldn't be all that difficult.
more to come....... ![]()
So... the drivetain mounts are final, the 5V-EU is back at Portland Engine Rebuilders, and we are a week away from going to the body shop...... ![]() Where the front sub frame will come off again and be finished up by Anthoni, while the body shop does its job, fixing 50 years of dents, dings, and rust.
Where the front sub frame will come off again and be finished up by Anthoni, while the body shop does its job, fixing 50 years of dents, dings, and rust.
Some thoughts...... I'm having some custom made pieces... The "6" fender emblems made into "8"
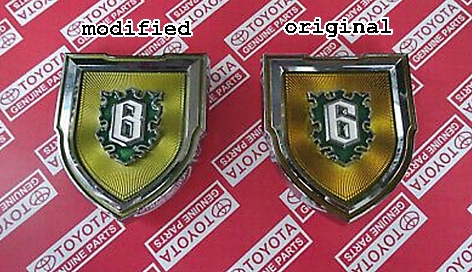
And the Hemi script in Japanese (something close to this...)

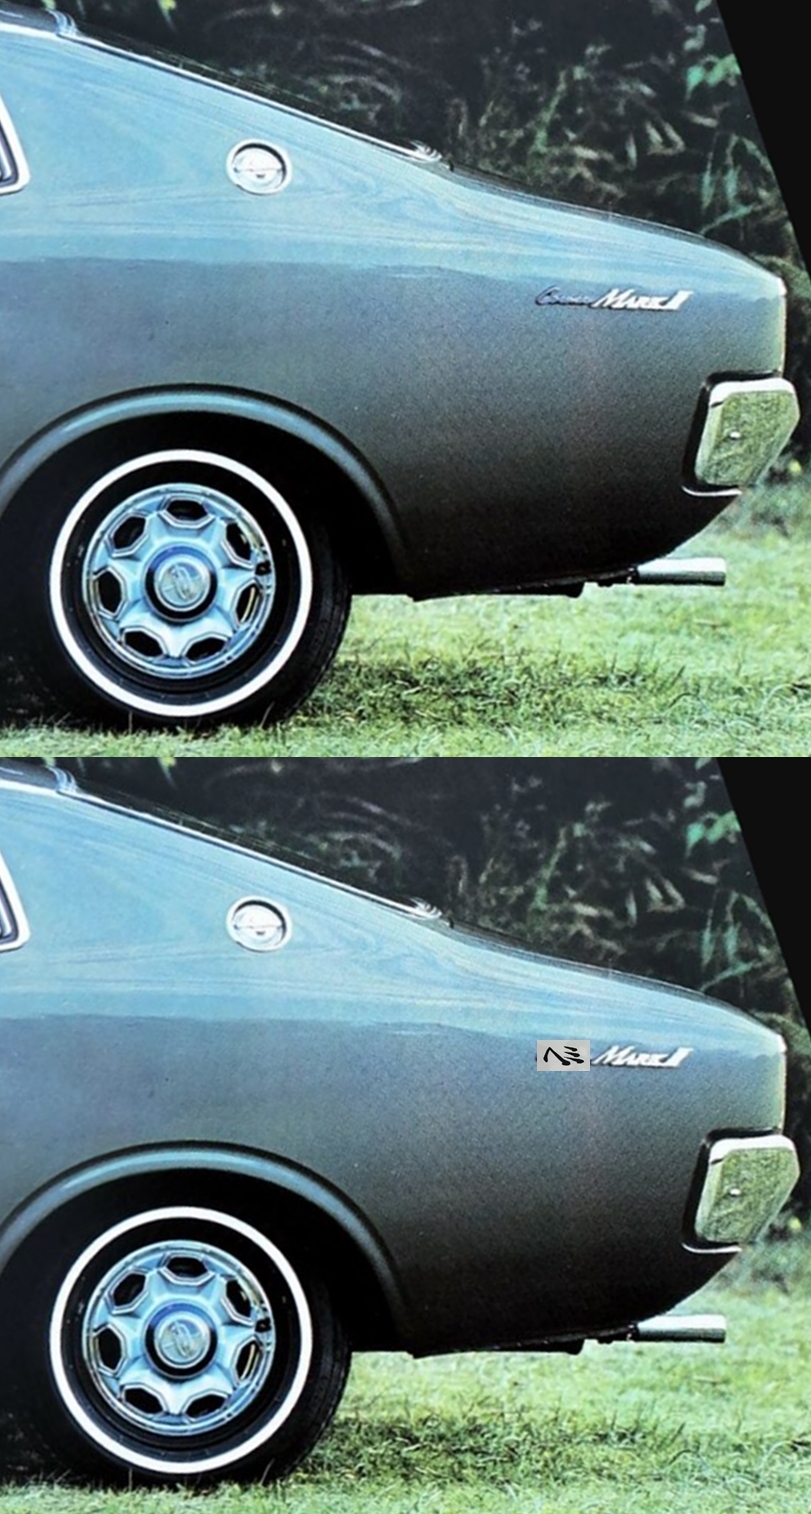
Originally my thought was to use the new scripts on the rear 1/4 panel in front of the "Mark II" - removing the "Corona" badge
another possible location would be above the new "8" fender badges
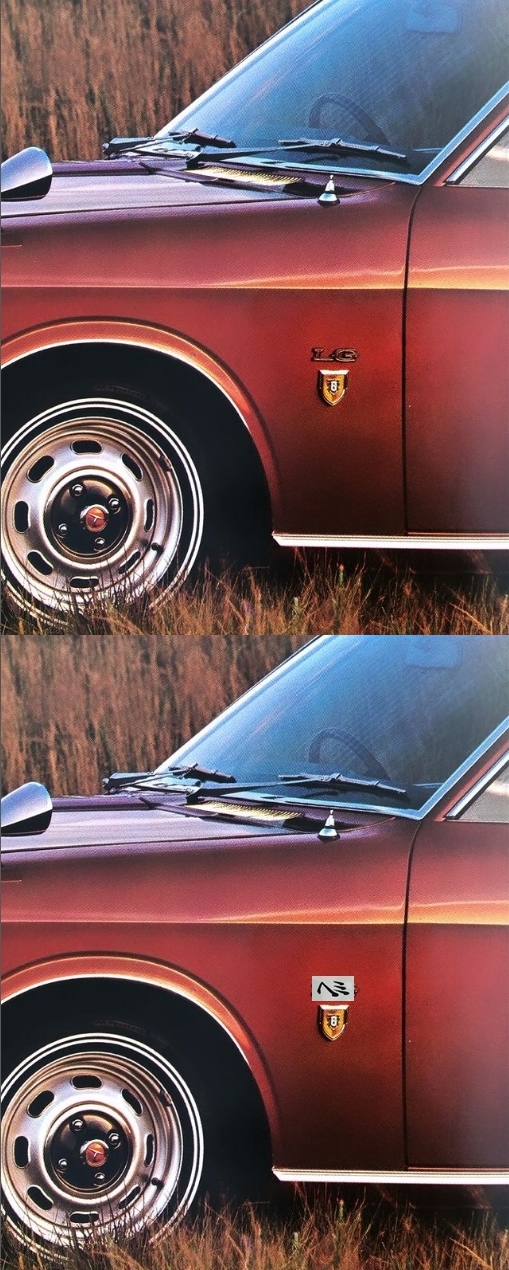
Any thoughts.......????
Just coming into this thread for the first time. What a good read so far!
As to today's question - eh, ditch the Japanese script, keep it as it is, but I do like the new 8 logo
oldeskewltoy said:
Any thoughts.......????
I prefer this one. Removing the rear "Mk.II" Badges doesn't "flow" as well to me, and I'd personally WANT people to know what it was before it's redesign.
As a rule, Japanese automakers label all their products in English, not Japanese (unless someone knows of an exception). If they would have built this, they probably wouldn't have put any non-English nameplates on it.
But they might have taken advantage of the engine's origins with a discrete badge. Maybe a simple 'Century' nameplate in a script that matches or complements the other nameplates on the car (or one taken directly from the contemporary Century) would have been added after the 'Corona Mark II' on the flanks, or directly below the 'Mark II' portion, or over the '8' on the front fenders.
Less is more, IMHO. Excessive badging and garnishment is a slippery slope. Personally, I think the custom '8' fender badges are all the advertising you need to do.
Hmmmmm, for now the finishing details are less important....
Now that the mods to the front subframe, and tunnel have been roughly finished, the car heads off to a local body shop to get 50 years of dents, dings, panel repairs, and paint.
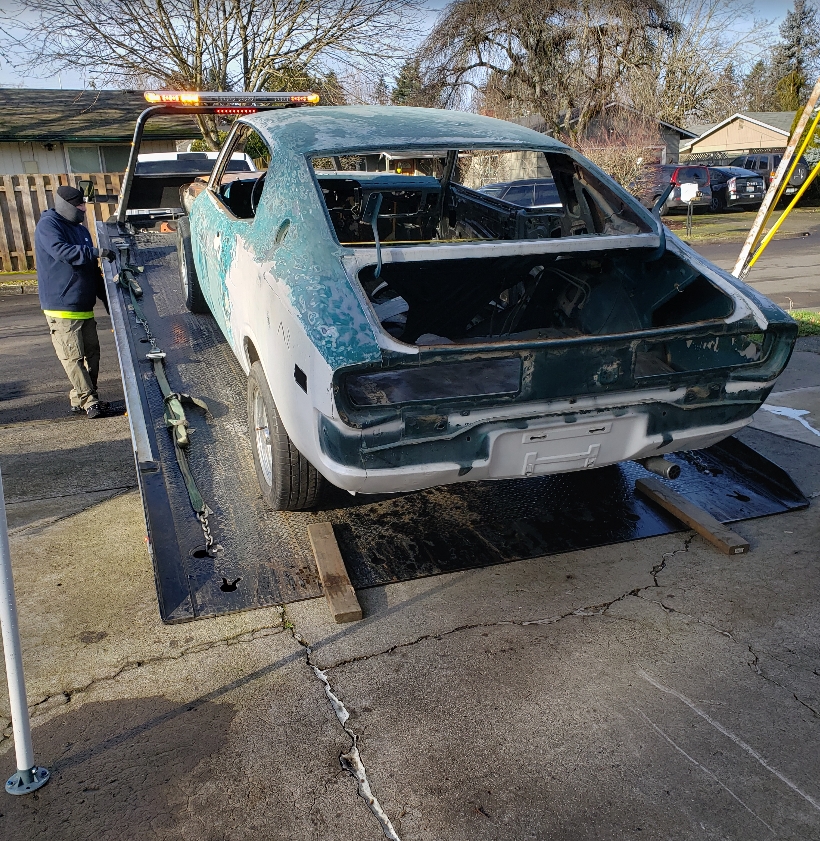
The car now at the body shop, the front sub frame comes off and heads back to Anthoni to finish, and powder coat.
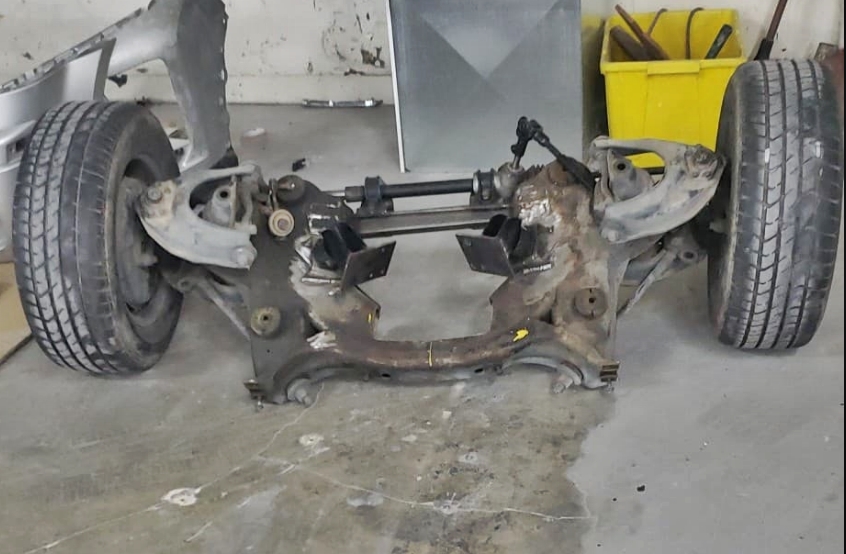
A LOT more to come in the next 8-10 weeks......
Exciting progress! I can't wait to see her continue to take shape, and I look forward to a ride someday.
Having seen this project in person, I know that driver's side header clearance is going to be a significant challenge due to tight space to begin with plus the need to have some means of steering in that tight space. Are there plans afoot to have the body guys do some massaging or reshaping to the box section "frame rail" of the unibody structure to maximize options in this area, or will the approach be to solve this 3D puzzle purely with header and steering design after-the-fact?
I'd vote for making some clearance now to set yourself up for success on the next steps, but I think I've always been more open to bending/cutting/welding parts of the unibody than you have.
Seems like a question worth asking now, rather than a regret for later.
ae86andkp61 (Forum Supporter) said:
Exciting progress! I can't wait to see her continue to take shape, and I look forward to a ride someday.Having seen this project in person, I know that driver's side header clearance is going to be a significant challenge due to tight space to begin with plus the need to have some means of steering in that tight space. Are there plans afoot to have the body guys do some massaging or reshaping to the box section "frame rail" of the unibody structure to maximize options in this area, or will the approach be to solve this 3D puzzle purely with header and steering design after-the-fact?
I'd vote for making some clearance now to set yourself up for success on the next steps, but I think I've always been more open to bending/cutting/welding parts of the unibody than you have.
Seems like a question worth asking now, rather than a regret for later.
not sure much can be done... I'll be looking closer on Monday... but the sub frame mounting bolt may make modifying that rail section moot - note where the bolt is in photo below

It (exhaust) may(likely will) require a custom manifold.
You'll need to log in to post.