1 2 3
lxnm
lxnm None
3/12/20 4:23 a.m.

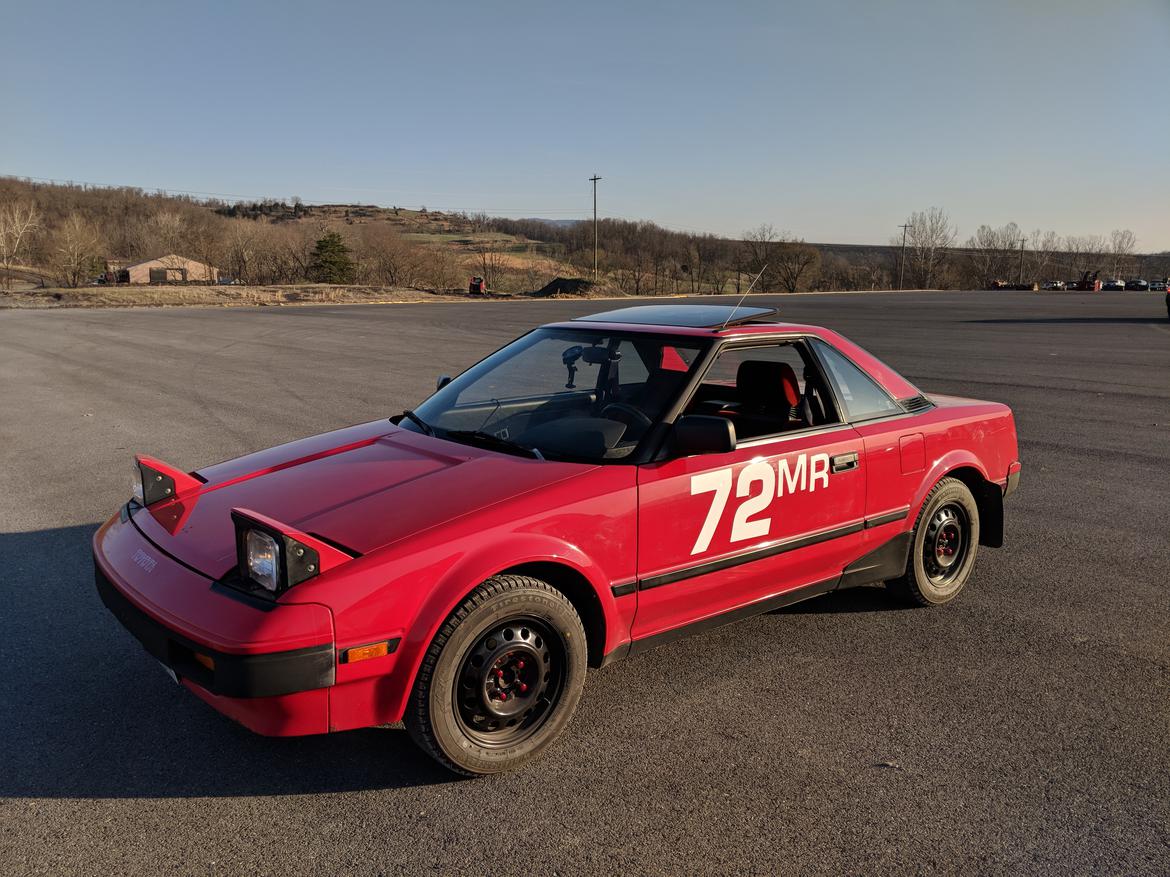
I have a 1985 MR2 that I’ve been prepping slowly for SCCA rallycross.  It is somewhat less exciting that other MR2 builds that you may have seen on this forum, certainly with fewer cylinders, so don’t get too excited.  The road to development has been bumpy and mistakes have been made, but I think maybe I’ve done enough stuff to this car to justify writing it down.  Maybe reading through this will even help someone else who’s daft enough to try this.

The car came from Indiana with 135k indicated miles, and included a blacktop engine, Koni adjustable dampers, Ebach lowering springs, 4 different brands of tires on stock wheels, and a transmission which wouldn’t stay in 5th  gear. I drove out from Maryland to buy the car sight unseen (what could go wrong), and then drove it home since I still lack a trailer. 5th gear I was able to solve with a bungy cord, and I still do that today. It’s inconvenient, possibly unsafe, probably doing damage to the transmission, but seems to work. 

The car was actually in pretty good shape.  The interior was pretty much perfect, though it didn’t stay this clean for long.  There’s rust in the fenders (it’s been mostly cut out), and surface rust pretty much everywhere.  As these cars go on the east coast, this one is pretty good. It’s probably too nice to beat the crap out of it on as a rallycross car, but so be it.  

There were also some maintenance items to deal with when I got the car: the headlights were blown (only had brights), the wiper switch needed work, the emergency brake lines were seized, things like that.  All that’s been done and more, as I break more stuff.

lxnm
lxnm New Reader
3/12/20 4:31 a.m.

The first major hurdle for racing an AW11 in the dirt is dealing with the intake.  I knew this going into it, and the car came with individual foam filters on each throttle body.  They sounded cool, but I didn’t think they were going to hold up to dirt for very long (I never tested that, but I’m betting I’m right).  

Much to my frustration, intake options for a blacktop are mostly geared towards open velocity  stacks on the throttle bodies, not keeping dirt out of the engine. I ended up installing a single ITG oiled foam filter over all the throttle bodies.  This was the best option I could find without putting back on the stock plenum. Over top of that I put a prefilter (from the same company) since that was generally recommended in dusty conditions.  Here’s that ITG foam filter after a single event (I had the prefilter on the car while it was running, it was removed for this photo):

It is difficult to understate just how much dirt gets into the engine bay of this car, the dirt gets everywhere.  Given the state of this engine bay with this filter, no one here will be surprised that I got dirt in the engine and destroyed the piston rings.  The reason it happened so fast though is because with open throttle bodies like this, where does the idle bypass valve pull from? The answer is open air, which is less than ideal when your engine bay looks like this.  

I made some attempts to fix the issue without much luck, then finally threw in the towel and paid someone to replace this blacktop with another one (I have the equipment in my garage to do this myself now, but didn’t at the time).  It was supposed to be a quick job, it wasn’t. The car was out for pretty much the rest of the season.  

I’ve gone through 4 variations of the air filter design, and finally have something that works.  If anyones interested, I can go over all the different failed attempts, but it probably makes more sense to just jump to the solution that works.  This is a Donaldson model G070018 7” air intake housing connected to the stock blacktop intake plenum (modified to clear the latch, don’t do that, just cut off the latch and install hood pins).  The tube to the left is the air intake tube, it’s routed through the firewall and directly into the passenger compartment, opening is right behind the drivers side headrest.

I really like this setup, the Donaldson is made for tractors and has some cyclonic action to reduce the dust going into the filter.  In addition, the filters are dry paper instead of oiled fabric or foam, which means the dust falls off them (or can be knocked out of them).  Replacement filters are a little expensive (around $35 each from Amazon), but are lasting me multiple events. This is a major improvement versus the aFe guard7 filters (the next best option) that came in at around $100 each, required cleaning each event, and would clog to buckling if I didn’t replace the filter at lunch (I would take 3 filters to each event, one for the morning, one for the afternoon, and one to get home on, a codriver messes that up).  

Ultimately, I think the car has lost a little of its zip with this setup versus open throttle bodies, but I’m not dusting engines anymore and that’s a big plus.  The snorkel solutions I’ve seen have even longer tube runs, so probably have just as much loss. Also, even with the snorkel on the roof, it’s going to be picking up more dirt than I am from the cabin.  Also, having the intake right behind your head makes for some good sounds. Seriously, this solution works. If you’re trying to rally an MR2 (AW11 or SW20), do this.

2Girlsracing
2Girlsracing New Reader
3/12/20 5:51 a.m.

I recall some of these in Australia having a snorkel intake from the engine bay onto the roof. Not sure who the manufacturer was but might give you cleaner air. I know the roof scoop on the rally car stopped a lot of dust getting sucked in from behind by pressurising the cabin.

Steffi

lxnm
lxnm New Reader
3/12/20 6:54 a.m.

I actually built one of those rally style hood scoops for the engine bay, with the hopes of pressurizing the bay to keep dust from getting in there.  I didn't have one of those fancy fiberglass panel things, so I just made it out of steel and lexan, with the scoop made of sheet metal.

The scoop itself is held in place pretty well, with 5000 M5 screws around the outside.  But the whole contraption is only held onto the car  with the 4 clips you see at the corners of this picture.  Those clip to brackets which are rivited to the car. 

On my first shakedown event in Harrisburg with the scoop, the car died on the way to the event.  I made it about 6 miles from my house, the car just wouldn't rev over about 3000 rpm, and wasn't making any power.  None of this was related to the scoop, it was a fuel issue. 

I was never really comfortable with how securely fastened the was to the car.  I think this'll stay on during a rallycross, but I wouldn't blame safety if they said no way.  By the time I had the car running again, I had a 'better' plan of how to handle the intake which wouldn't involve sheets of lexan cutting corner workers in two.  I built an airbox in the engine bay, and routed air into it through the fender into the C-pilar.  That didn't work as well as the Donaldson setup I have now though.  

Professor_Brap
Professor_Brap SuperDork
3/12/20 7:02 a.m.

Donaldson filters are the bee's knees for dudty environments. 

lxnm
lxnm New Reader
3/12/20 4:10 p.m.

So the thing I’m working on now is the transmission, and what a rabbit hole that is.  The plan is to replace the tired old C50 transmission with a C160 transmission with a better 2nd gear ratio (for rallycross), a working 5th gear (and 6th to boot), plus a torsen LSD.  The C160 bolts straight to the block, and even Toyota mated this thing to blacktop varients of this engine. How hard can it be?

Here are the transmission options next to one another.  From left to right we have a: C56 (out of the replacement engine), a C50 (came with the car), and a C160 (the shiny new one).  If you’re thinking about doing a conversion like this, look at these photos very carefully.

The first thing you should notice is that the selector shaft for the C50 exits on the opposite side of the transmission than the C56 or C160.  There should be no surprise here, a cursory internet search should tell you this is the case. You will have to modify the C56 or C160 to get the selector shaft to exit on the opposite side of the transmission.  

If you look a little closer you’ll notice that both the C56 and C160 have lobes for 2 starters.  This means that you can not use the backing plate for the C50 transmission that comes off the MR2.  I have the backing plate for the C56 though, so no problems there. This is going to haunt me later though.

Finally, if you look really carefully, you’ll see that bolt holes on top of the C56 and C50 are in the same locations; but the C160 are different!  This is going to require some additional bracketry to get the shift levers and motor mount attached in the right location. More importantly, it alludes to the fact that there may be more differences lurking under the surface.

Here are my modified brackets, before paint.  The one for the shift levers is made of a single piece of angle iron, appropriately cut.  The bolt up top is an M10, the one down low is an M6 were pre-existing on the C160; a spacer is needed below the M6 bolt. 

For the motor mount, I spent a fair amount of time measuring the locations of the bolt holes on the C50 and on the C160.  I referenced the end of the bell housing in one direction, and the top bolt on the rear housing in the other. Here is a scale drawing that I came up with, but I wouldn’t trust it if I were you (at least don’t blame me if there’s an error).  

I’m not sure if it’s clear in the drawing, but the bolts are all M10, and have an 11mm clearance hole.  The bolt holes in the transmission are around 8mm in diameter. Those numbers are all measurements in mm, the ones on the left are from the bell housing, the rest are horizontal from the back casing bolt. 

lxnm
lxnm New Reader
3/12/20 4:37 p.m.

Next I put the new (to me) backing plate on the car.  Doing this of course requires removing the clutch and flywheel.  I thought about replacing both, since getting the transmission wasn’t much fun, but the existing one has plenty of life yet and I couldn’t justify the extra expense.  Probably this means I’ll need to take the transmission off again in the near future.
 

Anyway, the backing plate indicated more problems relating to the position of the starter.  In the above photo, on the stock AW11 the starter is on the left.  On an ae111 (engine and trans came from a Corolla GTS with an engine swap), it’s on the right.  To make matters more fun, Toyota decided to change the mounting configuration of the starters by extending the flange around ½” on the ae111 (and other Corolas) starter.  This means that even thought my old starter will fit in the space I have for the new starter position, it won’t bolt in place.  Bugger.

This turned out to not be that big of an issue, the guy I got the transmission from still had his old starter.  The plan is to just use that one.  Here’s a photo of the two starters so you can see just how annoyingly similar they are. 

lxnm
lxnm New Reader
3/12/20 7:14 p.m.

So ends the mundane, normal issues associated with putting a transmission that was never meant for a car in that car.  Now we need to start drilling holes in the transmission!  I’ve been putting this process off because I was hoping to get the help of someone with a better outfit shop than I have to really nail the precision on this.  Thanks Chris!  Here's a photo looking straight into the selector shaft housing of the C160 (I forgot to take a photo of this before I did the drilling, the back is currently plugged)

The  new shaft is going to go straight out of the back, and we need to drill a nicely centered hole.  What we did was machine a plug out of scrap aluminum that tightly fit in that bushing with a center hole of made using the drill bit we were planning to use for the pilot hole (a long one).  This worked, but the resulting hole was not centered on the indentation that you don't see in the photo above because I didn't take a photo of it before we drilled it.  

Next we mounted the transmission to the mill.  It barely fits, so this was something of an accomplishment.  The transmission is sitting on a pair of parallels on the flange for the selector shaft, that we know that everything is square.  The rest of the transmission is supported by a motley collection of shims, clamps, and machinist jacks.  Note that the differential is hanging off the front of the mill table there, that’s because if we put that on the table, the transmission will be too tall for the quill to clear.  

With everything clamped in place, we indicated on the pilot hole, and set about enbiggening it.  There’s not actually that much material to drill through (maybe 1/4"), so this process was easier than expected.  In the photo below you can see the wall of the casting and the bore past it.  You can also see the aluminum plug we made a couple of steps back.  That was left in place (held there with some tape and a rag) to block any chips from falling into the works.

What you can’t see in that photo is that the hole seems to be off center, but you could feel it with your finger.  I’m not sure how that happened here, the alignment method we used should have been pretty good.  There's a chance that the bushing for the selector shaft isn't quite centered on its hole, or maybe the  drill was less straight than we thought.  Because the wall thickness was so thin we were able to indicate off the bore side (past the wall) and get things centered up again.  Had I been doing in my garage, I'd have been swearing pretty good about now.  The final hole was drilled with a 3/4” endmill, and ended up nominally 3/4" in diameter (as intended).

Into this hole fits an adapter for an oil seal, the transmission came to me with this adapter and seal (other wise I'd have made one).  The adapter wasn’t machined to great tolerances, and had a OD of 0.756 (6 thou over 3/4”, that’s not a nice metric size).  It was easier to turn the adapter down 6 thou than to bugger around with expanding our hole by 6 thou.  The final fitment is very tight, which is what I was going for.  I should be able to keep this thing in place with some locktight.  

irish44j
irish44j MegaDork
3/12/20 7:30 p.m.

I know that workshop well. That reminds me, I need to call Chris to do a bit of fabrication for me a swell :)

lxnm
lxnm New Reader
3/12/20 7:52 p.m.
irish44j said:

I know that workshop well. That reminds me, I need to call Chris to do a bit of fabrication for me a swell :)

It's a very nice shop that, I'm increadibly jealous.  Maybe someday.


Next it’s time for fun with selector shafts (it time to get shafted?), this is where I am in the process right now, and also where I really wish I could have found more better information floating around (and some of the motivation to bother posting all of this).  Below is a photo of the assembled selector shafts of the C50 (left), C56 (middle) and C160 (right) in approximately 2 orientations.  

From here the C56 and C160 look pretty similar.  But, actually the C56 is a lot more similar to the C50 than it is to the C160.  The C-clip pins look like they have the same spacing on the C50 and C56 (I didn’t measure this), and both use a simple pin for the shift interlock plate.  In the C160, the holes are not in the same place (I checked), there’s a ball bearing (just 1 ball, you can see it in the photo looking into the selection shaft housing posted earlier) for the shift interlock plate, and there’s an extra spring for 6th gear (you probably can’t use the C50 selector end cover on the C160).  

I was really hoping that I could take the levers off of the C160 shaft and put them onto the C50 shaft, install it and be done.  That’s not going to happen.  

Thing brings us to the parts list that internet wisdom says are needed for this swap.  They are:

selector shaft : p/n 33261-20080 (33261C)
inner no 1 shift lever: p/n 33251-20060 (33251A)
** inner no 2 shift lever : p/n 33252-20030 (33252A)
** shift interlock plate : p/n 33266-20030 (33266C)
oil seal : p/n 90310-15002 (33261H)
dust boot : p/n 33531-17010 (33531B)
spring #1 : p/n 90501-16167 (33276F)
selector end cover : p/n 33506-20280 (33528B)

The parts above in bold with ** are unobtainium, Toyota US doesn’t stock them any more.  To get them, I’d have to either take apart a C60 transmission, or have them shipped from who knows where (Japan?).  In addition, it’s also worth noting that the following are expensive: selector shaft ($200), #1 shift lever ($100), and selector end cover ($100)  (note: prices very approximate), the dust boot I had from my C50, and the oil seal came with the adapter on this particular example of a C160 transmission.  I’m also not convinced I really need that spring.  In all, the new parts will be getting into the territory of the value of this entire transmission.  

But, I’m in a hurry to get this done for the season, so I did the needful and bought as many of these as I could get my hands on (none of the unobtainium pieces, I couldn’t get them fast enough).  Here’s a photo of the bare selector shafts I have to work with (C160 left, new C60 middle, C50 right).

I’ve tried to line up one of the C-pin holes to give some perspective on the relative sizes.  Things to note, the C50 shaft is shorter than the C60 shaft because there are 6 gears (more selector shaft movement).  That probably means I couldn’t have used the C50 shaft even if I drilled new C-pin holes.  The C-pin holes for the C60 and C160 line up!  But, the spines on the C60 shaft are different.  In the C50, C56, and C160 the splines are all keyed with 1 extra-wide spline.  The C60 splines are all the same spacing.  Also, the C160 splines are obviously longer.  

The spline length (and lack of a key) means you can’t use the #1 shift lever, #2 shift lever, or shift interlock plate from the C160 on the C60.  At least without modification.  I could probably (maybe) chop of part of the C50 or C60 shaft and weld it onto the C160 shaft, but I'd really like to keep the C50 pieces unmodified so I can put in the old transmisison if I absolutely have to.  So, the plan for tomorrow is to put this chuck this new shiny C60 shaft up in my lathe (not as nice as Chris' lathe) and turn down the spines so I can get the C160 parts on it.  I sure hope I don’t mess this up.

lxnm
lxnm New Reader
3/13/20 4:19 p.m.

Step one of turning down the splines is figuring out a way to hold the shaft in the lathe without marring up the shaft.  I think normally you’d use some soft metal (like aluminum) to do this, I don’t have any on hand.  So I turned and bored a piece of derin, then cut it in half.  I actually ended up using this quite a lot to hold the shaft while modifying it.  

Then comes turning, I had trouble with this.  The shaft is pretty hard metal (not surprising), and the cut is interrupted by the splines.  I was eating high speed steel tools, and had other issues with carbide.  The vibration was loosing up the toolpost as well, letting the tool move away from the shaft and not cut so well.  But, I figured it out eventually. 

Here’s the final result looking pretty good.  There’s some strange cut stuff going on  around the holes through the shaft, every time the tool would go past the hole it would move in.  So, the cut is deeper on one side of the hole than the other.  But I don’t think this will really affect anything.  

The next modification relates to the splines.  The C160 and C50 (and C56 probably) have a 16 tooth spline with 1 spline missing for a key.  The C60 has 16 splines (same spacing, but no spline missing).  So, I need to remove a spline.  Photo below of the splines on the C160 (left), C60 (middle), C50 (right), with the spline that needs to removed marked in sharpy. 

I’m sure there’s lots of good ways to remove 1 spline, and I don’t have the tools for most of those good ways.  I used a cutoff wheel, not the most elegant or accurate solution.  The result isn’t pretty, but it works.  The #2 shift lever now its onto the shaft!

The final issue is that the #1 shift lever pinches the shift interlock plate when when the C-pin is put in place.  I fixed this by sanding it down a little, until I could just barely move the shift interlock plate freely.  Then I assembled the shaft!  I tested the shaft in the transmission, and can get into all 7 gears!  Here's the fully assembled selector shaft

irish44j
irish44j MegaDork
3/13/20 4:52 p.m.

I know the pace that Chris works at well enough to think you must have been there for at least two weeks getting all that stuff done lol. 

lxnm
lxnm New Reader
3/13/20 5:24 p.m.
irish44j said:

I know the pace that Chris works at well enough to think you must have been there for at least two weeks getting all that stuff done lol. 

The first time I got into Chris' shop was last weekend, and I was only there for one afternoon.  Maybe you need to prep your projects better?

lxnm
lxnm New Reader
3/15/20 5:43 a.m.

Before assembly, I have one last bracket to finish, it’s the one that adapts the mounting points for the second shift lever.  I couldn’t finish it earlier because I needed to know the final placement of the shift levers first, which required the shaft to be in place.  Here’s the final result of that bracket.

There are two captive nuts on the back side to bolt the shift lever to, and a spacer under the M6 bolt.  Up top is a secondary bracket made of some 16 gauge sheet I had lying around to hold the clutch slave bleed valve.  It doesn’t normally go up here, but this way I can bleed the clutch without getting under the car (I hope).  Bending the hydraulic line only resulted in slight crimping, it’s just the bleed line it’ll be fine.  

If you look close up there, you’ll also notice that the clutch slave cylinder is new.  That’s because  getting to that thing while the transmission is in the car is not the easiest.  That entire bracket assembly there attaches to the transmission through the slave cylinder, and front motor mount is in the way of accessing the whole thing.  

Then the  axles go in.  Getting the axles out of the old transmission was surprisingly hard.  I ended up using the pilot bearing fork from the C50 transmission as a lever, and hitting it with a 5 lb sledge.  That worked great.  I had heard internet rumors that the clearance on the driver-side axle may need some gentle massaging (with a flap disk).  But, it looks to me that the clearance is fine, maybe the  axles for the Mk1b and Mk1a are slightly different?


And then we have the rest of the assembly.  Here’s the whole thing put together and ready to go back in the car.  I didn’t talk about this earlier, but the engine mounts all had a pretty good coating of surface rust.  While I had them all out, I stripped the rust, and repainted them.  

I have a short lift in my garage, which is awesome.  But, I’m plagued with 8’ ceilings, so I can’t get the car that high off the ground.  When taking the transmission out of the car, I learned that traditional transmission jacks are way too tall for me, and normal car jacks are way too short.  What I’ve come up with is a tranny jack cylinder under the engine (no wheels yet, makes it too tall), and a motorcycle scissor lift (on wheels) under the transmission.  

I don’t have photos of the setup yet because while trying to wrangle the transmission in place, I did something stupid and caught my fingers in the scissor lift.  The good news is I still have all my fingers!   One finger is swollen to the point of being pretty useless, the other one is doing ok.  That pretty much ended my work for the day. 

irish44j
irish44j MegaDork
3/15/20 7:05 p.m.
lxnm said:
irish44j said:

I know the pace that Chris works at well enough to think you must have been there for at least two weeks getting all that stuff done lol. 

The first time I got into Chris' shop was last weekend, and I was only there for one afternoon.  Maybe you need to prep your projects better?

lol....I was being somewhat facetious......the only thing he's ever made for me was a small bushing collar (about an inch long). I think I was there for about 4 hours haha....mostly because Chris likes to shoot the breeze, spent half an hour showing me an unrelated project in another room of the house, and at the time Thomas's volvo was in there and his tools and parts were all over the place so half that time was spent trying to find stuff. 

sorry to hear about your finger!

lxnm
lxnm New Reader
3/15/20 7:44 p.m.
irish44j said:
lxnm said:
irish44j said:

I know the pace that Chris works at well enough to think you must have been there for at least two weeks getting all that stuff done lol. 

The first time I got into Chris' shop was last weekend, and I was only there for one afternoon.  Maybe you need to prep your projects better?

lol....I was being somewhat facetious......the only thing he's ever made for me was a small bushing collar (about an inch long). I think I was there for about 4 hours haha....mostly because Chris likes to shoot the breeze, spent half an hour showing me an unrelated project in another room of the house, and at the time Thomas's volvo was in there and his tools and parts were all over the place so half that time was spent trying to find stuff. 

sorry to hear about your finger!

I'm not being particularly serious either.  I was there for 1 day, but it was a really long day.  I actually wanted to see that project in the other room, it sounds really cool to me.  In the end, we ran out of time and had to run home before I got in too much trouble with the wife.  If I had done more than 1 days work in Chris' shop, it would have turned out better and probably involved fewer angle grinders.  

lxnm
lxnm New Reader
3/15/20 8:01 p.m.

I bandaged up a finger, I was back at it today with the goal of getting the transmission into the car.  It was hard to get out of the car, I expected it to be hard to get in as well.  It was.  Here’s the setup I was using.

The motorcylce scissor jack thing is what bit me yesterday.  I was somewhat more cautious today.  The setup got the transmission up into position pretty quickly, but I had a lot of trouble getting the engine mated to the transmission.  I’m pretty sure I’m just not good at this.  The last time I dealt with a transmission it was a Miata.  It was a very different thing.  


After I got it to about this position, it fought me for every mm.  Eventually something clicked, and it was in.  Then onto the motor mounts.  The driver-side mount didn’t really want to line up right away, which had me worried that my measurements for the adapter were E36 M3.  So I dealt with that one last.  Put the rear mount in first, then the front.  The front mount was upside-down, I apparently forgot the orientation.  

For the driver-side mount I needed to jack up one side of the transmission and loosen bolts holding the mount to the transmission.  That got things to about this position, which is close but not quite enough to get the bolt in place.  To get it the rest of the way I needed to pry everything over.  I couldn't quite make my crowbar work for me, but a piece of scrap steel tube did the trick.

That seriously took the whole day.  It doesn’t seem like much really, maybe I can blame my slow pace on injury.  I still need to get the rest of the bolts between the engine and transmission in, connect the shifter cables, connect and bleed the clutch, reconnect the suspension, and put on some wheels.  I also replaced the inner and outer tie rod ends, so I should probably get the car aligned too.  Likelihood of getting this done before the next event is low. 

lxnm
lxnm New Reader
3/21/20 7:22 a.m.

Yesterday I met the neighbors (which in general I try not to do).  Turns out he's a retired auto mechanic, information which I will store for later use.  While discussing the transmission project, he asked if I had any trouble getting the transmission input shaft into the pilot bearing.  I was pretty sure there wasn't a pilot bearing though, and it seemed to work fine before.  Still, this got me really worried I was going to have the take the transmission out again.  

Here's a photo of the flywheel:

no pilot bearing there.  After some googling, I was able to confirm that indeed, MR2's do not have a pilot bearing.  Seems like all (many?) front wheel drive setup Toyota cars don't have one, for some reason.  The MR2 is driving the rear wheels, but the engine is setup mostly as if it were front wheel drive.  Interestingly, there is a pilot bearing for FR setup  cars (ie, an AE86).  Not sure why the difference there.  So, not taking the transmission back off, good.  That would suck.

Then I got back to getting the shift linkage connected.  It looks like a made a bit of a mistake here.  When I was making the bracket for the lever for the shifter cables, I kinda just eyballed it, and assumed that the cable would give me plenty of play for small adjustments.  That's not so true.  It's a bit hard to see the problem in this photo, but here it is.

Both the transmission and the shifter are in the neutral position right now, and the cable is about 1 bushing diameter (around 1") farther to the right.  I can get the cable on that bushing, no problem at all.  But, if I do, it moves the cable almost all the way in.  The result is  that from inside the car I can only access gears 1, 2, and reverse.  I guess that's ok for rallycross, but it'll be really annoying any other time.

Obviously what I need to do is move the lever farther right.  I think the easiest way to do this will be to remove the blue bracket thing, and slot the holes.  This moves the lever back and forth, not left and right.  But, moving the bracket forward will force the lever to rotate to the right a bit.  Hopefully that'll do the trick.  

lxnm
lxnm New Reader
3/22/20 5:44 a.m.

Here's the shift lever bracket after more modification.  It's not super clear in the image, but I slotted the far hole towards the back, and the near hole to the right, and then enlarged the clearance cut.  This allows me a fair amount of adjustment left and right, but took off rather a lot of metal, but it's bolted down flat to the plate under it, this should be fine.  To get things lines up right, I put the transmission in 5th (or 6th) gear, then lined up the bracket so that the cable was all the way in.  I can now shift into all gears, woo!

With that done, I shifted the car into 6th gear, and turned the crank by hand.  I wanted to see the wheel hubs turning, proving that I have the splines mated.  This test passed, so probably everything is ok.  Since I'm pretty sure now I'm not going to have to take the transmission out of the car, I filled it with gear oil.  At first, I did this from the bottom into t he side fill hole.  Then the tube adapter came off the top of the bottle, and I ended up lubricating myself instead of the transmission.  After that I  wisened up, and used the fill hole at the top of the transmission, since I assume that's what it's for.  That worked much better.

At this point, the goal is to get the car started.  Which means I need to get the starter installed.  This caused me more trouble than expected.  The first issue is that none of the bolts I took off the previous transmission were the right length for the lower starter mount.  The long one there is too long and bottoms out on the hole.  The longer of the two short ones has about 1/2 thread grabbed, and the shiny one is the longest McMaster M10 bolt I stock (clearly I need to get some longer ones).  I  eventually found a replacement in my old bolts drawer, which is good cause I really didn't want to brave going to the hardware store and finding out that the M10 bolts that they have which are the right length are the wrong thread pitch.

The next issue was a little more of a pain.  The top mount comes in from the other side, so the hole on the starter is threaded.  But, it appears that this threaded hole is a little buggered.  If you don't get the bolt in just right, it'll cross thread and screw in pretty freely for around 3 turns, then jam.  Getting this one on took me quite a while, but I did eventually get it on.  

Here's a photo of the starter in place.  I hear that on the stock AW11 motor (which I've never worked with) fitment of the starter here is tight.  On this later model, there's not clearance problem at all.  Getting to the starter here is actually pretty easy.

And here's the  problem bolt in question.  It's the one directly above the shiny McMaster bolt in this picture.  Just to the left of it is one of the upper mounting bolts.  And farther to the left is the upper mounting bolt that I didn't put on yet, I  really should get around to doing that.  That McMaster bolt is my primary grounding point in this car.  The big fat wire goes into the trunk where the battery is, and the thin grounding strap connects to the chassis.  

Next up is bleeding the clutch, but before that I needed to find the clip that holds the clutch hydraulic line in place.  The one in the picture below, similar to the clips that hold brake lines in place.  I had smartly placed it somewhere while disassembling the slave cylinder bracketry for cleaning and what not.  I was pretty sure that somewhere was in the trash, but after going through the trash piece by metal shaving and oil covered piece, it wasn't in there.  It turns out it was sitting on my work bench in front of my face the whole time, just on the other side of the workbench, where I looked for it 10 or 15 times but somehow didn't see it.

Otherwise clutch bleeding went without any trouble.  The new bleed location is pretty slick and makes bleeding the clutch much easier, but I still needed my wife to hit the clutch pedal for me.  She only grumbled a little bit.  

The final step before starting was to install the battery again.  It had gone mostly flat over the winter, and so had been sitting on a trickle charger for the last month or so.  For anyone interested, here's the battery and bracket in the trunk.  Don't look too carefully at that bracket, it was on of my first tig welding projects and absolutely my first aluminum welding project.  The welds are strong enough for purpose. With the battery in this location, I was able to use the stock positive battery lead without modification.

Anyway, the car started no problem, which is a good feeling.  The bad news is that the throwout bearing is making some pretty awful noise.  This bearing (and the related fork) are different sizes in the C50 (stock AW11) and C160 (new 6 speed) transmissions.  So, I used the one in the C160.  In hind sight, that transmission was sitting neglected in someone's backyard for a few years, so maybe it's not too surprising that it's not in like new condition.  Seems like there's a good chance there's a new clutch and throwout bearing in my future, which I can't say I'm looking forward to.

The exhaust is still not on the car, so I didn't try actually moving anywhere or even putting it into gear.  I'll do that today after I finish tightening up all those little things that I haven't tightened yet, like that last upper transmission bolt, I probably need that.  
lxnm
lxnm New Reader
3/22/20 5:19 p.m.

Today I finished buttoning everything up, and finished the transmission install.  First up was getting the exhaust back on the car, there isn't a lot of exhaust on this car really, basically a header and a single muffler.  Toyota likes to use these circular exhaust gaskets it seems, and the ones I have on this MR2 are probably original to the engine.  The issue here is that the engine is a 4AGE blacktop, which was never actually sold in the US.  So I can't just go to the parts store and say 'Hey, can you give me a gasket for this car', it doesn't work.  JDM life or something.  

Since these things look like they're original to the car, I suspect that there's an exhaust leak in this general area.  Related, this car is stupidly loud because there's not a lot of muffler or pipe to do much about that.  It drones heavily on the freeway, and drives you mad after about 20 minutes.  I'm hoping that if I replace these gaskets, things will get better.  Maybe not good, but better.  So, I rashly guessed that the size of this gasket is the same on the AW11 and the AE111, they both have a 4AGE after all right?  

The non-factory part number from Walker for the AW11 gasket in this location is 31332.  As you can see in the photo below, it's too big.

So, off to the parts store I got.  It looks like the Toyota part number for the gasket I'm looking for is 17410B, and this gasket shows up in a lot of cars in the US including the 94 Celica.  I went and asked for this gasket from the guy at the nearest parts store, and he gave me another Walker 31332.  He kindly let me rummage around in their gasket bin for a while, and I actually found one that fits, a 31320.  The only slight issue is that they only had 1 and I needed 2.  So, I had to drive to a second place to get one more.

This is what the flange for the header looks like, and why I need two of these gaskets.  It's pretty covered in rusty yad, so I cleaned it off quickly with a wire wheel.  

Here's the other side of that flange after cleanup.  Not perfect, but much better.  Maybe it'll seal.

After this was a lot of boring but important things that I didn't photograph.  I put in all those bolts that I hadn't gotten around to, and checked that all the bolts I'd already put in were tight (they weren't).  I plugged in the O2 sensor, installed the air filter, and removed the middle skip plate (generous term) so that I could flatten it a bit.  And then I started the car.  

It seems that installing all the bolts in the bell housing fixed my throwout bearing issue, no noise now.  And the car moves!  Things actually seem to work, so I did a quick little test drive.  In other good news, this transmission definitely has a limited slip in it. 

I was done early, so I did a little gardening, and then figured it was time to install the new steering wheel.  I've never bothered with a wheel before, stock wheels seem perfectly useable to me.  But, I'm planning on putting a race seat in this soon, so I figure being able to remove the wheel might come in handy.  Not knowing if I'd want the wheel to have any dish, I bought the cheapest reasonable looking wheel with the right bolt pattern I could find.  It looks like I want no dish, time to go wheel shopping again.  

lxnm
lxnm New Reader
4/13/20 1:43 p.m.

I haven’t been getting much work on the car done lately.  There are a number of excuses I could make for that, but really I’m just being lazy after finally getting the transmission put together.  Or, a more positive spin is that I’m enjoying a functional car for a bit before taking it apart again…  I filled the time with yard work, and building a sim rig.

On the sim racing front, I’m hoping this will hold me over until events with real cars are allowed again in the area.  Based on previous experiences with racing sims in the distant past, I’m not sure it’ll work.  So the rig was built on a pretty strict budget.  The wheel and pedals I bought used off ebay (but are pretty nice), and I built the rest of the cockpit out of whatever scrap wood and bits I had lying around in the garage.  In particular, I’m using my crawler as a seat.

Much to my wife’s annoyance, I have this giant contraption installed right in the way of everything in front of the TV, for maximum immersion.  I’m not sure I’m getting any better at racing with this, but it is providing a pretty good distraction while I’m stuck in doors most of the time. 

On the car work front, the next thing to do (and a major reason for my procrastination) was to battle the ever increasing entropy of the garage.  I’m not particularly good at keeping my workspace tidy, so there was quite a lot to tackle after the transmission project was complete.  I also do particularly like cleaning (who does), so I conned my wife into helping to motivate me to get started.  Here are the results, it’s not perfect, but its still cleaner than it has been since we moved into this house.

One added benefit is that there is now space for my wife to park her car inside the garage, another thing that hasn’t happened since we moved into the house.  Maybe this will partially make up for having her help with the cleanup, and cluttering up the area in front of the TV. 

During cleanup, I also wanted to move the lathe.  I had it right in font of the work bench, and it was blocking the path across the garage.  It’s been relocated to its own corner under a set of cabinets that are now devoted to machine tools and such.  I’ll need to be careful to not put anything too heavy in there.  There’s still some space over to the right of the lathe where I could put a table of some sort to lift that toolbox on to.  Overall, I think I like this new location. 

The problem with this new location is power.  My garage is extremely under-equipped on the electrical outlet front.  There are only 2 outlets in the whole thing, they’re right next to each other behind the workbench.  Even worse, the breaker panel is on the other side of the house, so adding more isn’t a simple process.  My solution was to run the power cord to the lathe into the attic, you can see the red cable on the left of the picture.  It turns out that there’s actually 1 unused plug in the attic which was installed for the radon remediation system.  This will have to do until I have a subpanel installed in the garage, I really need one as right now I’m stuck welding on a 120V line. 

In behind the lathe I have tucked the 2 extra transmissions until I find a better spot for them (maybe the dump).  If anyone in the DC area is in need of a c50 (slightly broken) or c56 (in unknown condition), let me know. 

I ended the weekend with just a smidgen of actual car performance modification: its first go fast stickers.

Jerry
Jerry UberDork
4/14/20 12:15 p.m.

Relevant to my interests, and past:

I campaigned an old MR2 as my first rallycross car from 2011 to 2013 or '14.  I drove a friend's 2.5RS and decided I wanted a Subaru after putting a decent amount of $ into this car.  Some days I wish I had kept it instead.  RWD was certainly fun.  And I've only seen one other MR2 locally, and that was a second gen.

dherr (Forum Supporter)
dherr (Forum Supporter) Dork
4/14/20 1:57 p.m.

Watching with interest as I soon will be starting on my AW11 project and you are local. Mine won't be a rallycross car, but running a Solara V6. 

General comment as I get started soon, my understanding was that it was pretty easy to swap out the engine/transmission as an assembly from the bottom, would that not be the easier way to deal with the clutch and/or transmission issues. That was my plan to install it all as one assembly, but I am new to the AW11. I know on my 91 Turbo, it was all installed in that manner.

dherr (Forum Supporter)
dherr (Forum Supporter) Dork
4/14/20 3:24 p.m.

If you ever want to go to a V6, now is the chance as I have a 3VZ-FE in my AW11, that just needs the wiring harness figured out (should only need 7 wires connected to run). I purchased it with the V6 conversion already done, but I found a 1MZ-FE that I am using instead. The 3VZ is simpler, will give you a lot more power and torque. The Toyota mechanic that did the conversion did all the maintenance so this could be a good engine for you for rallycross. I will be pulling it in the next week or two, make me an offer if you want it. How about $200? I am local in Frederick, MD. 

lxnm
lxnm New Reader
4/14/20 6:33 p.m.

In reply to Jerry :

The MR2 is a hoot for rallycross, I suspect most RWD cars would be.  There's actually two aw11s in this region, along with about 1000 E30s to fill out the MR class.  Sometimes, rarely, both of the MR2 are even running at the same time!

When mines not, the fallback vehicle is a Subaru Forester, my commute to work car.  I'm pretty sure that on the track I'm faster in the Forester, and I do enjoy the increased suspension travel.  But, it's just not as much fun.  That said, every time I need to work on pretty much any part of this car, I think back on the days I had a Miata and how roomy it was...

1 2 3

You'll need to log in to post.

Our Preferred Partners
b4LM2BzvEnp8G20ih07ufF3jhKoWvdasFAHMRVm3wW9efT45EoaEaonBthFYmlpi