In reply to Keith Tanner :
Try a acetone mixed with a few pieces of dissolved ABS brushed on to the print bed for ultimate bed adhesion for ABS printing.
In reply to Keith Tanner :
Try a acetone mixed with a few pieces of dissolved ABS brushed on to the print bed for ultimate bed adhesion for ABS printing.
I haven't had any trouble with ABS adhesion yet, just the opposite on that one print :) Since then, it's been good. I've switched back to PLA for the time being because it's better suited to the stuff I'm working on.
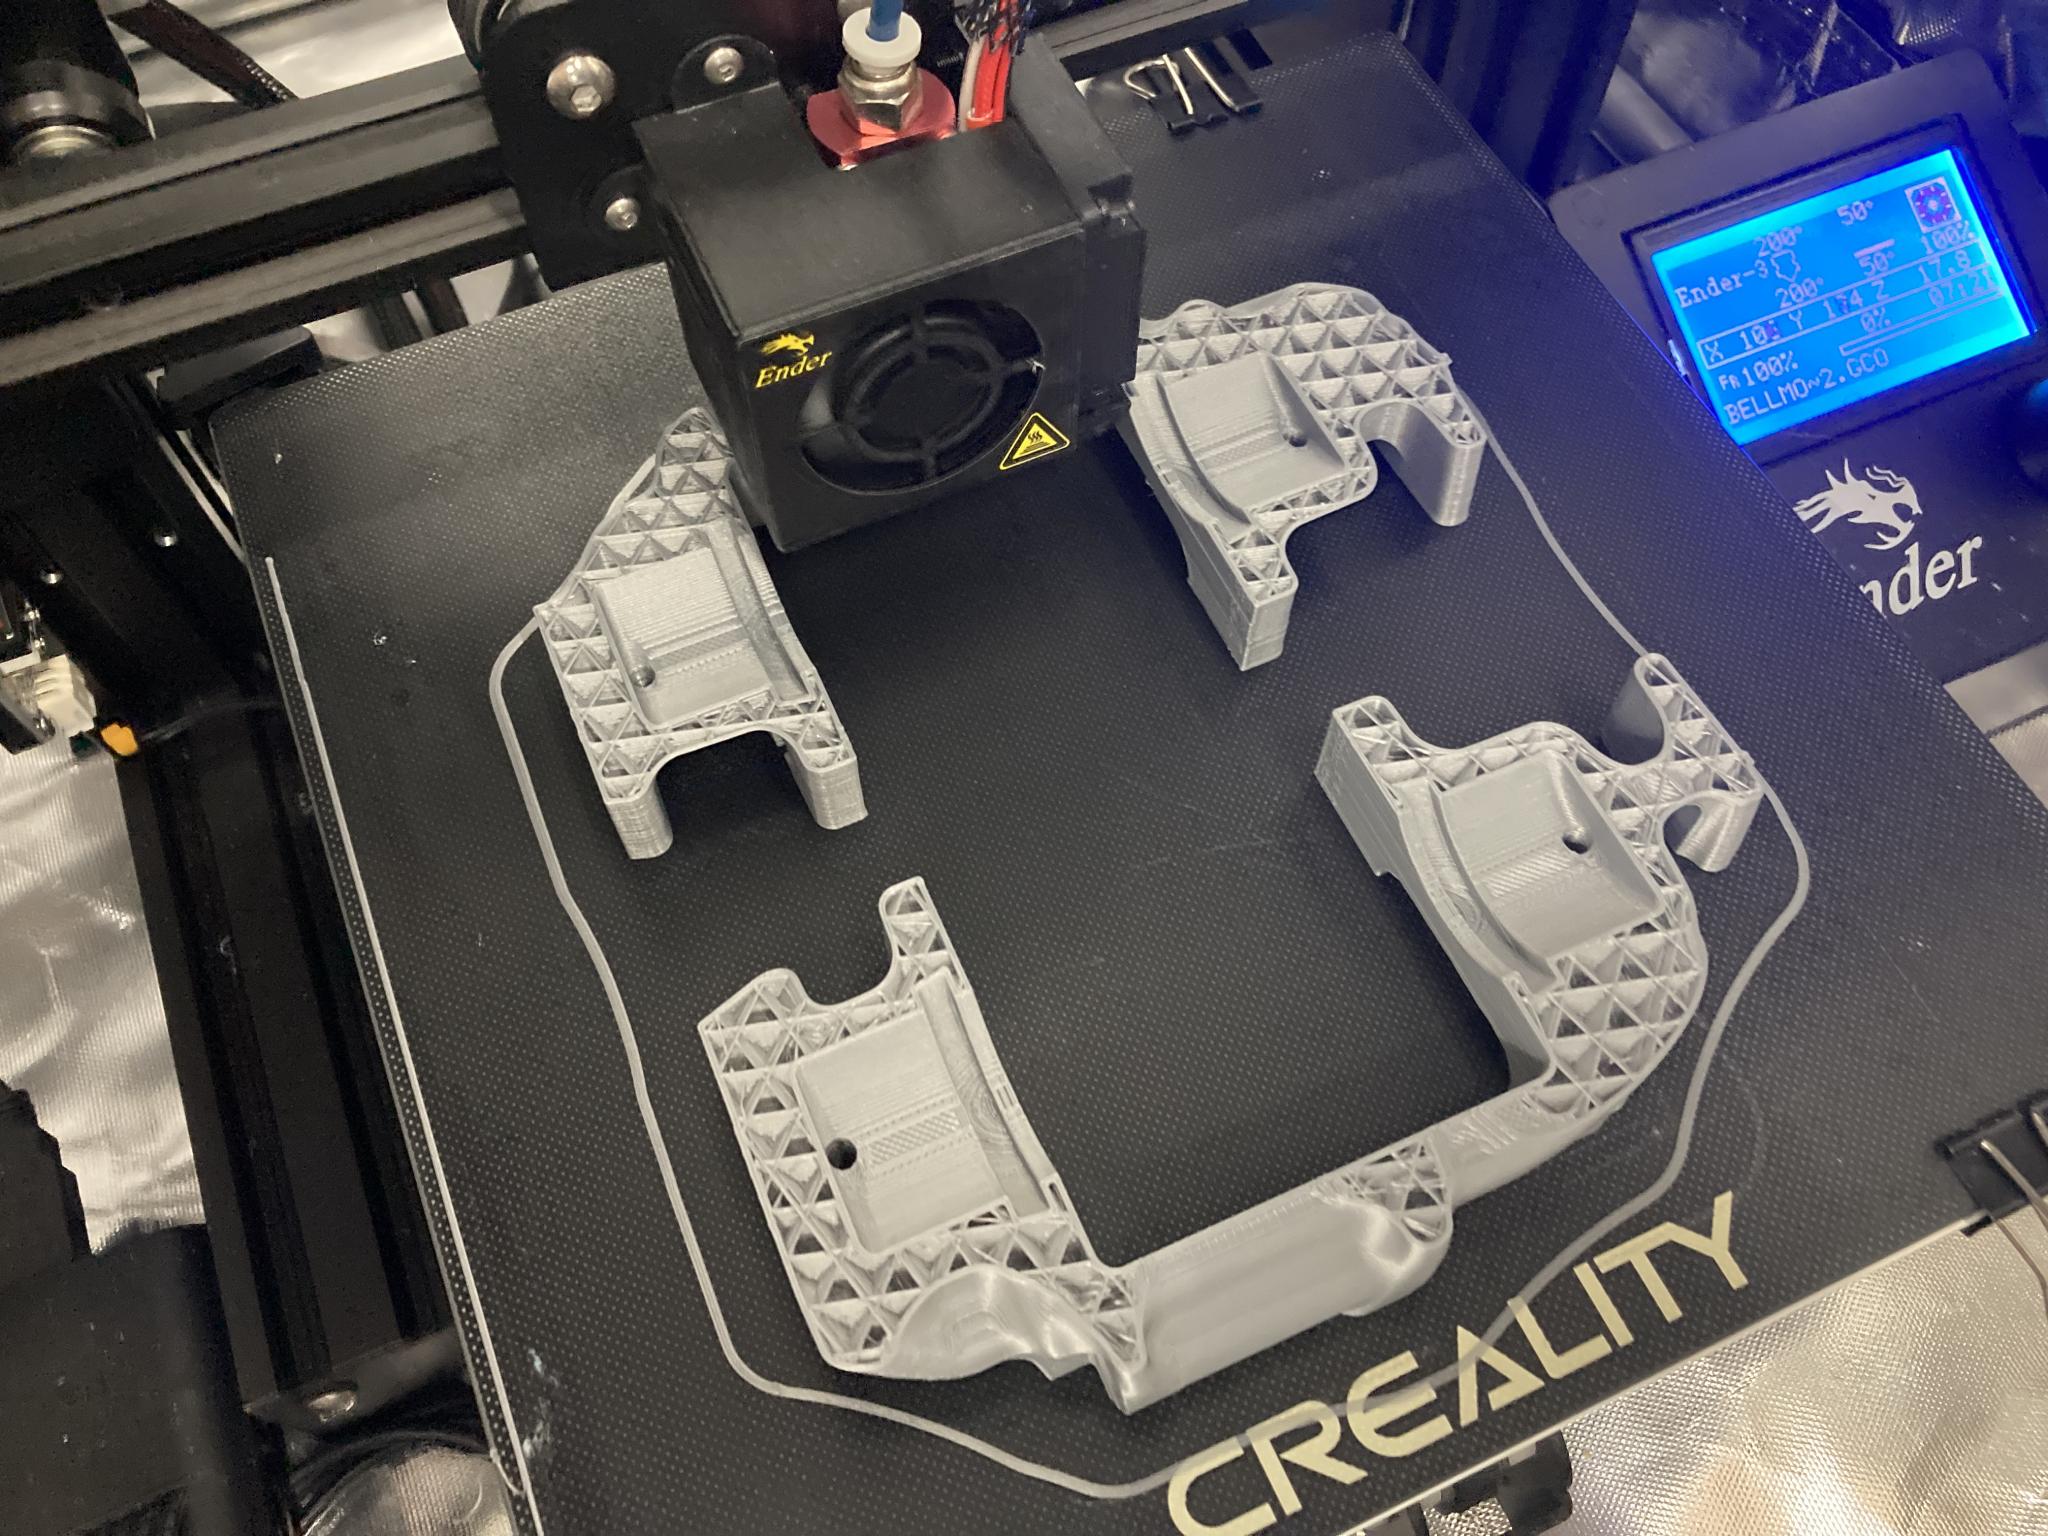
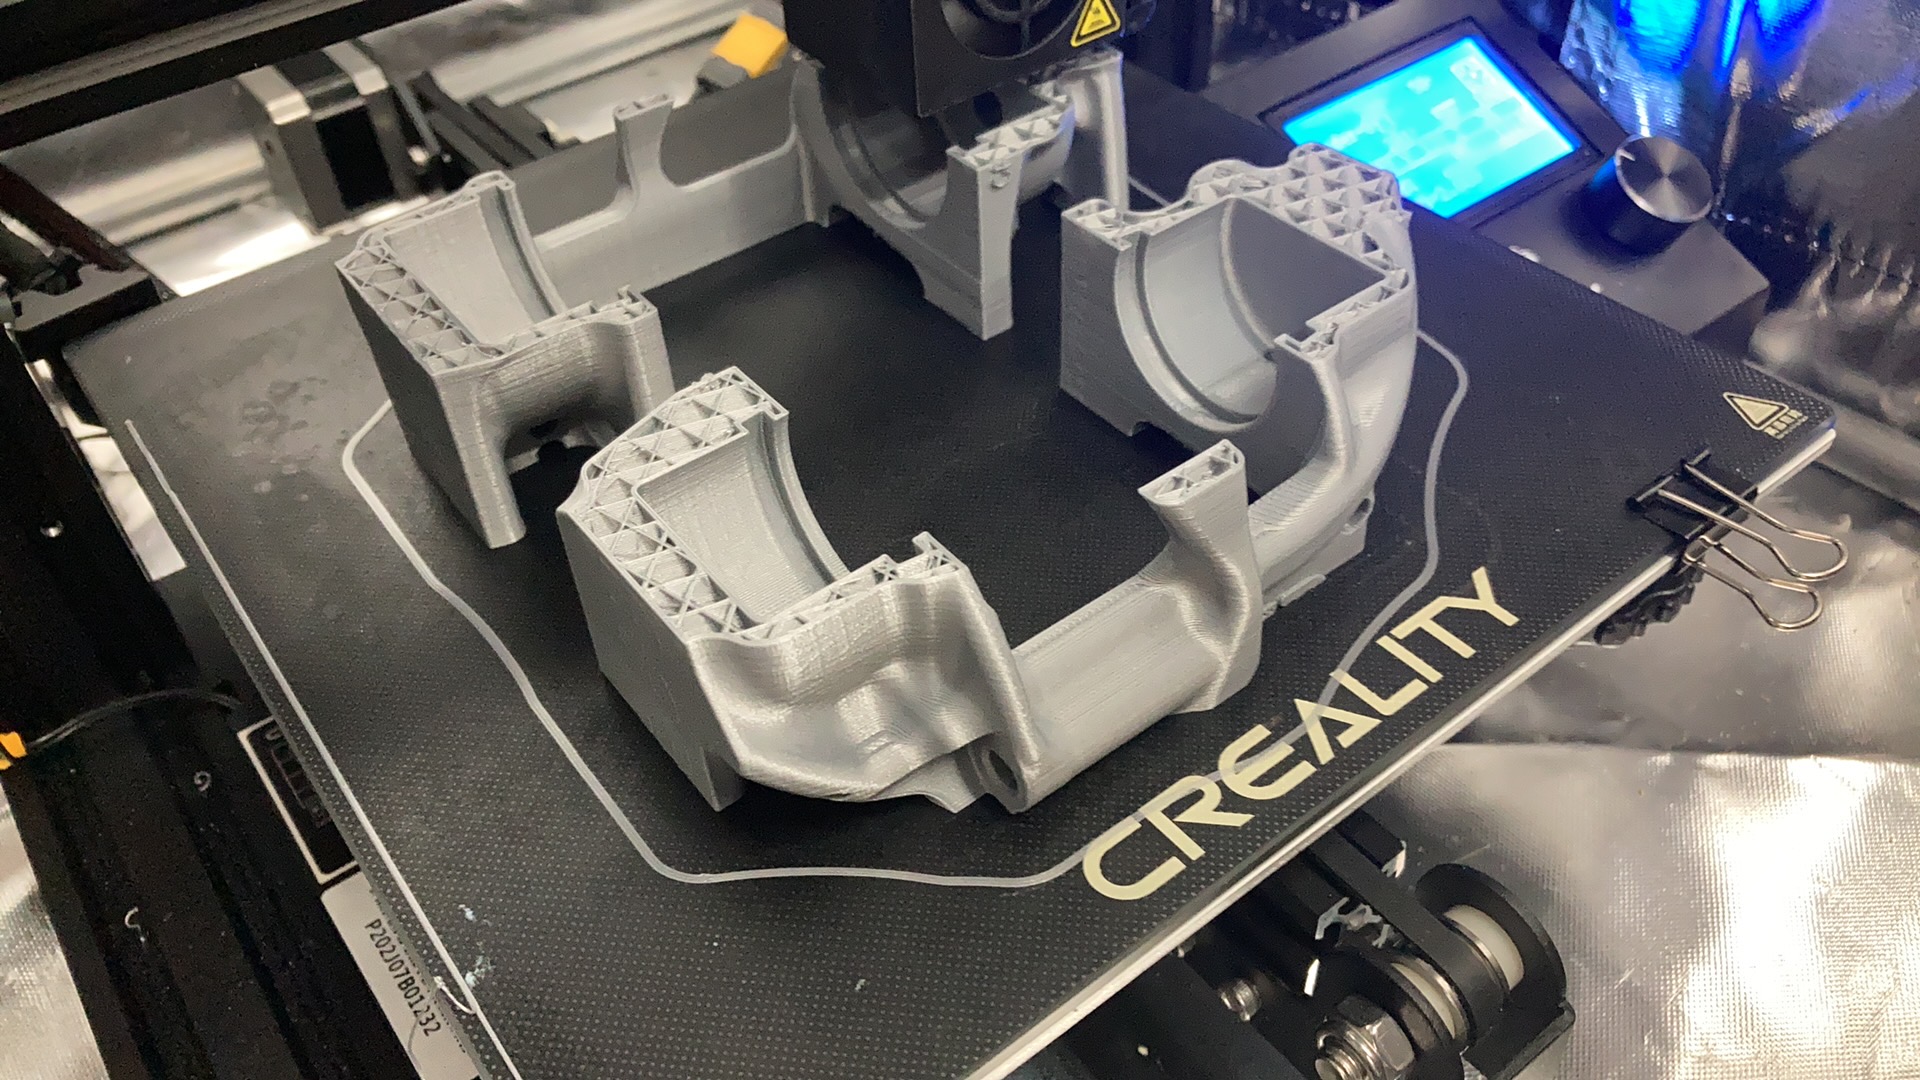
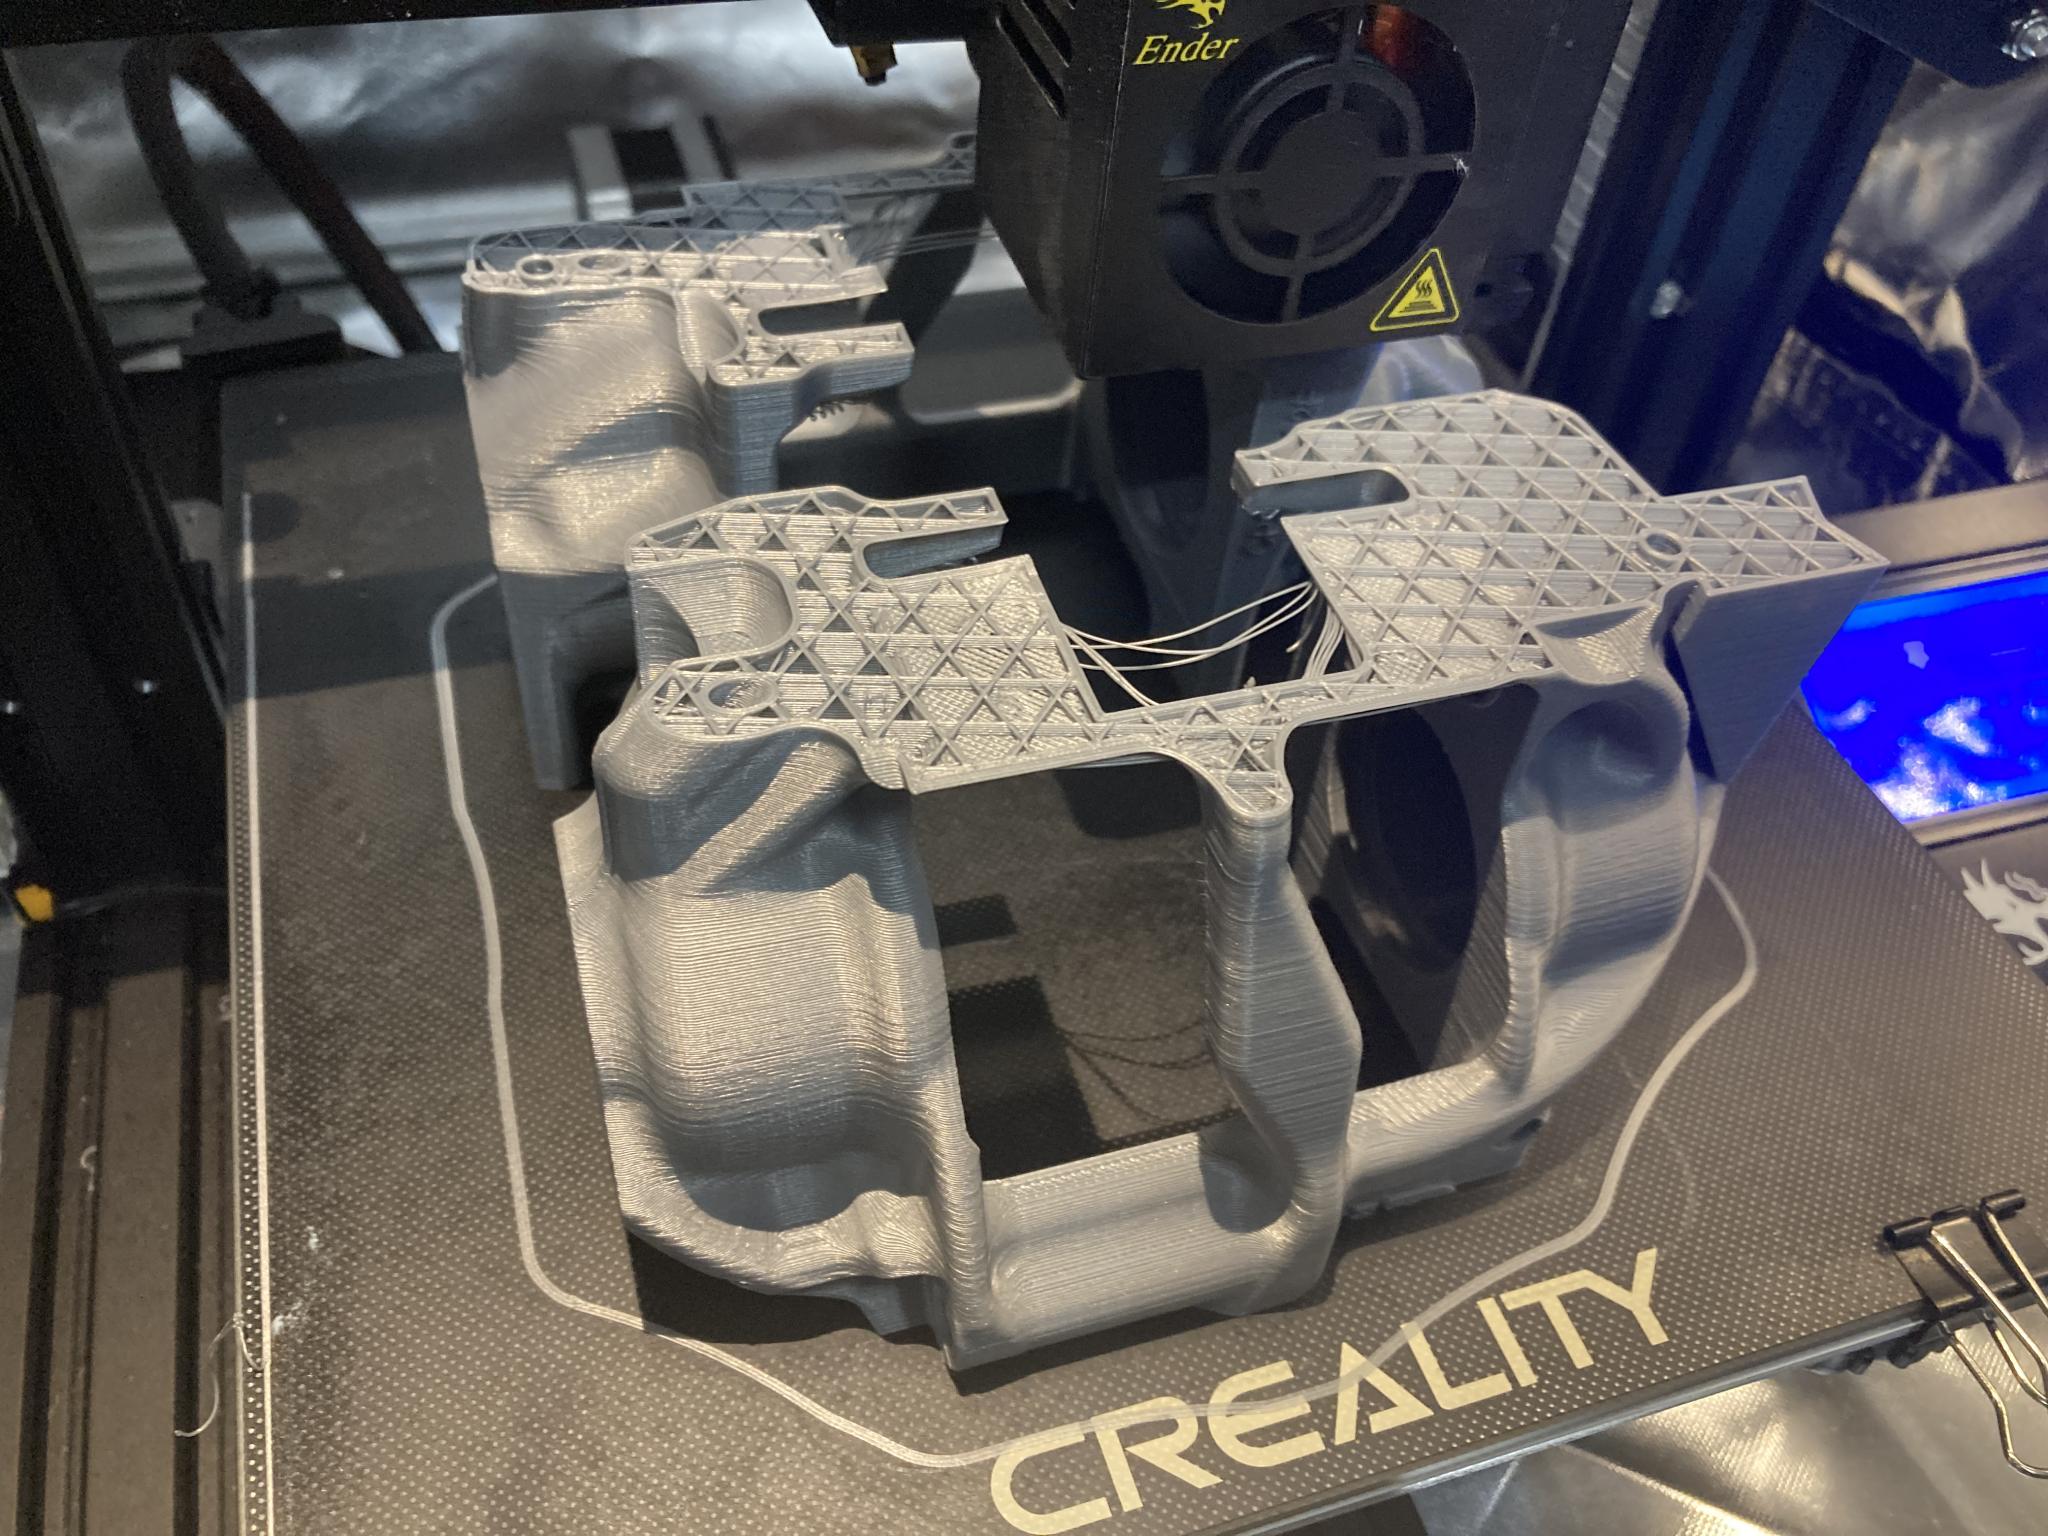
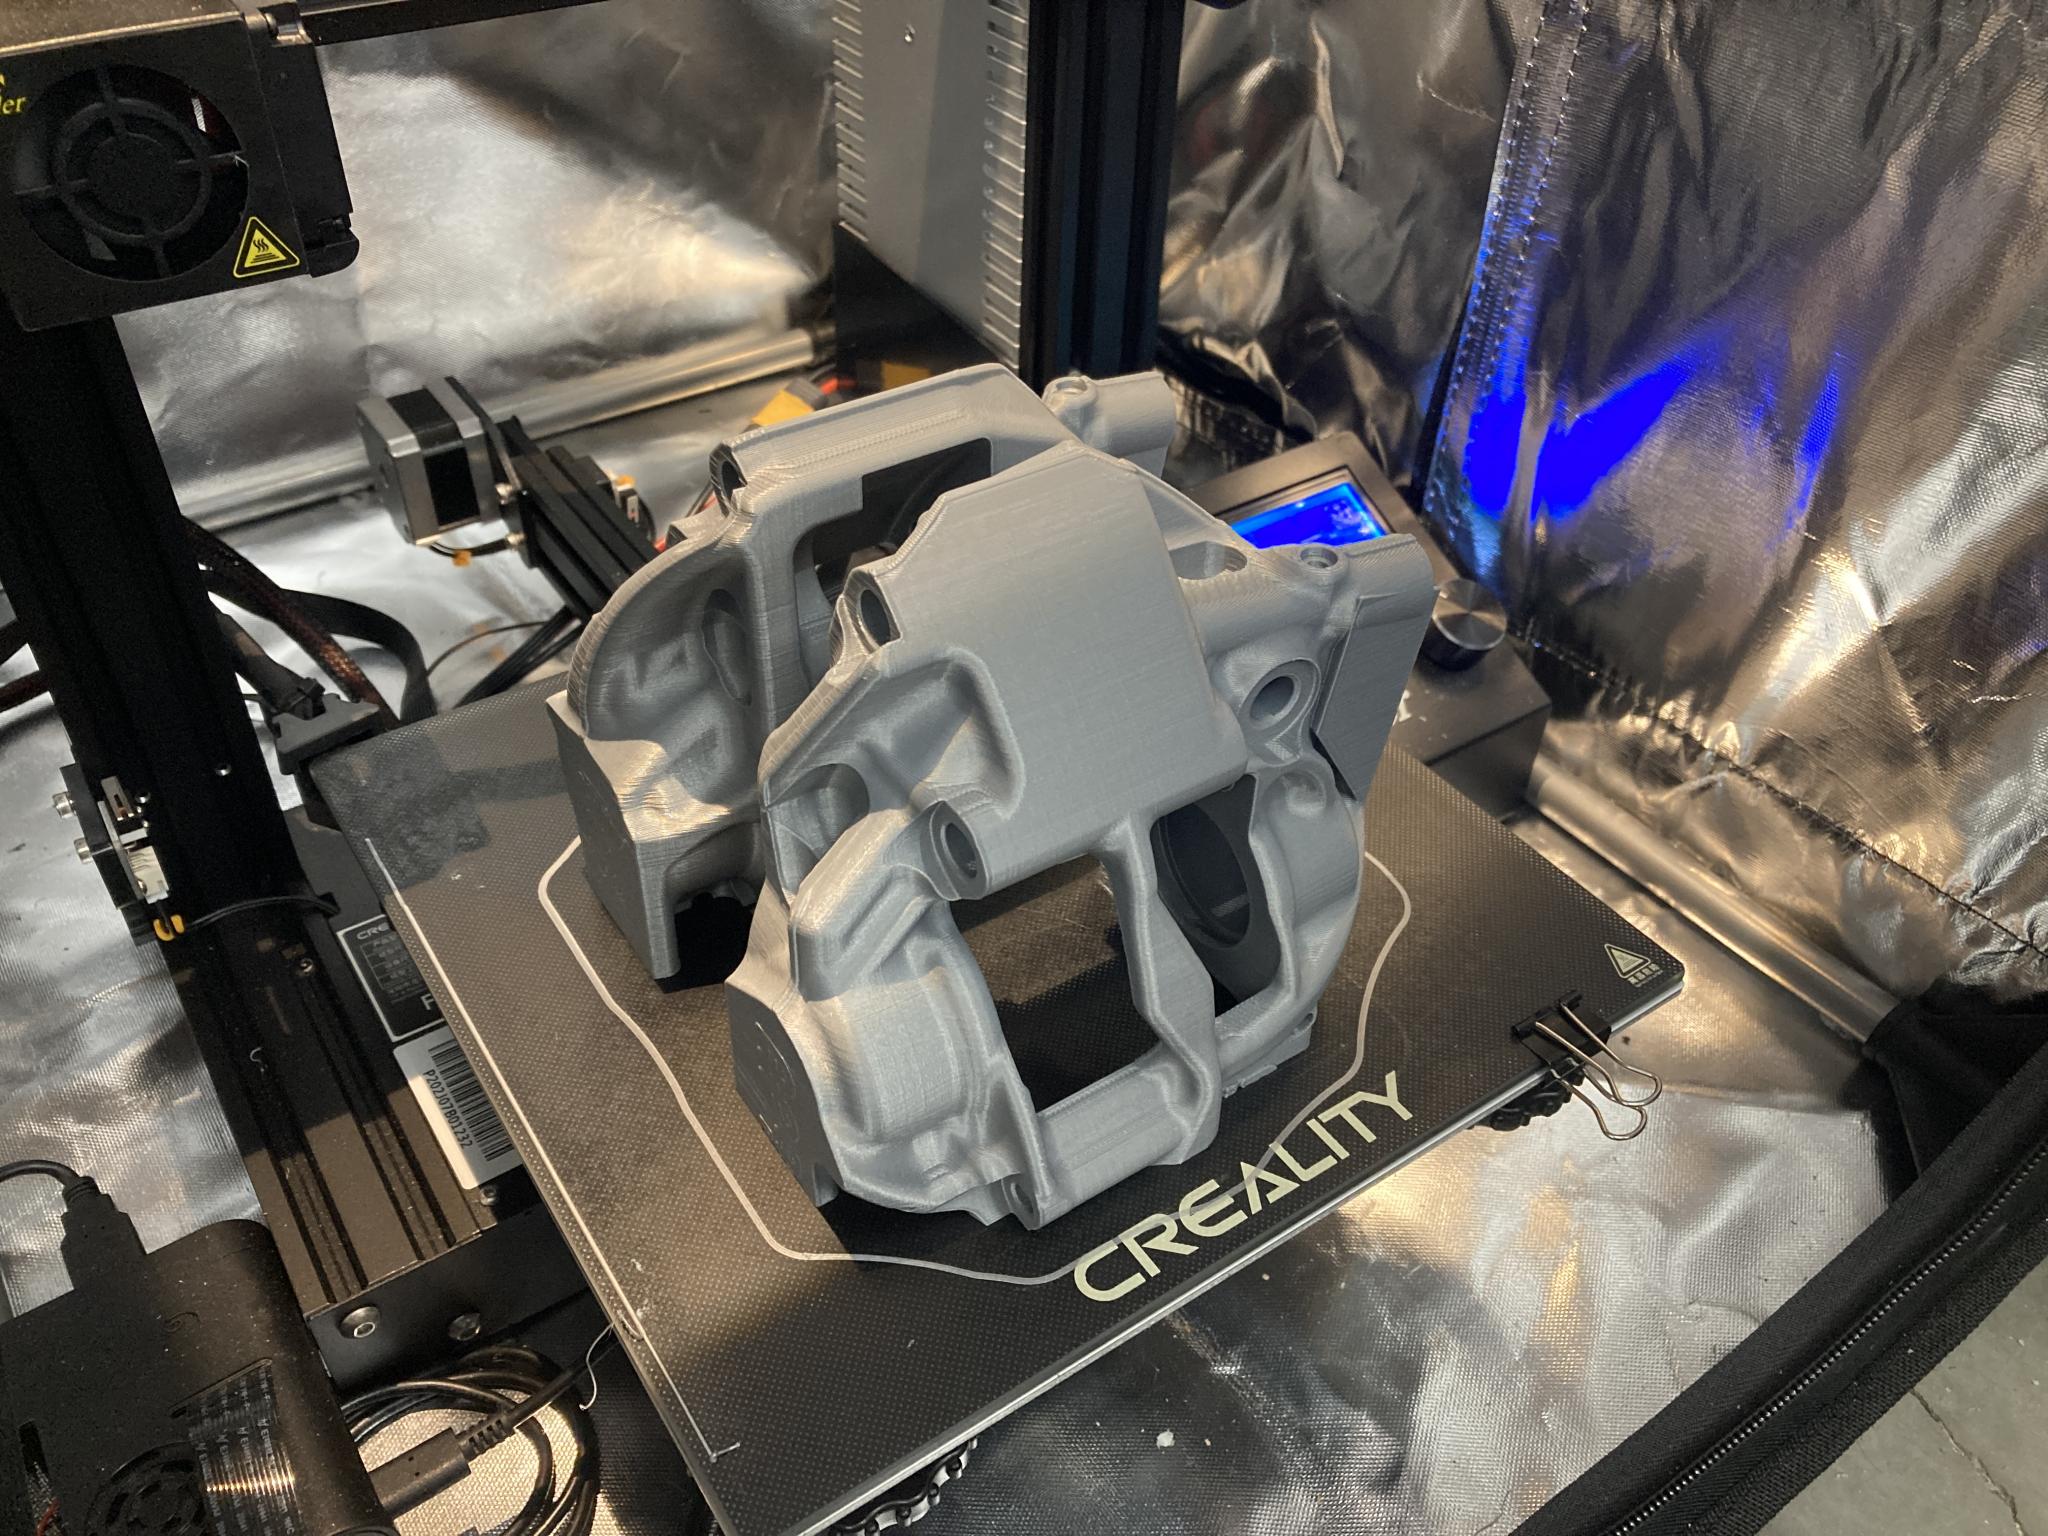
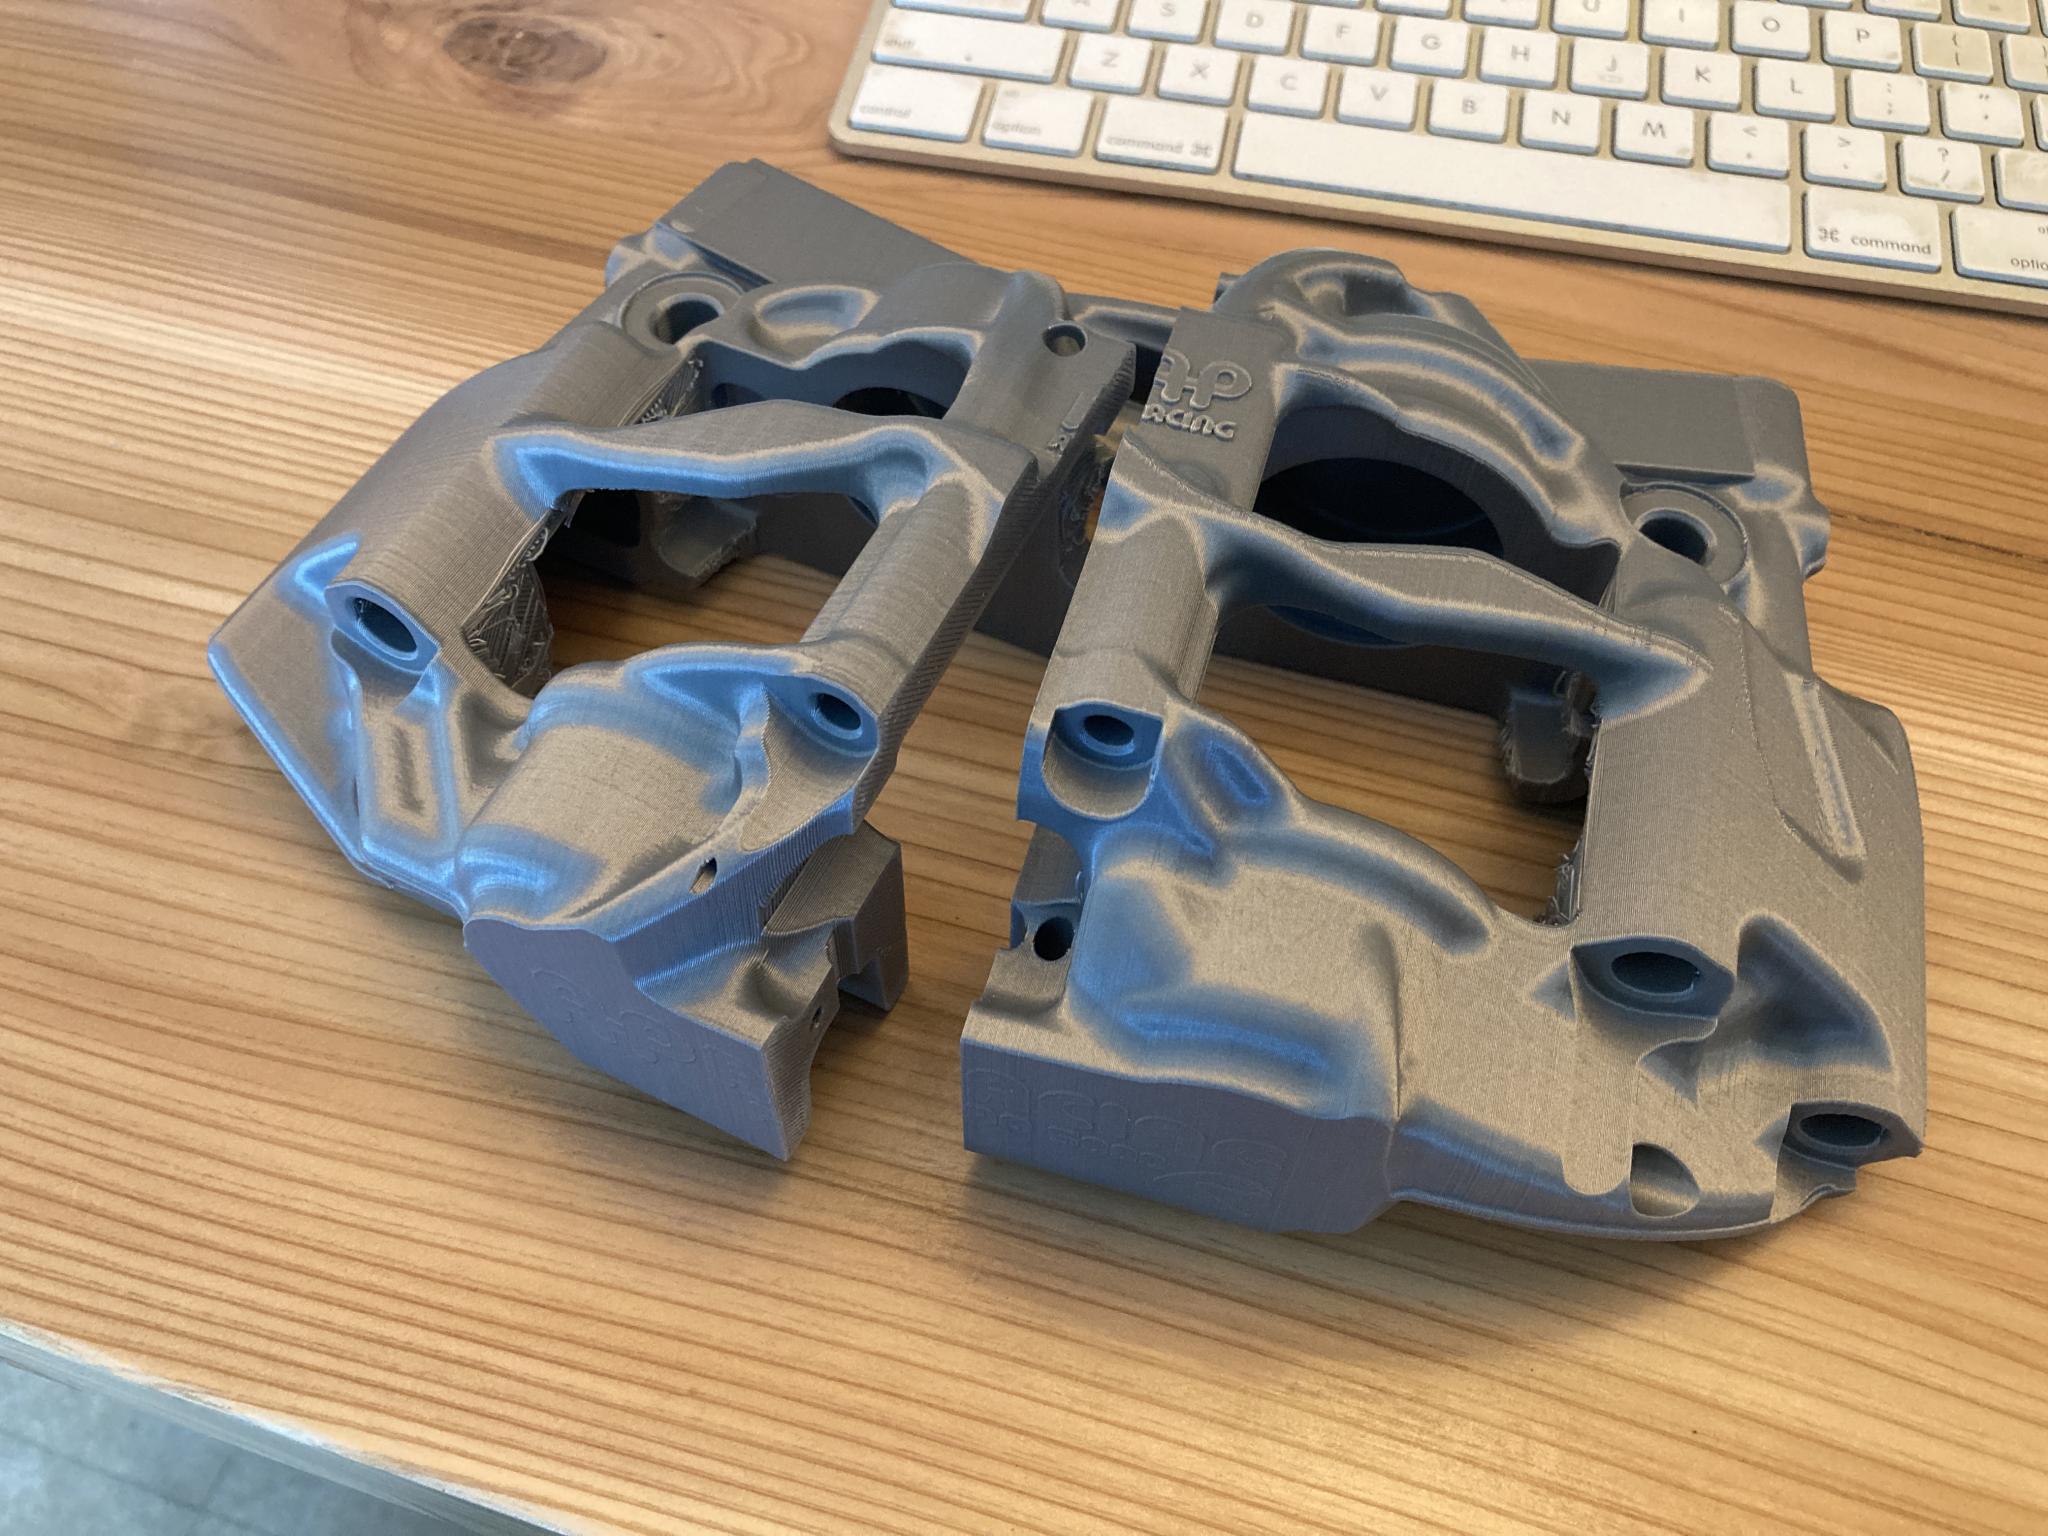
Full size brake caliper is a success. A little bit of stringing where I was asking for a fairly significant bridge, but I was willing to accept that because it allowed me to print this without supports. That's also why I cut the model in half instead of trying to print it in one piece. I can use one of the internal passages as a spot for some alignment pins. Now I have something to use for mockups! I may do a build thread on this whole project when I'm done. I'm pretty jazzed about this.
Hatchbox PLA, hairspray on the bed, about 33 hours print time. The LED light I have directly above the bed exaggerates the layer lines.
In reply to Keith Tanner :
Thats an impressive print!
I made my first thing that I actually drew up and printed. Really simple, but some little standoff/spacers.

Wow card reader #2 is dead too? Either the card has something funky going on, or me not "ejecting" it killed it??
In reply to java230 :
I can't take a lot of credit for that brake caliper - the model was provided by the manufacturer, I just had to come up with a way to print it. That involved finding a way to cut it and adding a chunk of material under one part that was unprintable without supports.
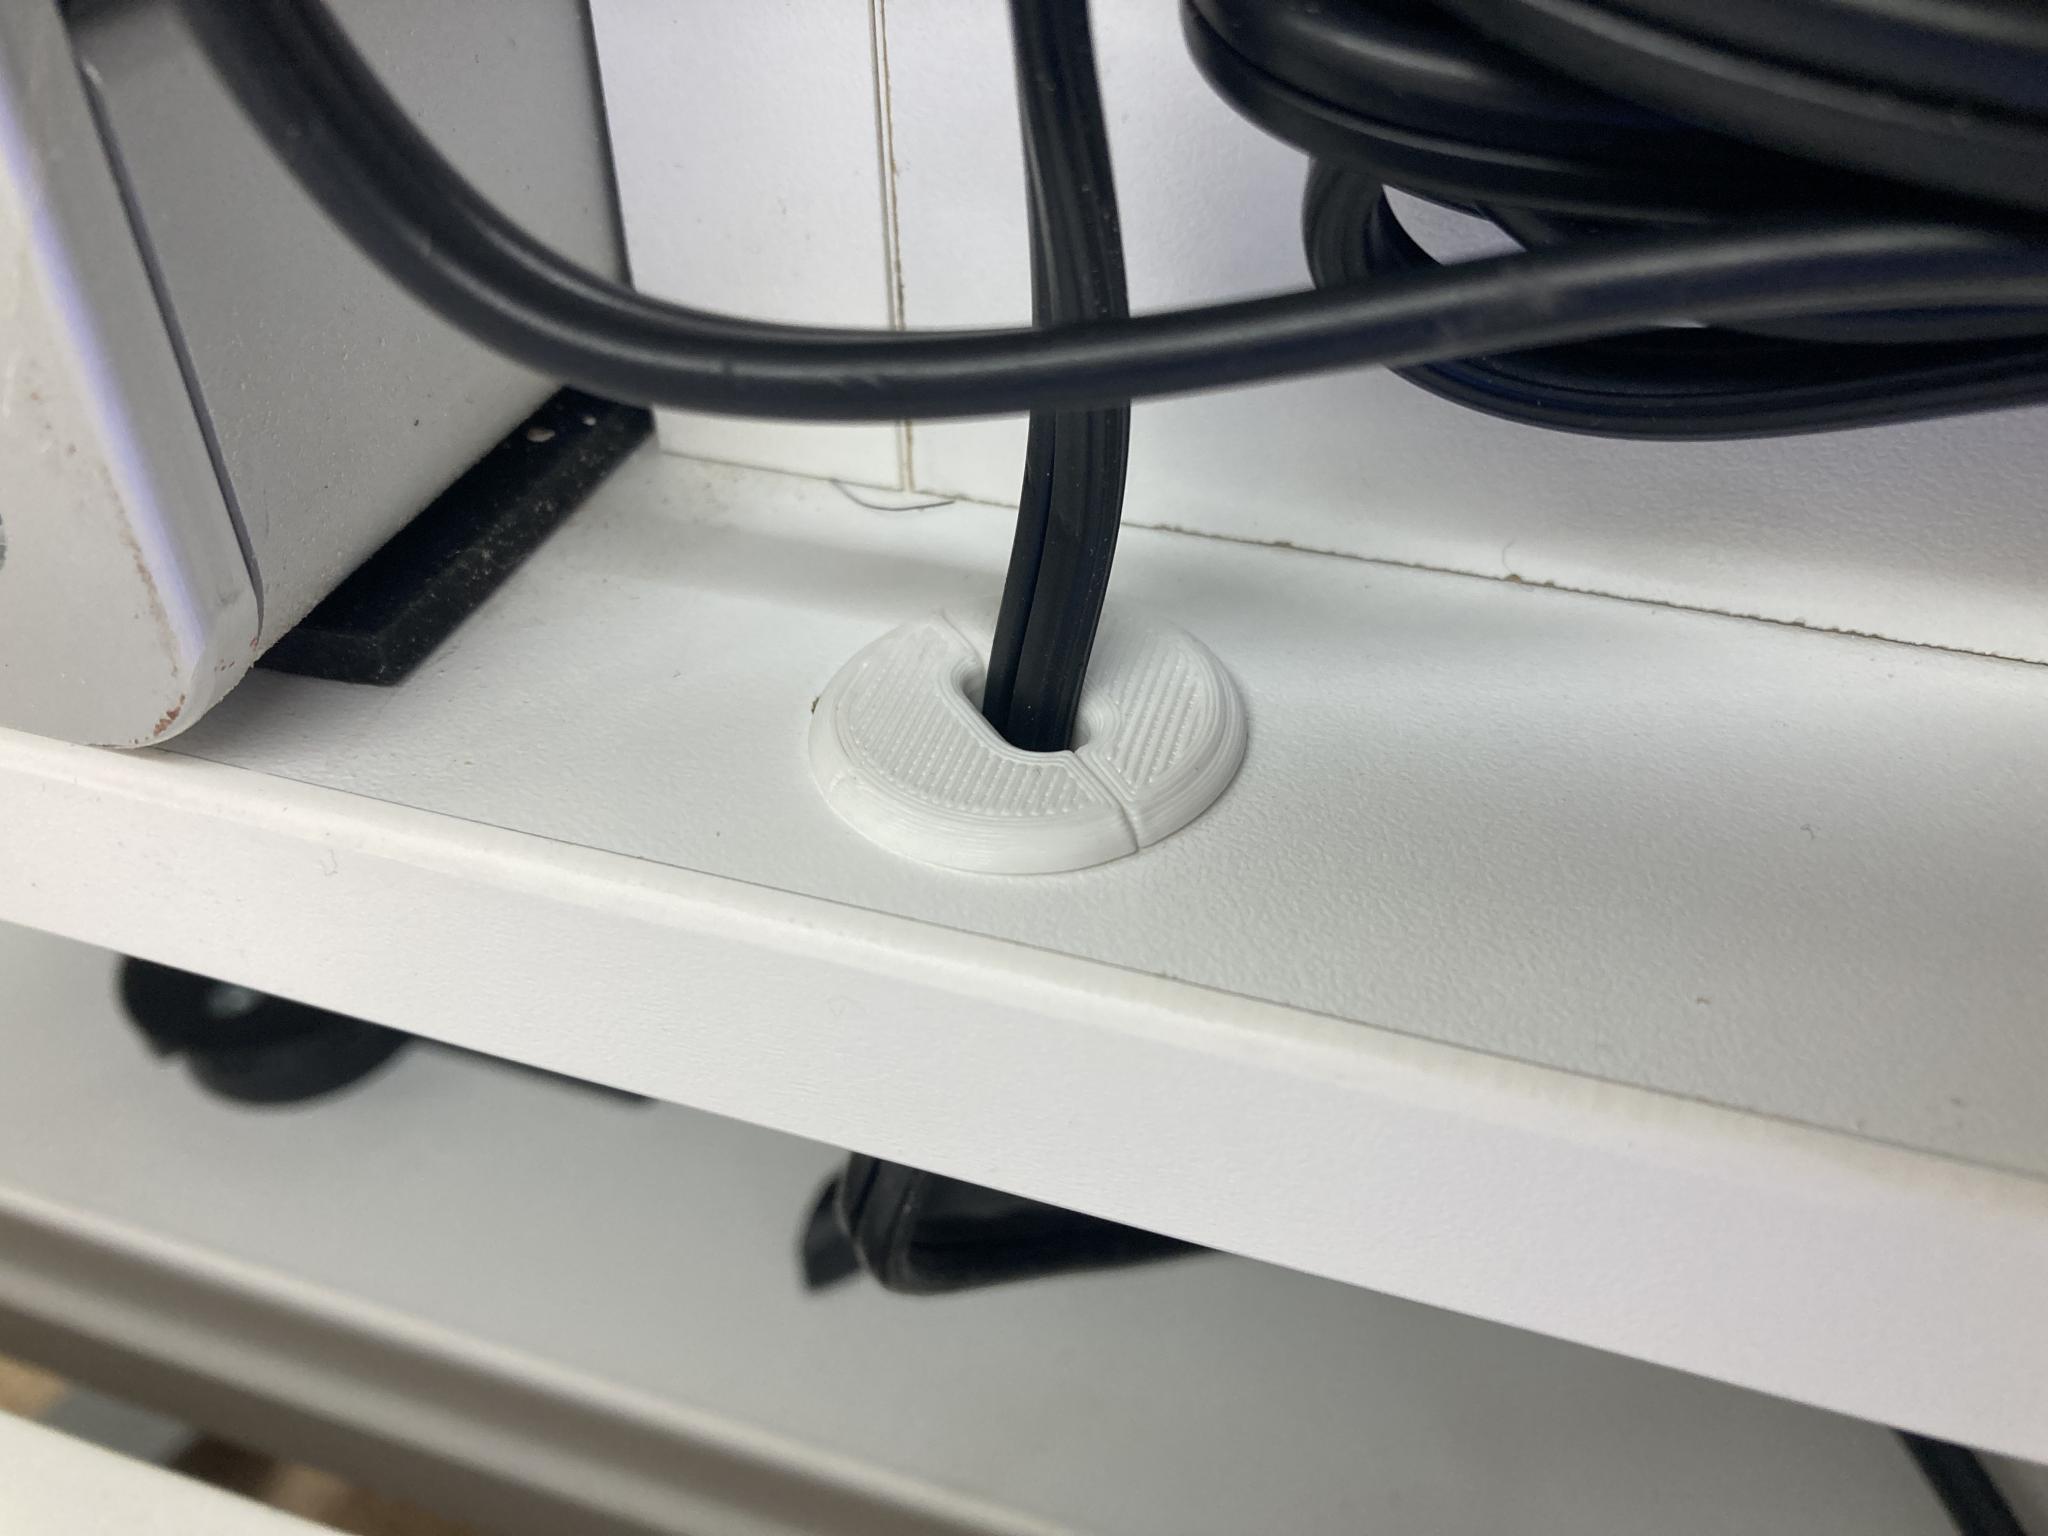
I've done a few other small ones that I designed, like this cord pass-through. It's for a table that can be raised and lowered and the original design had cords protruding out the back. This made them prone to being caught and sliced. There wasn't enough room for an off-the-shelf cord grommet and it had to look good, so a custom solution was called for. It matches the size of the cable and the diameter of the hole I drilled, and it's two pieces because of course there's a big freakin' plug on the cord. Very quick and easy and satisfying. I'm pushing the limits on overhangs on most of my prints to find out how much I can do without supports. This one was printed face down.
Has anyone found a source for connector housing stl files? Any style, metripack, deutsch, whatever.
I'm trying to make a box for an arduino project and it would be really nice to run the CAN wires and relay wires through connector. something I can use off the shelf pins and add it's mating connector to the car?
Go to the source.
https://www.te.com/usa-en/industries/autosport/autosport-3d-cad-models.html
Mcmaster has models for basically everything they sell, and they sell a bunch of connectors. Find the product, click on "product detail", download. Example Weatherpack: https://www.mcmaster.com/9171T25/
Hmm, now I want to integrate some connectors into a housing I'm working on. Nice idea.
Keith Tanner said:Go to the source.
https://www.te.com/usa-en/industries/autosport/autosport-3d-cad-models.html
Mcmaster has models for basically everything they sell, and they sell a bunch of connectors. Find the product, click on "product detail", download. Example Weatherpack: https://www.mcmaster.com/9171T25/
Hmm, now I want to integrate some connectors into a housing I'm working on. Nice idea.
Thanks! That's a good place to look.
is there any reason NOT to get the larger Ender 5 , its probably $100 or so more when on sale,
Just wonder if all the info and tips for the Ender 3 transfers over to the Ender 5 ?
Thanks for your thoughts
In reply to californiamilleghia :
I've heard, but never confirmed, that larger printers have trouble with small fine detailed prints.
Makes some sense in that with a large bed you have a greater mass moving around, and with longer belts you get a little more flex and deformation as it runs, but those are things that should be able to be tuned out
I've been unable to get my hands on any mirrored tiles from any hardware store. People must be buying them up to plaster them all over the house to look at themselves as some form of human interaction.
Might bite the bullet and just grab something off Amazon, as I've basically been unable to print for the last two weeks or so, and I'd like to get back to it.
For those interested in getting their feet wet...check out reddit 3d printer deals, I found a thread with discount codes for the CR10S PRO V2 for $352 with free shipping.
Mines on the way, or will be shortly. I'm making long lists of things to print.
Appreciate links to 3d print libraries. Also very interested in 3d scanning apps and results thereof...I have some (lots) of vehicle related bits and bobs I'd love to scan and print.
R
In reply to Azryael :
It doesn't have to be mirrored, just a piece of glass is sufficient. Hit a glass shop and they'll make something that will work.
Ideally it should be tempered to handle higher temps, but for things like PLA or PETG you'll be fine.
In reply to Stefan (Forum Supporter) :
Tempered doesn't really deal with withstanding higher temps. The temp changes can actually cause tempered to shatter. What he wants is borosilicate glass, and not soda-lime glass.
Borosillicate = Pyrex bowls
FYI, a print this weekend gave me the excuse to break out the heat set printed inserts. Basically, you put the insert on to a special soldering iron tip and just smoosh it into the print. Super easy. These are brass M3 inserts from Adafruit, but I have a bunch of others on the way from McMaster now because they are the dog's danglies.
I used a 4mm hole for these, McMaster said they work in a hole with up to 4.7mm diameter. I'll do some experimentation to see what works best. Shown here on a quick and dirty PLA print.

In reply to Azryael :
I just bought a piece off Amazon. I ended up getting a PEI sheet as well so I didn't have to bother with hairspray and glue stick.
So, here's this part, it still needs some minor tweaking.
It has a little slide-in part on the bottom that clamps and prevents it from slipping off. However, there's nothing to prevent it from sliding down the angled portion of the dash enough to fall off. Other than some rubber glued to the inside of the lips so it clamps and grips, I can't think of any way to prevent it from sliding down the bow cap's dash. Anyone got any ideas?


Have we done a "Post your printing area organization" thing yet? I realized that this hobby, like most others, seems to continually expand as you get further down the rabbit hole. I finally had to hang a little shelf to keep my workbench clear:
Tom Suddard said:Have we done a "Post your printing area organization" thing yet? I realized that this hobby, like most others, seems to continually expand as you get further down the rabbit hole. I finally had to hang a little shelf to keep my workbench clear:
How are you liking the enclosure?
Im thinking of getting one of them
In reply to hybridmomentspass :
It prints PETG perfectly with the enclosure, and keeps garage dust off of everything. 10/10 would recommend.
Yes, it's a little pricey, but considering it took me five minutes instead of five hours to build, I think it was worth it.
Tom Suddard said:In reply to hybridmomentspass :
It prints PETG perfectly with the enclosure, and keeps garage dust off of everything. 10/10 would recommend.
Yes, it's a little pricey, but considering it took me five minutes instead of five hours to build, I think it was worth it.
Well that's my thoughts too (time!)
Spend 70 and have it tomorrow (for example) vs trying to build something that might not be as good
I want to print in ABS and other things
Was having some feeding issues, sometimes it fed filament, sometimes it didnt.
i did some googling and one, top, recommendation was to replace the plastic bits with aluminum kit.

Was 10 shipped on Amazon and I just hit print on a file about 15 minutes ago. It's been printing perfectly.
When taking it apart I noticed the culprit - the piece which has the bearing on it and the lever (it's one piece that the bearing screws to) was cracked, so it wasnt having the tension/pressure on the brass drive gear that it needed.
This is the lever that you have to press to relieve tension to feed filament through etc, it can get a good workout and mine, apparently, cracked already.
Now it's got a TON of pressure...and I actually used the stock spring instead of the one that came with the kit, which was stiffer and longer, and, as stated, it's printing super well.
For ten bucks and next day delivery, Im very pleased and would recommend this 10 minutes upgrade to anyone with a creality unit.
Did a 4s4p lifepo4 pack housing/mount for a old fsae project on my ender3v2 out of petg. Initially attempted in ABS but with no enclosure it warped a little to much to be really functional. Considered a high tech cardboard enclosure but figured it was with giving PETG a try. Came out pretty good. Mounts to the frame with 3 hose clamps cushioned by some neoprene rubber
Toy shark for scale. Cells came from some server backup packs 144 cells for $165 should be good for ~480a for cranking. Back when we ran the car in formula a 4s3p pack was enough to spin up an f4i previously seized due to a oil pickup not being shortened to match the low profile oil pan.


You'll need to log in to post.