All I could think about with that tile was this.

Newbie. I've still got v3.0 on floppy ![]()
Stampie wrote: In reply to Keith Tanner: Only you would have wheels on your junk pile that I'd kill for.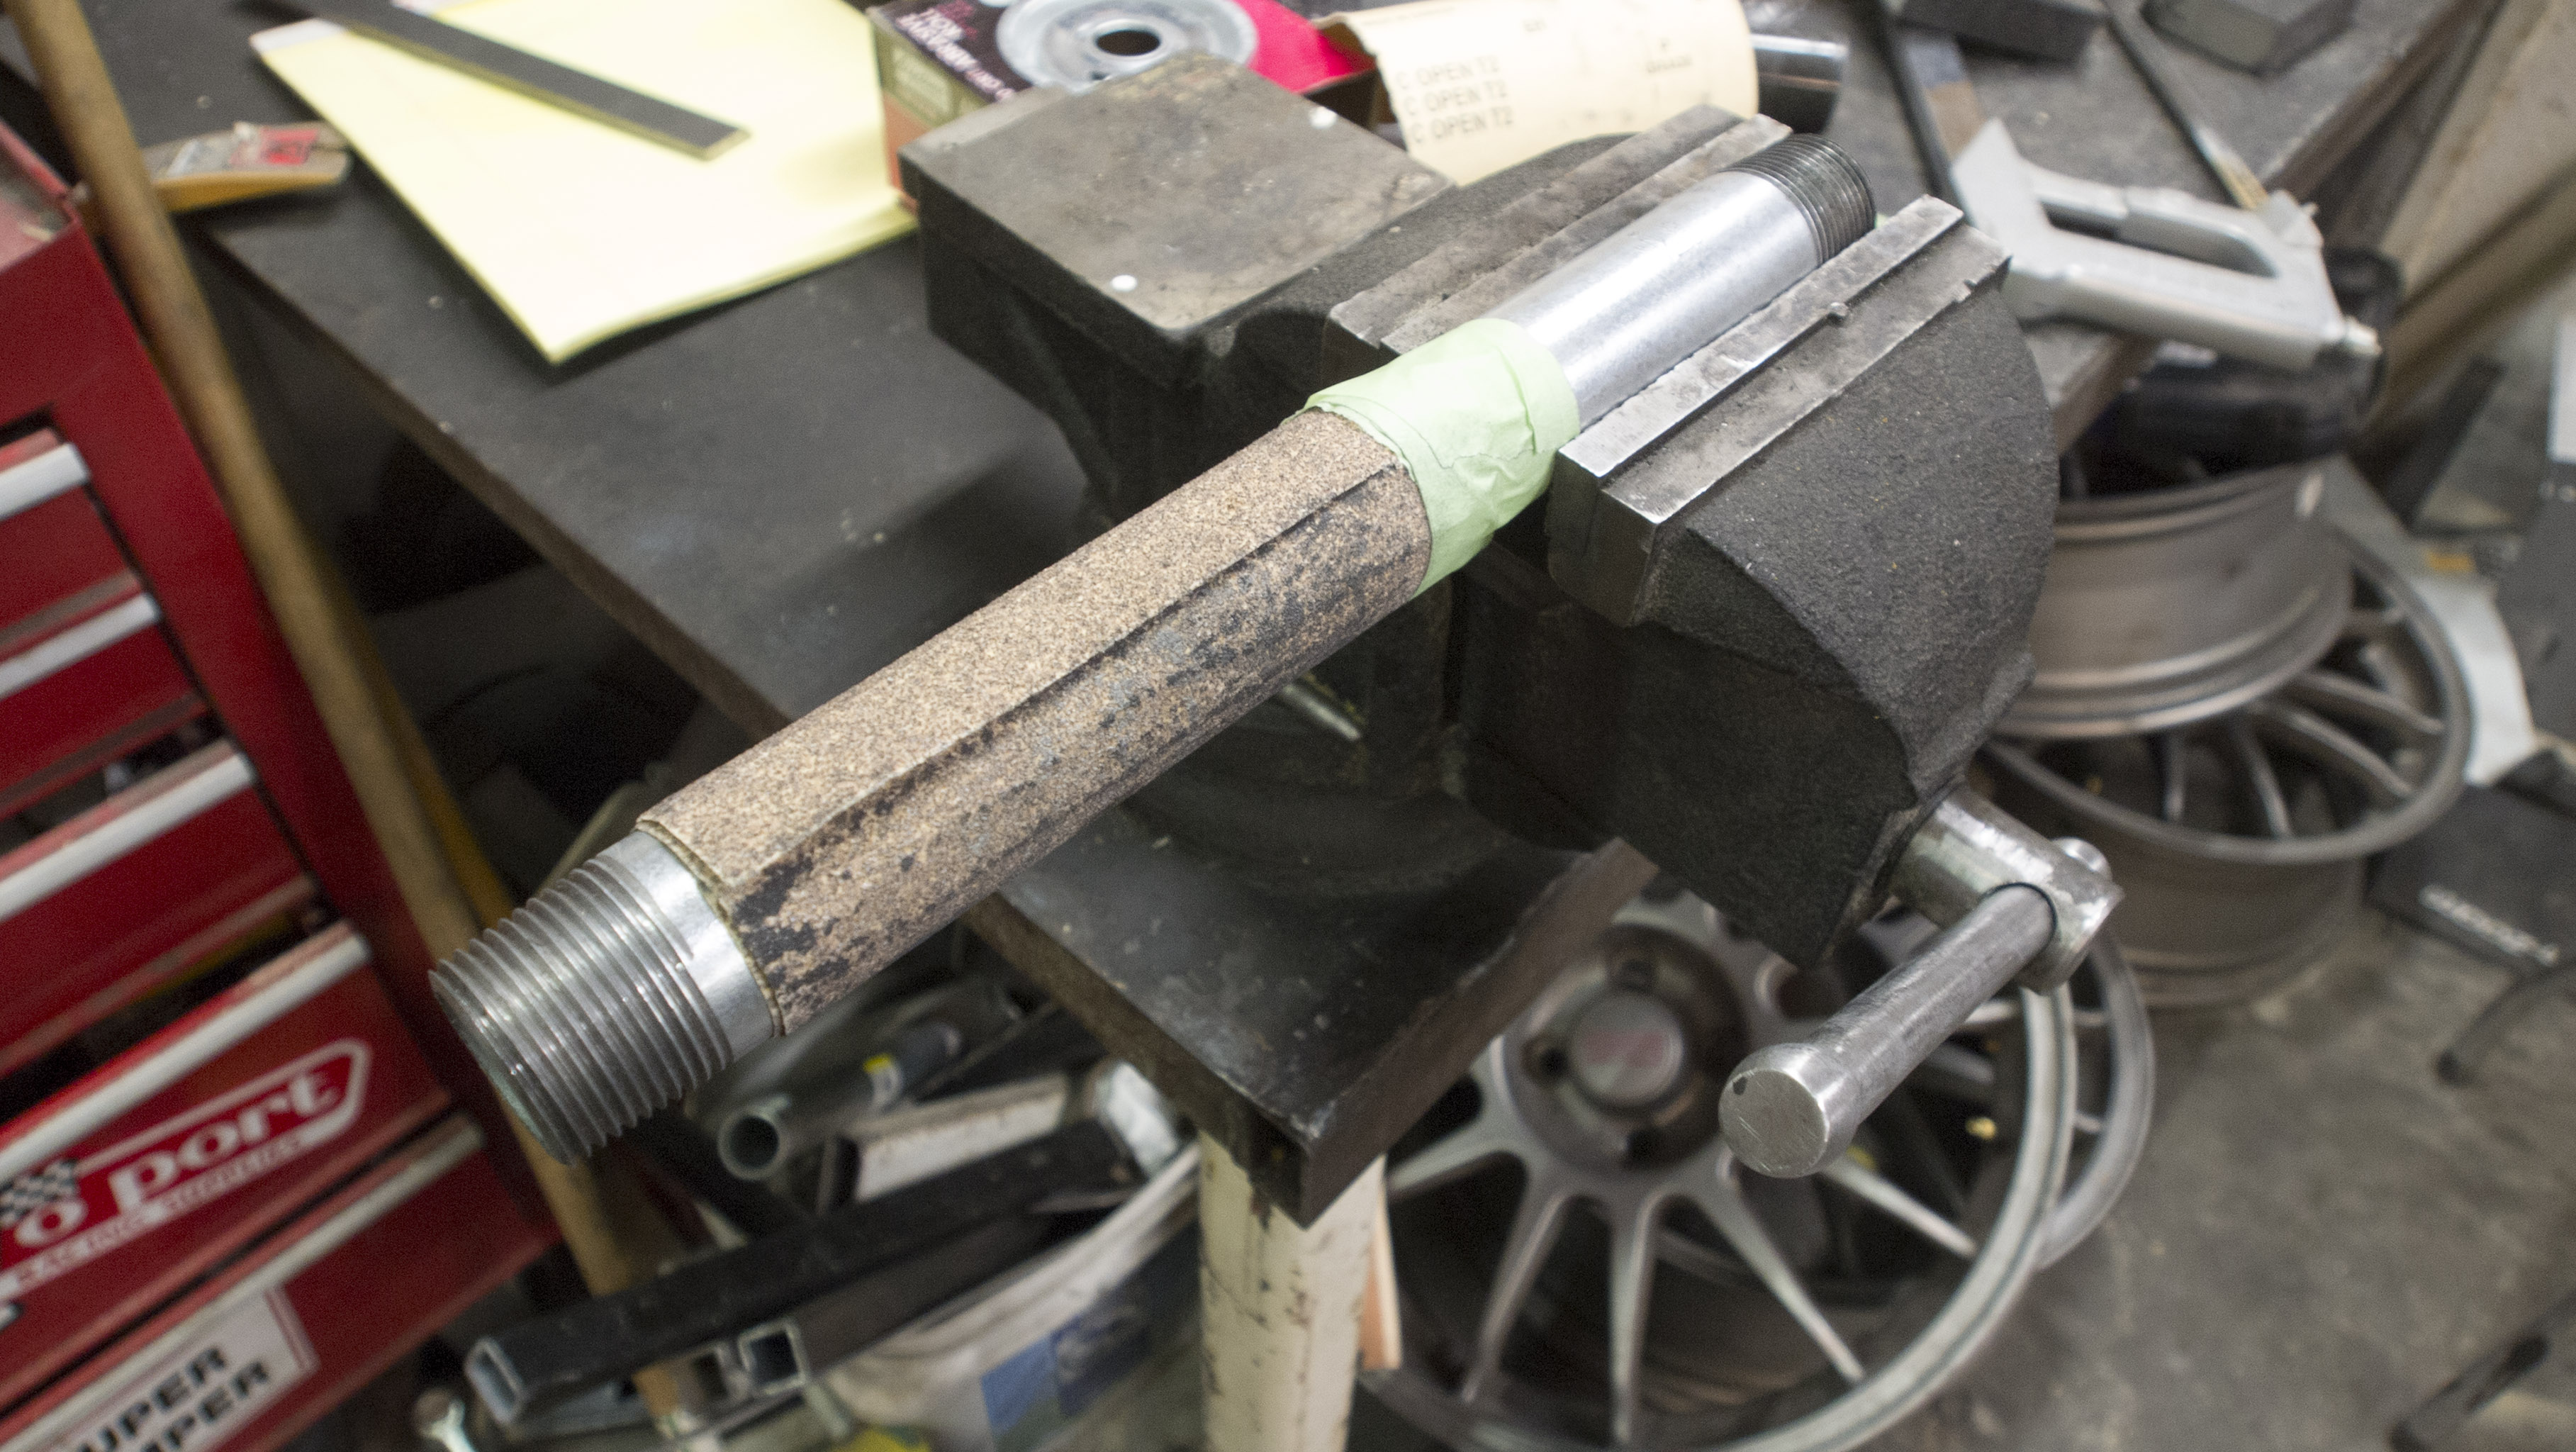
Not junk pile, just temporarily in the way.
Update time!
After the last test, we decided to add pins to stop the pole from rotating in case the camera was cantilevered to the side. Travis requested some inserts in the ends to improve crush strength - I think that's psychological more than an actual need, but still. And I figured I'd do a bit of work to add some rigidity.
So, step 1. Pins. Seems simple. Drill two holes and put a pin through it. But I wanted to make sure all the holes were in identical places and symmetrical so we didn't end up having to label every tube and identify "this way up". That wouldn't decrease the usability, but it would make it more of a pain to deal with.
So I took a piece of the CF tube to Home Depot and went looking for something to use for a jig. Turns out, I had cleverly selected an OD that was a perfect match to 1.25" PVC pipe. A coupler made the ideal jig, because it would slip on smoothly but with no slop at all and it has a stop in the middle for a consistent depth. Plus they're about 73 cents.
Next step was to get the holes in symmetrical places in the jig. Here, we turned to tape. This trick works really well for finding centerlines on almost anything - windshields, body panels, lengths of wood, whatever. Here, I'm finding opposite sides of a circle.
Wrap a length of masking tape around the pipe. You want something that won't stretch, so no duct, electrical or hockey tape here.
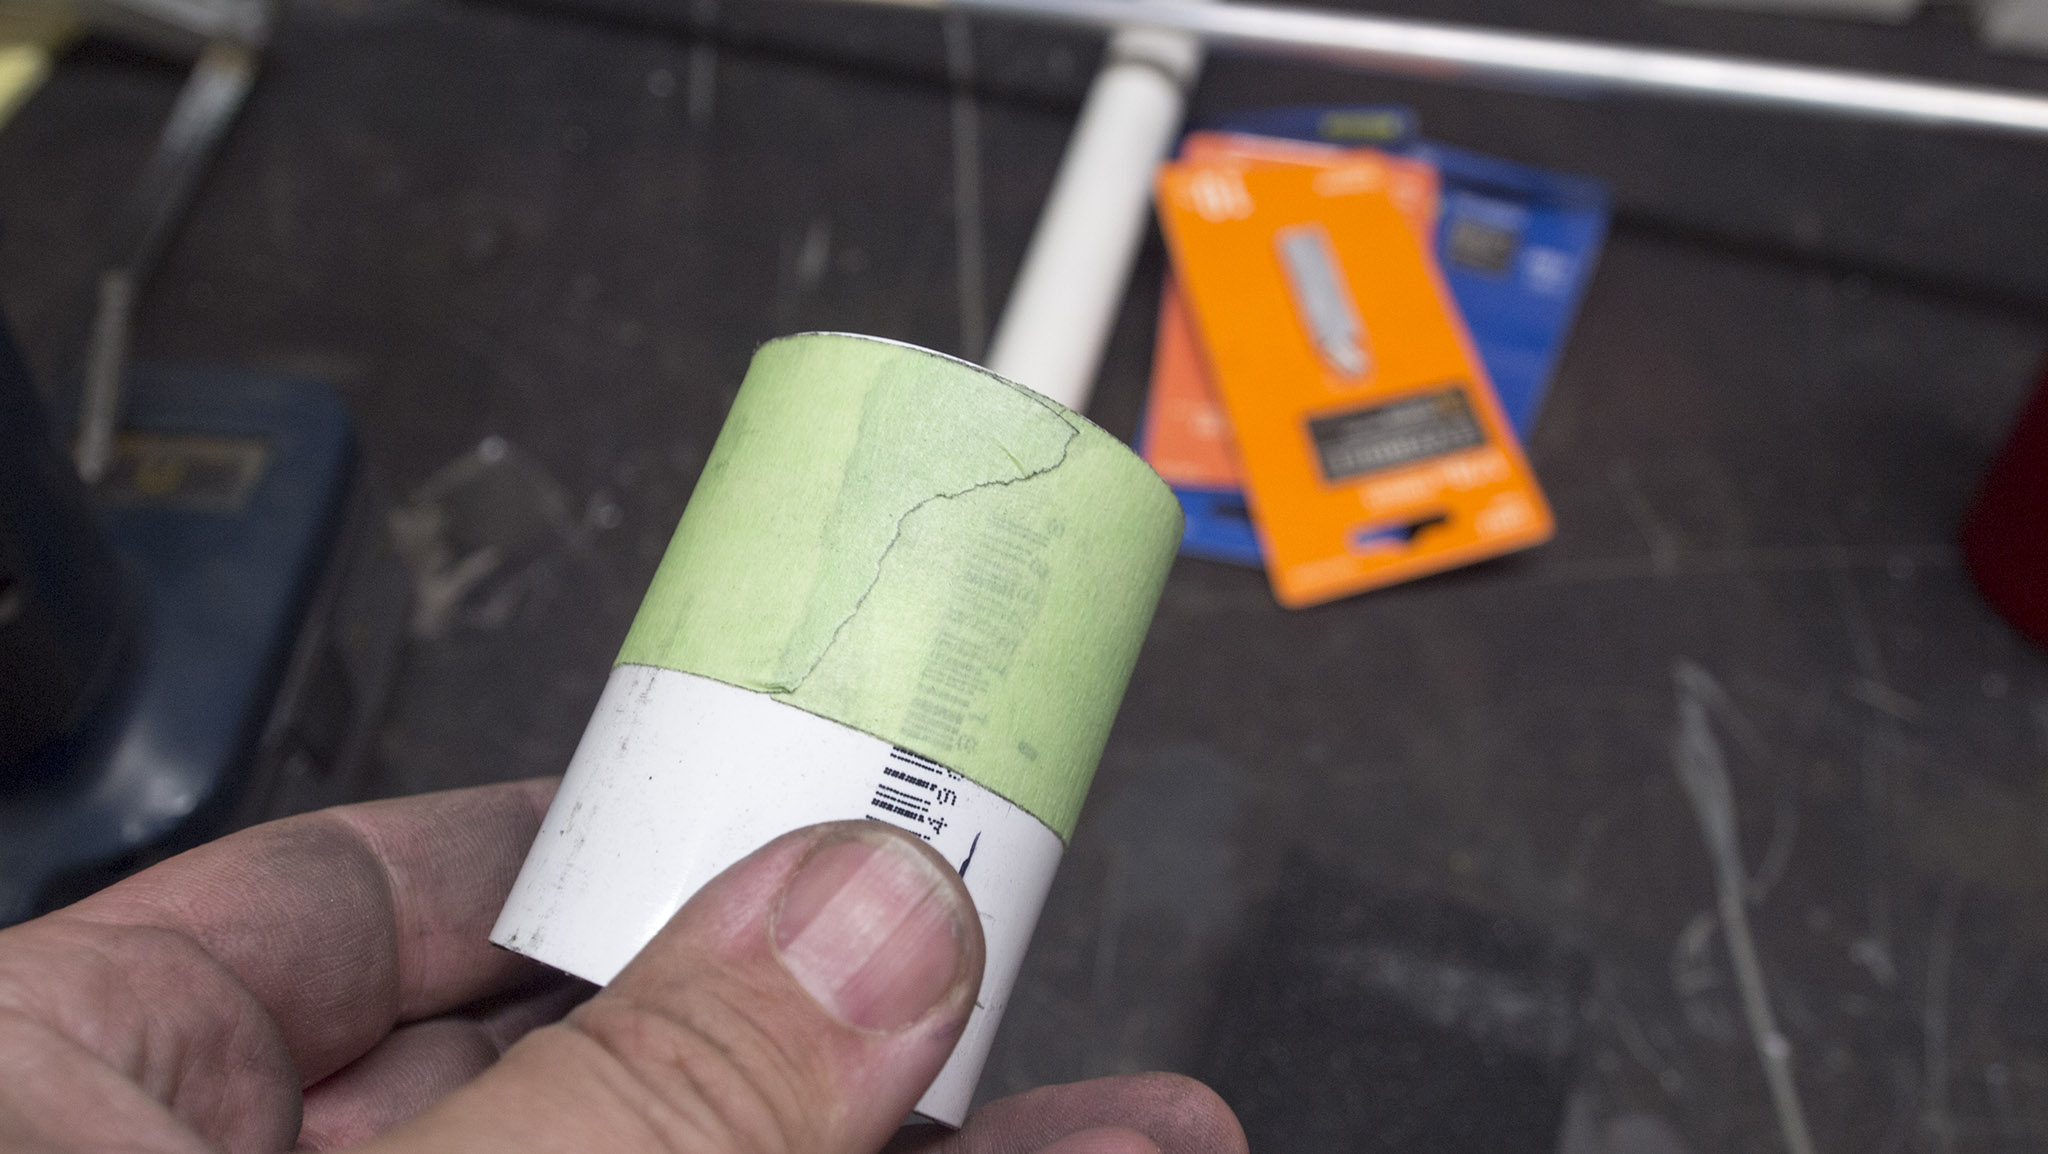
Cut it with a razor blade so the ends are butted together.
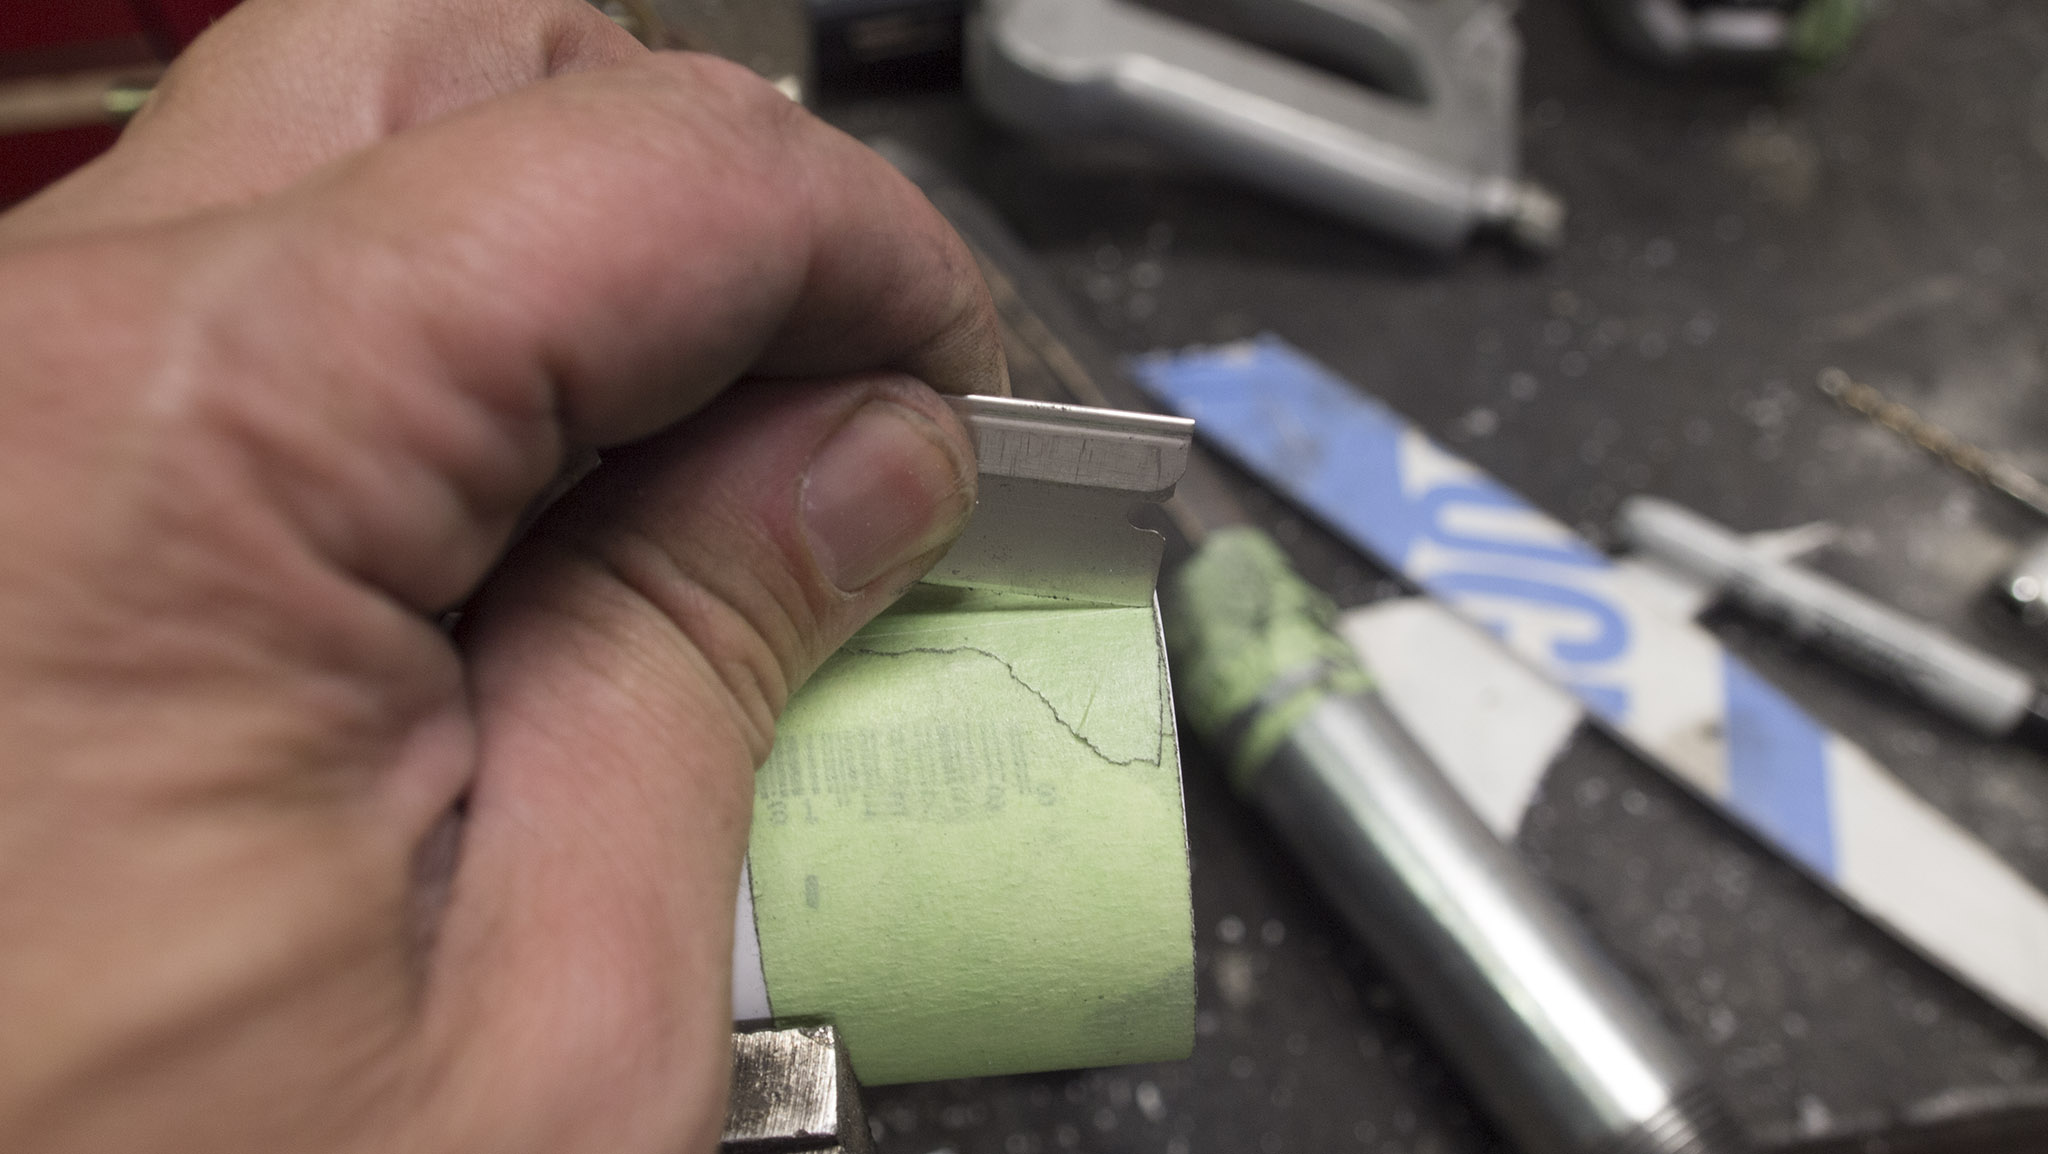
Peel one side back and mark your cut line.
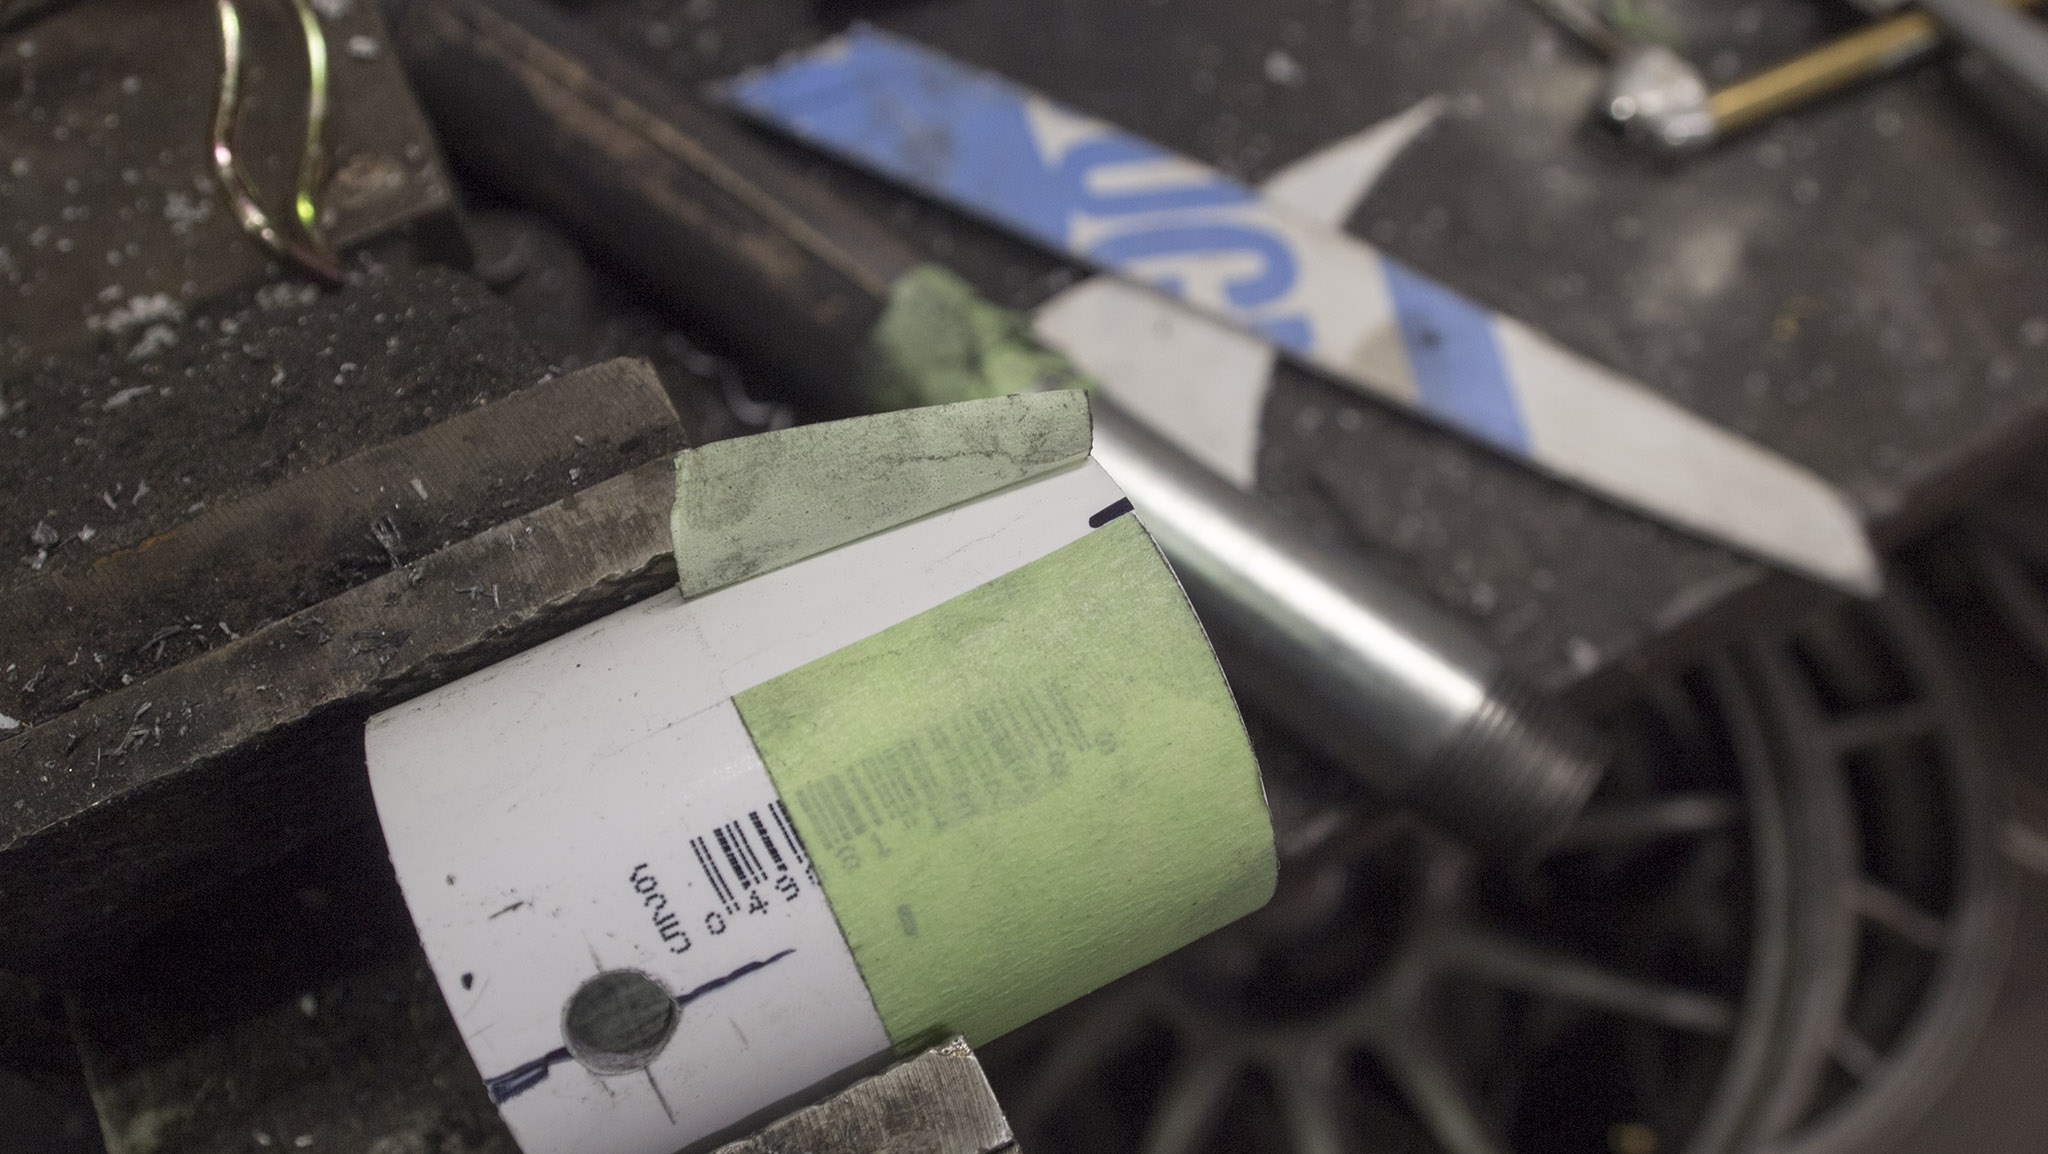
Keep peeling and fold the tape over. Line the free end up with the end that's still stuck to the pipe.
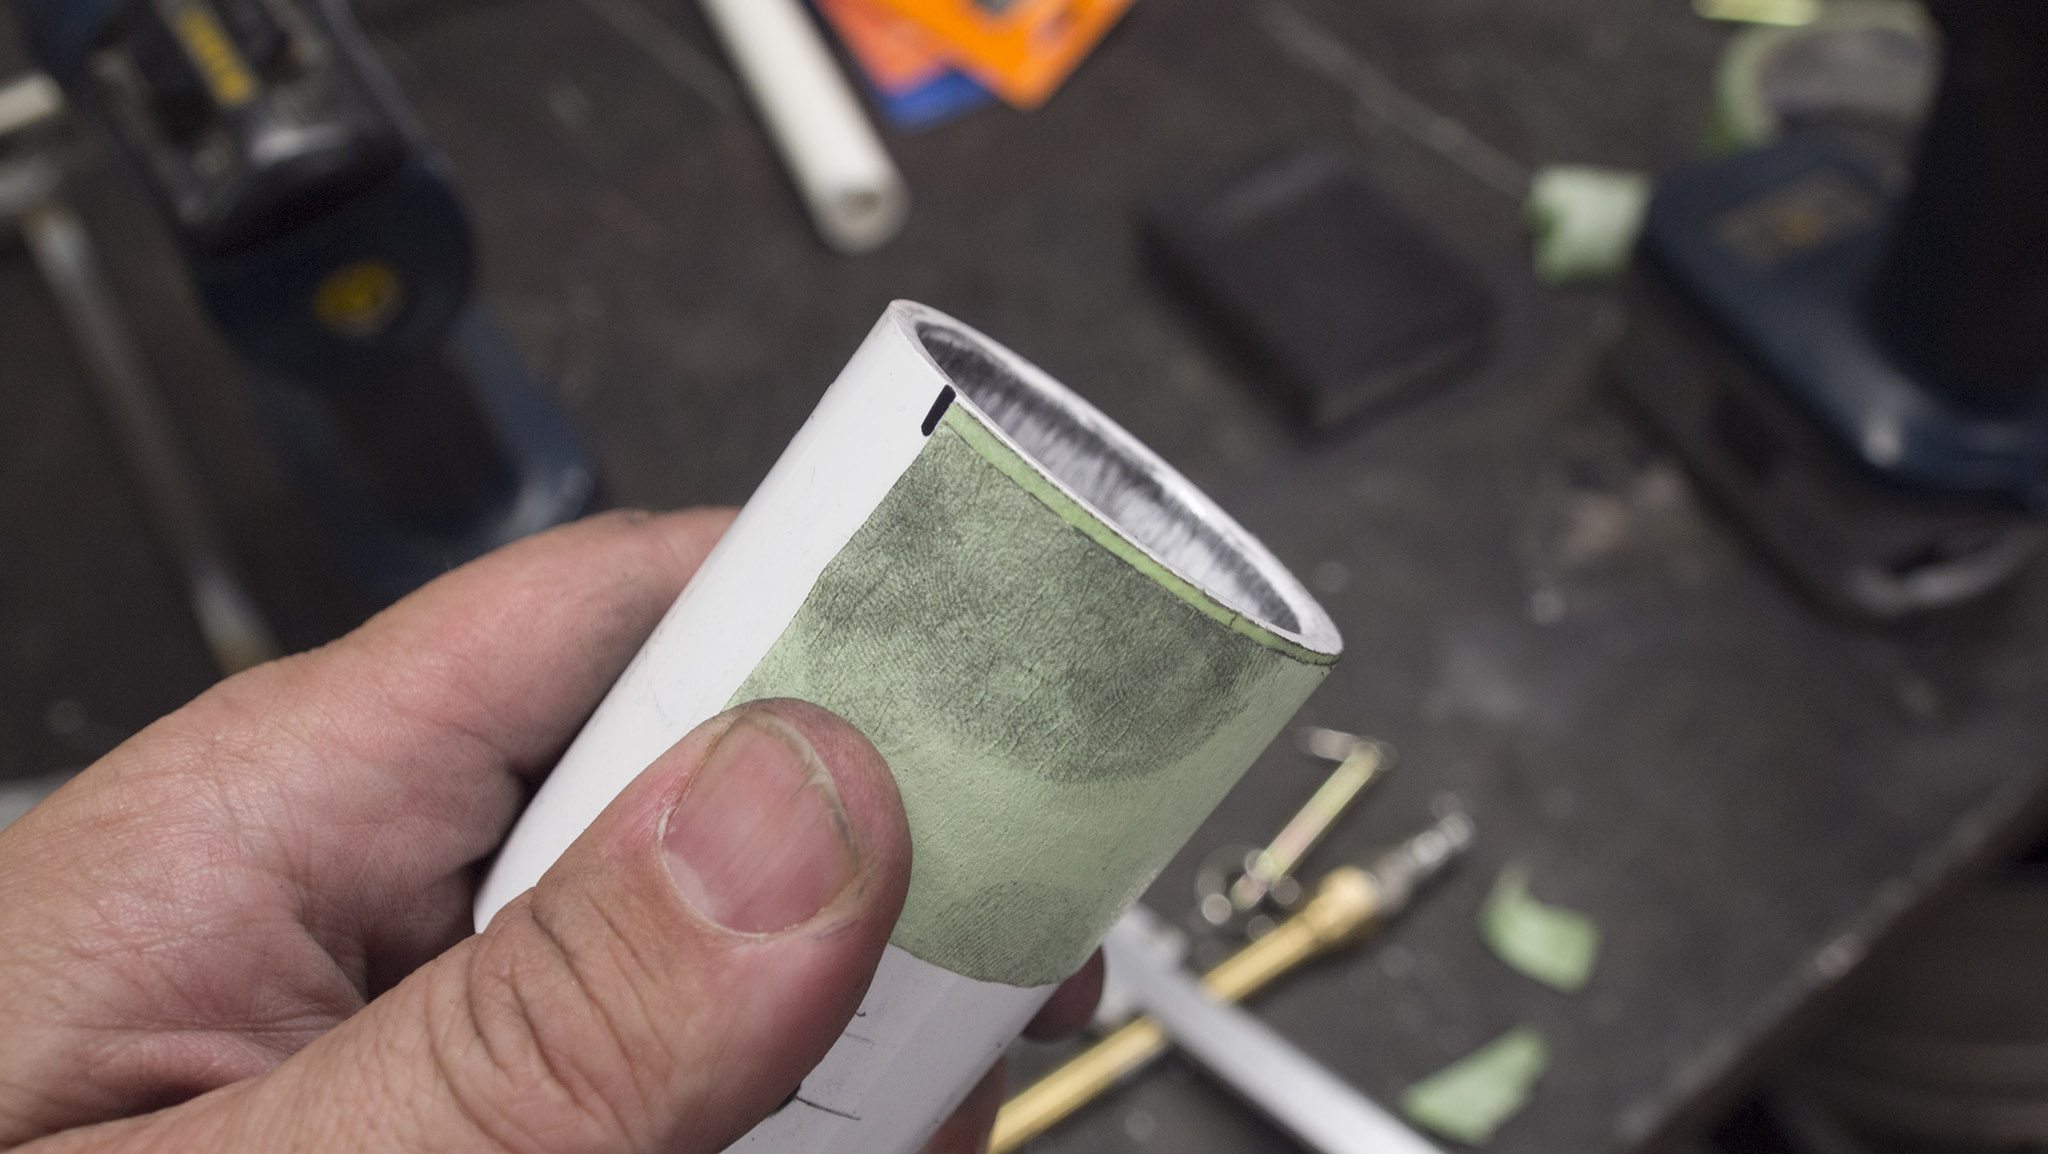
The other side of the tape - where it's peeling back - is halfway along the original length. Tah dahh!
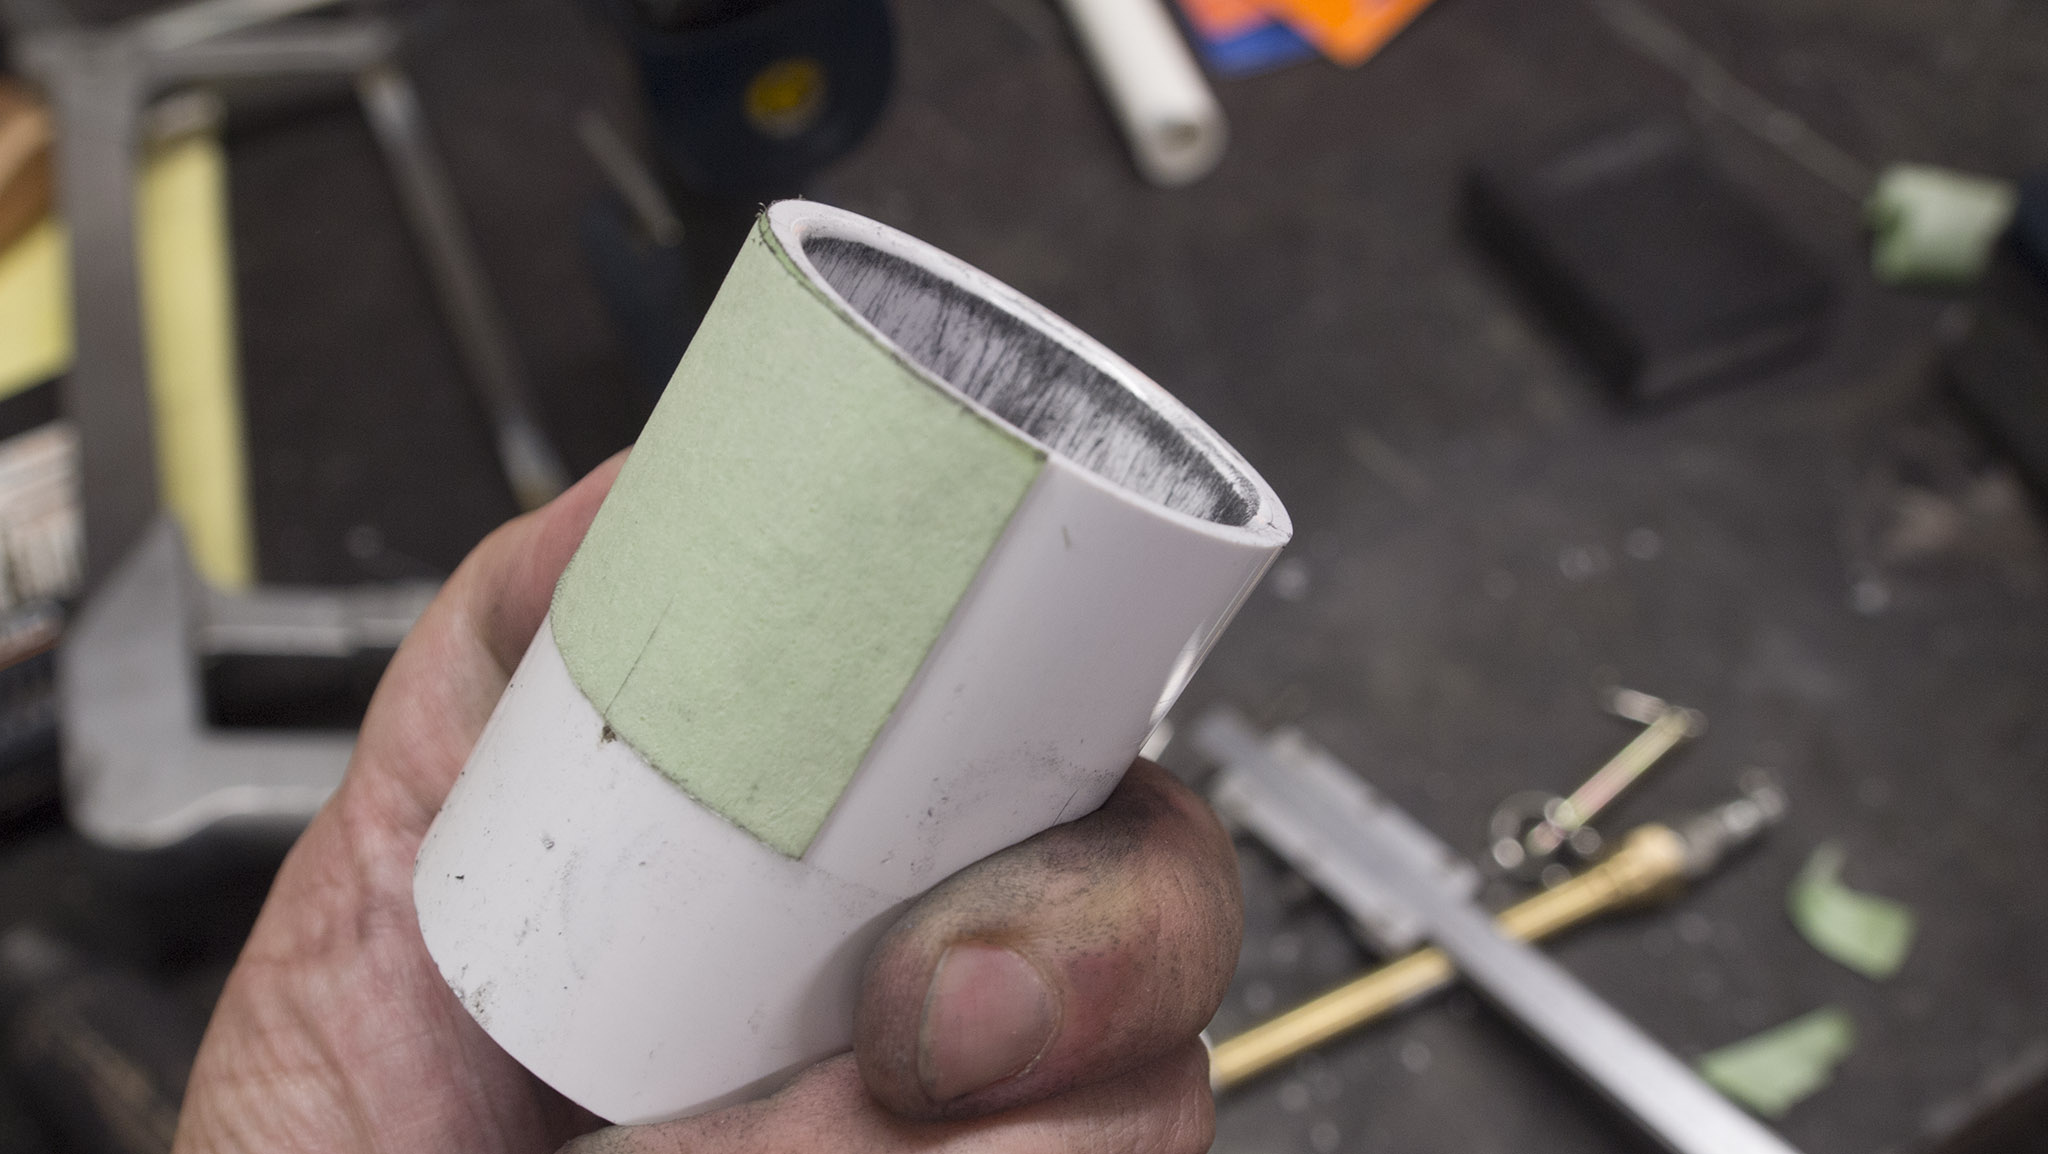
Mark it, drill it and voila. A jig. It's not a long-term jig because it's such a soft material compared to the CF, but it'll work for the half dozen pair of holes I need to drill. I did a test by drilling a tube just long enough to leave a mark from the tip of the bit, then turned the jig 180 degrees. The marks were centered in the jig, so that's success then.
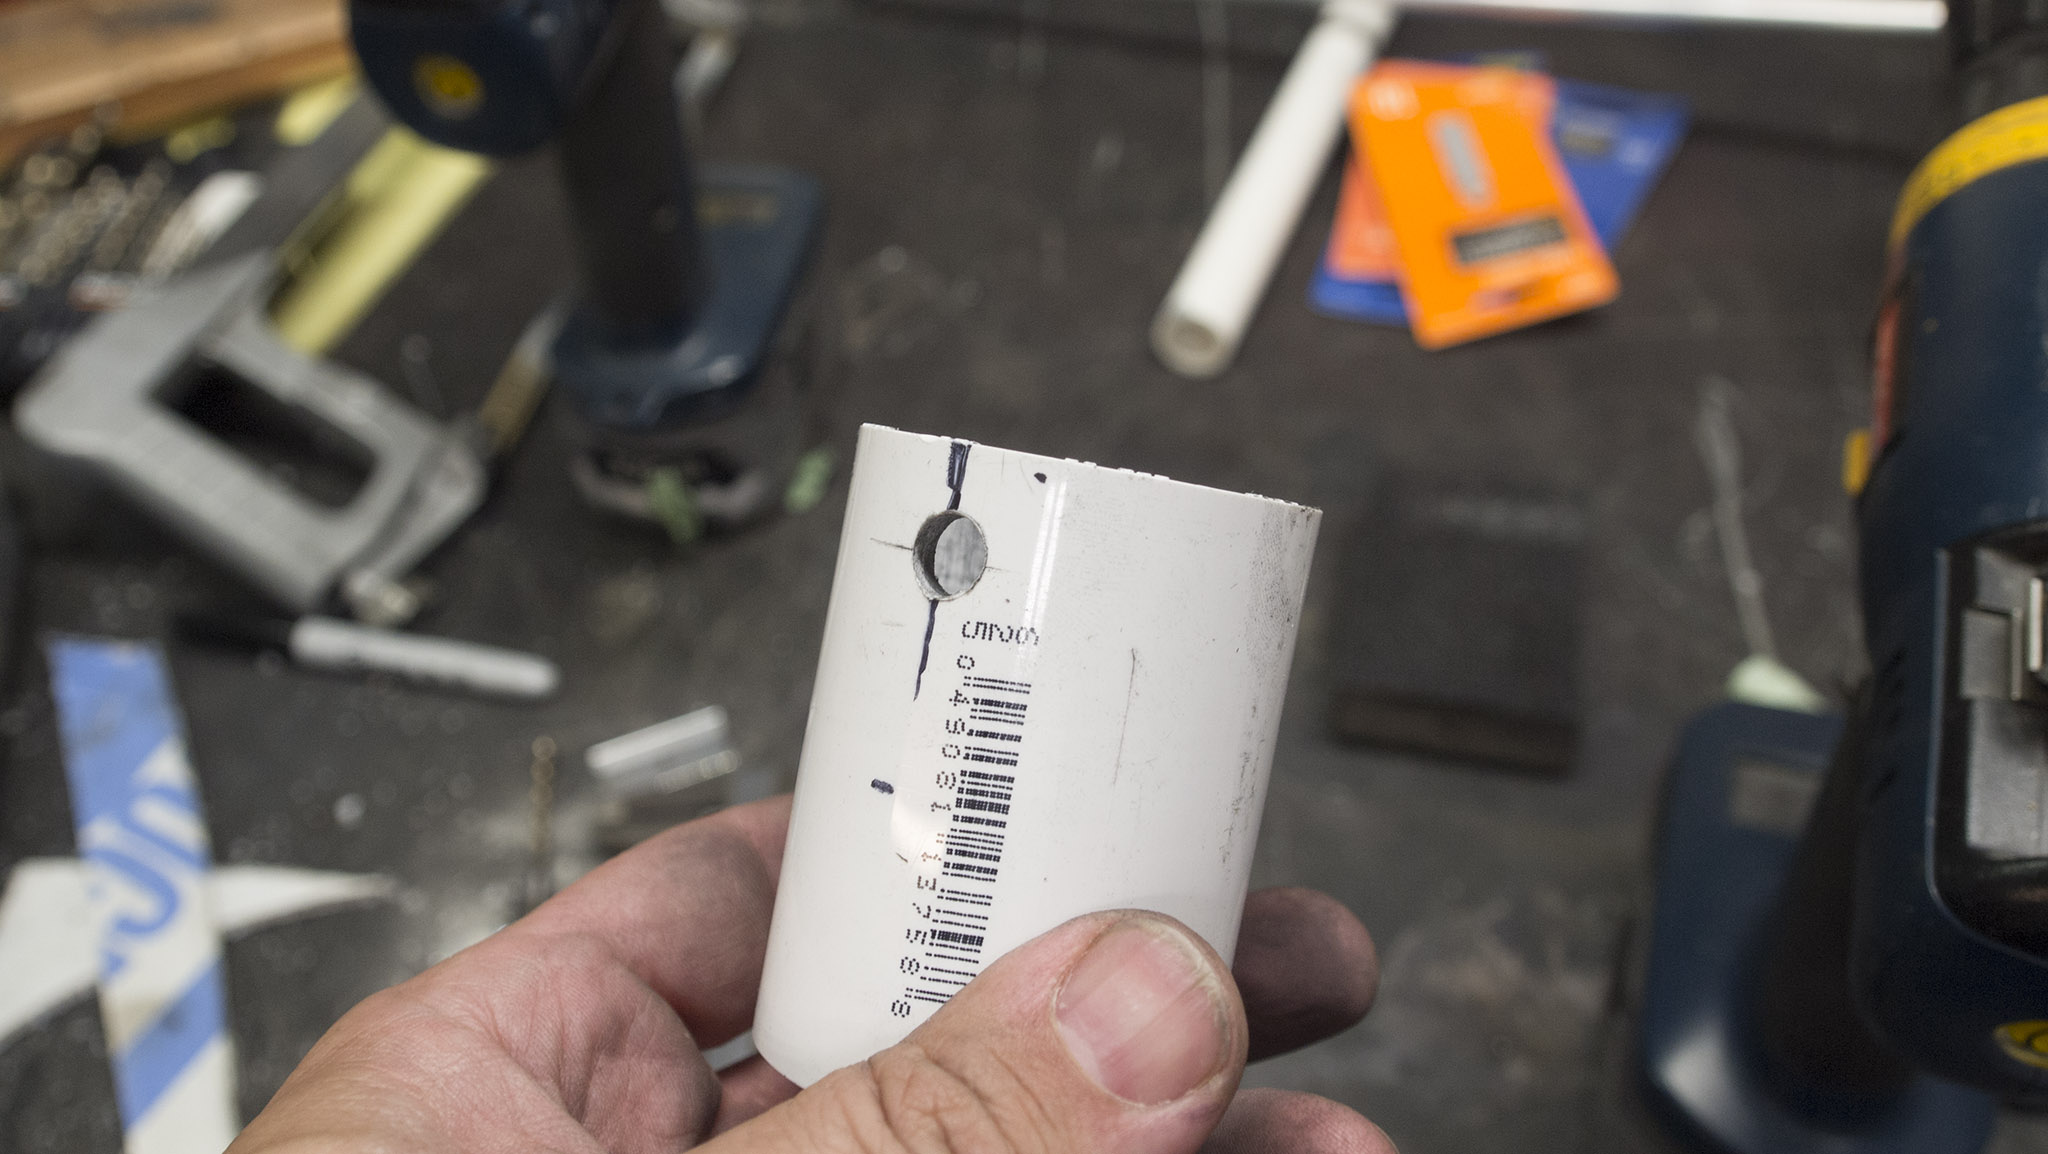
And now we drill. This is interesting stuff to drill. Seems to respond to a fair bit of pressure and a normal bit speed. Nothing much happens and then zoom. I drilled the outer tubes first.
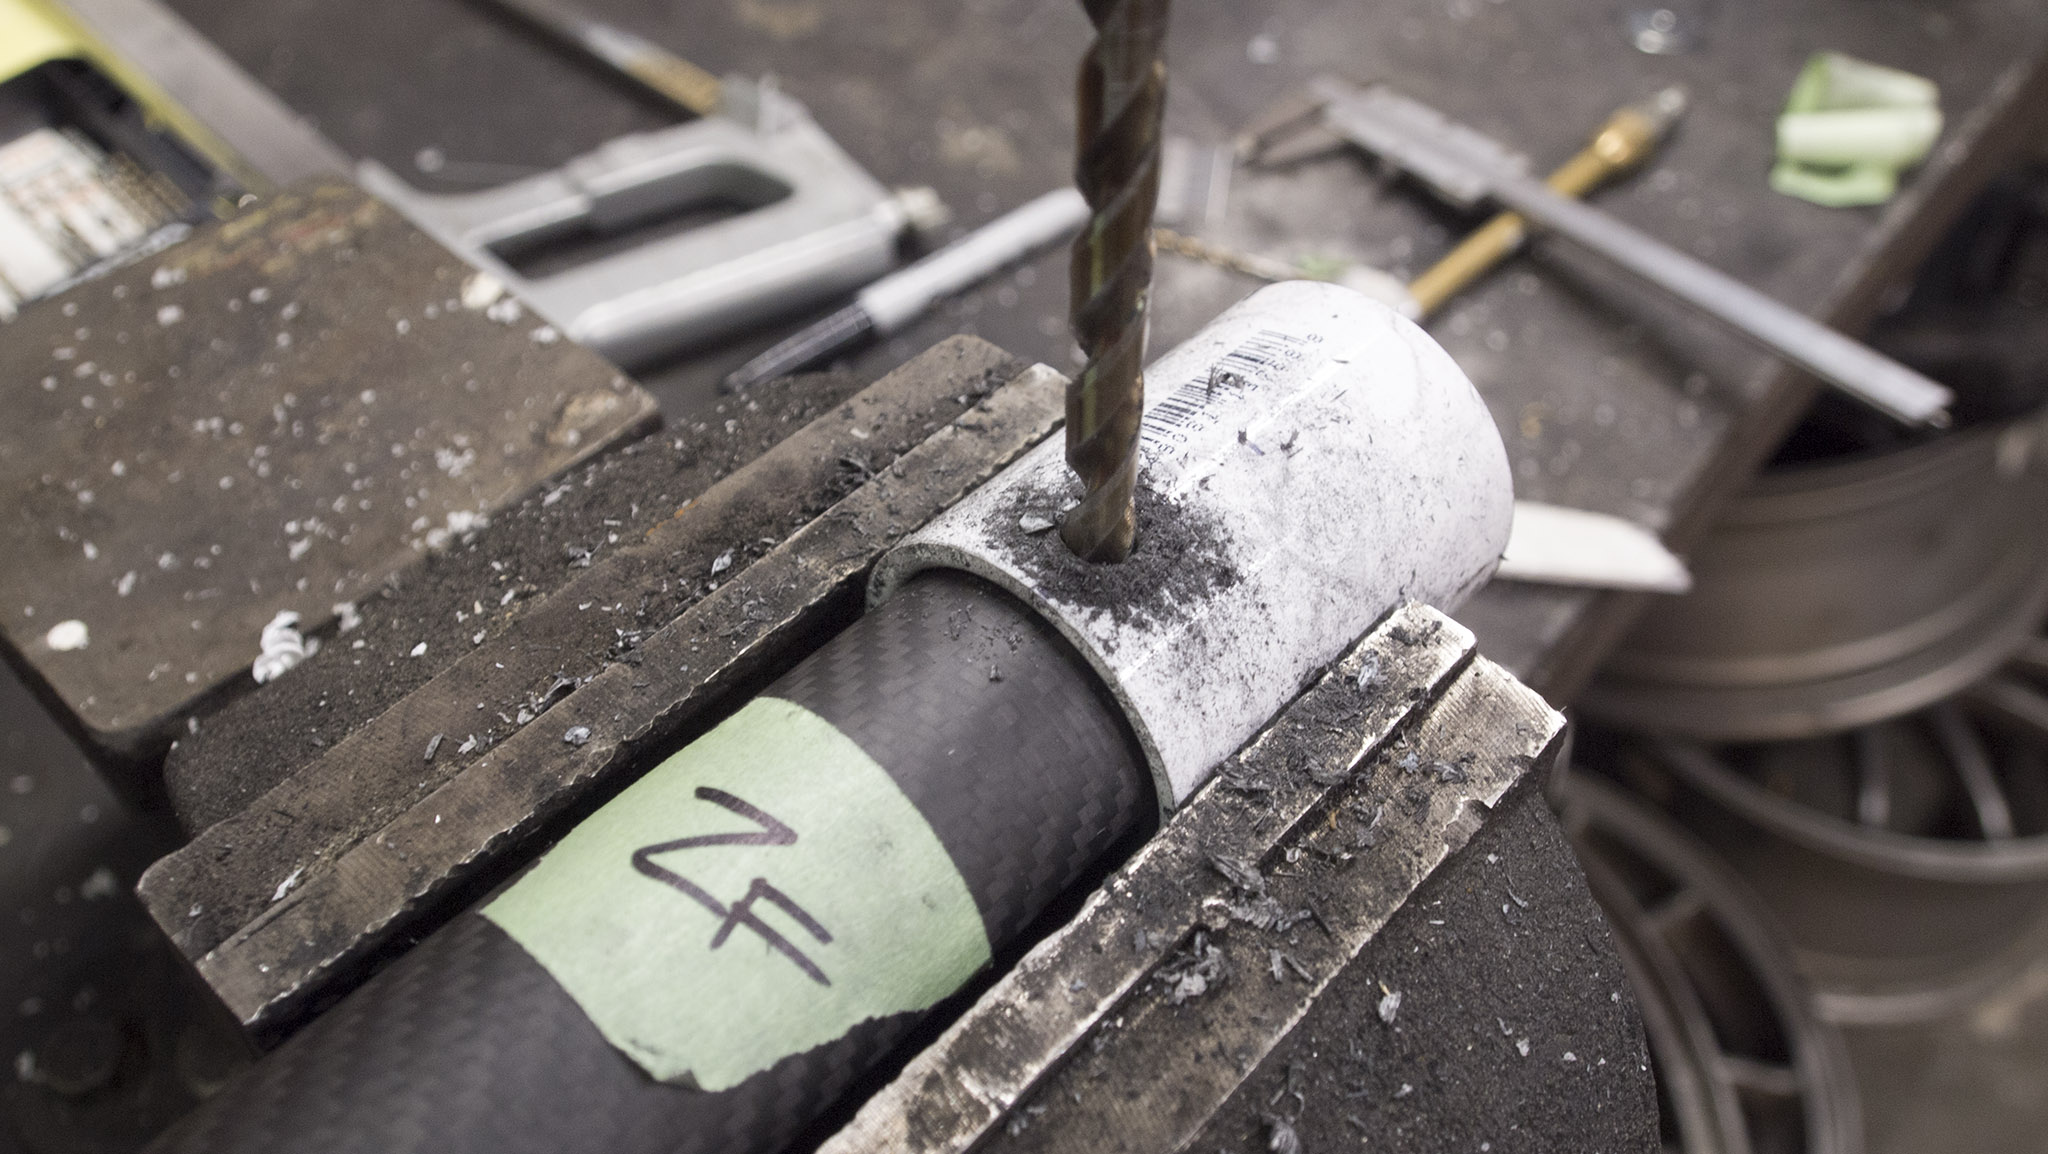
Then used the outer tubes as a jig for the inner ones.
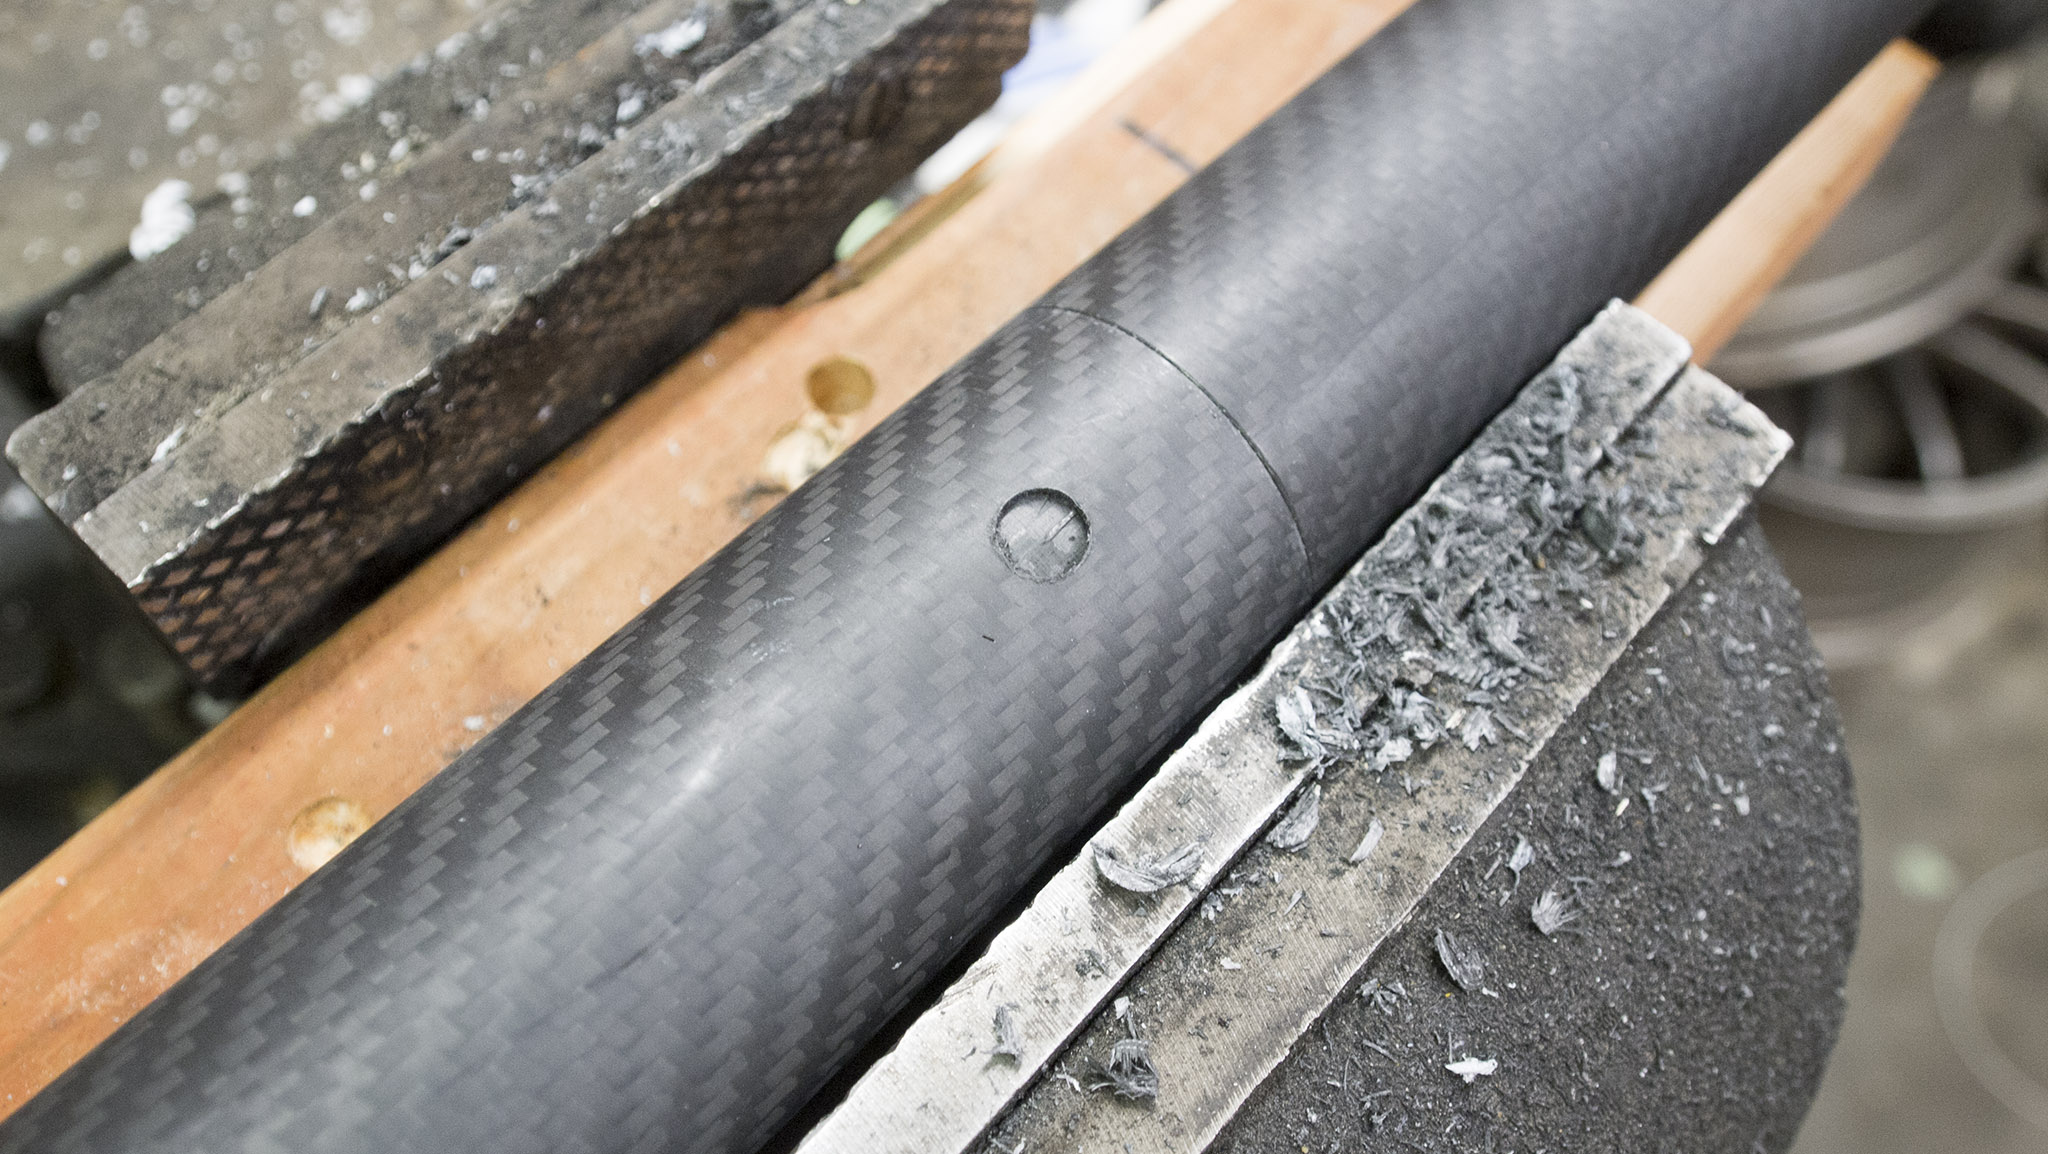
The end result was almost perfect. I was able to mix and match segments and rotate them without any concerns as to which was which. As I got to the last couple of holes, one side of the jig started to waller out (technical term there) so a couple of holes were just slightly off - I'd say about 0.020" at worst, and it was in the longitudinal direction. Easy fix with a step drill and the pins still slide in with no slop.
One extra step - I clocked all the holes the same way in each segment. I also drilled holes at 90 degrees to the others in the ends of the end segments. More to come on that.
Pins done, time for inserts. The 1.5" OD HPDE rod is fun stuff, dense (as in High Density) and slippery. It's dangerous to have a 2' long rod of this stuff in your hand, you want to hit things with it. So I cut it up immediately using my trusty 20th century hacksaw blade. Two 6" lengths and one 2" length. Again, a perfect match to the ID of the larger tubes. It's like this was planned. It wasn't, but that doesn't make me less happy about it.
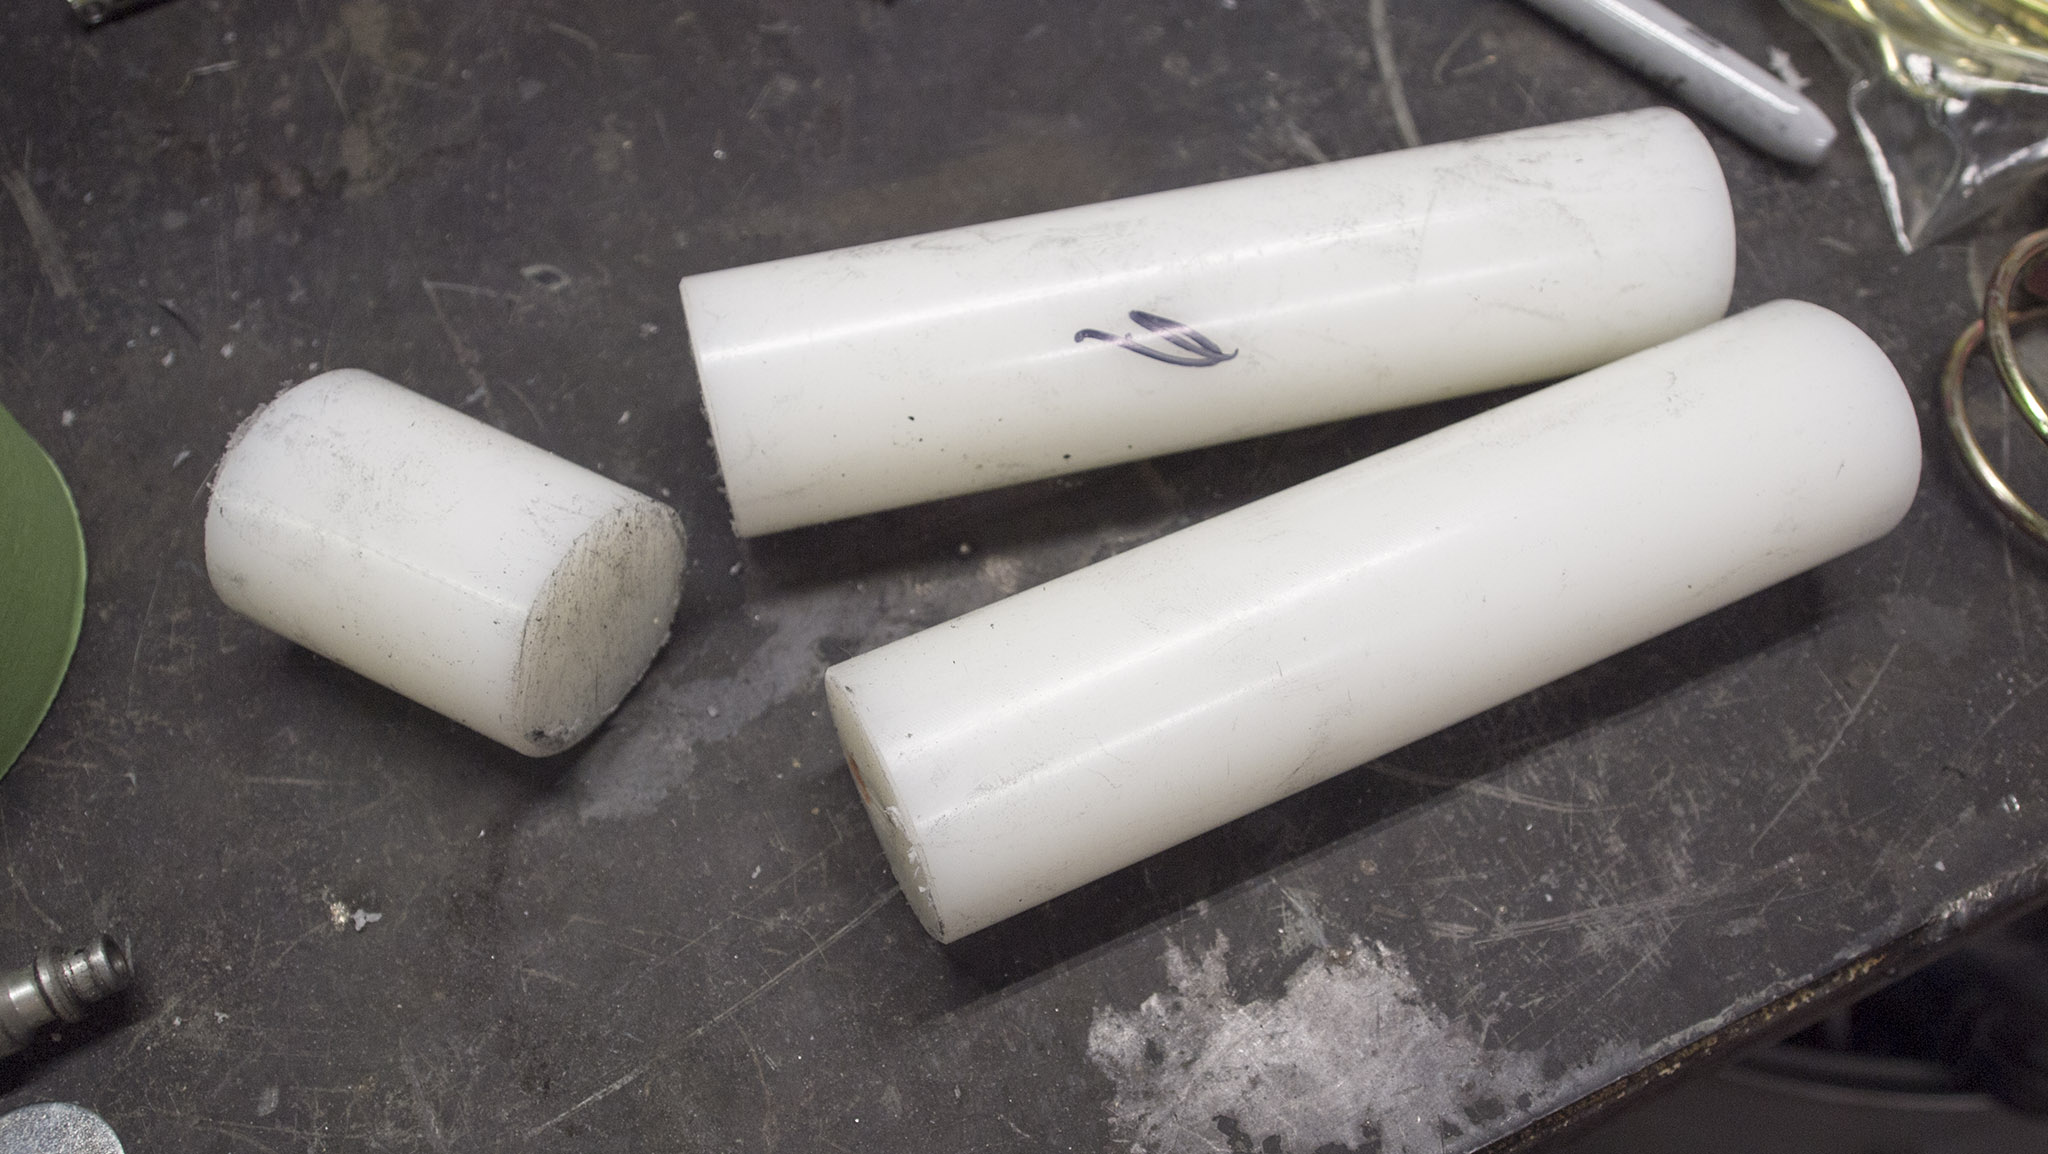
Now, I could have purchased some more CF and just stuck it inside. But that was going to take weeks for another shipment from China, would require SO much sanding again and this works. It's also really obvious which ends are the terminal ends of our pole.
The 6" lengths went in each end, epoxied and then got a hole drilled through. I let the HDPE protrude past the end of the CF by a millimeter or so to protect from bonking damage. We'll meet the reason for the hole shortly.
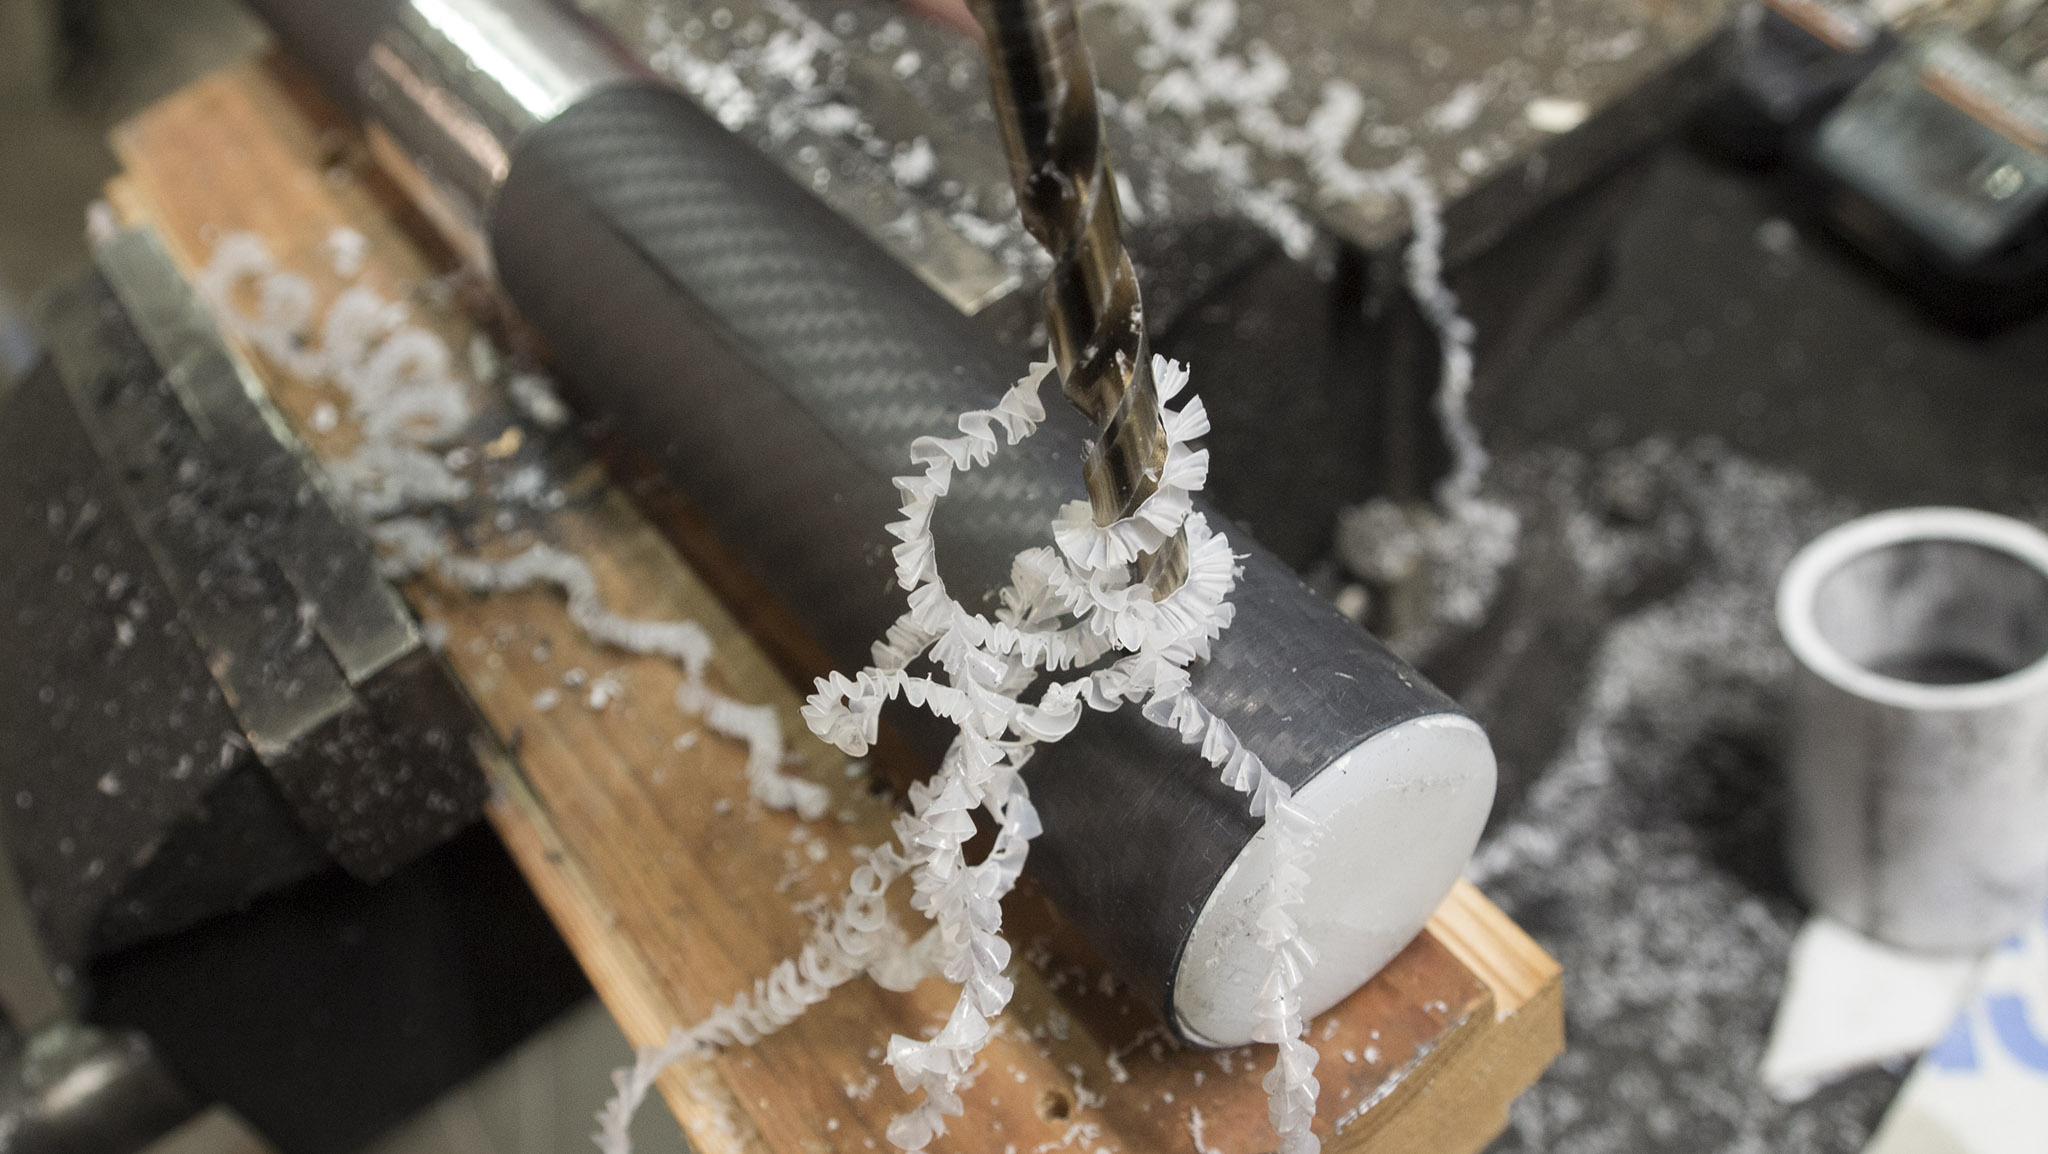
The 2" piece got goobered up and then run down one of the middle segments so it was nestled up against the backside of the insert. I'd already drilled a 1/2" hole there. This is, again, for the next step.
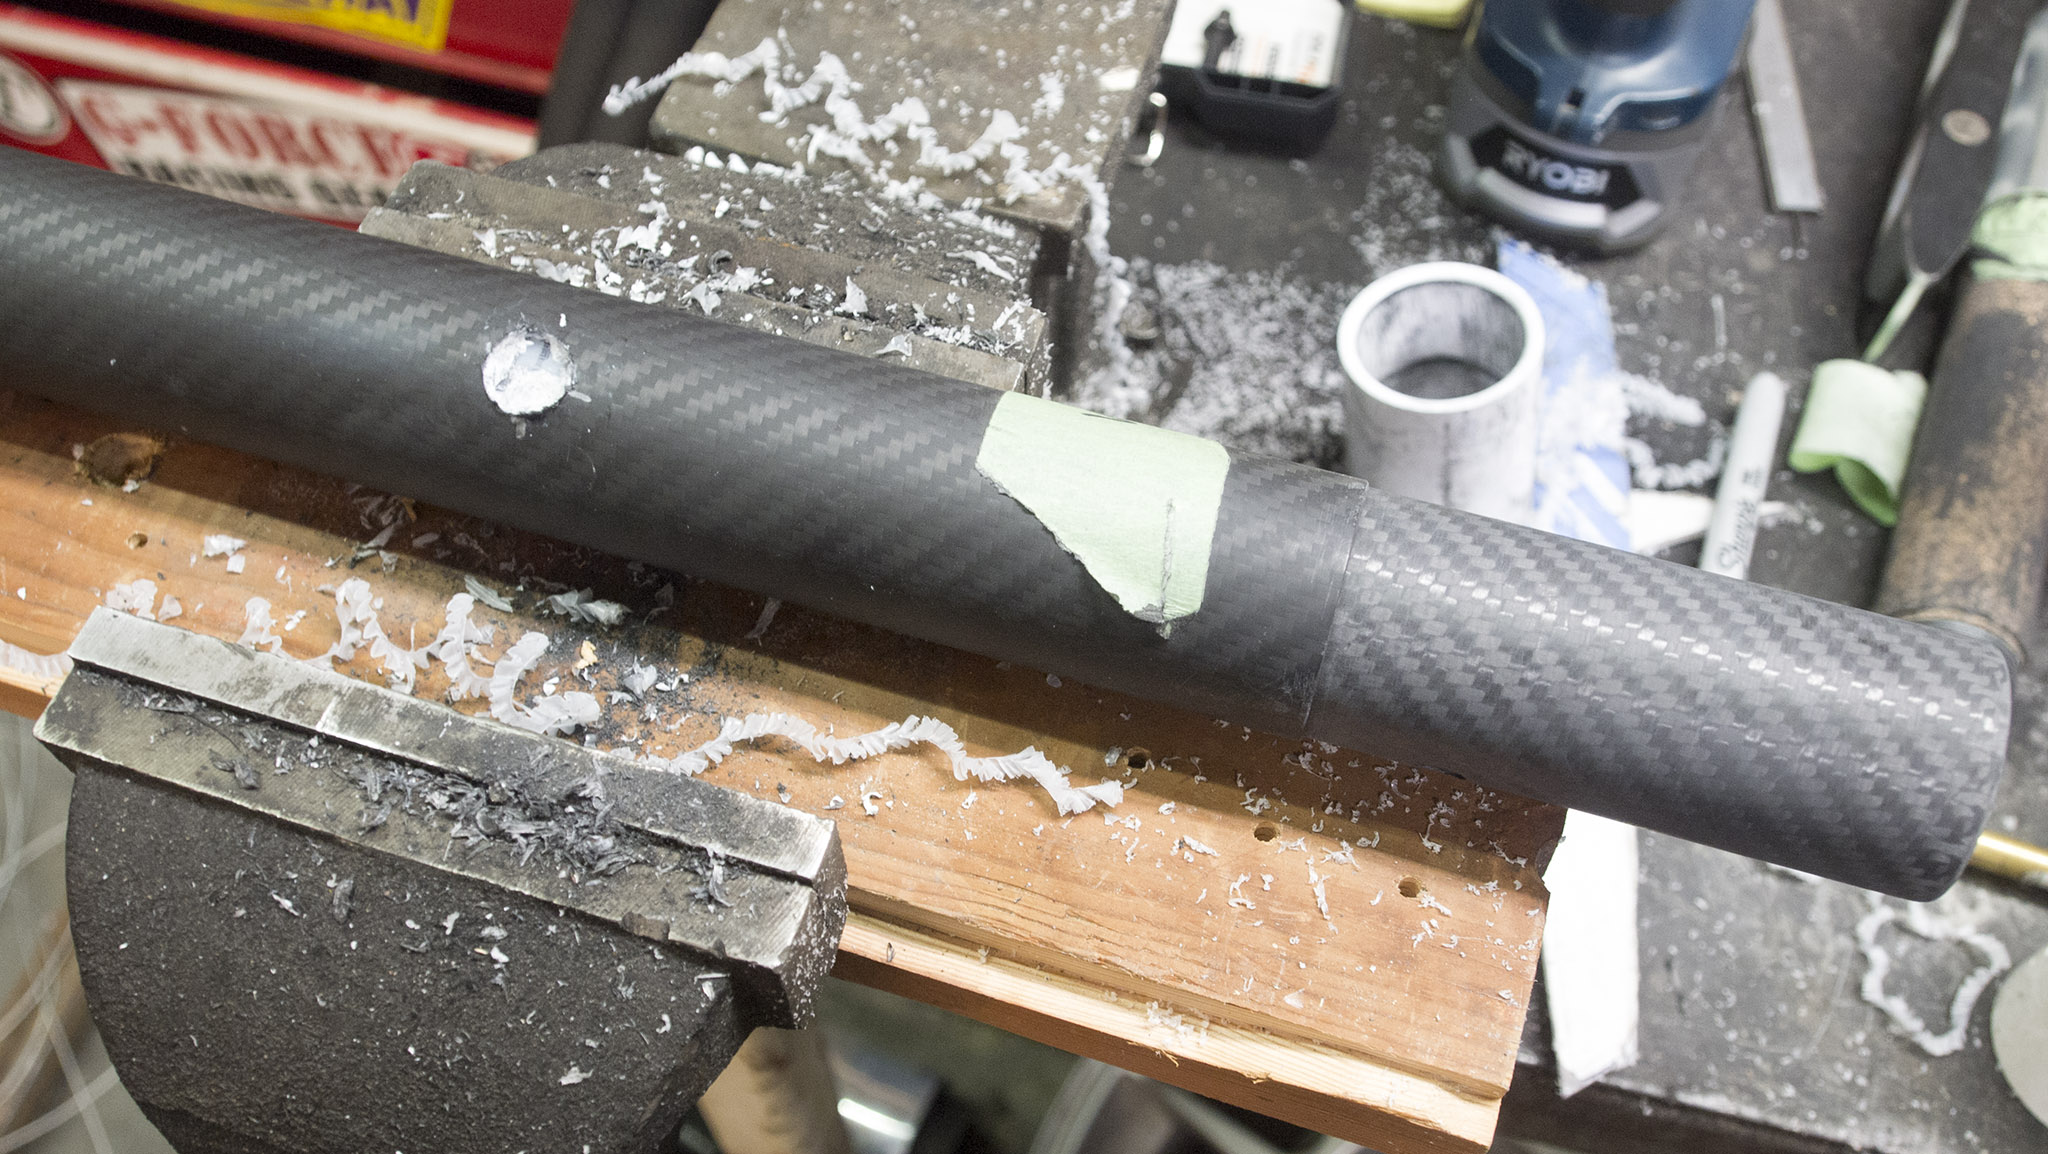
So now we have the ends of the main tube reinforced and protected against accidental damage of some sort. It's total overkill, this is now an uncrushable tube being clamped by clamps that are designed to spread the load around. But that's okay.
Now the anti-sag. The goal is to build something like the rig referenced earlier.
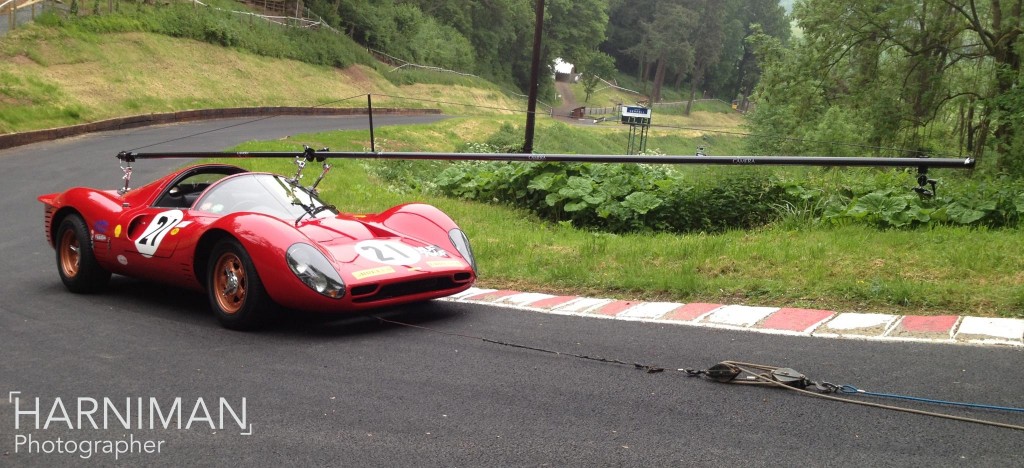
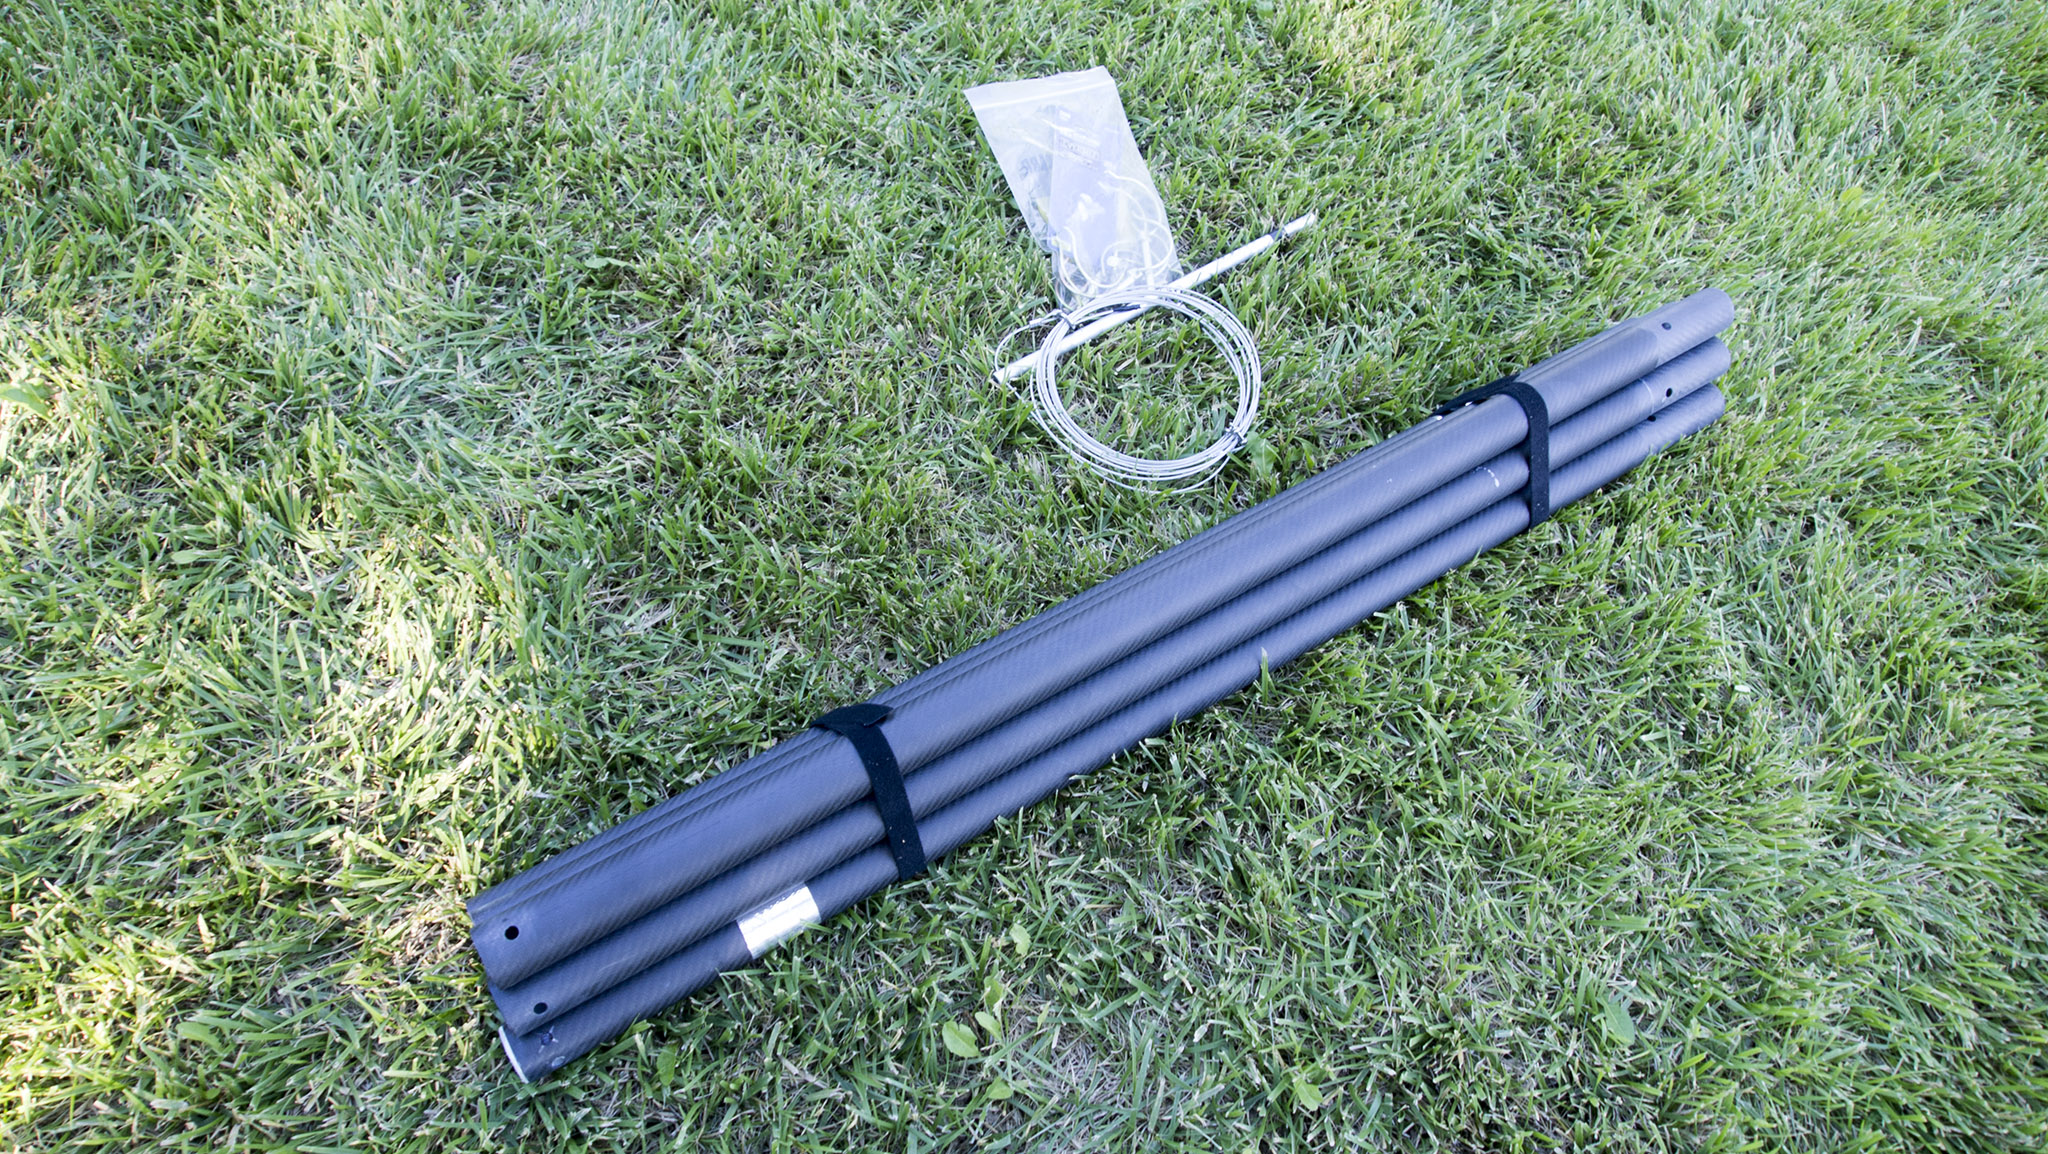
We're using smaller diameter CF pipe and will be hanging a real camera on the end, but that's the concept. All of these parts were sourced at Home Depot so they're easy to replace if something gets lost in the field. The plan is also to make it optional, so Travis can use a smaller number of segments of CF tube if he doesn't need the full 20' length. It also needs to be easy to put together and take down.
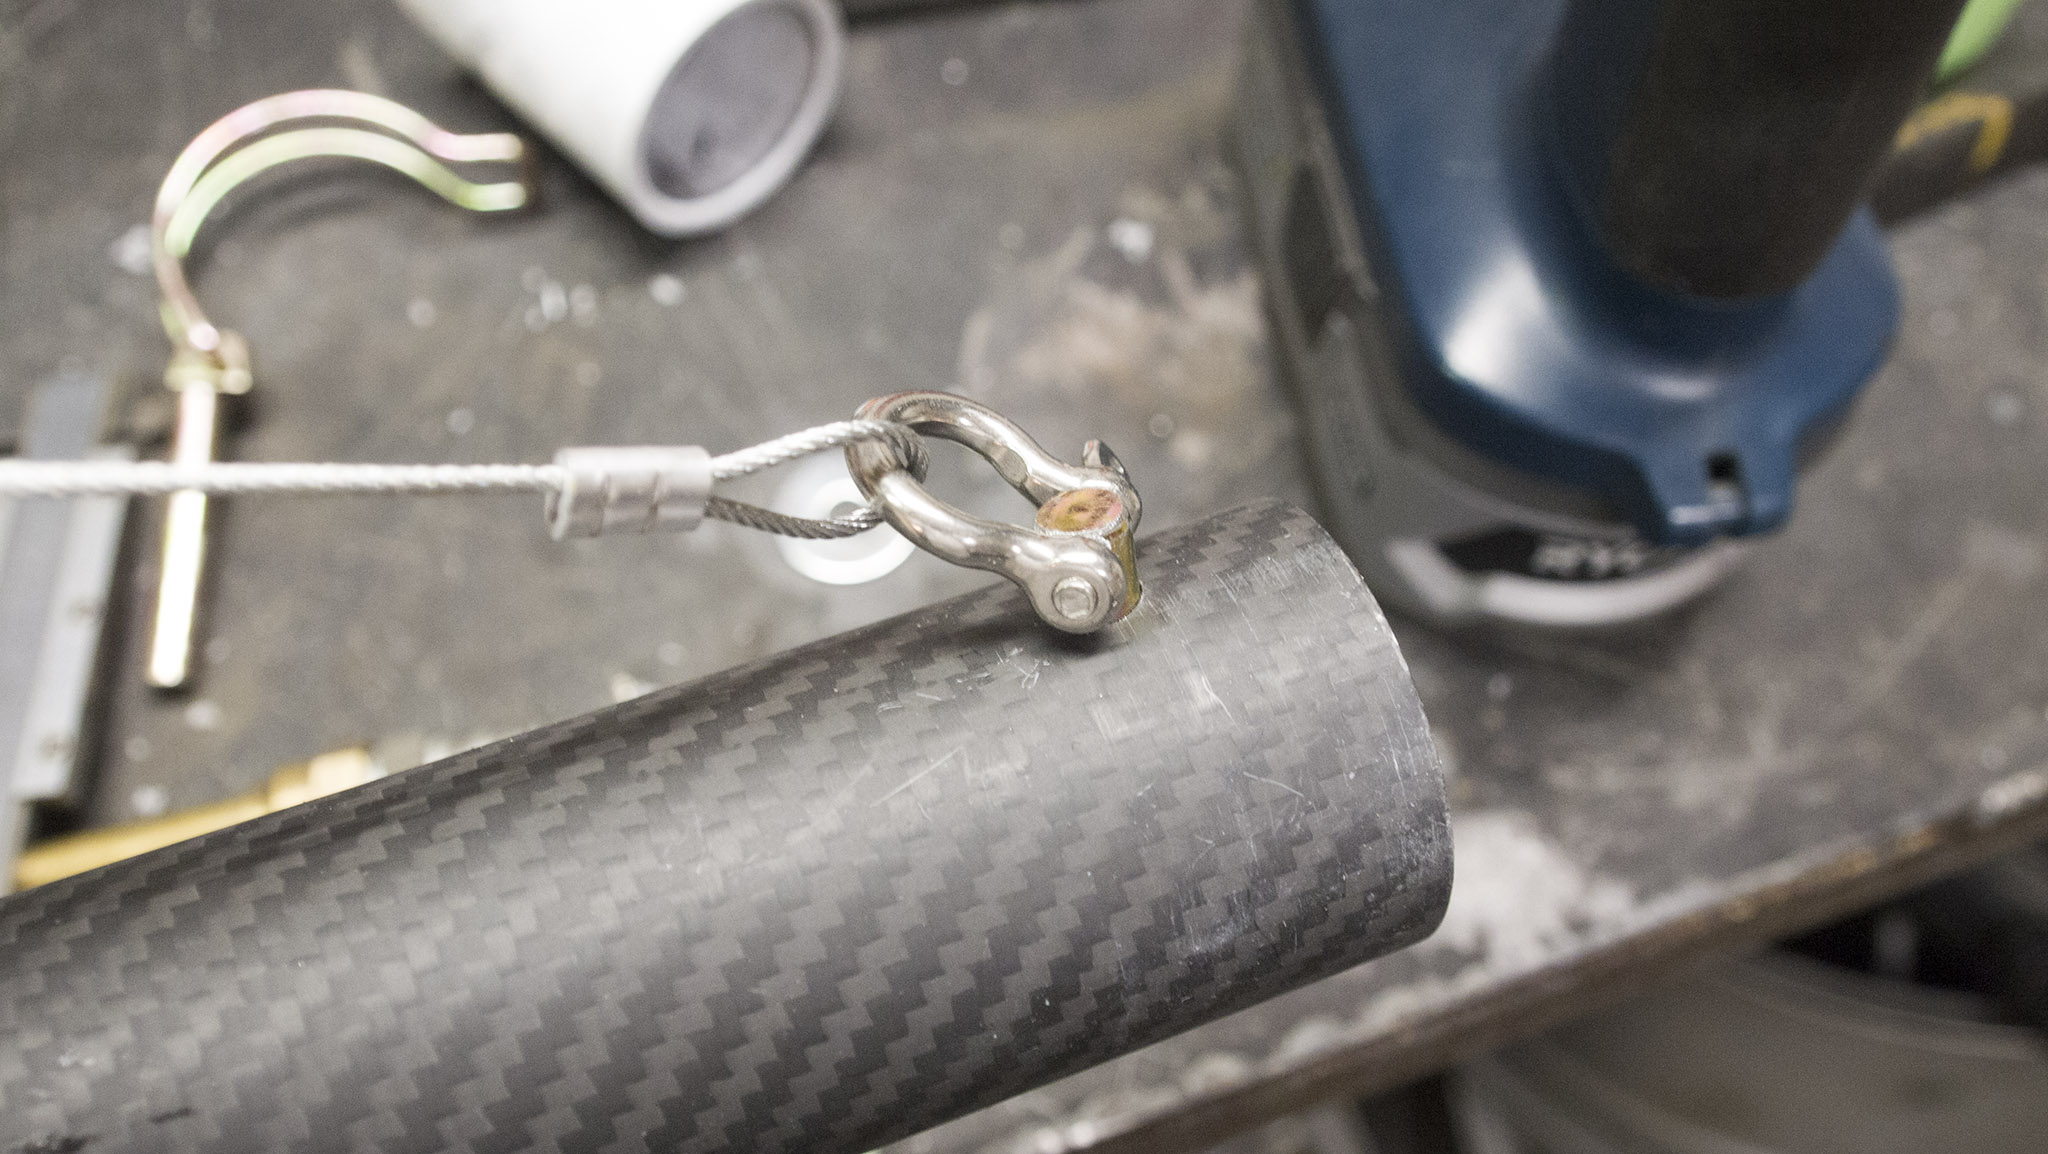
The cable is 1/16" aircraft cable. I anchored it to the end using a lynch pin and the cutest little shackle. There are a bunch of ways to do this, but I chose the shackle because it's easiest to install when you've got a fairly tight cable. Carabiners, S hooks and the like all require a little bit of slack. The pin goes through the hole in the end segment. That big solid chunk of HDPE means there's no chance of failure from a point load.
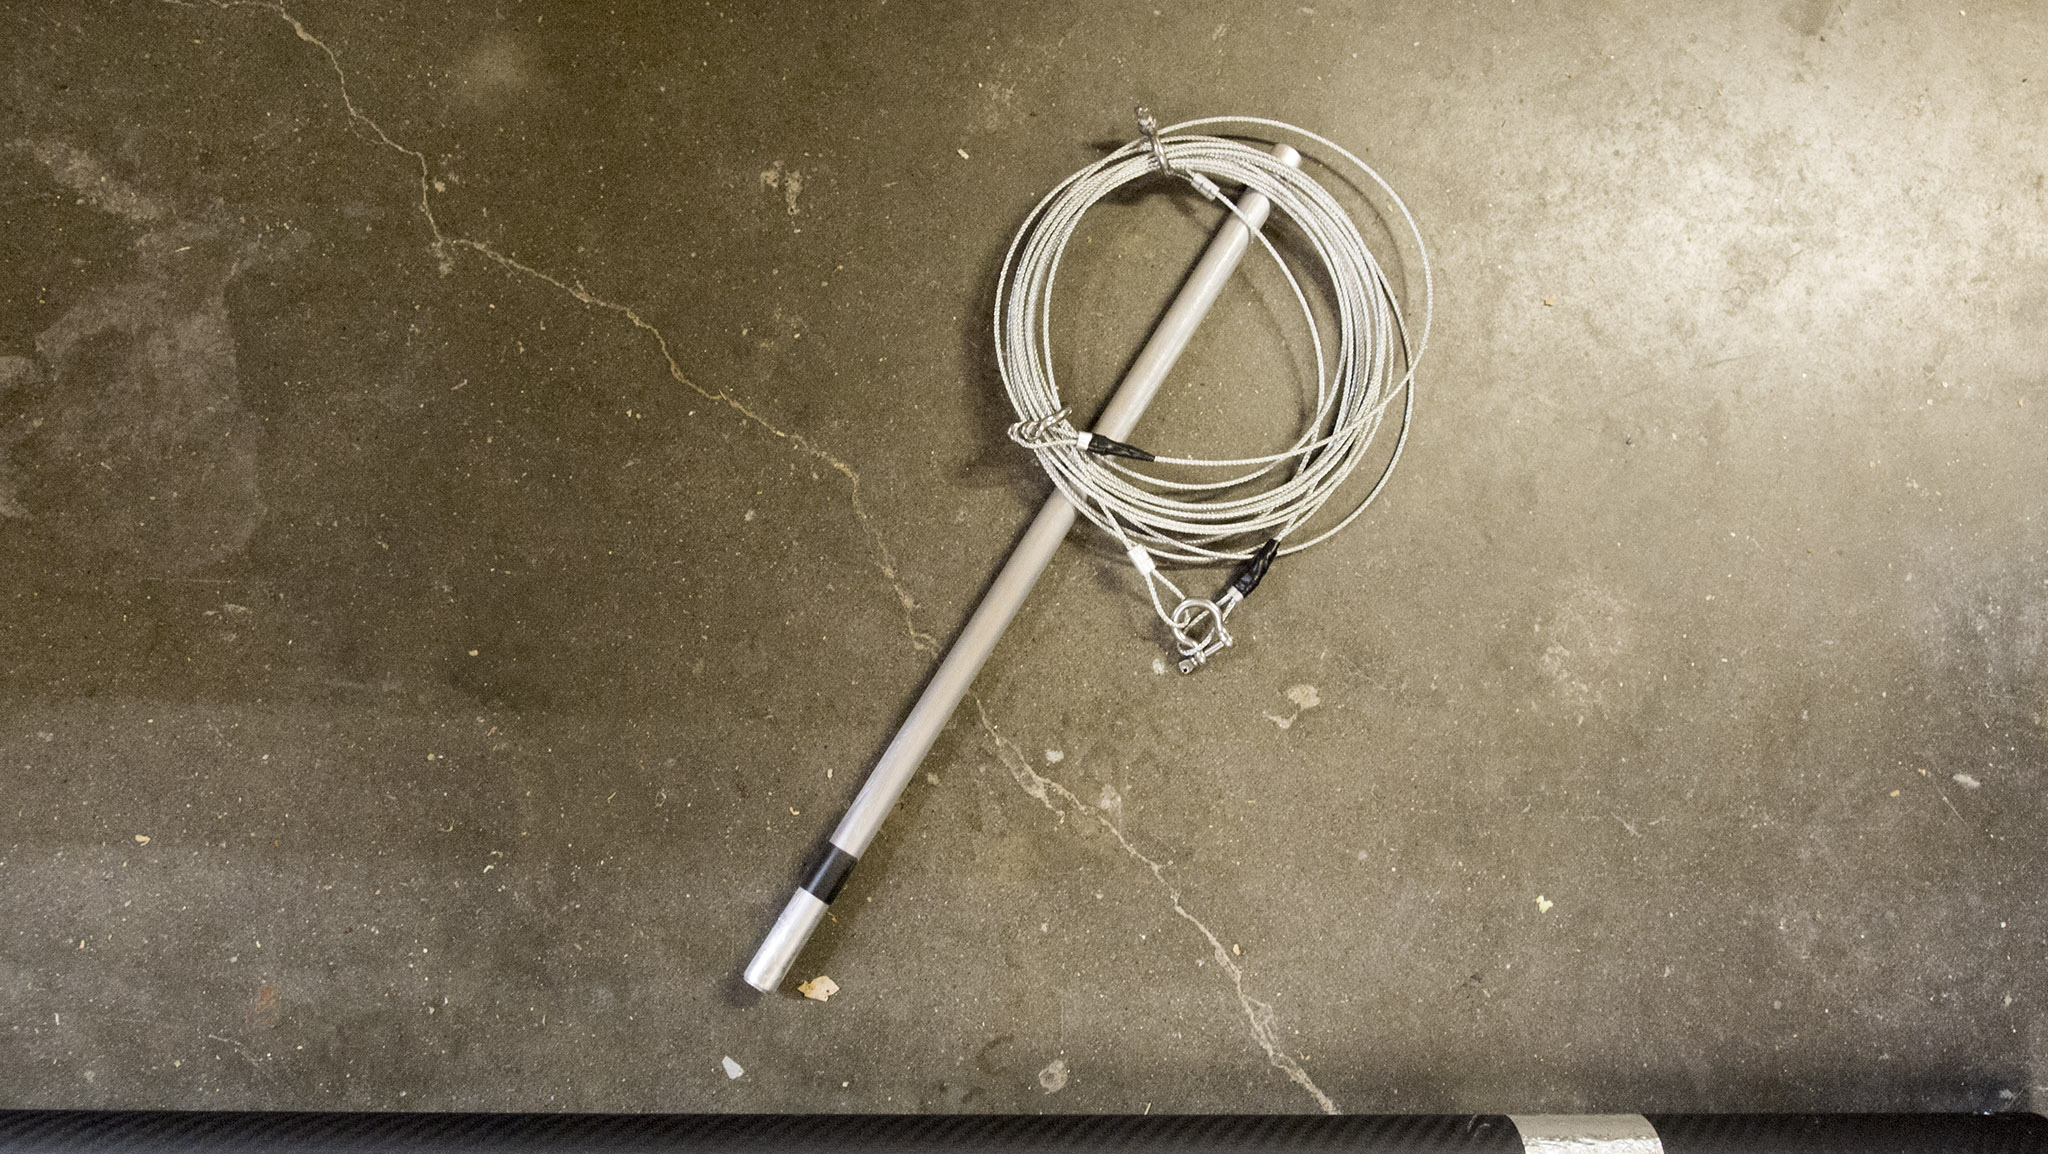
For the standoff in the middle, I drilled a 1/2" hole through that HDPE insert glued partway through one segment. I didn't go all the way through to the CF on the backside, but most of the way. A 1/2" aluminum tube slides in there. Here's the collection of parts. The black tape on the rod is a depth gauge to show full insertion, but the slippery HDPE means that's not really an issue.
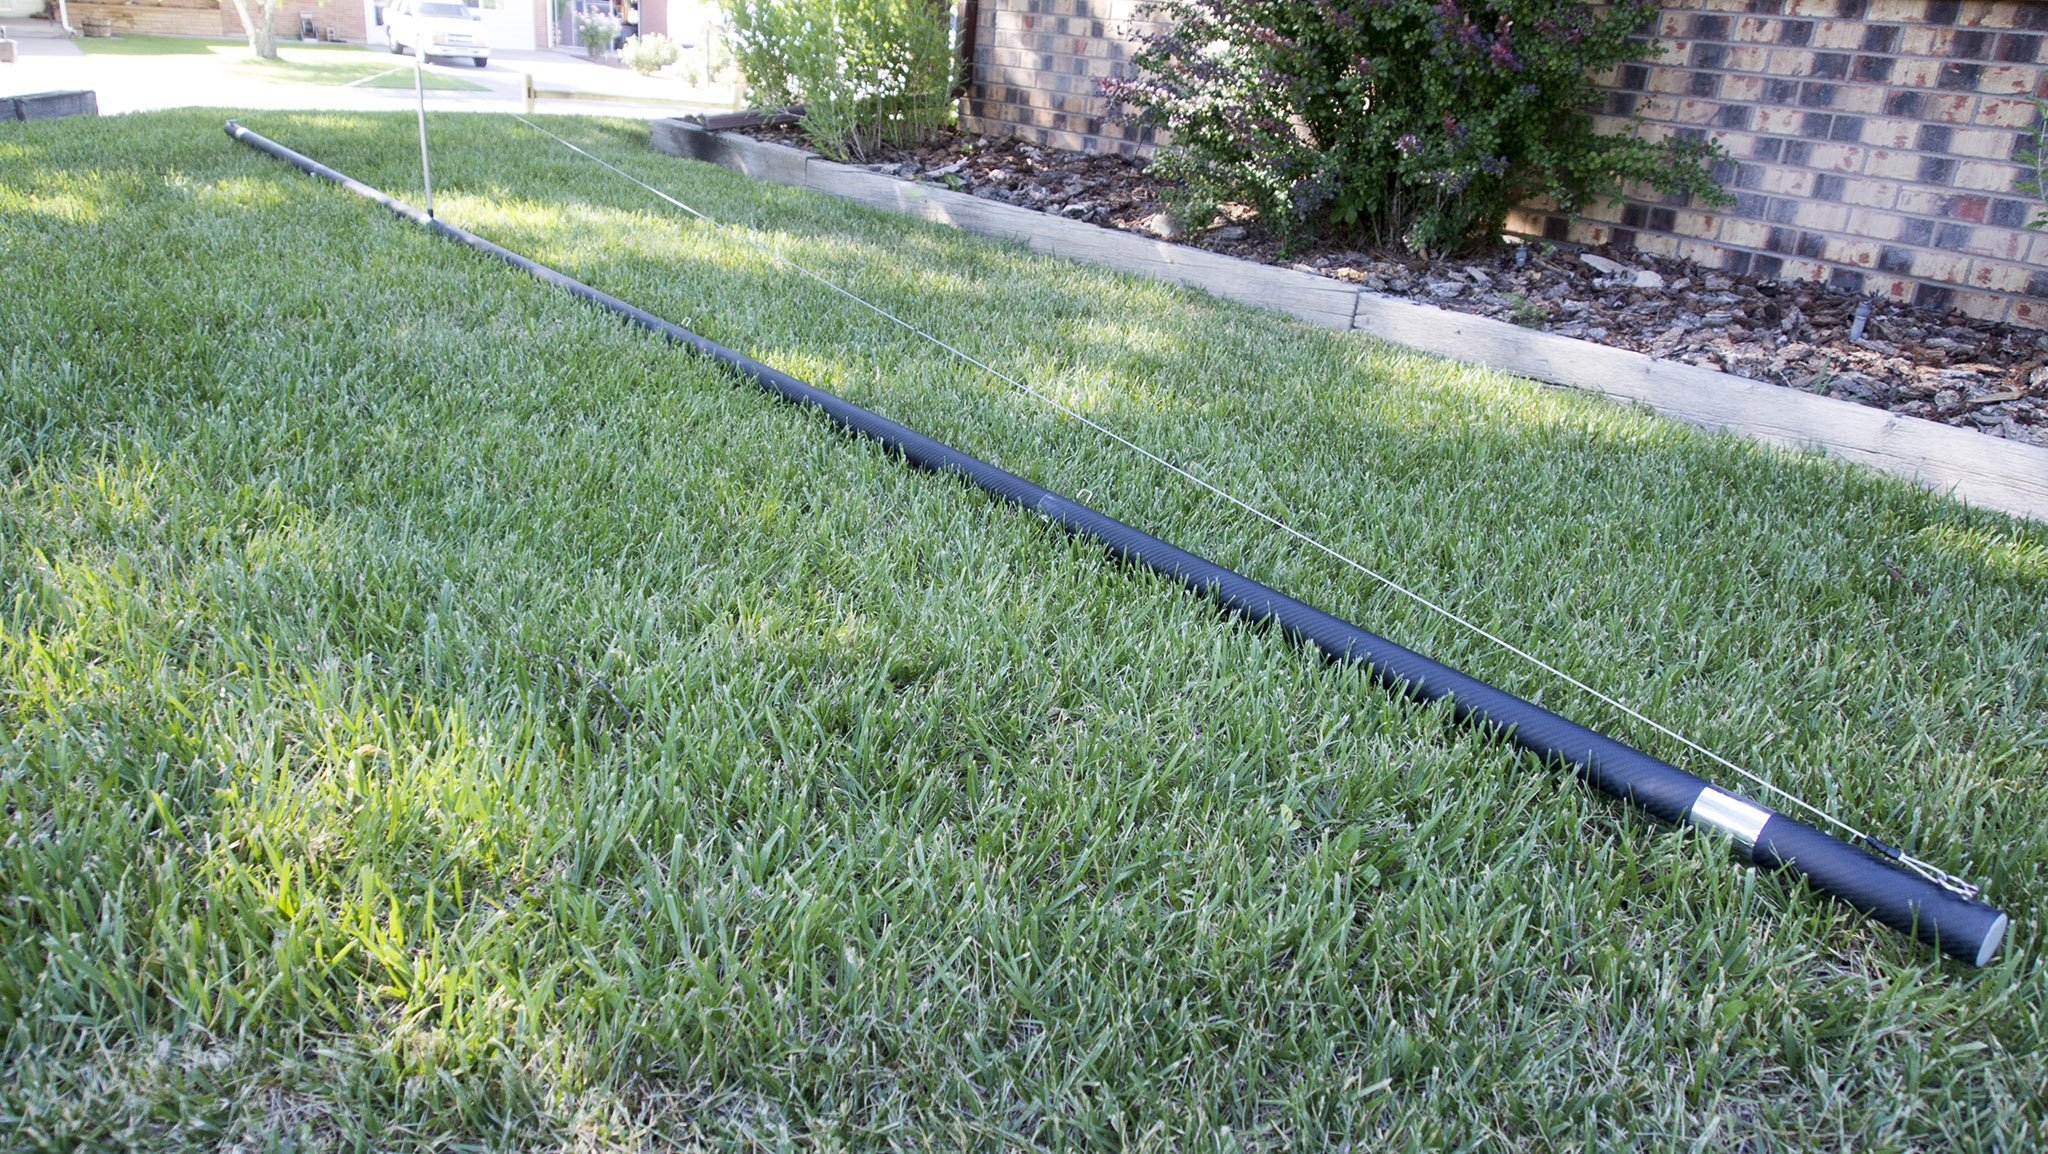
The assembled setup. This is at a 16'8" length (5 segments, not 6). To run at 20', I made a short extension cable that attaches using another shackle so Travis can easily adjust the length. There's little slack but no tension at this point. I could have preloaded it a bit, but that would have made it more difficult to assemble. The silver tape is there to mark the end of the crushproof inserts, and there's silver tape to highlight the hole for the standoff rod. You can't see the anti-rotation pins due to the grass.
Test time! Travis brought over the Mini again. This car is a worst case test because the hood is tiny and the clamps only end up being about 3' apart. They also put the tube on a downward slope unless you put extensions on the mounts - we didn't bother.
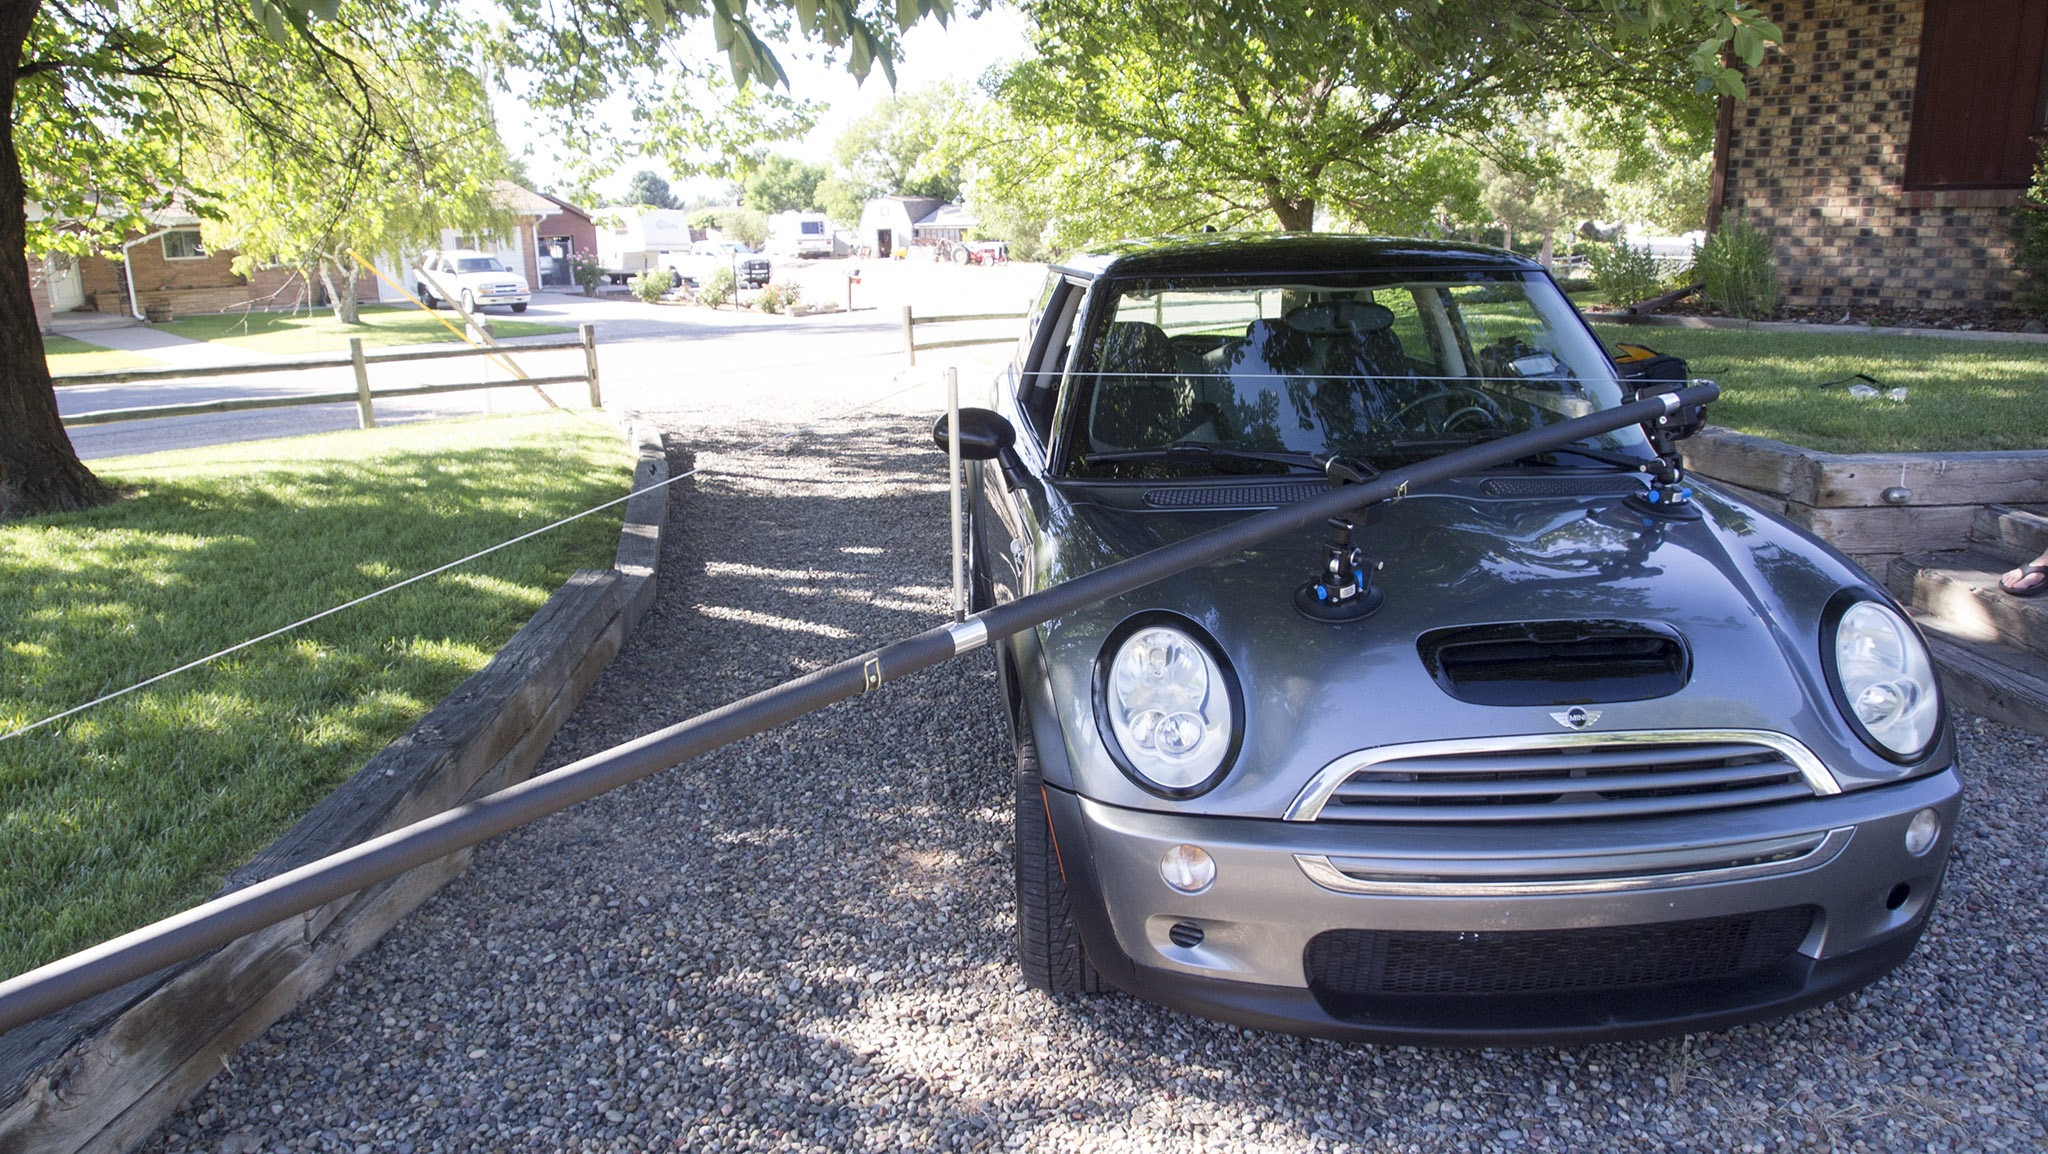
At the full 20' length - that's 17' of unsupported tube with about 5 lbs of camera on the end - it's got a bit of sag but not much. It's much improved. We also tried a roof mount similar to the Ferrari shown earlier, and it worked really well with the wider spread on the mounts. That was an angle Travis could never get before with his old rig, and now he's thinking up all sorts of oddball designs. The decreased sag also gets less pole in the photo so there's less post-processing.
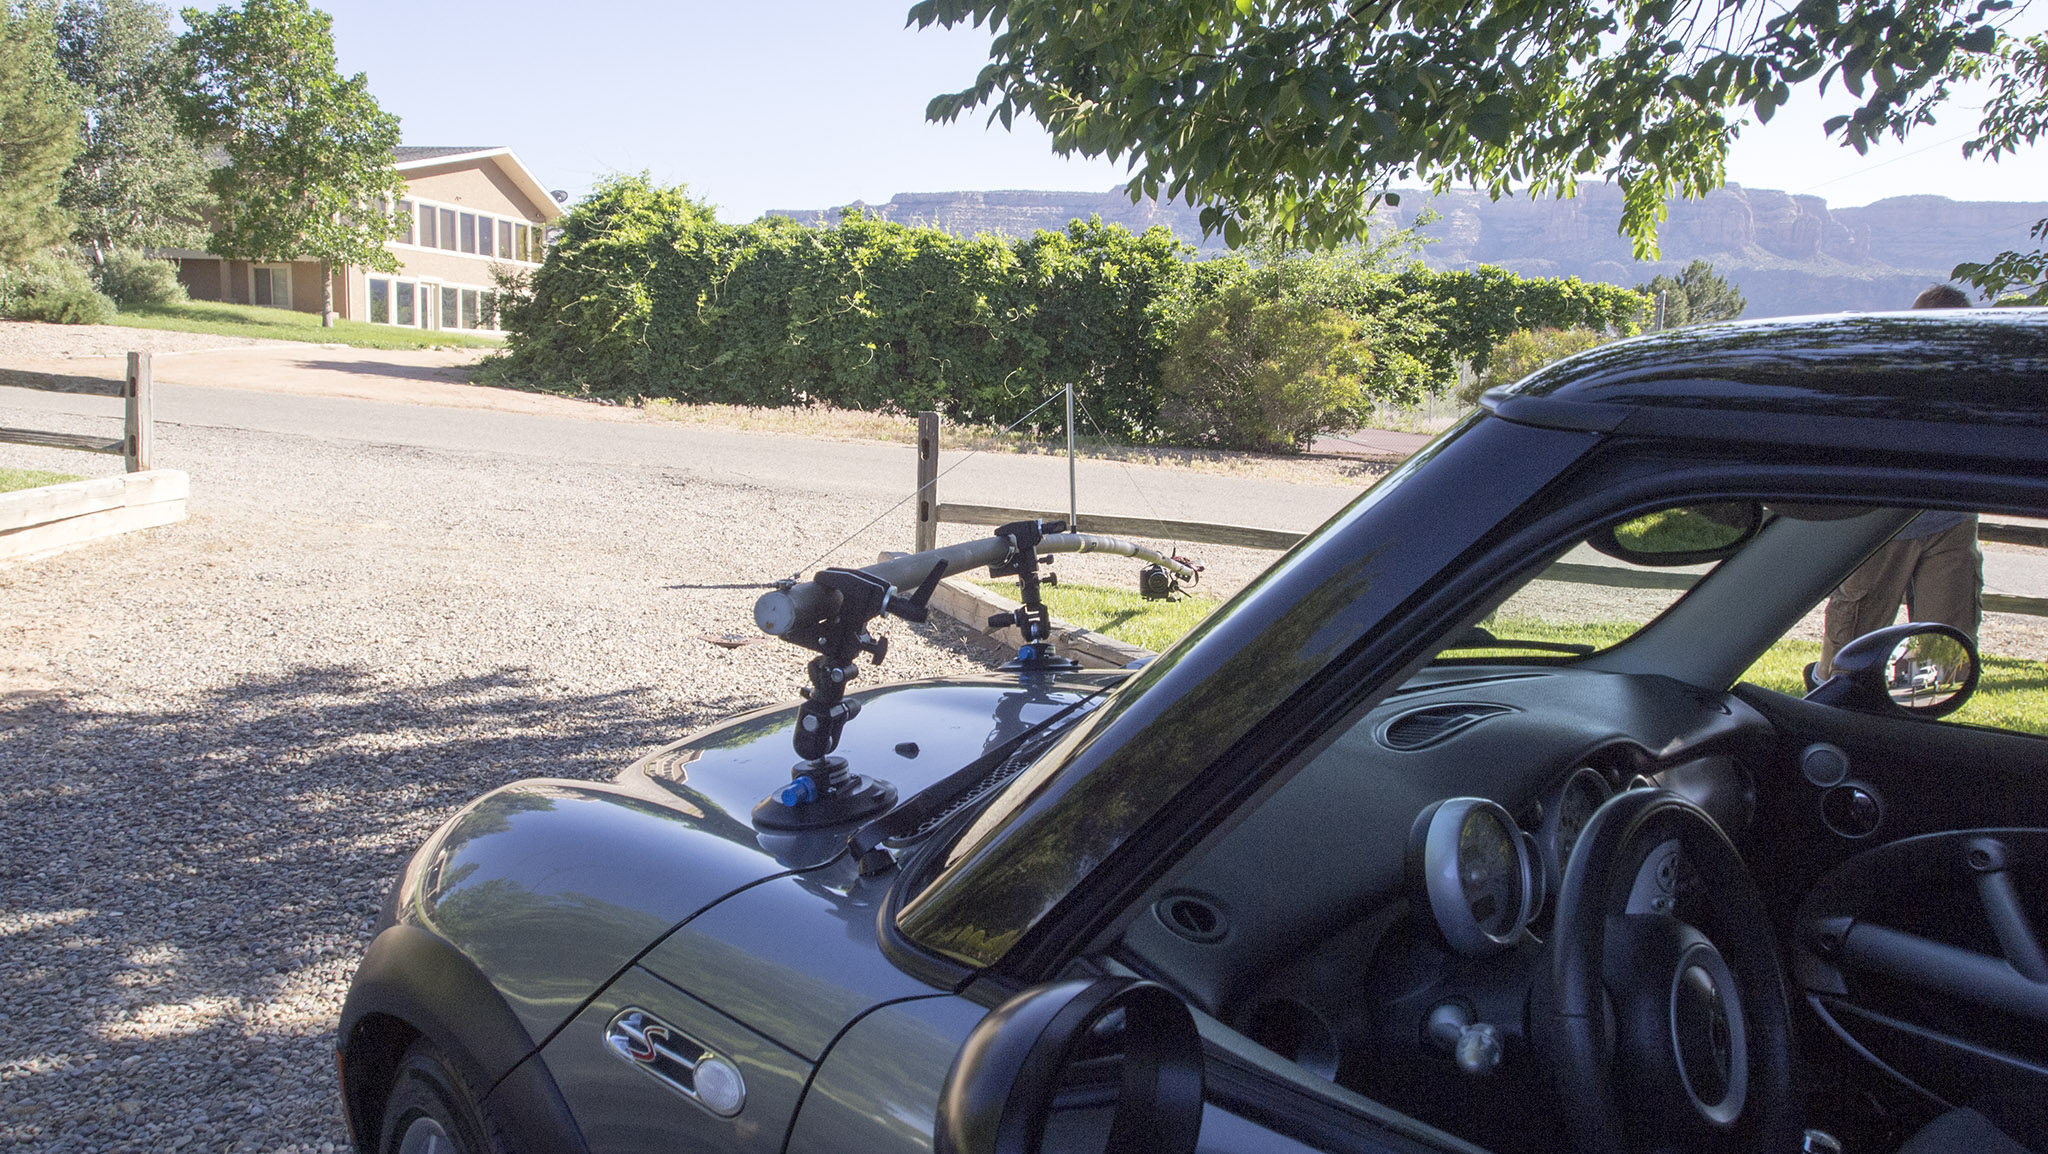
We did have one of the cable ends come off during testing. I reattached it and crimped down the ferrule much harder. I may redo the cable and double up on the ferrules if this ever happens again. The cable is only 23 cents per foot at HD so it's cheap experimentation ![]()
So there we have it. Total budget was right around $400. The end result is quick and easy to set up, can be used in multiple lengths up to 20'. It's still light (even with the HDPE inserts) and compact to carry around. I'm pretty happy with it, this was fun. And now I'm trying to think of what else in my life needs carbon tubes.
I'll see if I can get some from Travis. Simpler than you think, because the camera is under the pole so the pole mostly ends up against the sky. It's surprising when you look through the viewfinder. There's some skill in setup, you need to make sure that you don't end up having to mess around with reflections on compound curves.
oldtin wrote: nicely done! what do pics look like pre-editing?

Now, in a real shot, the car will be rolling so all the background is blurred. Makes it fairly easy to wipe out the pole. The mounts weren't carefully positioned here, we just stuck them on for testing.
Just a couple of things to mention, but first- Great Job! I love the CF setup, and the cable superbly solves the issue of "droop". I also now know how those shots are done, and I am brainstorming ways to take similar photos with my nearly antique D90.
Secondly, it appears you are correct with your assumption about the Harniman Ferrari photo, and the youtube video is a wealth of info on how he set up and shot it to someone who has never heard of a "rig shot" (like myself), and a follow up video shows some of the editing done to it (but just a before/after, and not anything that will be considered a step-by-step tutorial, unfortunately). These videos gave me an idea, and some noodling around helped me to find a few others to fill in a few of the blanks of what needs to be done. For many (maybe most) of you, this may all be elementary, but for me, it was an eye-opener.
Finally, as an electrician, I feel the need to point out that the conduit used in the first two photos appears to be "TW" (thinwall), and while the second photo uses compression couplings, the first uses set screws. For anyone looking to replicate this on the cheap, I really can't recommend TW, and especially set screw couplings. The conduit will collapse with set screw couplings, and the compression style is prone to breakage, which is why it has to be supported every 7' according to the Chicago Electrical Code. If you are going to use TW, find something to sleeve it with for at least 6" on each side of the joint, preferably another piece of tubing with an OD that matches the ID of the conduit and with a wall that is heavier than the conduit. If you were to use heavywall, then you should thread it and use threaded couplings, but HW is far too heavy to cantilever 15' or more off the hood of a car. I believe aluminum heavywall may even be too heavy for the task, unless it was a much smaller diameter.
Not trying to nitpick, just don't want to see someone drop an expensive camera, nor destroy the bodywork of a beautiful automobile.
Cool project. I love engineering stuff like that.
The idea using the tape to find center on the tube was not one I had seen before. I'll be filing that one away for later use.
That's why I went into such detail on some of those techniques, just in case they help someone. A coworker showed me the tape trick a few years ago and I've used it over and over to find the centerline of body panels. First time I've used it on a tube though.
Cooter, the conduit seemed awfully heavy for something called "thinwall". It may have been heavywall. The set screw couplings didn't work at all and the later compression fittings were only a bit better. Basically, neither Travis nor I can really condone the use of the conduit. It was the obvious unsuitability of the setup that got me thinking about this project in the first place as I watched Travis fight with it. At least Travis spent money on good mounts and cheaped out on the tube, as that gave us a solid base upon which to work here. There's something like $300 in the mounts and various clamps on that setup. Hard to justify if you're not at least an aspiring pro.
If he'll let me borrow the rig again I might play with a thicker cable to see if it's stretching at all. Once he's done a shoot or two I'll report back on any lessons learned.
A small turnbuckle at one end of the cable would allow you to tension the cable after the rigging has been set up, which would take out some droop. You could even use it to dial in the height of the camera without having to mess with the rest of the rigging.
Thought about a turnbuckle. We'll see if wire tension becomes important. The camera mount itself has a whole bunch of adjustment, as do the towers.
Great project!
Have you considered taking a page from the tent stake book and adding a single shock cord threaded through all the tubes so assembly doesn't require any thought as to which tube fits where?

I see that you've already idiot-proofed it well past the needs of Travis...just thought it might be a minor improvement. I wonder if you might even be able to find some of those spring loaded buttons like you see in awning frames and collapsible fishing nets and the like. Not sure it is worth the trouble or not.

The shock cord idea is great for tents, especially because it lets you do the magic trick where you just grab one end and throw the rest in the air to self-assemble. It takes away from the flexibility here, where Travis may want to run just a few segments instead of all of them every time. He's used to shooting with a 15' boom, so he may not use the full 20' all that often. I guess we'll find out! Thanks to that cheap little jig all the segments will easily swap with each other. We're actually going to do a bit of experimentation with the location of the support rod for the guy wire by shuffling the segments around.
You can get those buttons from McMaster, IIRC. They'd be a good alternative to the big pins. I looked at them, I honestly can't remember why I didn't go with them. Probably got distracted by something else ![]()
Selfie stick update!
I remember why I didn't go with the buttons. I wasn't sure how accurate the holes would be in the CF, and I was afraid of slack. Not that it would have been a problem in retrospect, but there you go.
I decided I wanted to see how the stick would respond to a thicker guy wire and adjustable tension. So when Travis dropped by so we could shoot my Mini, I made some tweaks. Sorry, no pictures.
We took it out and it was fantastic. Travis had had some difficulties on a previous shoot with some bounce in the rig, exacerbated by the fact that he was actually driving the car while shooting. The adjustable tension and lack of any stretch in the cable allowed us to get the rig rock solid, which let him try some shots he could never attempt before. I think it was mostly the thicker cable.
If you hadn't been on a shoot with the original rig, you wouldn't expect it to behave any other way than it did today. I was actually driving around casually with the rig attached, whereas the original rig needed one safety hand on the camera at all times.
Pictuers of the result!
The first setup. We only used the four meter pole because, c'mon, it's a classic Mini.
Second setup. Kinda looked like a preparation for pole vaulting.
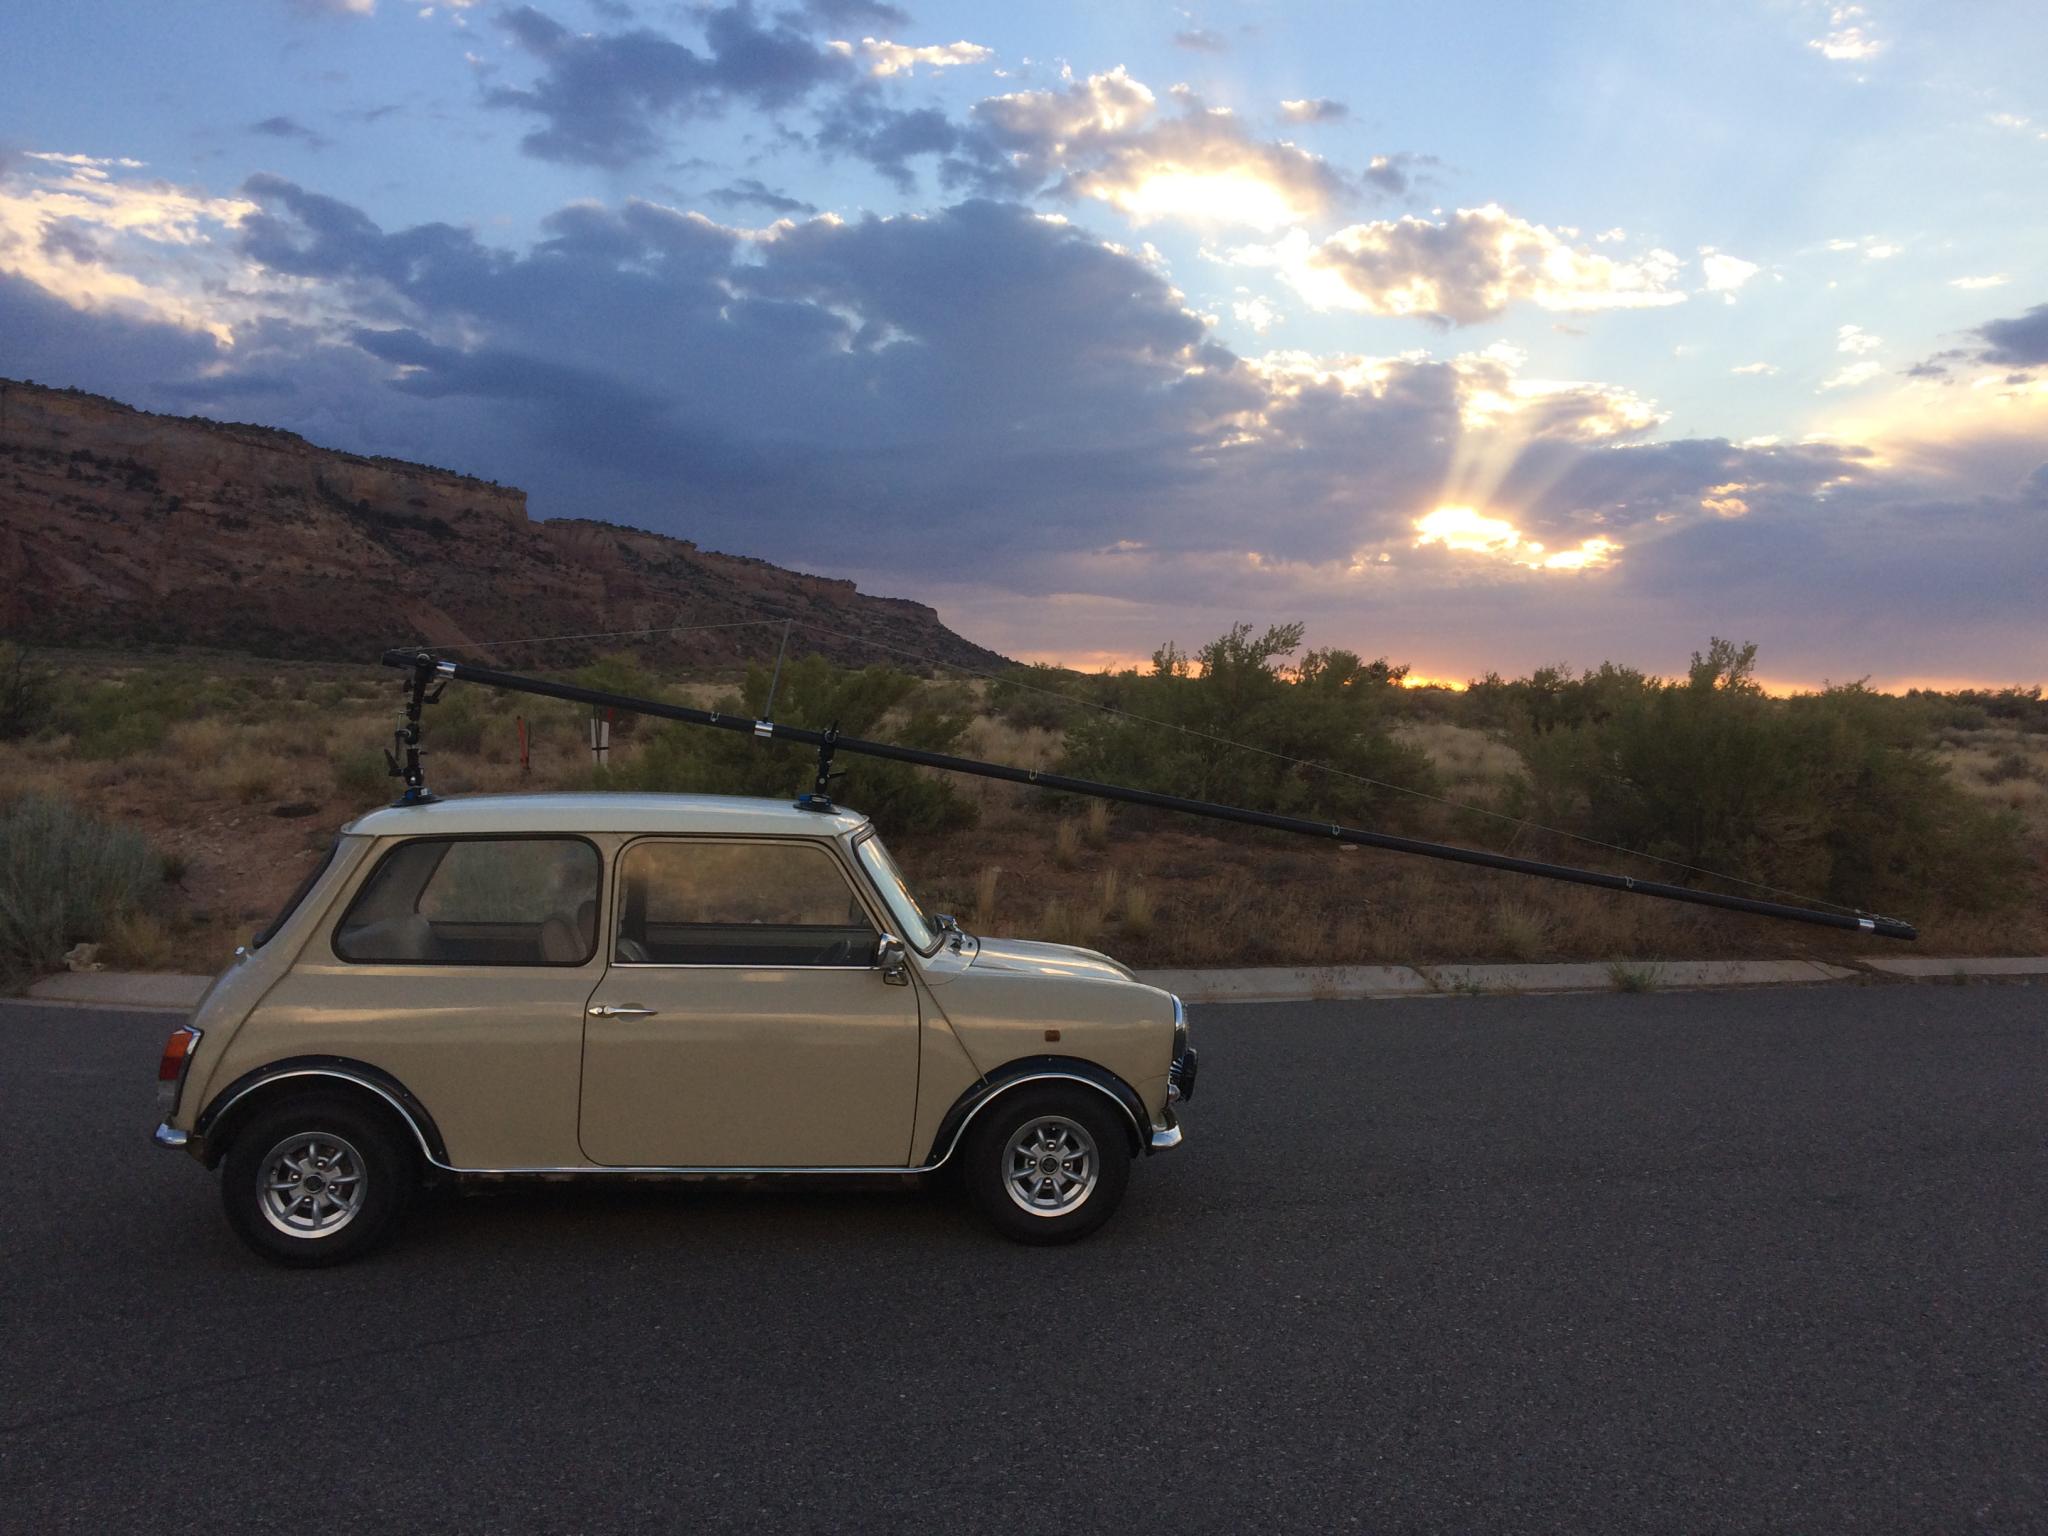
Here's how that one looked from the camera. Yes, this is a cell phone picture of an iPad, and that's straight out of the camera. I'll post the final result when Travis sends it along.
The action version! The Mini was rolling backwards slowly towards the other car parked in the background.
Travis sent me this shot within a few minutes of him getting home. That's the first rig angle. He says the front view is "extra epic", can't wait to see it!
BTW, if you ever look at a Koni ad, there's a very good chance Travis shot the pic - and if it's a tracking shot, I'm probably driving.

In reply to Keith Tanner:
With that much leverage on such a tiny mounting spot how much deflection do you get from the roof panel its self?
That's amazing work
My first thought was "why don't you just buy a used windsurf mast?" They're made of fiberglass or carbon fiber and break down in the middle.
But I don't think a mast would have been as stiff as what you've made. And it would be fixed length.
Windsurfing masts are flexy as part of the design, definitely. At least they were back when I was heavily into sailing. It would be a super-budget option though, I like it. I can't remember how long they are - about 16'?
The only time I've seen any real deflection on the mounting point was the hood of an NC Miata. We just had to move the suction cups around so we were on a piece of the panel that had some structure. The roof of the Mini had no problem. The cups have a fairly large base on them, so it's not a big point load.
Next time I have my hands on the rig, I'm tempted to drill out the center of the big chunk of HDPE that's on the camera end to take off a bit of weight. It's not really that heavy, but with everything else being so super-light it feels like it. And there's really no need for that to be solid.
Some of the edited shots. More at Travis' site. I'm looking in the mirrors in the shots because I'm rolling backwards ![]()


Glad the turnbuckle worked out. With a setup like that, the wire only gives you a stiffness benefit when it's in tension. If the camera bounces up and down and the wire goes slack for a moment, then you've lost all that benefit. All you need is just enough preload to keep it taught the whole time. Any more than that, and you're just adding undue stresses.
You'll need to log in to post.