7 8 9 10
AxeHealey
AxeHealey SuperDork
4/23/25 9:34 a.m.

I believe it was sold as stainless hardware but I'd have to check. It's likely the hole was undersized but I was literally testing just that. I've been burned too many times picking one drill bit size too large. There's really not an excuse for the screw to have snapped so easily.

It seems my initial impression of this stuff was correct given the fact that Crackers had the same issue and I did many times more surface prep than I typically do for paint. It's a bummer, for sure.


Thanks for the tip on the PS bleeding. The new seat belts probably won't be here in time so I'll be putting the seat back in and going for a test drive later this week or over the weekend and we'll see where we stand.

Crackers (Forum Supporter)
Crackers (Forum Supporter) SuperDork
4/23/25 10:52 a.m.

I don't remember what the directions recommended, but if I try it again time I'm going to try a good keyed surface with 80 grit. But realistically, I think anything of import I'll probably pony up for Rhino Liner.

AxeHealey
AxeHealey SuperDork
4/26/25 8:33 a.m.

I followed whatever the directions said in terms of grit but went beyond in cleaning, etc. Oh well.

I'm going to do the driver's side door seal in segments and tested my method by sticking some spots on the passenger side.

The seat and one old belt will go in today in anticipation of the trucks maiden voyage this spring after all the winter work. I have had two dreams now this week that the power steering felt great. Seriously. Hopefully that's the case.

budget_bandit
budget_bandit HalfDork
4/26/25 9:43 a.m.

In reply to AxeHealey :

I choose to interpret that dream as a vision and as such, 100% accurate

AxeHealey
AxeHealey SuperDork
4/27/25 8:20 p.m.

In reply to budget_bandit :

Sometimes visions aren't totally clear...

The test drive went very well overall but the steering still has some herky jerky to it. I'm going with it'll self bleed the rest of the way.

I LOVE how it sounds now even with the small leak. It is definitely quieter which I don't mind but the big thing is how smooth it is.

It's got a rear main leak that is what I'll call noticeable. It doesn't drip drip while idling but there was a single spot on garage floor after the 15 min test drive today. I feel like it'll be fine but I do have a bottle of stop leak juuuuust in case.

AxeHealey
AxeHealey SuperDork
4/29/25 2:53 p.m.

This is definitely the correct method. The glue still really sucks but working in little batches with tons of glue and lots of clamps is the best luck I've had so far.

I'm now on the hardest part because there's nothing for the rubber seal to hang on to so i'm trying this.

I then slathered glue up underneath and shut the door. Hopefully it at least holds everything in place long enough for me to get the trim piece on.


EDIT: Nope, didn't really work and unlike the passenger side, the holes in this trim piece were totally different than the existing ones in the floor. There has to be a better solution/glue out there but the trim piece is in and hopefully I don't have to do door seals any time soon!

AxeHealey
AxeHealey SuperDork
5/1/25 11:18 p.m.

Well. Good old Elmore almost made it to the Glen under his own power. On my fuel stops it seemed to either be lugging or the trans was slipping when starting from a stop. Turns out it was slipping. With 15 min to go it was stuck in second gear, I had my phone reroute me to the track rather than the AirBnb and it took me up a massive dirt road hill. That was the end of it.

Somehow I was able to find the best tow truck driver ever. He pulled Elmore up on his flat bed, hooked Sven and the trailer behind and dragged us to the paddock. After we unloaded he even gave me a ride to my AirBnb.

I'm totally exhausted so thinking is hard but it seems my options are to find someplace relatively local to have it repaired and then come pick it up or have it towed all the way back to Cleveland and then probably just start the manual swap now.

I'm not entirely sure but I'm thinking it was  at least partially my fault, unfortunately although I never had any confidence in the shop who rebuilt it a couple years ago. When I reinstalled the shifter, it didn't want to come out of park initially. I readjusted it and everything seemed OK but it had felt a little sluggish from a stop on the first test drive. At this point it doesn't matter I guess. It's blowed up one way or another.

For now though. Bed.

AxeHealey
AxeHealey SuperDork
5/5/25 8:48 p.m.

So, Elmore was our home base at the paddock Friday and much of Saturday just like he always is for me. Only difference was, he was immobile. I was mostly depressed about the truck on Friday but woke up Saturday realizing I had to get my E36 M3 together and figure out how it was going to get home. I made a post here, on the AER Facebook page and put it up on Uship. I eventually connected with a shipper offline and we came to an agreement. His home base was a few hours away from the track and timing was going to work well with my afternoon stint and helping with the final driver change.

Before the tow guy showed up, I attempted to start Elmore to see if he would even move and, no spark. Huh. Confirmed voltage at the coil and nothing coming out of the wires. Pulled the cap and saw that one of the wires running to the Mallory unit was frayed. Goodness! I hastily scabbed that wire together and Elmore was a runner again. At this point the tow driver was there, had a flat on his trailer and was very patient letting me poke around with the truck. Once it was running, I tried driving it around. Same deal. Dragging real bad leaving from a stop and very unhappy in gear. It would sit and idle just fine though and I was able to drive it on to the trailer which, maybe oddly, felt really good.

He was chained down and then on his way. I eventually got a pics around 10 that night of him back home in my driveway.

I did nothing with the truck yesterday evening when I got home but did some testing on work breaks today. It started right up and ran well but the moving condition is unchanged. It feels almost like the emergency brake is on when you take off (there isn't one) and when I tried to drive up my street it wouldn't even make it up the slight hill. 

It lurches when you engage reverse as well as drive but then it's just unbelievably sluggish in both directions. I think if it were the pump gone bad, I wouldn't have positive engagement with those. Since I know next to nothing about automatic transmissions, I did some internet searching which suggested that maybe the governor was sticking and I found a method in a few places where you drive slowly at part throttle in drive and then shift directly to reverse and doing the same in the opposite direction. I tried that in my driveway a few times with no change.

At this point, after taking to a mechanic friend and a local shop, I'm guessing it's the torque converter, which would make sense. Although I don't trust the shop who rebuilt the trans two years ago, the only thing they didn't change was the torque converter. It's at least 30 years old and has been on towing duty for going on 9 racing seasons.

I looked into pricing of a new torque converter rated for towing and they seem to be at lease $300, usually more. 

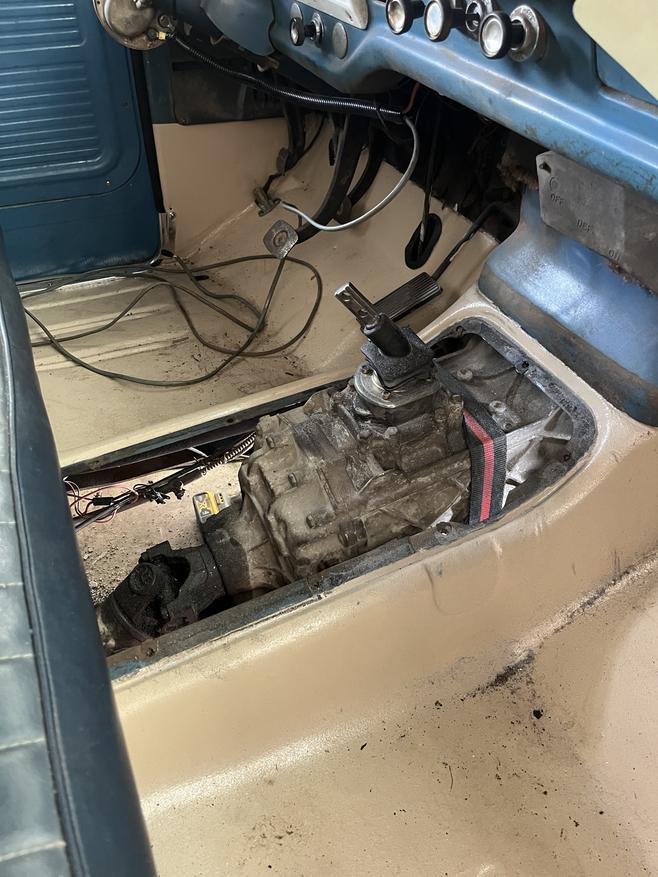
If anyone has thoughts, suggestions, I'm all ears but I'm thinking it's time to just yank this trans and start into the manual swap. Elmore's next tow duty is the weekend of June 28th so I think I could make it happen in that amount of time.

AxeHealey
AxeHealey SuperDork
5/6/25 2:02 p.m.

Can anyone following along confirm/deny that these are the parts I need? As a reminder, the big block in the truck came out of a '71 Thunderbird meaning it needs an internally-balanced flywheel... I believe.

The ZF5 is an S5-42. 


I think that this kit from Modern Driveline is going to make my life 1000% easier here and is actually less expensive than the way forward I imagined piecing together stuff from Wilwood. It comes with a 0.700" master cylinder though so I may have to buy Wilwood's 7/8" MC separately. 

AxeHealey
AxeHealey SuperDork
5/7/25 3:49 p.m.

Here's what I'm thinking is my solution for the slave - a hydraulic TOB. RAM makes a universal one, this is the part they say will almost certainly work in my application. 

https://ramclutches.com/product/78126HDL/

HotNotch
HotNotch Reader
5/7/25 4:08 p.m.

In reply to AxeHealey :

I don't have any F-series or BBF specific input here, but I will say, I've been extremely happy with the MDL Hydraulic Clutch system on my LS swapped Fox Body.  Has given us years of problem free service and is engineered very well.

AxeHealey
AxeHealey SuperDork
5/8/25 6:44 a.m.

In reply to HotNotch :

That's great to hear! While the kit I bought is pretty straight forward and I certainly could come up with a similar solution, I'm really hoping it makes this swap much more efficient.

Recon1342
Recon1342 UltraDork
5/8/25 11:41 a.m.

In reply to AxeHealey :

From Paul Kane at Ford Forums-

  • 1979 & later 460's were externally balanced, while the 1978 & earlier were internally balanced.
  •  
  • Look for numbers that are stamped on the edge of one of the crank's counterweights: 460 internal balance crank numbers are 2Y, 2YA, 2YAB & 2YABC; 460 external balance crank numbers are 3Y, 3YA, or may have none of these markings
  •  
  • Between the harmonic balancer and the timing cover, a spacer rides on the crankshaft snout. On the internal balance engine, this is nothing more than a sleeve/spacer, while on the external balance engine it is the external balance/hatchet weight.
  •  
  • 1979 & later 460 external balance flex plates have a weight on the perimiter, while the 1978 & earlier do not.
  •  
  • OEM internal balance engines will have a cylinder block casting number of D9TE-AB, but beware that an external balance rotating assembly may still be placed into the earlier blocks without any modifications.
AxeHealey
AxeHealey SuperDork
5/8/25 2:13 p.m.

In reply to Recon1342 :

Thanks! This engine is definitely an early one out of a '71 Thunderbird so I have to assume it is still internally balanced and I believe it's the stock crank from what the builder told me.

AxeHealey
AxeHealey SuperDork
5/9/25 4:08 p.m.

The adapters that I hope will work have arrived. 

I feel as though this is going to work. The diameters of the various bits are right on but the length, primarily of the channel that the roll pin goes through, is slightly different. 

AxeHealey
AxeHealey SuperDork
5/9/25 8:50 p.m.

Well, there's lots of material in there.

It seems my initial hunch that it was slipping was correct. I checked and re-checked  that linkage but I'm thinking it must have just not been fully engaging D or something like that.

In more uplifting news...

This Sachs clutch kit came directly from ZF North America, as it turns out. It hadn't occurred to me once that ZF would be a place to talk to about options regarding slave connection situation. They'll be on my list to call on Monday.

AxeHealey
AxeHealey SuperDork
5/11/25 8:05 p.m.

No pictures because I had a very busy weekend and it takes almost as long to get all of the ATF and grime off me as it does to do the work but the two cross members are removed, dipstick tube out, vacuum line removed, shifter disconnected, etc. Once the starter is unbolted, the trans will be ready for removal.

I had a ~'69 C10 pull up behind me yesterday just a grumblin' away and it really made me bummed that I'm missing precious Elmore time so I want to keep this project moving and as efficient as possible.

My goal for this week is to have the C6 out and the ZF5 test fit so that I can get a measurement to the driveshaft shop for the new front section. I also want to have the oil pan dropped so that when the new rear main shows up I can throw that in along with a new oil pan gasket.

I think all of the major parts are scheduled to show up this week but at least half of them are coming FedEx so I'm expecting them in July.


AxeHealey
AxeHealey SuperDork
5/12/25 1:30 p.m.

Trans out! I only forgot about two bolts, which I'm calling a win.

I'm not sure yet how I'm going to get it out from under there but that's a problem for me at a later time. Probably just pull the converter and dump it off the front somehow(?). I don't think I have the ability to get the truck high enough to roll it out and I sort of don't want to find out. We'll see.

Also - the drilling into the flex plate is to zero out the flex plate itself...right? I'm not learning that some 460 rotating assembly was put into this first 429 block and all of a sudden I need to find an external balance flywheel...right? EDIT: When I search a 429 flexplate, that exact thing is what comes up for a 1970 429 for a C6 trans. I'm calling me good.

AxeHealey
AxeHealey SuperDork
5/12/25 3:08 p.m.

Out! And I only destroyed one fingernail!

AxeHealey
AxeHealey SuperDork
5/12/25 8:36 p.m.

Here is my quick and super dirty repair of that frayed wire going to the ignition module.

I was able to squeeze that connector off and because this is Grassroots Motorsports, after all, I'll be attempting to solder it back together like this and then putting shrink tube over it.

AxeHealey
AxeHealey SuperDork
5/13/25 10:10 a.m.

I guess we'll see if the heat was too much for the unit - I don't think so. 

AxeHealey
AxeHealey SuperDork
5/13/25 1:37 p.m.

Lunch break and we've hit a bit of a snag, literally. 

I was able to snake the C6 out around that collector flange but with the ZF5's case being a bit taller and the mounting for the slave cylinder on the other side, I think I'll have to pull that header, unfortunately. In the grand scheme of things it's not a big deal, just yet another gasket, but for whatever reason it feels like a lot. 

I'll get out there on another work break later this afternoon and see if there's some wiggle room I'm missing somewhere.

AxeHealey
AxeHealey SuperDork
5/13/25 4:26 p.m.

I dropped the header which gave me all sorts of room. Great! I was being very patient and methodical working it up and closer to the block inch by inch but this tab was interfering with the tunnel. 

So I politely evicted it.

I then got closer than ever but there were a few issues. First, the trans needed to rotate a bit and with the ratchet strap and the angle, I couldn't do it in situ. Next were two similar tabs on the case back by the shifter that were getting in the way. Last was a seam in the firewall that I think I'm going to have to either trim or persuade with a mallet.

I lowered the trans down, released the strap, tried to adjust it and... it rolled off, dumping gear oil everywhere out of the speedo cable hole. Hooray! Luckily the biggest issue is the enormous mess it made and the fact that I have to wrestle it back on to the trans jack which was a slow, tedious process the first time around. 

Since it was way down on the ground, however, I used the opportunity to trim off the other two tabs. 

I'm pretty well tied up the rest of the afternoon and evening so I likely won't be back at it until tomorrow. 

AxeHealey
AxeHealey SuperDork
5/14/25 2:55 p.m.

That, friends, is a ZF5 in Elmore!

Technically it's still on the trans jack, it's only secured with the top two bolts and I didn't install the block plate but, boom!

I actually need to run out to get longer bolts for the rest of the holes as the flange on the ZF5 turns out to be much thicker than the C6. There's also going to be a very troublesome bolt on the driver's side that I may need to size to only catch like 1/2 of the threads in the block or something and will probably have to put it in the hole before getting the trans into place. I haven't measured but it's probably only 1" from the tunnel there.

One more casting excess needed removal as well. I actually did some Googling before chopping this one off because how it was cast made it look like a gasket was running through the middle of the section. It wouldn't have made sense but I certainly didn't want to screw that up. 

Also, I test fit the right-angle adapter into the slave. The little o-ring seemed to seat in there real tight and I can't get any movement out of the fitting other than spinning. I'm going to put the OEM one back in to see if it spins, I believe it does. 

I also realized that this black adapter is steel as is the OEM one so, worst case, I slice them up and (carefully) weld them together!

Recon1342
Recon1342 UltraDork
5/14/25 6:46 p.m.

In reply to AxeHealey :

For that one bolt, drill a hole in the tunnel and size it to fit a grommet when you are done. 

7 8 9 10

You'll need to log in to post.

Our Preferred Partners
KO4D6A7SHvVC8Ffr6Rkd6kwdTTq3svMgUyKtsc4dbpm3VFft0vTOCO91YGkTWh2d