1 2 3
fujioko
fujioko Reader
6/4/14 7:45 p.m.

Like the title says, this is a low buck engine dyno project. I'm setting a budget of $1000.00 , lets see if that will be enough.

I guess I should clarify how I intend to use the dyno and what results I am expecting. This dyno is an extension of my Miata B3 project and will be used to bench tune a second B3 engine. I am not necessarily interested in measuring peak HP and torque on a B3 engine because that data would be depressing. Instead, I am going to use the dyno to simulate daily driving in a controlled environment.

With this dyno, I can test a few cams and dial in the one the works best. Work out the ignition table, experiment with a low boost turbo. Explore internet myths. If this dyno works, it will provide unlimited access to data that is currently unavailable.

With a little bit of electronic voodoo and some imagination the dyno can be rigged to play back variable loads that mimic a typical road test. Its not going to be perfect, but it should be repeatable.

I plan to record a profile with Mega Log Viewer and play back the loads on the dyno for tuning the engine. I have over 40,000 miles on my B3 project and I have yet to find the perfect tune.

Seem ambitious?... you bet! Everything in this project has to be custom built from scratch and be low buck. The title says low buck so I will use inexpensive solutions for expensive problems. It is actually not as hard as it sounds. ... or maybe it is and I'm just being ignorant. we'll find out.

THE B3 MIATA.

For those not familiar with my B3 Miata, here is a brief overview. The B3 project is my solution for sporty two passenger lightweight RWD commuter car. The original 1.8L engine was swapped with a 1.3L engine from a Ford Festiva. The car has been trouble free for over 40K miles and has delivered an average of 45 MPG during the daily commute.

My goal is to develop a tune that will allow the car to achieve 50+ MPG without sacrificing or suffering.
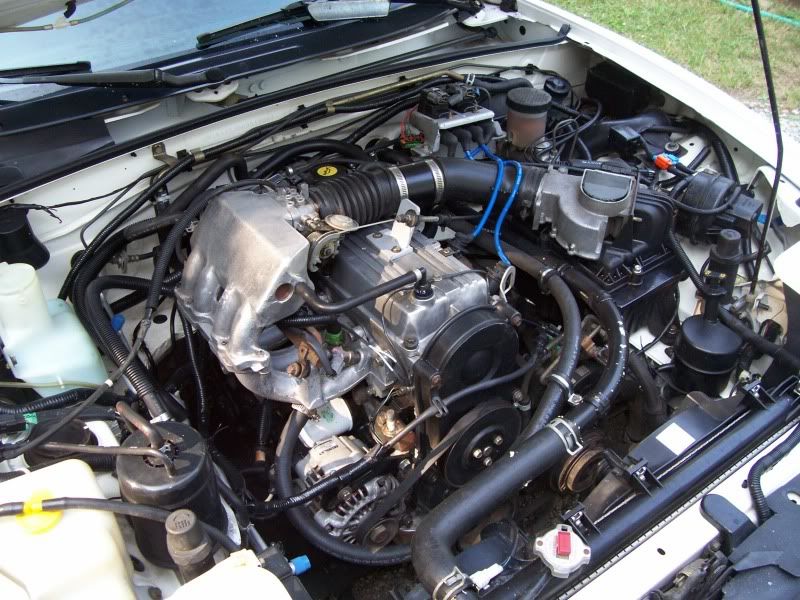
63HP B3 looks at home in the Miata engine bay.

The Dyno.....

This dyno is made for marine engines and is able to absorb over 200 HP. It's basically a hydraulic pump with a controlled orifice. The bulk of this machine is the reservoir tank, which holds about 20 gallons of fluid. I spotted this treasure on CL for $425.00. I grabbed a friend and took a road trip up north to give it a good look over. The dyno looked great and was worth the $425, but I offered $375.00 and a deal was made. ($625 left in budget)

Getting this sucker home was somewhat of a challenge with my Saturn wagon. The dyno certainly fit in the wagon, but only if it was laid on its side. The problem is the dyno appeared to be leaking....
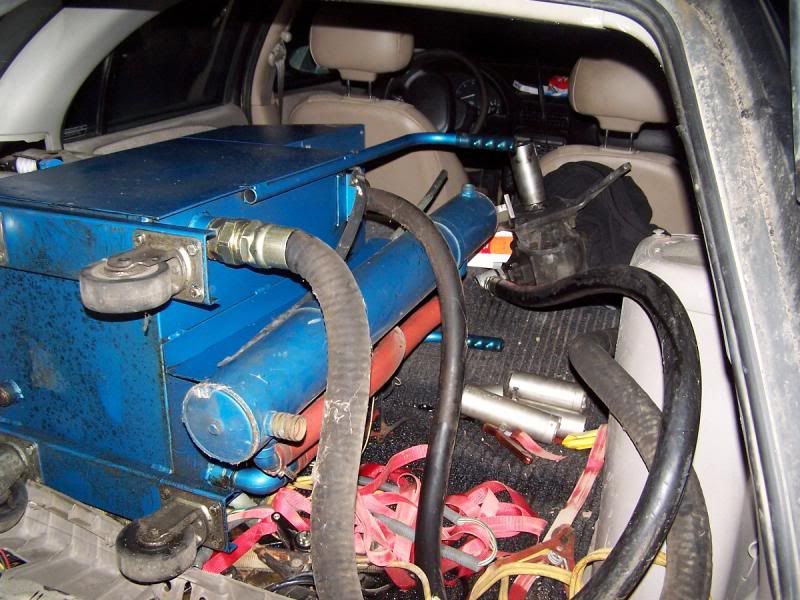
I have never been kind to my Saturn and was not about to start ... this trip will take its toll on the poor car. About half way home, I stopped for gas. While filling up, I noticed a puddle developing under the car. .... I paid cash for the gas and quietly slipped into the night, no doubt leaving a trail of hydraulic fluid in my wake.
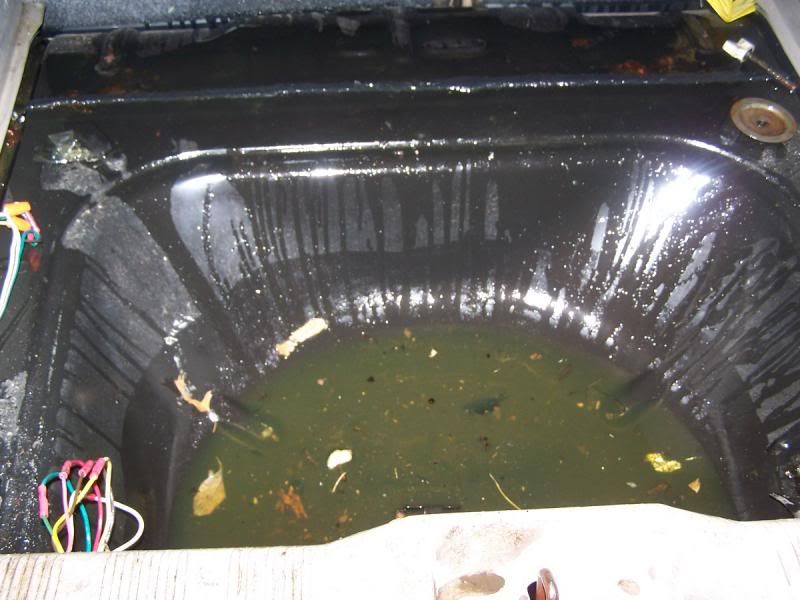
To date, I have recovered over three gallons of fluid from the interior of the car. I just drill holes in the floor and let it drain into a bucket. ... it could be worse.

Stay tuned!

Slippery
Slippery HalfDork
6/4/14 7:49 p.m.

Awesome! Subscribed.

fujioko
fujioko Reader
6/4/14 8:19 p.m.

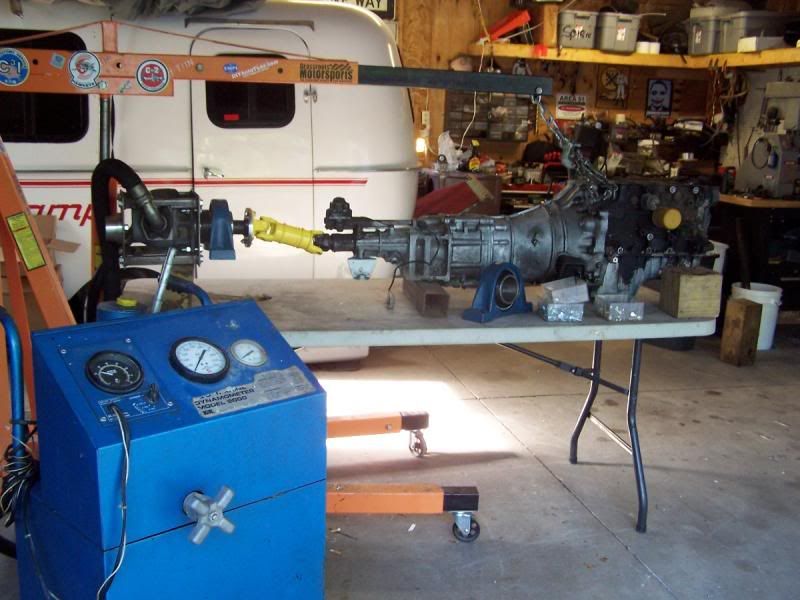
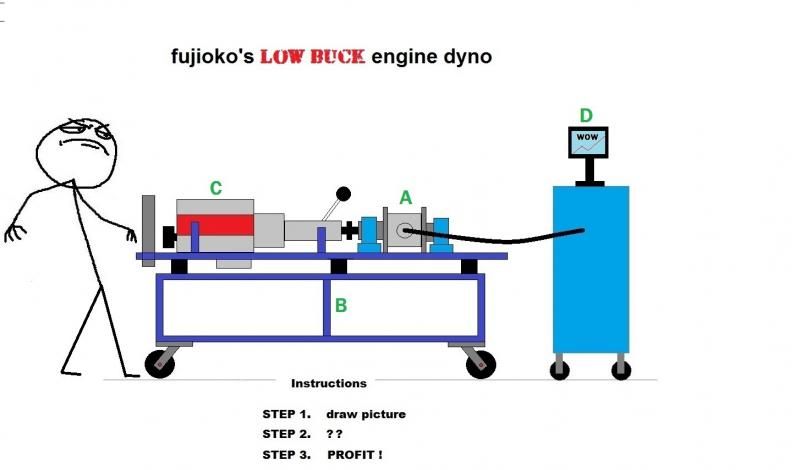
PAU = power absorption unit . As you can see from my highly detailed plans, I'm going to mate the B3 engine to a Miata gearbox and couple this combo to a hydraulic pump. (PAU) The Miata gearbox makes everything a lot easier and I can use it to lower the hydraulic pump speed if needed. The pump has a 4000 rpm limit... good enough for me. The pump needs to be mounted on bearings to be able to measure torque. The bearings will support the pump and allow it to easily rotate in the direction of the load. I toyed with the idea of directly coupling the pump the drive shaft yoke. This would act a front Bearing in a way. I think it would work if everything was perfect, but I have no idea what I'm talking about. I have never done this before and I'm invent''n this as I go along.

Just to be on the safe side I decided to do something I think might be slightly better. The rated output of the B3 is 63 HP and 75 lbs of torque. Doesn't seem like much power when compared to a real engine, but this is some serious power for a bench top experiment. When in doubt, add more metal.

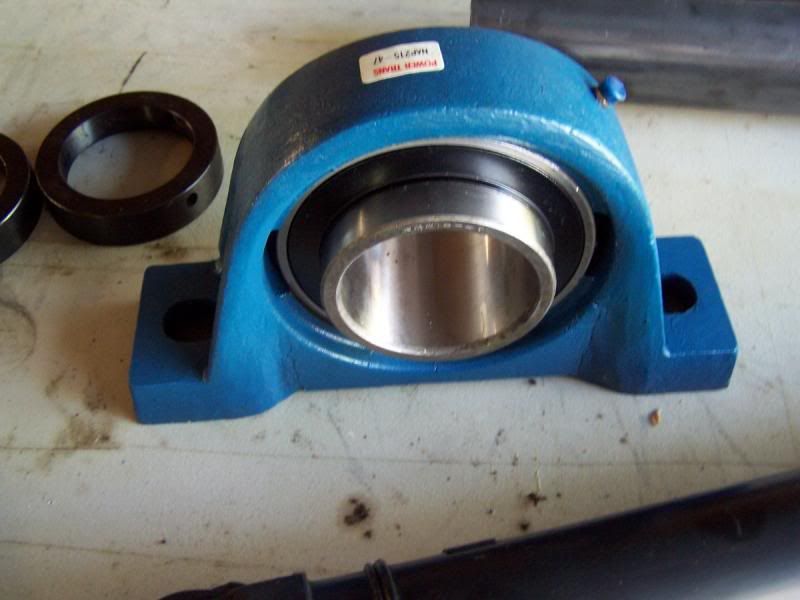
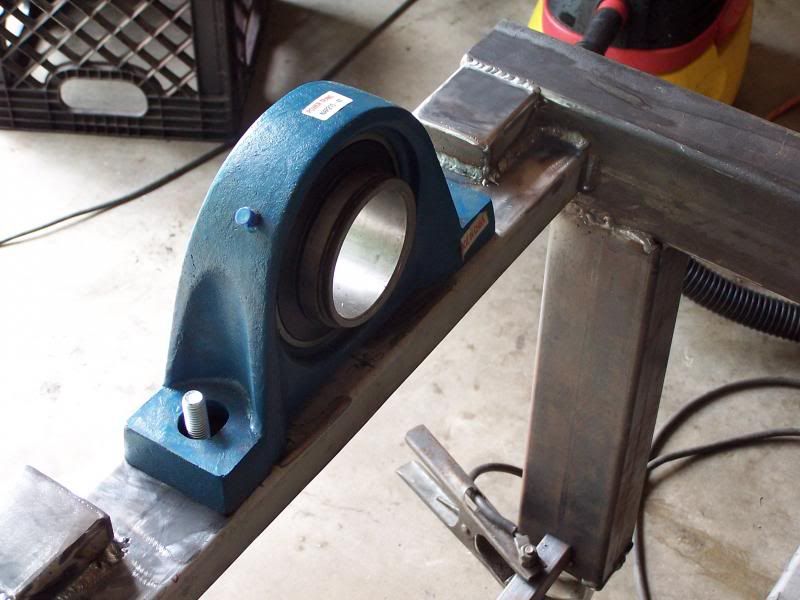
Pillow block bearings get crazy expensive when they go up in size. I wanted to get the largest bearing I could afford. Bearings in the 3 inch range run well over $250 each. yikes! I located some from online surplus in the $60.00 range... ouch!... (I'm cheap ..remember?) I found an odd size bearing at 2 and 15/16 for $9.95 .. still a bit pricy but it will do.

let's look at some pictures...

. One of the two El-Cheapo pillow block bearings. $9.95! .
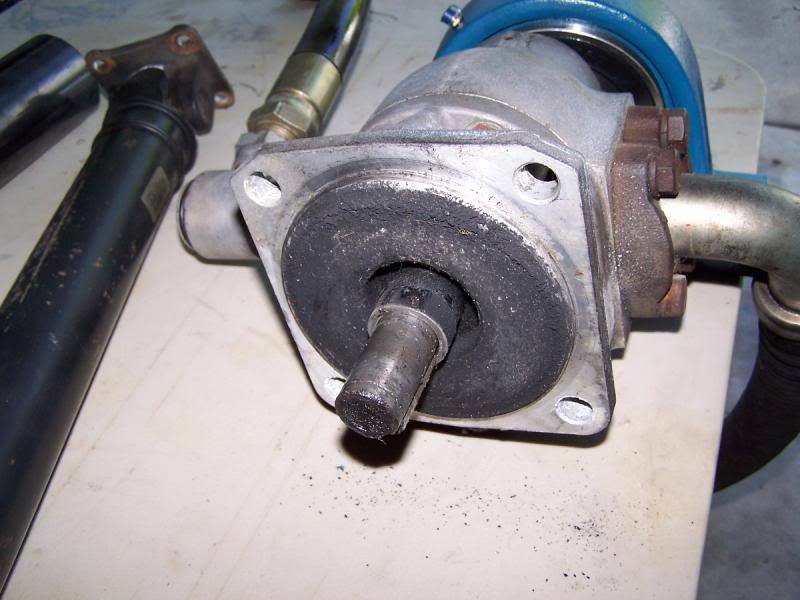
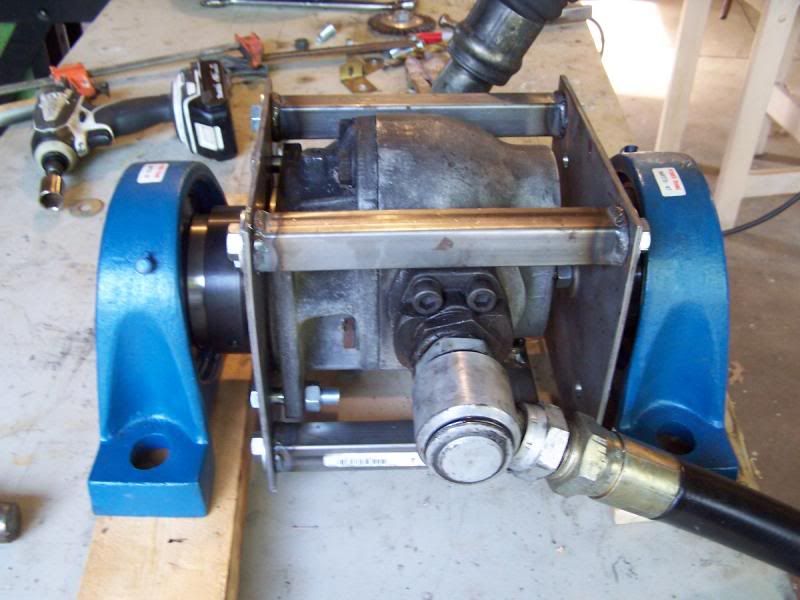
. Here is the hydraulic pump that will act as the PAU. .
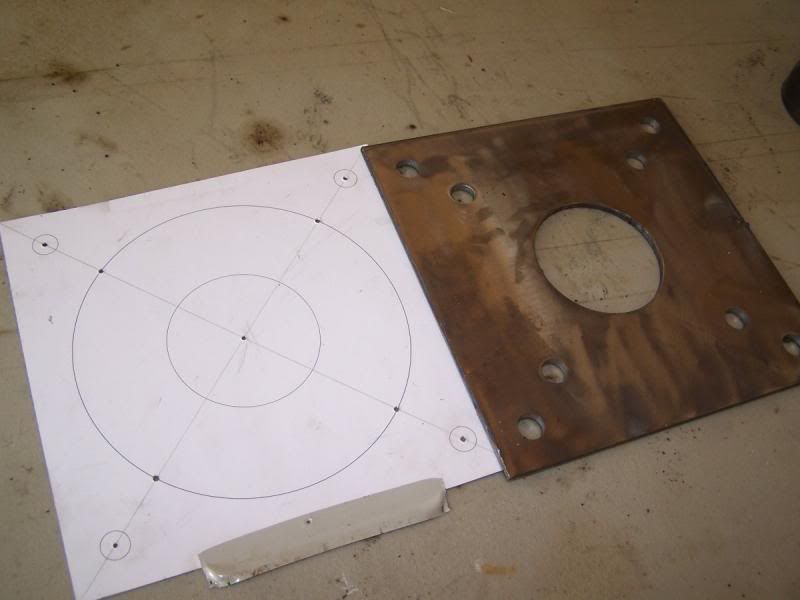
. I started off making a template of the front of the hydraulic pump and transferred it to a 8x8 steel plate. Making templates is easy if you know how. I'll show you a quick and dirty cheat on templates in the next section.
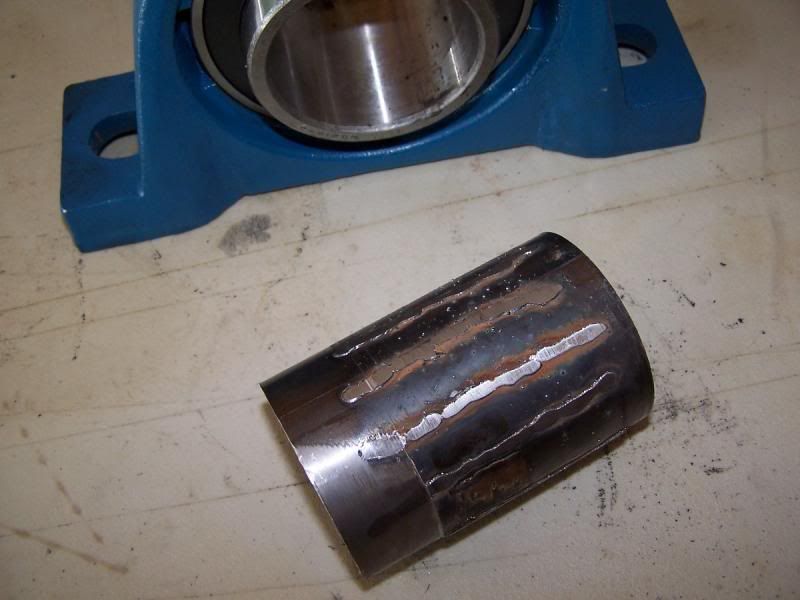
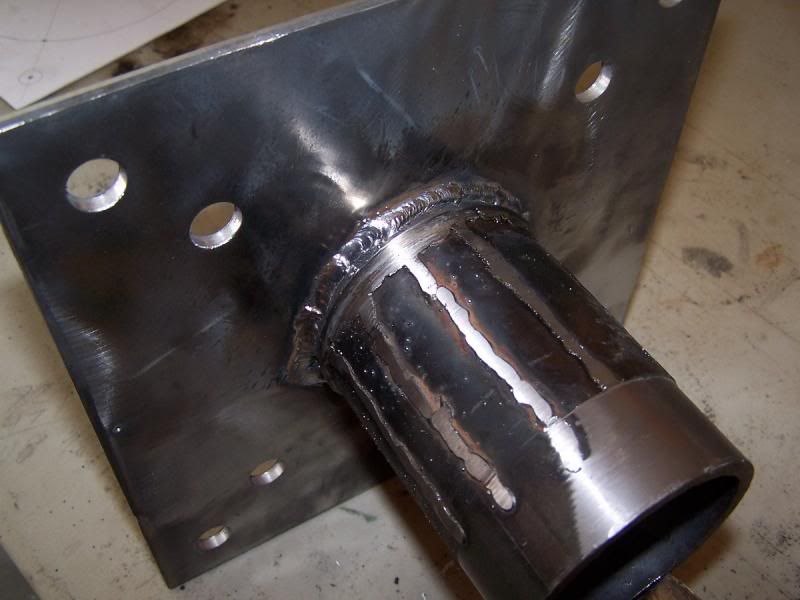
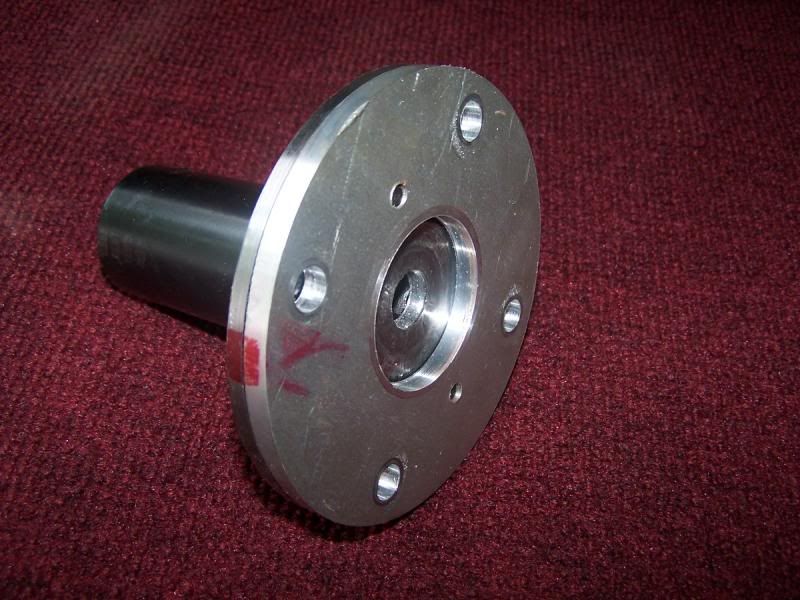
Since the pillow block bearings were dirt cheap (odd size) I had too weld filler beads on to this tube to build up the surface. The pipe was sized in the lathe for a perfect fit. . [/URL] . the pipe was then welded to the previously fabricated flange. .
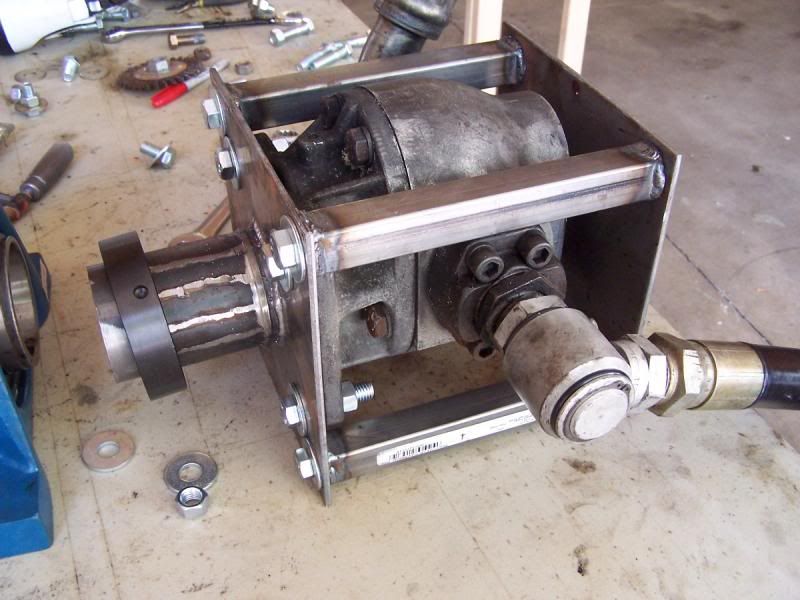
. The pump lacked any sort of mounting surface on the rear so a removable cage was fabricated. .
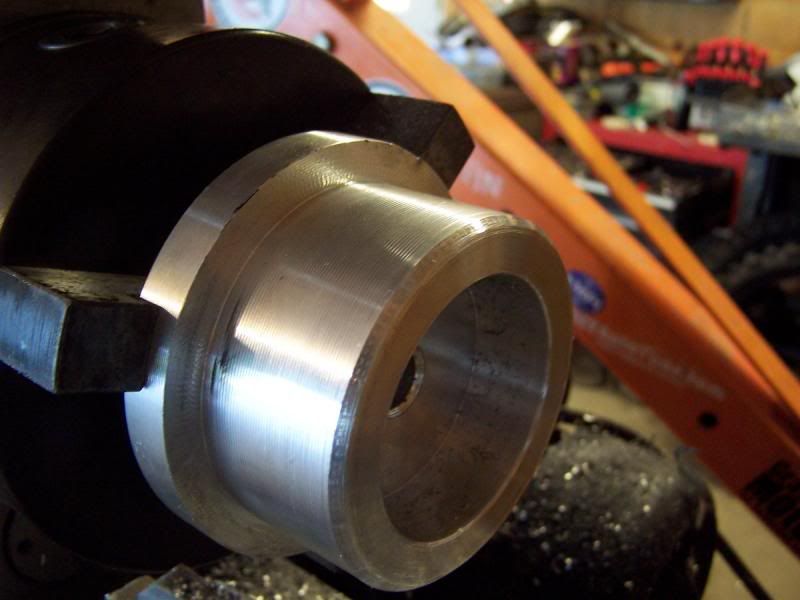
. A hub was fabricated to support the rear of the pump. Pictured is half of the hub, the other half missed its appointment with the camera. . . rear hub mounted.....
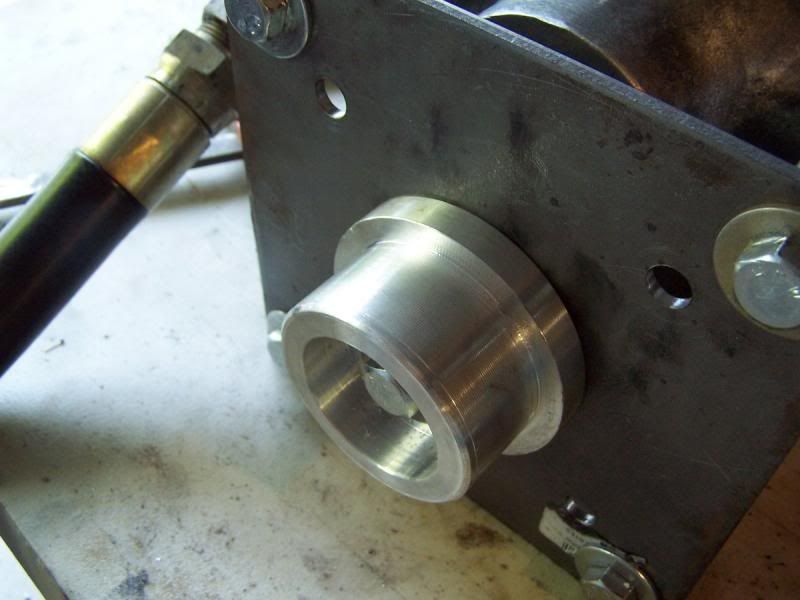
. The pillow block bearings were test fitted to the PAU and the whole assembly moves with ease.

I will eventually build the load arm and the load cell, but for now I have enough to move forward with the rest of the build.

Stay tuned!

jgrewe
jgrewe New Reader
6/4/14 9:40 p.m.

I've spent hours Imagineering a similar set up using a couple hydraulic pumps for a hub mount dyno. After seeing a Roto-test dyno in person I knew it wouldn't be that hard.
A friend of mine has had a couple pumps for a big excavator on a shelf for a few years. I'm waiting for him to get tired of storing them. I did some math and each one will handle/absorb about 280hp. A couple of those would be plenty for the small bore cars I play with.

I'm sure your load cell output will be easy enough to work with. I've planned on a little more complex set up using a Sport Devices controller.

Looking forward to updates!

erohslc
erohslc HalfDork
6/5/14 10:10 a.m.

For lo-buck data acquisition, I've used products from here:

http://www.dataq.com/products/startkit/di145.html

The software is really easy to use with standard PC.
Display sensor readings vs time as if they were on a 4 channel oscilloscope.
You can stop, skip, rewind, search, set stop/capture/trigger points, etc.
It will record as much data as you have disc storage for.
You can easily configure it to calculate HP based on RPM and torque (from the load cell).
Exports to Excel, CSV, etc.

NFI, I just think it's neat.

(BTW, it's only $30)

bluej
bluej SuperDork
6/5/14 10:14 a.m.

So much coolness

fujioko
fujioko Reader
6/5/14 9:44 p.m.

In reply to erohslc:

Thanks for the heads up! The $59.00 unit has everything I need to get the dyno functional. I think I'll give it a try.

I'm also looking at using a hodgepodge mixture of arduinos and a DOS based PC. I never got into Visual Basic and can only write in Basic and C. I'll eventuality need input and output channels to actively control the load and the arduino stuff is a dirt cheap.

More pics coming soon!

Keith Tanner
Keith Tanner MegaDork
6/6/14 10:05 a.m.
jgrewe wrote: I've spent hours Imagineering a similar set up using a couple hydraulic pumps for a hub mount dyno. After seeing a Roto-test dyno in person I knew it wouldn't be that hard. A friend of mine has had a couple pumps for a big excavator on a shelf for a few years. I'm waiting for him to get tired of storing them. I did some math and each one will handle/absorb about 280hp. A couple of those would be plenty for the small bore cars I play with. I'm sure your load cell output will be easy enough to work with. I've planned on a little more complex set up using a Sport Devices controller. Looking forward to updates!

FYI - the Rototest only uses the hydraulic pump for the load. Actual torque is measured by strain cells, as the temperature and age of the fluid varies too much to allow the hydraulic pressure to be a valid measuring technique. Just fine for fujioko's needs, but not so good if torque measurement is your goal.

Great thread.

jgrewe
jgrewe New Reader
6/6/14 1:16 p.m.

KT, I've worked out the style valve I need to load up the pump like what is going on in this thread. Then have the load cell and torque arm pretty much like he is doing or like Stuska engine dyno I used to play with. The trick is going to be how to control it with a stepper motor through the dyno control system. I want to be able to hold rpm's and load the driveline etc. Inertia dynos can only do so much.

erohslc
erohslc HalfDork
6/6/14 2:25 p.m.
jgrewe wrote: KT, I've worked out the style valve I need to load up the pump like what is going on in this thread. Then have the load cell and torque arm pretty much like he is doing or like Stuska engine dyno I used to play with. The trick is going to be how to control it with a stepper motor through the dyno control system. I want to be able to hold rpm's and load the driveline etc. Inertia dynos can only do so much.

Beware of loop control dynamics.
The slew rate and response time of the steppers has to be fast enough to respond.
Under some circumstances the loop may be unstable, and you may get oscillations (not good when you are dealing with mechanical power systems that could injure or kill you!).
Often these can be tamed by introducing mechanical damping in the hardware, along with signal filtering and damping in the control loops.
You ideally would like for your overall loop damping to be enough to prevent overshoot on step transitions, but not so much that the system is unresponsive.

Keith Tanner
Keith Tanner MegaDork
6/6/14 3:00 p.m.

That's how the Rototest works, little steppers. I know they upgraded them over time. They had a 'torque overload' warning if the dyno wasn't able to hold the load.

BTW, if you actually want a used Rototest, we have one at the shop. Difficulties with the embedded NT control boxes, but if you're a software guy all the hardware is there. Seriously, it's for sale. Drop me a line.

jgrewe
jgrewe New Reader
6/6/14 3:46 p.m.

Stop it! The dyno is a back burner project, don't make me move it yet.

fujioko
fujioko Reader
6/10/14 8:58 p.m.

The PAU is coming together a little bit at a time. I'm only fabricating enough of each assembly so I can determine how long the unit will be. I'll have to go back and finish the unit when it is finally mounted in place. There shouldn't be any surprises...

I do a lot of my fabrication freestyle because I am wired for that mode. Occasionally I'll sit and doodle out a drawing with dimensions and whatnot but that is mostly for the convenience of other folk.

Laying out brackets and flanges with a ruler and scribe is tedious and often they do not fit as well as I would like.

The internet is full of free CAD type programs but I don't have the patience to sort through all that nonsense. Most of the good stuff is disabled and the rest are crap.

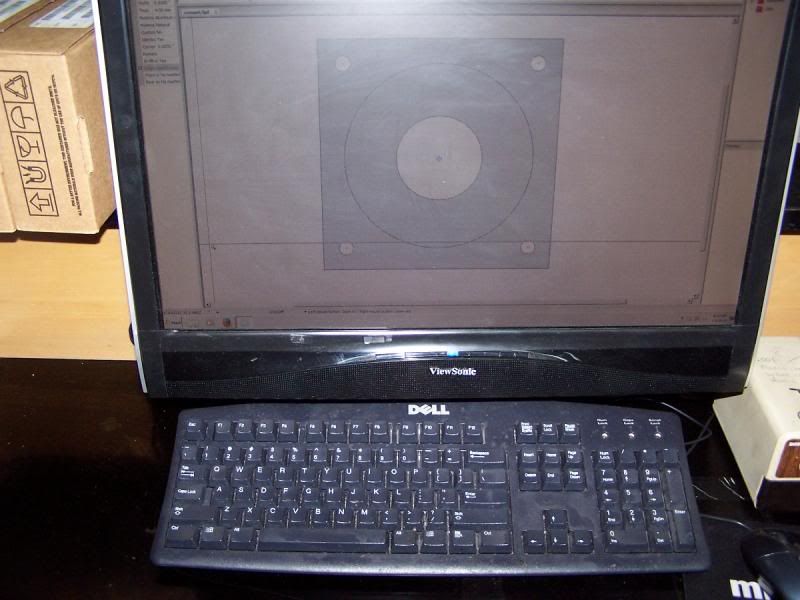
A cool cheat I have been using is a free program that is meant to design front panels for industrial equipment. Its a halfass CAD program that has enough elements to lay out templates and brackets and then print them 1:1. Some knowledge of drafting is probably required but the program is simple to use. You can get the utility at Front Panel Express. Canoe?... Sorry if it is.

The pictures will tell the rest of the story.

The PAU to driveshaft requires a custom adapter. I plugged in a few dimensions and an adapter flange magically appears on the computer screen. Select string mode with crosspoints when printing.

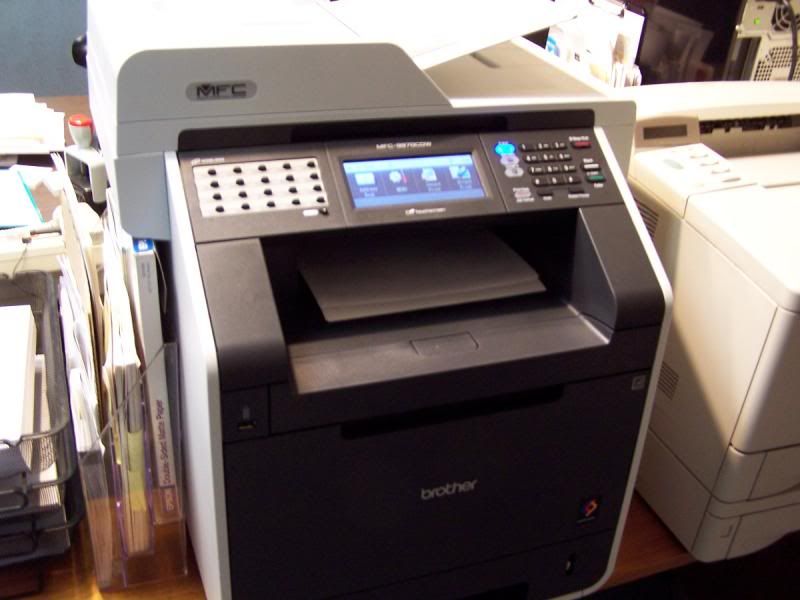
Distract the office manager long enough to get a useless picture of a printer spitting out the drawing....
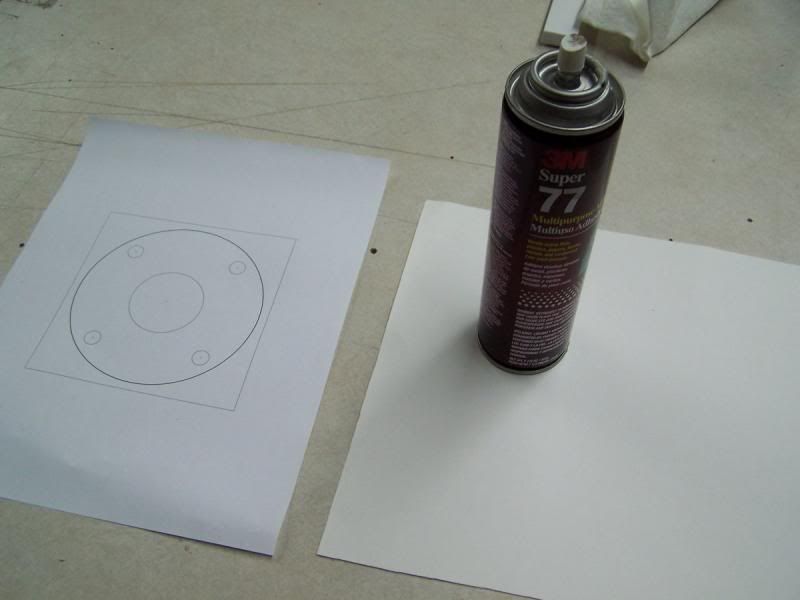
Spray the back of the drawing with artist achieve and affix to a piece of poster board.
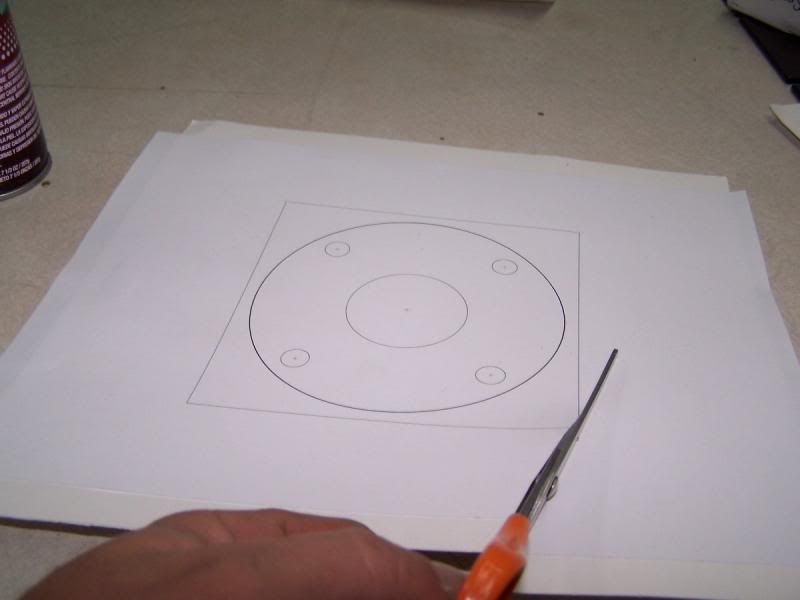
Cut template down to a manageable size.
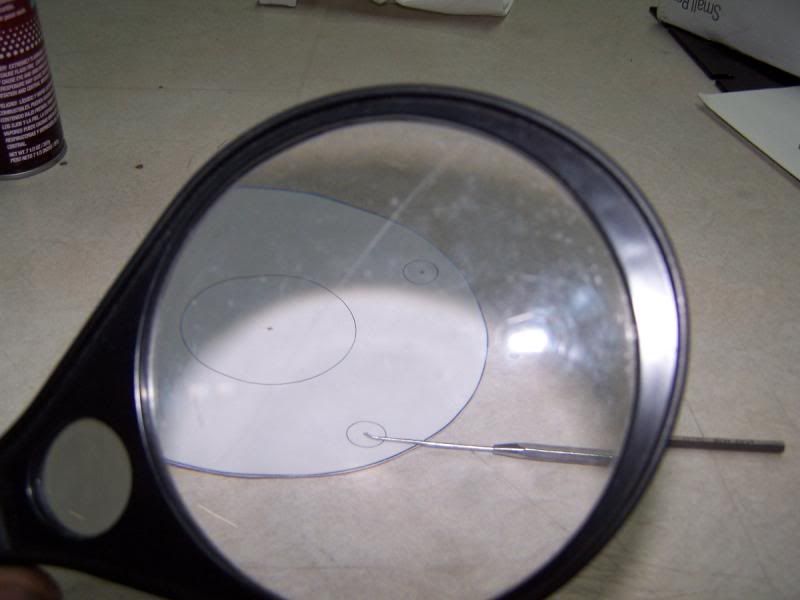
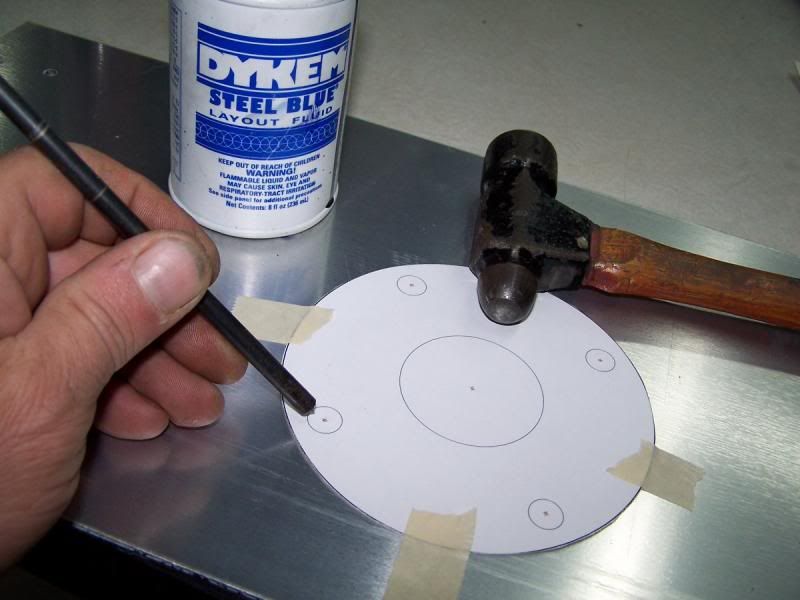
Use a magnifying glass and put tiny punches on all the center-lines.

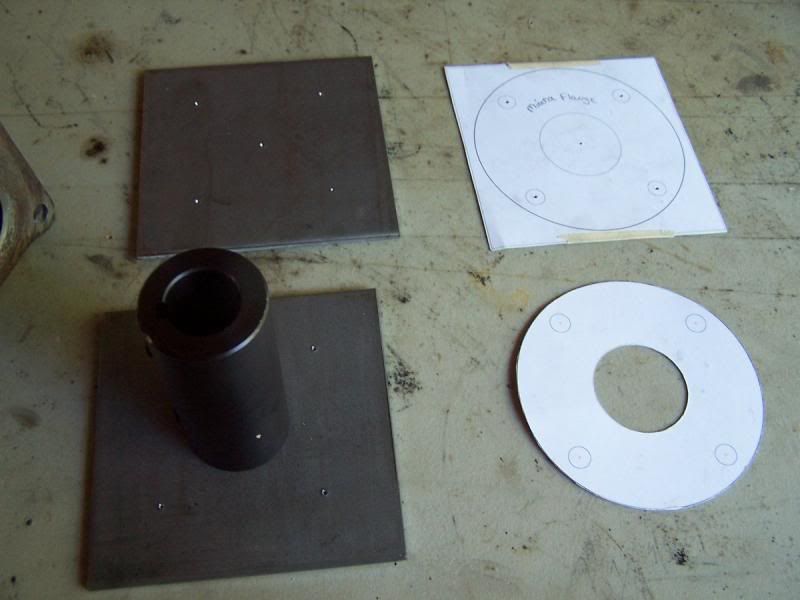
Tape template to a chunk of metal and center punch all the holes. A perfect fit every time!

Parts before drilling and welding.

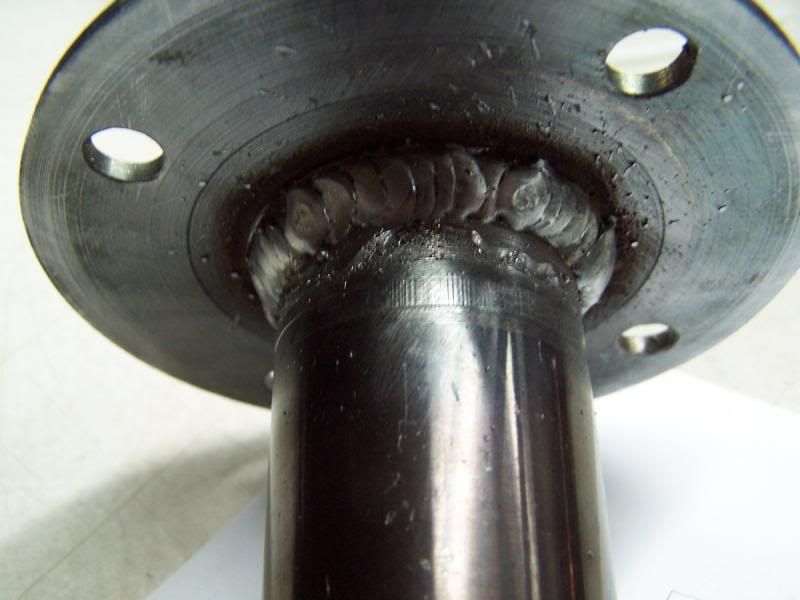
Welded!

Secondary hub-centric flange mounted to adapter.
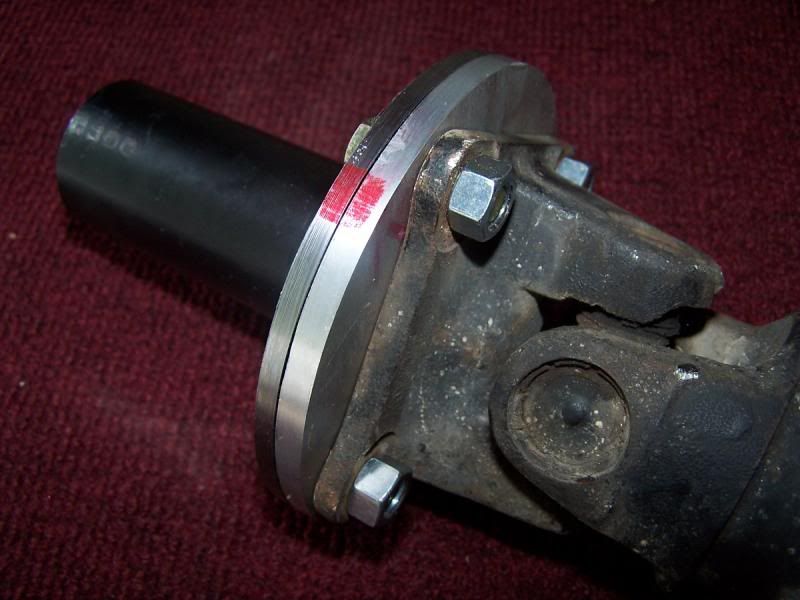
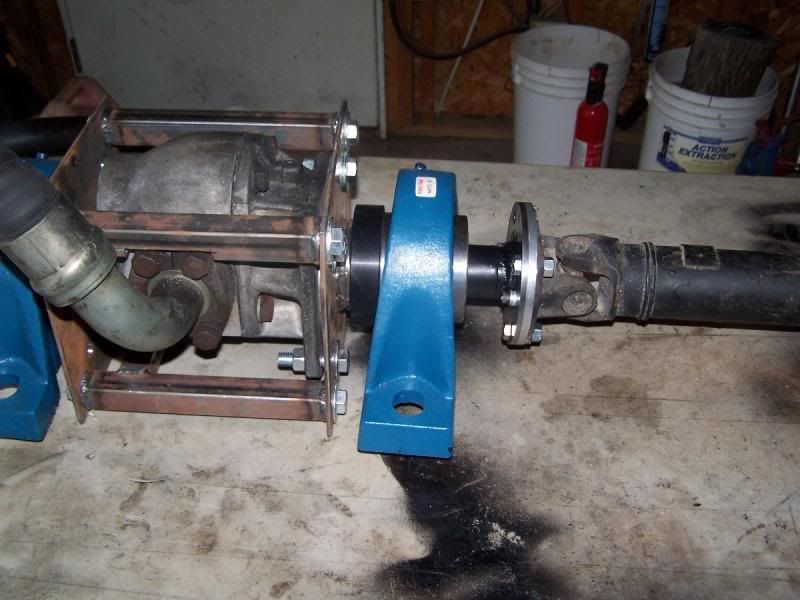

driveshaft test fitted to adapter.

Driveshaft test fitted to pump assembly.
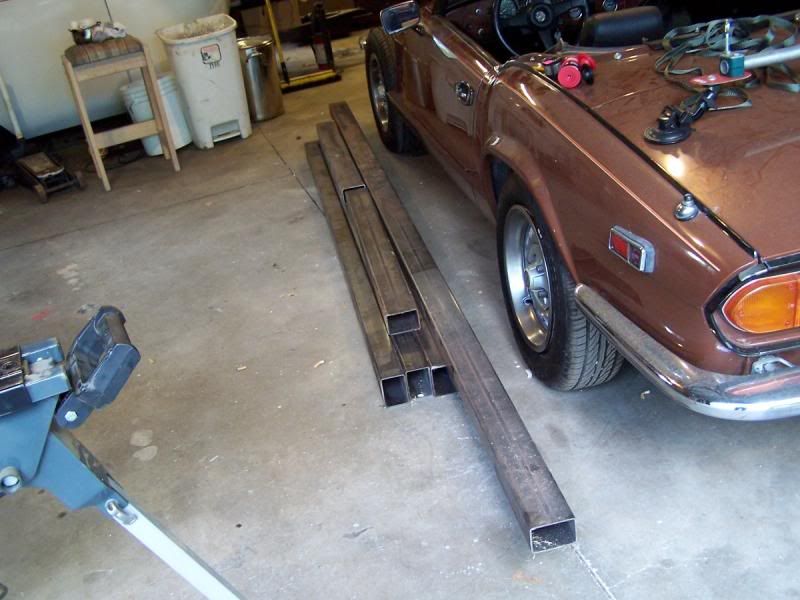
The next step it to radically shorten the non-serviceable Miata driveshaft. Oh joy..

coming up soon...

Scored some steel locally on Craigslist. The seller was asking $100.00 for this pile of fresh steel. It seemed like a bargain so I scooped it up.

Stay tuned!

jgrewe
jgrewe New Reader
6/10/14 10:19 p.m.

On that driveshaft, Rockford Driveline part #430-10A is a replacement joint that will do the job. A little work with a die grinder to smooth out the little barbs where the stock one is staked in and you are good to go.

I've used them for years on race cars.

fujioko
fujioko Reader
6/11/14 9:08 a.m.

In reply to jgrewe:

Cool!

I suspected u-joints were available but hadn't researched it yet.

Thanks!

fujioko
fujioko Reader
6/17/14 8:07 p.m.

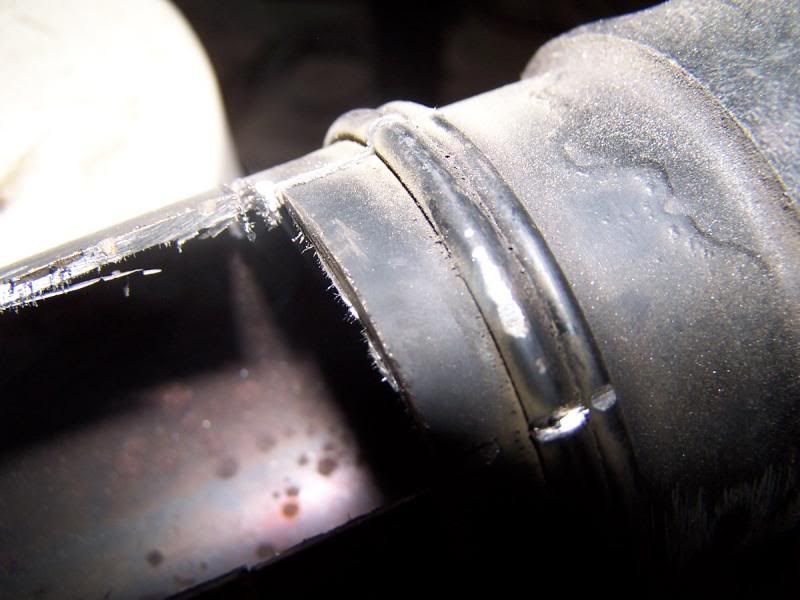
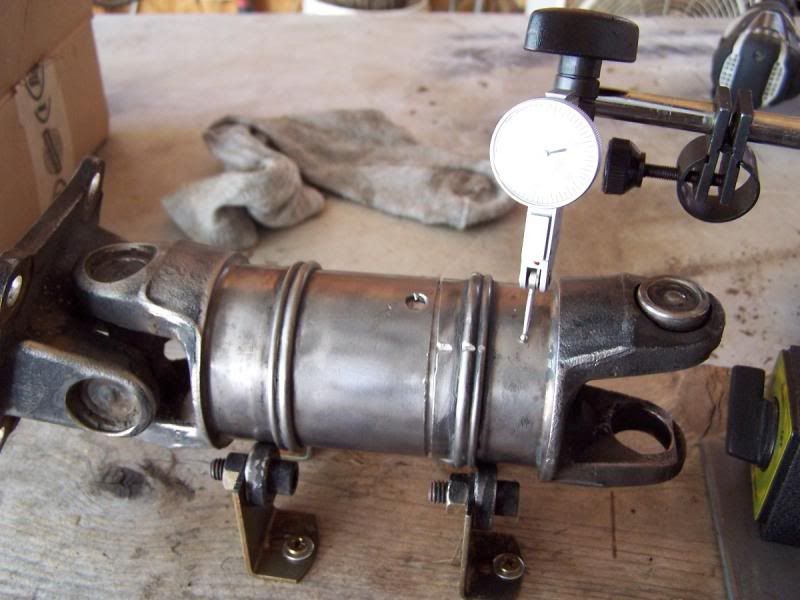
The Miata drive shaft is a real WTF when you actually take a close look at it. I still don't know how its put together, but somehow Mazda made it work. Folk's, this is borderline witchcraft.

Although somewhat difficult, the U-joints eventually come out and are not really an a problem...... . The issues I had were with how the yokes are friction welded to the drive tube. It would appear the yokes cannot be easily salvaged and I needed a plan "B"..... however when it comes to driveshafts.... there is no plan "B".... if you follow me.

So...

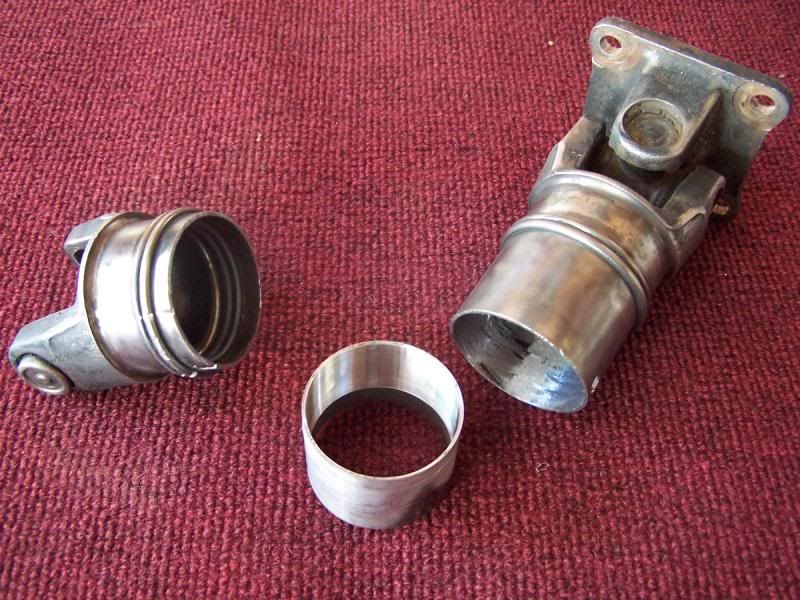
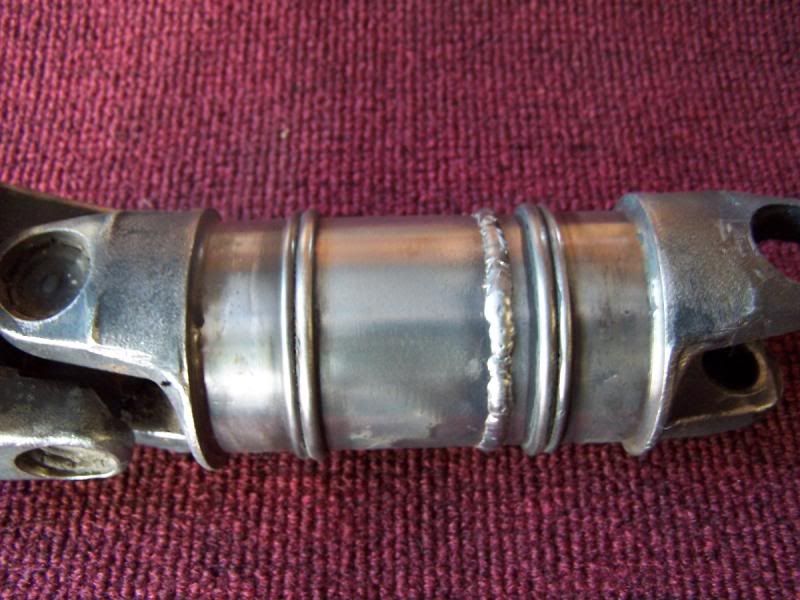
Plan B: Sleeve weld.

Sleeve welding a driveshaft isn't the best and would more than likely fail on a car. My application is somewhat different so I'll see what happens.

After cutting open the drive shaft and seeing the inside, it was head scratching time.

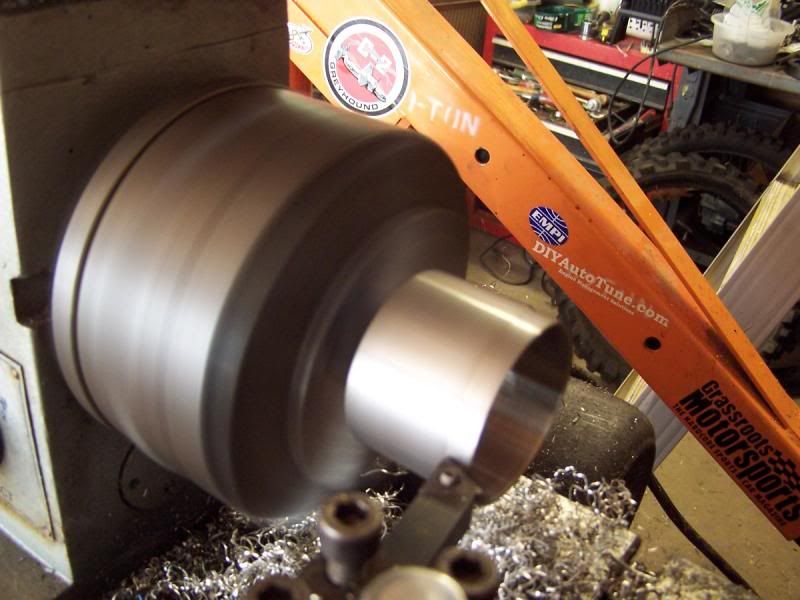
A sleeve was harvested from a smaller diameter Volvo driveshaft. A quick visit to the lathe trims off a few potato for a perfect fit.

Soon...

The shortened shaft it assembled and the yokes aligned good enough. and the whole works is ready to be welded up solid.

There it is folks, the worlds shortest Miata driveshaft. From yoke to yoke it works out to be potato centimeters.

U-JOINTS....

Replacing the u-joints in a Miata driveshaft used to be somewhat controversial. Years ago It was thought that only heretics did this sort of butchery. Times have changed and its now OK to replace the U-Joints on your non-serviceable driveshaft.

A little internet sleuthing will yield many different ways to remove the old u-joints. All of them are a pain in the ass. From what I can gather, It ain't easy, but it can be done.

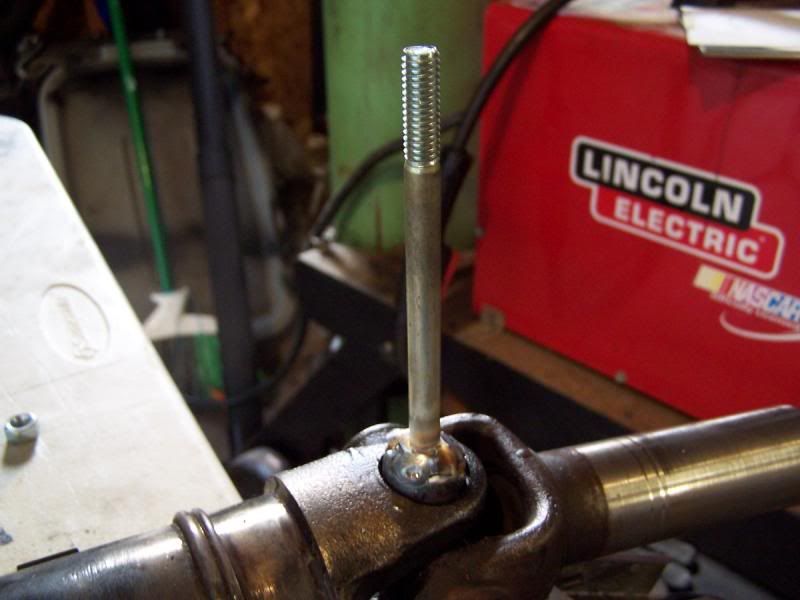
A lot of times you can cheat the demons of engineering with a MIG welder. Welding steel with the power of Thor will free your mind and let you think outside the box.

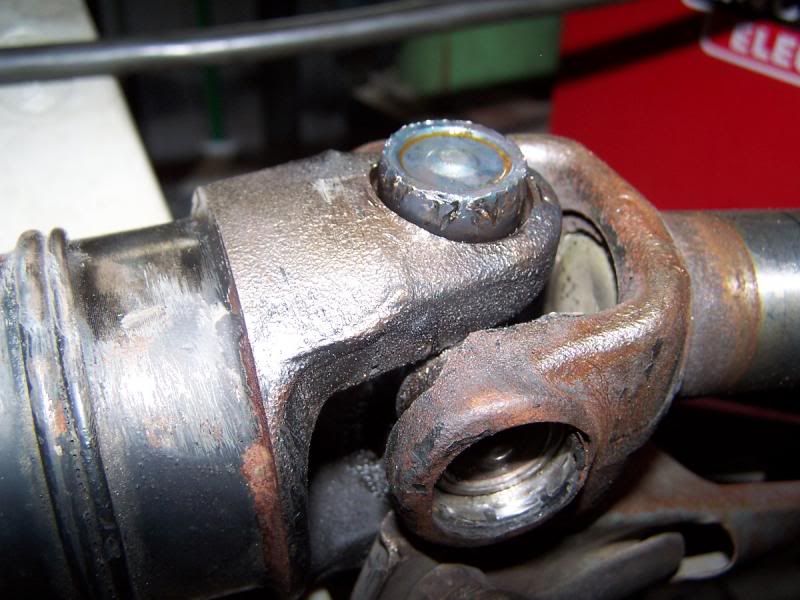
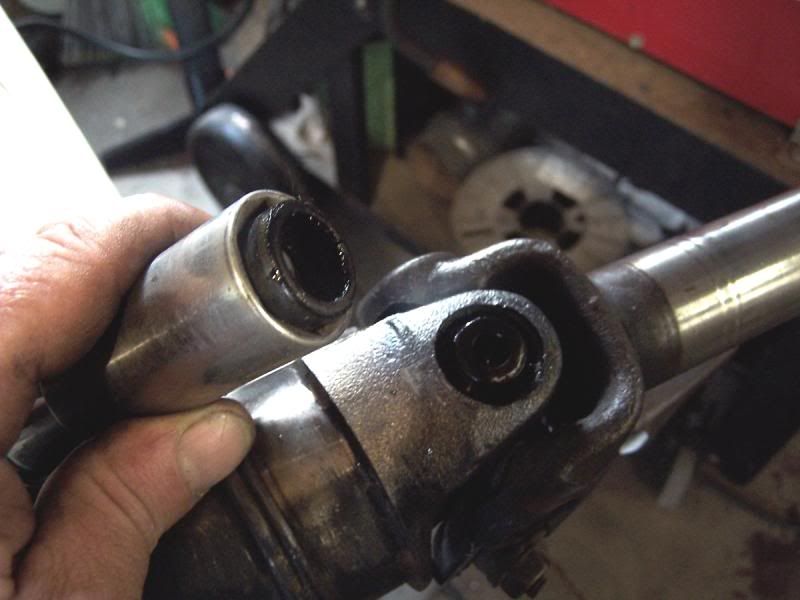
Anyway, one of the bearing caps was being somewhat difficult to get off. So I said berkeley it, I'll just add the part I need to make this work better.

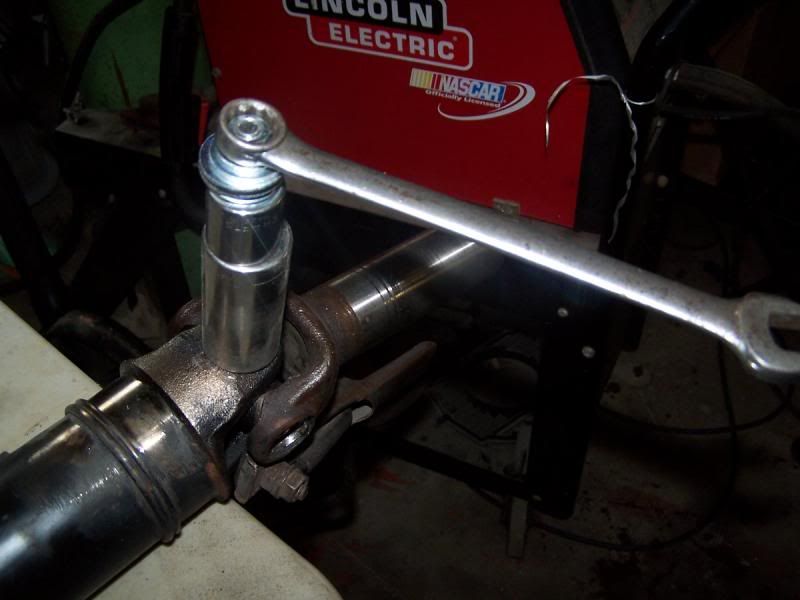
I zapped a bolt on to the bearing cap and used a few sockets and pulled the cap off the yoke in about a minuet. Damn Skippy. that's one slick way of gett'n em off.

That's all I got to say about Miata U-joints.

This bearing cap resisted a troop of vice grips before yielding to the power of Thor.

Bzzzzzap..

A few sockets and a wrench....

Damn Skippy. that's one slick way of gett'n em off.

Stay tuned!

jgrewe
jgrewe Reader
6/17/14 9:32 p.m.

Easier way is to take a torch to the "X" part of the u-joint. Once the center is gone you just tap the bearing caps in toward the center. Clean the little barbs out of the bores and you're ready to install the new ones.

fujioko
fujioko Reader
6/17/14 10:14 p.m.

In reply to jgrewe:

Hell yeah, the torch trick is easier. Thanks for the tip!

wearymicrobe
wearymicrobe SuperDork
6/18/14 12:23 p.m.

Please bolt the model T up to this in some fashion.

erohslc
erohslc HalfDork
6/18/14 1:42 p.m.

Whatever you do, please keep in mind how much energy can be released in a dyno cell, and plan for safety:

http://speedtalk.com/forum/viewtopic.php?f=1&t=40233

jgrewe
jgrewe Reader
6/18/14 3:10 p.m.

Holy crap! Looks like a Cummins with a huge hair drier hooked to it. I know my truck makes about 800 ftlbs of torque with very little done to it. That monster was probably about 1000hp and near 2000ftlbs.

fujioko
fujioko Reader
6/20/14 10:00 p.m.

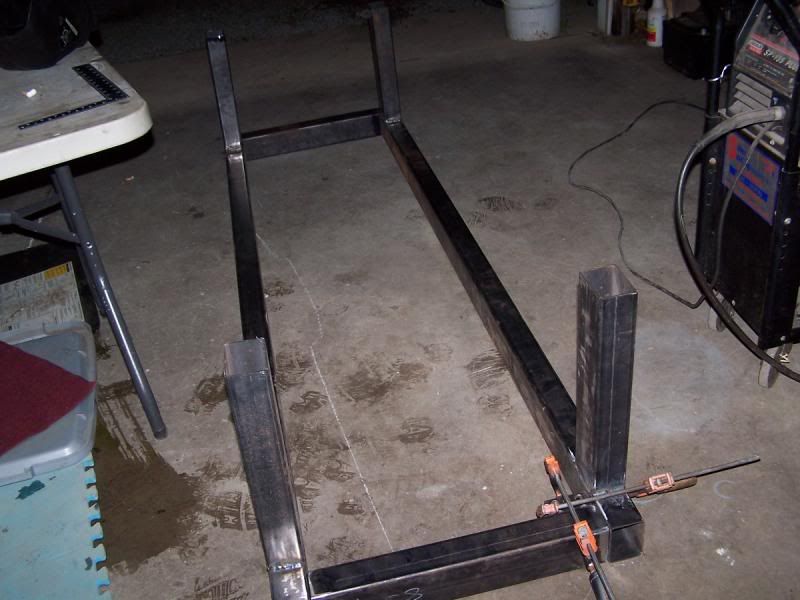
With the majority of the PAU figured out, it was time to move on to the engine stand. The parts were gathered and roughly assembled on a flimsy table to determine how large the stand should be. A few dimensions were noted and the madness began.

In a coffee fueled manic build session I was able to design and build the bulk of the dyno chassis. The build went well into the night and I occasionally took a break to light off fireworks. It's hard to annoy my neighbors but I try. I wish more nights could be like this.


All the ducks in a row.

cut, weld..... then light off some bottle rockets while the steel cools off.
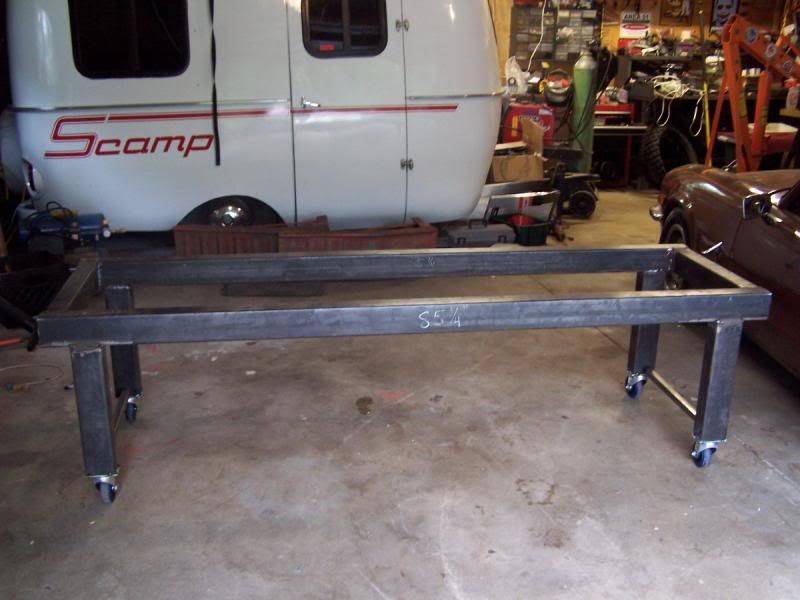

.......rolla


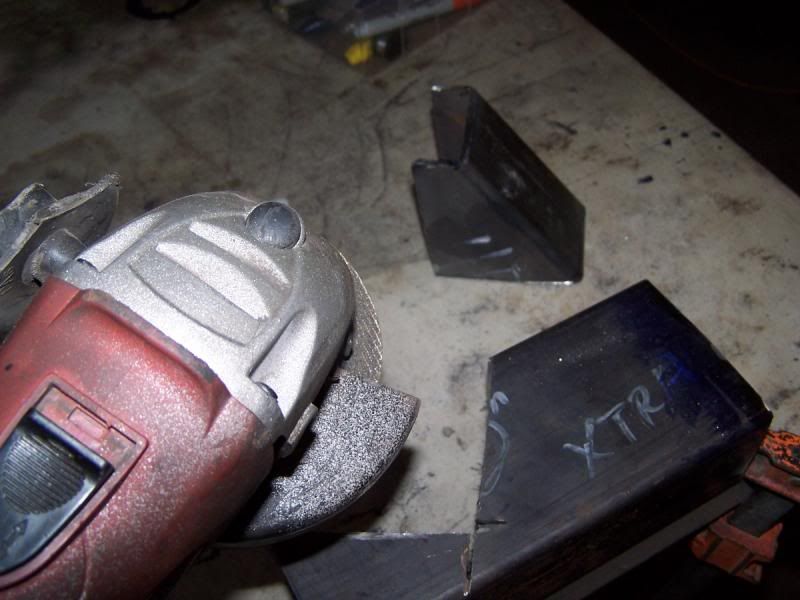
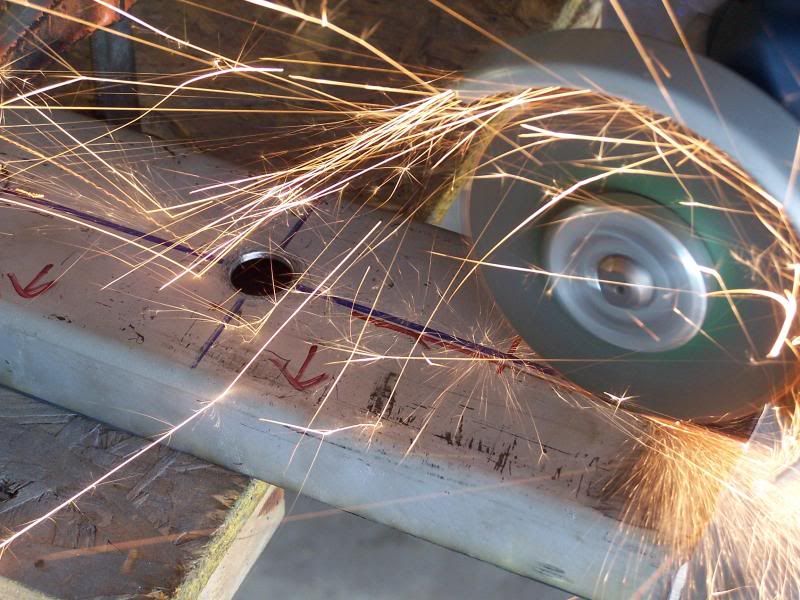
Carving out motor mount brackets with an angle grinder.

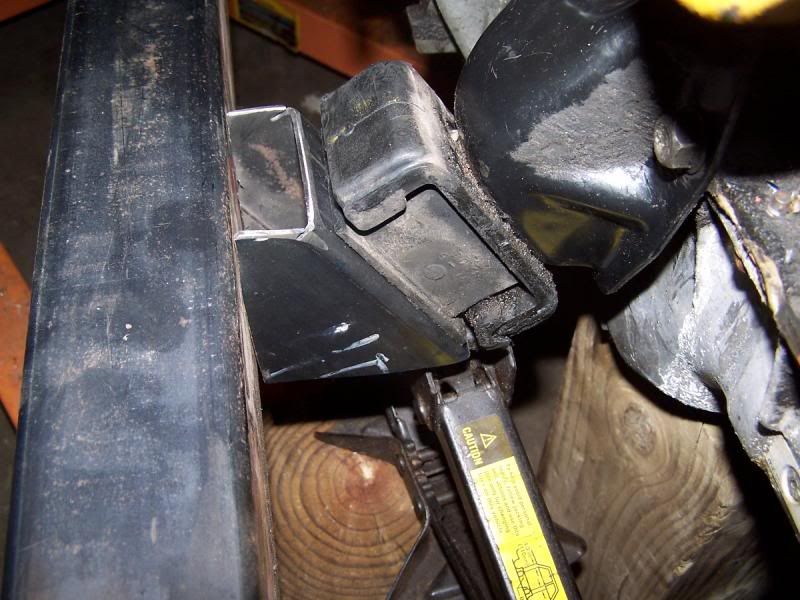
Test fit... looks good!

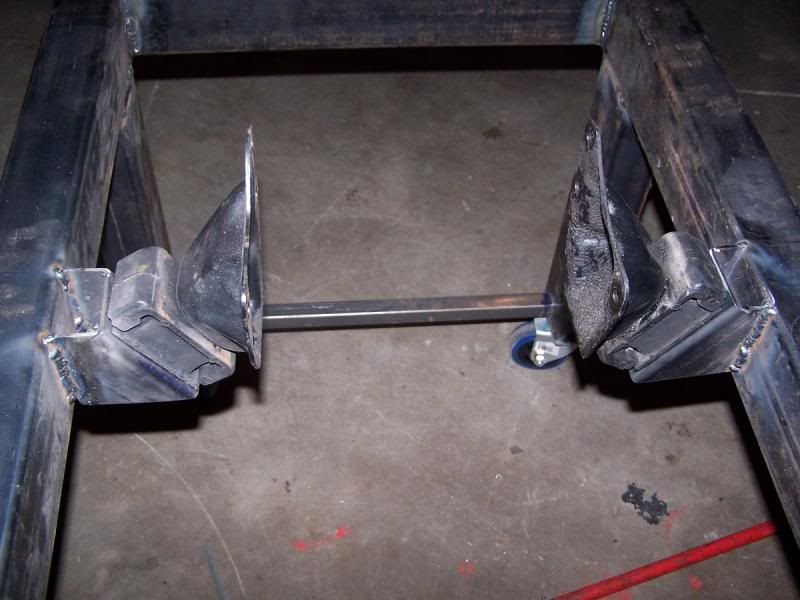
Ready to receive an engine.

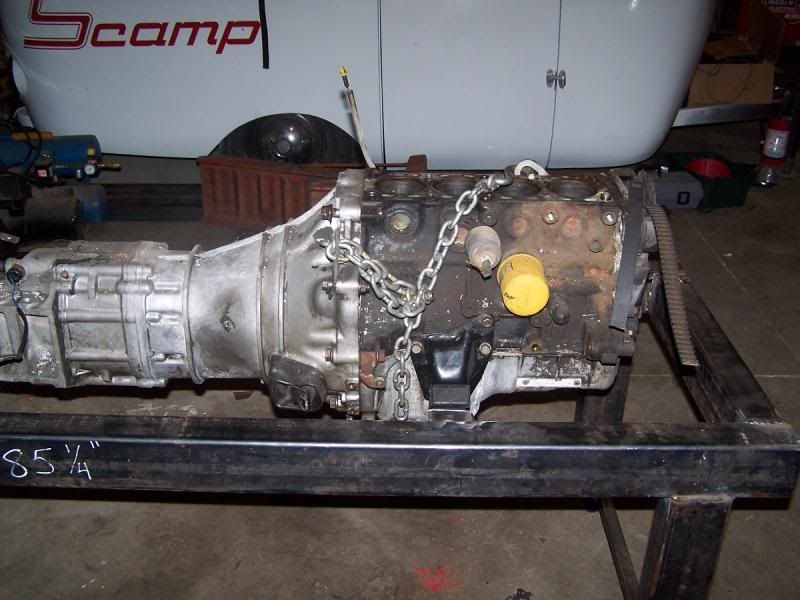
Mounted....

The dummy engine I used is a Miata 1.6. This dyno will work with the B3 Festiva engine as well as the Miata 1.6 and 1.8.

Stay tuned!

fujioko
fujioko Reader
7/4/14 9:08 a.m.

With the engine mounts in place, it was time to figure out the transmission mount. Some of you folks are aware that the Miata transmission uses the PPF for a rear mount and there is no conventional method of mounting.

I used a transmission mount from a 77 Chevy Nova with a 350/automatic. Basically I punted and got whatever mount was cheap and available. The mount was seven bucks and change.

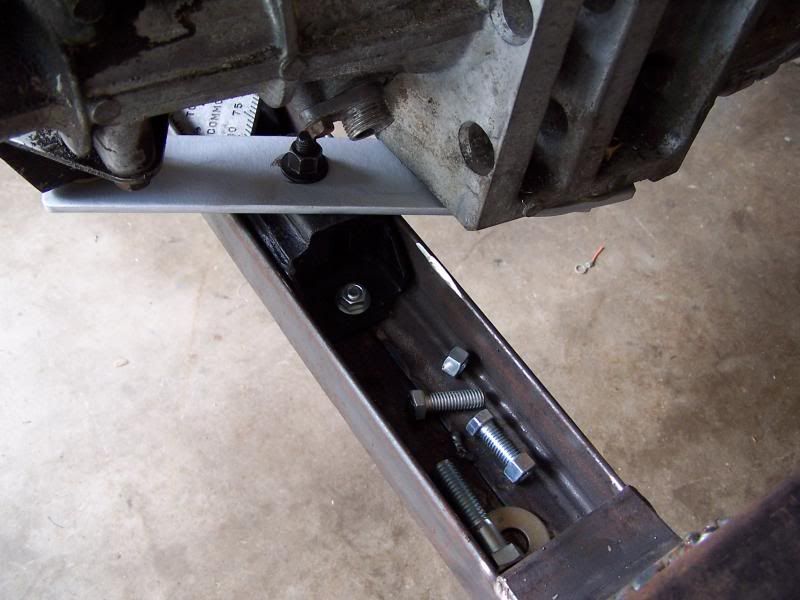
A bracket was fabricated to put the mount on the centerline of the transmission. An additional torque arm will be fabricated to hold the transmission in alignment while under load.

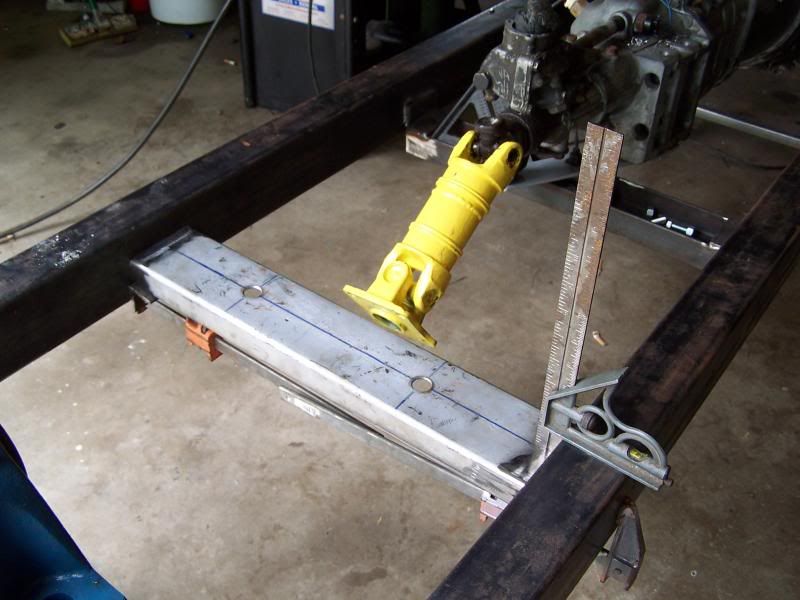
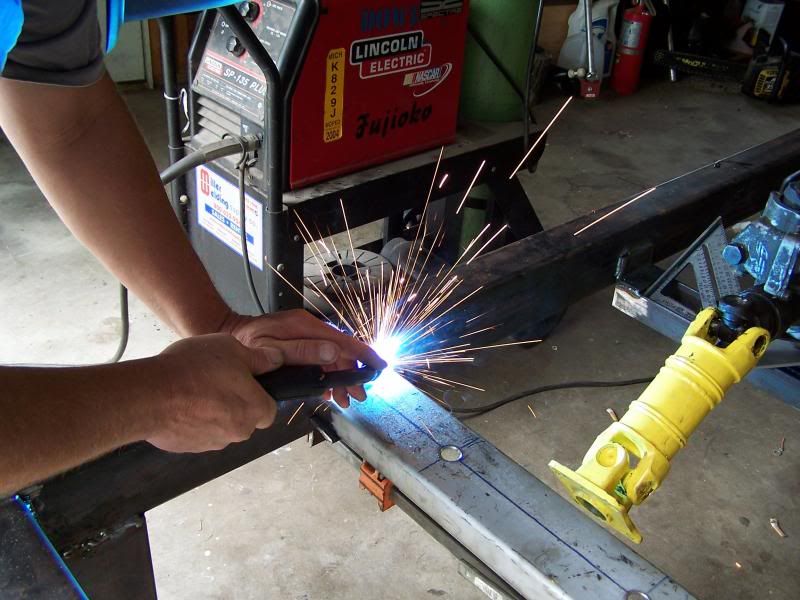
The PAU mounts were also fabricated and I ran into a bit of an interference issue on the last mount. This is what happens when you don't plan anything. A little bit of cutting and all was well.

Let's looks at some fourth of July fireworks... fujioko style....

A 1977 Chevy Nova transmission mount fixes Mazda's mistake.

Aligning the PAU crossmember.

Happy 4th of July!


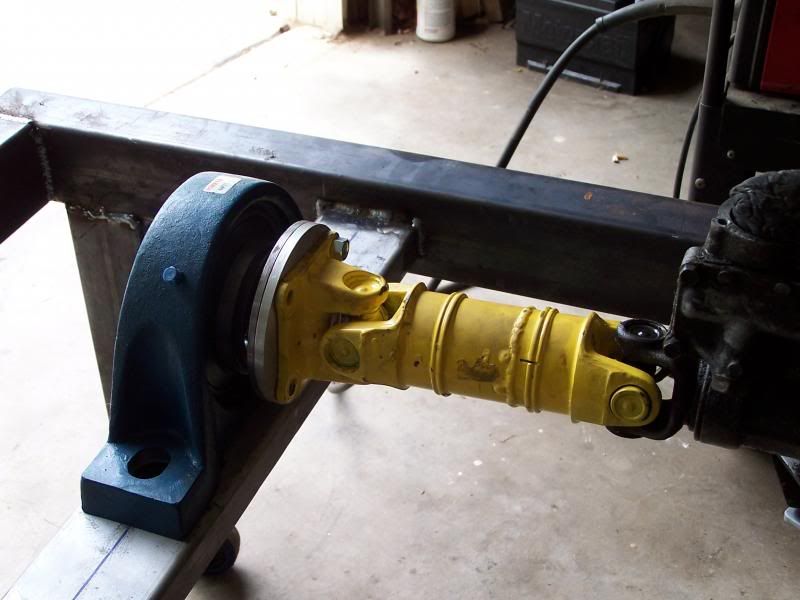
PAU bearing in place.. all looks good.... oh wait.... not enough space to fit the PAU into this contraption...

Cutting steel and making sparks is fun.

Its a close one... next time I'll measure twice before welding.

Happy fourth!

Stay tuned!

fujioko
fujioko Reader
7/5/14 3:13 p.m.

The berkeleying engine......

This project revolves around a custom-built 1.3l engine. By combining select parts from an Aspire, Festiva and Miata engine you will end up with the B3 Stealth powerplant. The theoretical horsepower remains in the Sixtyish neighborhood however the Frankenstein engine is a bolt in on the Miata chassis.

I figured it was time to actually build and install the hybrid engine so I could work out the radiator mounts and whatnot.


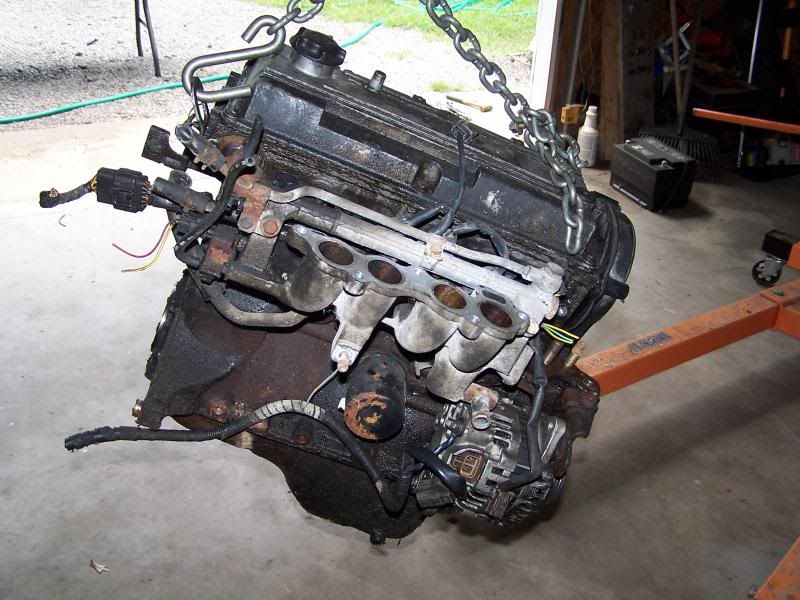
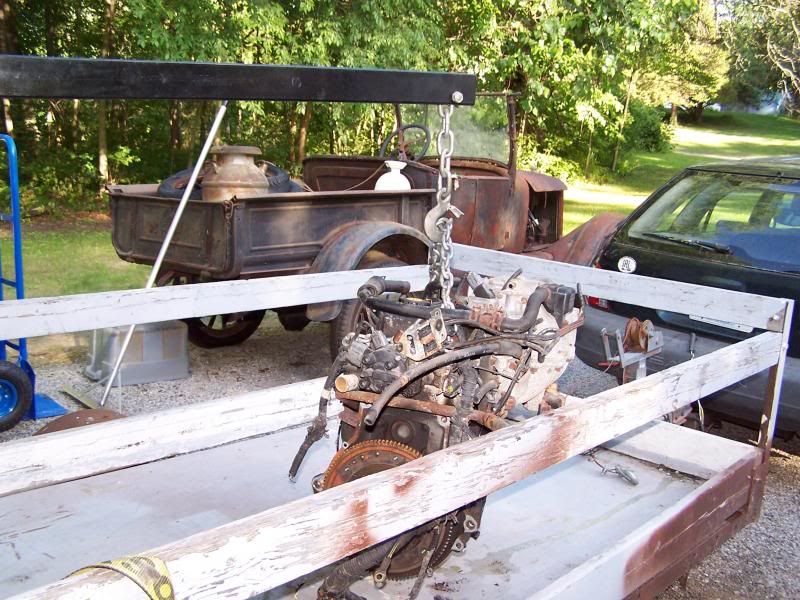
This engine has occupied premium space in my garage for several months.


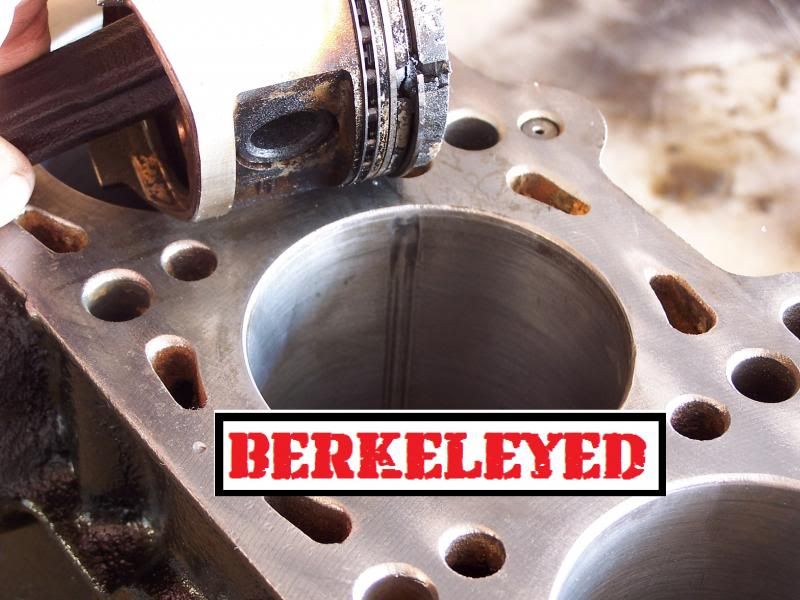
The chosen engine was hauled out of storage and disassembled for a quick cleanup. berkeley! berkeley berkeley berkeley! the engine is berkeleyED!!!!!!!!!!!!!

My goal is to have the engine running by the 2nd week of July and this was a HUGE setback.

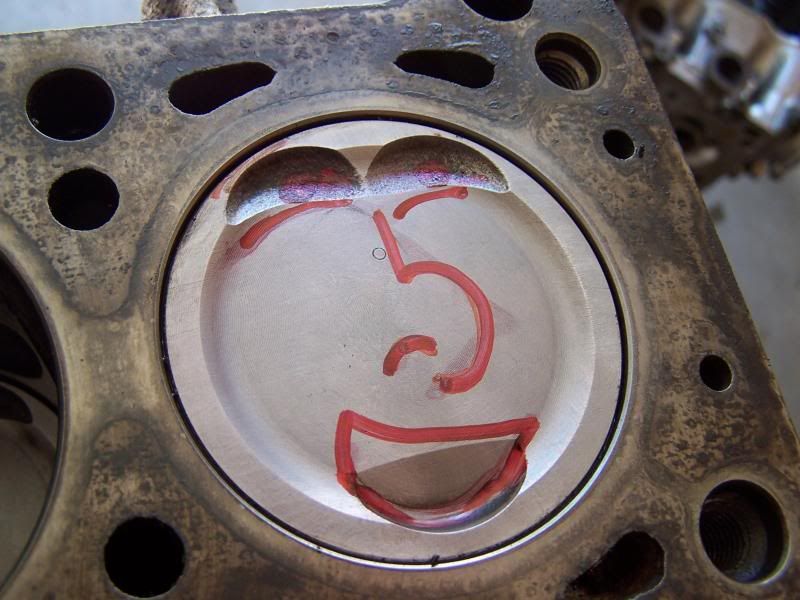
I drew a cartoon of what happened next.....

NEW greasy pig arrives......

I like the cut of the jib, this engine is going to be a winner.

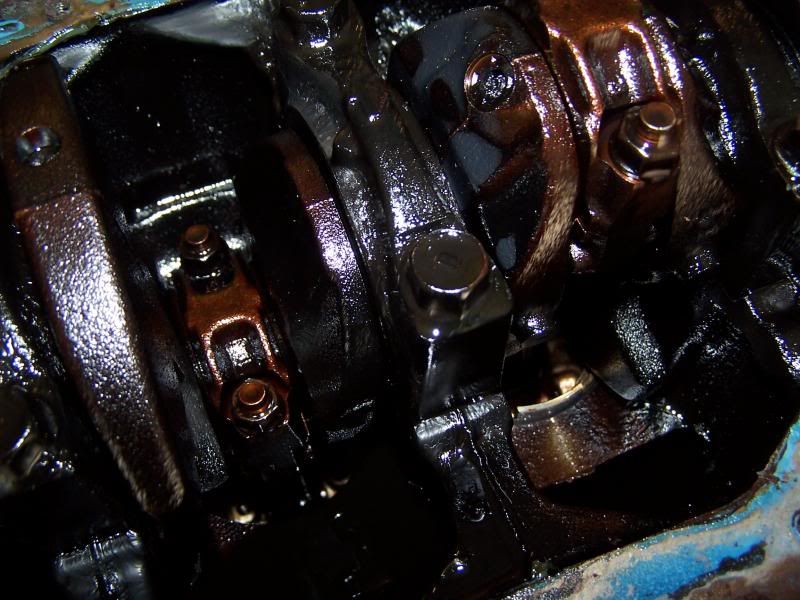
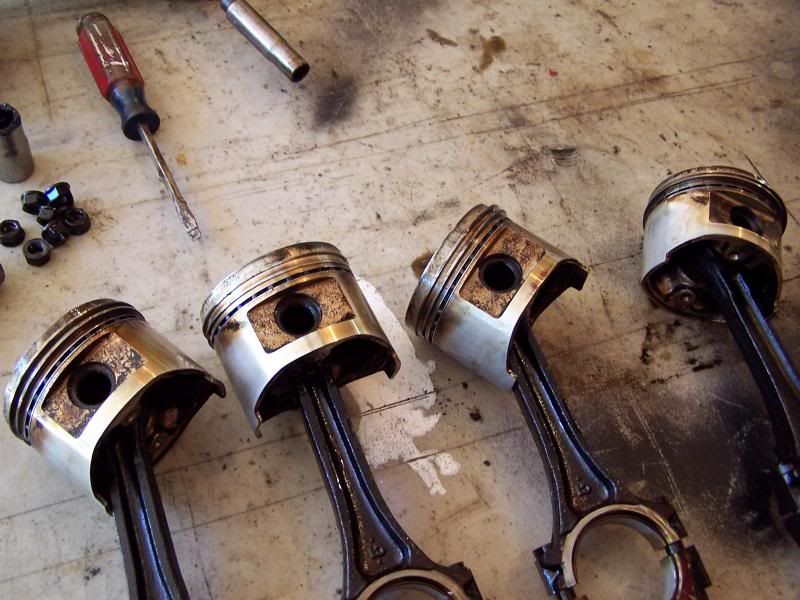
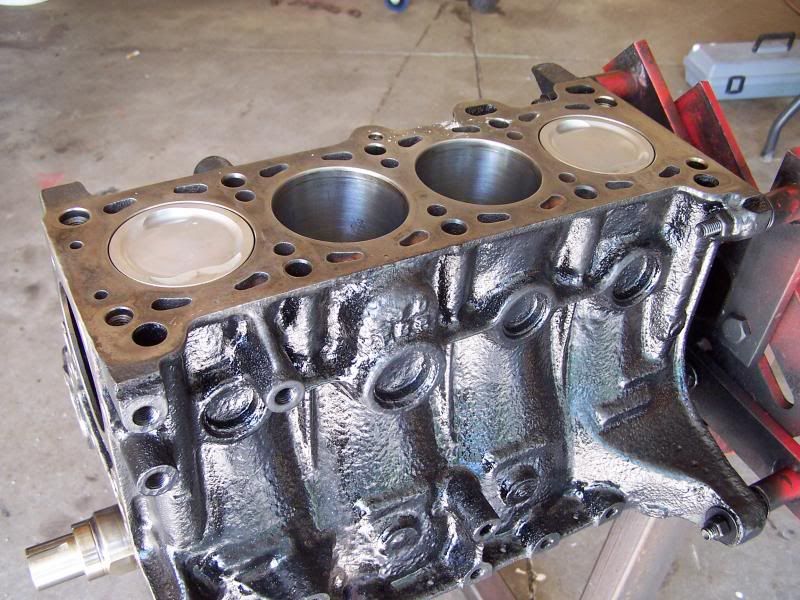
Cheap cars have cheap owners and sludge build up is not uncommon. Although this NEW engine has significant sludge, the important bits were in near perfect condition. The seller said the engine was a "good runner" and I believe him. I saw no reason to replace the piston rings and bearings at this time. Once I get some baseline data I'll tear into the engine again and try some coatings and magical elixirs. For now, I'm happy with a basic cleaning, hone and new gaskets.

I have seen a lot worse.... These pistons look pretty clean for 180K miles.

Short block all cleaned up and reassembled. This is the starting point for building the B3 powerplant.

Stay tuned!

fujioko
fujioko Reader
7/14/14 7:40 p.m.

The new B3 engine is almost finished. I'm still waiting on a few more parts to arrive, but things still look good for the first start this upcoming weekend.... fingers crossed.


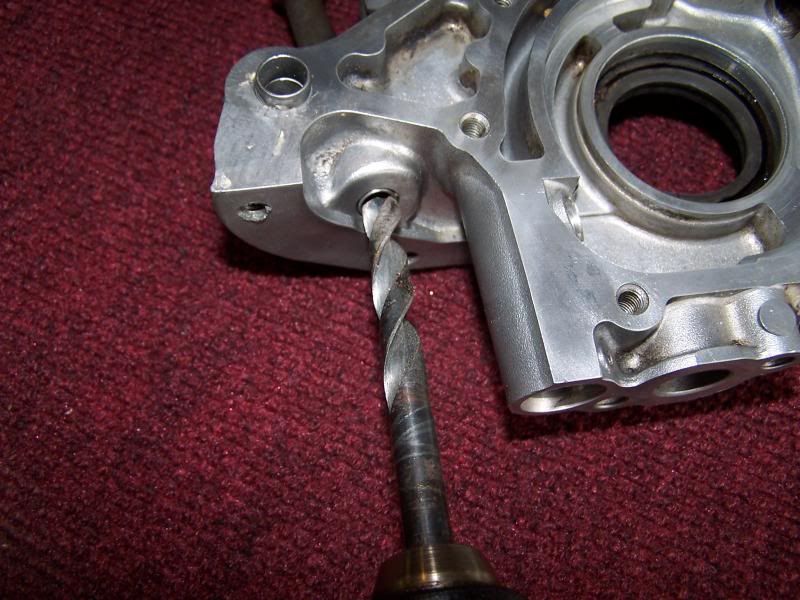
The Aspire/Festiva oil pump housing needs to have the dipstick removed because of clearance issues. This dipstick isn't going to be used because the Miata oil pan has a built in dipstick. The hole was filled with a 5/16 bolt with a nylock nut.


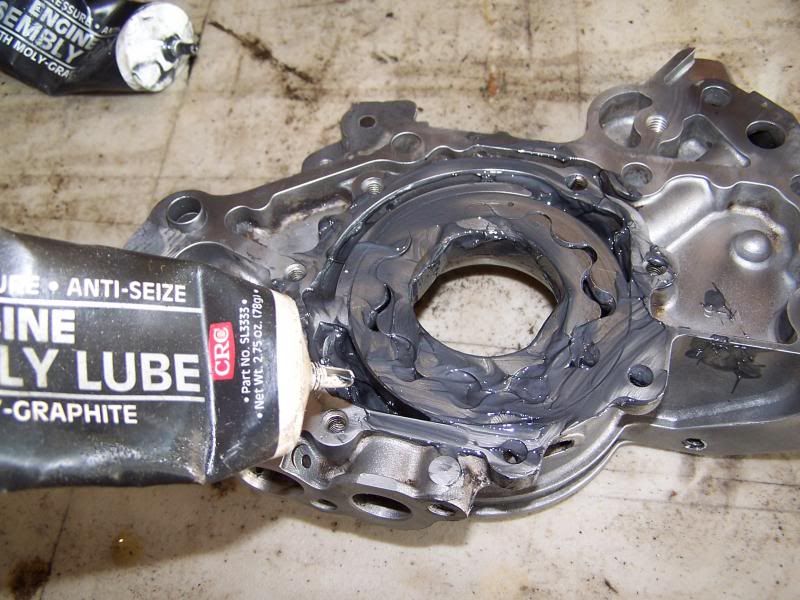
The oil pump is packed with assembly lube before reassembly. I'm using the pump from the NFG engine because it looks to be in really good shape. New pumps are still available but I think I'll take my chance on this used one.


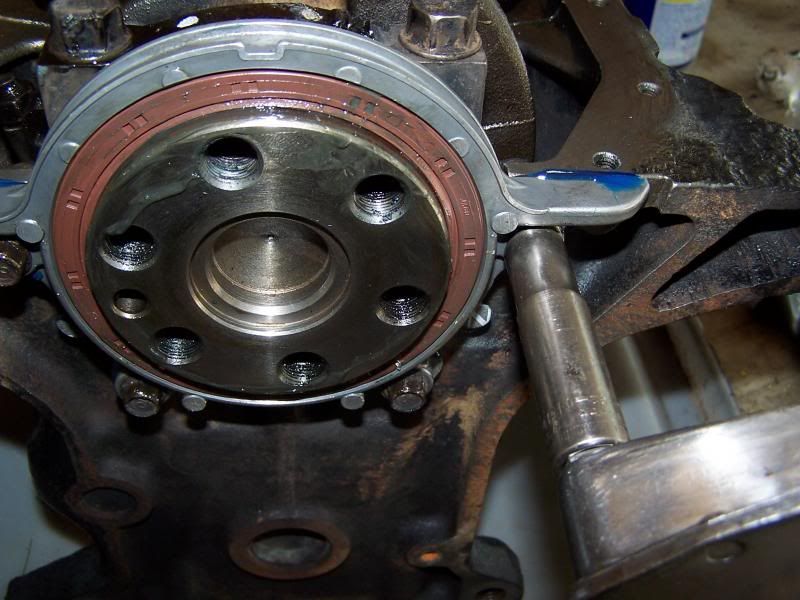
A Miata 1.6 rear seal retainer is used.


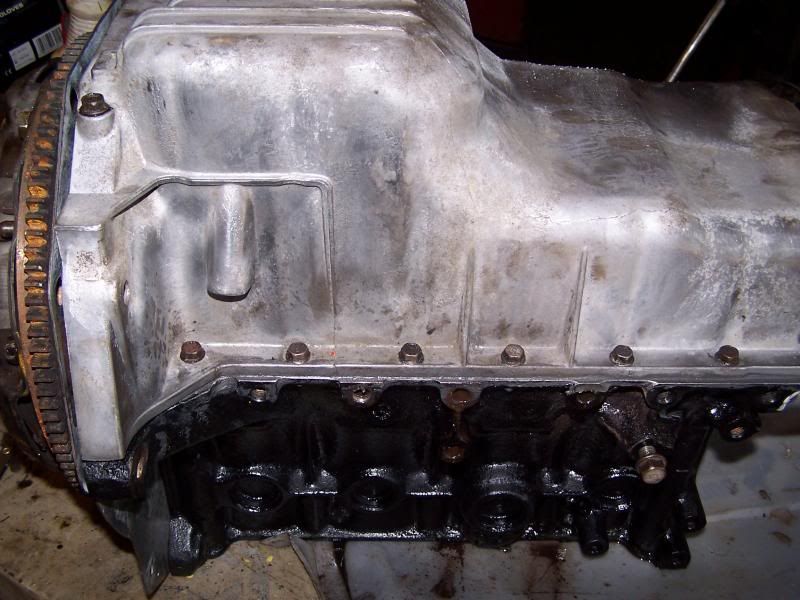
The Miata 1.6 oil pan is fitted to the Aspire block. Its a perfect fit!


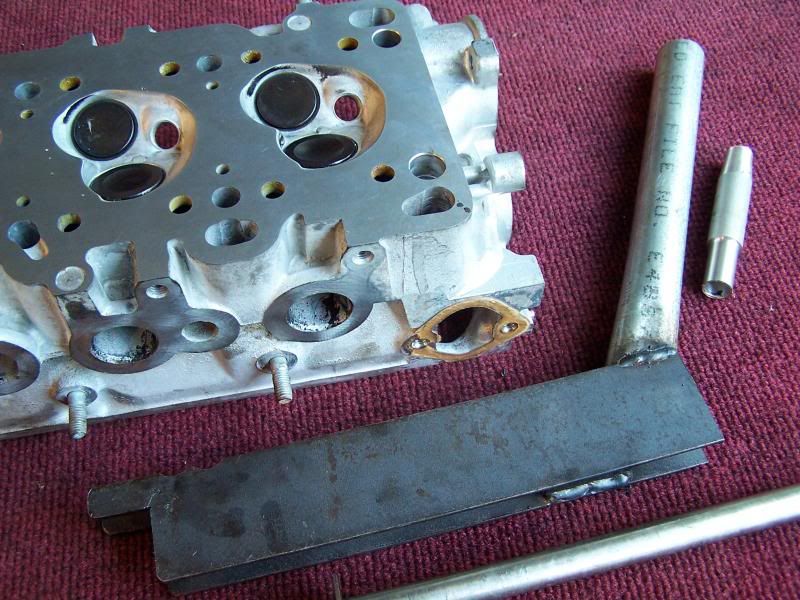
I had to fabricate some tools to get the valve springs out and to insert new valve stem seals. The head was sent out to get surfaced. The bill was thirty bucks to clean and mill ten thousandths off the head. I lapped the valves when the head returned from the shop.


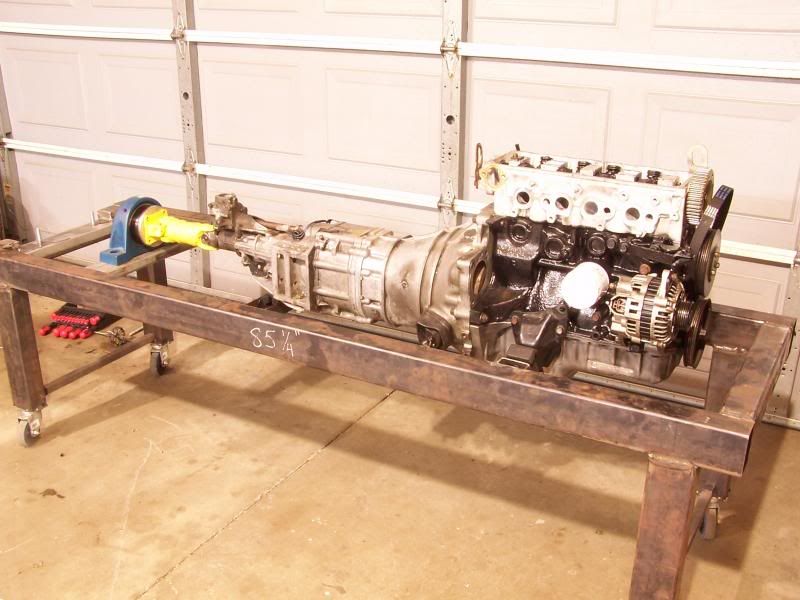
The engine/transmission combo is installed onto the test stand to work out radiator and other mounts. I have fallen behind in collecting photos and the project is a lot further along then the photos suggest.

Stay tuned!

1 2 3

You'll need to log in to post.

Our Preferred Partners
k2eDPGQOb2trKuUEWNp8MIdg7L5UKf1mzYa8uoGcr0PT9Qhw5f56lHkW4u2cnmJx