


In reply to Pete Gossett (Forum Supporter) :
No problem! Rattle cans i generally do 10 plus feet in humid conditions when im spraying large amounts

In reply to Pete Gossett (Forum Supporter) :
No problem! Rattle cans i generally do 10 plus feet in humid conditions when im spraying large amounts
previously
budget spent: 1832.46
recoup: 1000
new money
prorated materials that ive used the last of like butyl tape and chassis paint
blaupunkt head unit: 13.98
front and rear speakers from the parts cars
kosei k1s came with the piles
dual pillar pod: 8.73 (actually had it from god knows where, but it was new so I found a price)
rear .75 sway bar from second gen rt at pull a part: 25.39 all in
rear sway bar end links for the swap: 22.25
New total: 1881.34
recoup: 1000
so, ive actually sold off quite a lot more stuff that I cant count for recoup. But, its real world budget! And the trade pile for my bodywork supplies keeps getting bigger. He really has no idea what hes in for when he comes to pick up. Hope he has a big truck.
Anyway, when we left off with a full update, the car was equipped with a few bits of interior, beautiful paint on the sides, no glass, and a little bit of this and that.
Well, ive been busier than a one armed wallpaper hanger!
I guess well start with roller status. I had the rear suspension mostly cleaned and painted in the last update. I rebuilt and lubed the emergency brakes, and ran the rotors on the brake lathe to clean them up. Went ahead and painted the hats and such with cast coat iron while I was there to give them a clean look for a while. Also used a light brushing of leftover rustoleum safety red on the calipers, because red calipers. They just make me happy.
 20200617_132512 by Michael Crawford, on Flickr
 20200620_184416 by Michael Crawford, on Flickr
I also refinished the konis. They had been sprayed some florescent yellow previously, were crusty and rusty. The mopar xxhd springs were pretty bad as well. So Mary and I pulled them apart, rattle canned the springs and strut mounts.
 20200614_090641 by Michael Crawford, on Flickr
I put the konis in the workmate and cleaned them up with the knotted brush on the grinder. Then painted with the valspar. Came out way better than I was expecting.
 20200615_094600 by Michael Crawford, on Flickr
 20200615_094611 by Michael Crawford, on Flickr
 20200617_081359 by Michael Crawford, on Flickr
we also chucked the suspension hardware through the wire wheel and painted with some random silver I found in the cabinet.
 20200615_142604 by Michael Crawford, on Flickr
once we had all of it cleaned, painted, bushed, etc, it was time for assembly! And yes, I probably qualify for OCD. I also never took a picture of the sway bars, apparently. Will correct that at some point.
 20200616_073804 by Michael Crawford, on Flickr
 20200617_181239 by Michael Crawford, on Flickr
after this, I moved inside for a minute. Reason being, its amazing how much more volume a car takes up when disassembled. Especially interior pieces.
We started by refinishing all the window surrounds with rustoleum satin black.
 20200620_100841 by Michael Crawford, on Flickr
pulled the door handles out of E36 M3box, as they were in way better shape than the ones from the acr. The window rubbers from the rt were in better shape, so they were used. And the ACR door weatherstripping. I grabbed the roll if butyl tape, and used 9 feet to install the quarter windows.
 Screenshot_20200612-223023_Amazon Shopping by Michael Crawford, on Flickr
got the doors rebuilt, adjusted, door glass in, etc.
 20200620_173656 by Michael Crawford, on Flickr
you can tell when looking close that this is not exactly chronological, but its the way that makes the most sense in retelling. I kinda work in circles and a nonlinear fashion. Jump around a bit depending on what parts are underfoot, on hand, or have to go in prior to what I want to put in.
on the inside of the car, I went ahead and put one rear panel from the RT, one fro the ACR, the package tray covering from the RT, rear seat from RT, squiggly door panels from the pile, front sport squiggly seats from the pile, acr embroidered head rests from the pile, sun-visors and headliner from the rt, and the best dash parts from all the piles. For the stereo, stock speakers in the dash, 6.5 woofers that I put in the doors in 2012, 6x9 from E36 M3box, and the $13 blaupunkt receiver that is remarkably almost adequate! Everything was scrubbed, shined, screws tightened, clips adjusted, etc. make it the best I could with what I have. I used the console from the rt with the funky maddog shifter and a 1st gen boot. I also got rid of the frog eye pod for a pillar pod rocking the ancient and faded ultralights that I put in in 2012 and came back to me. Replaced the steering wheel with one from a sebring that was in way better shape, and re-purposed the clock spring airbag wiring for nitrous switch wiring. Neon embroidered floormats from E36 M3box. Ill give you the overall, then show you how I got there.
 20200630_075242 by Michael Crawford, on Flickr
 20200630_075259 by Michael Crawford, on Flickr
 20200630_075309 by Michael Crawford, on Flickr
 20200630_075331 by Michael Crawford, on Flickr
 20200615_200602 by Michael Crawford, on Flickr
so, guess ill start with the steering wheel. I had a feeling that a sebring leather wheel would be identical to the neon wheels. So I bought the cheapest one I could find on ebay to replace my wrecked stocker.
 Screenshot_20200629-190038_eBay by Michael Crawford, on Flickr
its identical except for coloring. Everything else is bang on. So I stripped it bare, and used a few coats of shoe edge dressing to make it black instead of dark gray.
 20200624_173039 by Michael Crawford, on Flickr
reassembled with a push button switch in the cruise pod, and it looks mint!
 20200625_203152 by Michael Crawford, on Flickr
as far as the seats go, that was a fun ordeal. These were by far the most degraded sets of foam, and filthiest covers I have EVER had the misfortune to work with. Near as I can tell by pictures of when I bought this car the first time, these are the original seats. When I got the piles back, we pulled the, from the upper story of Nates uncles tobacco barn where they had been since 2013. they were funky then, and then got tossed in my crawl space for a couple years. That didn't help things.
So, I started with purple power and the pressure washer. Let me tell you, the dirt that came out of, and off these seats was almost biblical in its amount. Just wow. This is after two rounds, by the way. You can see in the bolstering just how wrecked the foam is. Like, there really wasnt any on the drivers side, and passengers is just a suggestion.
 20200624_082944 by Michael Crawford, on Flickr
I looked at my availible parts. I have ONE good set of foams, a passengers side from the rt. And its not perfect, but usable. I took a comparison shot to try to show the difference.
 20200629_134524 by Michael Crawford, on Flickr
stripped down
 20200629_163102 by Michael Crawford, on Flickr
takes a little clearance the foam to make a passengers side back work on the drivers side. I also took the liberty of adding a little memory foam from a free memory foam mattress topper to the bolsters, and filling the voids left in them by the seat frame. Before the foam though, I needed to reinforce the broken spots of foam. Little spray glue, some pieces of old bedsheet from the rag box, and done!
 20200629_170552 by Michael Crawford, on Flickr
 20200629_170754 by Michael Crawford, on Flickr
 20200629_171706 by Michael Crawford, on Flickr
 20200629_173257 by Michael Crawford, on Flickr
and put it all back together.
20200630_075331 by Michael Crawford, on Flickr
so, we also went after the engine bay. Cleaned all the electrical connectors, cleaned the harness and cables, put into place. Cleaned and painted the iceman battery tray as well, and started to make a pair of mint battery cables fro a few sets of stock parts.
 20200627_161305 by Michael Crawford, on Flickr
 20200627_161259 by Michael Crawford, on Flickr
we also prepped and reshot the roof and hood. Still need wetsanded and buffed to perfection, but so much closer!!!
 20200630_165256 by Michael Crawford, on Flickr
 20200701_091642 by Michael Crawford, on Flickr
 20200701_094138 by Michael Crawford, on Flickr
 20200701_094708 by Michael Crawford, on Flickr
 20200701_095732 by Michael Crawford, on Flickr
 20200701_101855 by Michael Crawford, on Flickr
time for another part out.
 20200701_081556 by Michael Crawford, on Flickr

Inspirational work there.
If it helps your budget, I'm glad to pay for the intake we discussed anytime. Let me know.
In reply to wheelsmithy (Joe-with-an-L) (Forum Supporter) :
Nah. Just whenever you can come east!

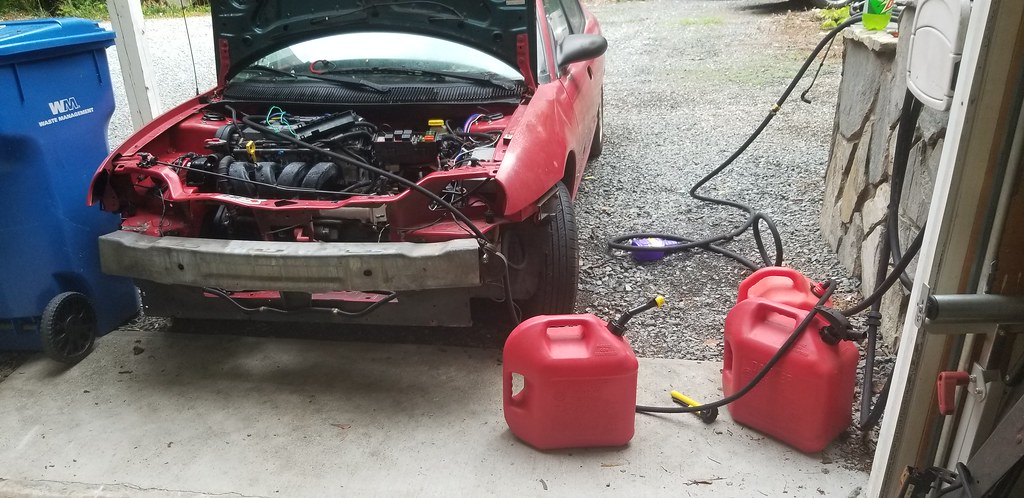
I have too much neon in one confined space. However, the red one will be pushed back out by the end of theday. Engineless. With the parts i need otherwise remaining inside as well.
 Munchkin, stu laswell and i got the engine out of E36 M3box today. Did NOT go according to plan. Dropped the car when manhandling it out of the shop to get room for the cherry picker, barely missing stus foot and catching my hand and wrist pretty good. Hand hurts bad, and is very swollen now. Time to quit.
We put the new cover on the car since everything will be happening in the other bay for a while....


Hope the hand is ok!
In reply to java230 :
Yeah, its the one that I already have problems with. Carpal tunnel, and some joint damage in the thumb.
Gotta see the orthopedic specialist anyway.....

Sorry about the hand. I come here for my daily dose of AWESOME and don't need you disabled.
Were ya doing something sketchy when it all went wrong?
Pete
In reply to NOHOME :
Yup. I had planned to go out the bottom with the pull. Hot it bound up on the axles that wouldn't break free of the spindles. So, couldn't roll, the.car normally, couldn't get the cherry picker out, and was running out of options. My genius ass decided to use the floor jack on the core support as front wheels to pish the car sideways in the bay, then half out the door to get cherry picker room to come out the top. I was heaving like a motherberkeleyer on the core support to make it roll and pushed it right off the Jack
Like a dumbass
With no safety precautions whatsoever.
Im lucky it wasn't way worse
Glad it wasn't worse....
java230 said:Glad it wasn't worse....
Same. Could have been truly bad.
Hand feels a lot better this morning. Not as good as it was yesterday morning though. But a lot less swelling, and i can use my wrist without wanting to cry!
!!!!!!!
Glad you're (mostly) okay.

Geez Michael, you never even mentioned that you hurt your hand when it dropped. Glad to hear it's better this morning... I hope it'll continue to heal. Enjoy your "Treason Day" with your family!
I knew I got it, but it was one of those that took a few to really sink in, stu. Im still grateful it missed your foot.
So, got the engine and trans stripped down enough to pressure wash. And a bunch of parts.
Sorry. Damn near melted in the sun and heat, and didn't take any pictures of "after". Maybe tomorrow morning i will before heading to pullapart for their fourth of July sale.
Heres a couple of before. Theres multiple telltale signs in the car and engine that it was boosted before. Including a return on the oil pan. Wonder what im going to find when i crack it open.
Also, can anyone here recreate labels? I want to repop the trans information sticker if i can. It didn't survive cleaning very well despite a layer of tape protection.


Man I step away for a day and someone else decides they don't like their hands. Do we need a GRM stand down safety day? Glad it's feeling better.
Yeah. every now and then I pull a "mr safety " moment. Yesterday was a prime example. So grateful it wasn't worse.

 cleaning drivetrain parts isn't really any fun.

Dusterbd13-michael (Forum Supporter) said:Also, can anyone here recreate labels? I want to repop the trans information sticker if i can. It didn't survive cleaning very well despite a layer of tape protection.
There's a guy over on the Garage Journal board who's been supplying replacement labels for restored power tools (like bench grinders and such.) His labels look very nice and he can supply them in a variety of materials - clear, foil backed, etc. You could give him a try. https://www.garagejournal.com/forum/showthread.php?t=356439

I'd slap your hand and say "BAD!" but I don't even like you.
![]()
Stop hurting yourself. Really.
Stuart: thanks! Ill om him.
Bent: lol. Every now and then i go stupid. Ive been luckier than most so far.
This morning I woke up at about five and couldn't go back to sleep. So i went downstairs to clean parts.
Its probably a sign that im not well that I'm painting used power steering lines.

 lots of parts painted, lots more to paint.

Giggity
 NOW it can start going back together.
This also marks the second head gasket ive ever done. This one was leaking externally from a coolant passage from what appears to be a knick in the gasket. Engine has a slight ridge, and a scratch in a bore you can feel with a fingernail. However. it ran REALLY GOOD, didn't smoke, and made no noises before i pulled it from E36 M3box. So, im confident that if i keep things clean amd assembled per the factory service manual, and use the fresh gasket kit i got, ill be ok at the end. Maybe not huge power, but reliable power.
You'll need to log in to post.


