
7/21/19:
Got More Stuff done Today.
Rear end in installed and Just Waiting for a driveshaft before road testing.


After Lowering the car to the ride height I want I found that there might be some rubbing in the upper rear wheel well. Will find out for sure after road test. It seems that the O.E Ford Bullitt 17"x 8" come in different offsets, so I might swap them from another car and see if that takes care of the rubbing.
Also Did the Baer 10.98" Rotor Install and EBC YellowStuff Pads.
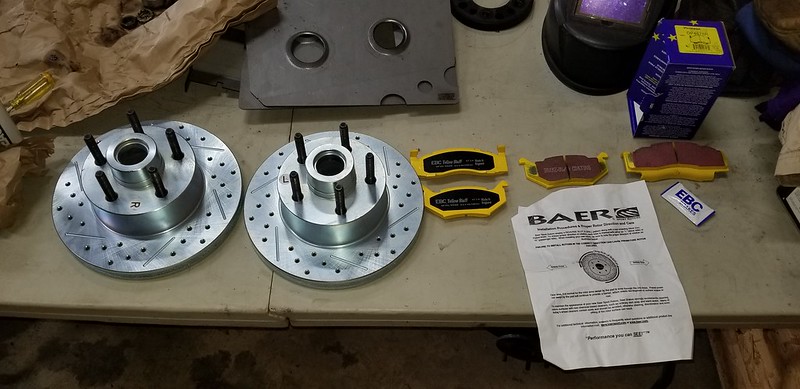
Had a new Proportioning valve that I bought a while ago. Installed that and bled everything down.
It's possible that I might get a 4 speed in there before the end of the summer. Need to pull the interior for that job, as I need to swap in the Transmission Hump / Tunnel to utilize the A833 Trans. While that is going on (whenever that is) I also have a Battery Relocate kit and frame connectors to go in (weld in) as well.
Also got a set of proper Deutchland Grüne Hölle plates. Will need to fab up a mount for the front one soon.
Greg
i dig the old mopars. thanks for sharing!

Thanks Guys.. Here's some more stuff to check out...
7/25/19:
Getting closer.... waiting on driveshaft shop now.
I found out that there are 2 flavors of factory ford issued bullitt wheels. Some iterations have +45mm offset ~ 6 3/8" backspace, while others have about +32mm backspace ~ 5 3/4" backspace.
Fortunately I have 2 sets of each. The +45's are perfect for the rear of the car with the "B" body rear end. The +32 offset works well up front with 3/4" spacers.. If I want to run the +45 offset then I have to add more spacer in the front as well as source longer 4" lug studs.
(edit): I might be able to use the +45's up front with the 3/4 Spacer or possibly a 3/4" + 1/4" spacer. The iss is 2 fold the +45's ar very close to rubbing the Upper Ball Joint.. But with more spacer I run out of usable threads on the front wheel studs.
Also ground more of the steering stop nub on the a body lower ball joints with f body spindles.

Began working on the Firm feel idler arm retrofit.
The oe stuff has just plastic and rubber inside there.. thats all.. I was surprised by the construction


Old arm shell gets outer bushings pressed into the arm housing... all metal.. adjustable..torrington bearings... greasable.

Finished product... hope to install tonite.


Greg
Im running early style bullit wheels on my 70 duster, with fmj spindles and unicast 11.75 rotors. I had to use a 3/8 spacer up front. Thats it.
Is the early a significantly different in some regard that makes wheel fitment different in regards to the suspension? Or is it brakes?
In addition, id look at hubcentric spacers with the studs installed. Theyre ~$50 a pair on ebay, and i feel much better using them vs longer studs and slip on spacers. Narrowest ive seen is 3/4 thick though.
Edit: i remember i had to grind the lip on my stock uca at the very tip to keep it from contacting at droop. And use a low profile 90 degree zerk.
slantsix said:
TED_fiestaHP said:
Great job on all the work.
A while ago there was a guy that added a turbo charger to one of these. I am sure the story is still here somewhere.
Thanks! There are a few folks with turbo Builds on www.slantsix.org as well.
I used to work with a guy who turbocharged the slant six in a late 1960s Dart, he also added a home brew fuel injection system with a Megasquirt ECU. It was pretty cool.
I had my 225 turbocharged back in the mid 90’s. It was a weird junkyard setup that my dad and I put together. In a stepside swb d150 it was pretty fun
In reply to stuart in mn :
I also have some Megasquited slant 6's - No boosted ones yet. This one Is just running ignition for now.. Maybe some day it will Get fuel on the megasquirt with 6 ITb's.
This car has had megasquirt II on it since 2008.. Running Fuel and spark. Its a bit crusty and rusty from driving in the salt for 20 Years. This would be an awesome canidate for a turbo someday!
In reply to Dusterbd13-michael :
No, The brakes clear fine No issues with smallish factory style ma mopar Brakes and 17" wheels.
It's the Upper Ball joint. There is just enough clearance although I have not road tested it. I ma not using stamped steel factory Upper control arms It's Reiley Motorsports Tubular Upper arms.... Could have better geometry that could put it closer to interference with the car and Spindle combination. My F bodies have the same Problem with these wheels... I need to use 1.5" Bolt on spacers on that application.. Thanks for the tip. I may have to look into the hubcentric spacer / adapter. So Far I have not needed to worry about them.
Greg
7/26/19:
Got the Idler arm installed, tightened and greased. no movement whatsoever compared to the O.E. plastic and rubber parts.


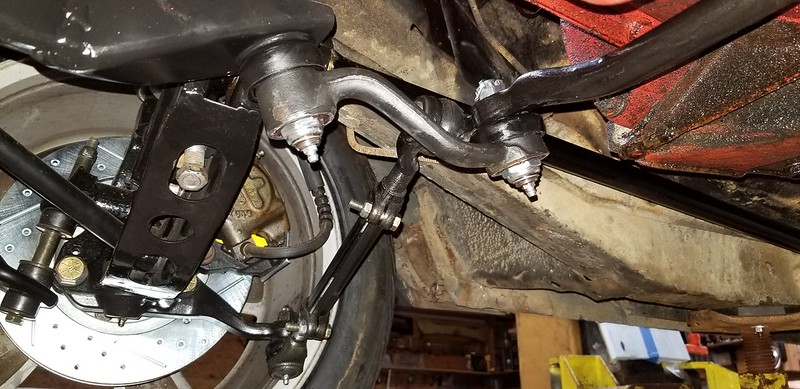
Will have to go the the +45 Wheels in the rear for sure to prevent rubbing in the upper wheel wells.
I am going to investigate the spacer situatiomn on the fronts so that I can run 4 of the same wheels around the car.
Greg

8/3/19
I got the Driveshaft Back, It was made 2 1/4" shorter to compensate going from a 7.25" Rear to the 8.75" Rear. Got it installed and lowered the car. The muffler was rubbing the driveshaft.. so I got a muffler hanger to pull the muffler away from the the driveshaft by about 1/2" or so.
I took it for a ride with the ride height set where the coil over adjusters for the springs don't compress the spring at all. I like the look of this ride height, but when more people and cargo was added it was scraping the rear tires inside the wheelhouse on some bumps.
To fix that I simply put 3 turns of spring compression into the coilovers. (raises Ride height)
Still no 4 or 5 speed transmission in there, just the 3 on the tree for now. also just running with a 3.23 open rear carrier. I have a 3.91 Carrier with an eaton Truetrac for the car when I go to the 5 speed, and get an engine that makes some power.
I found that the old 3.23 Center Section that I had just laying around had a super toasty pinion seal. Ii put this thing in the axle just to get this project rolling for its first drive with all the new rear suspension installed.. to find out what rubs, clanks and bangs. So I pulled the axle yoke off after a few days of driving and installed a new seal. Ii might have lost 6 or 8 ounces in a week ! I have never seen a pinion seal where the Rubber just totally seperated from the metal.. Ya gotta love swap meet parts!
I bought frame connectors as well as torque boxes for the car. Those will probably get welded in when I get to swapping the trans. No matter what Trans I go to use( 4 or 5 Speed) I have to do some sort of cutting to make it work, and the carpet and other inside bits will be out of the car.
I also Fabbed up a Front License Plate mount for my European Plate. It bolts to the original bumper Mounting point in the front of the car.
Glamour Shots:
- As of right now It has the +45mm offset's wheel in the rear and the +32mm offset wheels up front - they are shaped a bit different and a different color.. hope to get 4 matching wheels on there soon.


Greg

8/6/19:
Got a spare tire mounted up.
245-45-17's do fit in the spare tire well... I thought maybe they were going to be too big or the spare tire well size on the 67-69 Mopar A body cars is smaller than 63-66 models?!??.. either way its good to have a spare for it.


Future plans include fixing the pesky fuel filler tube...The design from the factory allows fuel to spill on hard right turns with 1/2 tank or more of gas. :-(

Here are some more arts glamour shots.. and other stuff.
Kid draws picture of your car... makes you feel all warm and fuzzy inside.. like you have 32° total ignition timing:

My Dart in front of my grandma's house - Reminds my uncle and dad of 1964-1969 when my dad had a green 64 dart in front of the same house:

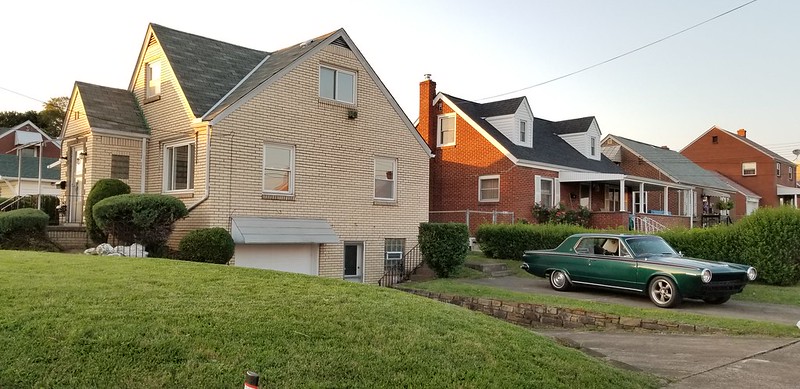


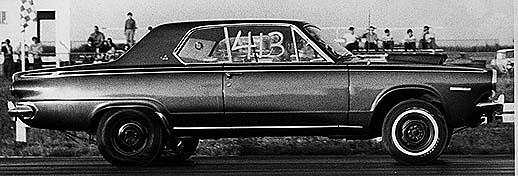
Dad's 64 Dart: It is the same color as the Grüne Hölle car. Dart GT, Slant 6 4 Speed.

Some artsy Pics:
I go by this building sometimes on the way to parents and friend's and I love the Font of the Sign. It's totally something like I might see in a magazine ad from the 50's or 60's or something.


Greg
This Dart looks seriously trick- The blacked out grill fits it perfectly.
Sounds odd, but I wonder about that 'Theater Bar' too- wonder what it's used for? If at all?
In reply to GIRTHQUAKE :
Thanks on the dart looks.
Don't know on the building.. I have never been there.. just driven past. Cars are parked there in different locations on different days. Maybe people live upstairs.
Greg
I love it! The front looks so mean without a bumper. Some friends race a 64 sedan that I've always liked. Such cool cars.

loumash
New Reader
8/19/19 9:19 a.m.
Great build! You've give me some good ideas for my 1966 Barracuda, when I do finally start working on it....
Interesting; I haven't seen a four link setup like that on an A-body before.
For the alternator, I'm using a 1989 Dodge D150 / 318 unit on mine. This is a 120 amp unit with a factory V-belt pulley. The pulley can bolt onto later versions of the alternator. IIRC, I had to grind down a bracket a little to make it fit the slant six.
In reply to MadScientistMatt :
Hi Matt Yep I do have one of those on my other car ... the EFI'd slant 6 79 duster.
Thanks! Greg
In reply to loumash :
Great. You'll get to it when you are ready for it!
Greg

loumash
New Reader
8/30/19 10:27 a.m.
In reply to slantsix :

 Here it is when I got it... needs some assembly now!
loumash said:
In reply to slantsix :

 Here it is when I got it... needs some assembly now!
A guy that races Slant 6's with me had that same car with the same wheels.. You'll get to it!
Greg
9-9-19
Nothing Real to report here.
Just went to a local Mopar show then 120 Mile country road loop with the family last night. :-)


Greg
5/2/20
After getting fished with some Other Projects on the Lift, Wife's Exhaust on the Ford escape, and the Jeep XJ Front end rebuild, It was time to get back to working on Grüne Hölle again.
I wanted to get a 4 or 5 speed installed by the end of last summer but that never happened.. I did however enjoy taking the car on local trips and drove it to Hershey PA for the AACA swap meet ( we will have swap meets and races again right?)
So now I am getting back to this car! Starting with installing the Frame Connectors, I got the Right one done today.. Hope to het the left one done tomorrow.
Pics:
Lay out the Areas to grind down to metal ... and scrape lots of undercoat off.


After a few hours of layout, fussing, grinding, scraping and welding with the car's weight on the tires.

Fully welded 
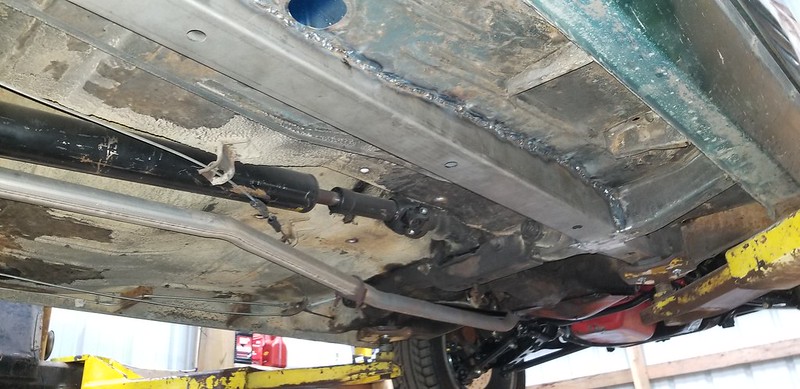
Solid!

All the stuff that I scraped off.. There's more to scrape.

Greg

5/3/20
I got the Left Side Frame Connector all burned in, and cleaned / Scraped a bunch more rust proofing as well.
I also blew out a bunch of mouse nests and sand out of the frame rails. I had aleady hosed the frame rails out once or twice, but there's still stuff in there!

This car spent most of it's life in southern Georgia until 2015. I guess there is a lot of sand down in those parts near the gulf coast. Cars around here just have rust in the the frame rails usually, so to find so much sand and so little rot is refreshing.
Metal Prep after scraping a bunch of rust proof / sound deadener.

Dry Fit - Lots of wee little bits of trimming to get the gaps close.

Had to Cut a Window in this side for the parking brake cable to pass through.

All Burned in. It seemed that this side welded better.. Maybe I prepped the metal better, had tighter gaps or had a lot of practice in Overhead Mig yesterday?


Both sides, Front and Rear tied together and tied to the floor.

Torque Box(es) get installed next, Then Swapping 3speed for a 5 Speed.
Greg




 Here it is when I got it... needs some assembly now!


